mtaylor
-
Posts
26,271 -
Joined
-
Last visited
Content Type
Profiles
Forums
Gallery
Events
Everything posted by mtaylor
-
I had to go back a few pages to see what you meant. Oh... blue air time in my neck of the woods. But it's a great recovery you're making and the stack looks great. To steal David's line and add to it.. a Master Brasssmith your are.
-
Uniforms of the Royal Navy and Marines circa 1724?
mtaylor replied to timboat's topic in Nautical/Naval History
There's a book of contemporary paintings.. Fighting Ships by Sam Willis that contains many deck scenes with Marines and sailors. I've seen a few sites such as: http://www.royalnavy.mod.uk/news-and-latest-activity/news/2014/october/20/141020-royal-marines-uniforms and this: https://www.google.com/search?q=royal+navy+uniform+history&biw=1374&bih=746&tbm=isch&tbo=u&source=univ&sa=X&sqi=2&ved=0ahUKEwjW6L3kz93PAhUJ1CYKHTREBAoQsAQIOAshould lead you in the right direction. -
ancre La Salamandre by tadheus - 1:24
mtaylor replied to tadheus's topic in - Build logs for subjects built 1751 - 1800
I'm just following along in awe of your ship, Pawel. Just beautiful. -
The hull is coming out very well, Charlie. I'm impressed. The fan blowing out the window is a great idea as long as the neighbors don't object. And it's probably a lot quieter than shop vac. Good on you for the face mask.
- 362 replies
-
- 2
-

-
- active
- revenue cutter
- (and 1 more)
-
Cutty Sark by NenadM
mtaylor replied to NenadM's topic in - Build logs for subjects built 1851 - 1900
Nenad, I think what you're calling an awning is just a canvas cover over the hatch which would have been normal for the ship at sea. I've seen these in some pictures and in other pictures, it's just the plain wood slats. The hatches were for access to the cargo area and so had to be protected. On ships with grates, those were to provide light and fresh air to the crew working on the lower deck. You might ask this in the Deck Furniture area if no one else answers.- 4,152 replies
-
- 5
-
-
- cutty sark
- tehnodidakta
- (and 1 more)
-
Indeed Bill, it's my laser cutter. Greg the peg leg sailor (If my brain remembers correctly) started calling it the Deathstar and the name has stuck. Edit: Yes, it was Greg after I speculated that maybe I could build a death star after upgrading the tube...
-
Thanks for looking in, the comments and the "likes". As this is being written, waterways are going in and the center deck, carlings for the hatchways, and the center thickstuff areas are being marked out. Still thinking of pre-cutting the planking on the Deathstar instead of shaping each plank by hand. Micheal, I want her out, but have very mixed feelings with a fear that I'll break something while still working on the hull. I think I need to suck it up and do it after this deck. Bill, It's a pretty tight fit but it's also glued with PVA into the frame. I'll be following Hahn's lead on this and cutting the frames as close to the line of the top rails as possible and then sanding, filing, making a mess, etc. as needed. I'm thinking it's easier to cut it free than try to undo 120 frame joints (60 frames times 2 futtocks holding it in place) using isopropyl.
-
Mike, I'd solder the loops. There's nothing more frustrating (well.. there probably is....) than to have some bit of rigging come flying off due to pulling too taut, bumping it, etc.
-
Thanks everyone. Sam, she'll come off probably after this deck is done. I fear waiting until the forecastle and quarter deck are done will risk some damage. I have a work cradle designed but not built. Having said that... there's really nothing stopping me at this point from taking it off now. Must rethink and be logical and rational... Denis, There's 2 ladders (one officer and one crew) that are under the quarterdeck. One open but under the boat on the gundeck and another under the forecastle. There there's he two from the quaterdeck/gangways to the gundeck. The ol' gundeck is going to be a busy place soon.
-
Jason, You might look for a Makerspace near you. They usually have the smaller (~40W) machines, though some have bigger ones. Everyone of them is somewhat different depending on the people they are serving so you might have to look around.
-
Windlass purchase link
mtaylor replied to frenchguy's topic in Metal Work, Soldering and Metal Fittings
Wefalck That is stunning. I thought I was looking at the real thing until I read the text. -
I'm with the others.... I got a dollar says it's started before Christmas.. "Maybe just seeing how the parts go together" is common reason around here.
- 473 replies
-
- 5
-
-
- greek bireme
- dusek
- (and 1 more)
-
Rats... sorry Greg.
-
Greg, Try here: http://www.bnamodelworld.com/scale-hardware No dimensions on these: http://www.micromark.com/washers-00-pkg-of-25,10675.html
-
Micromark used to sell a set of washers (I think it's 4) exactly as you described, John. I have a set for my MM saw and they work not perfectly (the opening is a bit rounded due to the blade wobble) but they are usable and the dado can be squared up if needed.
-
Power Tools for a Fully Framed Build
mtaylor replied to ChrisLBren's topic in Modeling tools and Workshop Equipment
John, Light and infrequent milling will work (except as pointed out by Roger). However, the bearings will not handle the side loading very well for very long. We've had builders use a drill press as a lathe and as a mill but there is the risk of killing a bearing. By all means, check the bearings as you're using it for heat build up also. -
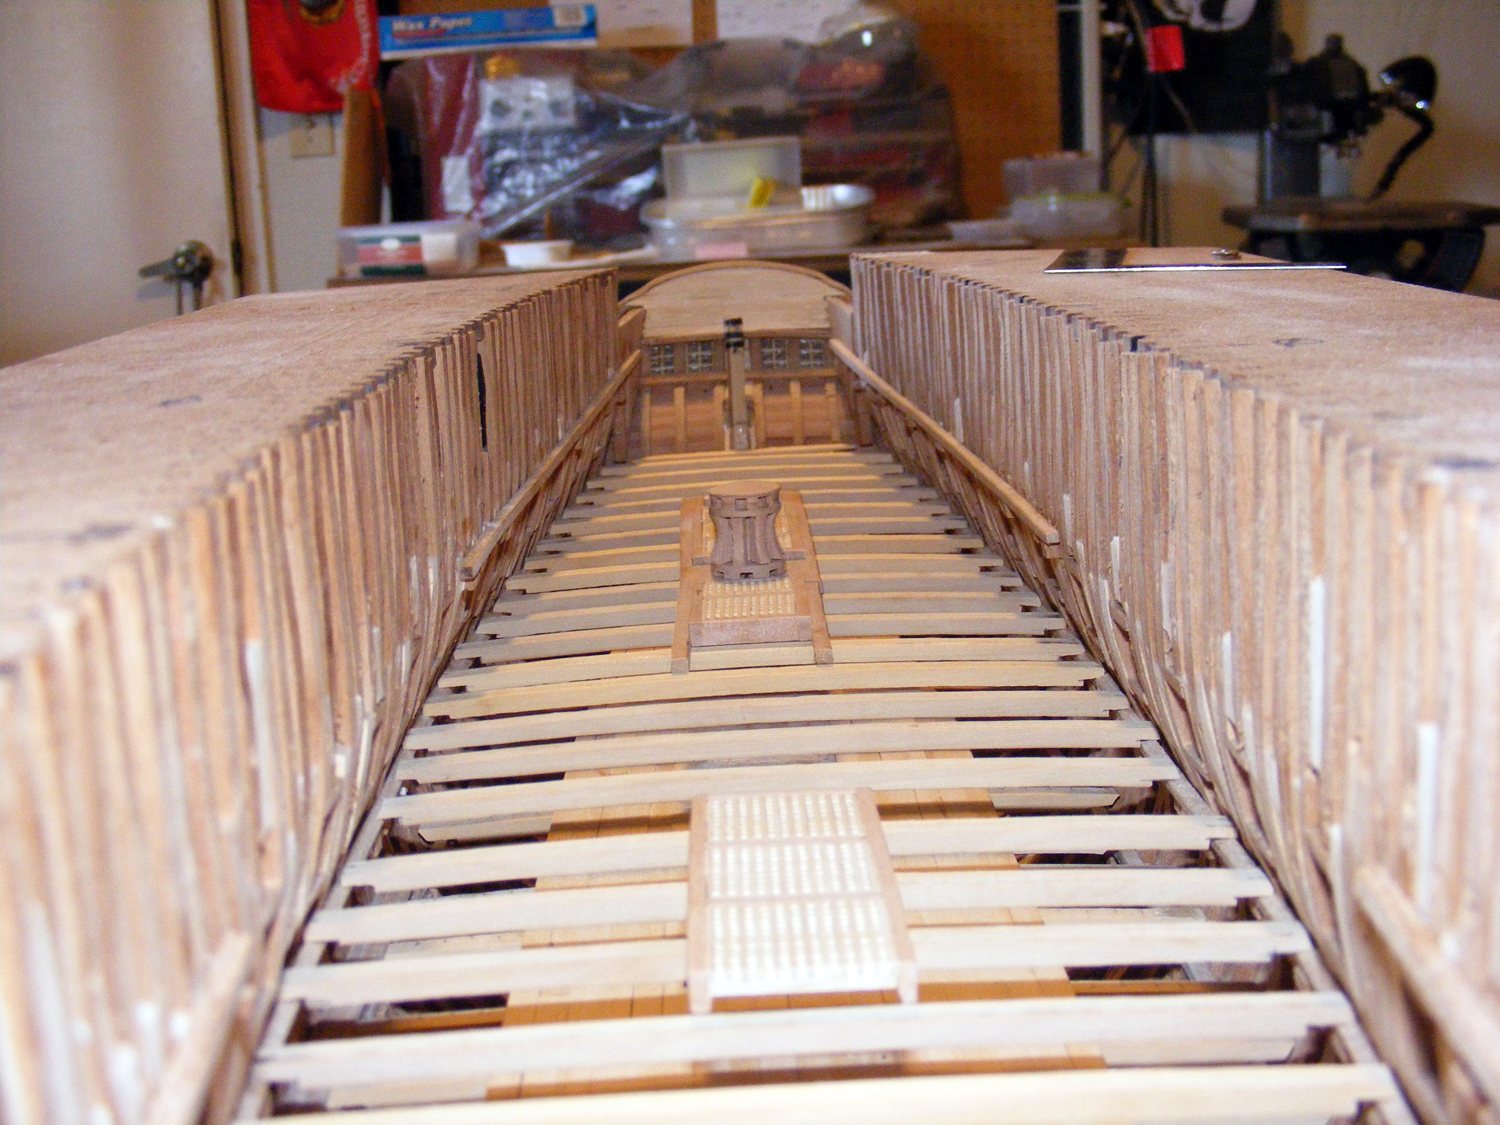
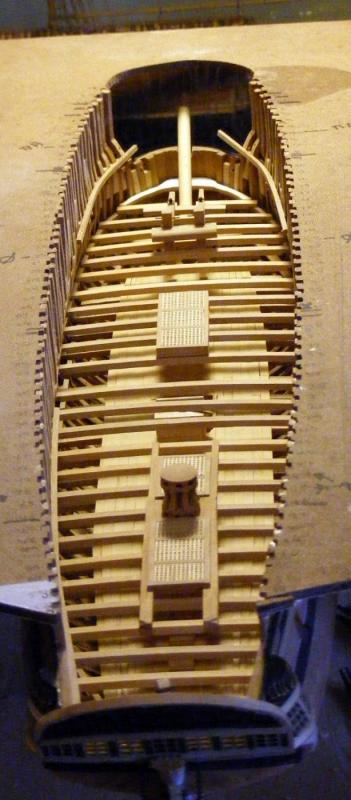
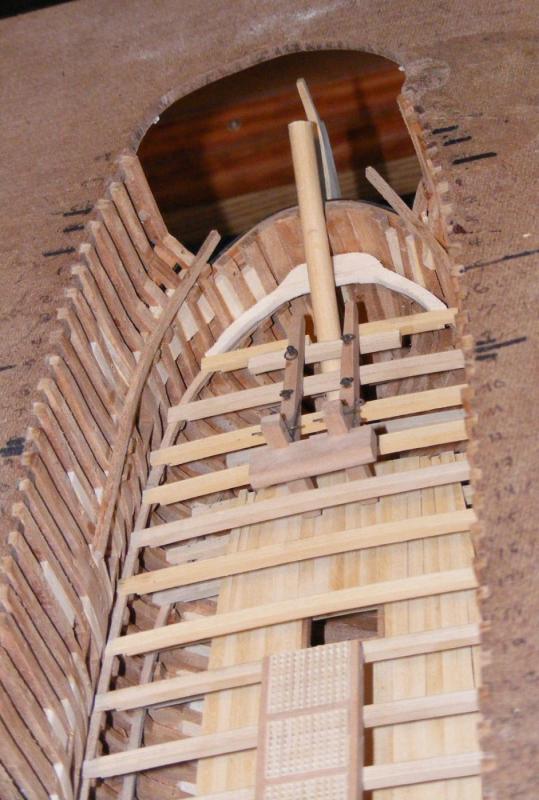
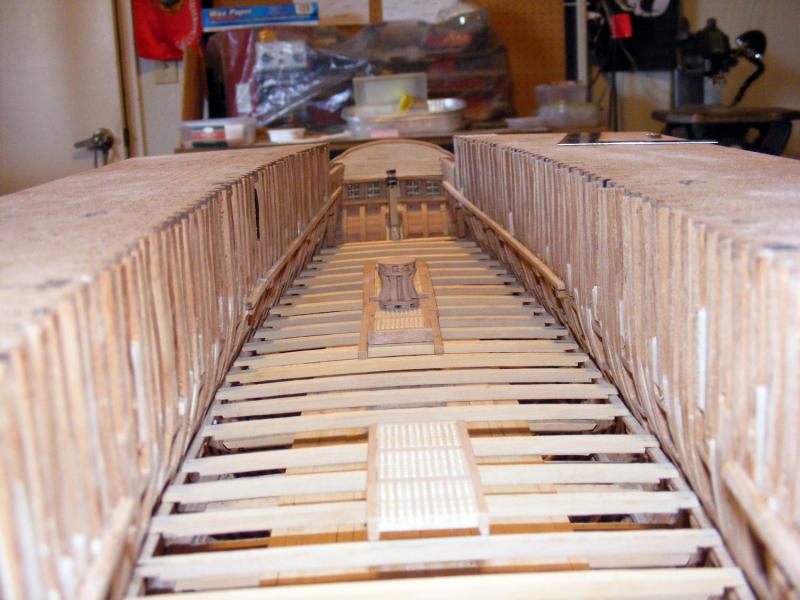
Thanks for the comments and the "likes". The best laid plans of mice and men... an Admiralty meeting. We discussed progress and plans then "if I can't see it, why do it? You'll save a couple of months, right?". "Err.. yes. But I want to do it because it's there. I'll know it." Well, so much for argument. It's her ship and I'll do it. So,.. I scraped the planking, added the oven and mizzen mast step and applied a coat of Wipe on Poly. And then moved to the gundeck. Beams are in and the furniture on deck was salvaged from Version 1. It's all destined for the scrapbox except for the riding bitts. I just decided I can do better. There's a dummy bowspit in place. Carlings need to be added at various hatchways. So... 4" of deck planking (except the center area which is 8") and 4" for the coamings. 4" thick coamings for the hatches on top of the 8" center area. What else... planking will follow the French style of following the hull lines. And the ceiling. Sorry for thinking out loud... There's a pantry around the mizzen mast and rudder lines, a "cabinet" around the rudder, a step/storage at the transom along with all the other furniture on the gundeck. The partition for the wardroom/Great Room is on the table as far as possible. It was removable as was the captain's and executive officer's bedplace. I won't get into all the politics and issues with the wardroom not being the Captain's cabin, roundhouses (Captain's bedplace and dayroom), etc. I'm done babbling.... I have my work cut out for me so here's pics.....
-
Power Tools for a Fully Framed Build
mtaylor replied to ChrisLBren's topic in Modeling tools and Workshop Equipment
I forgot.. LittleMachineShop has this one: http://www.littlemachineshop.com/products/product_view.php?ProductID=4962&category=1387807683 It's the same as the MM but with the non-tilting column. -
Power Tools for a Fully Framed Build
mtaylor replied to ChrisLBren's topic in Modeling tools and Workshop Equipment
Chris, I went with the Little Machine Shop version for my second mill. The MM mills have the tilting post which isn't as secure as it could be. Check the prices including shipping as depending on freight charges it can make a significant difference. -
Nice going on the cart, Jerry. Looking at it, one wouldn't think it was done on a budget. I never considered how heavy your ships would be when you started them but it's an eye-opener.
-
Power Tools for a Fully Framed Build
mtaylor replied to ChrisLBren's topic in Modeling tools and Workshop Equipment
I'll assume you also have a scroll saw? Mills.... a vice, assorted mills (ball and plunge and standard set), a rotary table with a 4 jaw chuck (not necessary but really a nice to have tool), There's lots of jigs you can make. There's a topic here that's a lot of help: http://modelshipworld.com/index.php/topic/11214-how-to-make-best-use-of-your-milling-machine-tips-and-techniques/ There's also this place which has a lot of information: http://www.littlemachineshop.com/Products/product_new.php Have alook at the Info Center and the Learning Center tabs. Lathes.... This has a lot of solid info: http://www.mini-lathe.com/Default.htm A lot of the accessories will depend on what you'll use them for.. 4-jaw and 3 jaw chucks, live centers, etc. As for using a mill as a drill press... that works. Some mills are eaiser to use as drill press (a drill press type handle in addition to the crank). My drill press really never has been used since I got the mill. I hope this helps. Chances are, you'll spend as much on tooling as you did on the base unit. But careful research can reduce the costs, such as "beginner tool sets", Amazon, etc. There's also a lot of junk out there... mostly from China. -
Johann, What the others have said about details and time. This isn't a competition. As long as you are enjoying the journey, that's all that matters. You're doing amazing work and I, for one, love being along for this journey.