mtaylor
-
Posts
26,273 -
Joined
-
Last visited
Content Type
Profiles
Forums
Gallery
Events
Everything posted by mtaylor
-
Power Tools for a Fully Framed Build
mtaylor replied to ChrisLBren's topic in Modeling tools and Workshop Equipment
John, Light and infrequent milling will work (except as pointed out by Roger). However, the bearings will not handle the side loading very well for very long. We've had builders use a drill press as a lathe and as a mill but there is the risk of killing a bearing. By all means, check the bearings as you're using it for heat build up also. -
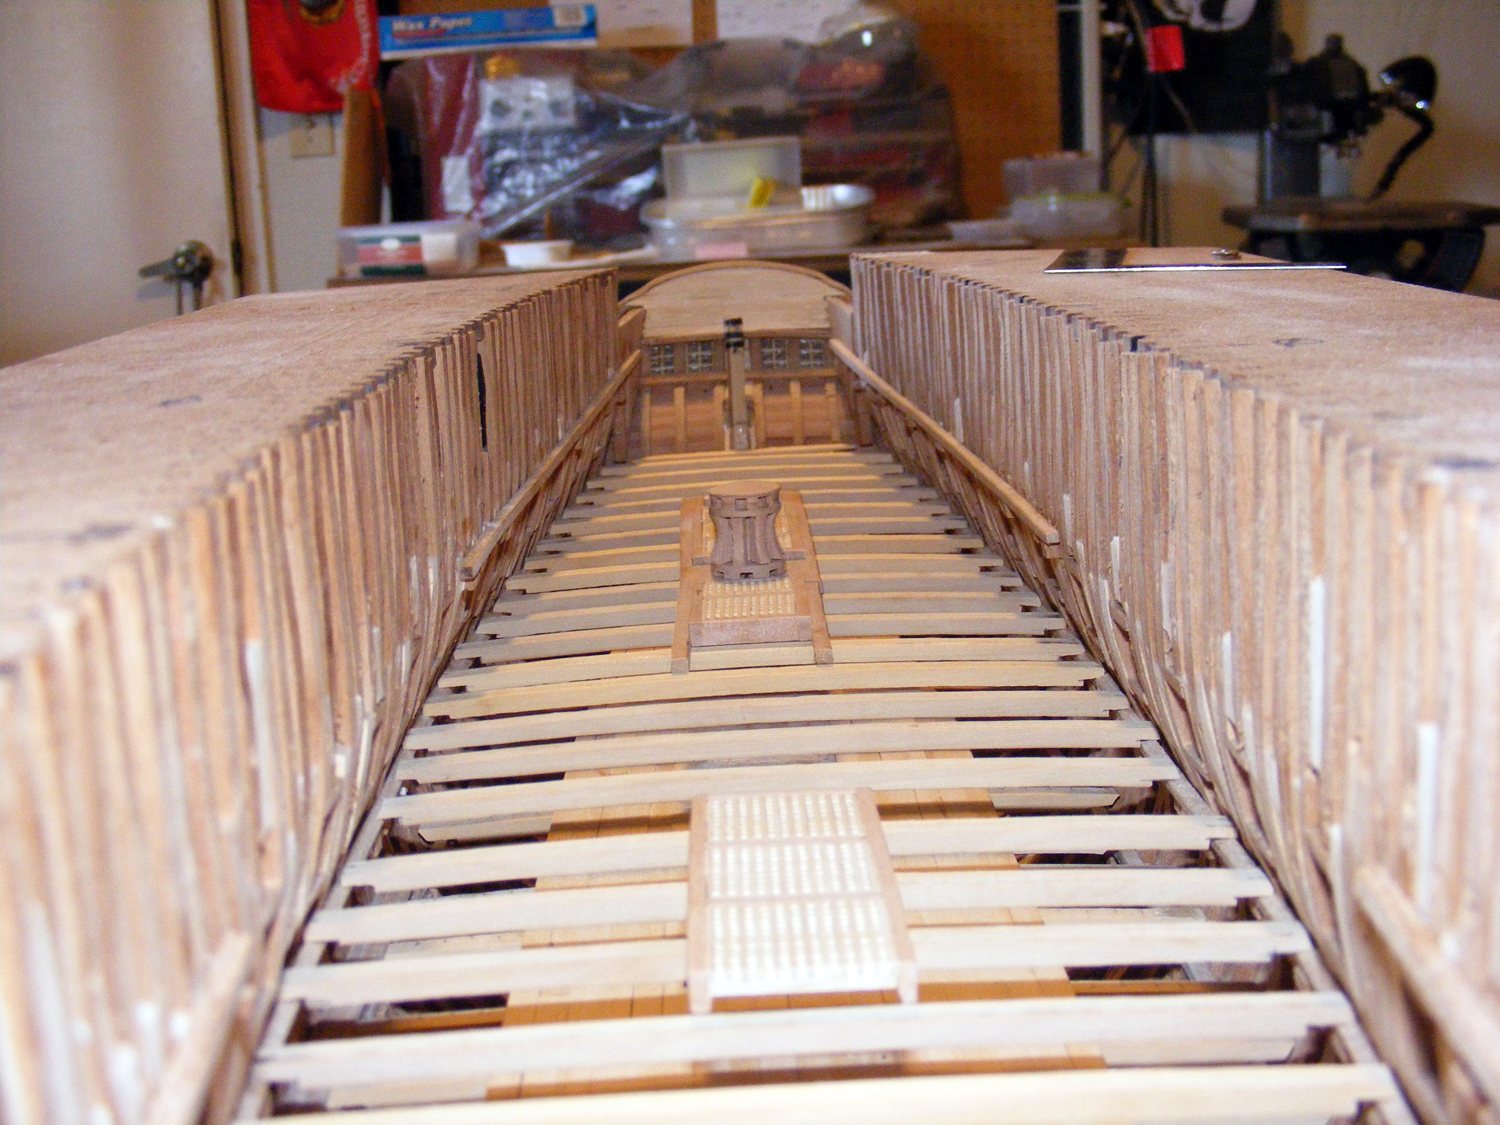
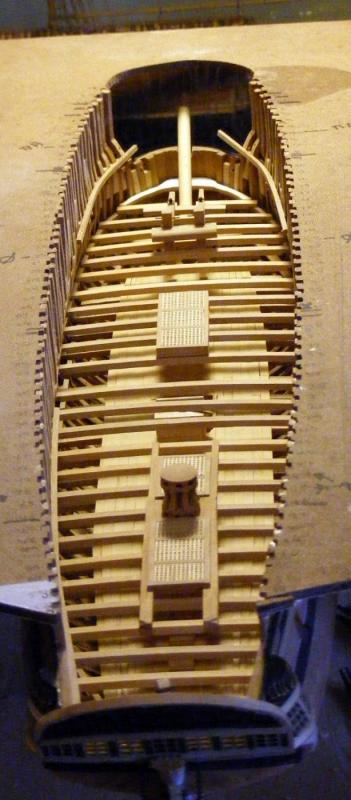
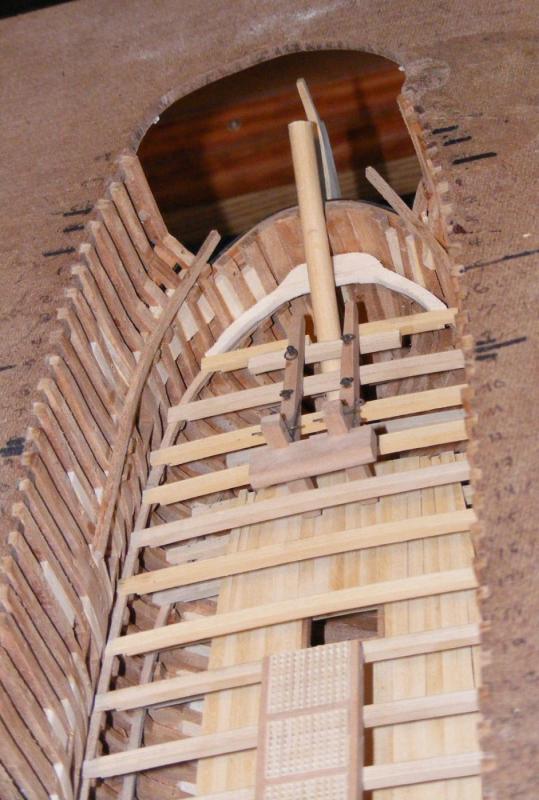
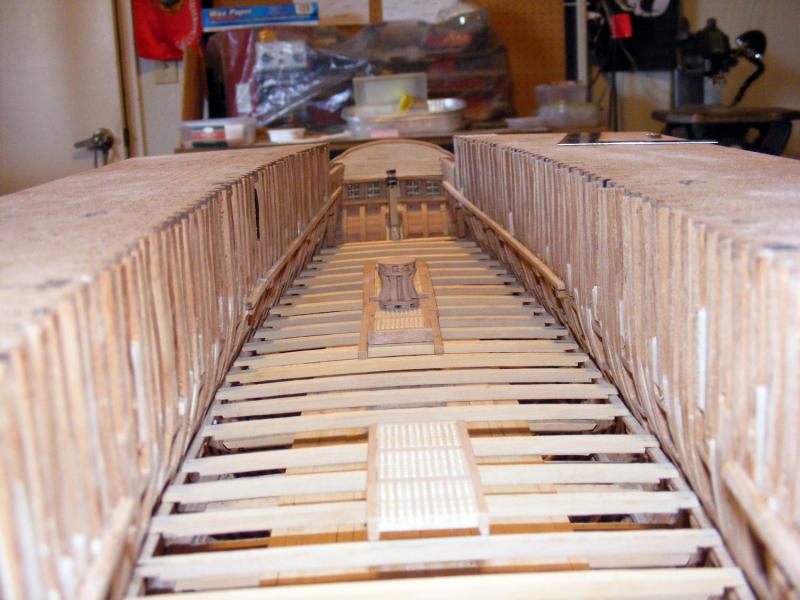
Thanks for the comments and the "likes". The best laid plans of mice and men... an Admiralty meeting. We discussed progress and plans then "if I can't see it, why do it? You'll save a couple of months, right?". "Err.. yes. But I want to do it because it's there. I'll know it." Well, so much for argument. It's her ship and I'll do it. So,.. I scraped the planking, added the oven and mizzen mast step and applied a coat of Wipe on Poly. And then moved to the gundeck. Beams are in and the furniture on deck was salvaged from Version 1. It's all destined for the scrapbox except for the riding bitts. I just decided I can do better. There's a dummy bowspit in place. Carlings need to be added at various hatchways. So... 4" of deck planking (except the center area which is 8") and 4" for the coamings. 4" thick coamings for the hatches on top of the 8" center area. What else... planking will follow the French style of following the hull lines. And the ceiling. Sorry for thinking out loud... There's a pantry around the mizzen mast and rudder lines, a "cabinet" around the rudder, a step/storage at the transom along with all the other furniture on the gundeck. The partition for the wardroom/Great Room is on the table as far as possible. It was removable as was the captain's and executive officer's bedplace. I won't get into all the politics and issues with the wardroom not being the Captain's cabin, roundhouses (Captain's bedplace and dayroom), etc. I'm done babbling.... I have my work cut out for me so here's pics.....
-
Power Tools for a Fully Framed Build
mtaylor replied to ChrisLBren's topic in Modeling tools and Workshop Equipment
I forgot.. LittleMachineShop has this one: http://www.littlemachineshop.com/products/product_view.php?ProductID=4962&category=1387807683 It's the same as the MM but with the non-tilting column. -
Power Tools for a Fully Framed Build
mtaylor replied to ChrisLBren's topic in Modeling tools and Workshop Equipment
Chris, I went with the Little Machine Shop version for my second mill. The MM mills have the tilting post which isn't as secure as it could be. Check the prices including shipping as depending on freight charges it can make a significant difference. -
Nice going on the cart, Jerry. Looking at it, one wouldn't think it was done on a budget. I never considered how heavy your ships would be when you started them but it's an eye-opener.
- 553 replies
-
- 1
-

-
- sloop of war
- constellation
- (and 3 more)
-
Power Tools for a Fully Framed Build
mtaylor replied to ChrisLBren's topic in Modeling tools and Workshop Equipment
I'll assume you also have a scroll saw? Mills.... a vice, assorted mills (ball and plunge and standard set), a rotary table with a 4 jaw chuck (not necessary but really a nice to have tool), There's lots of jigs you can make. There's a topic here that's a lot of help: http://modelshipworld.com/index.php/topic/11214-how-to-make-best-use-of-your-milling-machine-tips-and-techniques/ There's also this place which has a lot of information: http://www.littlemachineshop.com/Products/product_new.php Have alook at the Info Center and the Learning Center tabs. Lathes.... This has a lot of solid info: http://www.mini-lathe.com/Default.htm A lot of the accessories will depend on what you'll use them for.. 4-jaw and 3 jaw chucks, live centers, etc. As for using a mill as a drill press... that works. Some mills are eaiser to use as drill press (a drill press type handle in addition to the crank). My drill press really never has been used since I got the mill. I hope this helps. Chances are, you'll spend as much on tooling as you did on the base unit. But careful research can reduce the costs, such as "beginner tool sets", Amazon, etc. There's also a lot of junk out there... mostly from China. -
Johann, What the others have said about details and time. This isn't a competition. As long as you are enjoying the journey, that's all that matters. You're doing amazing work and I, for one, love being along for this journey.
-
I like the way that roller came out. Looks sharp.
- 250 replies
-
- 4
-
-
- willie l bennett
- model shipways
- (and 1 more)
-
I hope your not following too closely. My cross-section warped somehow in the last couple of years. In an air-conditioned and humidity controlled house, yet.
- 132 replies
-
- 2
-
-
- triton cross-section
- cross-section
- (and 1 more)
-
It's great to see you back, Chris. The Confed is looking outstanding.
-
Speechless...
-
Cutty Sark by NenadM
mtaylor replied to NenadM's topic in - Build logs for subjects built 1851 - 1900
Sorry about the pain... I hope it gets better. What a great looking puppy, but be patient. Sort of like model ship building.. we just have to wait on some things. You get a cat on the lap, I get a dog. Hmm... they pick the most inconvenient times to take a nap.- 4,152 replies
-
- 4
-
-
- cutty sark
- tehnodidakta
- (and 1 more)
-
Drill Bit Sizes Appropriate for Ship Modeling?
mtaylor replied to Mike40's topic in Modeling tools and Workshop Equipment
The chuck is all I ever use with the dremel and it works very well down to the pretty much the smallest size. -
Tony, It boils down to your choice and what you can live with. I hacked off the top of frame 5 because I too screwed it up. But I can live with that decision. My goal was to learn and if it came out looking presentable, I was going to be ok with it.
- 132 replies
-
- 2
-
-
- triton cross-section
- cross-section
- (and 1 more)
-
It's great to see an update, Frank. She's looking super. It's a bit odd to see what looks like a balcony until one sees some of these Chinese ships. The weathering is perfect.
-
Pandora by marsalv - FINISHED - 1:52
mtaylor replied to marsalv's topic in - Build logs for subjects built 1751 - 1800
Lovely work, Marsalv. It's great to see that you are back. -
I'm looking forward to your log also. Definitely double check the copies for accuracy as sometimes (usually?) they don't copy at exactly 200% due to the machine not being accurate. It's a function of copiers and scanners at 100% to prevent counterfeiting of currency and many times that inaccuracy continues for enlargements and downsizing.
-
Amati Loom-a-line worth using? (edited by admin)
mtaylor replied to bluenose2's topic in Masting, rigging and sails
Sorry Les. I think it's a lesson we've all had to learn... search first, then ask before buying. Painful at times. -
One way around the problem is either blinds on the window or a solid back (even temporary) on the display case. Mike gave a good link and also paints will fade in direct sunlight.