HOLIDAY DONATION DRIVE - SUPPORT MSW - DO YOUR PART TO KEEP THIS GREAT FORUM GOING! (Only 27 donations so far out of 49,000 members - C'mon guys!)
×


mtaylor
-
Posts
26,273 -
Joined
-
Last visited
Content Type
Profiles
Forums
Gallery
Events
Everything posted by mtaylor
-
Looking pretty darn good, Sjors. The bow looks super and I can't wait to see what's under those clamps.
-
Cutty Sark by NenadM
mtaylor replied to NenadM's topic in - Build logs for subjects built 1851 - 1900
Whatever you name them, Nenad, they look great. You are putting a lot of detailwork into them.- 4,152 replies
-
- 6
-

-
- cutty sark
- tehnodidakta
- (and 1 more)
-
HMS Naiad 1797 by albert - FINISHED - 1/48
mtaylor replied to albert's topic in - Build logs for subjects built 1751 - 1800
Simply beautiful, Albert. I too like the wood choices as they go very well together along with your clean work. -
I'm hoping for the best outcome for you Danny and for you to soon be doing what you love to do.
-
Beautiful work, Greg. But I've got to back up to the top of your post... ship's cat? My mind is totally boggled.
- 342 replies
-
- 6
-
-
- dreadnought
- zvezda
- (and 2 more)
-
Cutty Sark by NenadM
mtaylor replied to NenadM's topic in - Build logs for subjects built 1851 - 1900
Incredible work, Nenad. Looking very usable but only if one is really tiny.- 4,152 replies
-
- 7
-
-
- cutty sark
- tehnodidakta
- (and 1 more)
-
That nameplate is perfect and puts a very nice touch on a stunning display, Alexandru. Congratulations on getting her into the case.
-
Looks like your metal work and the recesses came out perfectly, Alan.
-
Max, I think your answer is very viable.
-
What a sweet looking and well detailed out ship. Thanks for posting the great pictures, Jack.
-
I love the lion drawing. Do what your heart is telling you and that is take care of your friends, Gwen and yourself. Hobbies can wait, but friends and loved ones often can't.
-
Hi Alexandru, I'll try to answer but others maybe have better ideas than I do. 1. How to coil the rope from the gun tackles on the deck - those rope spirals? a)Take the fall from the gun tackle and spot glue the end to the deck where you want the coil. b)Then take a piece of double sided tape and stick to your workspace (not the deck). c) Carefully coil the rope on the tape. The tape will hold it in place. d) Brush the coil with a 50-50 mix of water and white glue. Allow to dry. e) Carefully remove the coil from the tape. It takes some practice as the coils are fragile and come undone easily. f) Glue the coil to the deck over the end of the tackle fall. 2. How to make a flag and from what to hang at the top of the mast? What I've done is use a drawing program and make the flag on the computer. Copy and flip it over. Take a piece of silkspan (the paper the flying models airplane guys use) and tape it to piece of cardstock. Mark the silkspan and the cardstock as you'll need to flip the silkspan over. Print the first side of the flag. Flip the silkspan and retape paying attention to the marks. Print the other side using the flipped image you created earlier. It will take some practice to get each side of the flag lined up. Do not use a color laser printer but a color inkjet type printer. When printed, spray the flag with some artist's fixative. When dry, you can bend, twist, etc. to shape. I hope this helps. I'm also hoping someone has an easier way.
-
ancre le rochefort by cabrapente
mtaylor replied to cabrapente's topic in - Build logs for subjects built 1751 - 1800
I too love the details, Cabrapente. What's amazing is that most of them are working details. -
Jim, That's not cheating... paper is made from wood. That's my story and I'm sticking with it. The carvings are looking great.
-
Frank, I'm partial to the fruit wood stain. Just seems more natural to me.
-
In Praise Of Lacquer
mtaylor replied to Julie Mo's topic in Painting, finishing and weathering products and techniques
That sounds like something I'll look into for the next model as the hull exterior on the current one is pretty much done and finished with Wipe On Poly. I'm aware of the ventilation needs after painting cars with lacquer and rubbing them out. -
No clue here, John. I saw Toni's post and she mentioned the need for a higher fence.
-
What a monster... and great looking one at that. Personally, I like the cherry... your planking is lovely.
- 213 replies
-
- 5
-
-
- la couronne
- 74 gun
- (and 2 more)
-
The MM heavy duty mill is a totally different critter than the one I had. This new one is probably closer to yours in function. The Admiral and I talked about it. This one is the "Easter Egg"... hidden. There will be another on the base and perhaps different wording. The hidden one is there just in case the outer is lost. Wishful thinking that someone might find my model interesting enough to look inside with an endoscope. I can't speak for "all" French ships... but on the lower decks, there are two strakes to the outside of the main hatch and run full length of the deck. These are thicker than "normal" planks and let into the beams. On the gundeck, similar but with thicker planks between the two strakes. All being let into the beams such that the deck is smooth. There's also another row of strakes on the gundeck about midway between the hull and the centerline (on each side) that thicker and let into the beams.
-
In Praise Of Lacquer
mtaylor replied to Julie Mo's topic in Painting, finishing and weathering products and techniques
I think most of us don't know about this. And there's the "how to get" and "how to apply" issues... is it available in spray can? Brush only? Or need an airbrush? -
I just wish this one had been available when I ordered the MM one. I guess as we get older, we hate fiddling with "make it do want you want instead of buying that way". I'm holding on cutting that reinforcement piece for now. The feet raise it up enough to give me clearance but I won't really know until I start using it in earnest.
-
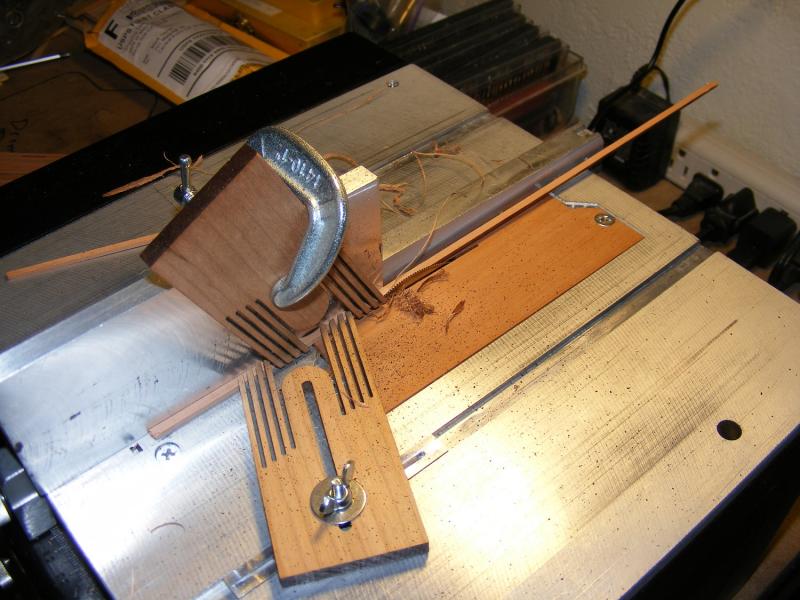
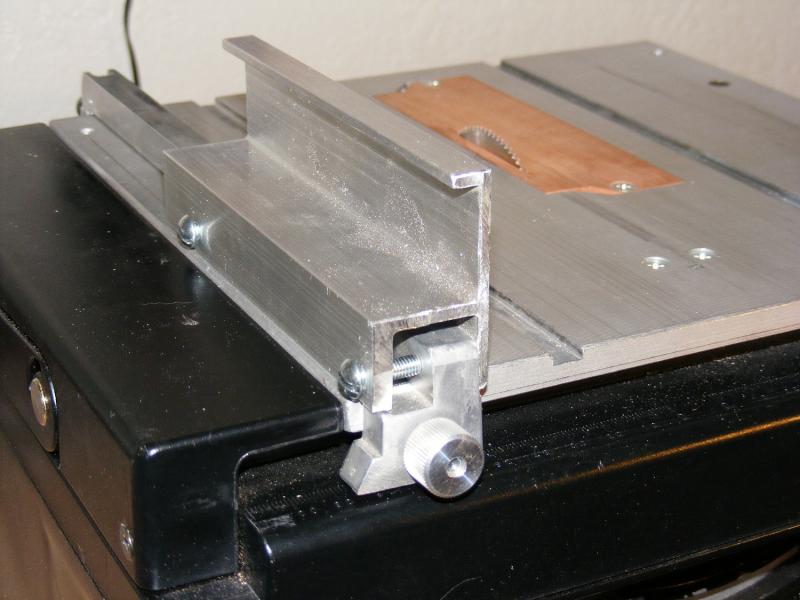
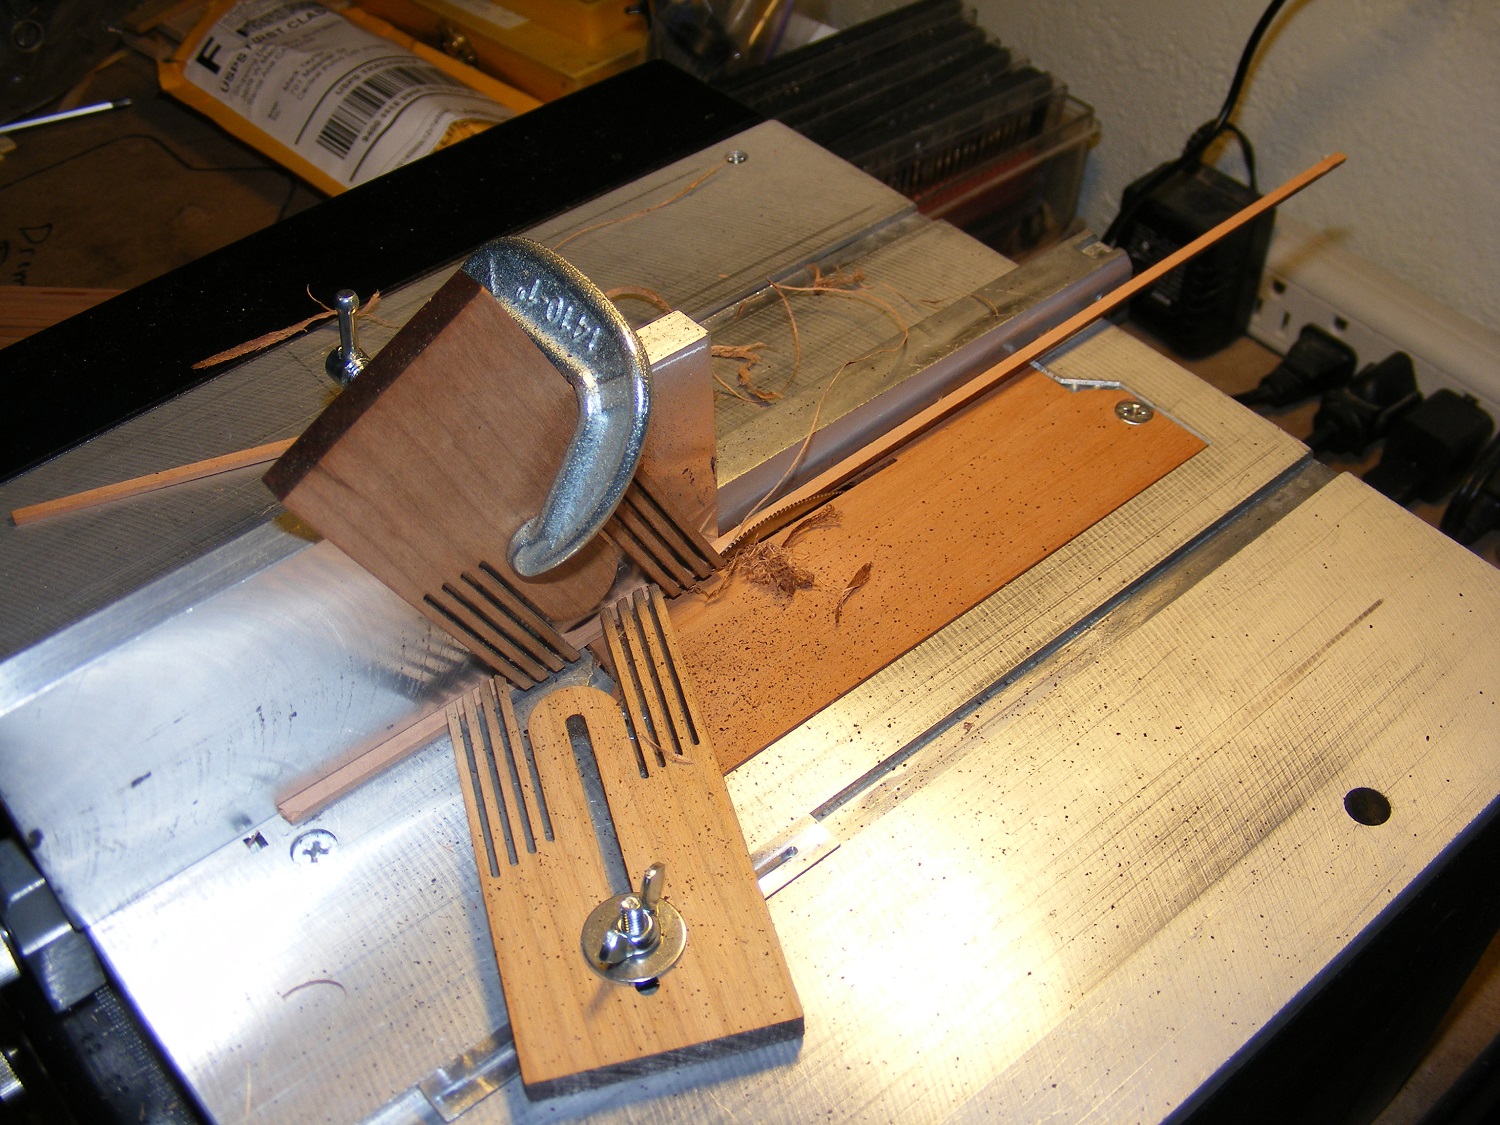
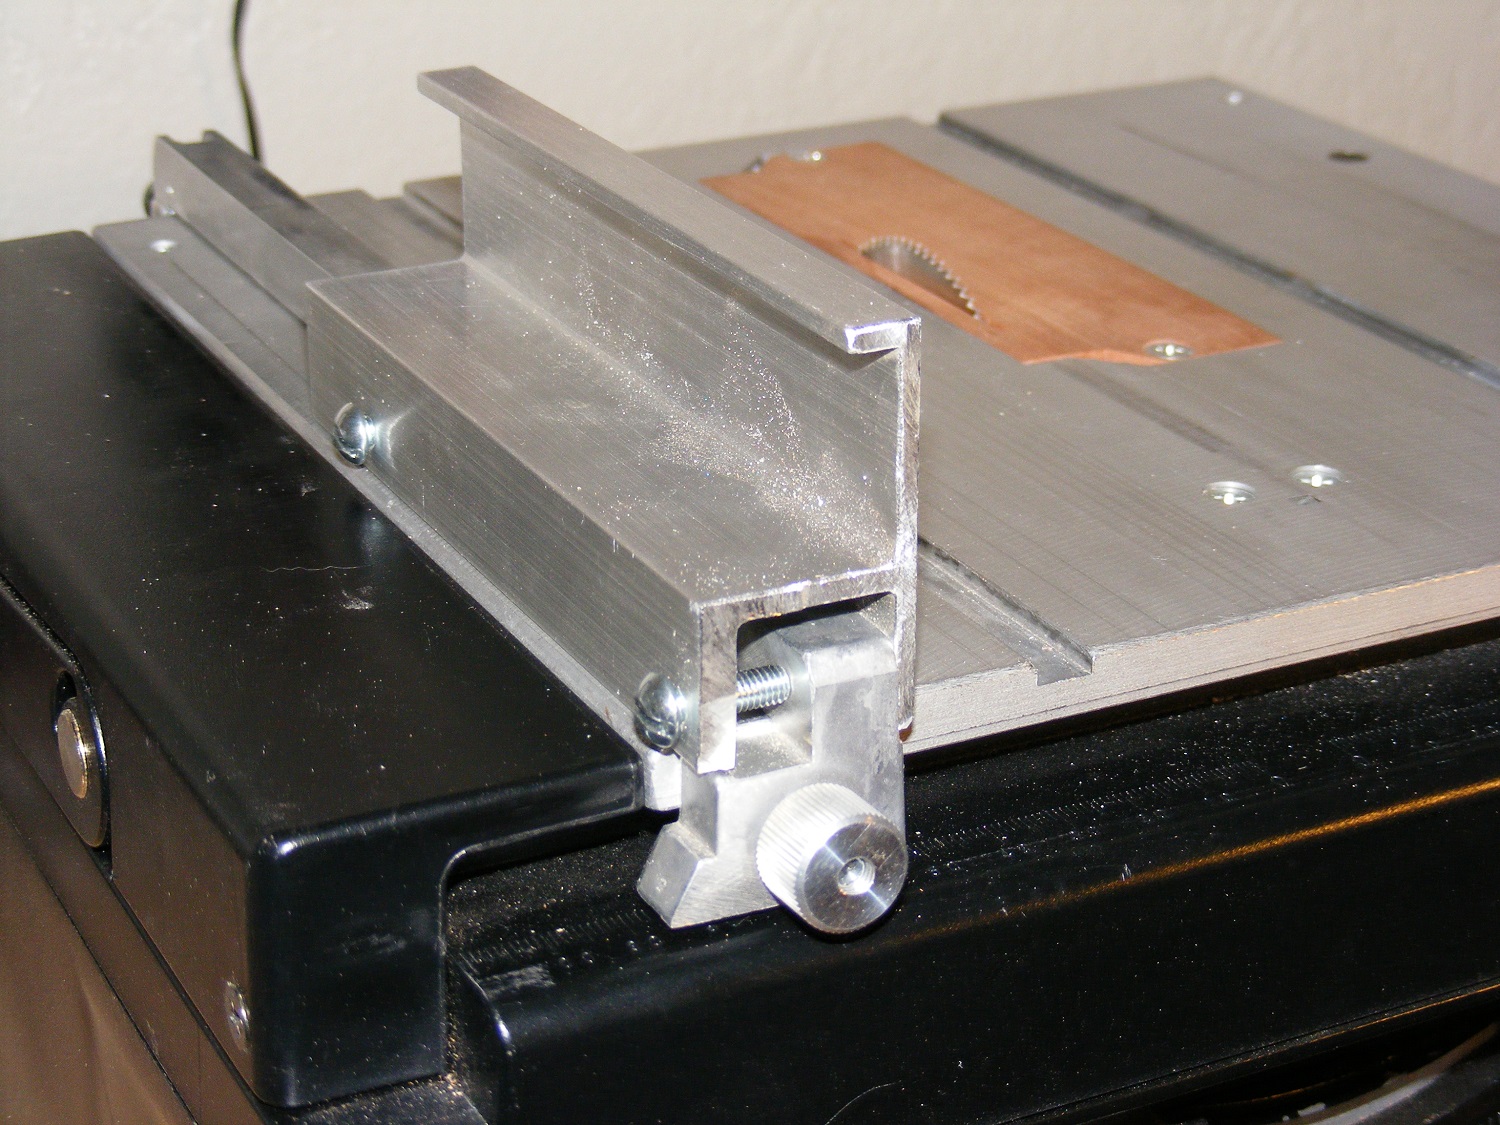
The Accurizer is still available: http://www.micromark.com/accuriser-ii,7504.html As for a higher fence, I don't know if this will help... but MicroMark does sell a "taller fence" that fits over the existing fence. It will fit a fence that's about 3/4" wide and 5/8" high. Have a look here: http://www.micromark.com/Featherboard-and-High-Fence-Attachment-Set-or-80463-MicroLux-Tilting-Arbor-Table-Saw,7586.html I have one that I cut down such that it only goes to the leading edge of the blade to reduce kickback. Here's pics of how I use mine: