Supplies of the Ship Modeler's Handbook are running out. Get your copy NOW before they are gone! Click on photo to order.
×


mtaylor
-
Posts
26,270 -
Joined
-
Last visited
Content Type
Profiles
Forums
Gallery
Events
Everything posted by mtaylor
-
Christian, I'm sure there's a book or two out there... Maybe this one would help: http://www.amazon.com/Young-Sea-Officers-Sheet-Anchor/dp/0486402207/ref=sr_1_1?ie=UTF8&qid=1459362735&sr=8-1&keywords=the+young+officer%27s? Since every country and even between ships, the rigging was different, this something that almost has to be sorted out individually.
-
Beautiful work, Bill. How many gunports get the carvings?
-
Thanks for the likes and the comments. It's actually an old handkerchief that I had in the shop and used it as a shop towel for smaller bits, Ken. Thanks, Pat. Sam, I think you're right. Jesse, that's the great thing about MSW. Your log was one of the ones I looked at and followed for my rudder coat. We learn from each other. It's as Greg and others have said.. rudder coats just aren't often modeled. I found very few overall.
-
Wonderful ratlines, Sjors. When did you fire the spiders and hire the gnomes?
- 1,616 replies
-
- 6
-

-
- caldercraft
- agamemnon
- (and 1 more)
-
What the others said about printing and even scanning. If you can find one locally to use/borrow/rent what ever, the HP Deskjet 9800 will take 11 X 17 paper.
- 525 replies
-
- 1
-
-
- anchor hoy
- hoy
- (and 1 more)
-
Fortune favors the well-armed and your vessel is indeed well-armed. I hope it's rum for the post test-firing party.
- 962 replies
-
- 7
-
-
- sovereign of the seas
- ship of the line
- (and 1 more)
-
Tim, 3mm wide or 3mm long? If wide, do a shim. If very narrow but 3mm long, sawdust and a 50/50 mix of glue and water. Make a slurry and fill the gap.
-
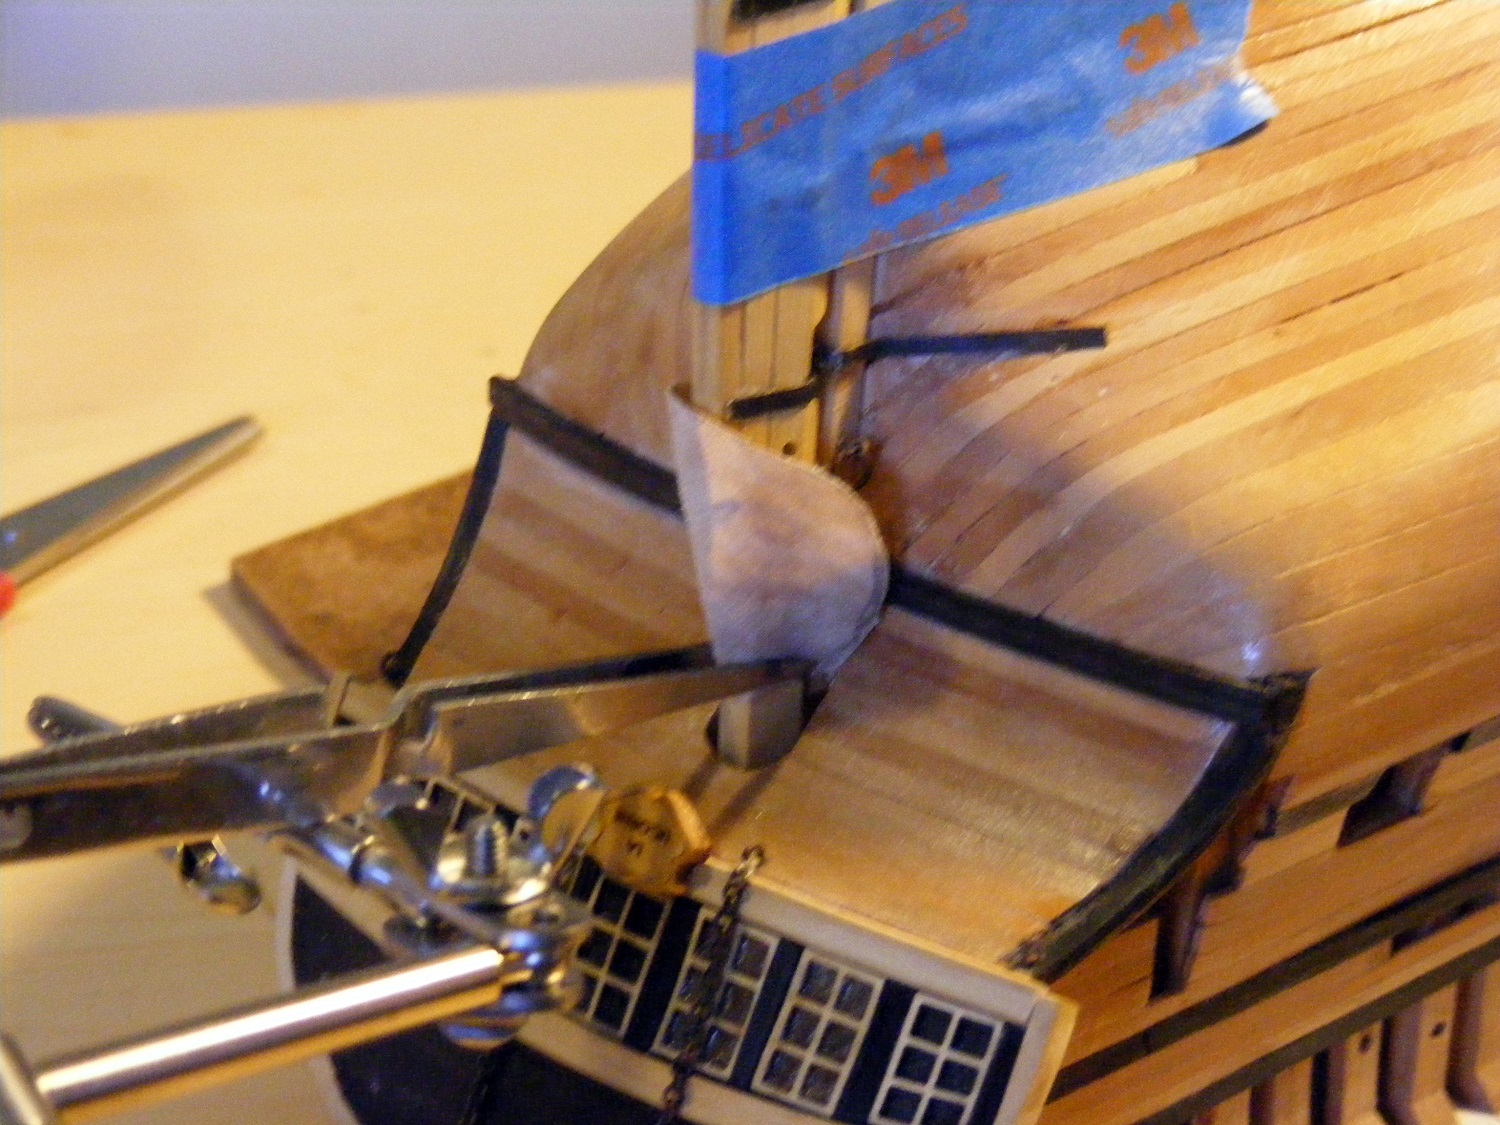
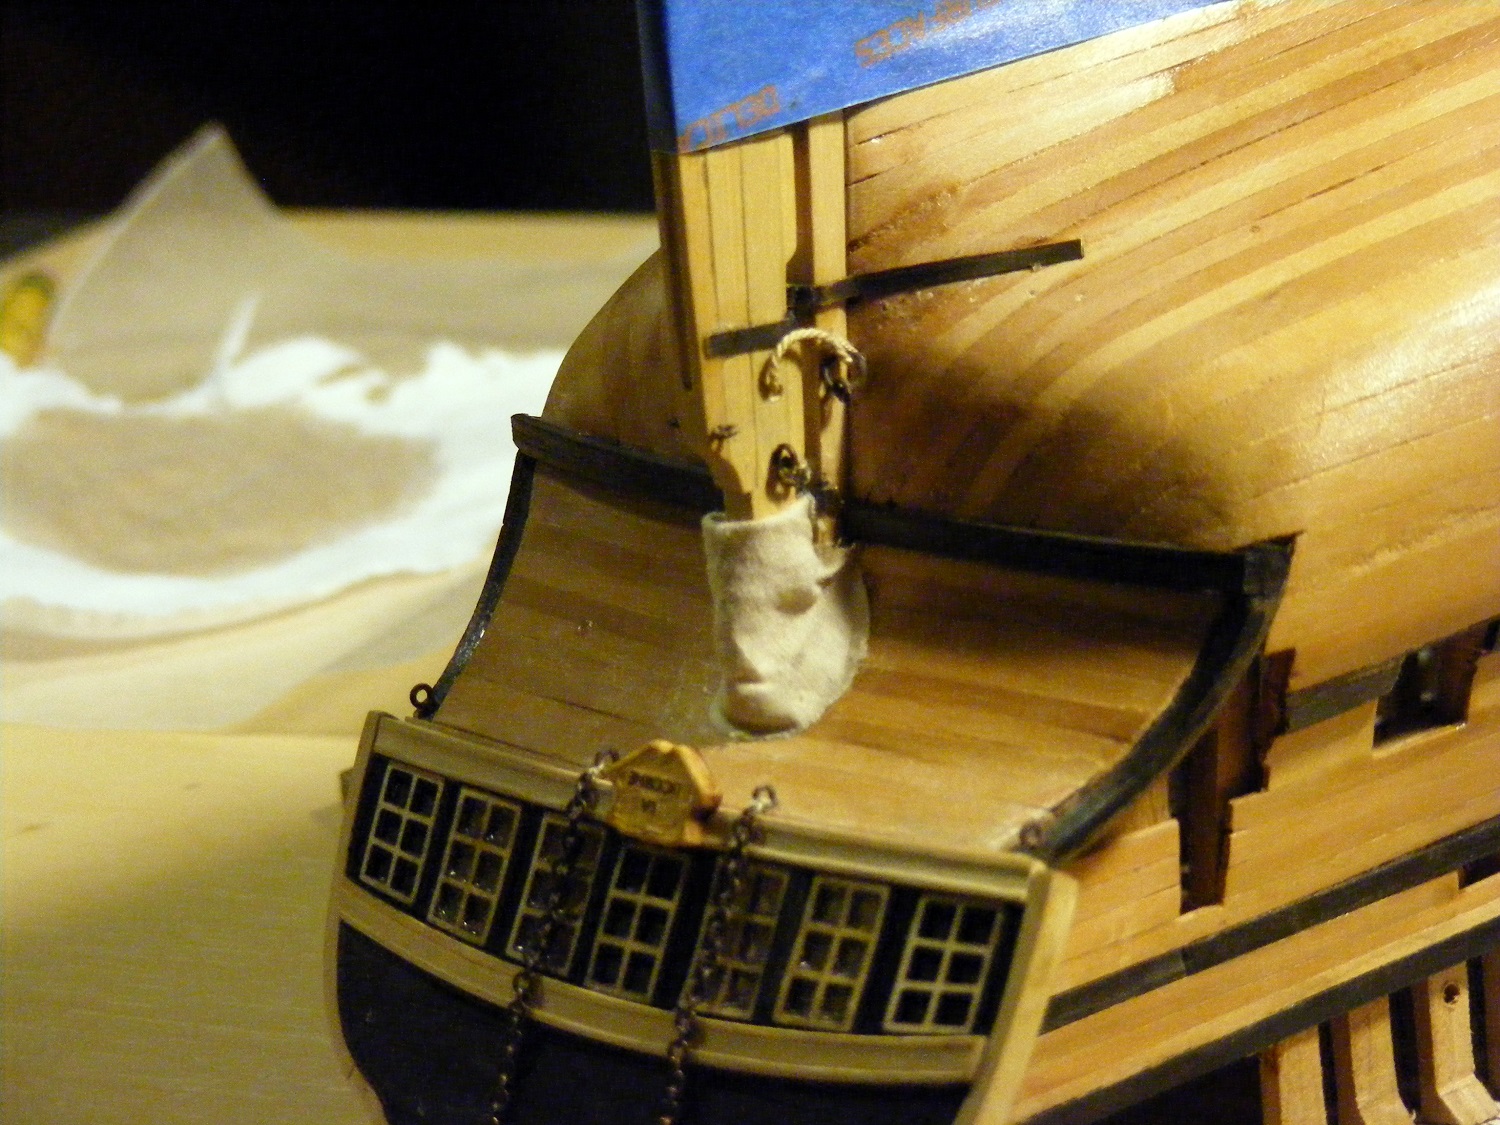
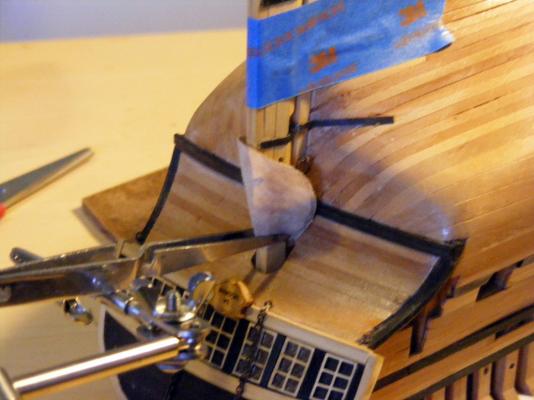
I think this pretty close... Here's the jig I've been using along with a pattern. I've cut out the coat from thin cloth that has a light brown stain to emulate the Stockholm Tar and have started the installaton. It's been folded down for trimming and gluing. And the final gluedown. It bulges nicely but still needs a bit trimming after the glue sets. The rudder is a slight angle to port and puts just bit twist to the coat. I think I'm onto the quarter galleries....


-
Steven, Looking good... You might try painting the plug with white glue and water to seal it, then use a paste wax (automotive) over it. Lay on 2 or 3 coats with buffing between coats. Or... make the grooves ever so slight larger and wrap the plug in a kitchen food wrap. Test first though....
-
Sweet work.. no.. correction... incredible work.
- 641 replies
-
- 6
-
-
- greenwich hospital
- barge
- (and 1 more)
-
Thanks for the suggestions and the advice. I'm working with the jig and trying some things. Wood is still an option. That's my test for today, Robin and Frenchy. I'm testing on the jig. When in doubt... we just bodge away, Robin. I'm giving that some serious thought, Sam. It was on my "drop dead" list. I"ll be going to Michael's tomorrow and I'll see what's needed to cure it out and also, if it will take glue or epoxy to secure it. The weave on those is huge, Bill, for the scale I'm working at. I'm dealing with something that's about 3/4" diameter at the counter and 1/2" tall on the aft side. The fore side is only 1/8" tall. Too late, Denis. Ripped it off already. Leather jerky, Sjors? I was thinking boil it and then make soup. Nick, I looked and only saw the finished product, not a "how" on his method.... I'll have to look again. Thanks, Elijah. I'm hoping... and I won't stop until it is better.
-
I'm with the others on the powder keg, Dave. You wouldn't want one in harm's way in a gunfight. err.. cannon fight. At some point, as I understand it, they painted them red to distinguish them from all other kegs and barrels. Not sure when that occurred, though.
- 962 replies
-
- 7
-
-
- sovereign of the seas
- ship of the line
- (and 1 more)
-
Thanks for looking in. Robin's post on the length of the coat is what tripped my trigger and made me re-think things. Thanks Robin. I'm going to try the cloth one last time, just because. I do have silkspan waiting in the wings. But first, I need to fix that counter area and I do have a plan and also need to clean up the glue spots on the rudder. As mentioned by Gaetan, wood is a possibility. Sjors, I think leather would be too thick and stiff. I am grateful for the advice and the extra sets of eyes. The wood is forgiving and fixable and I do remind myself of that.
-
Lovely framing, Frank. The time spent now is worth it in the long run.
- 649 replies
-
- 5
-
-
- dunbrody
- famine ship
- (and 2 more)
-
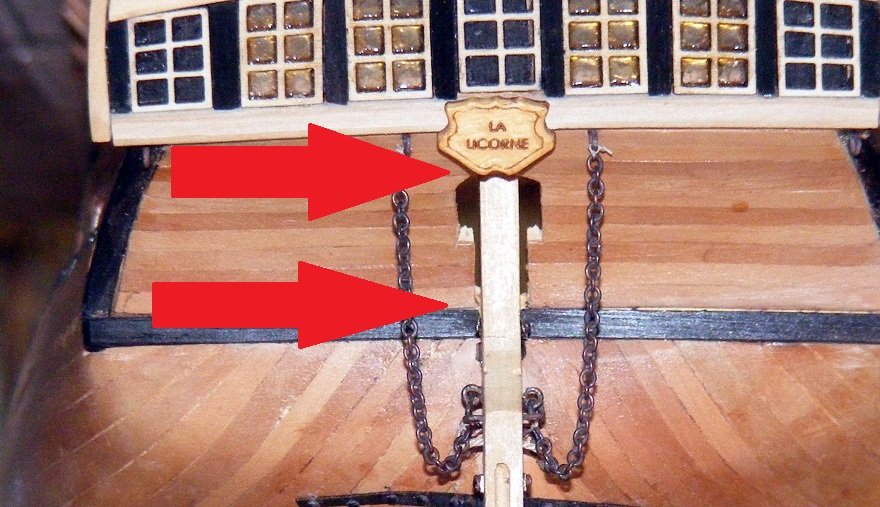
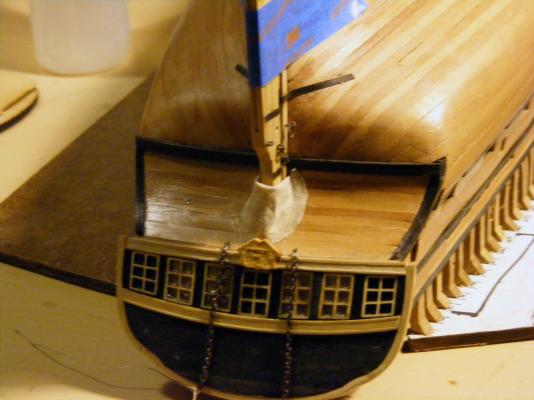
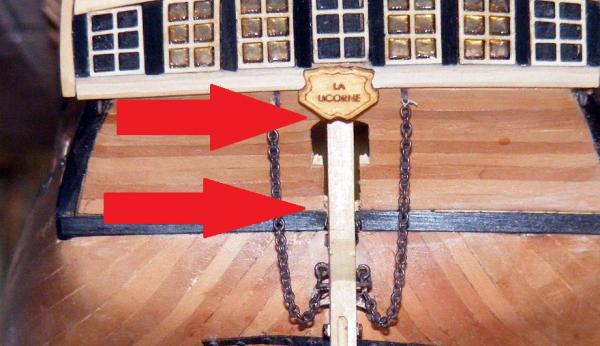
Hmm.... Here's the area that needs the rudder coat... between the two red areas. It's fairly long. There's two "slots" on each side of the stern post. Maybe if I fill those in..... ???? In fact, I think that will do the trick. It was a very bad decision on my part to plank the counter before installing the stern post. Lesson learned.
-
Matt, Consider silver maple instead of surgar. Silver seems to have very little figure. It's look almost like holly but not as white.
-
Hold fire.. hold fire... I just had a light bulb moment. The two working neurons I have left just talked to each other. I've got one made up that I'm tweaking but so far it looks like it'll fill the bill. I just realized that I'm not "blousing the coat" like one blouses one's pants in the military....


-
I used that as one of main references, Druxey as it was the only reference I could find. I'll keep wrestling with it until I get it right.