mtaylor
-
Posts
26,273 -
Joined
-
Last visited
Content Type
Profiles
Forums
Gallery
Events
Everything posted by mtaylor
-
Looking good, Frank. By the way, that scrap box isn't full as we can see the bottom of it. Which adds a pile more of "well dones" as you got things right.
- 649 replies
-
- 6
-

-
- dunbrody
- famine ship
- (and 2 more)
-
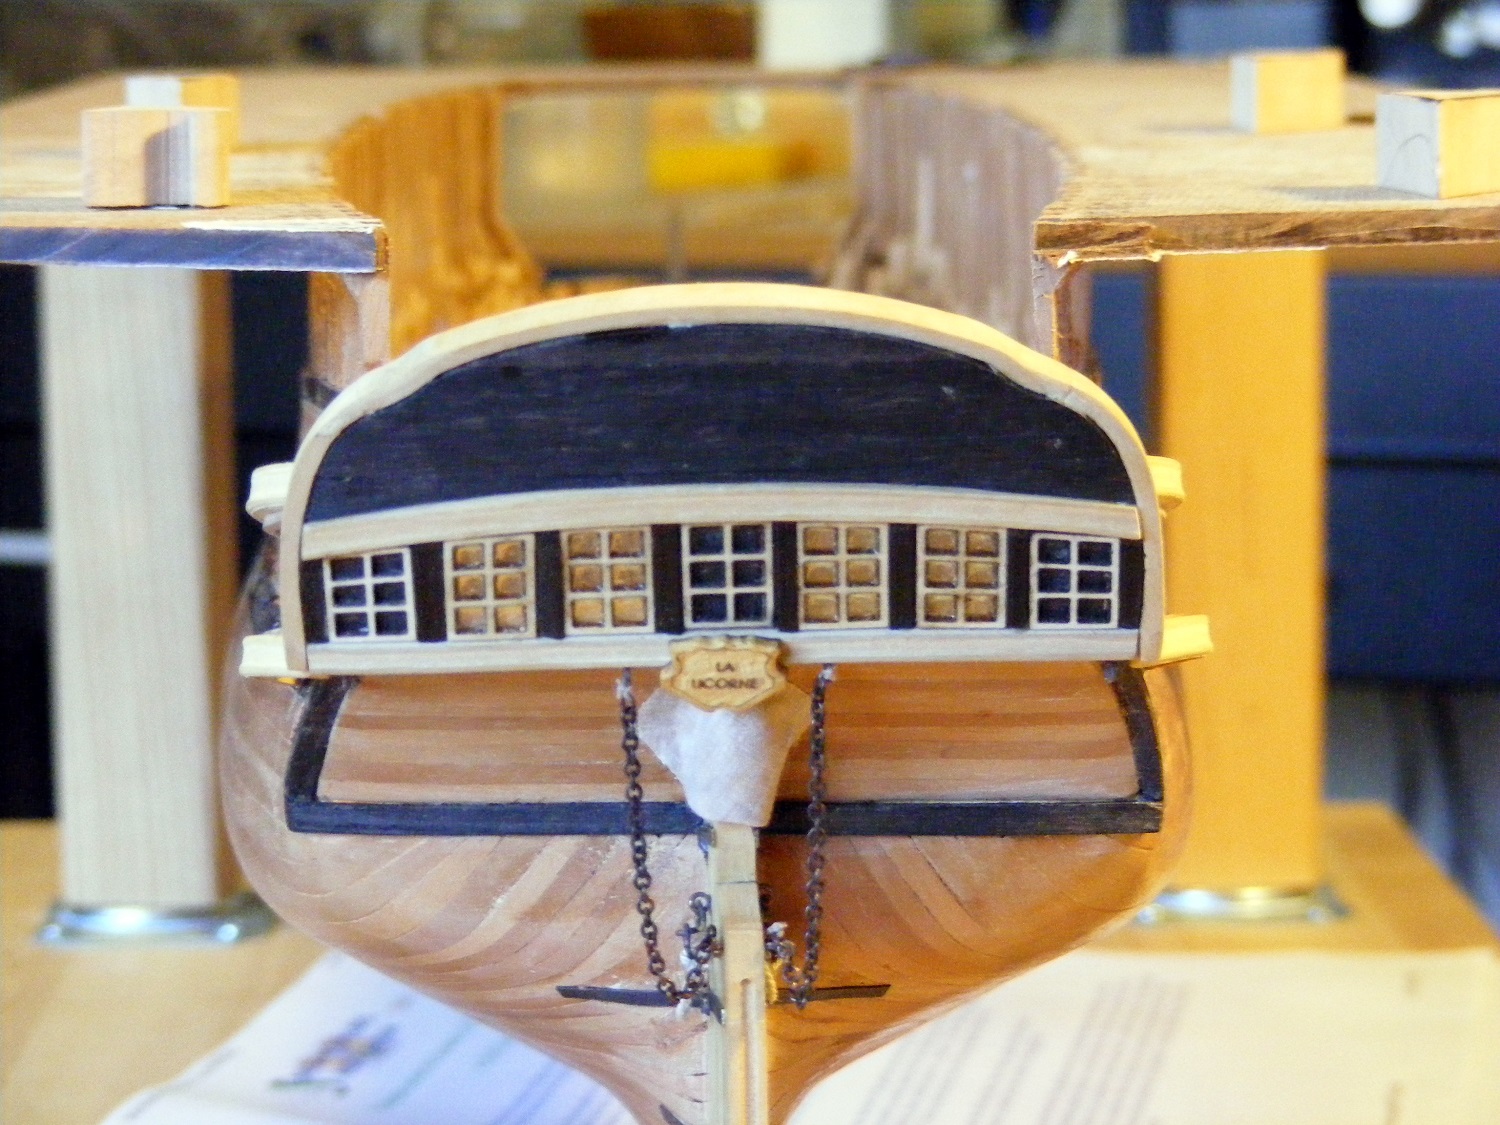
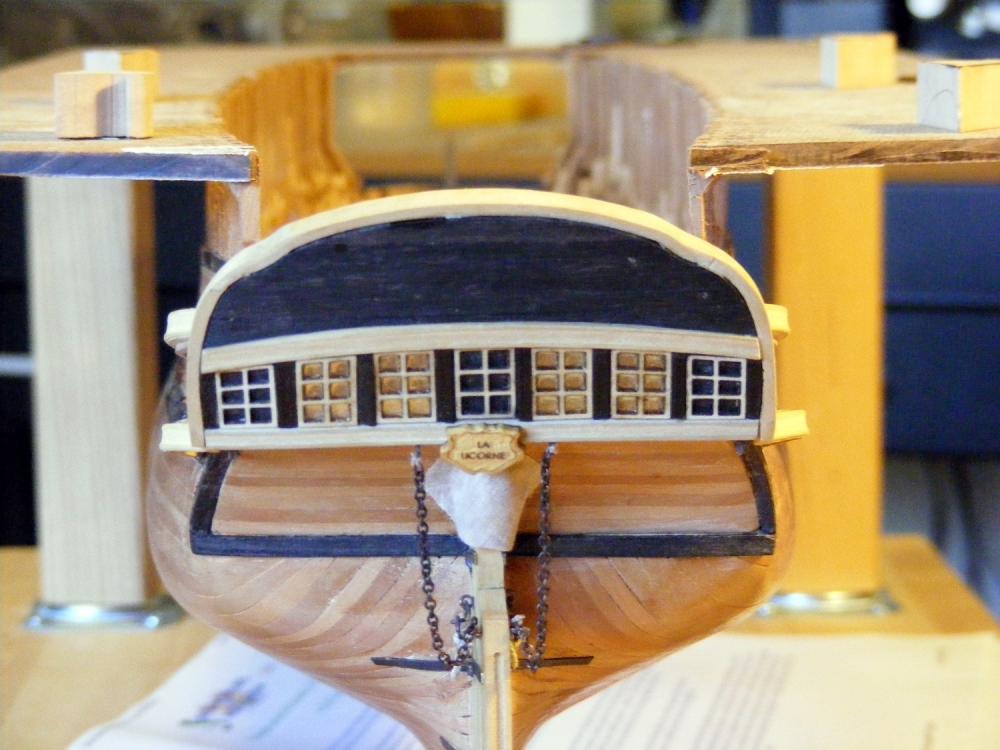
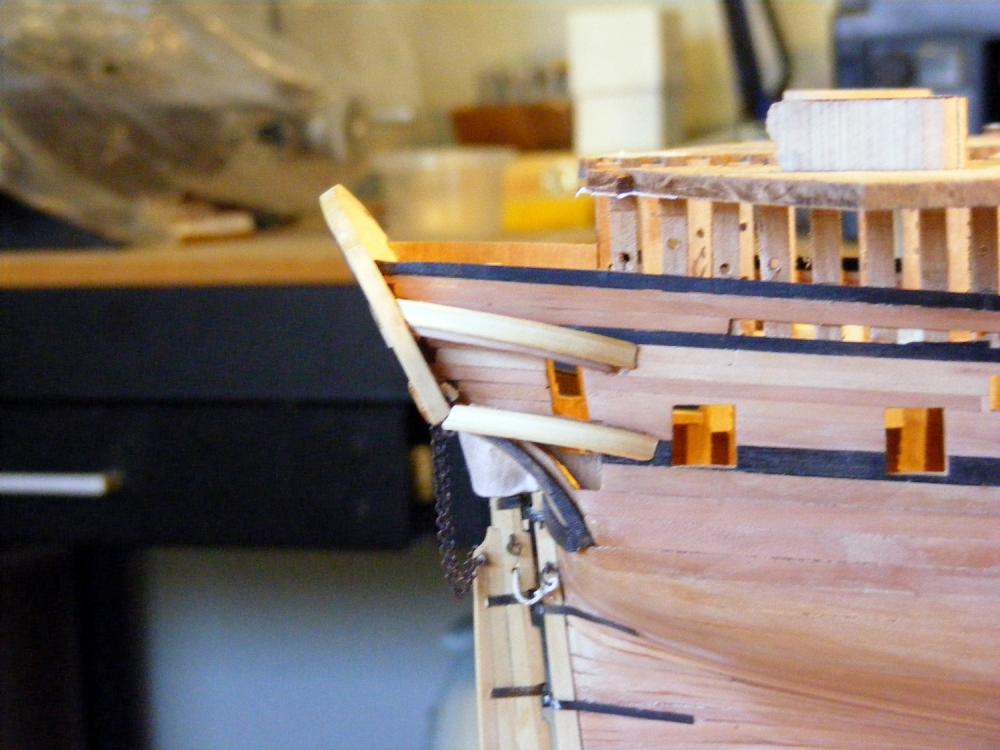
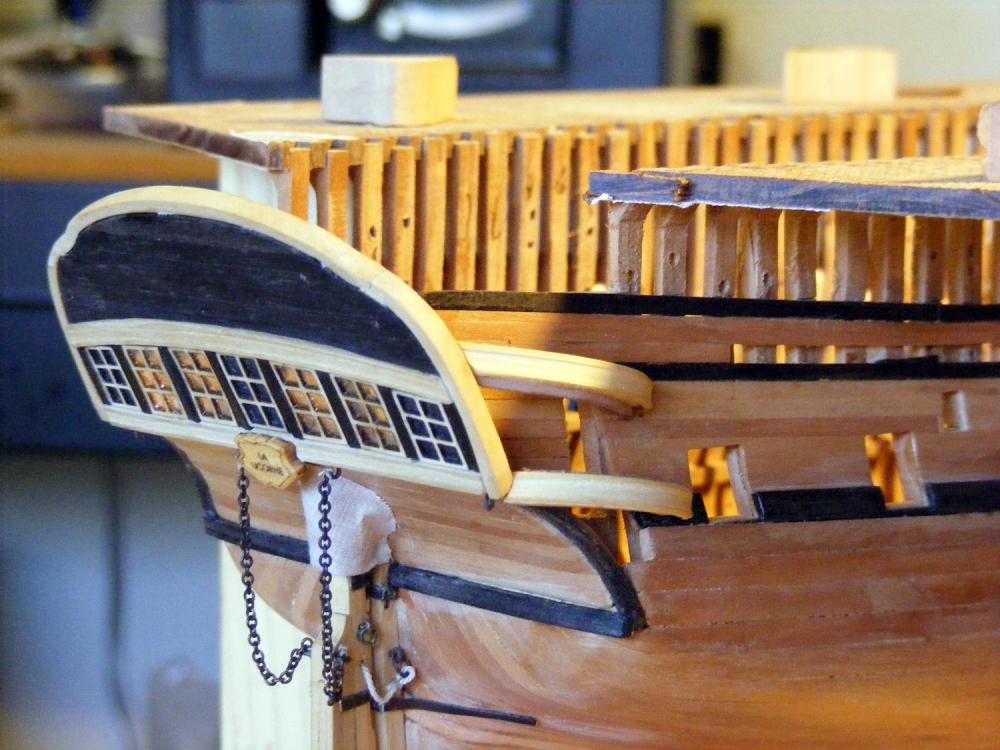
Thanks for the "likes" and comments... time for an update. Thanks Dan. I did a similar thing by cutting the outline of galleries in thin basswood. This gave me reference points. I then added cardboard and basswood until I was happy. At that point, I destroyed them for piece parts. Here's where I am today... not a major update but it's getting there. I made the basic frames which provide the anchors for the the windows and planks between them. I added a stop for the windows and planks and the molding strips to these pieces before installing them. The moldings were carved using a scraper. I then measured and fit repeatedly (even remade them a couple times) until I was happy with the locations and appearance. The pictures look strange, maybe it's the camera angles but there is a slight curve to these and they are dead on at .5" between the top and bottom. Next up will be to make and fit the windows and planks, then the drops and the top. I have windows plugged into CorelDraw for cutting on the laser but still need to tweek them a bit. The drops are cut oversize and I'll start working on them also. Lastly, there's some joinery issues, but those will be hidden with the carvings for the taffrail. I've them cut to size but not carved. Now for the pictures. As always, clicking the pictures will enlarge them.
-
I hit "like" to acknowledge that, Jesse. I don't like the news. This saddens me terribly. Keith had a lot of insights not only into ship building but life. I've been hoping he'd come back as I missed his builds and his PM's. I'm hoping there's a better prognosis for yours and I wish the medical types had better treatments. I'll keep you and Keith in my thoughts and prayers.
- 1,306 replies
-
- 11
-
-
- syren
- model shipways
- (and 1 more)
-
Papegojan 1627 by mati - FINISHED - 1/48
mtaylor replied to mati's topic in - Build logs for subjects built 1501 - 1750
Wow... -
That's a great idea on the frame jig. With that many frames, that jig will get a lot of use. The frames are looking great.
-
I believe there may have been a fashion piece that covered the ends of the hull planking and the counter. I'll have to search and find a picture as most builders seem to miss this... You can see it here in the last pic: http://modelshipworld.com/index.php/topic/232-hms-naiad-by-edt-160-frigate-38-1797/?p=72229 I did that here on my ship but it's French.... http://modelshipworld.com/index.php/topic/5339-licorne-by-mtaylor-pof-316-french-frigate-hahn-version-20/?p=374762 What most usually do is have the hull planks (and wales) cover the end of the counter planks.
-
Barrel? I'm grabbing a stool near the workbench.
-
Oh look.. a comfy chair. Looks to be something a bit different, even in the runabout category.
-
Stunning as it is, Druxey. The ensigns will just add to it.
- 641 replies
-
- 2
-
-
- greenwich hospital
- barge
- (and 1 more)
-
Steven, What Druxey said... We're harder on ourselves than anyone else could ever be. And movable goalposts... I have to remember that.
-
Kees, it is pretty amazing isn't it? Talking and sharing with people all around the world. Your research is impressive on this and watching the parts come from the pictures is, to me, just incredible. You get all the details and they look great. Your dad did a great job on his trawler.
- 434 replies
-
- 4
-
-
- pelikaan
- beamtrawler
- (and 2 more)
-
Now that is incredible. I've watched it a couple of times and it looks as real as can be.
-
Eric, Do you have a "third hand" or locking tweezers? I find they help immensely along with some magnification. You'll still need plenty of patience and some extra blocks for those that go flying off in the twilight zone. Looks great...
- 83 replies
-
- 1
-
-
- revenue cutter
- BlueJacket Shipcrafters
- (and 2 more)
-
Well done on the entire ship and that ingenious battery box. Looking great. Wish the brothers for me and much nuts and booty.
-
That is stunning work, Ron. There's a couple of shots where the background is just right and it looks like an ocean of smallish whitecaps. One could think it's the real one just from those pictures.
-
Looking good, Jack. Nothing wrong that a little touch up won't fix. The hatch covers came out well and the contrast in wood to the deck makes things pop.
- 250 replies
-
- 3
-
-
- willie l bennett
- model shipways
- (and 1 more)
-
Hmm... white metal. I'd try JB Weld. But it may cure harder than the metal and make sanding/finishing tough. Or maybe some Bondo? I'd think something like those since they're designed for metal. I'm curious others will recommend.
-
I went looking for info on this tool and did find a manual: http://vintagemachinery.org/files/PDF/Dremel/700.pdf It looks like you could turn small diameter brass rod but you'd have to use files instead of cutters. Nice bit of machinery there. I'm glad someone helped you out.
- 1,306 replies
-
- 9
-
-
- syren
- model shipways
- (and 1 more)
-
Looking good from here, Kevin. I'm still surprised you can get her in and out of the house as big as she is.
- 1,319 replies
-
- 3
-
-
- caldercraft
- Victory
- (and 1 more)
-
Nice progress, Andy. And welcome back.
-
You are well on your way. That is is some realistic rowing motion going on there.
-
Beautiful framing, Mike. The finish makes it pop. I wouldn't worry too much about "light" and "dark" differences since as the wood ages, it will change color. I'm not sure what time frame is involved, however. I noticed on my build that the Swiss pear was brownish-pink when I put the planks on and then went more pinkish with the Wipe on Poly. It's now slowly loosing the pink.
- 969 replies
-
- 6
-
-
- hahn
- oliver cromwell
- (and 1 more)
-
Interesting thoughts and research, Ed. I wonder, would a layer of sand been put down between the metal and the brick? I've seen this on friend's firepit they built on their deck and never thought about it until I read your post.