mtaylor
-
Posts
26,273 -
Joined
-
Last visited
Content Type
Profiles
Forums
Gallery
Events
Everything posted by mtaylor
-
Removing Blacken-It from Brass
mtaylor replied to mtaylor's topic in Metal Work, Soldering and Metal Fittings
I'll try the acid bath. Nothing to lose but a few parts. -
Second planking???? You're going to cover up what you've done? Or did I miss something? Looking very good, Chris.
-
Removing Blacken-It from Brass
mtaylor replied to mtaylor's topic in Metal Work, Soldering and Metal Fittings
Allan, The parts were blackened about 5 years ago and have taken a beating in the storage container. Some turned green so I'm thinking of cleaning the crud off and blackening using the Birchwood Casey product. I tried some acetone and also vinegar but doesn't remove it completely. I'd just hate to toss all the nails and eyebolts, etc. -
Truer words were never spoken, Piet. And the MSW members do seem to push (myself included) a bit... I'm doing stuff I only thought about because of people like you.
-
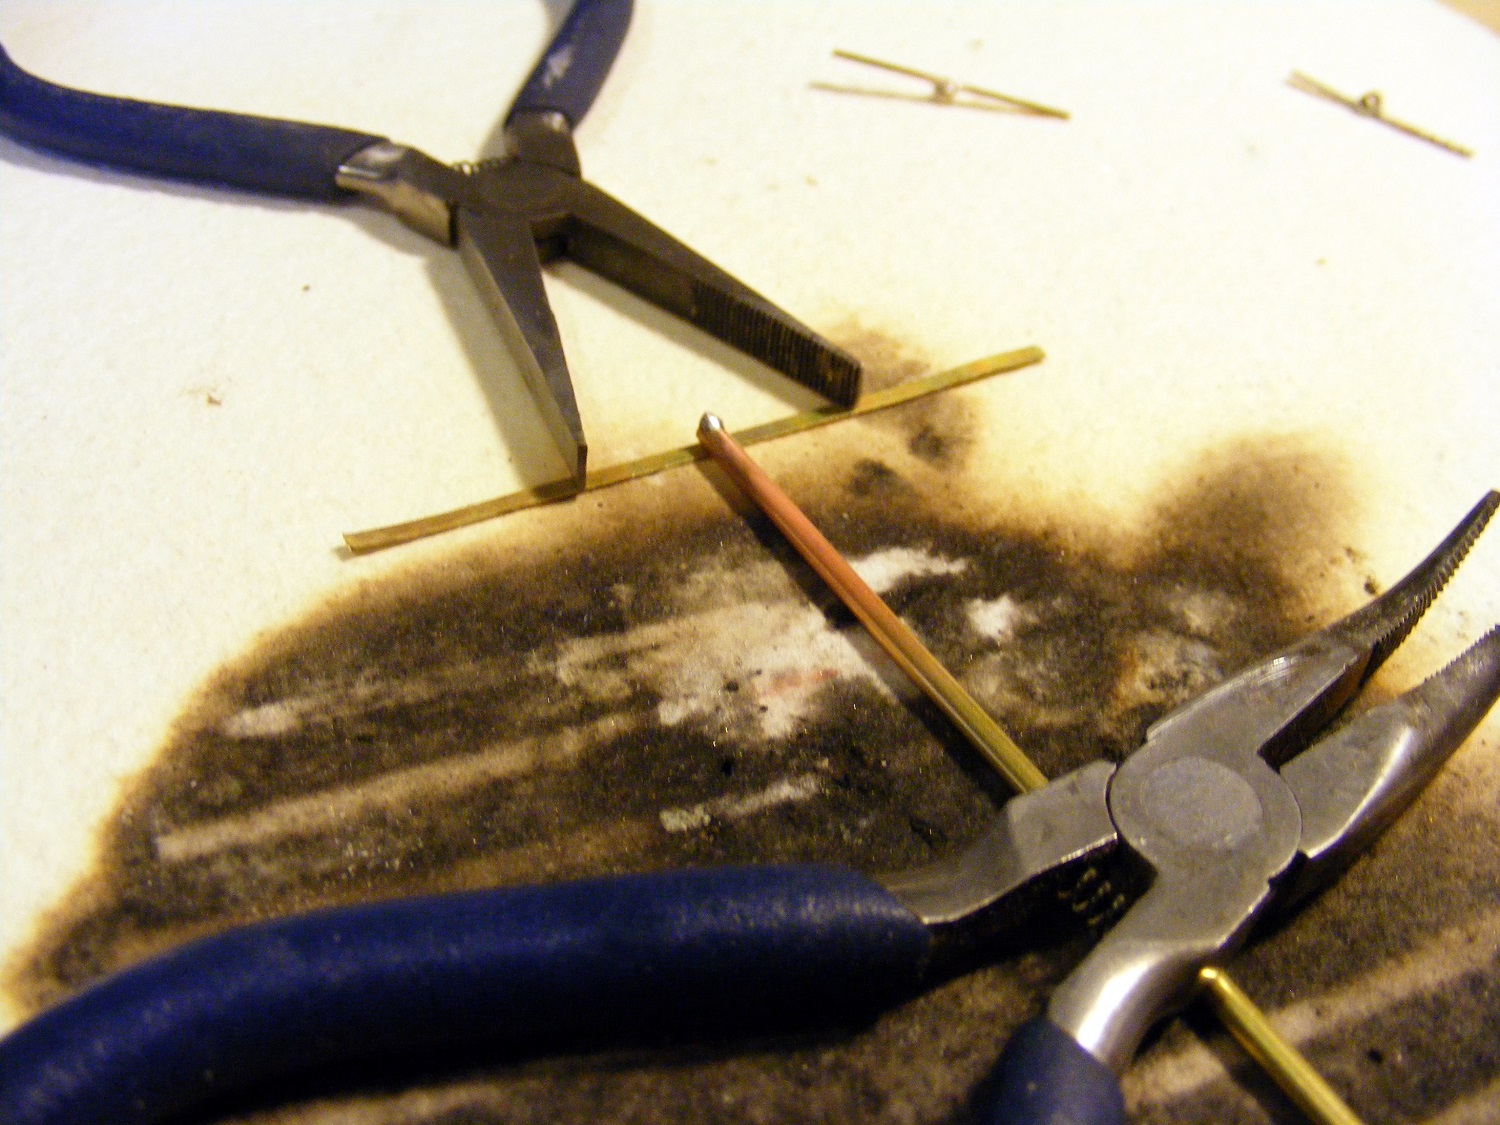
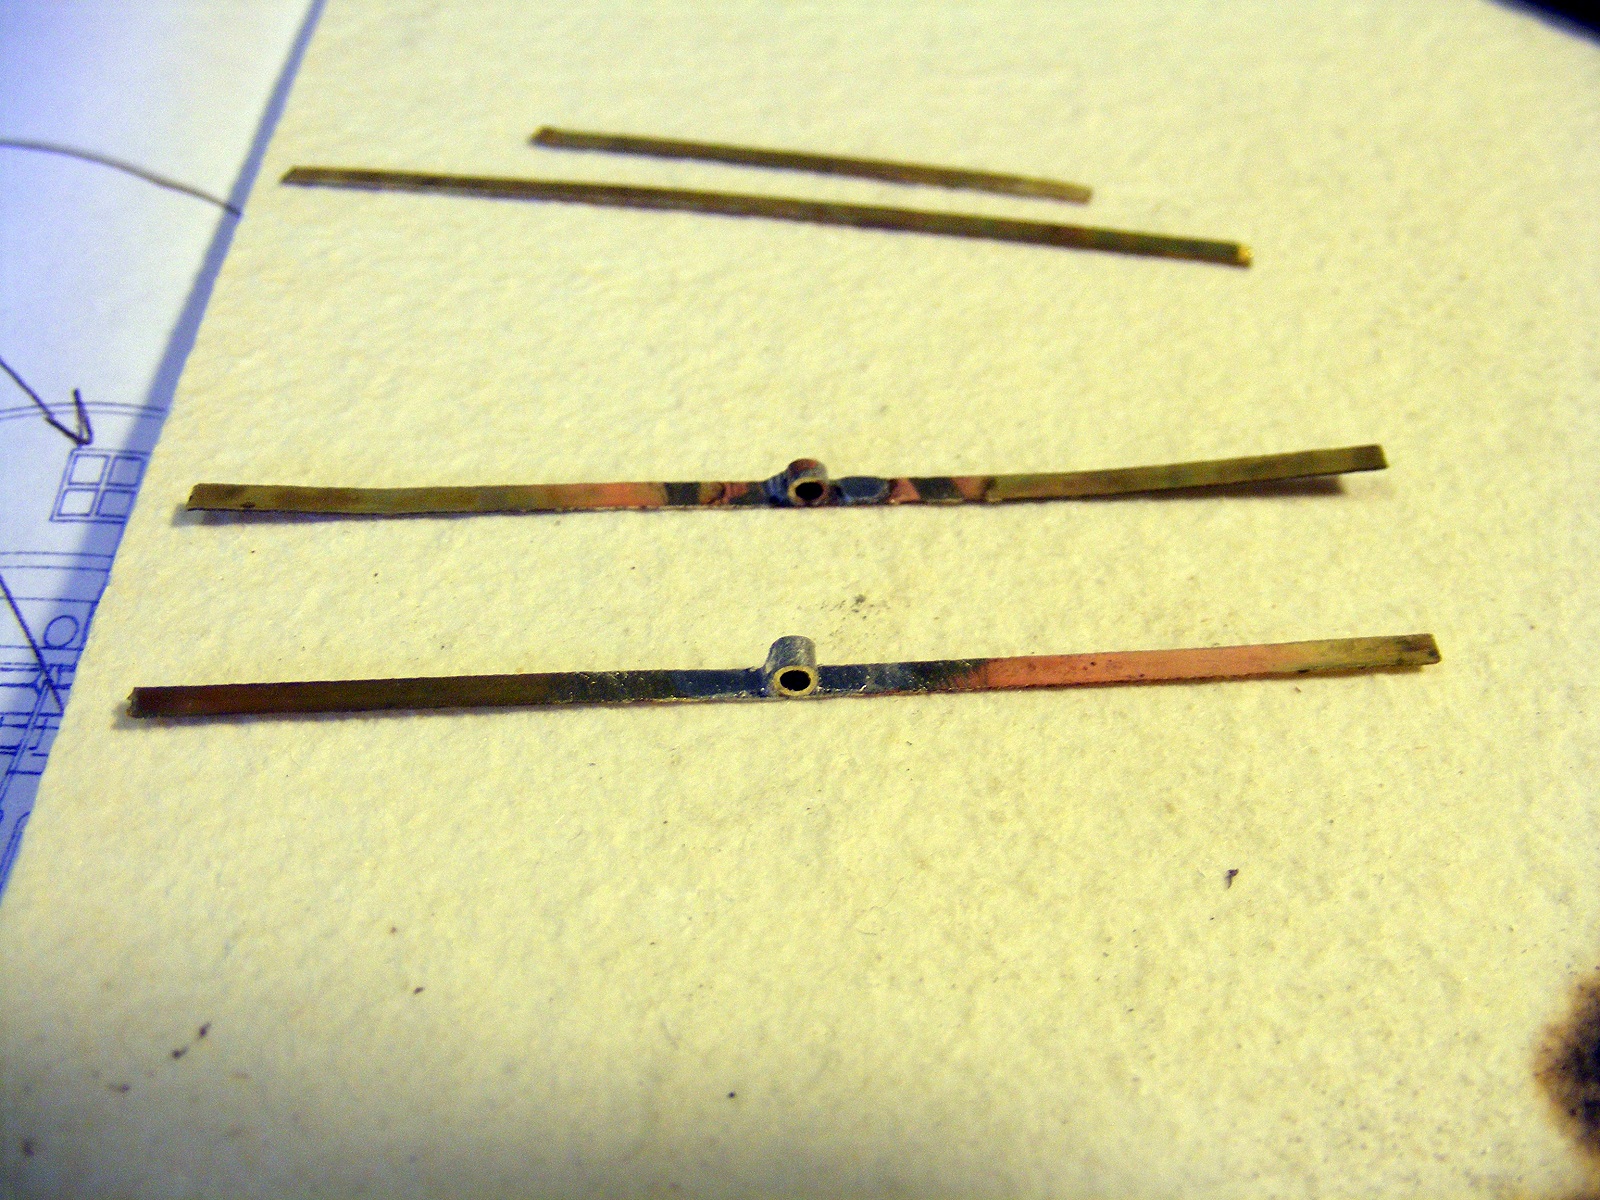
The "likes", comments, and questions/challenges appreciated..... So... pushing the envelope... I've reworked the rudder and added some metalwork. It looks a lot better. The metal banding will have the appropriate amount of nails in it before this piece is ready to mount. Edit: I forgot to add... I cut it apart using a thin jeweler's saw and then glued it back together using some colored glue. And a couple of quick shots of the rudder irons/straps in work. I started by annealing the straps. I silver solder the tube, cut-off the excess, and clean it up with a file. For the pintle, a 1/16" brass rod will be epoxied into the tube. The cudgeon will not have the shaft, naturally. I should note that these are not cleaned up yet. So far, so good. I've got a pile of brass pieces now pickling in some vinegar. I'll rinse well and let dry overnight. I'm thinking of using paint on these or hitting the local gunshop tomorrow for some Birchwood Casey's. In testing, Blacken-It did nothing for the silver solder. I've got some discards painted and drying and I'll how they look.


-
Is there anyway to remove Blacken-it from brass? I have some very tiny parts that were blackened a few years ago but they need re-blackening and I want to remove the old stuff first.
-
Congratulations on finishing and the sweet work on her, Jack. The decals don't look like decals . I like your sense of history for this ship, it just seems be the frosting on the cake.
- 203 replies
-
- 5
-

-
- artesania latina
- marie jeanne
- (and 1 more)
-
Unless the shot (grape? canister?) hit something solid, there would damage to the ropes at least by the muzzle blast. I'm thinking some of the forward firing guns across the head would have been last ditch defense as opposed to chase guns. Maybe the higher up would be used for the chase?
- 608 replies
-
- 2
-
-
- la couronne
- corel
- (and 1 more)
-
You're research is both meticulous and over the top. And then applying to the model. Fantastic work, Daniel.
-
It was actually made out of 3 pieces of wood, Paul. The main piece was oak and the other two were pine. I'm planning scribing the lines in as they're straight and not tabled like the English ships. Unfortunately, I don't have anymore of the original boxwood that used when I cut the blank otherwise, I would re-cut. What I do have is noticeably different so... for eye-appeal, I'll go with what I have.
-
Just one impressive boat you have going there. I'd love to be shrunk down and take her out on the lake.
-
The deck planking is looking great. That is an interesting pattern they used and you're matching it.
-
A #11 blade and some bits....? Wow!!!!
-
Cutty Sark by NenadM
mtaylor replied to NenadM's topic in - Build logs for subjects built 1851 - 1900
I love your wheel, Nenad. I'm also deeply saddened by the loss of your mother-in-law. I know what she meant to you. Take the time you need, my friend.- 4,152 replies
-
- 7
-
-
- cutty sark
- tehnodidakta
- (and 1 more)
-
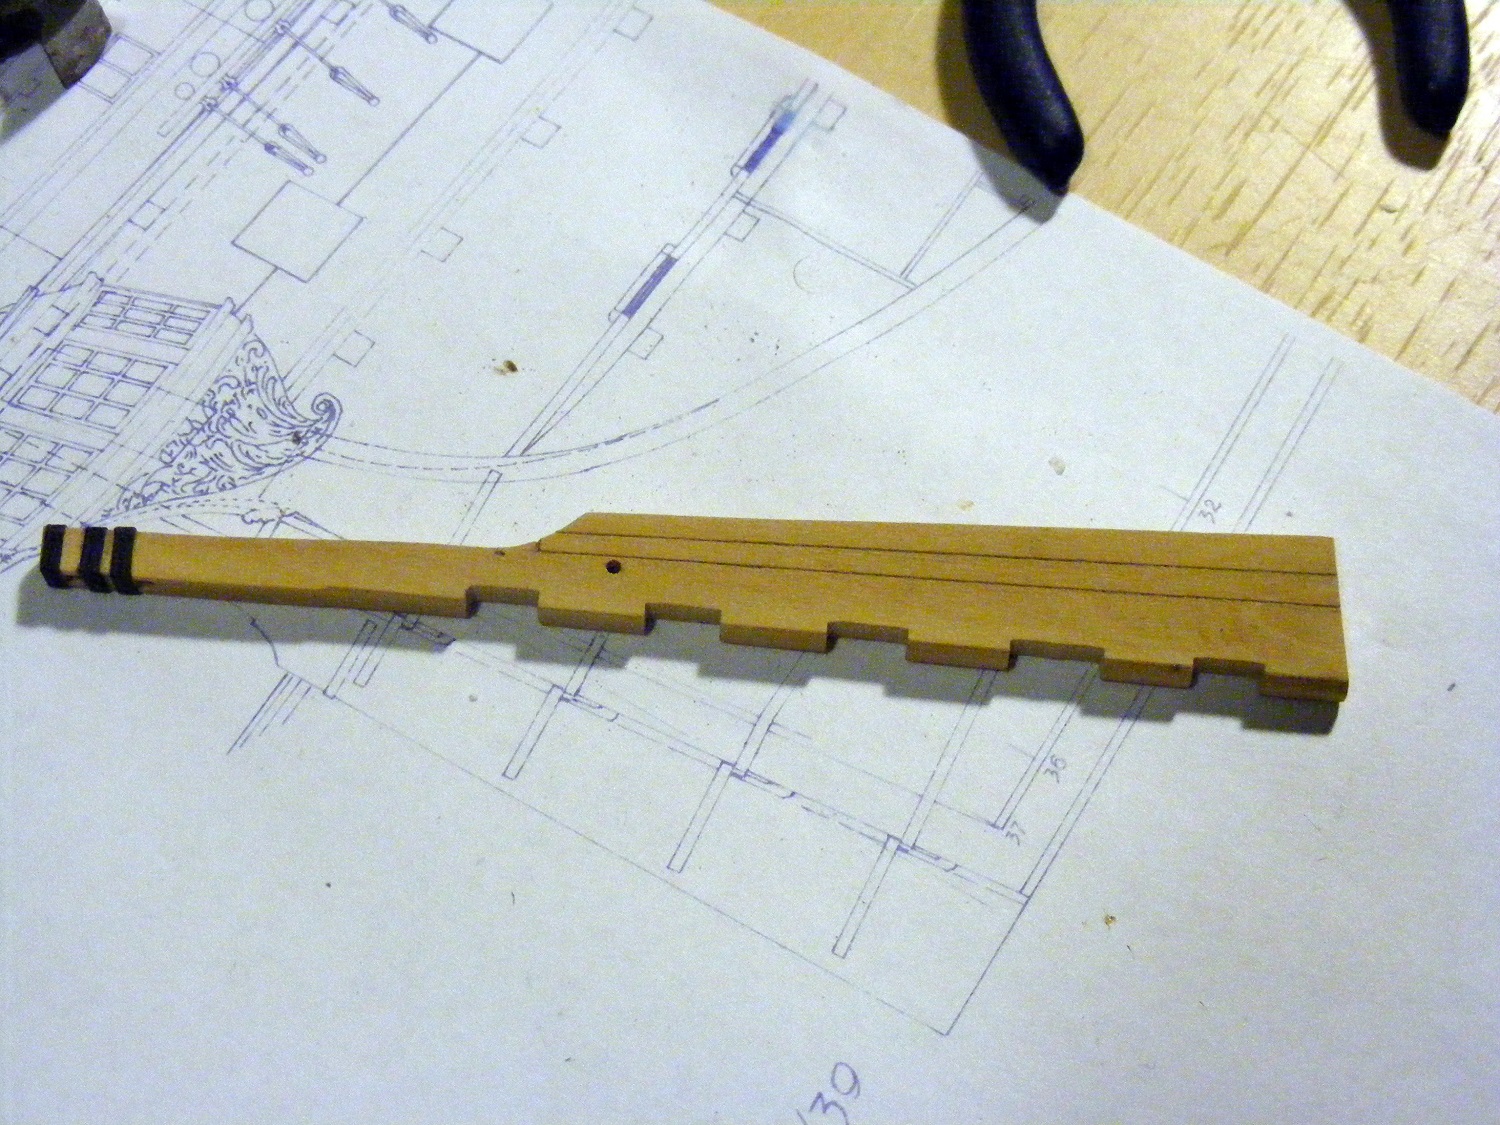
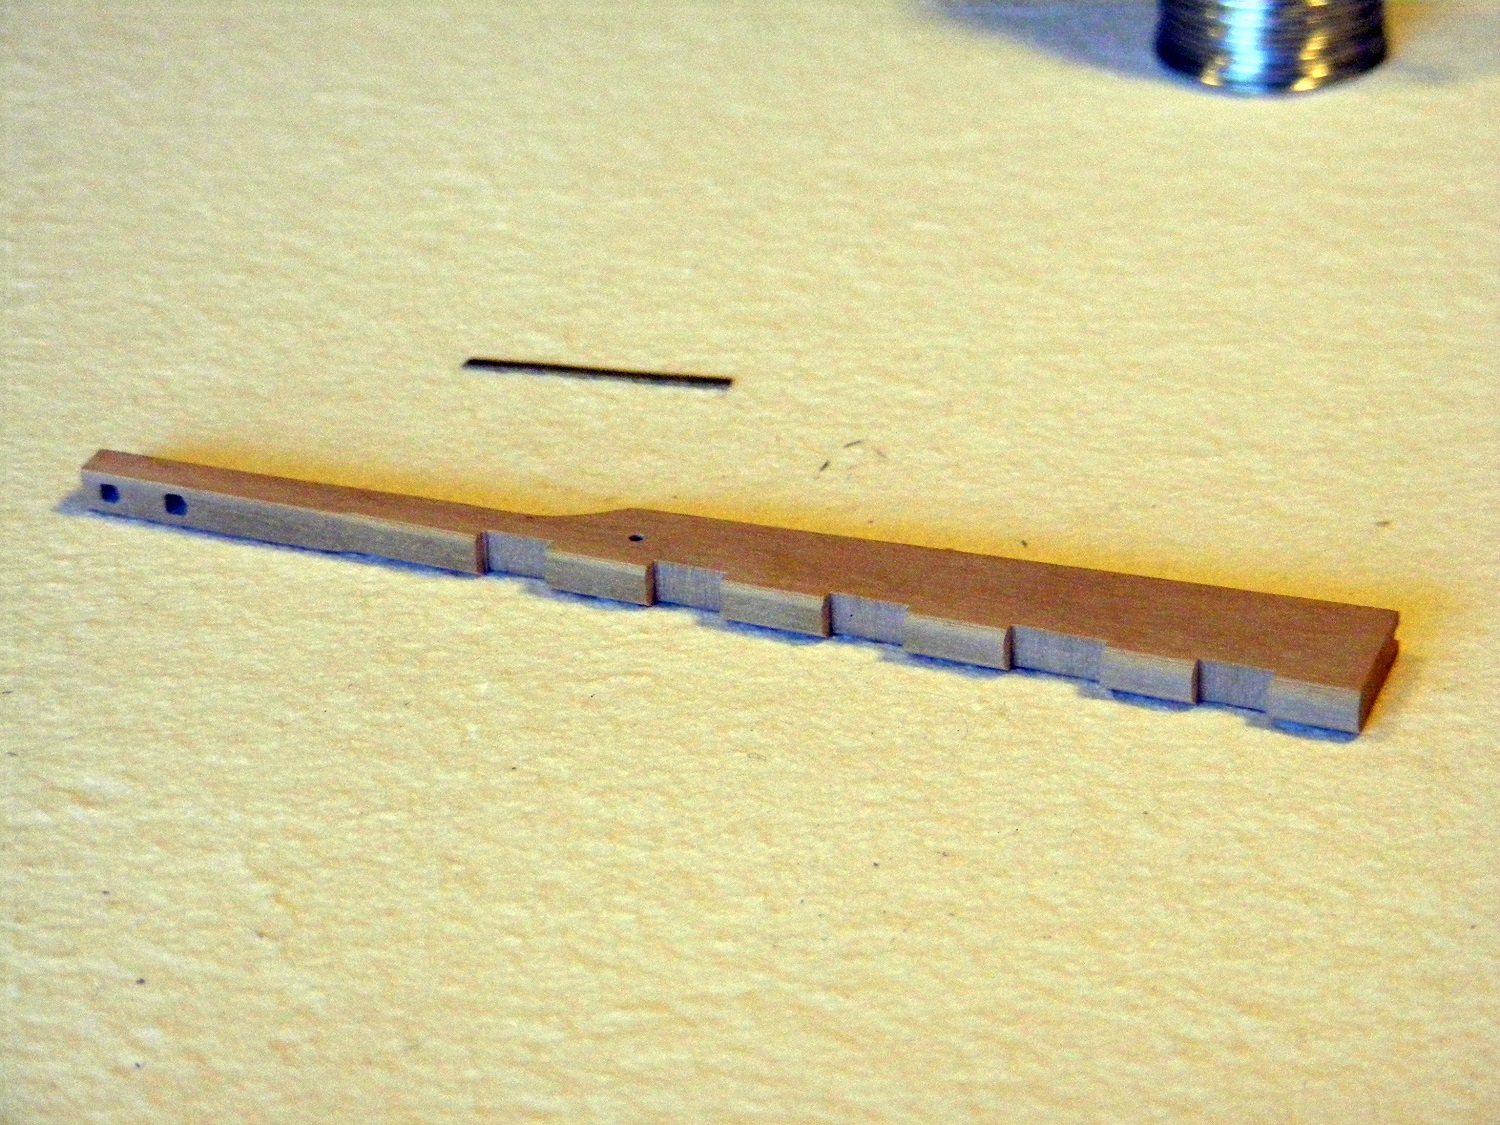
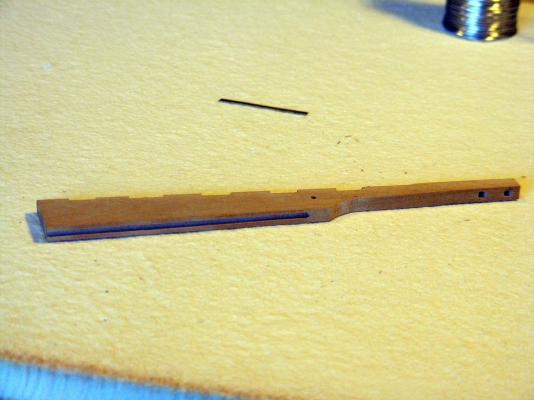
Thanks for the "likes" and comments. When I laid the keel, I also cut the stem, the stern post, and the rudder from the same chunk of wood. I've been busy with other things recently, but did spend a lot of time researching the rudder and sorting things out. I found that many of my assumptions and some of what is on the plans wrong. Here's what I've found (including from those responding to a post on this)... 1) As built in 1755, there's minimal vertical taper. It wasn't common to do this, but not uncommon either. Which makes me wonder that maybe it was a shipyard decision. The rudder follows this. 2) There is no fore and aft taper to the rudder. That one caught me by surprise. 3) There is a cavitation/turbulence groove. This would have been added when the ship was rebuilt/overhauled at some point later in time. It would have been present in 1778 when captured. 4) The fore side of the rudder was beveled at about a 45 degree angle. The pintle and cudgeon<SP?> straps were recessed only at the fore side of the rudder and at the aft side of the sternpost where the straps bend to the side. They were recessed as on some other nation's ships. 5) No spectacle plate. There's an eyebolt with rings on each side just above the strop hole for the emergency steering. The strop hole is nominally rigged to two eyebolts. So.. I machined the rudder blank as shown in the pictures below. There's two mortises in the top of the rudder, one for the normal tiller (which on Licorne is in the Great Room) and one for the emergency tiller which is on the quarterdeck. I'm off and running with the metalwork. I've started silver soldering and wondered why I didn't do this years ago. It's pretty fast and gives a nice result.

-
There's also fabric glue available at some arts/crafts stores and many yard goods (sewing) type shops. Also matte varnish works well.
-
Timing and Headspace Gages????? Did he have a time machine in his room?
-
CRG, Copy the URL and paste it into Google Translate. It should translate the whole page. Most browsers now allow a plug-in for Google Translate so a right-click and pick "translate page" is available.
-
Steve, I think Chuck did his rope early on using that one... and motorized it. I could be wrong on that....
-
Cutty Sark by NenadM
mtaylor replied to NenadM's topic in - Build logs for subjects built 1851 - 1900
I guess we all have to be patient, Steve. One cannot rush a master builder.- 4,152 replies
-
- 5
-
-
- cutty sark
- tehnodidakta
- (and 1 more)
-
NIce..... back on the bench. How you can keep these projects separated and your parts inventory up is beyond me. And on top ot it, all the projects look great.
-
Impressive work, Denis. The ladder by itself is a miniature work of art.