mtaylor
-
Posts
26,273 -
Joined
-
Last visited
Content Type
Profiles
Forums
Gallery
Events
Everything posted by mtaylor
-
MDF is hard, I used a sawblade that I wax down with beeswax every 10 or 15 strokes. Also, the dust is toxic so cut outside, or wear a mask and run a vacuum while cutting. A scroll saw works well but it does eat the blades, even waxed if you're cutting a lot. As I recall, I went through 2 blades on my build board. The problem isn't the wood fibers but the glue binding the fibers together. If you can, check the store where you get your wood and see if they have a small piece of scrap you test with.
-
I can't comment on the size, but a lot of the hobby places carry it. I've used it and it works. Just make sure you don't get warped pieces which seems to be a big part of the offerings lately.
-
To spile or not to spile...
mtaylor replied to fish's topic in Building, Framing, Planking and plating a ships hull and deck
On spiling.. if you line off the hull per the tutorials at bow, the planks will need a taper. If it gets too 'thin' on the taper, a drop plank will be needed. At the stern, if the needed planks get too wide, stealer time. The tutorials are a big help and about the only difference is the method in laying out the runs of the planks. On plank width... shoot for a plank length around 28-32 feet or so... It's going to vary from place to place depending on what was available at time. Width could be 6" to 12" wide... again, depending on what was available. Crackers... microwaving works but you'd best move it to the workshop as the planks cool down fast, in my experience. I've been using the curling iron method which works for me. I'm trying the Chuck heat gun method but so far, I don't have the hang of it. -
To spile or not to spile...
mtaylor replied to fish's topic in Building, Framing, Planking and plating a ships hull and deck
You can taper to a fine point, but that's just not realistic. In the real world, you would need at least one nail/trunnel/whatever there to hold the end down. The usual rule of thumb (rules are made to be broken...) is to not taper more than half the plank width... but see about rules made to be broken. -
Buying an Expensive Kit and throwing most of it away
mtaylor replied to pirozzi's topic in Wood ship model kits
Keith is right...laser cutting is the wood equivalent of a cutting torch. -
To spile or not to spile...
mtaylor replied to fish's topic in Building, Framing, Planking and plating a ships hull and deck
Druxey, In my "scrap" and "misc" piles, I have pieces that I soaked and bent with a curling iron set to "MAX". The pieces are still bent after several years. I did do some steambending way back on my Constellation but the parts on the ship and I'm not finding any scrap... so that's inconclusive. -
Then that's the way you should build them. Everyone builds differently and for different reasons. Go for it. Open a build log and we will follow. Edit: I forgot about this one... http://modelshipworld.com/index.php/topic/10558-sponge-diving-boat-trechandiri-tirhandil-by-mhmtyrl-mehmet/ Lots of character.
-
I've used a 50-50 mix of water and wood glue to harden basswood. About all I can say is that it works. It might take paint, but I doubt it will take stain.
- 1,306 replies
-
- 6
-

-
- syren
- model shipways
- (and 1 more)
-
Jim, Looking good. There's a topic here that might help: http://modelshipworld.com/index.php/topic/11214-how-to-make-best-use-of-your-milling-machine-tips-and-techniques/ Posts 35 & 44 These will let you do what you're doing to any length of wood. Before mills.... oh my... custom scrapers to do that. A PITA, but it works.
-
Cutty Sark by NenadM
mtaylor replied to NenadM's topic in - Build logs for subjects built 1851 - 1900
A beautiful throne fit her presence, sir. Well done. And a great story about the hand... or glove as it turned out.- 4,152 replies
-
- 6
-
-
- cutty sark
- tehnodidakta
- (and 1 more)
-
Wow.. seeing mass destruction is never a pretty sight but I'm confident the reconstruction will be excellent. Bold move, Dave... very bold.
- 962 replies
-
- 8
-
-
- sovereign of the seas
- ship of the line
- (and 1 more)
-
No Richard, you're not wrong. What I showed is actually the "reverse" of the way the draftsman would do it from what I've read. In that case, they take the measurement of the ports from the keel. Hawse holes are a different critter. What does Chuck have to say about the hawse pipes in the instructions? As I recall, that tutorial/practicum is pretty comprehensive.
-
Dave, FSwart is right. These are simplifed (and slightly modified plans). This was designed as a beginner's project and thus there are some things not there. Some of us kept it simple and others embellished it.
-
The Japanese modelers do build in wood. Here's the homepage of "The Rope"... Japan's biggest ship model club: http://www.theropetokyo.org/english/activities/ Here's one set from an MSW member who visited: http://modelshipworld.com/index.php/topic/1710-38th-the-rope-exhibition-tokyo-japan/
-
Buying an Expensive Kit and throwing most of it away
mtaylor replied to pirozzi's topic in Wood ship model kits
Uh.. what rules? The rules as such... build what you want, the way you want. As for "looking stupid"... I don't think so. The reason for this site is to learn from each other and that works in spades. We all make mistakes but that doesn't make us stupid. There's another purpose of this site... the build logs, the questions and answers. They all do more for sorting things than any "official review" could ever do. There's several manufacturers do read and post here and listen to what's being said.- 72 replies
-
- 14
-
-
Have a look at Riverboat's builds... Matt.S.S. There's others, but those two off the top of my head for kits. Kees in the scratch area. I know there's others who weather their ships. It's a part of the hobby. And I agree with Slog.... This is MSW. We're not stuffed shirts who only build models "one way..the true way'' as some places seem to prescribe.
-
I think all of us who pre-ordered are trying to be patient... I'm only checking the mailbox once a day so far. Ok.. I lied. I check the front porch hourly.
-
Brig Eagle by robnbill - 1:48
mtaylor replied to robnbill's topic in - Build logs for subjects built 1801 - 1850
Nice work, Bill. I like the way you did those sheaves and catheads as well as everything else. -
Buying an Expensive Kit and throwing most of it away
mtaylor replied to pirozzi's topic in Wood ship model kits
Janos, It would appear that Chuck is doing this. The Lumberyard offers "timbering kits' where you buy the plans and select your wood. So far, those and maybe Bob Hunt of whom I nothing of his current operation but he did in the past, have been the only ones doing this. What I got into in my previous build was heavy kit bash... It just pointed me to scratchbuilding since the kit was heavily modified. It's really a pity that the kit makers don't consider this or offer this. Or maybe offer something like plans, metal parts... and the modeler supplies his/her own wood. -
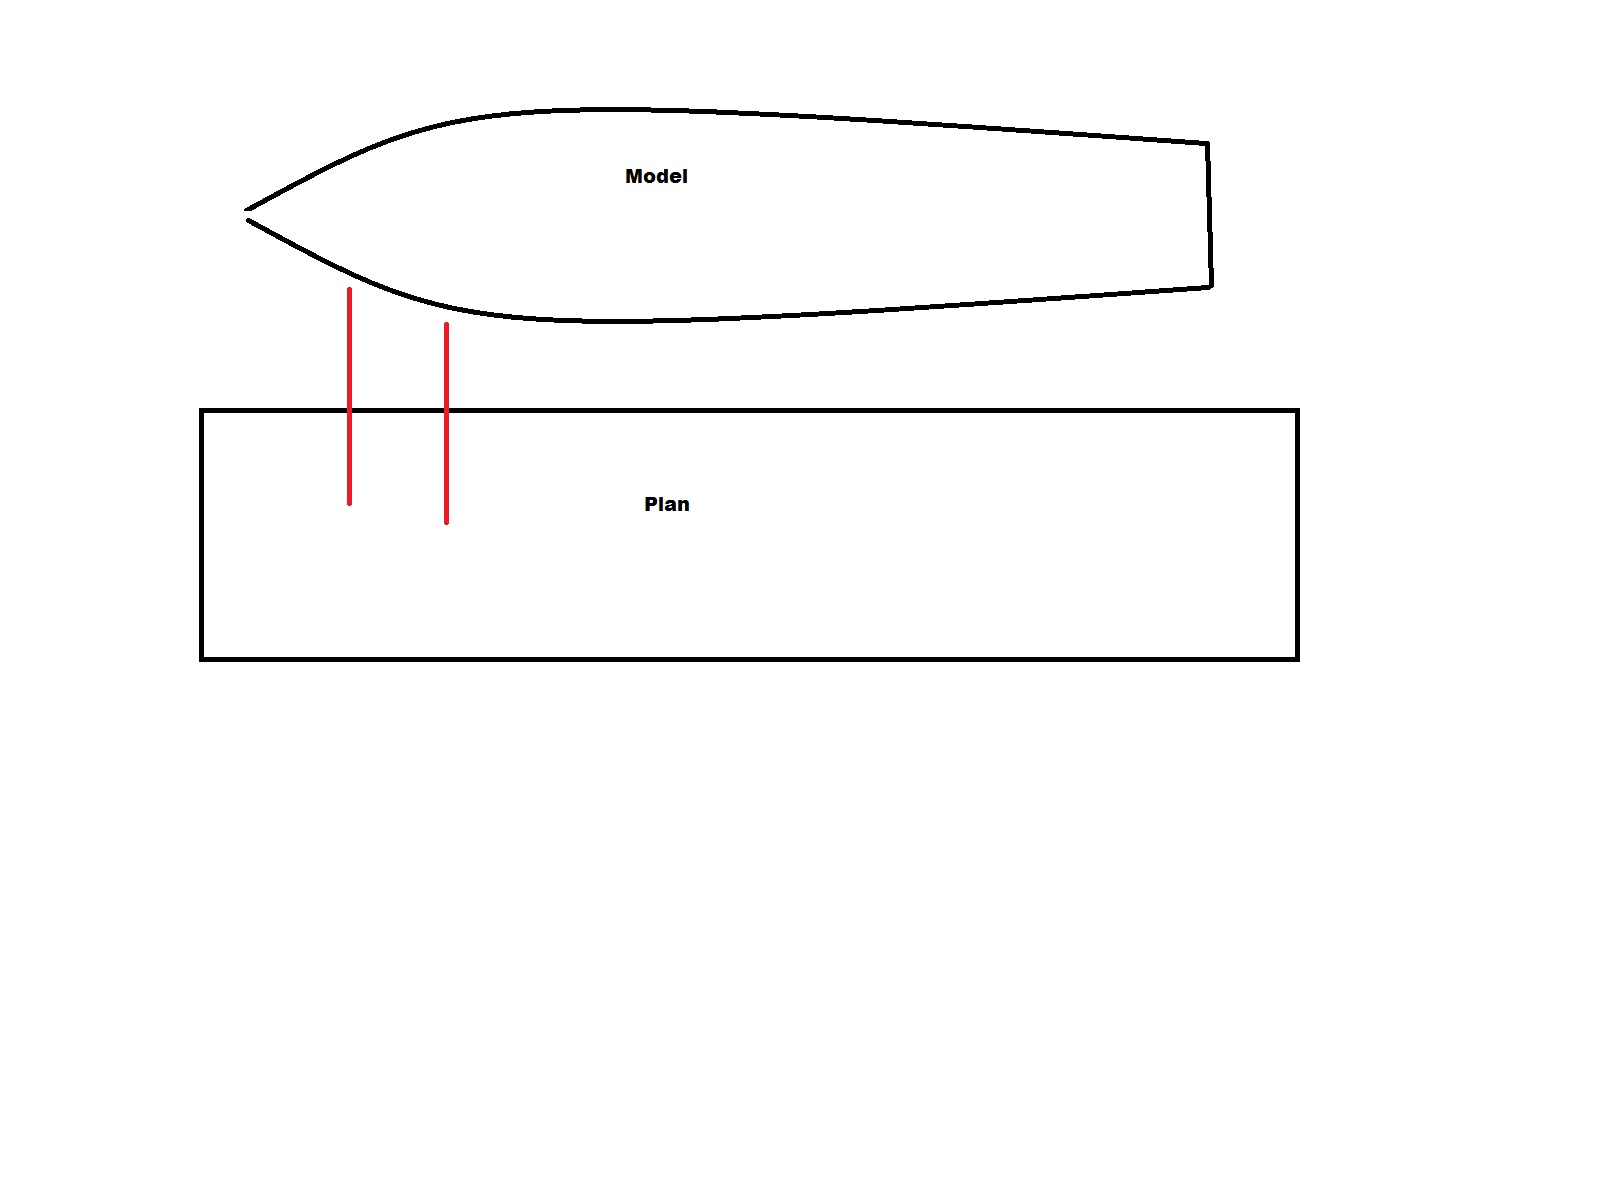
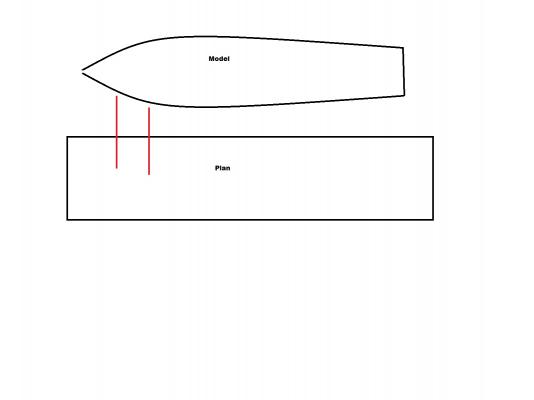
Ron, If you have a top view, use that for marking off things. If not, it's a bit more complicated. Reference my crude drawing.... Set the ship up on the workbench or table. Lay the plan down in front of it and line up the bow and aft. Then it's a simple matter of running line (red lines) using a ruler/t-square/triangle such that you can transfer the ports, etc. to the side of the ship. It seems more complex than it is but once you set it up, it should become clear.
-
I'm happy with it. Not sure what a different course would be as this one seems to be covering it.