HOLIDAY DONATION DRIVE - SUPPORT MSW - DO YOUR PART TO KEEP THIS GREAT FORUM GOING! (Only 24 donations so far out of 49,000 members - C'mon guys!)
×


mtaylor
-
Posts
26,273 -
Joined
-
Last visited
Content Type
Profiles
Forums
Gallery
Events
Everything posted by mtaylor
-
Cutty Sark by NenadM
mtaylor replied to NenadM's topic in - Build logs for subjects built 1851 - 1900
Looks very good, Nenad. Have fun and carry on.- 4,152 replies
-
- 1
-

-
- cutty sark
- tehnodidakta
- (and 1 more)
-
Pete, Everyone took all the words... just super and looks great in the water. Well done. Splice the main brace.
- 296 replies
-
- 1
-
-
- herreshoff
- buzzards bay
- (and 1 more)
-
Thanks Rusty and Grant. I'm firm believer in Murphy and "crap happens" so being prepared for re-do's and do-over's and repairs is part of the building process. David and Sam, Saw blades in abundance, I have. My current favorite for this work is the one that X-acto makes that resembles a #11 blade with teeth on it. Since the frames are laminated of two pieces (one forward, one aft) the glue line is the problem. I'm not sure alcohol is the answer because it can weaken the joint above and below the cut. I thought about filing out the waste area but that's time consuming, tedious, and I'm not sure I could get it exact or even close. There's only 3 more gunports which are in the aft cant framing. So I'll muddle along using the current process. I still will have to file/sand out the sides of each port a bit more.. but that's not bad.
-
HMS Druid by Krug - FINISHED - 1:48 - Hahn
mtaylor replied to kruginmi's topic in - Build logs for subjects built 1751 - 1800
Good on you for the break. You deserve one as this is a beautiful model. -
Beautiful figurehead. I like the pupils on the eye...something you don't see often.
-
I quite agree with Bob. Lovely work.
-
Great looking parts. Finding the right supplier is sometimes 75% of the battle for these oddball items that we want.
-
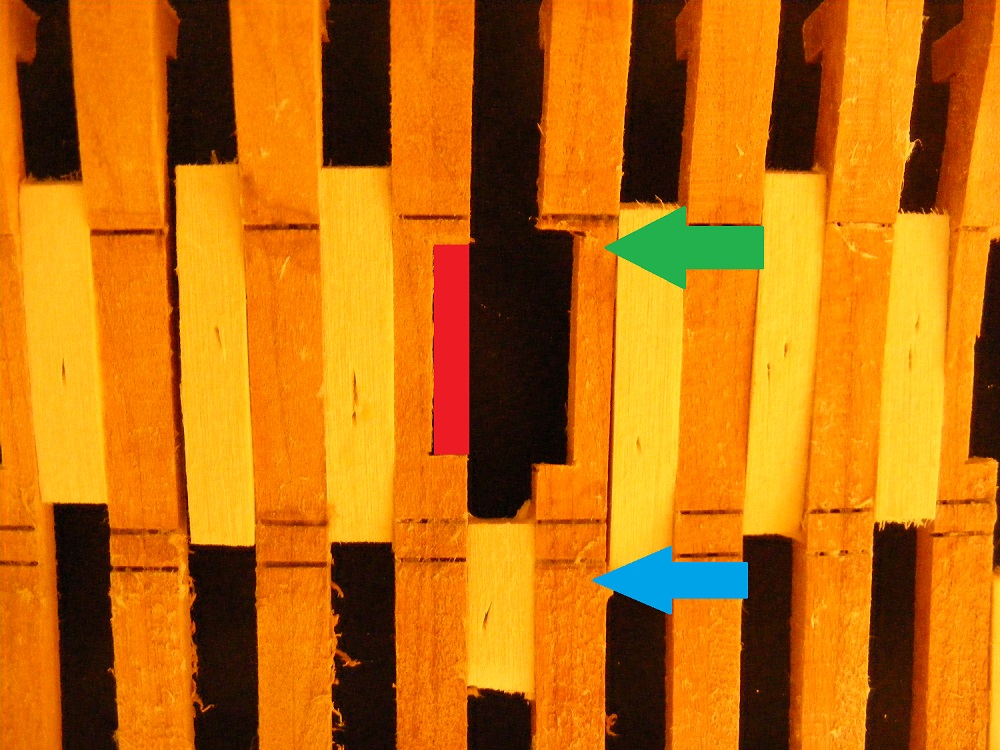
Thanks again for the comments and likes. I guess I ought to explain what happened on the broken frames. To make the gunport, the red area has to be removed. Actually, slightly more that that. The ports are currently 8mm wide and they need to be 9mm wide. The frames are 3/16" (about 4.5mm) wide and approximately 1/8" (3mm) thick at the gunport area. The markings on the frames are for the wales and the cutline. All markings were done before the frame was installed. Hahn installs his frames and spacers and then cuts and removes the waste (red area). How he removed that block, I have no idea. What I did, was make the cuts at top and bottom. Then apply alcohol to the port area, wrap in a soaked paper towel scraplet and then plastic wrap and let it sit. The glue softens and also, so does the wood. When I pulled the waste out, on 3 pieces, the frame broke in the area of the green arrow. On two of them, it was in the area of the blue arrow, which I've since tested, could have been repaired.

-
Dave, In spite of what you're telling us, I think the helmsman looks super as does the Ogallala.
- 170 replies
-
- 1
-
-
- ogallala
- praire schooner
- (and 2 more)
-
I hope you don't mind if I pull up a chair.
-
Steve, My prayers and wishes are with you. It's a rough spot you're in and I hope you have a support system around you of family and friends. Distraction, such as fixing up an old tool (nicely done) or working on the model can be helpful.
-
I wish I could help you out, Jason. But no sails on my model. I guess I'm inherently lazy.
- 116 replies
-
- 1
-
-
- constellation
- artesania latina
- (and 1 more)
-
Would using shield cabling work? If not shielded, wrap in aluminum foil and ground it.
-
Thanks for likes and comments. Ben, Both ways work well. I did my Triton cross-section right-side up. And if I want to, I can flip this one over which I couldn't do on the Triton.
-
Good catch and good fix. As for the last...one can hope.
-
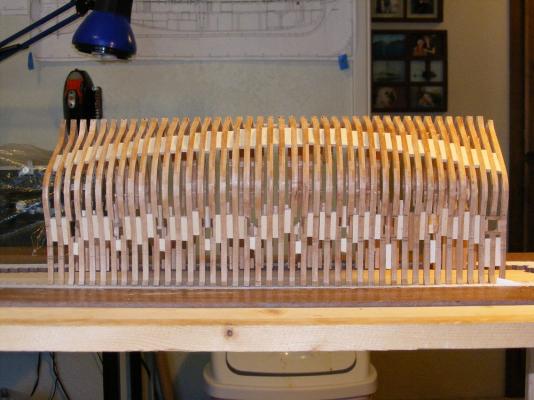
Minor milepost... all the full frames have been cut, installed and spacers added. The five broken ones have been replaced along with slapping myself upside the head when I realized two of them could have been repaired. I've started "pre-fairing" in that I'll sand it pretty close to fair except for the frames at the end, get the keel and keelson notches flat and fair, and then tweek the keel's rabbet to account for the changes the garboard strake will have to follow. I'm also sorting out the inboard side as far as fairing. The end frames will be faired in once the keel and keelson are installed and the cant frames are done. And yes, it continues to be a fun ride.

-
Phil, This is probably more info than what you wanted but it should give you the info you need on signatures: http://modelshipworld.com/index.php?/topic/760-how-to-add-a-build-log-link-to-your-signature/
-
Nicely done on the bowsprit. And yep, we're charter members of the Rigging Oops Club.
-
Ah.... mothballs it is then! Sounds better than silica gel.
-
Cutty Sark by NenadM
mtaylor replied to NenadM's topic in - Build logs for subjects built 1851 - 1900
Ah.. the catch of life. It's not for us to think it necessary but for the Admirals in our lives. Admirals know. We don't.- 4,152 replies
-
- 1
-
-
- cutty sark
- tehnodidakta
- (and 1 more)
-
It's a pity that you didn't like it. That is some very fine joinery on the scarfs. So, I wouldn't call it an 'epic fail'... more like a learning experience as that skill will come in handy sooner or later.
-
Ah... the sawdust is flying. Rough is ok. Just make sure that your cuts are outside the lines to allow some meat for fairing.
-
There's still pie and ice cream left... whoopee!!!! We didn't have to leave the house again this year as the stuff going off in the neighborhood was impressive... and noisy.. and need I add, messy. Been picking up debris from the yard and roof this morning.
-
Given the tumblehome and the windows (not portholes), I suspect it's French?