HOLIDAY DONATION DRIVE - SUPPORT MSW - DO YOUR PART TO KEEP THIS GREAT FORUM GOING! (Only 24 donations so far out of 49,000 members - C'mon guys!)
×


mtaylor
-
Posts
26,273 -
Joined
-
Last visited
Content Type
Profiles
Forums
Gallery
Events
Everything posted by mtaylor
-
Looks fantastic in the sun with her ports hanging down like that. Bravo on the milestone!!! I suppose you'll need to make a wheeled cart to move from here on out?

- 1,319 replies
-
- 1
-

-
- caldercraft
- Victory
- (and 1 more)
-
Ah... first one here so I can pick my seat... er... chair.
-
I'm assuming that bloodshed was minimal and a great time was had??? So much talent in one place...
-
I guess the only question is will it be 3 coats or 10????
-
I agree with Augie on this. We know you too well....
-
I think I'll pull up a chair in the front row.. This should be an interesting build.
-
Sheesh.. that's incredible. As for not a "real ship n the bottle"... picky, picky, picky. Put a cork in it and you will have a shipbuilder in a bottle.
-
Excellent tutorial, Nigel. Thanks!
-
Artesiana Latina HMS Victory 1:84 scale kit (REVIEW)
mtaylor replied to mtdoramike's topic in Wood ship model kits
Well...if you have a niche market... your price point is whatever the market will bear. Now I think your $1200 is list price so one would have to wait for a sale. It's still a shame that they've gone up so much. Even wood for scratch building is getting spendy. -
Beautiful work on her and the rework of the lanyards should make you very proud. That was a major undertaking.
- 1,319 replies
-
- 1
-
-
- caldercraft
- Victory
- (and 1 more)
-
Daniel, A stunning achievement. The water and sails give it a unique character. A pity one can't bottle a 1:64 size ship....
-
HMS Druid by Krug - FINISHED - 1:48 - Hahn
mtaylor replied to kruginmi's topic in - Build logs for subjects built 1751 - 1800
Only 5 months? Crikey.. and a beautiful ship to boot. Hmm... I guess it'll take about an hour for the figurehead? Ok... seriously.. it's only wood. Make some sawdust, or in this case, carving dust. If it's not right.. do it again. We have confidence in you. -
Artesiana Latina HMS Victory 1:84 scale kit (REVIEW)
mtaylor replied to mtdoramike's topic in Wood ship model kits
Well... there's inflation, rising transportation costs and various "green" initiatives that have made wood more expensive. From where I sit, everything is more expensive. -
Thanks for the "likes" and comments. Sam, On Licorne, they are 1/2 the frame thickness. Other ships... not going to vouch for them. I have some other Hahn plans which when I dig them out of the dark recesses of my storage area, I'll check.
-
Pops, Been there, done that, have the pile of firewood. While you're waiting, give some thought to removing the thwarts and adjusting the risers. The biggest obstacle would be glue type. I hate to see you bagging this model as you've learned a lot on it and were doing a great job. Someone around here once said: "It's only wood... it can be fixed."
- 132 replies
-
- 1
-
-
- 18th century longboat
- model shipways
- (and 1 more)
-
Looks very good, David. Congratulations on a well-done build.
-
Cutty Sark by NenadM
mtaylor replied to NenadM's topic in - Build logs for subjects built 1851 - 1900
Sweet looking coppering, Nenad. You are flying along quite nicely on this part. -
There's some articles here on LED setups: http://modelshipworldforum.com/ship-model-furniture-and-deck-fittings.php
-
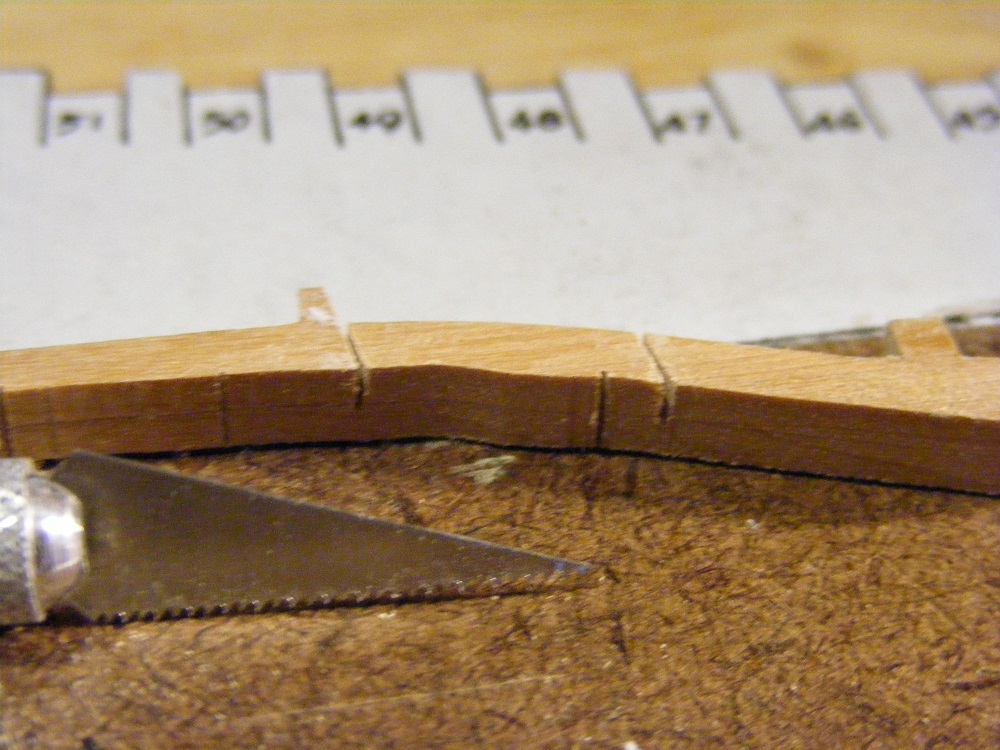
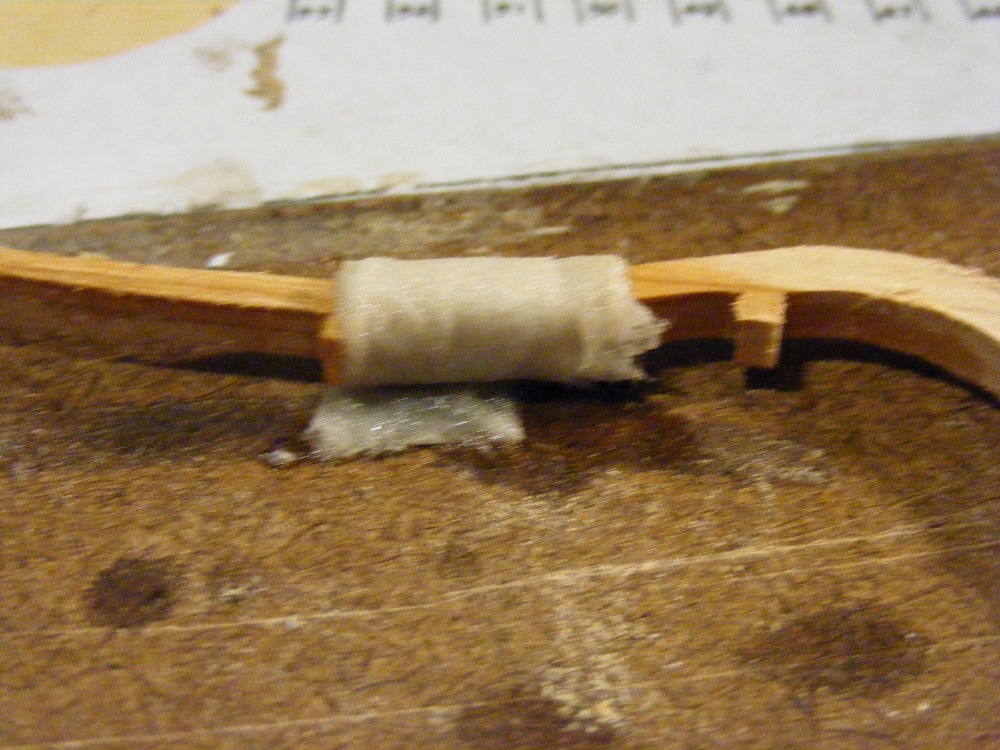
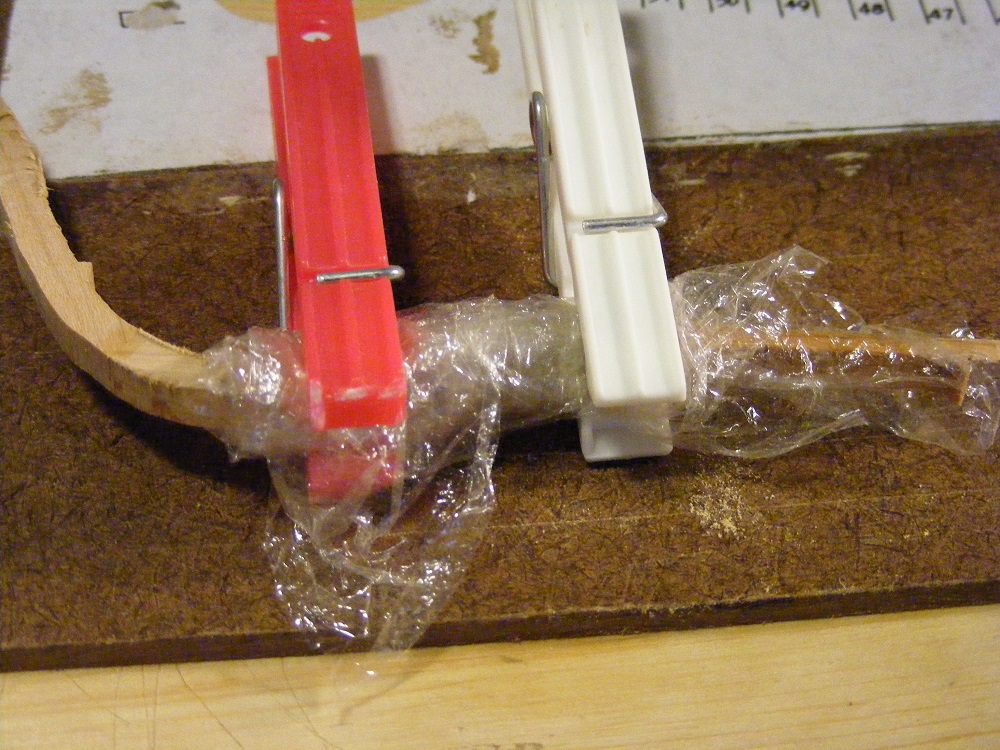
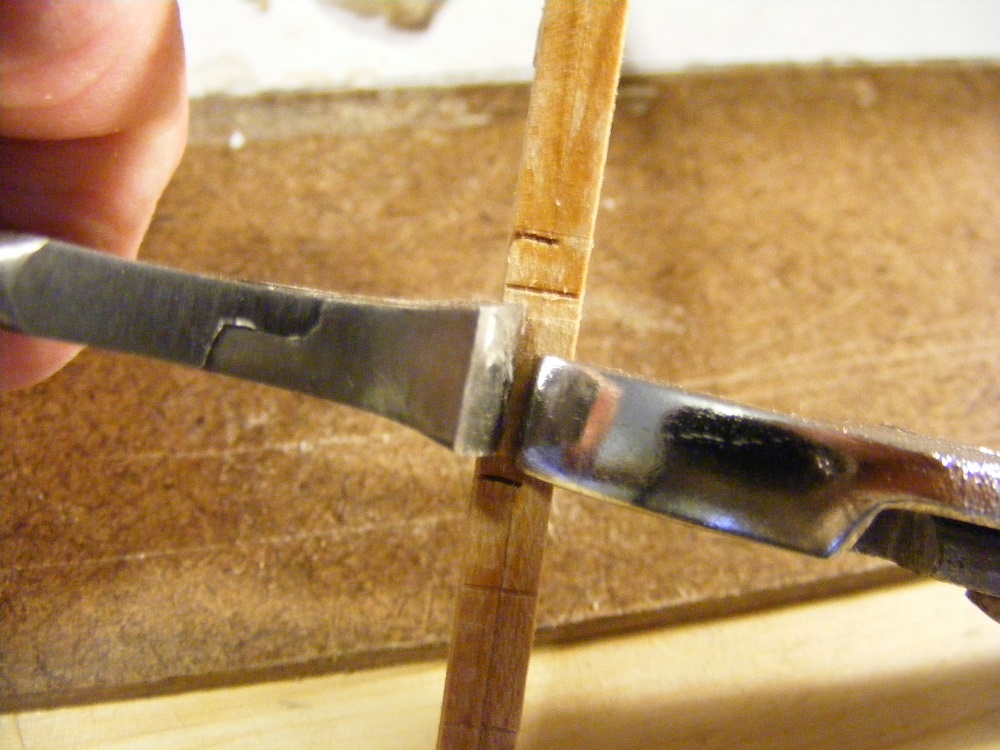
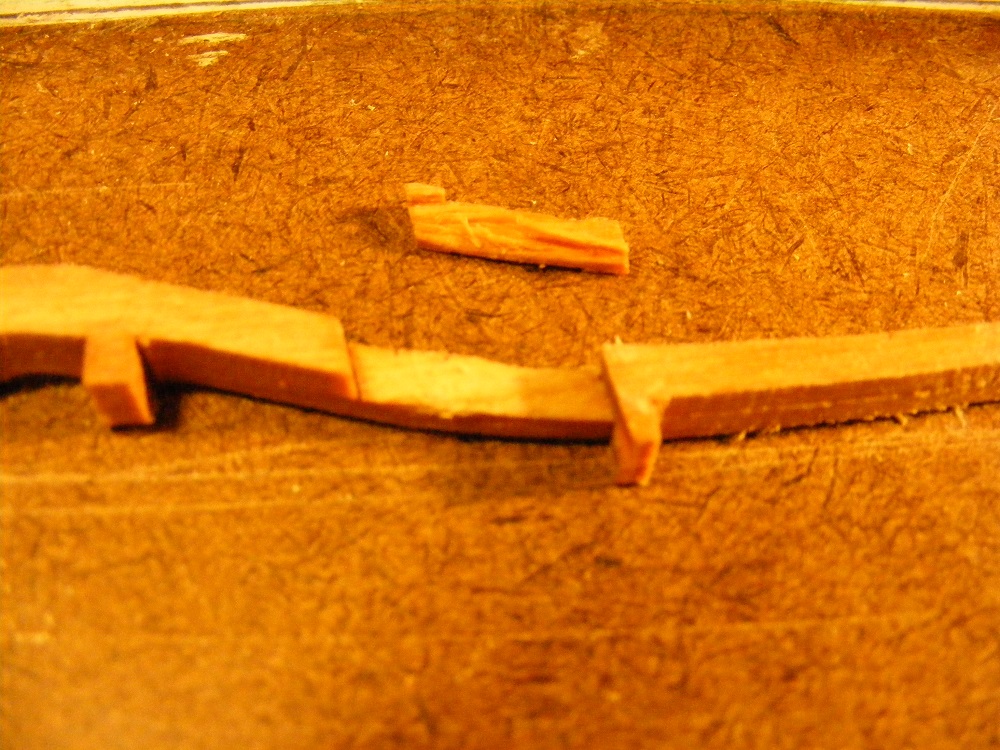
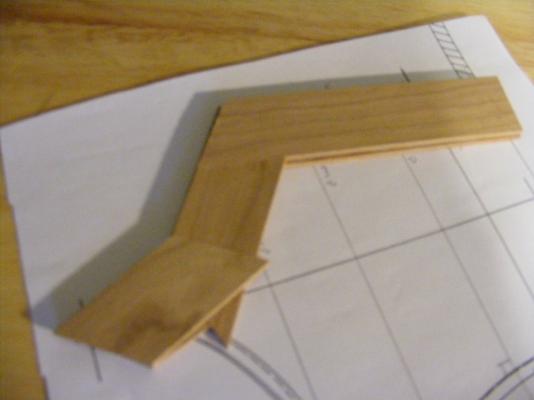
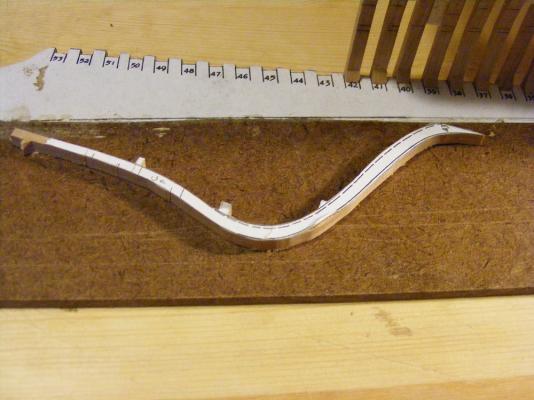
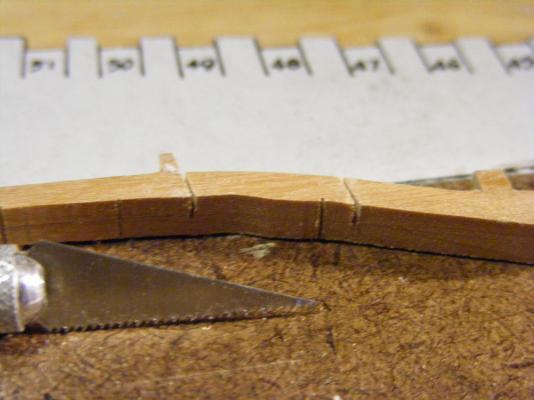
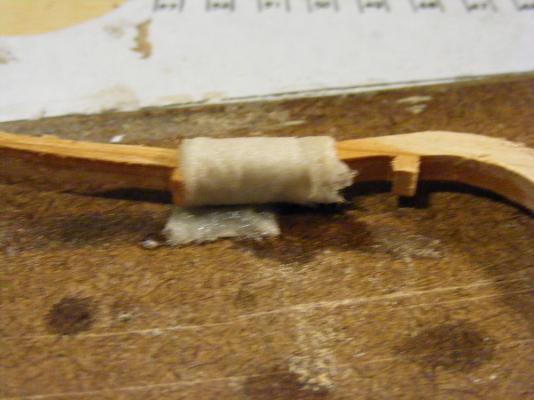
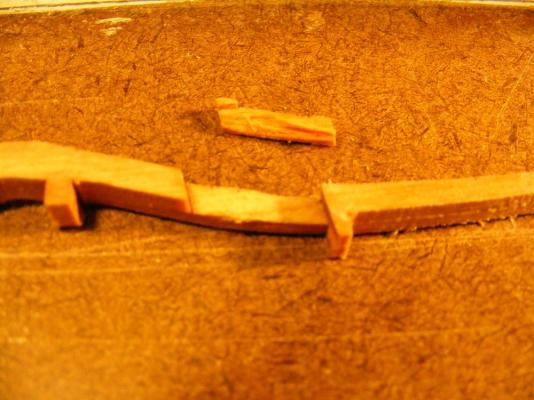
I mentioned above about how I cut gunports. So here's how I do it. I make no guarantees that it's the best way but it works for me. First up is a laminated frame blank (I'm using a half frame as the full frames are done). I then rubber cement the frame plan to it and carefully cut it out. I fit the frame into position and check all the reference points both against the plans and in situ using the EdT tool. After that, the reference points are etched using the scroll saw and the frame cuts are made with the saw pictured. I soak the joint in 91% isopropyl and wrap in a scarp of paper towel which is also soaked in the isopropyl. The joint is then wrapped in plastic wrap and secured at each end with clothes pins (pegs) so as not let the whole frame separate. After doing something else for about a half an hour, I grab the frame with pliers and piece to be removed with a pair of cutters. A slight pull and the piece comes out, usually cleanly. At this point, the frame is glued into place, space blocks added between the newly installed frame and the existing frame, everything clamped and the glue allowed to cure. After curing, I double check all reference points, just in case.... I hope this helps someone.


-
Mayflower by SawdustDave - Finished
mtaylor replied to SawdustDave's topic in - Build logs for subjects built 1751 - 1800
Go for the bamboo, Dave. It looks great! You got me thinking about ripping up one my cutting boards, but the Admiral would be really irritated as the one in kitchen is a lot larger than one I have. -
Advice on disc sander
mtaylor replied to Don Quixote's topic in Modeling tools and Workshop Equipment
I simply put the plank in a vise (between two long piece of scrap wood) and sand using a very long sanding stick held at the proper angle. I'm afraid that with a power tool, I take too much off the plank. -
Sure you can... tell them you took a nap and the alarm didn't go off.
- 1,873 replies
-
- 1
-
-
- occre
- san ildefonso
- (and 1 more)
-
Ulises, Frolich (The Art of Ship Modeling) saves the barrels until last so they don't get knocked about during rigging. As the French ships rig the breeching rope different, this works for him. I can see where it would work for you, just put epoxy on the trunnions and the area that sits on the quoin. But try to make it the final step (or nearly final) of the build. Yeah.. I'm doing a Frenchie but we'll see on when I do the guns.
- 786 replies
-
- 1
-
-
- Royal Louis
- Finished
- (and 1 more)
-
When you can, Rich. I'm looking forward to your progress on the model and also your sailing pics.