HOLIDAY DONATION DRIVE - SUPPORT MSW - DO YOUR PART TO KEEP THIS GREAT FORUM GOING! (Only 24 donations so far out of 49,000 members - C'mon guys!)
×


Old Collingwood
-
Posts
12,098 -
Joined
-
Last visited
Content Type
Profiles
Forums
Gallery
Events
Everything posted by Old Collingwood
-
 Health can sometimes be a real hinderence and get in the way of our hobbies (as can life in general) keep your chin up mark keep pushing on, you have a wide fan club of well wishers. OC.
 -
Thanks mate, very much appreciate your feedback and kind words. OC.
- 455 replies
-
- 3
-

-
- slightly modified
- greyhound
- (and 1 more)
-
Yeah with the mast collars I wasn't sure wether to do them square or simple round rings, I have seen the square ones done on the large scale where they are pieces of art in them selves, and join around the mast in a locking method. OC.
- 455 replies
-
- 2
-
-
- slightly modified
- greyhound
- (and 1 more)
-
Is the pilot ok in the heli, he could have suffered a massive head ache. OC.
- 133 replies
-
- 3
-
-
- jeanne d arc
- heller
- (and 2 more)
-
Yep, second time around one learns so much. OC.
- 455 replies
-
- 2
-
-
- slightly modified
- greyhound
- (and 1 more)
-
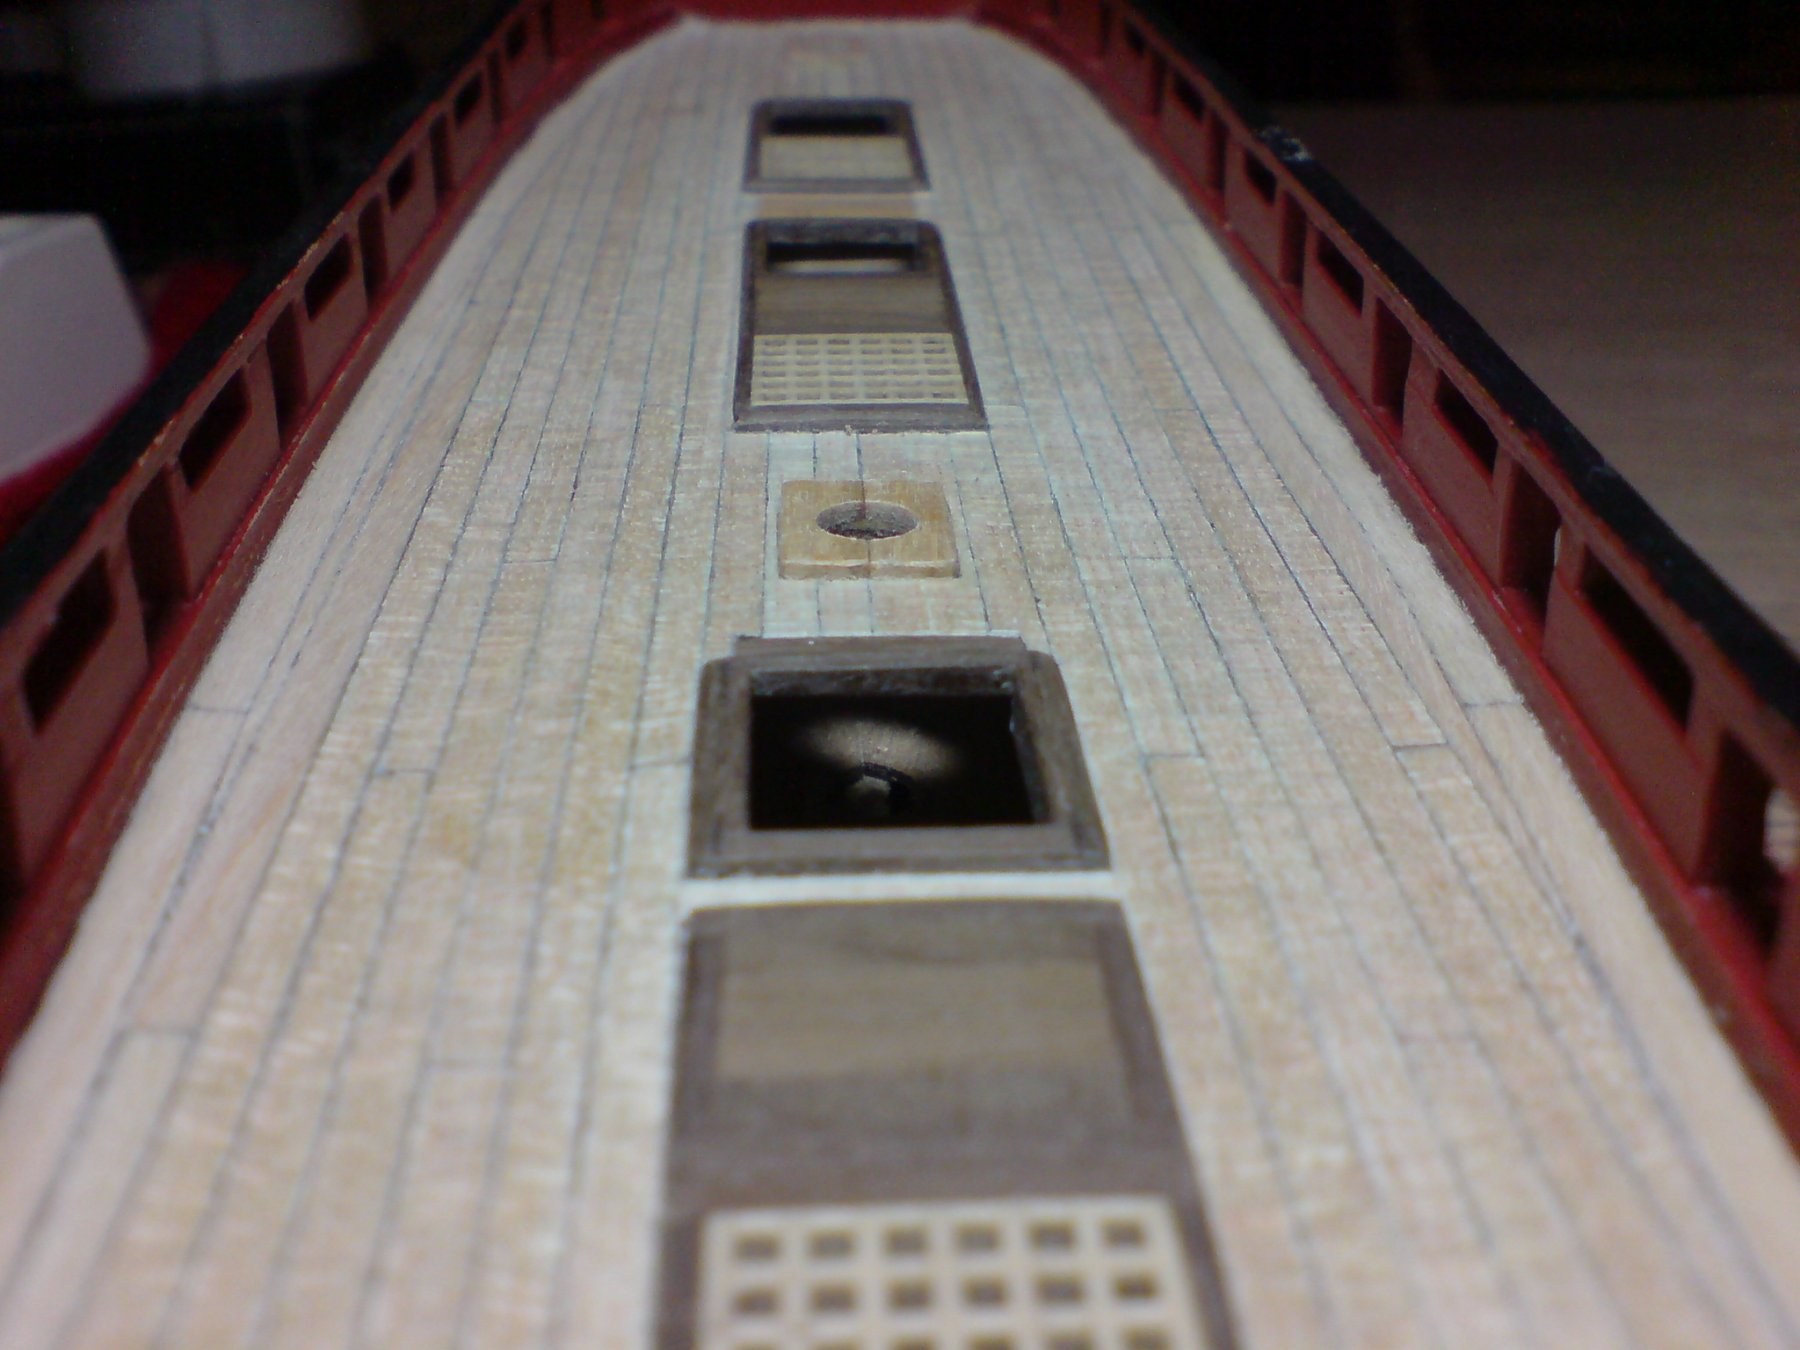
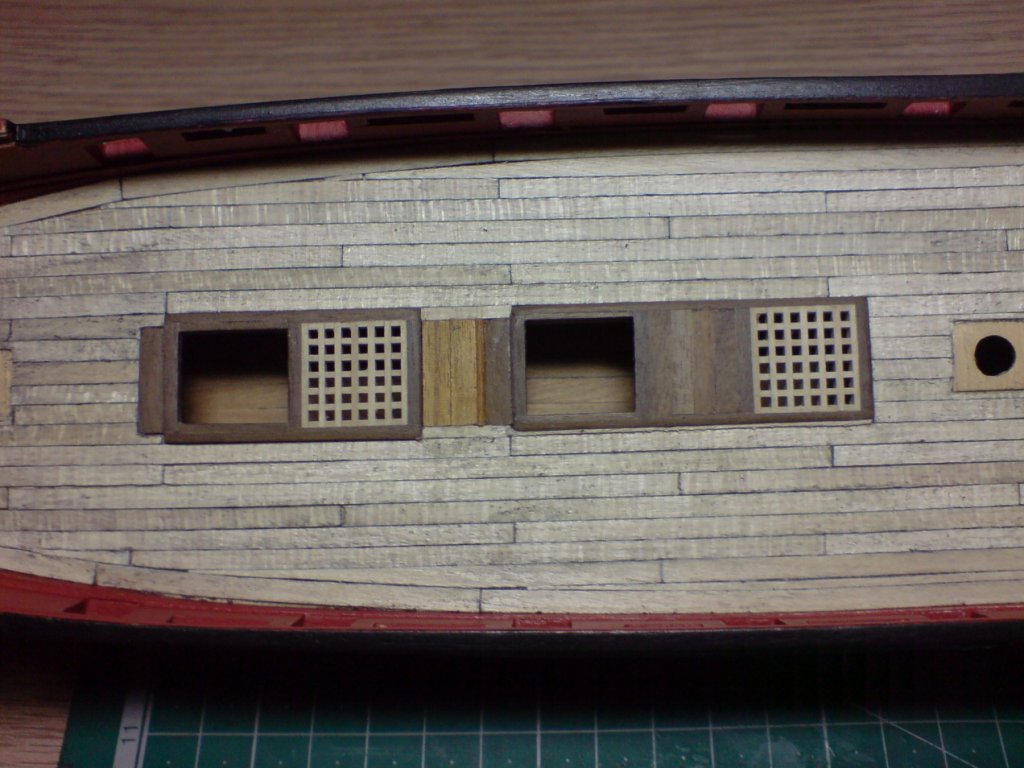
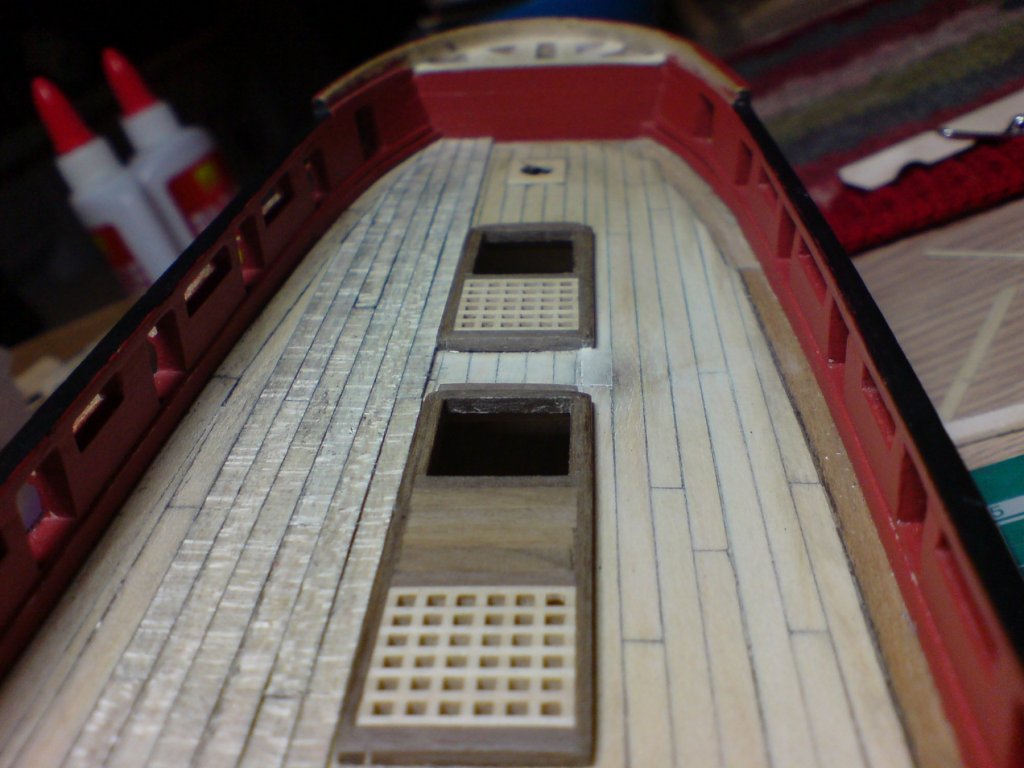
Another update folks - I lightly sanded the deck and did a small amount of wood dust filling, then I worked on creating some mast/deck supports, these were made using 1.5mm stock wood, I built up three flat sections from two strips glued together, then when set I sanded them to thier slightly different lengths, then after sanding smooth they were glued down on to the deck. When these had glued I drilled out the centeres then used firstly using my fine rounded file then a half moon one, to get the correct size aperatures checking with my masts. Here are a couple of pics. OC.

- 455 replies
-
- 9
-
-
- slightly modified
- greyhound
- (and 1 more)
-
Thanks carl, I will not attepmt treenailing for the same reason you mentioned. OC.
- 455 replies
-
- 2
-
-
- slightly modified
- greyhound
- (and 1 more)
-
I am pleased because like most things - the more attempts at the same thing - the better they become, I was also more careful about the deck layout keeping it to a 4 plank system with 20ft eqv sized planks, and even the side planks where they meet the bulwarks are more precise. Its made the hull stronger aswel with a slightly thicker deck. Next stage will be to build the mast surrounds then a gentle sanding. Then I will apply some wood filler (that I brought today) this will be applied to the grooves on the upper hull as shown in my previous picture, then sanded and more yellow ocre applied (but lightened slightly with dull white). Well thats the plan. OC.
- 455 replies
-
- 4
-
-
- slightly modified
- greyhound
- (and 1 more)
-
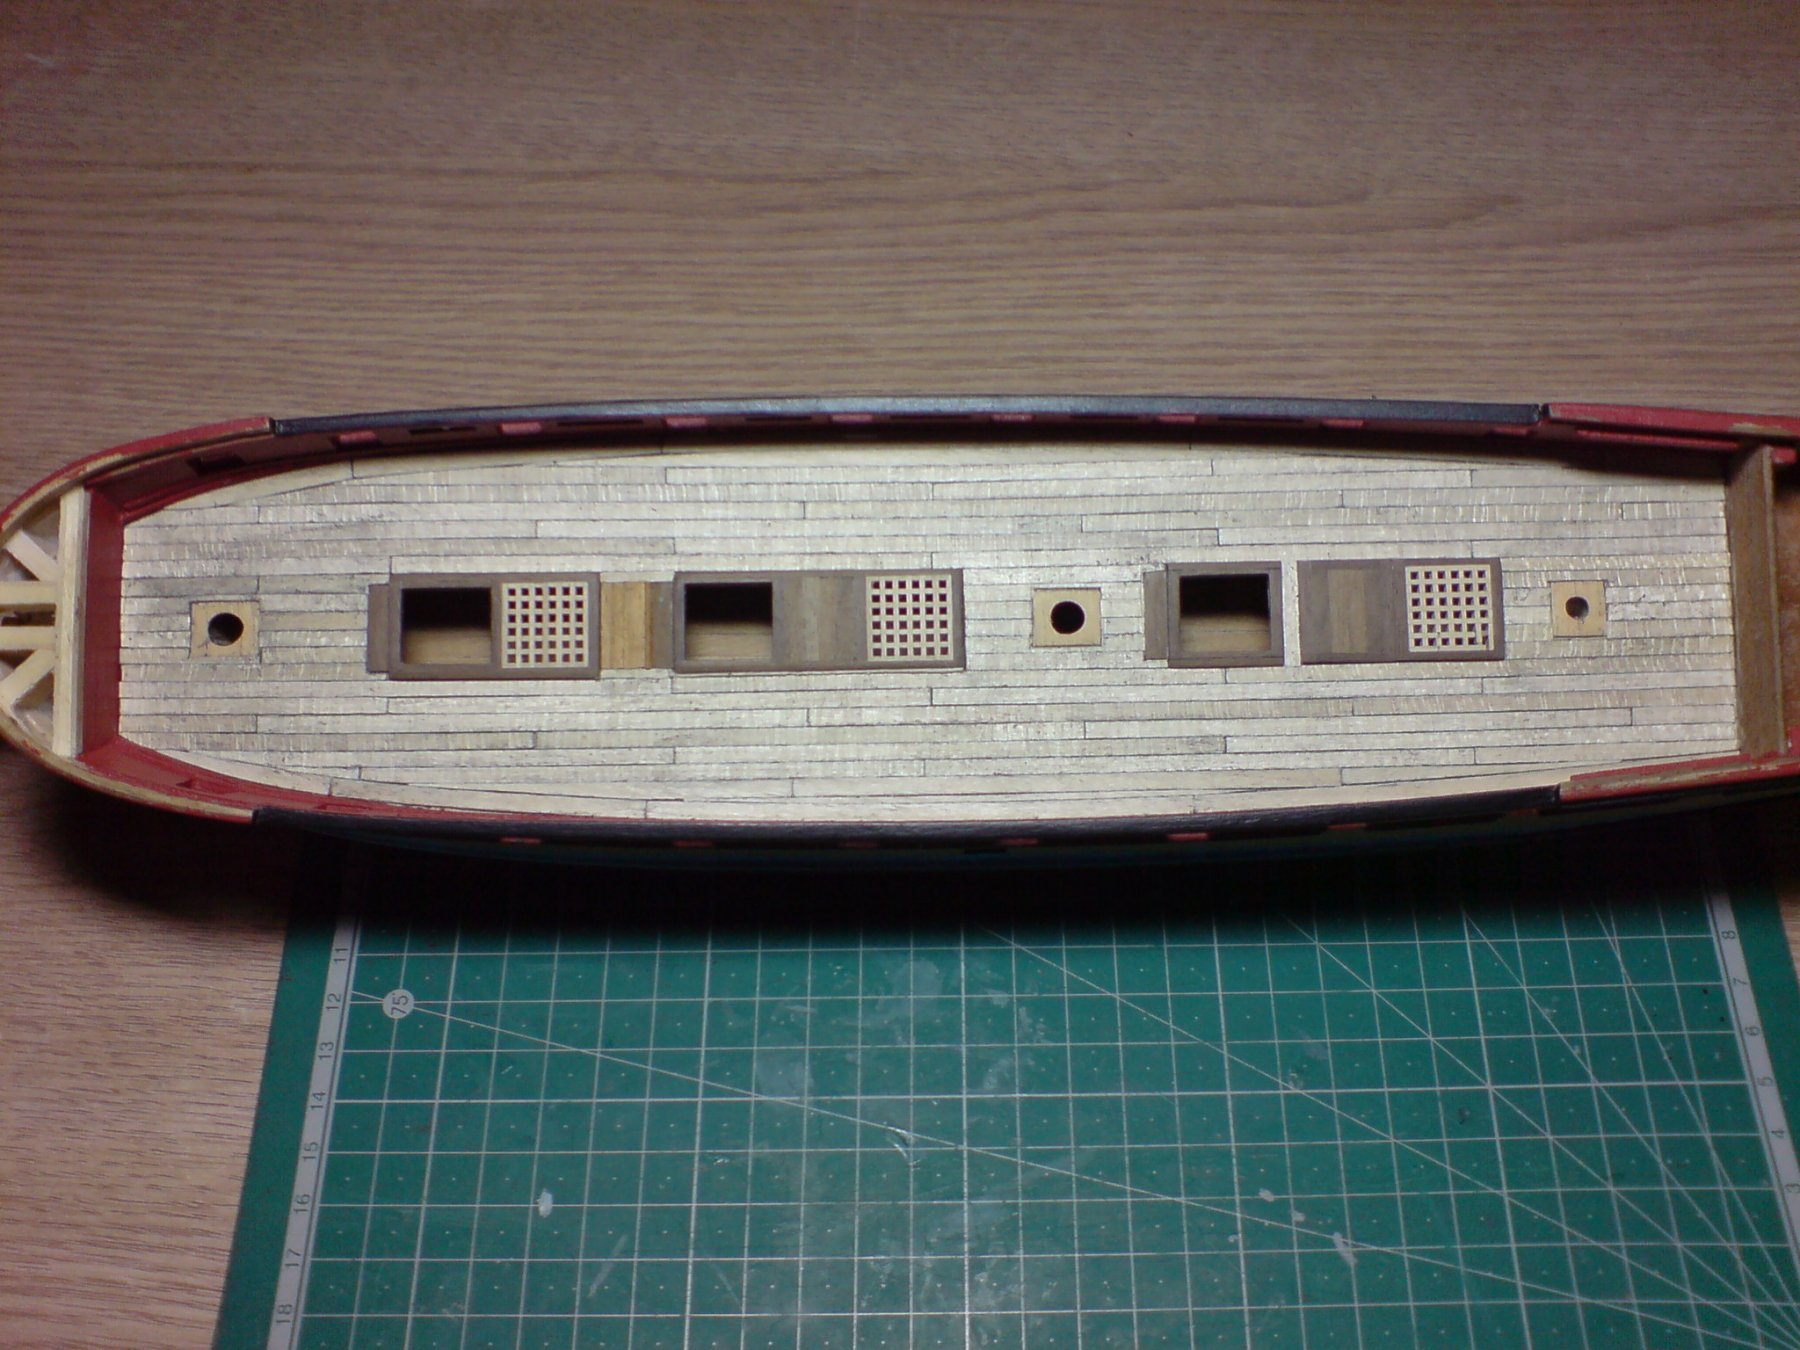
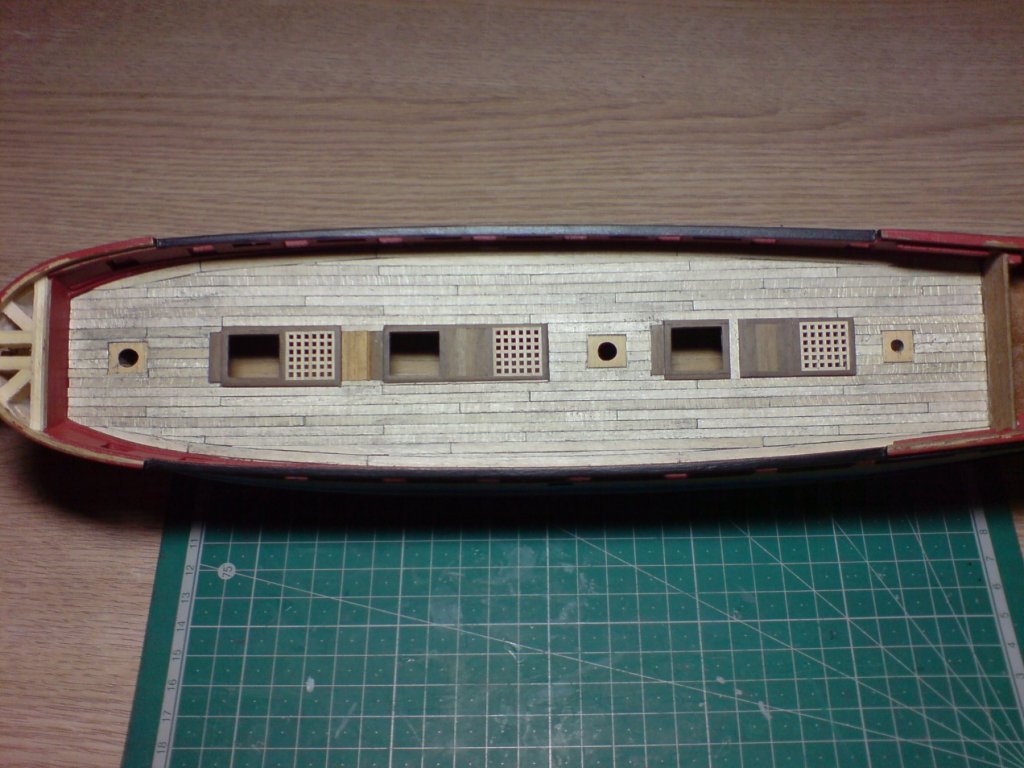
Evening all, I finallly got round to finishing the deck planking, I think I have done a tidier job than my first deck planking, I added some thicker planks between the center sections, and will construct the frames around the masts. It will need a gentle sanding then a couple of coats of flat coat. OC.
- 455 replies
-
- 11
-
-
- slightly modified
- greyhound
- (and 1 more)
-
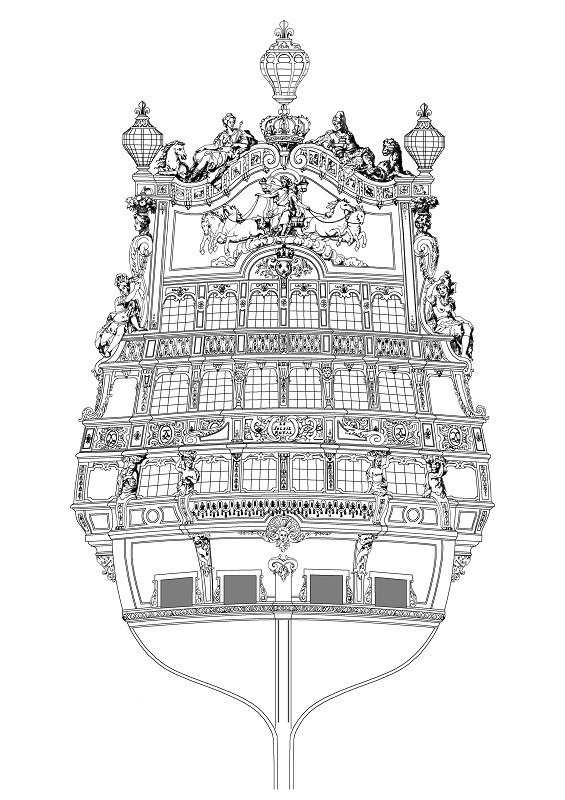
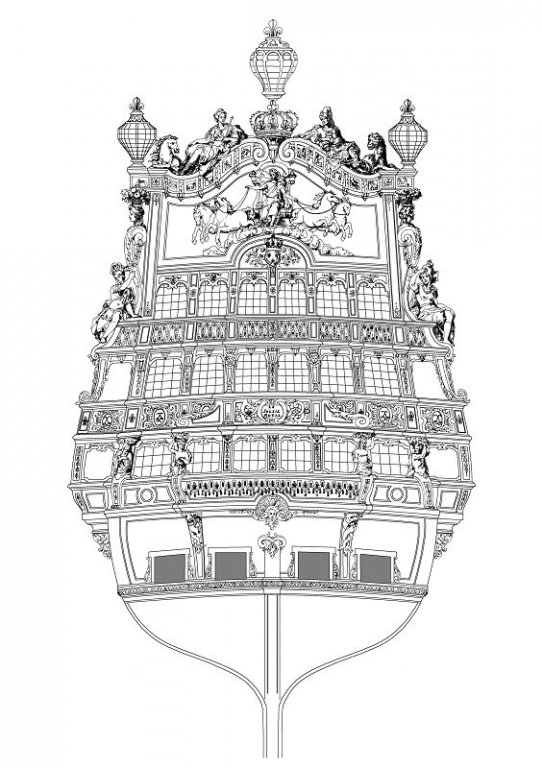
I found this drawing on the net and wondered if you could get away with bringing the width of the windows across, possibly allowing for all six, it looks like the windows might extend further across.? OC.
-
Good to stay busy and have a plan for future builds, I was tempted to do a Pirates of the Carribean theme, with my frigate making her HMS Interceptor, getting Revelles HMS Victory and making her HMS Dauntless and getting Revells Black Pearl, all would have been similar scale hit and miss a bit. OC.
- 133 replies
-
- 6
-
-
- jeanne d arc
- heller
- (and 2 more)
-
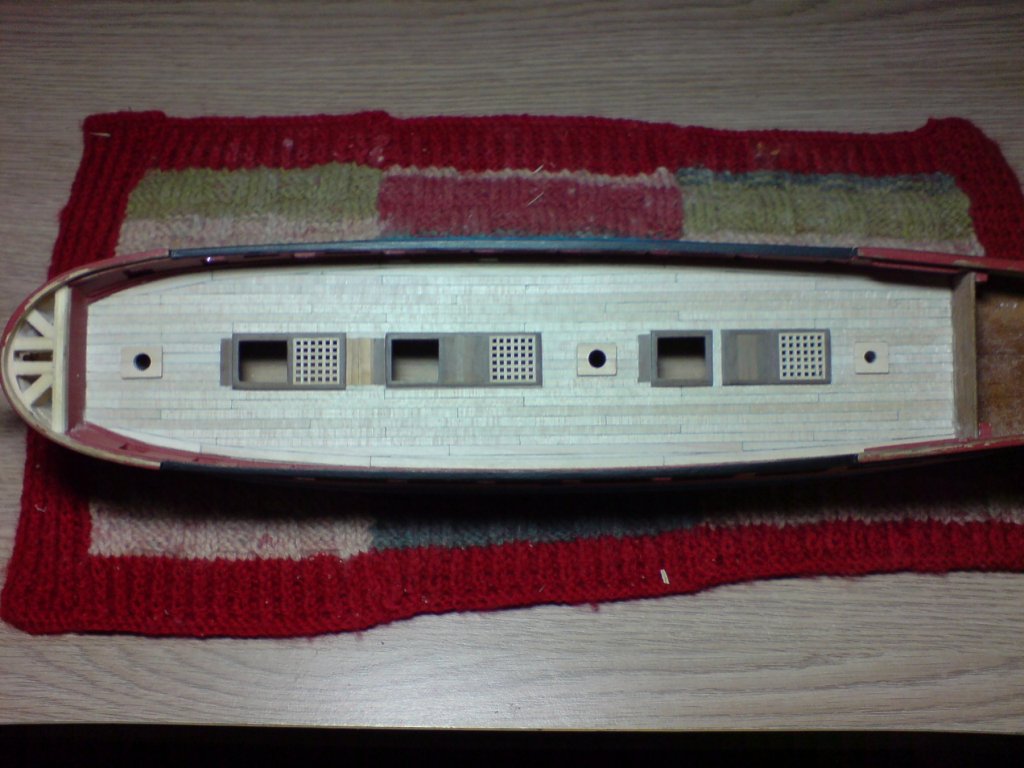
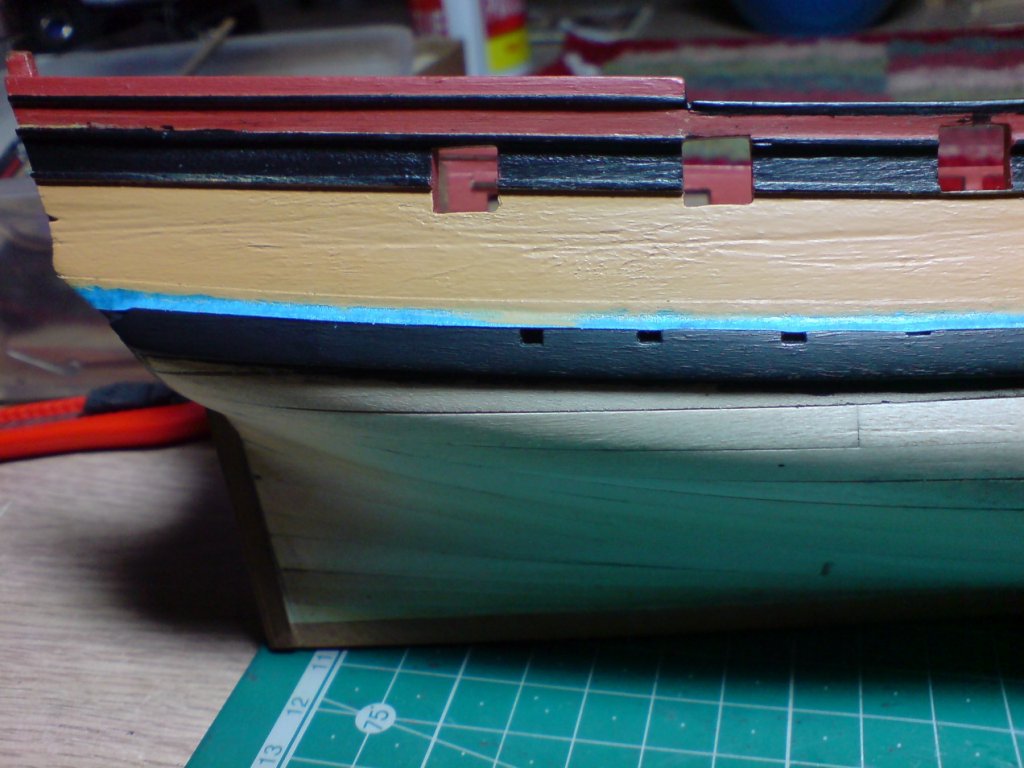
I managed to get nearly half the deck planked today, its going quite well no doubt helped by doing it previously. Here are a couple of pics inluding the yellow ocre side that needs some filler. OC.
- 455 replies
-
- 8
-
-
- slightly modified
- greyhound
- (and 1 more)
-
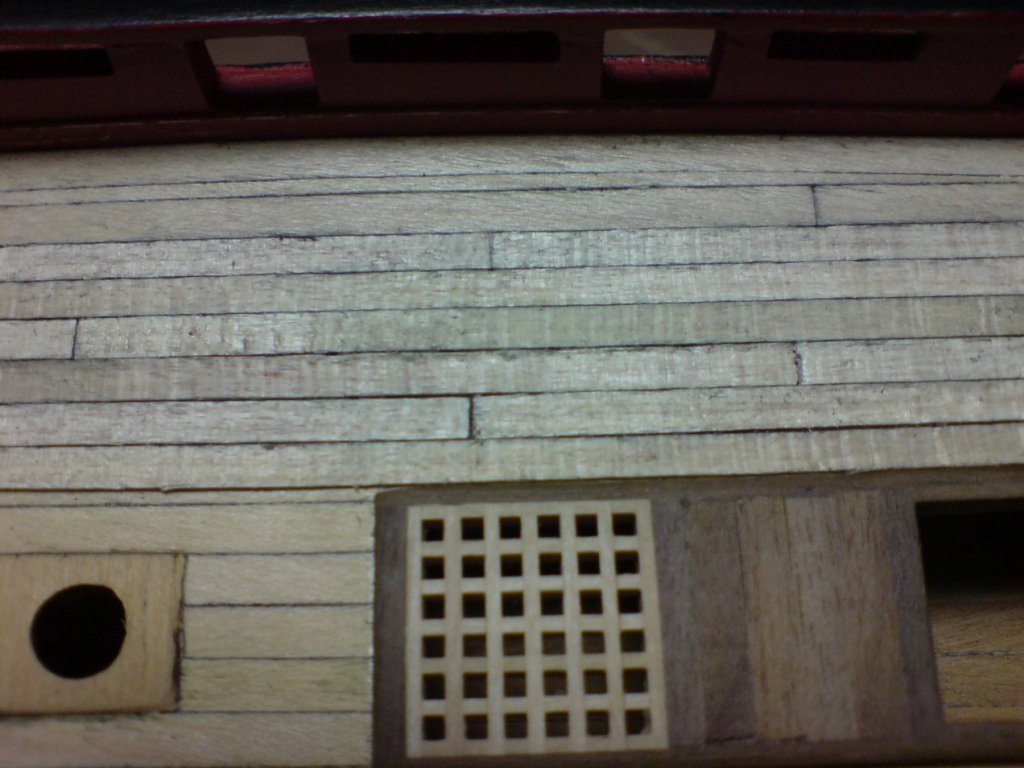
So head on into re planking the deck - I first sorted out enough planks then gave then a light sanding on both faces, then I made the decision to bleach them in some household bleach, I put them all in a large flat bottomed dish - layed them all out flat and bunched together, then poored the bleach over them (enough so they were immersed in bleach) I also ran a sponge over them to make sure the bleach was doing its job well. After about an hour I took them out and soaked them in plain water to get rid of the bleach, then towel dried and taken to the table. I dived straight into planking by measuring out the planking plan using 20foot eqv planks, I decided to do a four plank tier system, and so far I have put down three runs. The upper hull planking where the grooves are will need to be filled with wood filler, fingers crossed and weather allowing (we have our first large amount of snow) I will buy some wood filler tomorrow and get it thinly layered on the hull. After it has been sanded smooth I have decided that the (mustard) Yellow Ocre is too vibrant and deep colouring, so I will add some dull White to it to tame it a bit. OC.
- 455 replies
-
- 5
-
-
- slightly modified
- greyhound
- (and 1 more)
-
Yep I am having to scavenge the deck planks from my new xmas pressy Corels HMS Peregrine, to complete the deck planking. OC.
- 455 replies
-
- 2
-
-
- slightly modified
- greyhound
- (and 1 more)
-
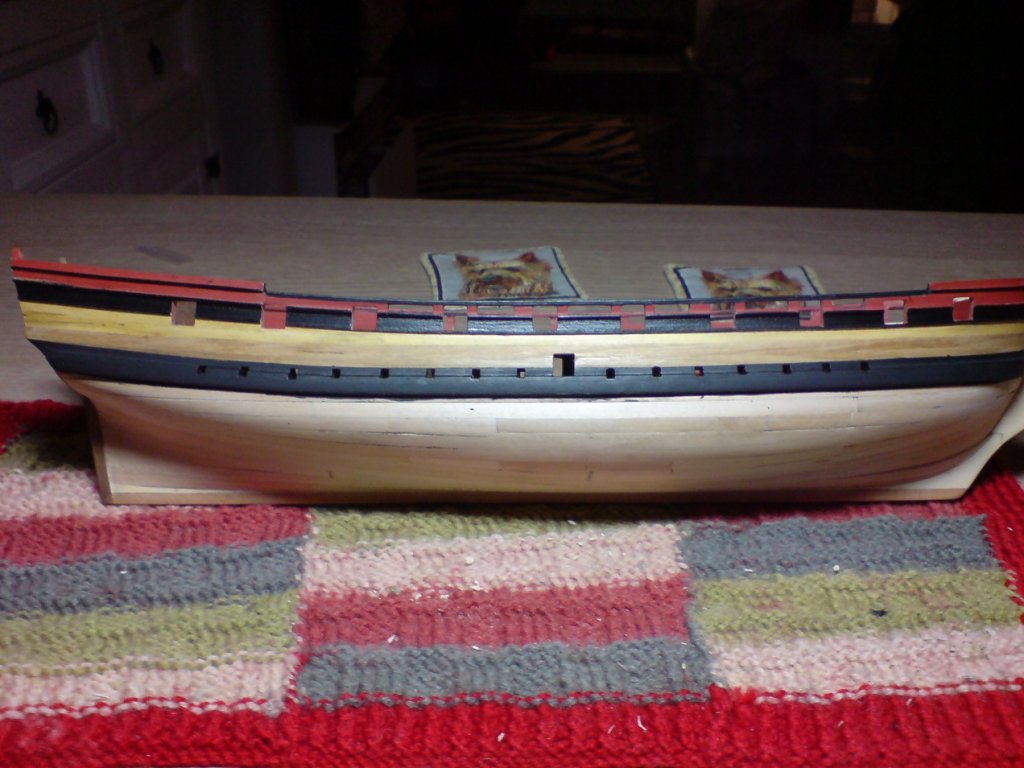
Decided to do a bit more painting today, the plan was to do the upper hull broad band of yellow ocre or mustard as was known in 18th century, I had to mask the upper edge of the wale line first using narrow strips of tape, after applying a few coats of my admiralty paint, I noticed that the planking was quite badly scored from over zelous sanding, it will need a bit of wood filler and gentle area sanding. Also I had a small area of my deck develop a mark again due to over aggresive sanding revealing the dark under deck. So - I haver decided to re-plank the whole deck (I know madness) OC.
- 455 replies
-
- 5
-
-
- slightly modified
- greyhound
- (and 1 more)
-
I have just had some bits arrive from Cornwall Models (early xmas gifts) consisting of Corel HMS Peregrine, and a heated plank bender and some Admiralty Acrylic paints. OC.
- 453 replies
-
- 3
-
-
- thermopylae
- sergal
- (and 1 more)
-
Very nice work indeed she looks beautiful. OC.
- 310 replies
-
- 2
-
-
- cheerful
- Syren Ship Model Company
- (and 1 more)
-
More work on the decoration today, I fitted two thin strips either side on the upper hull. Here are a couple of pics.
- 455 replies
-
- 8
-
-
- slightly modified
- greyhound
- (and 1 more)
-
Thank you for that, the decking was quite an enjoyable stage and fairly straightforward. OC.
- 455 replies
-
- 1
-
-
- slightly modified
- greyhound
- (and 1 more)