HOLIDAY DONATION DRIVE - SUPPORT MSW - DO YOUR PART TO KEEP THIS GREAT FORUM GOING! (Only 36 donations so far out of 49,000 members - C'mon guys!)
×


scrubbyj427
-
Posts
1,668 -
Joined
-
Last visited
Content Type
Profiles
Forums
Gallery
Events
Everything posted by scrubbyj427
-
 Stick with model ships, I’d say you’re doing very well with this project.
 -
Nice work on chapter 9! Looks really good Matt. I broke all the same pieces as well! They are very fragile and snap very easy.
-
Beautiful work! That looks so good with the pear(?) deck beams. Good luck with your move. JJ
-
Well done Matthias! That just looks so good with the gratings complete. Very nice execution. JJ
-
Thank you Don. I think you’ll like it out there. Bend is growing into a destination spot but still has a small town feel and great weather year round.
- 144 replies
-
- 2
-

-
- winchelsea
- Syren Ship Model Company
- (and 1 more)
-
Excellent work Don! Your Winchelsea has turned out just wonderful! Congratulations! Do you plan to build a nice display? I will look forward to following your cheerful progress! JJ
- 144 replies
-
- 1
-
-
- winchelsea
- Syren Ship Model Company
- (and 1 more)
-
Very nice progress Mike! She’s looking great!
-
Good luck Ben, glad to see I’m not the only one with a packed up Winnie model. Chuck is right, you will miss the snow!
- 399 replies
-
- 3
-
-
- winchelsea
- Syren Ship Model Company
- (and 1 more)
-
HMS SUSSEX 1693 by 8sillones
scrubbyj427 replied to 8sillones's topic in - Build logs for subjects built 1501 - 1750
Would love to see more of this. -
Nice work Glenn. You will be rigging them right?😂
- 840 replies
-
- 3
-
-
- winchelsea
- Syren Ship Model Company
- (and 1 more)
-
That looks very good! Really completes the model.
-
Lovely work Don! Glad to see you back and almost at the finish line. Those headrails and grating look very good. JJ
- 144 replies
-
- 3
-
-
- winchelsea
- Syren Ship Model Company
- (and 1 more)
-
Thank you Rusty! I should have some updates to the digital model soon. Thank you @rlwhitt. I recently purchased the Boss LS-2440, so far I’m very happy with it but of course I’m still learning the ropes and how to fine tune it.
-
Beautiful work Glenn! Stunning job on chapter 5!
- 840 replies
-
- 4
-
-
- winchelsea
- Syren Ship Model Company
- (and 1 more)
-
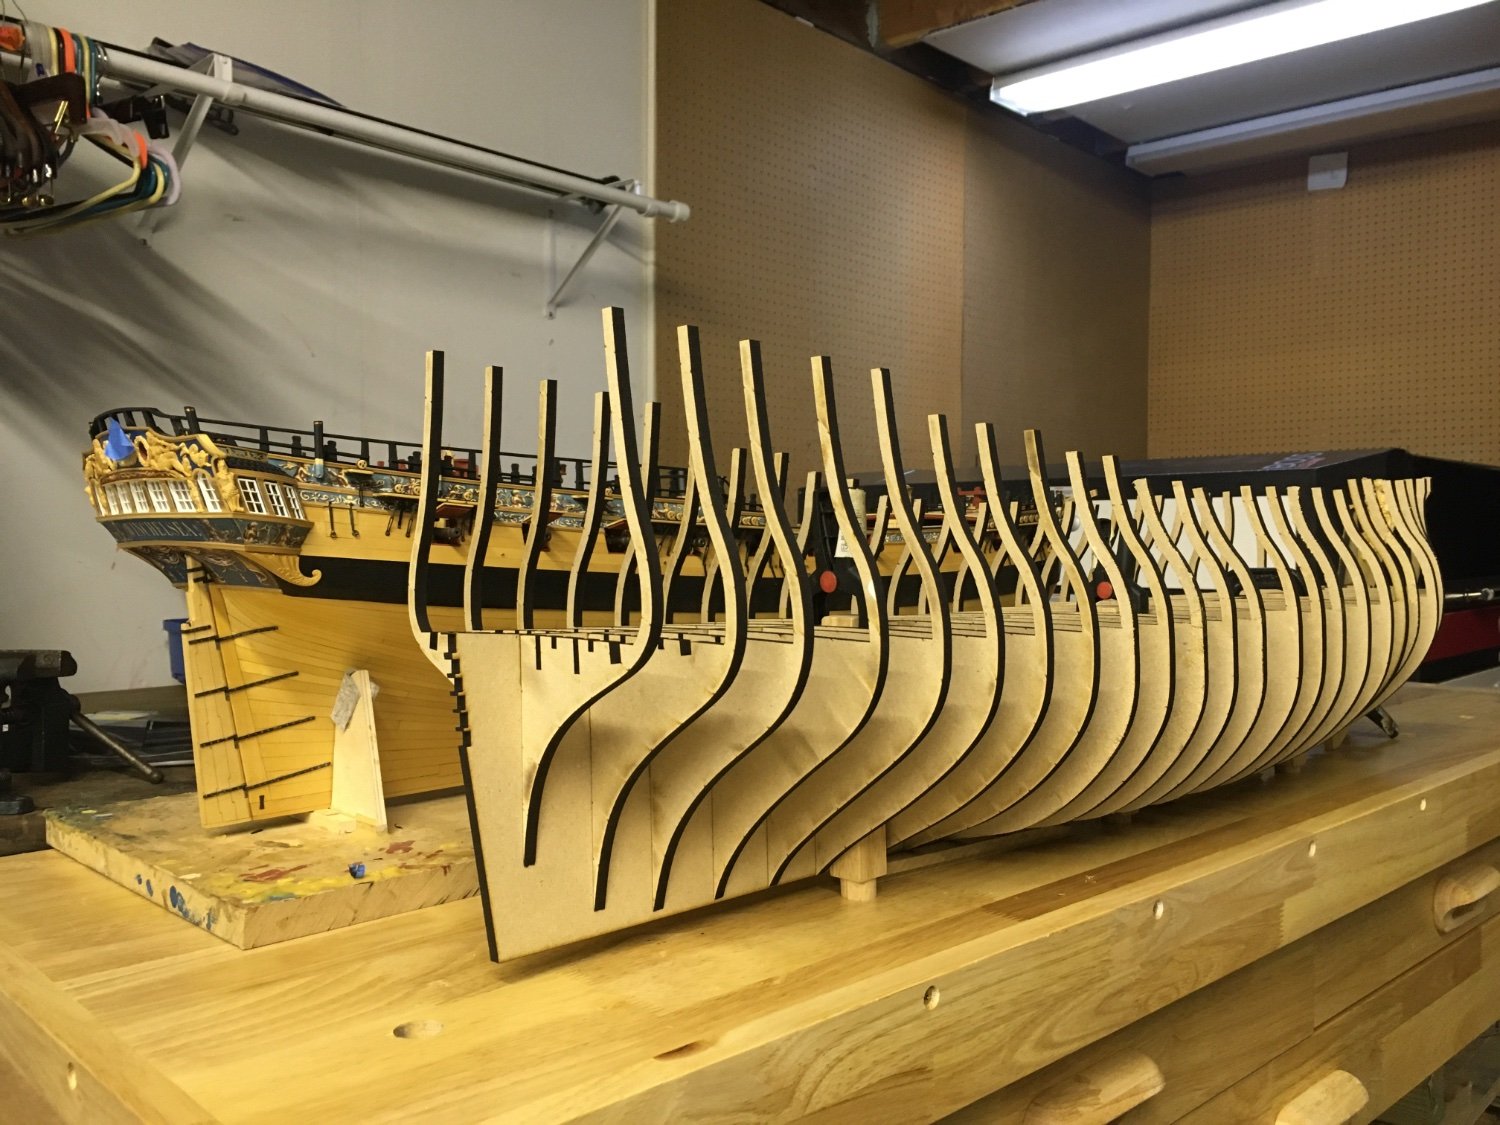
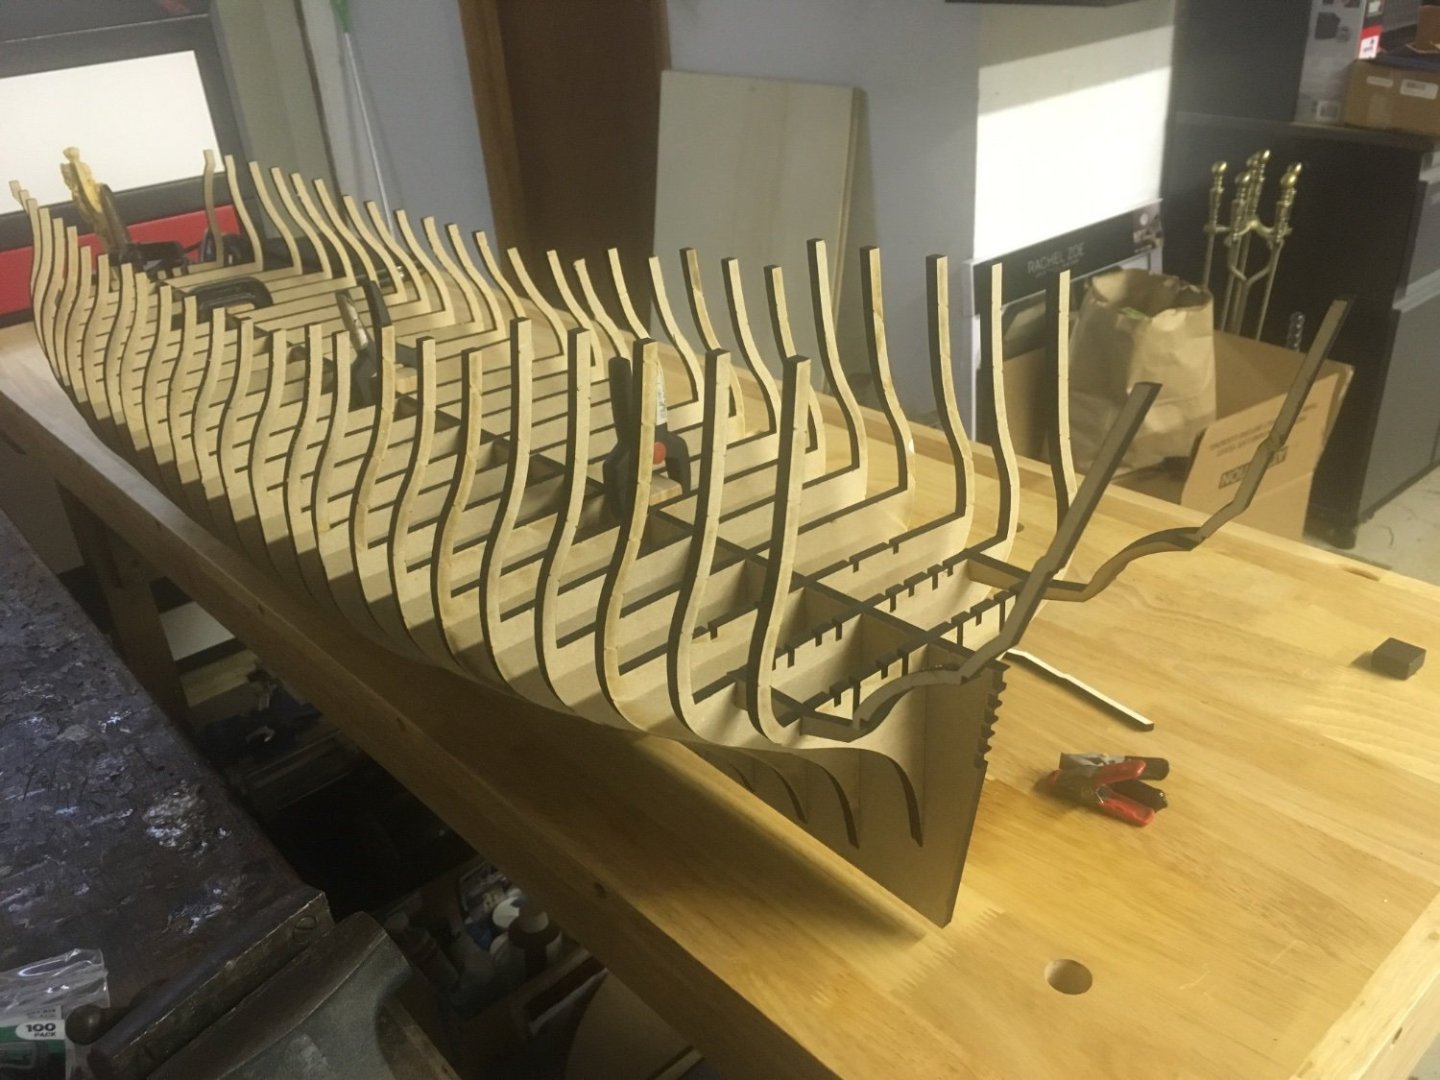
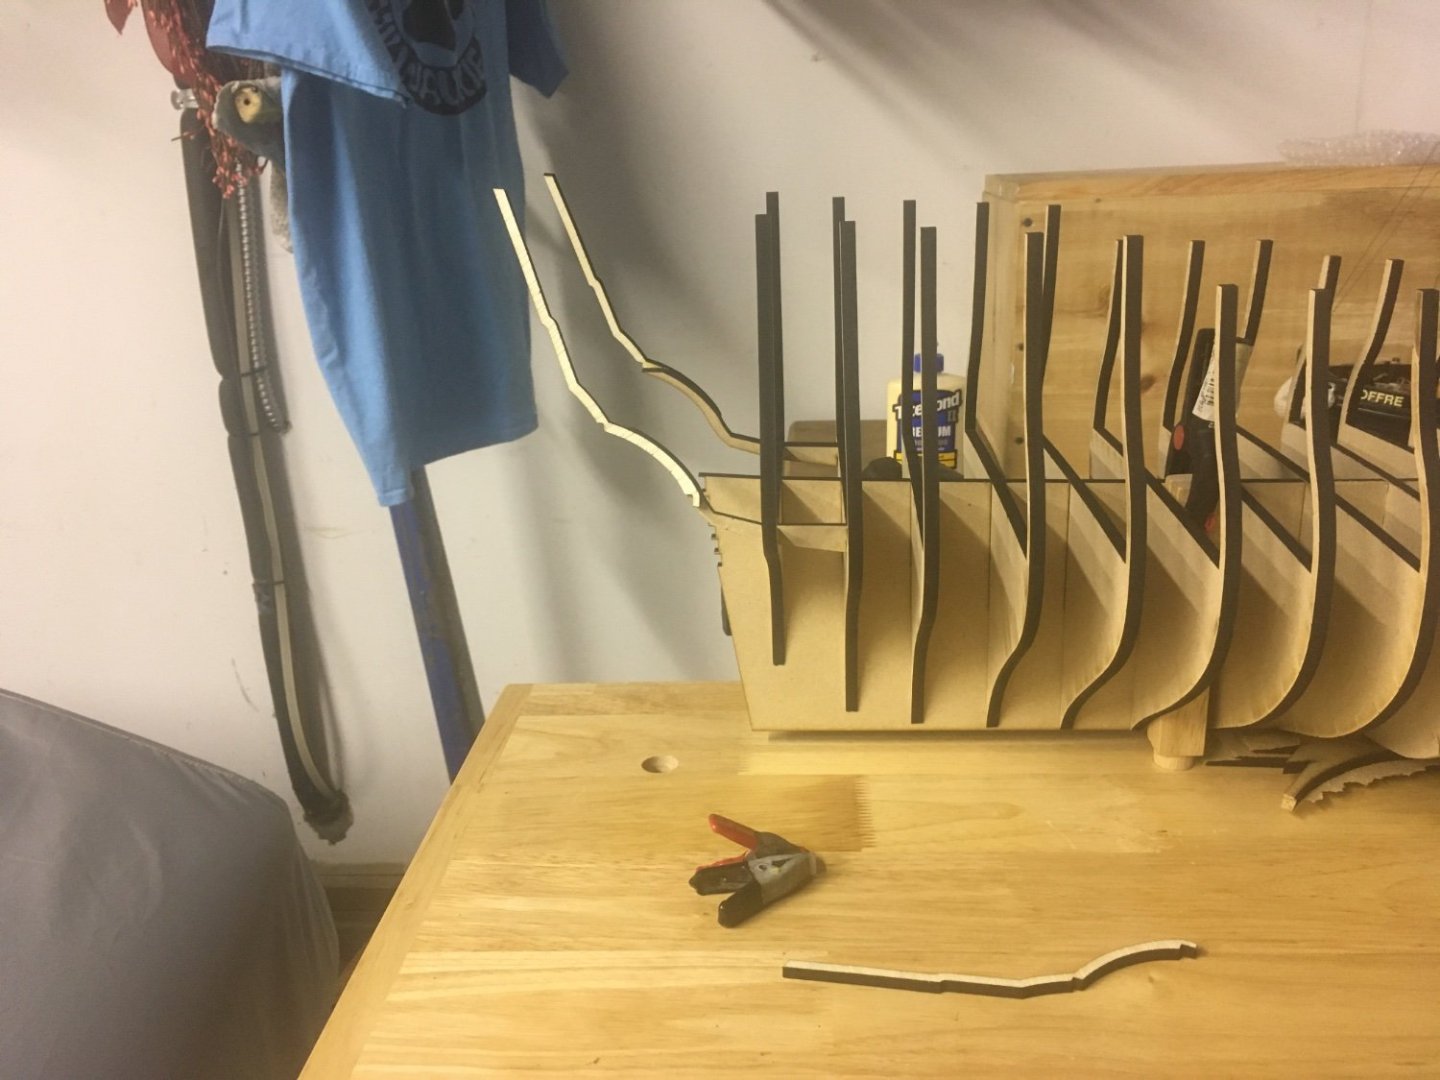
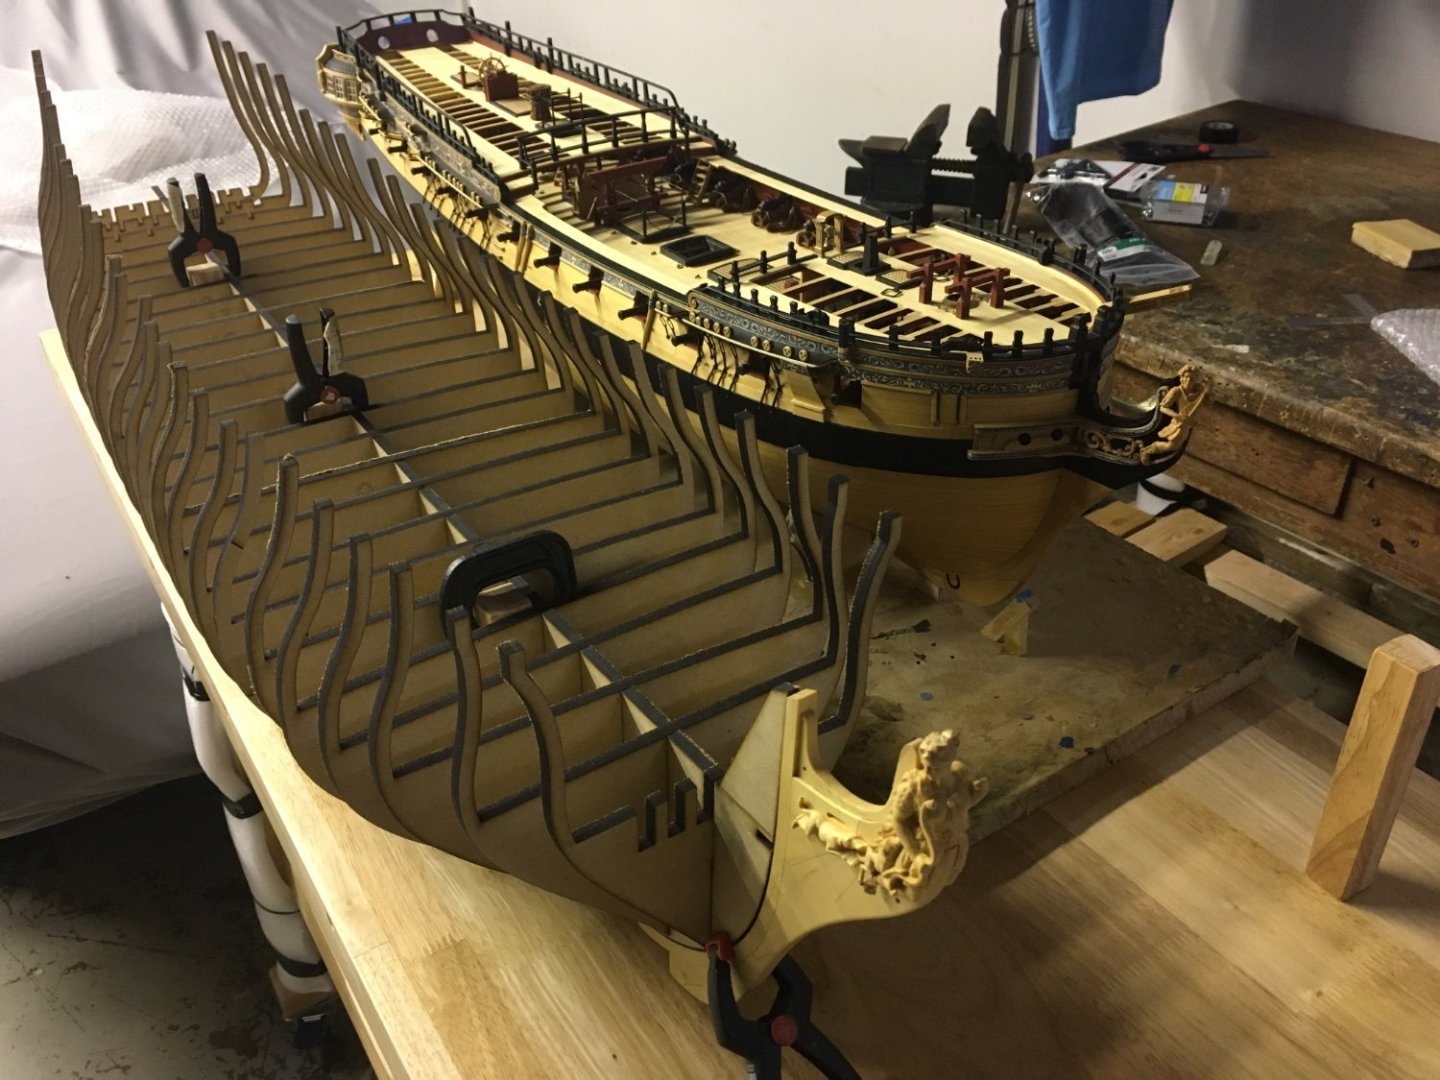
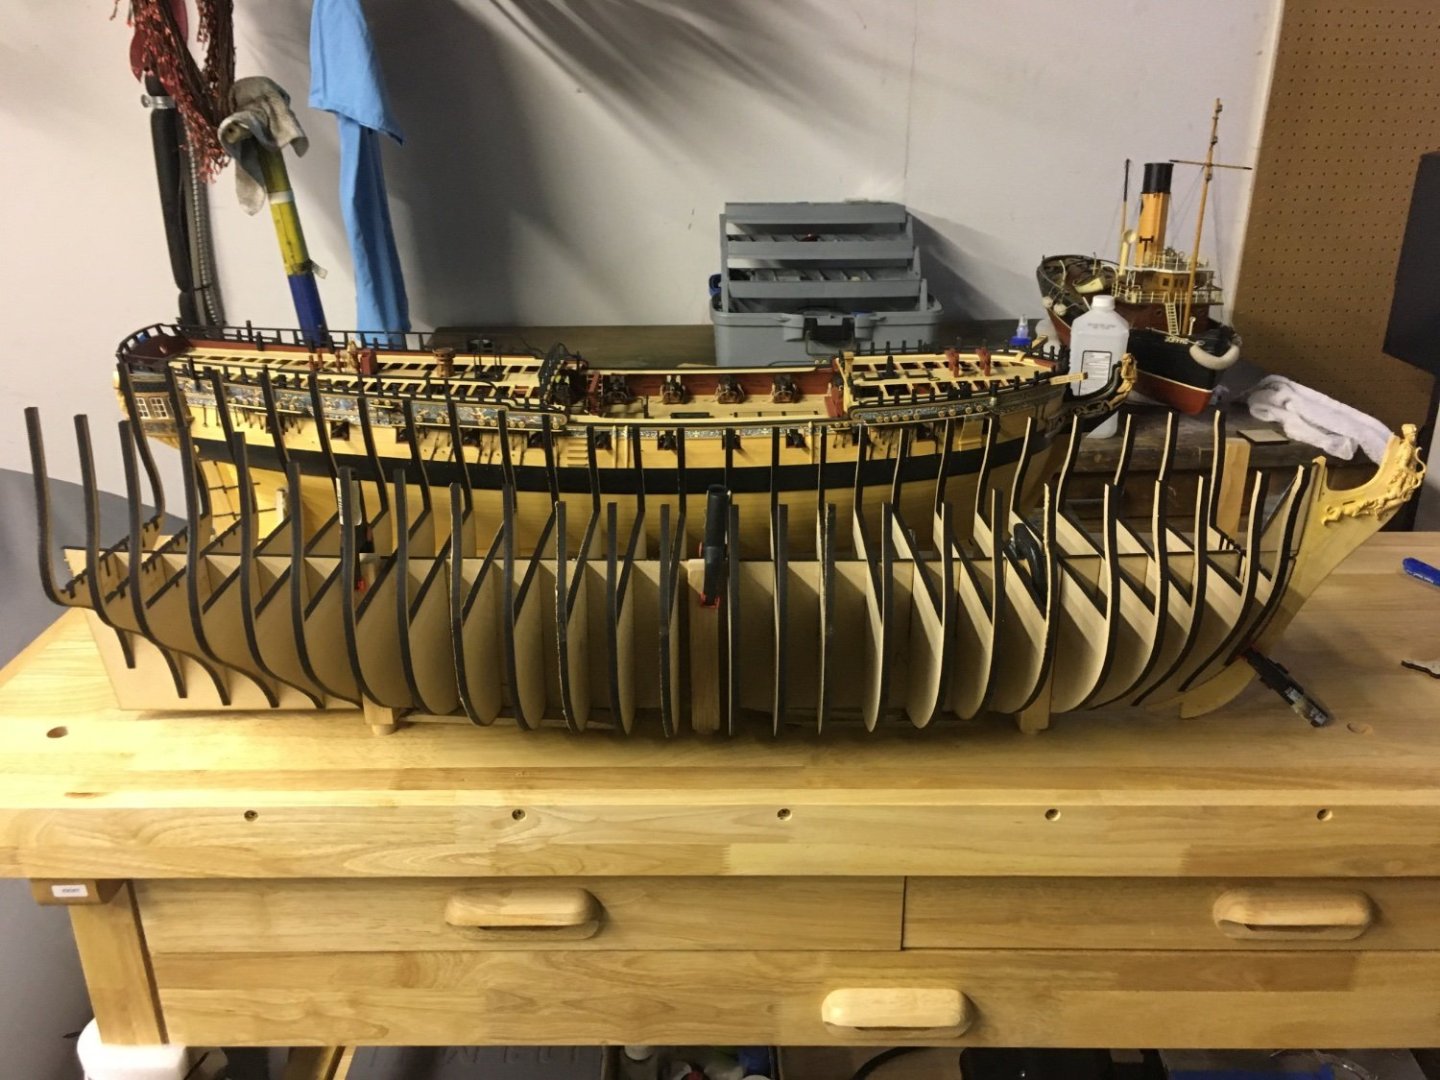
This will be my last physical model update for a bit as I’ve returned to work which means I’m away from my laser. Before I left I just wanted a nice mock up of the basic Skelton so I cut the outer aft transom frames just to give an idea of the overall length and height of the hull. For the next couple months I will be “assembling” Part1 of the kit on my computer to make sure everything required to make the hull is included and fits correctly. This will also yield all my cut files for that part of the model. Stay tuned for updates.
- 370 replies
-
- 25
-
-

-
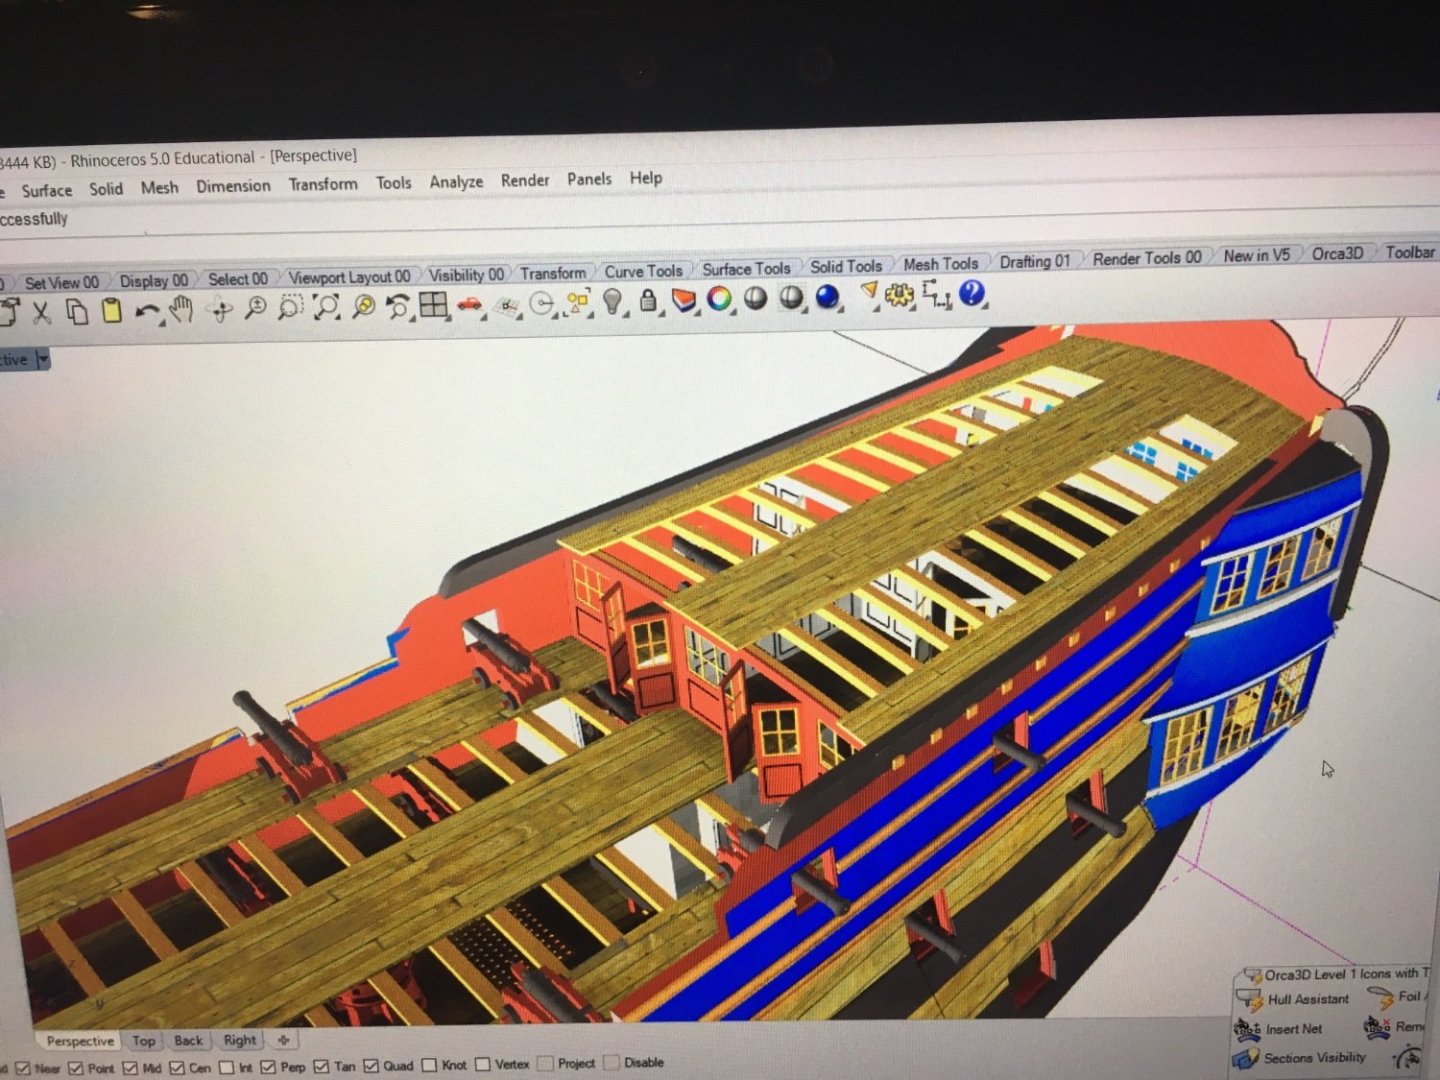
Thank you Chuck! That means a lot. I’m currently working on the 3D assembly and cut files for Part 1 of the kit and will be posting updates soon. Thank you Fred! You Brits just built so many elegant ships that we can’t help ourselves but model them!😁
-
Thank you VTHokiEE! More updates coming soon! Thank you Ben! Very excited to start construction. Thank you Mark! Updates will be slow at first, but I will have some 3D progress soon that shows construction on the first part of the model which will cover the hull and framing. Thank you Matt, stay tuned for more updates. Thank you Allan! Appreciate your input.
-
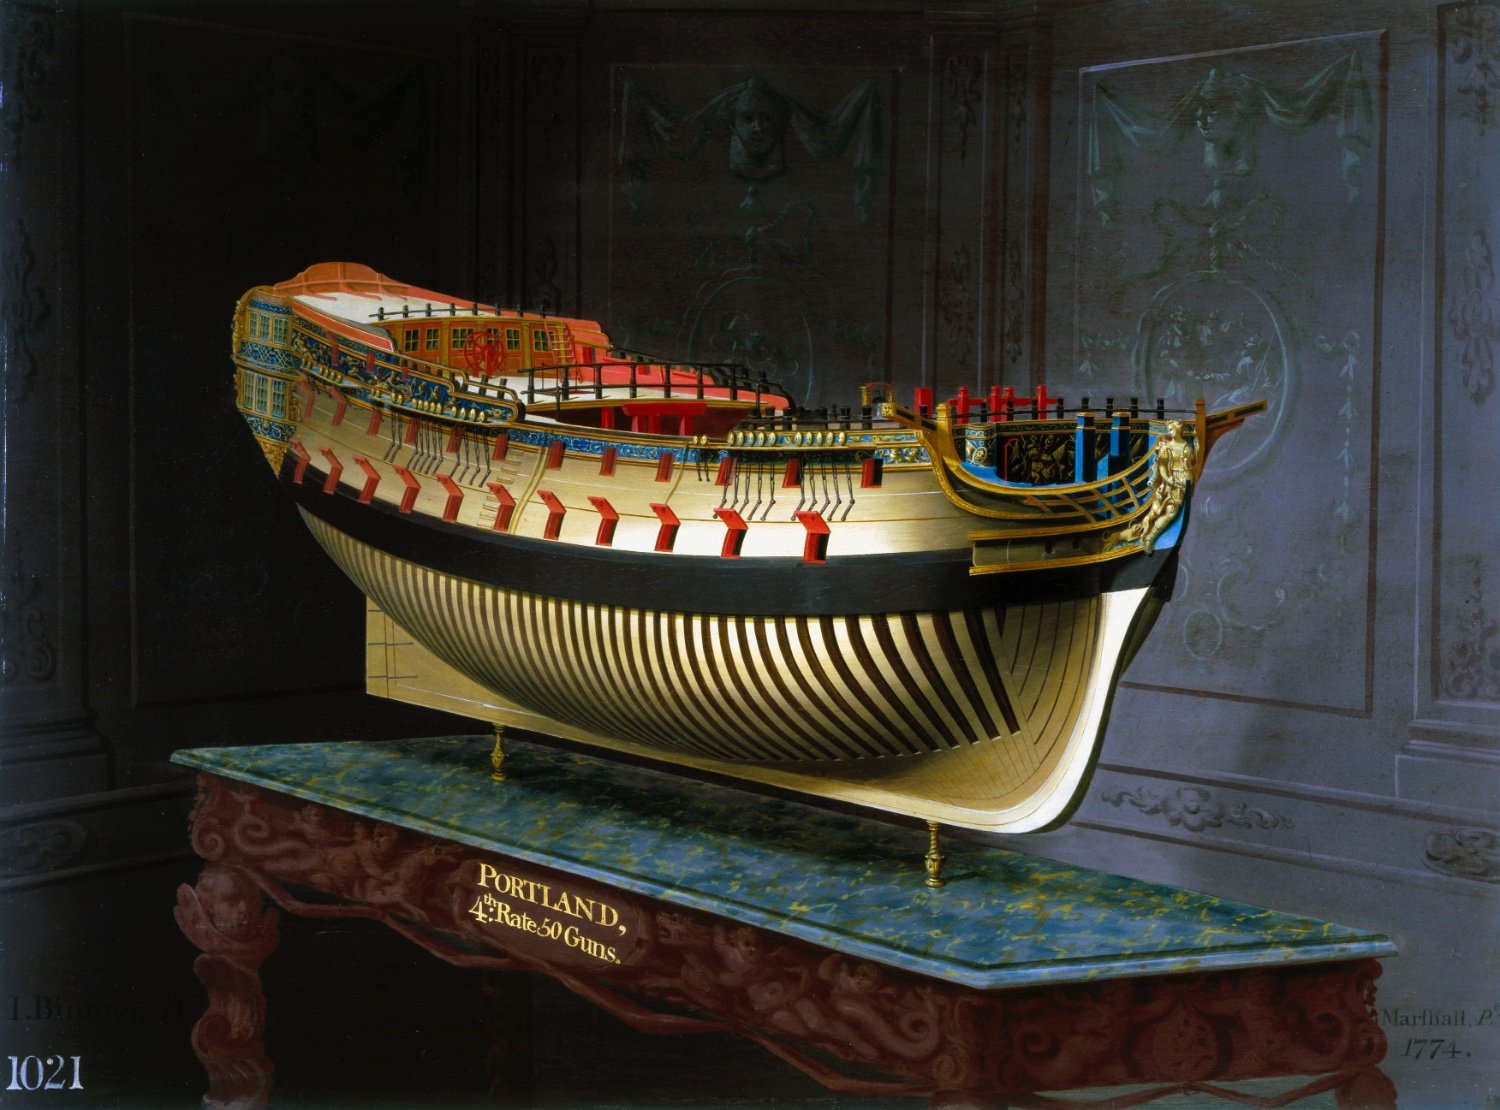
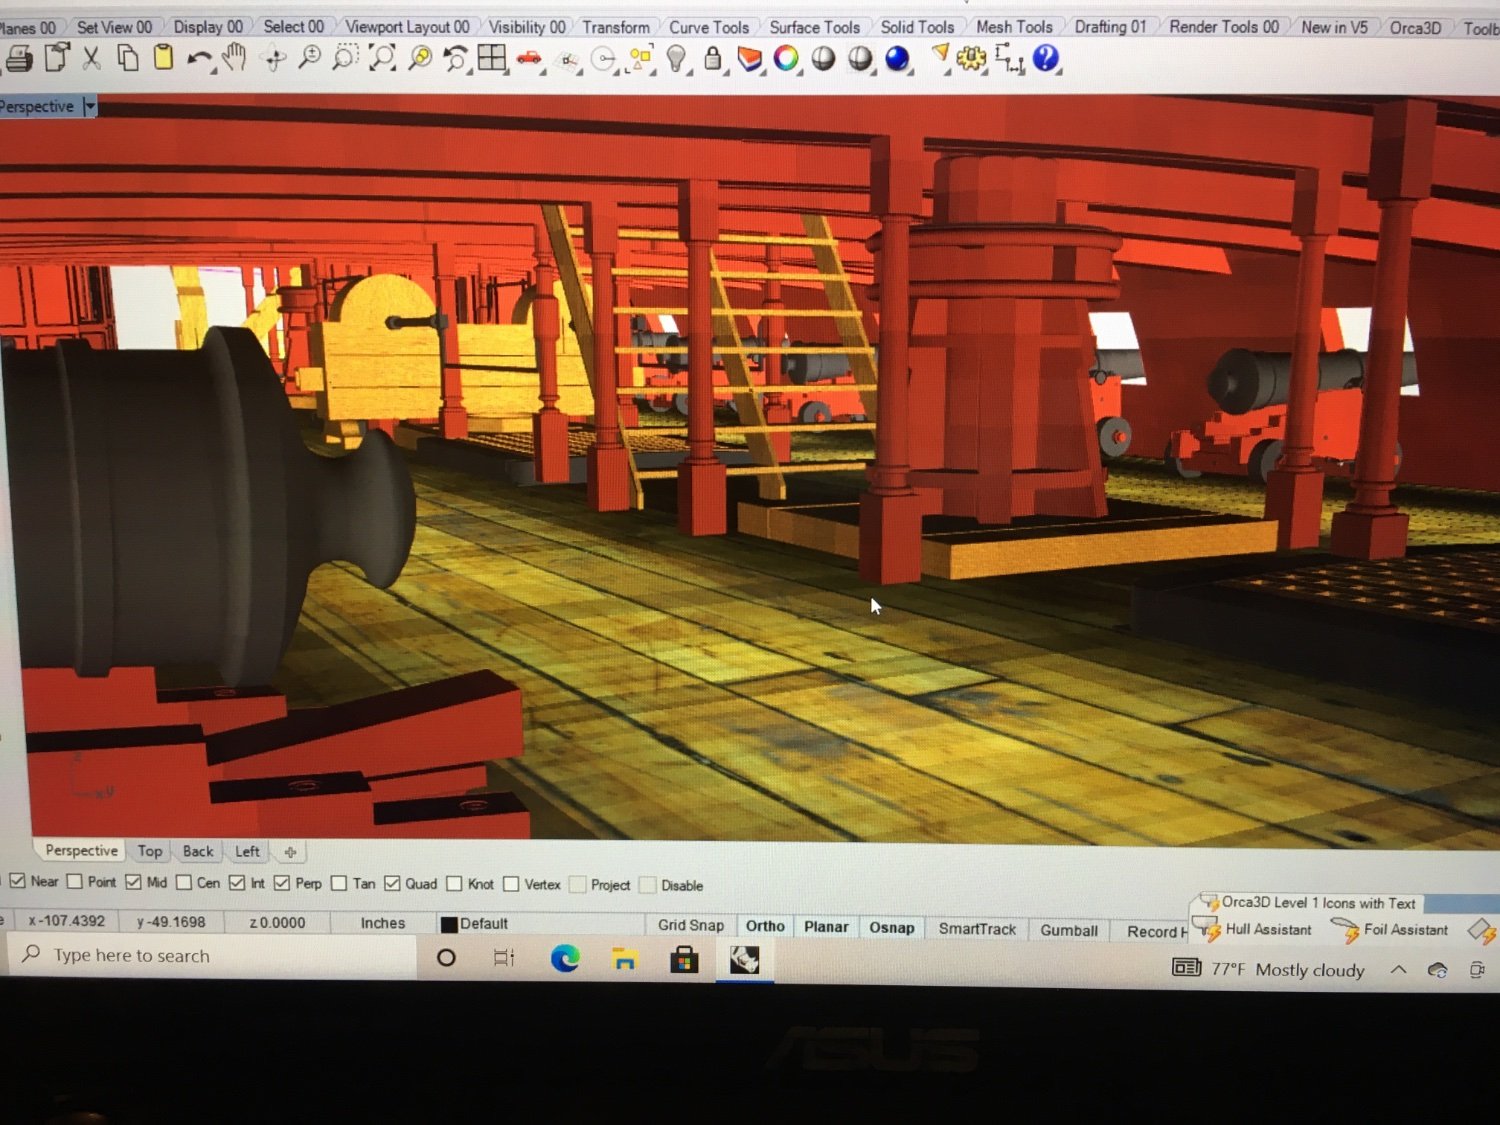
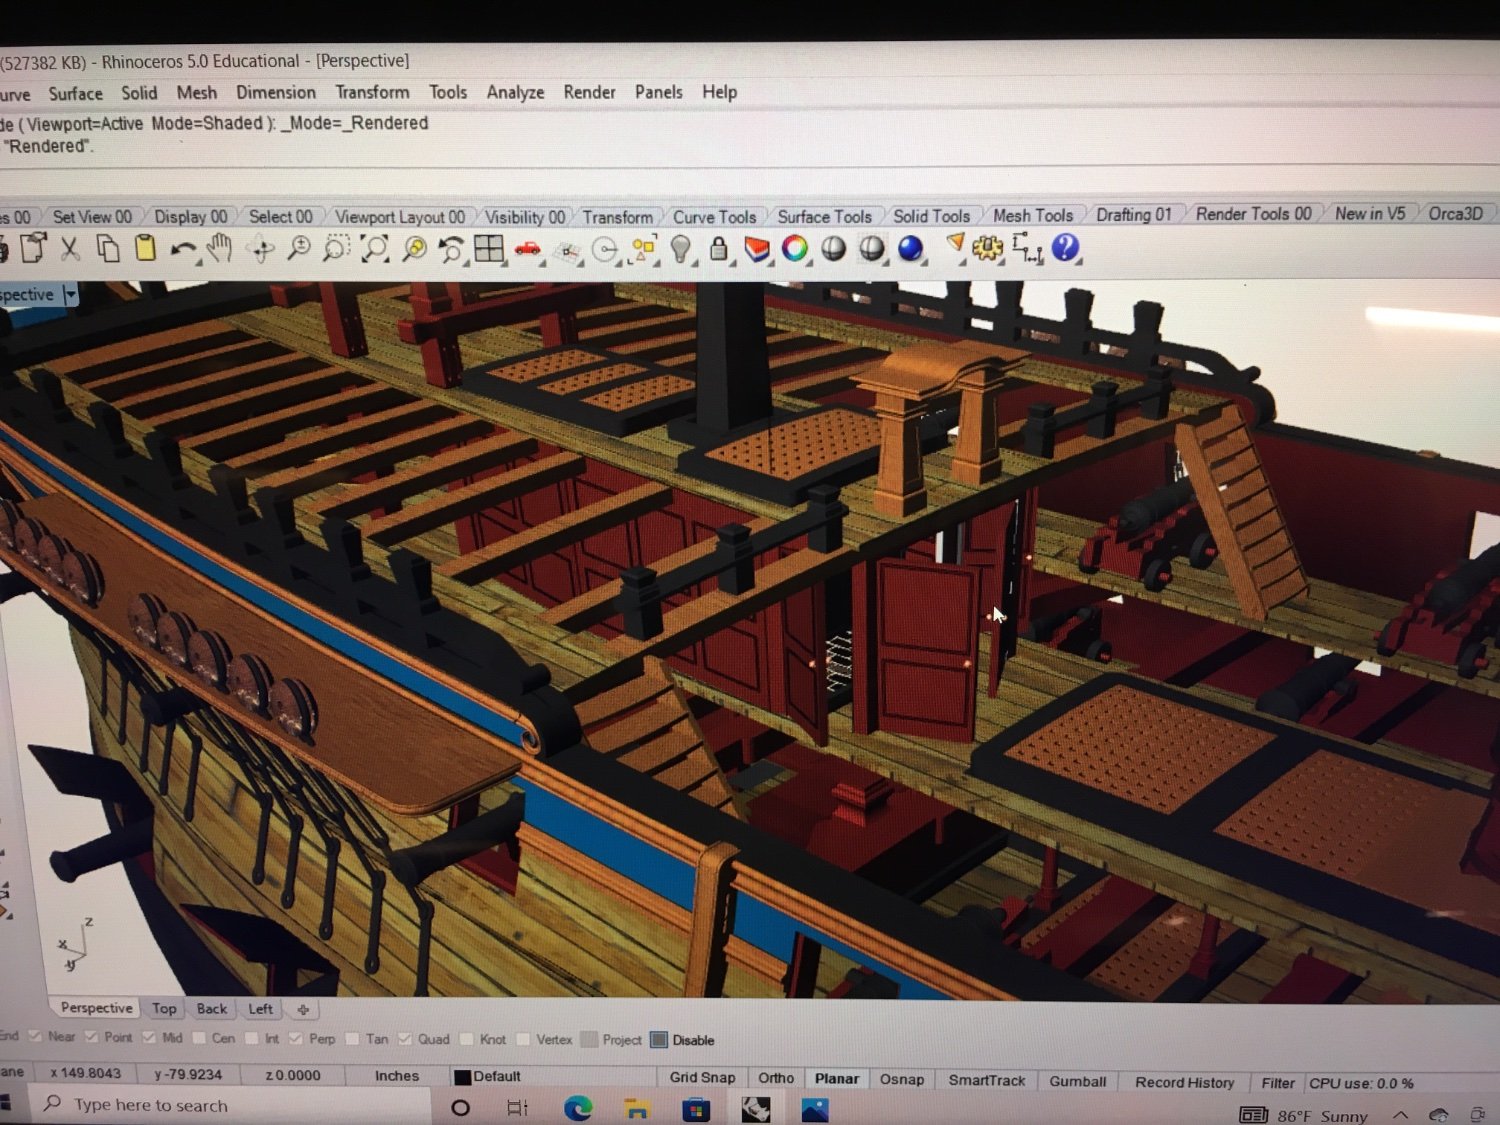
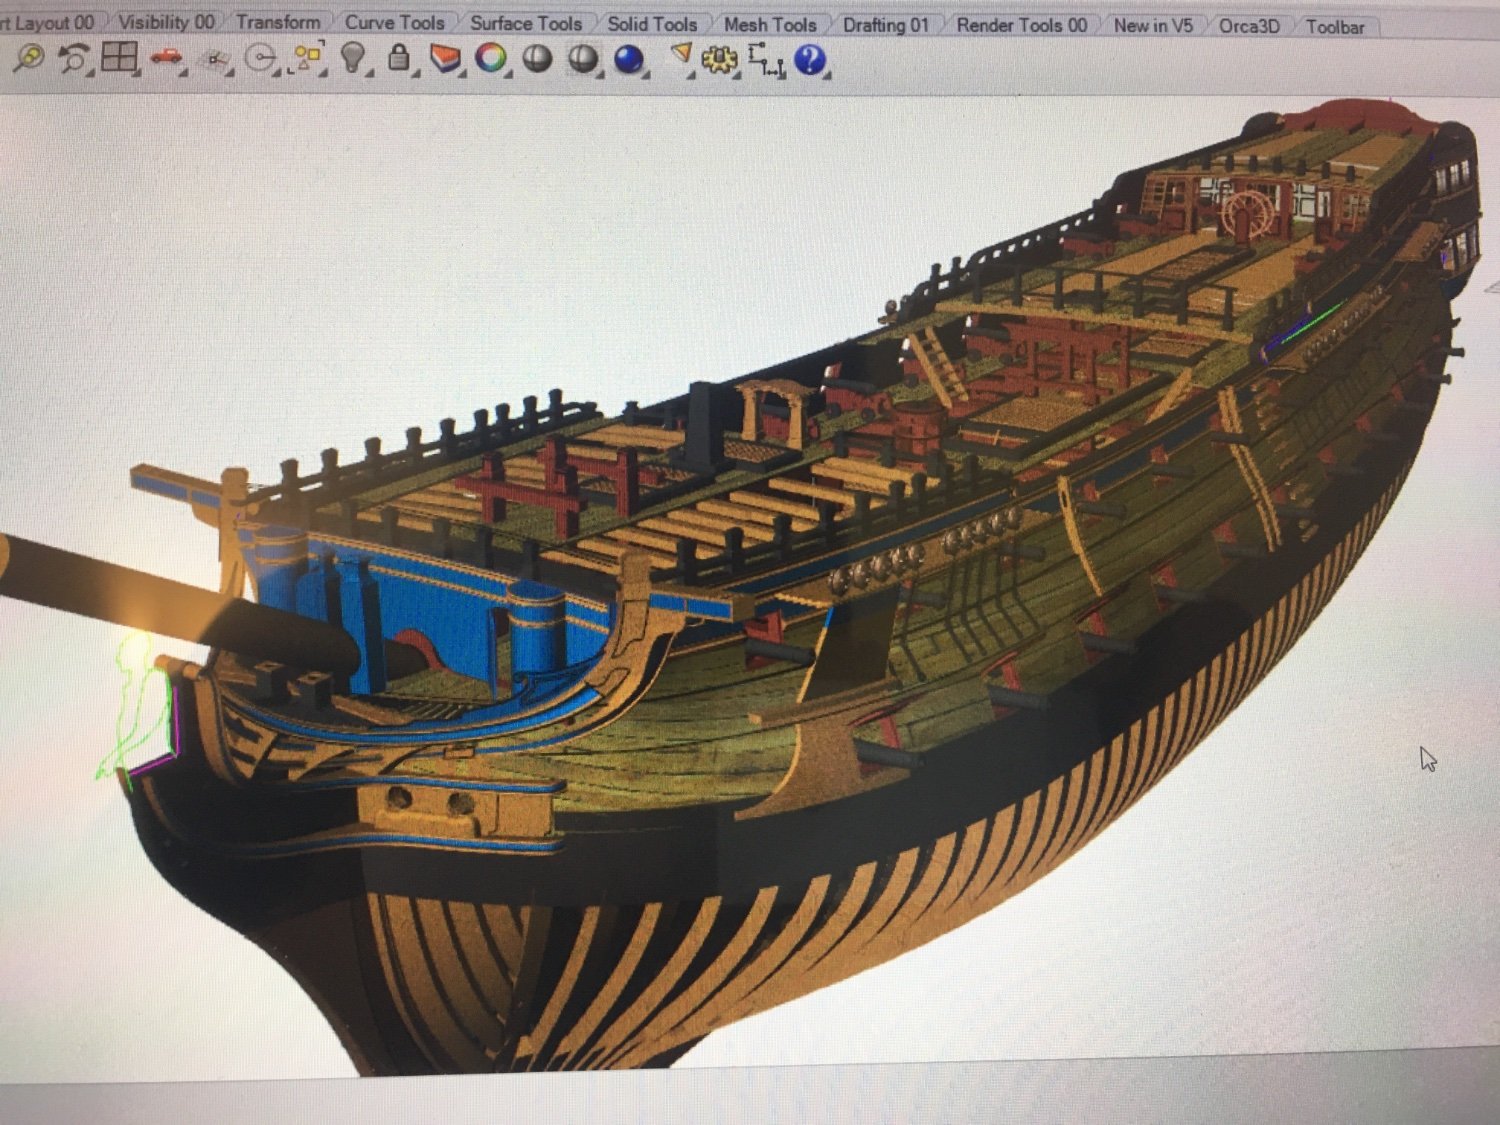
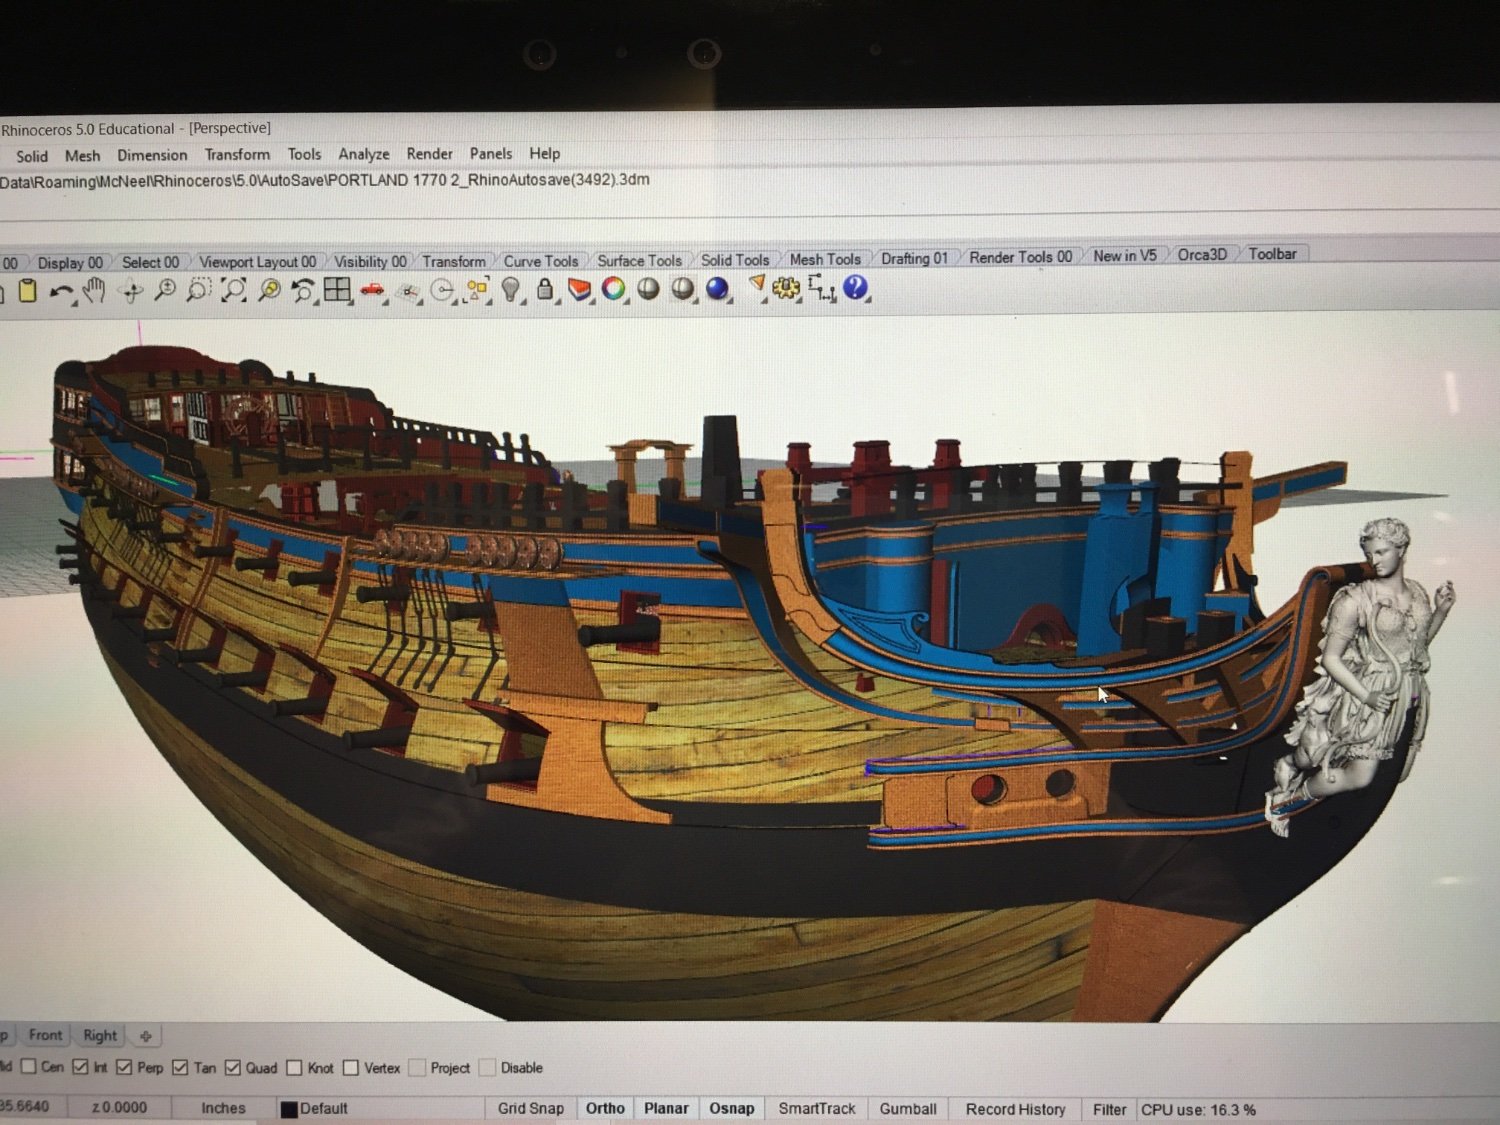
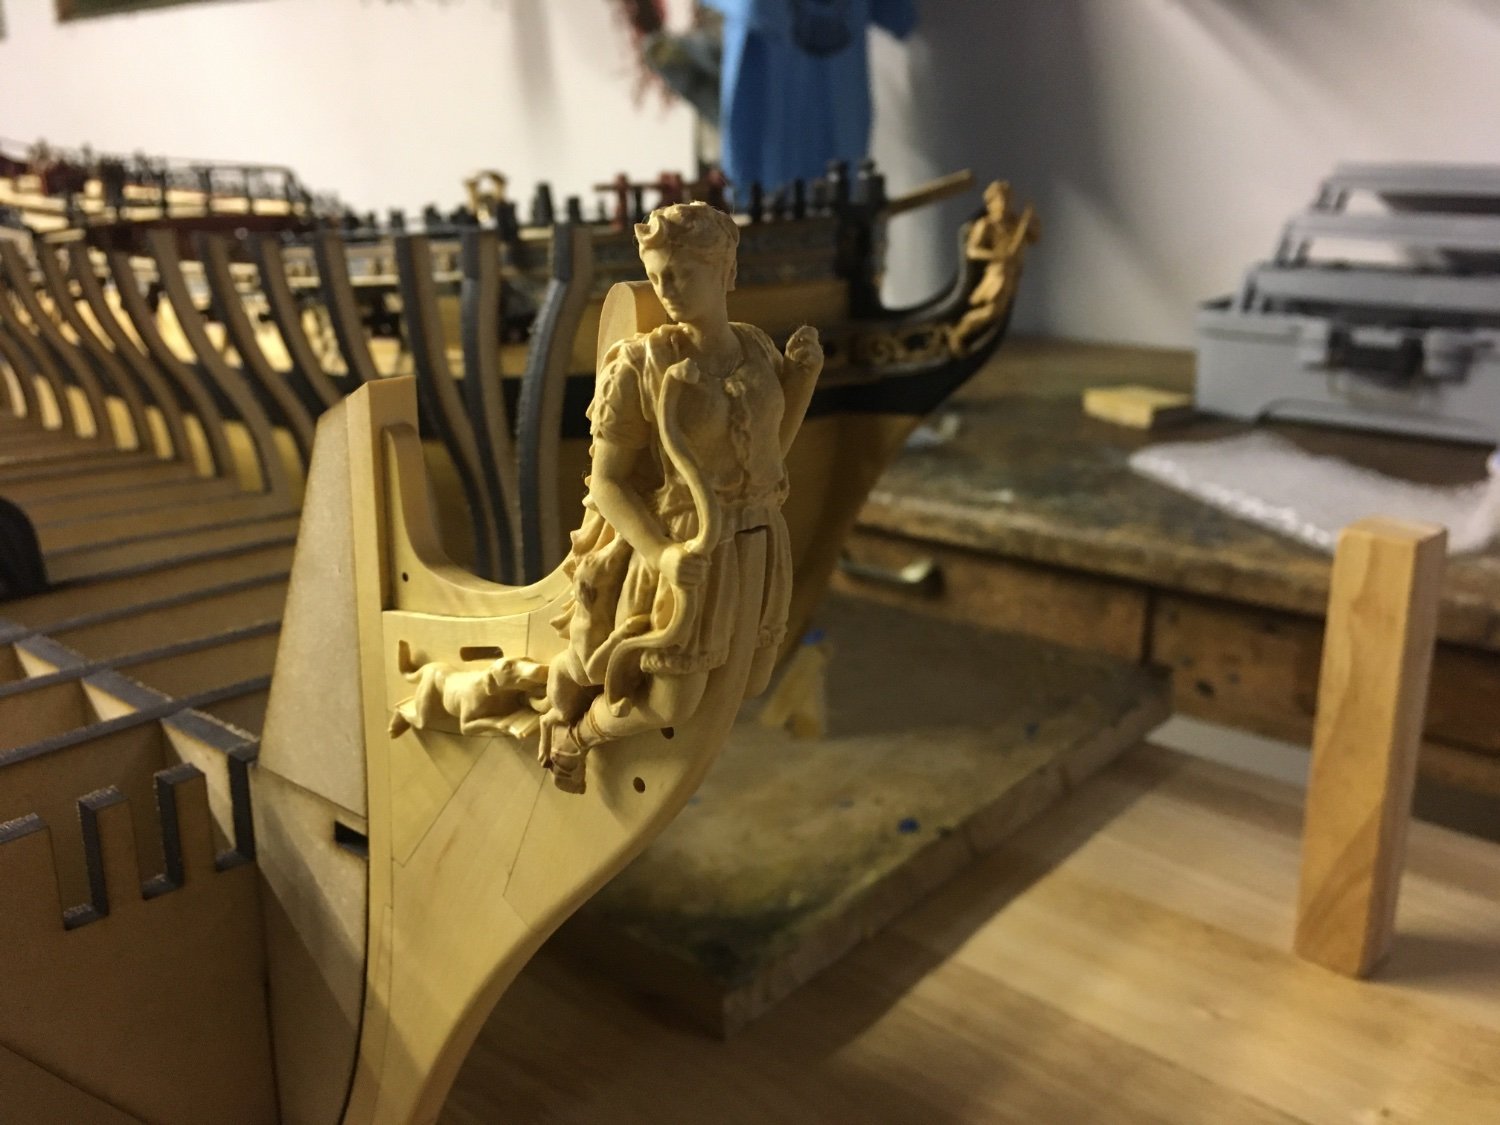
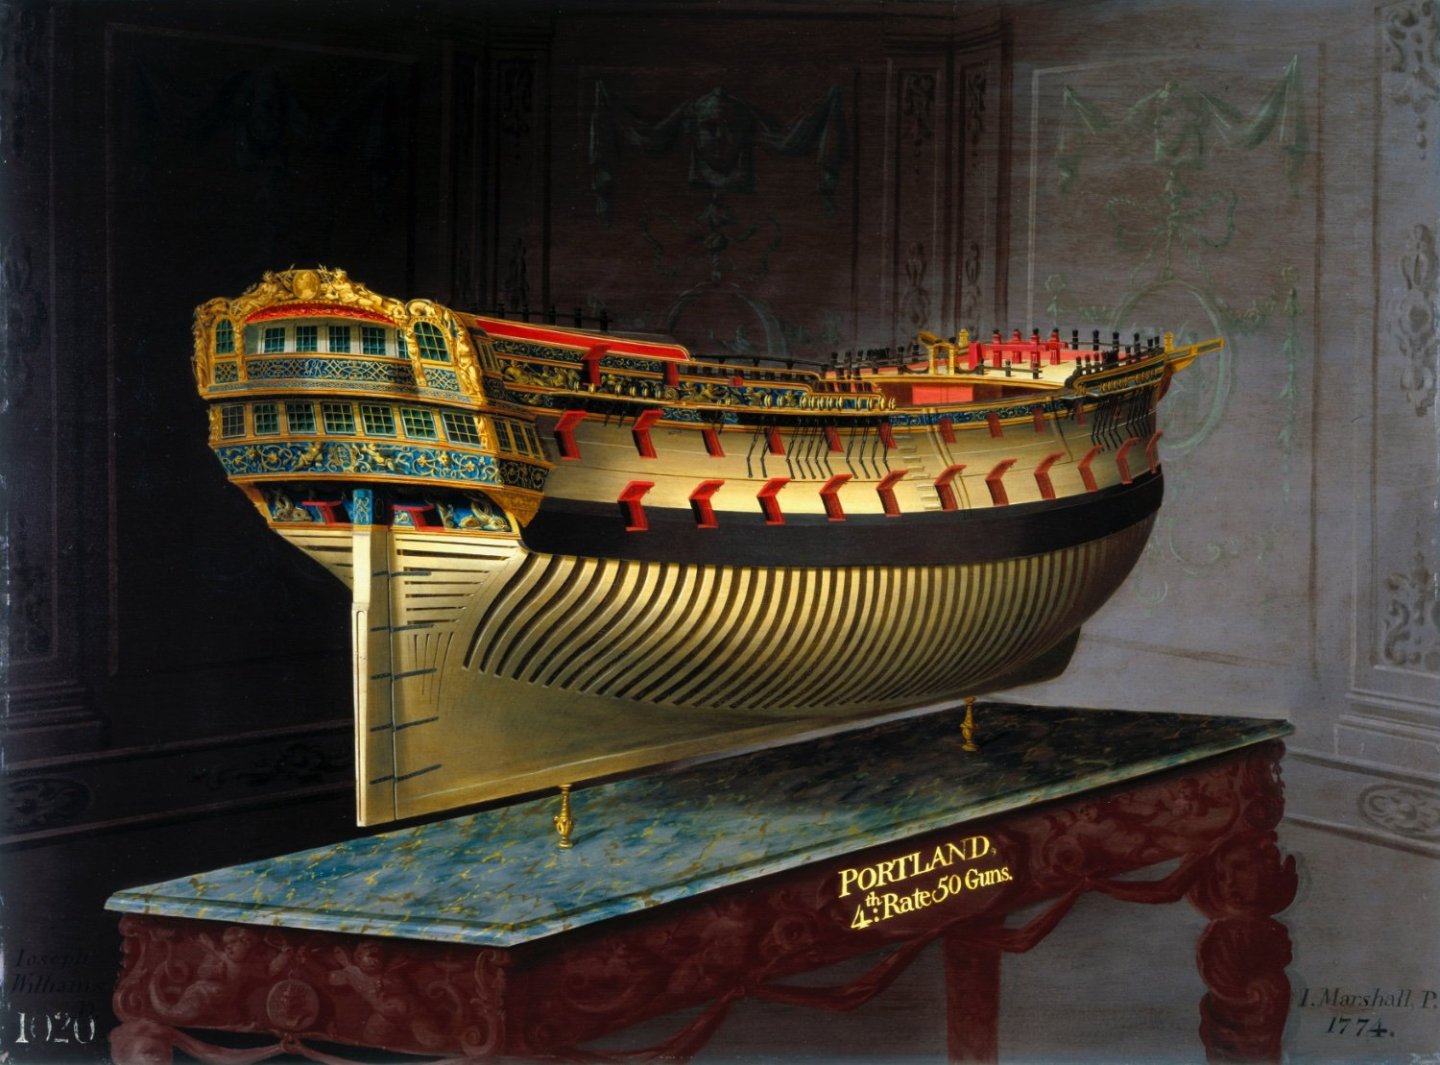
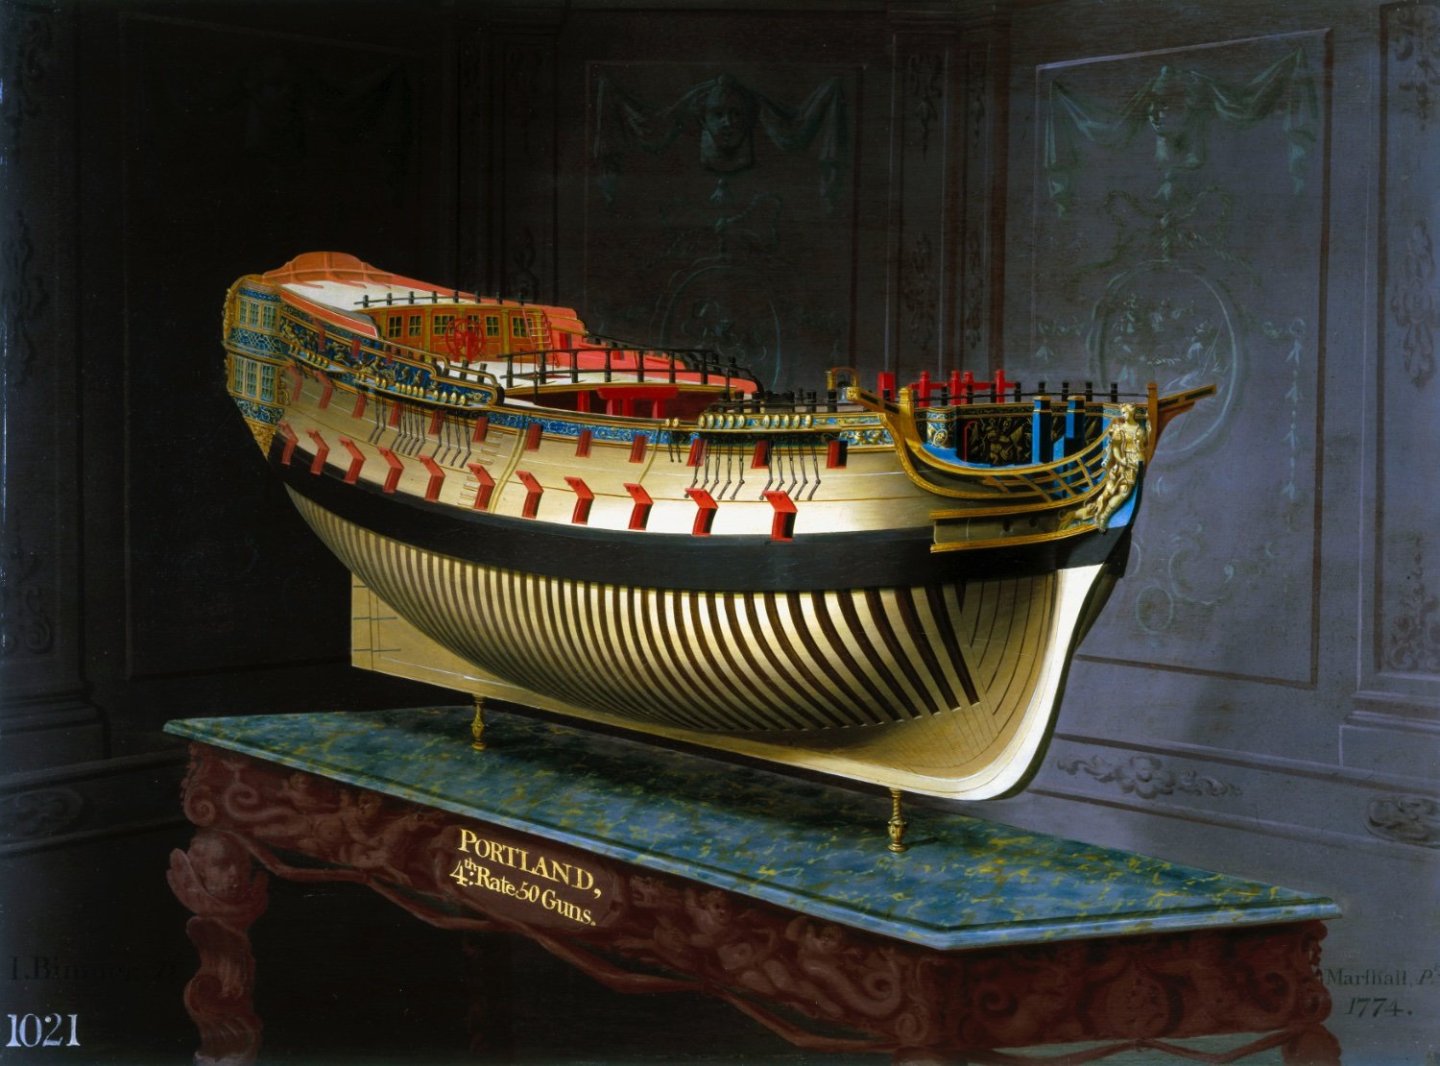
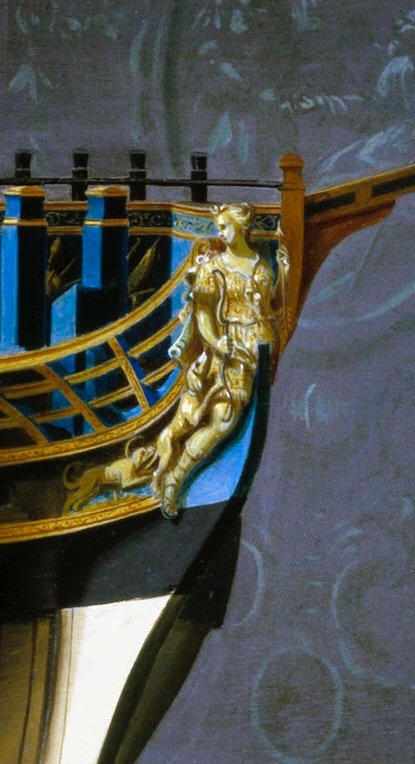
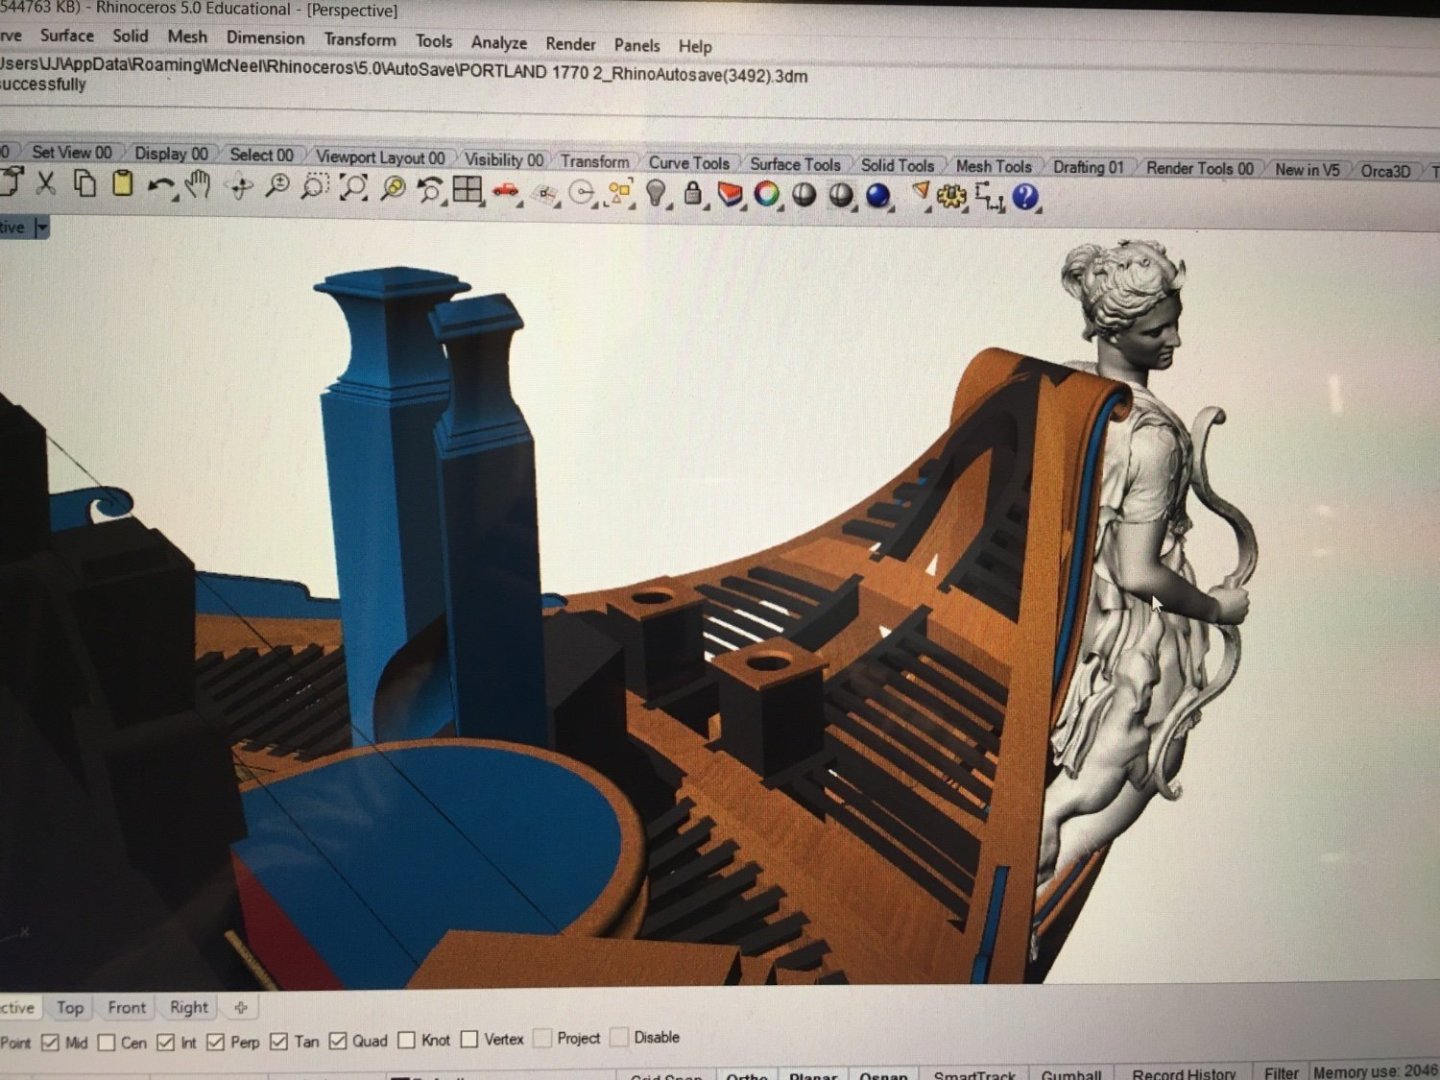
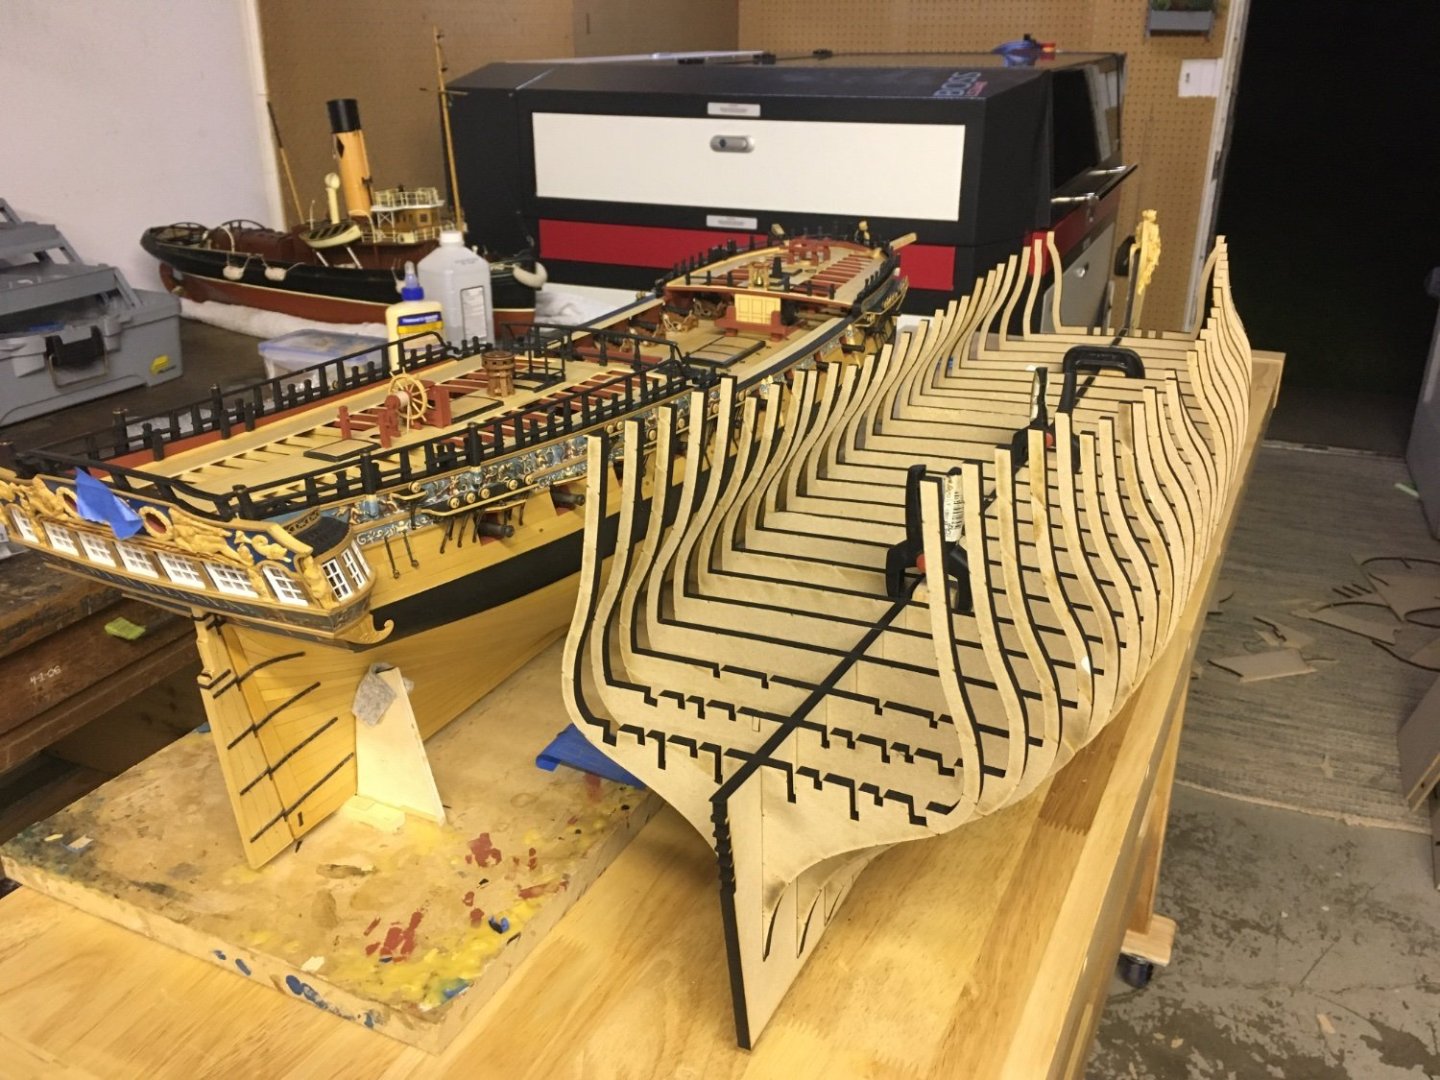
Hi Guys, So I’ve been developing HMS Portland for about two years now and I plan to offer it as a kit, it will be sold in parts or sections so you can build at whatever speed you wish or only purchase what you want and scratch build the rest. The project will be in 1:48 scale and will be offered mainly in Alaskan yellow cedar and other various woods including boxwood for select parts and I’m leaning towards MDF structure but I will have to see how the initial prototype builds. As a Winnie builder, I was inspired and blown away by Chucks incredible design work and flawless representation of the Winchelsea, so much that I purchased a laser machine and started designing. My aim is to offer a model as detailed and accurate as possible. The model is designed to represent the dockyard style model of Portland as depicted in the Joseph Marshal paintings of 1774, as seen below. There are enough early drawings of Portland available to accurately represent her as initially designed, these drawings also match up well with the paintings of the contemporary model, she does differ from her closest sister, Bristol but the model could be modified to represent Bristol if desired. It will have all decks built and exposed down to the main gun deck showing all frames, guns and fittings. currently the model is in its final stages of design/development, I will begin assembling the hull and proving the design as I go, I don’t plan to offer parts of the kit until I’m very very far into the build. Currently the sculptures are being finalized with the figurehead of Artemis, the Greek goddess of hunting already being produced, I should be able to post updates on the stern carvings in a couple months. I am going to try and offer both resin and boxwood sculptures for this project, I haven’t been able to determine the cost of the full set yet but it shouldn’t be outrageous. At 1:48 the model comes in just under 43” long and about 10.5” in beam. So it’s not unmanageable, unless of course you decide to rig it. The design prototype shows half the model with exposed frames, as the contemporary model was built, I may offer a version like this but it will be very expensive and tricky to build, it will be a hybrid POF/POB if released. I will likely start a test portion of this alongside the prototype build. Currently I have set up my new laser machine and I’m cutting some parts just for testing purposes, I took some photos next to my Winnie to give an idea of scale. I think the two will look great sitting next to eachother.


- 370 replies
-
- 52
-
-
-
Beautiful work! That QG looks just excellent!
-
Hi Matt, I sprayed the thin pieces of the Channels before laminating them, essentially I would have just had to sand more “char” off to achieve the correct look. By the time I realized what I did, they were already assembled. Thank you Frank.
-
Congratulations Rusty! She’s beautiful. It’s been wonderful following your build and very inspiring as a fellow Winnie builder. Looking forward to your next project. JJ
- 642 replies
-
- 2
-
-
- winchelsea
- Syren Ship Model Company
- (and 1 more)