


vossiewulf
-
Posts
1,207 -
Joined
-
Last visited
Content Type
Profiles
Forums
Gallery
Events
Posts posted by vossiewulf
-
-
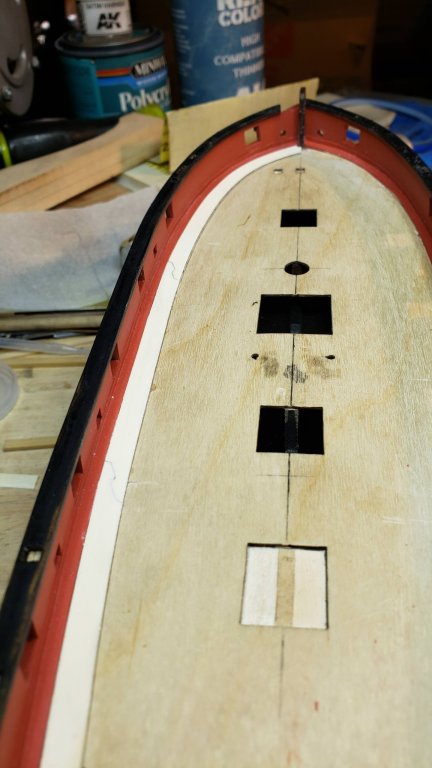
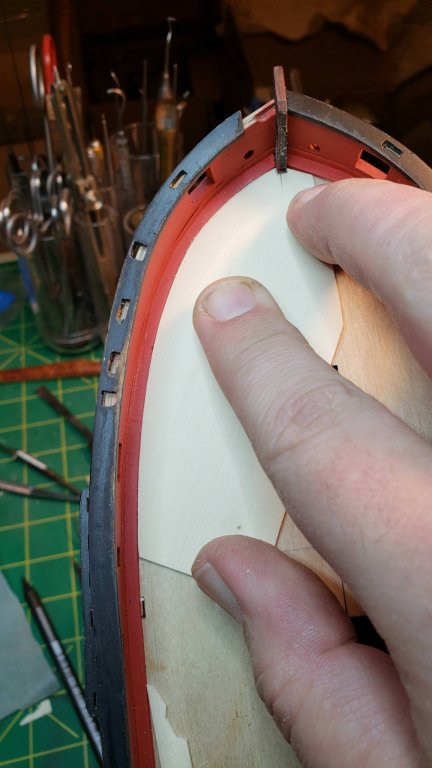
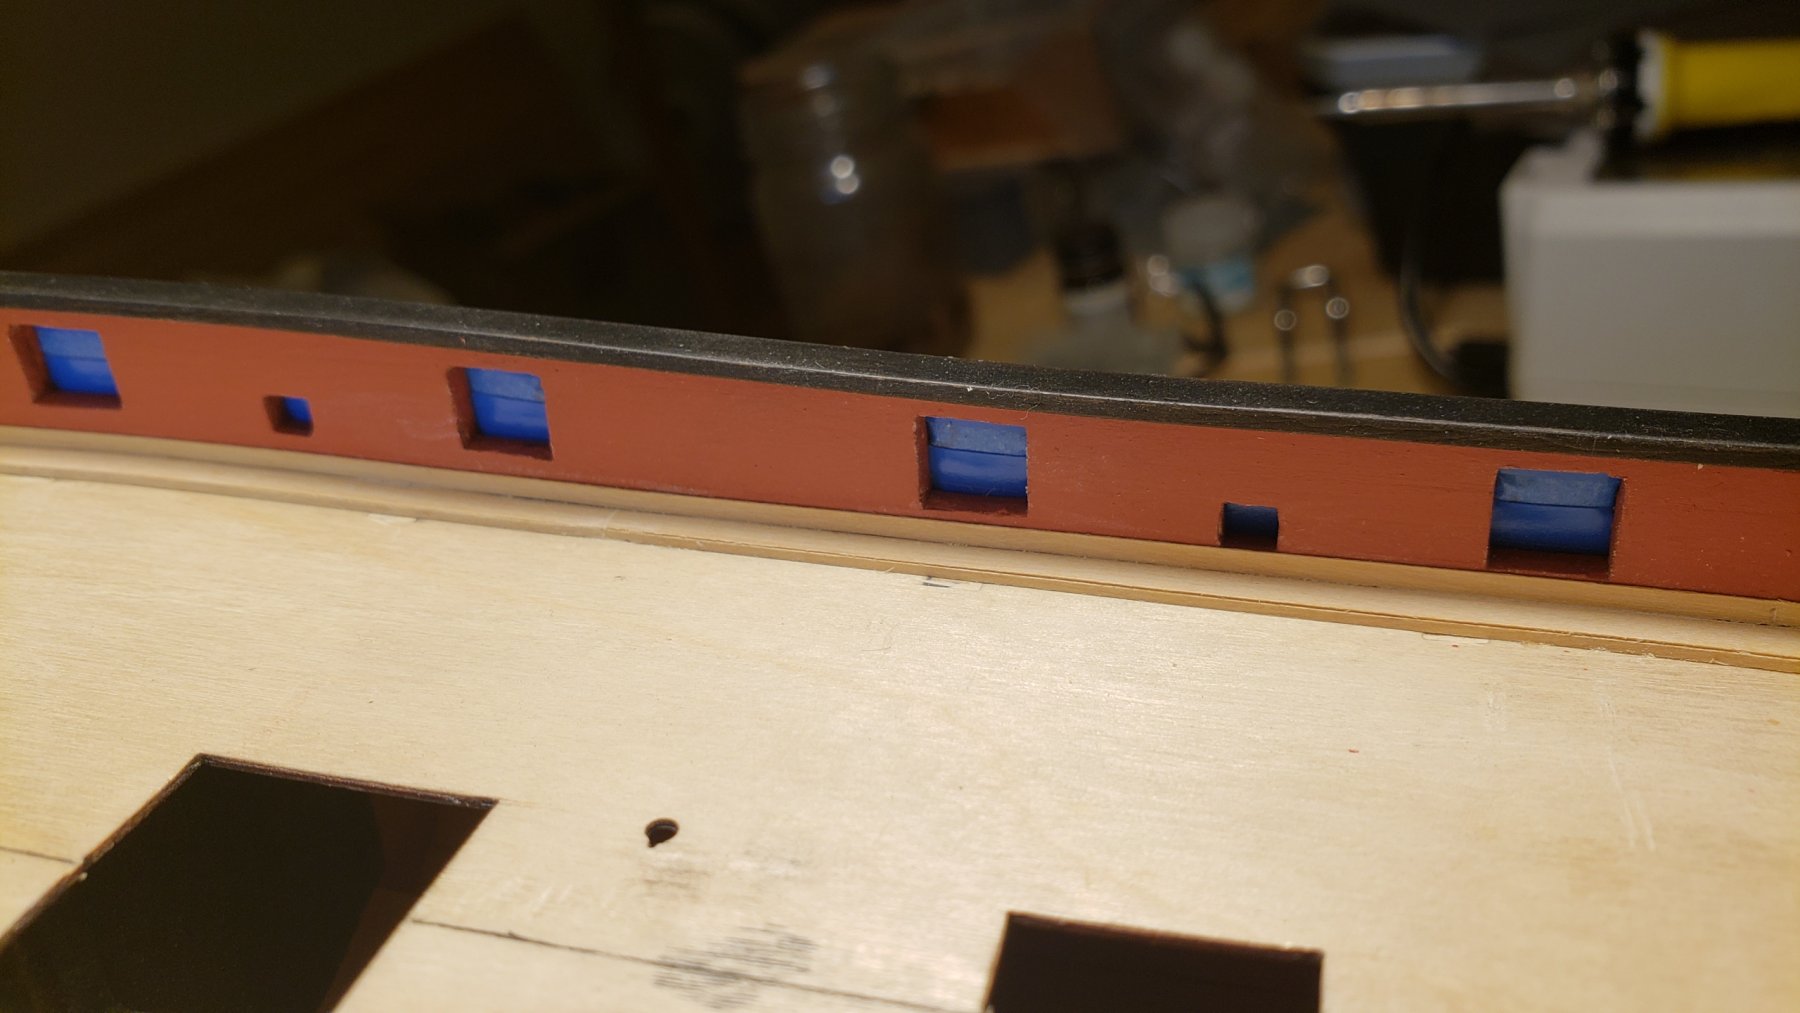
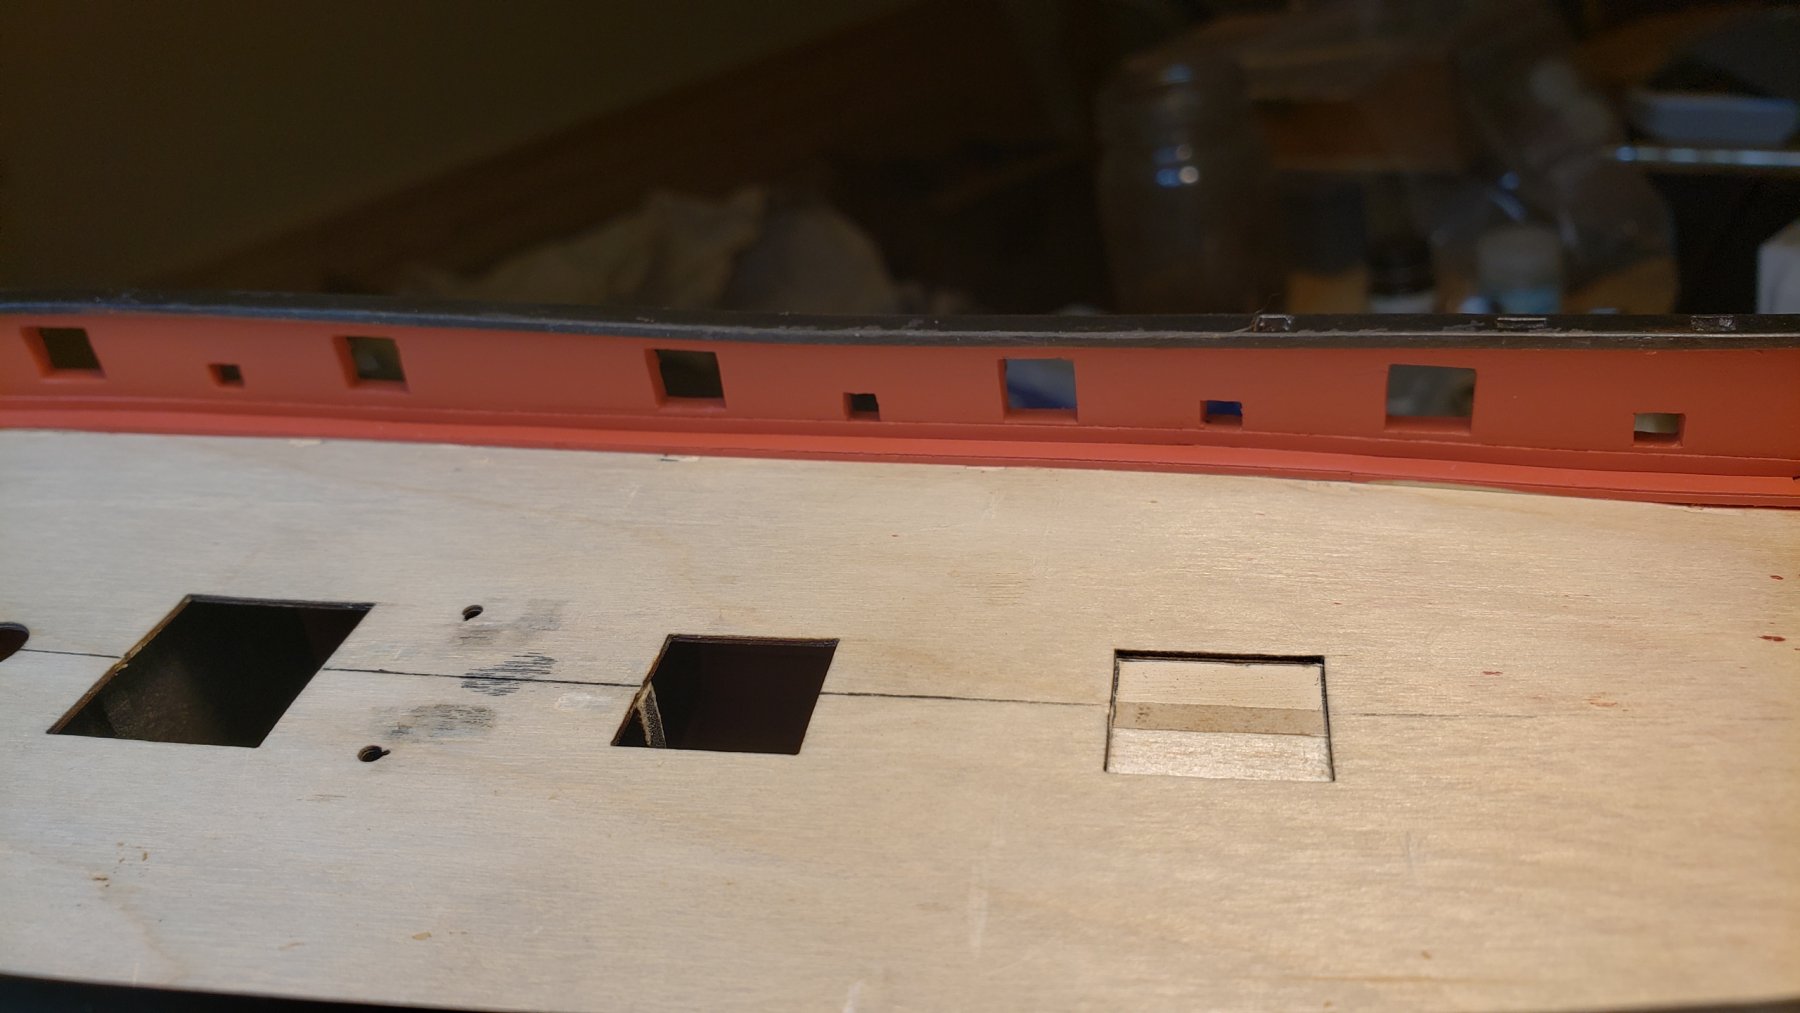
So I spent a long time staring and figuring out how to do this and having it being super complicated until I finally made the executive decision that the damned deck furniture was just going to sit on the planked surface and I wasn't going to plank around them. Three out of four of the furniture elements extended slightly width-wise across a plank line, which would have required... I don't know what they call it but instead of having a thin plank section they bevel that back and extend the next plank width-wise to cover the space. Almost half the planks would either be beveled short sections or planks with extended width, and honestly I wasn't sure I could make those accurately enough at this point. So for once, I'm not taking the double black diamond slope for this section and am simplifying a bit.
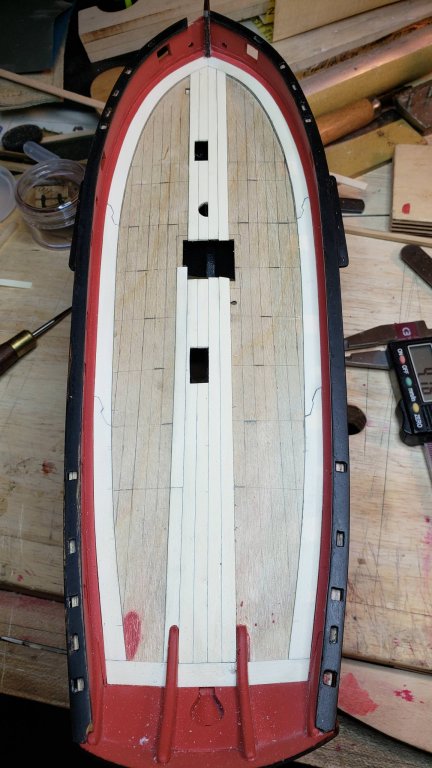
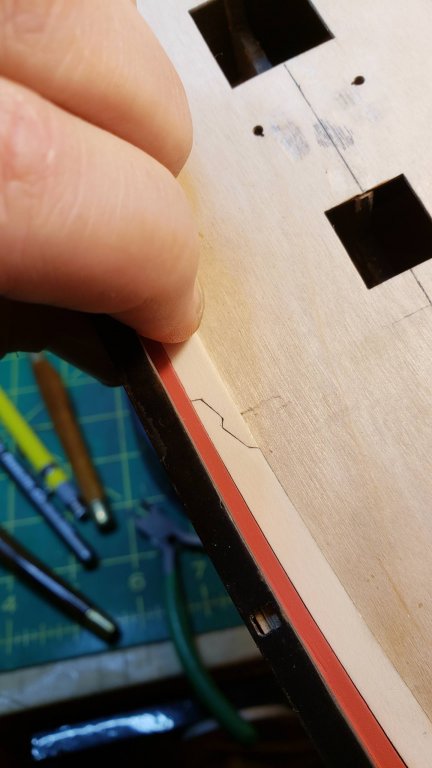
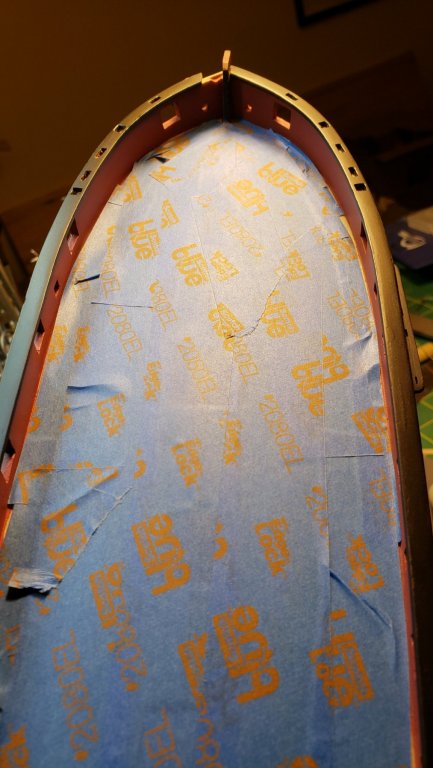
As for nibbing, I decided the planks will be straight run, no tapering and nibbed at both ends. Here we're finally all marked up ready to go. During the process of doing the marking I made more executive decisions about whether to cut planks and have them follow the four-plank shift or let them run long, there are several places where it makes more sense to let them run. I then made a big pile of holly planking that is exactly 4.04mm wide on the Byrnes saw.
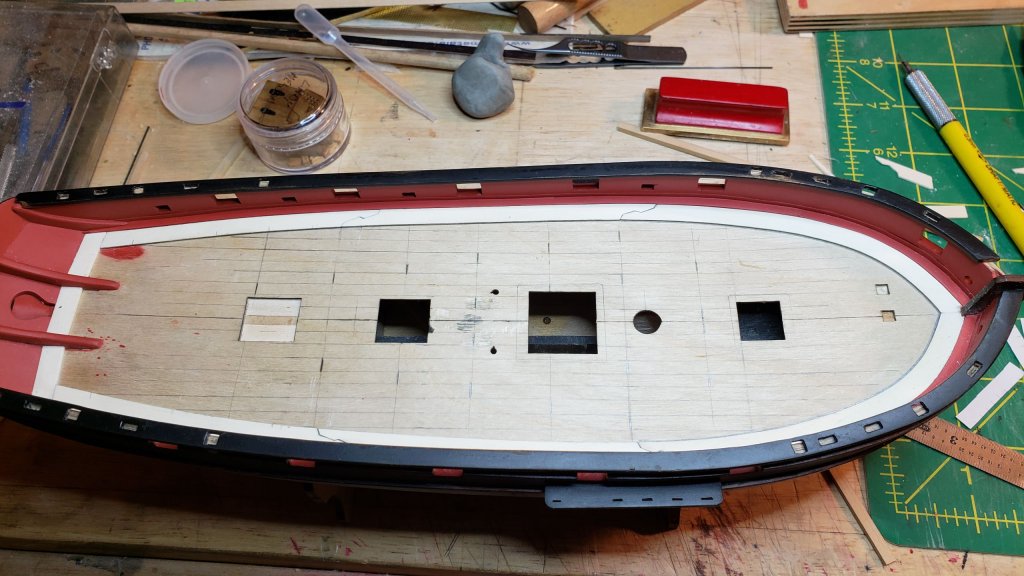
To make the lines between planks consistently visible, I found I had to blacken both sides of the plank joints, and run CA glue down between the planks to enhance the line.
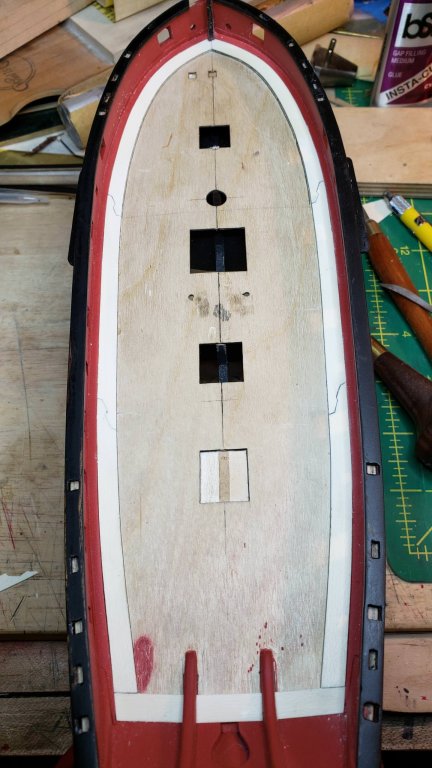
Exactly four planks between the stanchion thingies.
Speaking of which, why are those not glued on last? They're in the way the whole build and you end up dinging them and retouching them a number of times. And when it comes to deck planking, it leaves a very fiddly fitting process.
Coming along now.
- Rick01, JpR62, Tigersteve and 10 others
-
 13
13
-
I am confused about the deck planking. I though nibbed plank ends were only on the bow, while on the stern the planks tapered as long as they didn't taper to less than half their widest width. However I have a drawing of nibbed plank ends showing it done on both bow and stern of what looks like a cutter, with the planks running dead straight and no taper. Can someone explain what is correct?
-
I used the polycrylic on my LN, and just found it doesn't adhere well to anything- I had to mask off the ship to spray the bulwarks and it came off in many places with the tape, even over bare wood. Hopefully you have better luck.
-
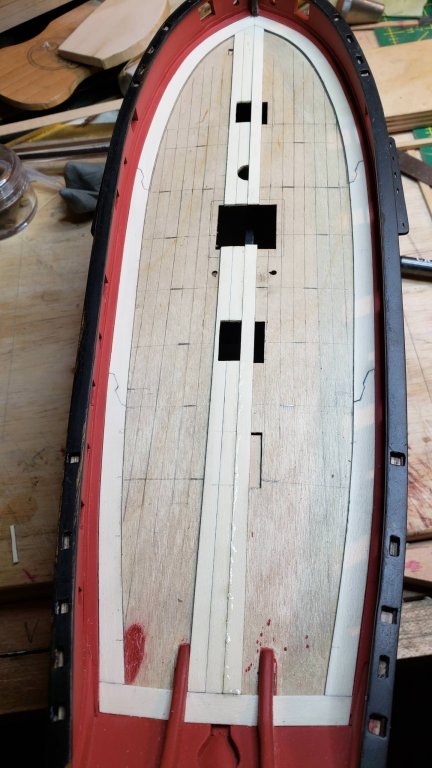
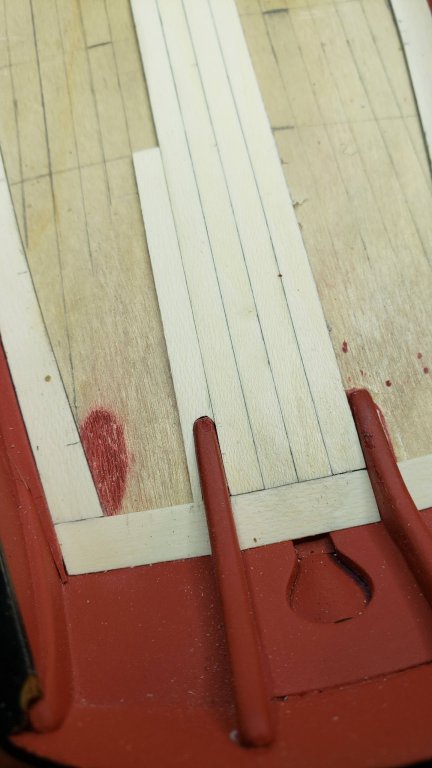
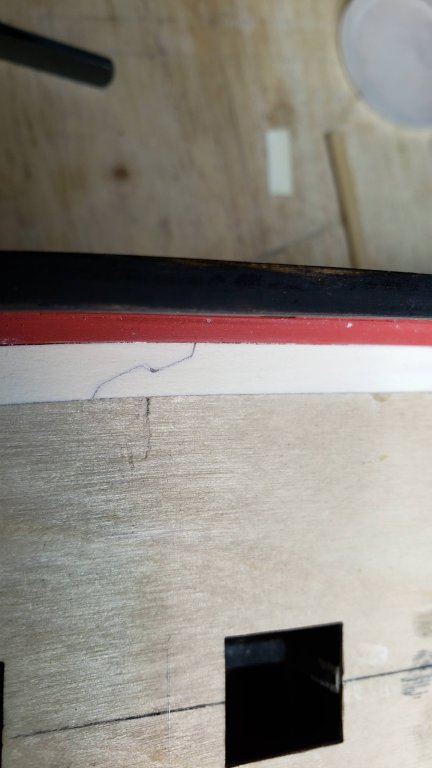
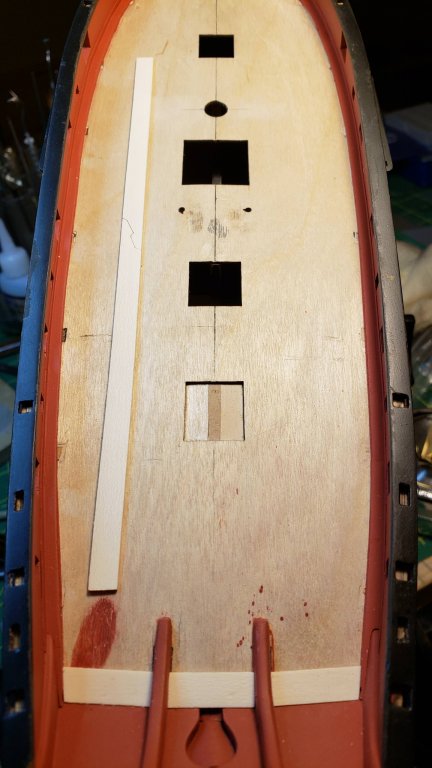
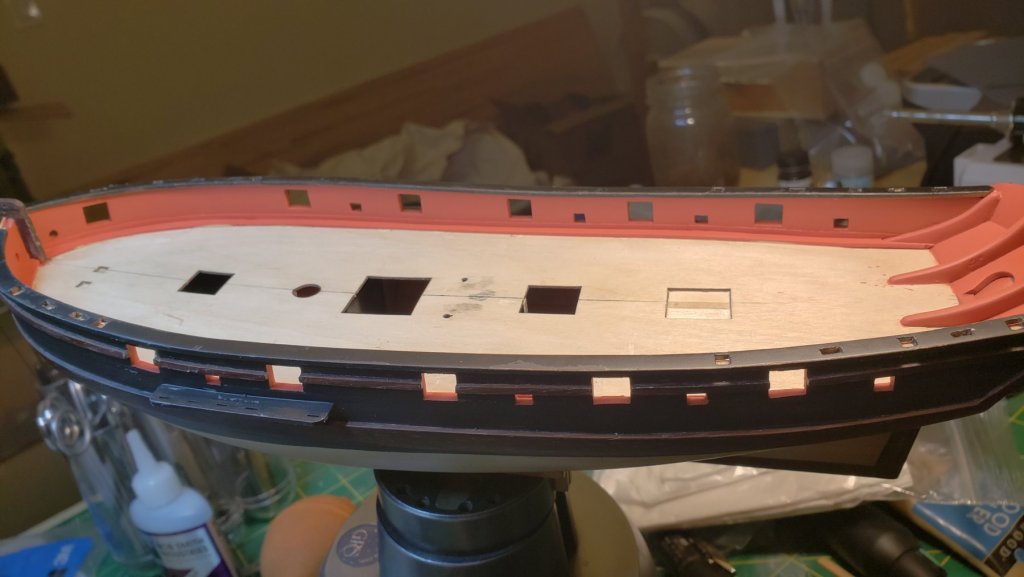
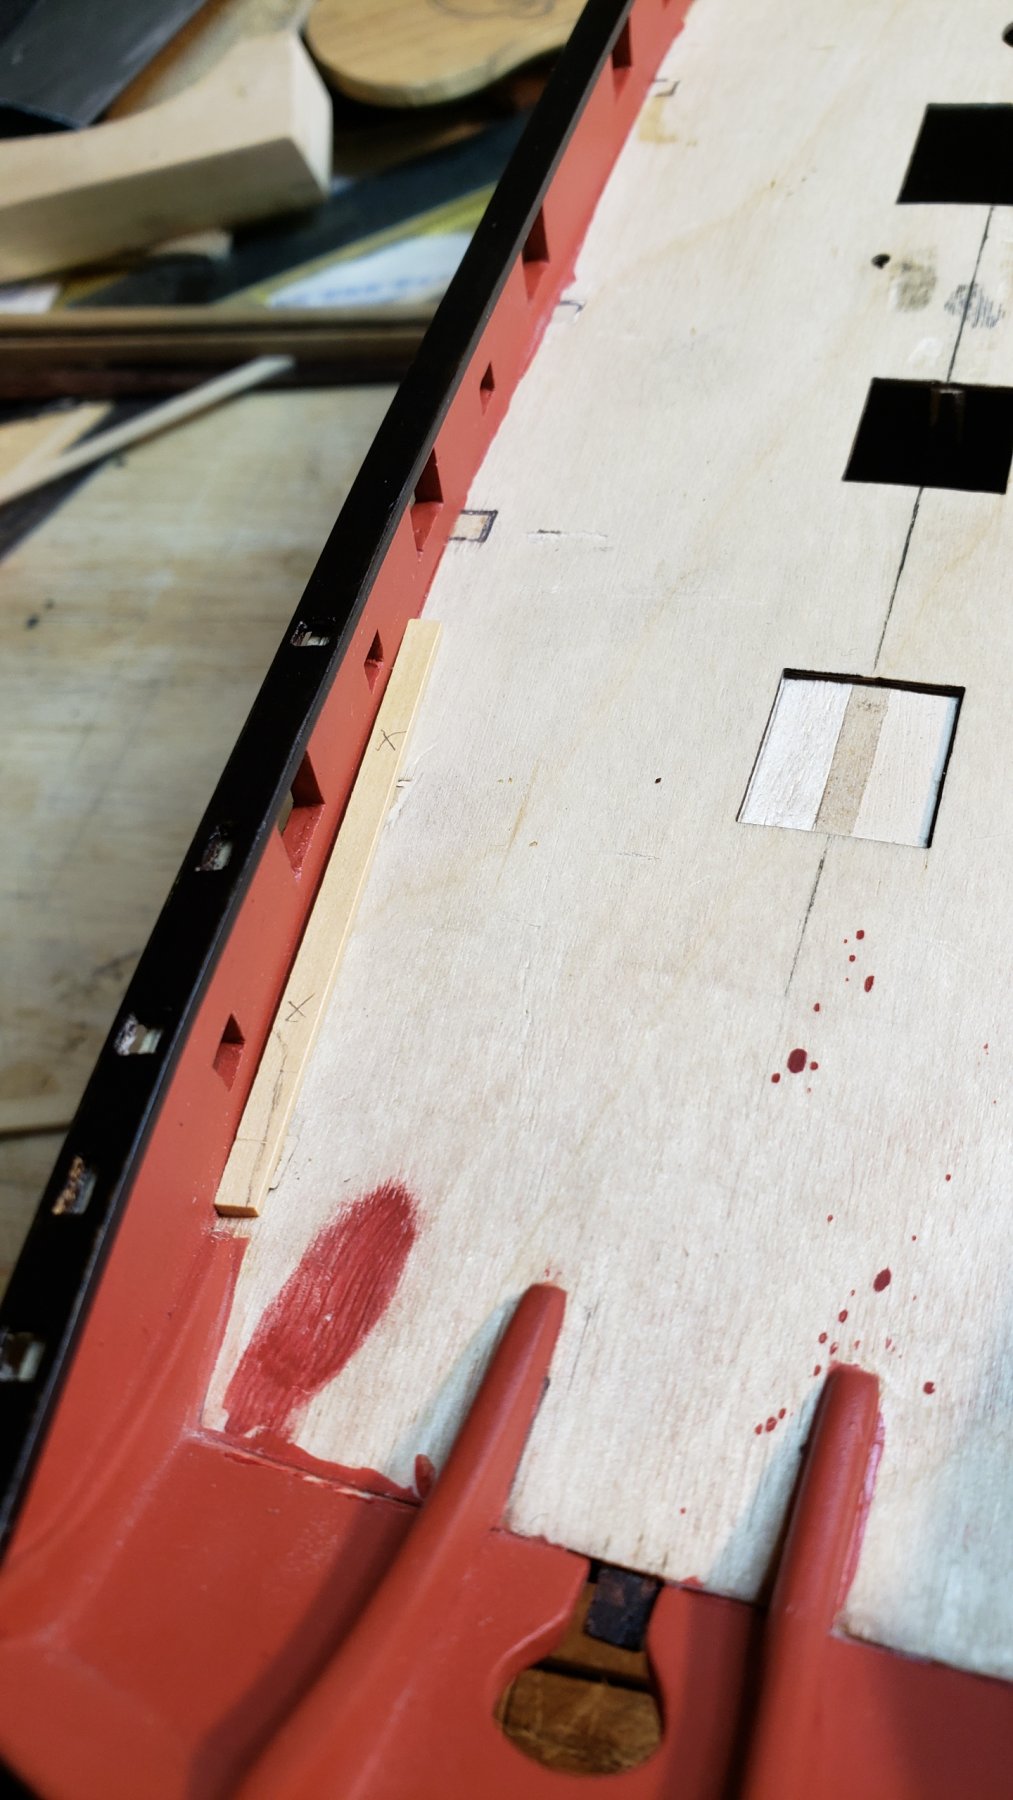
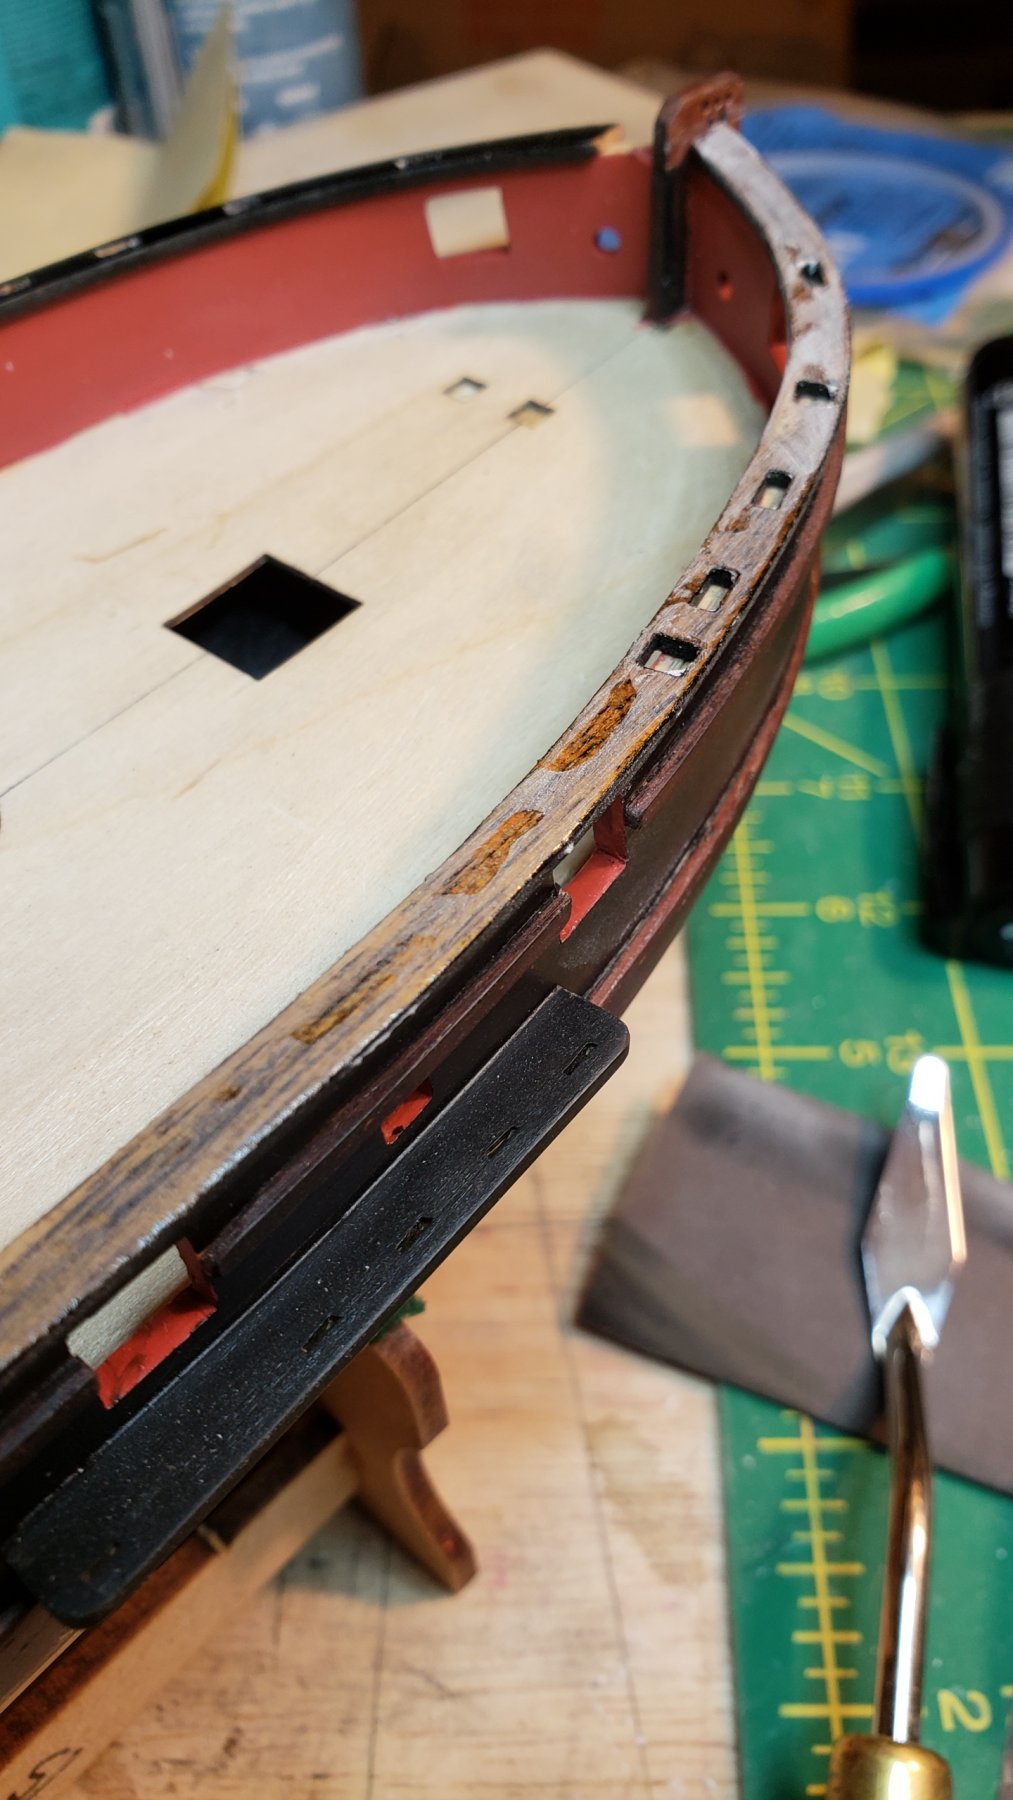
Work crises interrupted the shipyard for a couple days, but I did get the margin planks finished last night.
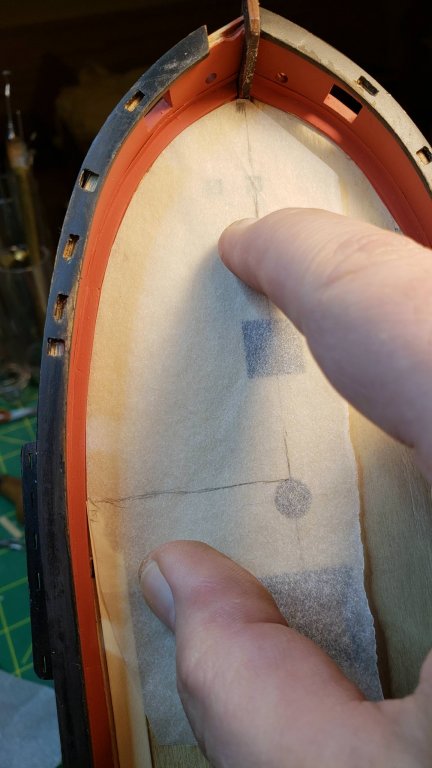
Picking up where we left off, I had the outer curve on the bow margin plank. To get the inside curve, I used my digital calipers as a marking gauge again, something I do regularly- in this case set it to 6mm, lock it, and run one jaw along the outer curve while the other scribes a fine line. I then run a pencil down said line to make it easy to see, and a few light passes with a knife and we're done with just a few seconds of sanding the inside edge required.
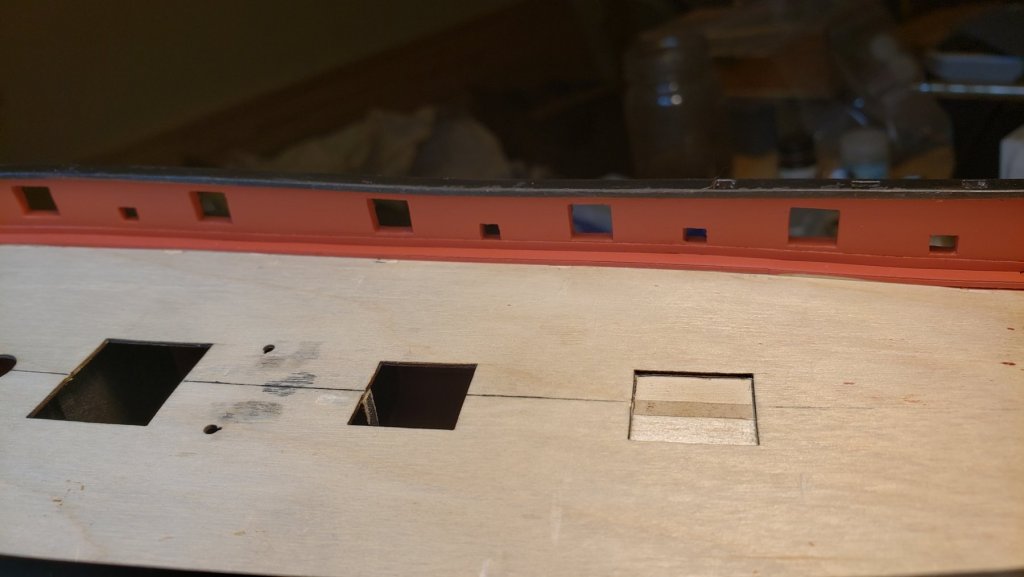
This is where we enter a good lesson on how not to think your way through a process. On the first side, I started by gluing the stern piece in first, but as I later realized this was the wrong end to start with. By doing it this way I ended up with no "out" on the final joint between the middle plank and the bow plank- the far end of the bow plank was already done so I had to mark the last joint and cut to those markings with no second chance. Here are the three port planks dry fit and glued- I got ok close with the final joint but not better than that, which didn't make me happy.
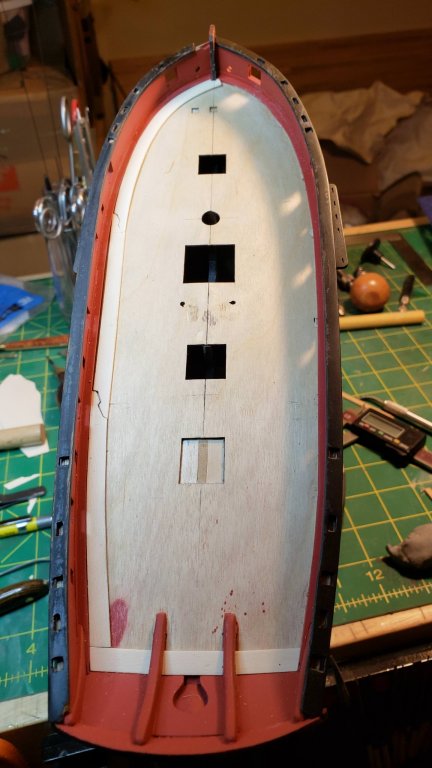
So for the starboard side, I started on the bow end and that was better, but unfortunately I had faced the scarf joints in the direction that made sense starting from the stern, and I couldn't reverse them since the port side was already done. The problem was that the joints faced the waterway, rather than facing the center of the deck- so for the starboard side I had multiple tries, but dry fitting and especially gluing were made much more tricky by having to fit the new piece in between the waterway and the previous piece. If I'd thought this out right, I would have started at the stern and reversed the direction of the scarf joints, that would have made this process MUCH easier.
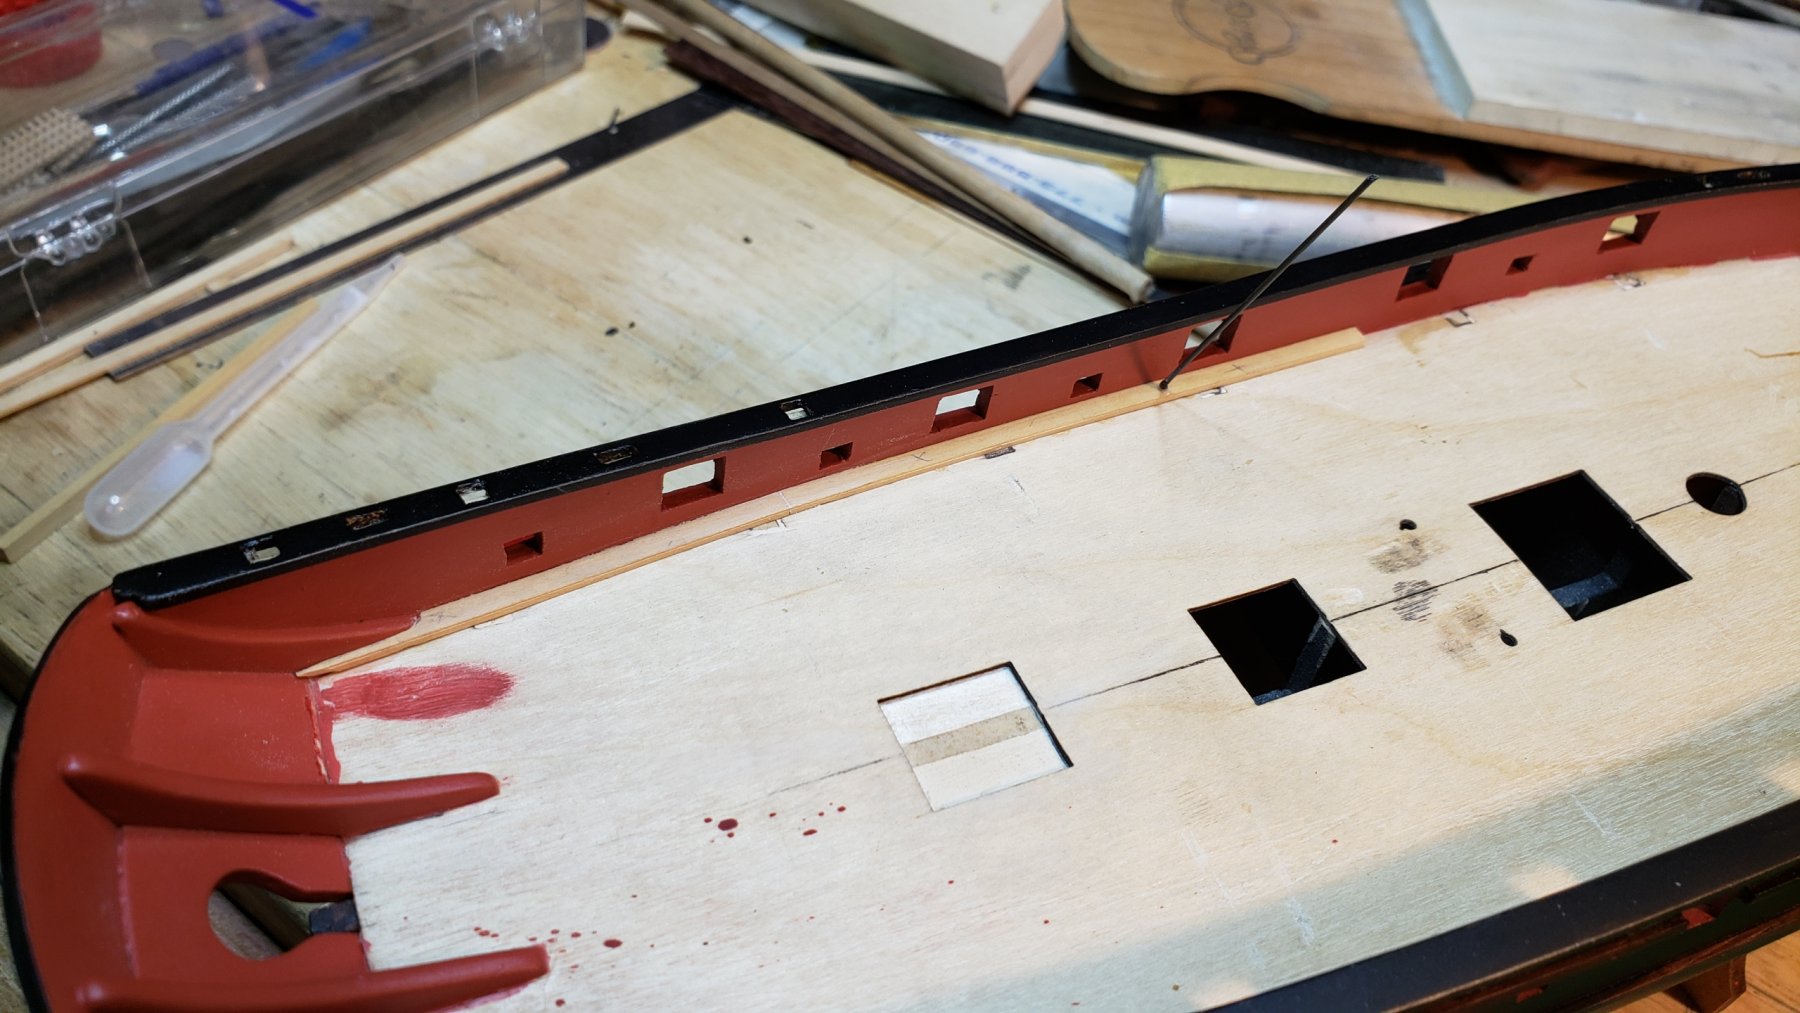
Done now.
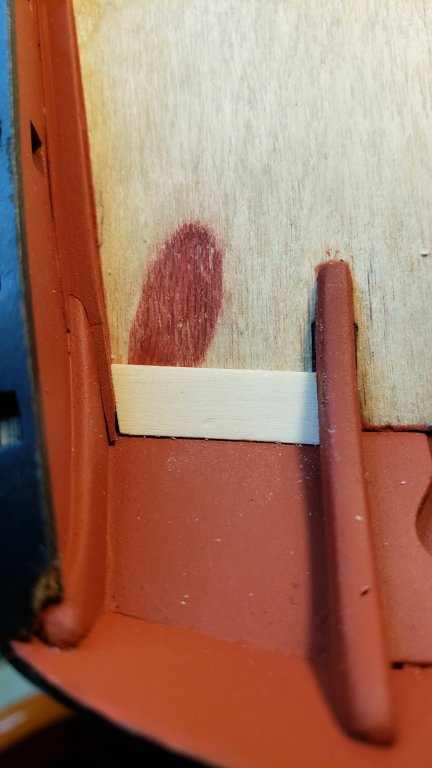
And as noted, the joints are ok but not nearly as precise as I would like. The first one was perfect:
But the rest weren't so perfect due to my poor planning.
Now I'm trying to think my way through the rest of the deck planking. Hopefully I will do a better job of that than I did here.
- Fright, src, Landlubber Mike and 7 others
-
10
-
Bob is disgustingly good at rigging, I realized that with his Granado which was before the Prince and the Essex. He makes it look very easy and straightforward, like he throws a pile of line at the ship and they all magically orient themselves and suddenly the standing rigging is done. I figure I'll ship my Lady Nelson to him because he could do in four days what would take me 6 weeks to figure out, and his version would be better.
-
1 hour ago, BANYAN said:
Nice work Vossie; looks good.
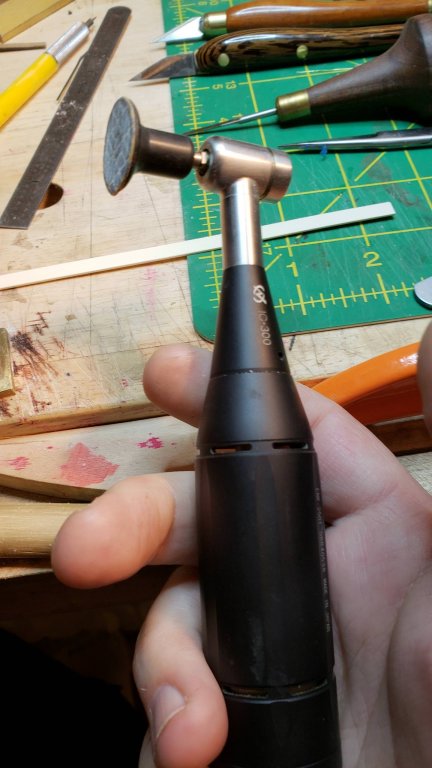
I have a micro-motor with a 90 degree attachment but it has one of those swivel clamping levers at the top; does yours have that too? If so, then I am assuming you need the specialised accessories (sanding discs etc) to suit? Again, if so, where did you get your from, my searches are restricted to a few drill/cutters and the like.
cheers
Pat
The standard Evolution handpieces have a lever lock, but the 90 degree attachment does not. It uses a collet key thing which is the only drawback to the tool I'm aware of, it's slow changing burs but I have a second Evolution handpiece that I use for burs, so this one at least for now stays in this configuration as I use the sander constantly.
I shop at Artco Tools because they're a professional supply shop for die sinkers and patternmakers and engine guys who do porting and they have everything to do with rotary tools. If you already have a micromotor and a 90 degree attachment, all you need are the disk sander mandrels and the PSA sandpaper circles. You can find the mandrels here and the sanding disks here. Artco also makes their own sanding disks that last longer than the NSK ones that can be found here. They don't quite fit the NSK mandrel sizes, but not enough to be problematic.
I suggest you poke around their store, they have lots of things interesting to ship modelers. Another one you should have in your arsenal if you don't already is rubberized abrasives in at least 1/8" size so you can chuck them in the micromotor. Think pencil erasers with abrasive grit embedded in them, they're extremely useful for removing metal and polishing metal pieces, they're used very commonly by jewelers polishing jewelry after it comes out of the mold. Since they're like pencil erasers, you can also shape them pretty easily, I just run them against a piece of sandpaper. Otto Frei has a pretty big selection also.
When using my mini disk sander, I brace my elbows either on my knees or the benchtop with the handpiece in my right hand and the work piece in my left. I then brace the heels of my hands together, leaving only the fingers holding the work piece moving, and I look at the disk from the side with it slightly off-axis from my eyes for obvious reasons. When braced this way, it's amazing how much fine control you have and it does feel like you could just strip a few molecules if you wanted to. Every one of the hull plank ends that all turned out near perfect were done this way, and it really isn't all that difficult.
-
Get some files, and you're going to need wood carving gouges to thin out the gunwales, generally that is done by cutting straight down with a shallow-curve gouge. Same gouges would be helpful carving down the hull also. If you want to be successful you'll need to invest in at least some of the tools you see people using here- ship modeling can be accessible or it can be extremely difficult depending on what tools you have.
-
You should also read the build log of an active Sultana build:
-
What tools are you using? Some aggressive files or rasps are good for removing most of the waste. You should also check out the new build log from Mr. Bluejacket himself of Red Jacket. He just started a few days ago and is busy carving down a much bigger hull than you have, and it would be a very good idea to ask him the exact process he follows while doing so.
-
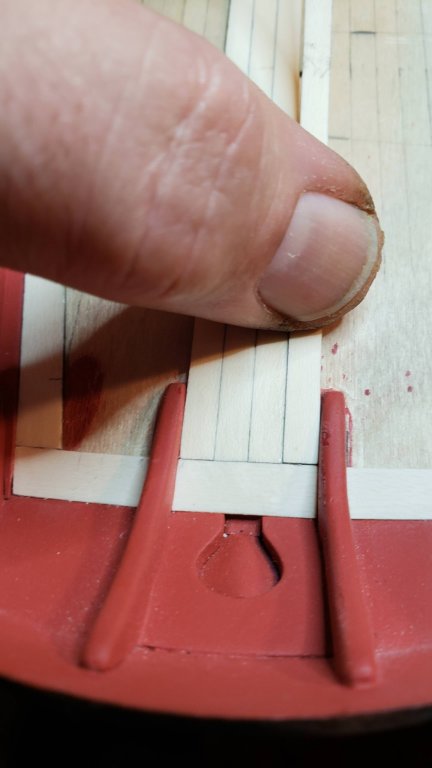
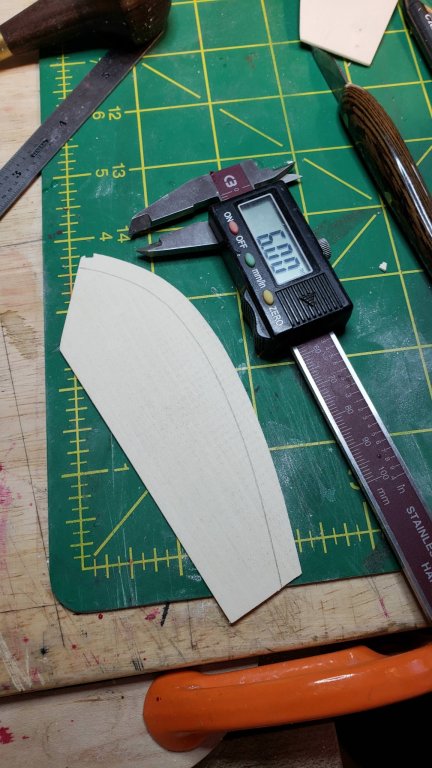
Some progress on the margin planks. First, guess how wide the margin planks are.
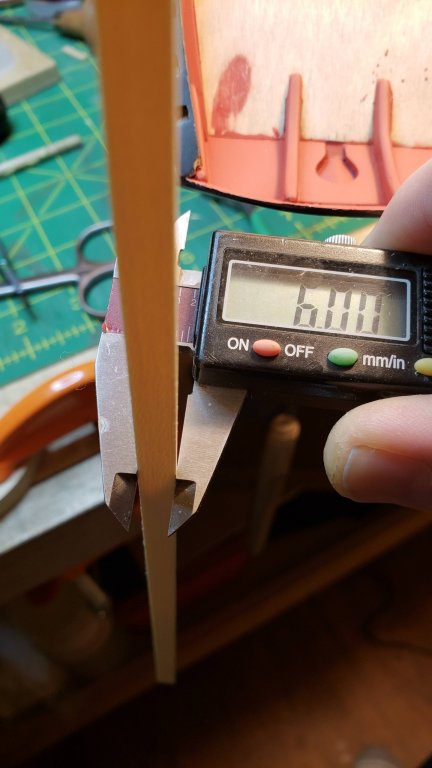
While I'm at it, I know it's quite expensive but the NSK Evolution micromotor with the 90 degree attachment is something you really want if you build ships- it's a handheld disk sander and you can chew through half an inch of endgrain wood on a plank or remove a few molecules to refine a fit. It lets you set two angles at once and the output is a perfectly straight edge. It's pretty much the perfect tool for fitting the ends of planks on ships, so if you can somehow get it on a Christmas list, do so. It will speed your work considerably.
It makes getting a fit like this a lot easier than it looks.
I decided on a 6mm margin plank as that leaves me exactly 36mm on each side, so I can make my planks 4mm-4.01mm with 9 a side. It might have been 5mm but I really didn't want to make 4.138932mm planks.
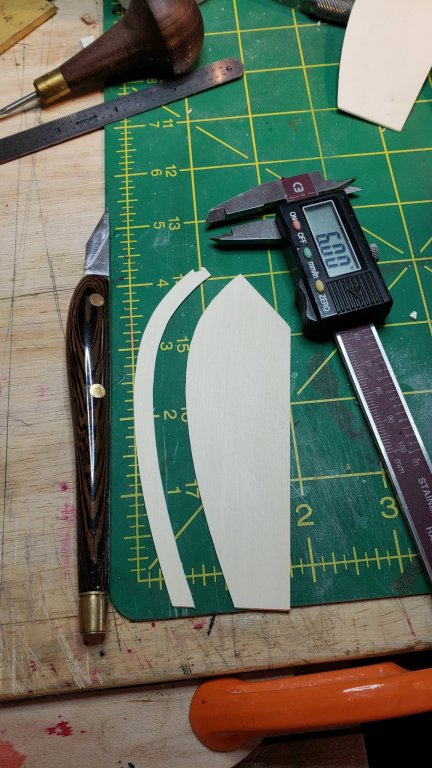
Also decided on three planks for the margin with scarf joints. I blackened the edge with a 4B solid-graphite pencil.
Test fitting the first scarf.
The middle plank.
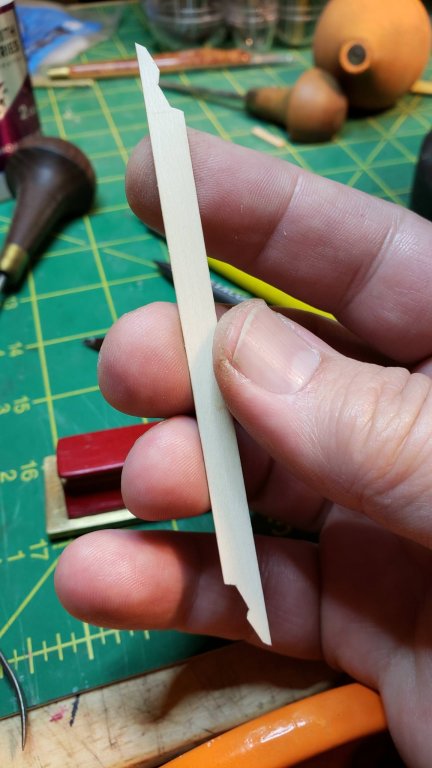
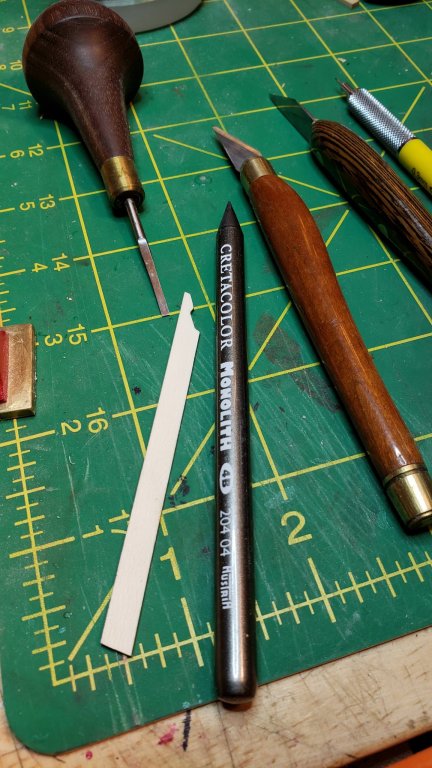
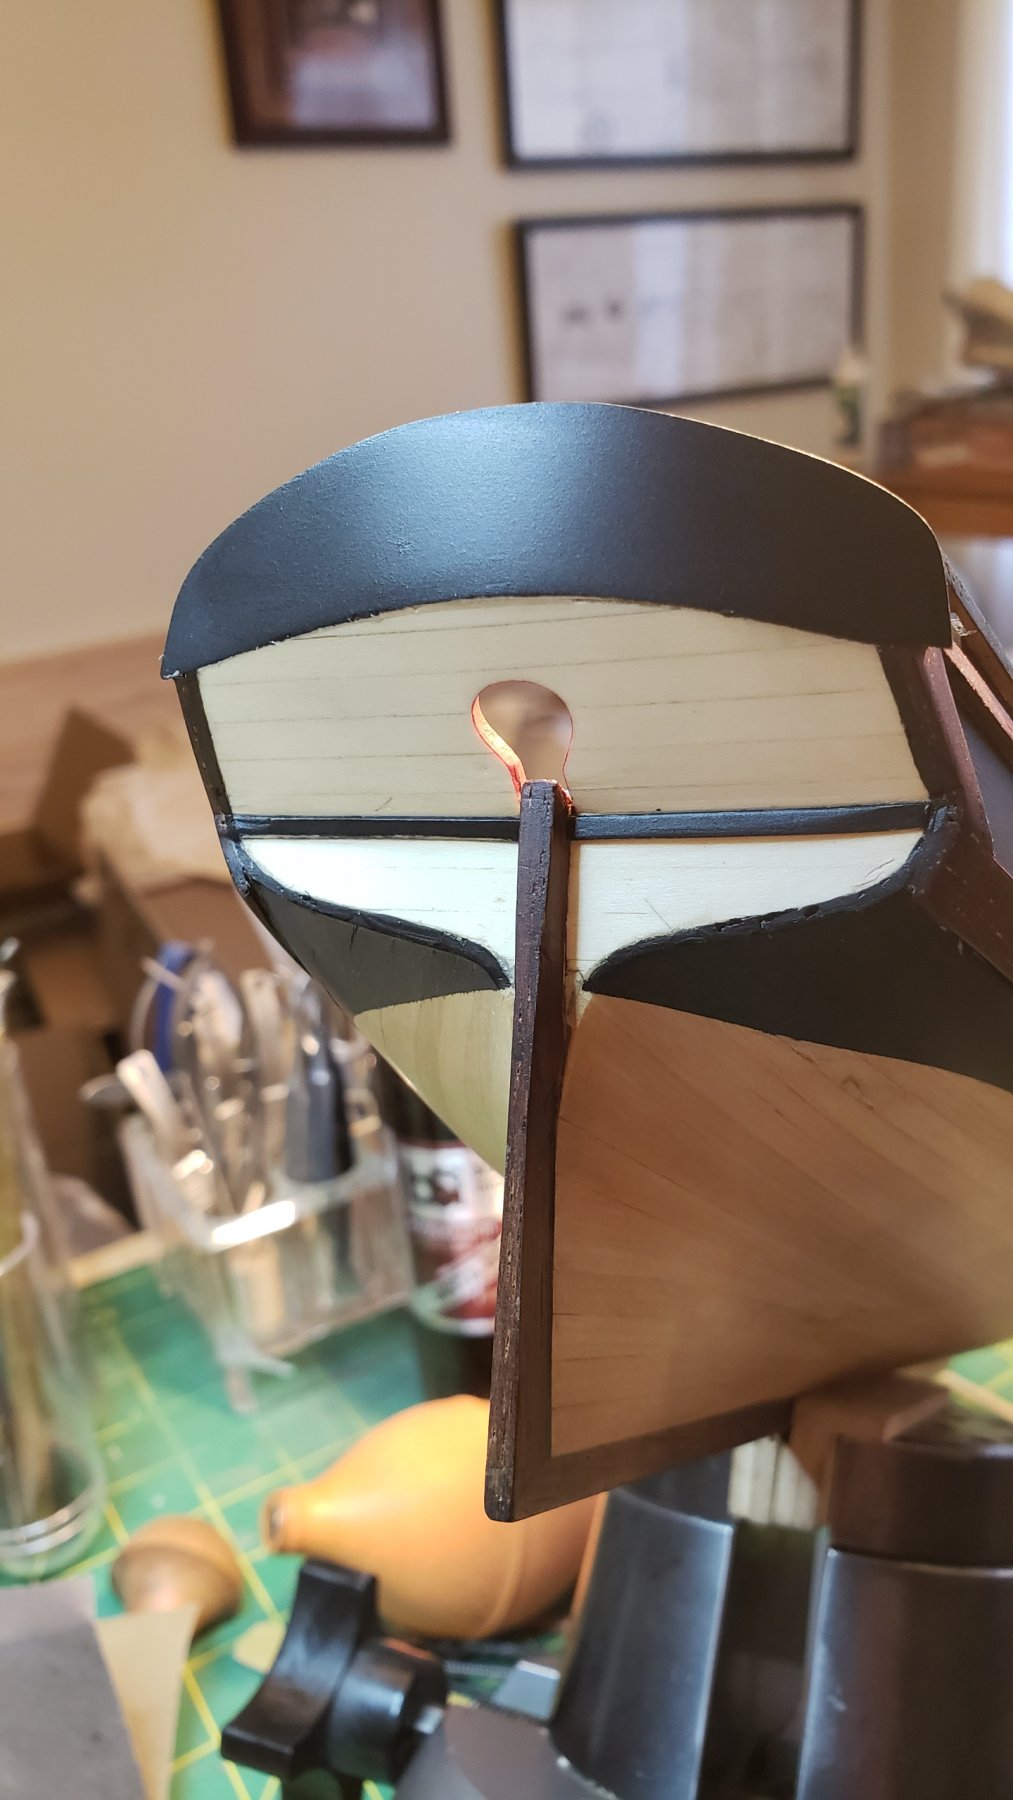
I see no way to bend these planks for the bow so I'm spiling the bow plank. I started with a paper template.
And transferred that to a piece of holly, some disk sander work and hand sanding, we have a pretty good fit. I knocked off there, tomorrow I scribe the other edge and cut the scarf and then move to the other side.
-
Good luck Andrea, you're in the right place to ask questions, there is tremendous knowledge in this community.
As for your stern, I assume you need to work the hull down until your template fits. That will mean removing some material from the sternpost area.
-
53 minutes ago, Rick01 said:
Here's a shot of a working replica of a 53' topsail schooner pin rail.
Thanks!
-
3 hours ago, Rick01 said:
You know you'd have been pretty mad with me if I'd let you carry one and lay the deck without the waterway. 😉 Whilst we're at it - have you thought about making the deadeye with 5 holes for the mainstay? Not needed for a while I know but just thought I'd ask!
Rick
Of course I would have, it should have the proper planking. But that wasn't going to stop me from looking for scapegoats when something went wrong!
")
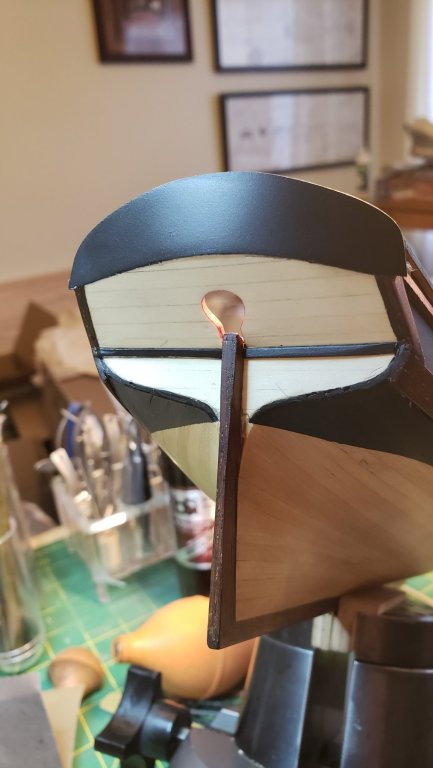
I put five holes in the stem, I think the first thing you told me a year and a half ago was that the stem needed five holes and that meant a five-hole deadeye and for some reason I haven't fathomed yet, you think making the deadeye is going to be super tricky. Generally small is not a problem for me. I remember making a 1/48 Albatros D.III, about six inches long, and I rigged it so the control column actually worked and moved the control surfaces. And then there were the 1/32 cockpits with every knob and switch and indicator light. I can't see that well anymore without help, but I have lots of experience with small and fiddly. In fact I'm very likely here to build some 1/200-1/600 ships, and if I scratchbuild a ship it's also likely to be small. I may get one of those engraver's microscopes with the 10" working distance to facilitate that work if I do go that direction.
- Rick01 and popeye the sailor
-
2
-
Four months... are you sure you're not an alien with say three extra arms growing out of your back? Either that or you didn't sleep for four months? I'd love to see a video of you working on it, there would have been just a blur of arms and tools and flying wood chips
It's beautiful, have never seen that quality achieved with such incredible speed.
-
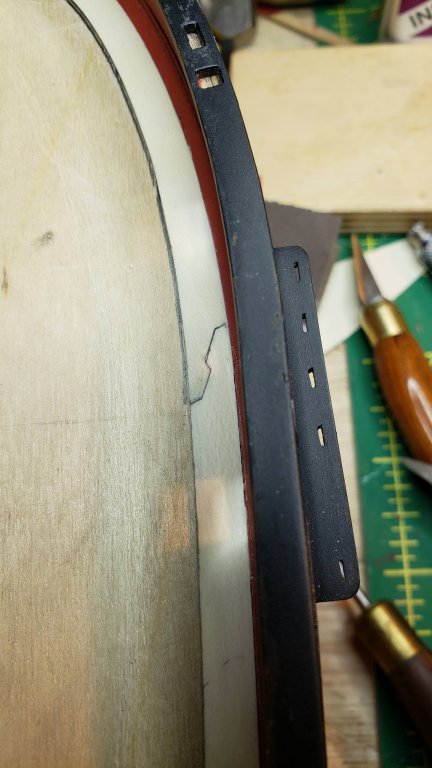
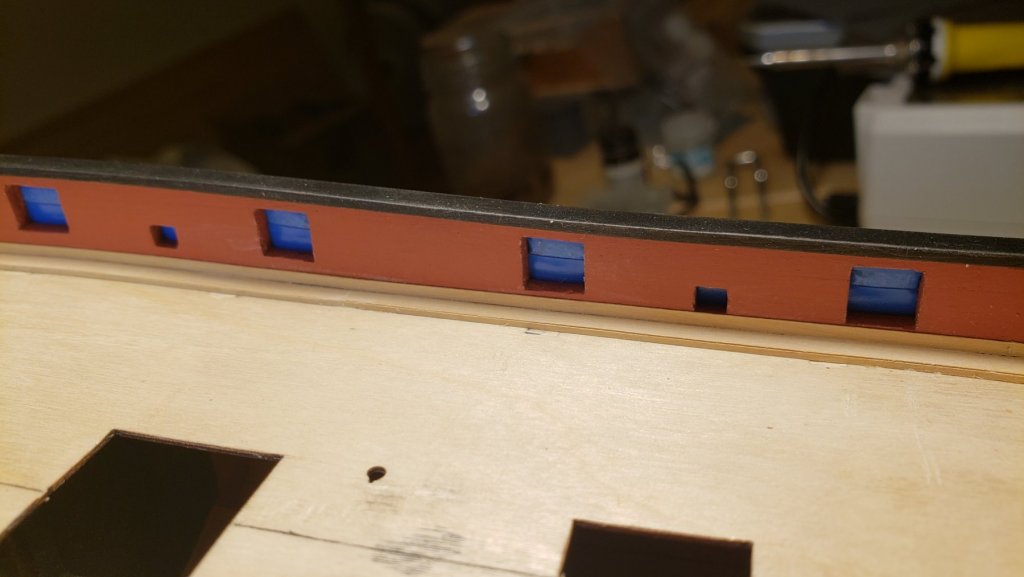
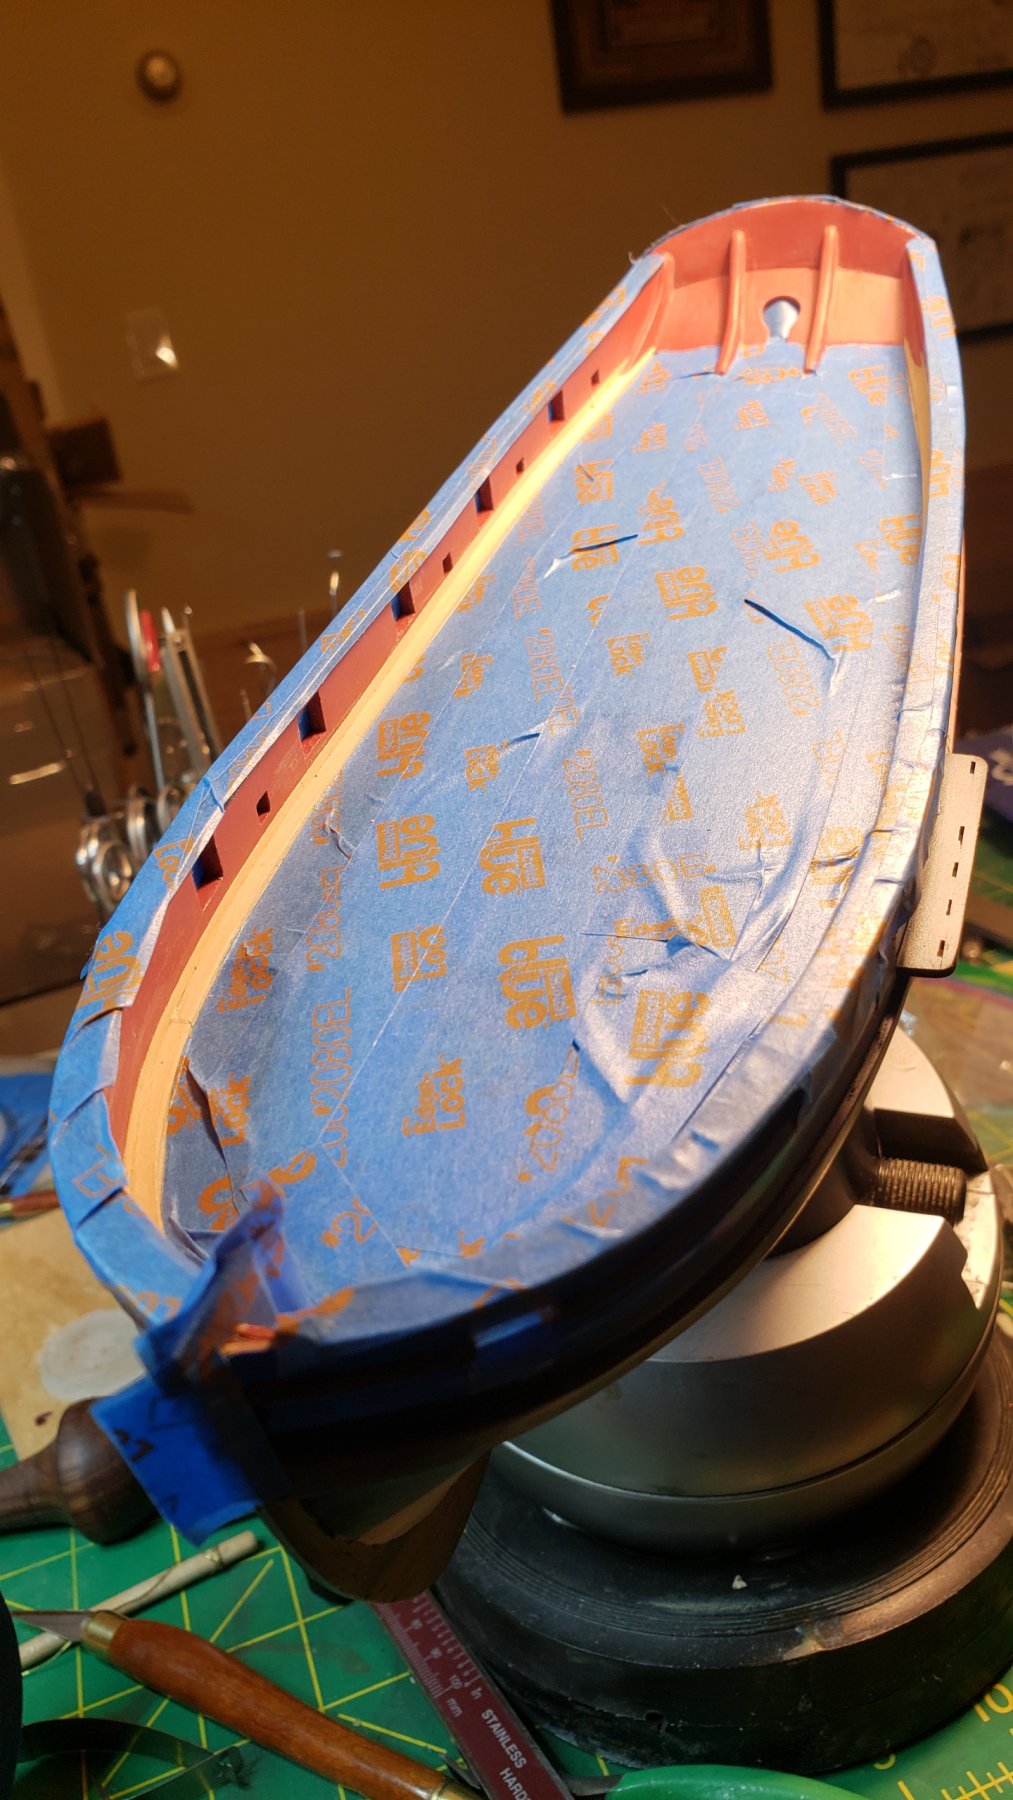
Then the next steps forward and back are all Rick's fault, because he totally twisted my arm and forced me to put in the waterway and spirketting before going ahead with deck planking. My arm is barely attached to the socket from all the twisting.
And it went basically fine, except my spirketting strip turned out to be thinner than I really wanted, but it still looks ok. The problem occurred when I masked everything to spray the red- it turns out this clear finish is adhering none too strongly to anything. It's not the black, it lifted from the raw cocobolo too.
Not really sure what to do. Switching finishes won't help much at this point as it's still the bottom coat everywhere and may induce compatibility issues. All I can really do is remove all the lifted sections and spray more coats until it disappears, and then know this finish will fall off if you look at it sideways. Regardless it will be a lengthy process to fix the damage.


- BANYAN, Haliburton, DORIS and 5 others
-
8
-
Thanks Rick, that is noted and will help me as I have no idea how to tell if a pin rail has the pins too close. I see several variations on pin rails also so I assume it's ok to have more than one.
Thanks Popeye
Two steps forward and at least two steps back.
Starting with forward, I spent a couple evenings fixing some things I wasn't happy with. One was the cap rail, I thought the open grain of the walnut would be ok along with the open grain of the cocobolo, but under black it looked terrible, like the sailors wasted time by carving huge gouges out of the rail. So I sanded it down, squeegeed a couple coats of CA, sanded down, re-blacked and resprayed the top coat. The stern just got sanded down quite a bit before refinished.
.thumb.jpg.982ef2b3ed6077a4fda3f75db868cdb5.jpg)

- Fright and popeye the sailor
-
2
-
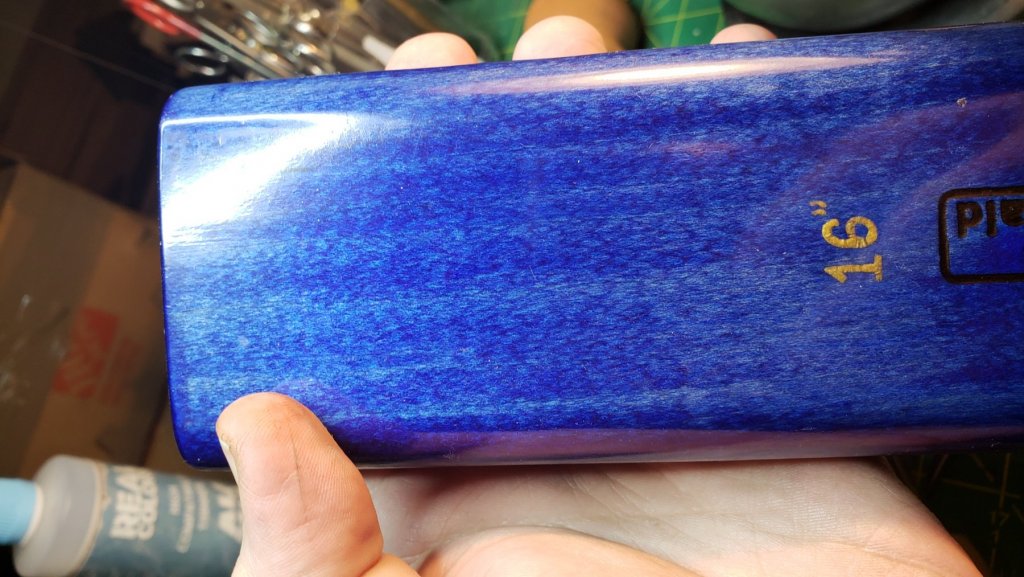
Then you'll definitely fall in love with aniline dyes, it's what guitar companies use to dye their guitars because it doesn't obscure the pretty grain of their quilted tops at all. Another thing I like is that although it looks like it penetrates, it doesn't- the color is right there on the surface. So if you dye something and you don't like the output, a couple of minutes with sandpaper and it's all gone and you can try again. If nothing else it saves on test pieces.
I generally apply with a rag, wait for 30 seconds or so (with alcohol solvent things move quickly), and then wipe excess, I find you can get some weird surface effects if you just spread and leave it on. Repeat until you get the tone you want. You can even generally go back lighter by wetting the surface again and rubbing it immediately and if you do get some undesired effect it's also solved by rewetting and wiping.
Below is a neck radius sander on which I used aniline dye.
-
13 hours ago, john_weiman said:
Peter, I managed to obtain different color grades in walnut, and used stain to get the final colors. The blue is a mix of Saman water based stains to get the right shade I wanted. I never use paint on wood. The top coat is oil based from Minwax (Natural). Golden Oak, Ebony was used for the hull sides, and mix of Dark Walnut & Provincial & a touch of Mahogany to get the lower hull shade.
Regards, John
If you're using stains to avoid the grain obscuration of paint, you might want to try aniline dyes for their much improved clarity over pigment-based stains, and with a kit of the basic primary colors you can make any shade you need. I use alcohol-based so grain isn't raised.
And by the way, your ship is stunning
-
-
7 hours ago, Tom E said:
Are you going to build up anything around the hull of Bowdoin, like icebergs and the like?
Polar bears on the icebergs!
-
On 12/6/2018 at 6:38 PM, geoffs said:
Still looking at the Marathon micromotor as my next rotary tool and have a couple of questions:
- What method is used to hold the bits? collet or chuck?
- What diameter shaft is used for bits?
I have an NSK but I looked at the Artco page and it says 1/8" standard with a 3/32" reducing sleeve. Usually 3/32" is standard as most burs are 3/32", 1/8" is considered heavy duty for serious wood removal. It looks like it has some kind of keyless collet. That's one thing I like about the NSK's lever collet- flip a lever one way and the bur drops out, drop in new one and flip lever and it's good to go.
-
1 hour ago, No Idea said:
Hi vossiewulf thats a very interesting post and something that I would like to have a try at in the future when I get some more time on my hands. Over here in the UK I guess the most popular knife would be a Swan Morton scalpel as the blades are so cheap. I get 100 blades for about £9 and you can buy a little tool that helps change the blades without cutting your fingers.
I have a question though - could you tell be how to hone a plane blade correctly? I use diamond plates to sharpen them but I have never actually honed a blade before. You mention a strop; is this just like a leather belt?
Honing is just refining an already-sharp edge, and generally speaking you use a strop or a high-grit polishing stone. The idea is sharpen once, keep it sharp many times with the strop until the edge starts to get dubbed over, then you go back and sharpen again and reestablish the bevel. So if I started from a dull edge I would use my 1000/4000/8000 stones to resharpen and then a strop for the final polish. I'd then just use the strop on the edge for several weeks until the edge starts to get rounded over, at which point I sharpen again.
Strops are made from many materials, one is leather. My favorite is an artificial pad that uses aluminum oxide powder, but most people use leather strops with chromium green stropping paste. Just go to Lee Valley or Woodcraft (or a good similar retailer on that side of the pond) and search on strops, you'll find both the strops themselves and the recommended paste.
Also not sure whether you're talking small planes and small blades or full-sized ones. Full-sized plane irons generally are sharpened with a slight curve across the edge, so the corners are maybe .003" curved back from the center of the cutting edge. This feathers the edge of the cut of the plane and prevents marks made by sharp plane iron corners. The best way to do that correctly is to use the Veritas Mk.II sharpening system from Lee Valley with the barrel-shaped roller, that makes it easy to rock the iron slightly as you're sharpening, relieving the corners.
-
3 hours ago, Bob Cleek said:
Your knives above are real works of art and warrant the investment in a good blade that will hold an edge for a good long time. I think the reason it's hard to get people to use "real knives" as well as other edged tools, is that sharpening and maintaining a good cutting edge is fast becoming a lost art. Time was, (as some of us remember well,) every boy owned his very own pocket knife by age seven or eight and was carefully instructed in how to properly sharpen it. It was practically a rite of passage. Now, it's common to see guys pay hundreds of dollars for Lie Nielsen planes and then go out and spend hundreds more for fancy electric "sharpening systems" that promise instant gratification without skill or experience.
The thing is, sharpening my knife up there takes me a good solid 15 minutes, and I only have to do it about once a month because it's a Ron Hock blade that holds an edge forever. Only steel I know that holds an edge longer is the PM-V11 steel from Lee Valley.
Sharpening small plane irons takes no time at all, either. I would recommend people get Shapton Glass Stones in 1000 and 4000 grit plus a strop of their choice and they're set for life sharpening everything from full-sized plane irons down to little carving knives. I've been using some Shapton stones regularly for over 5 years and I see no meaningful change in flatness and they still remove steel faster than anything I've ever seen, including diamond, so I'm thinking they're going to be still working fine 20 years from now.
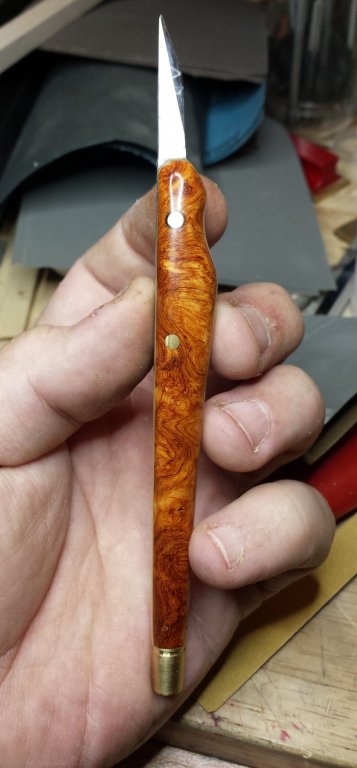
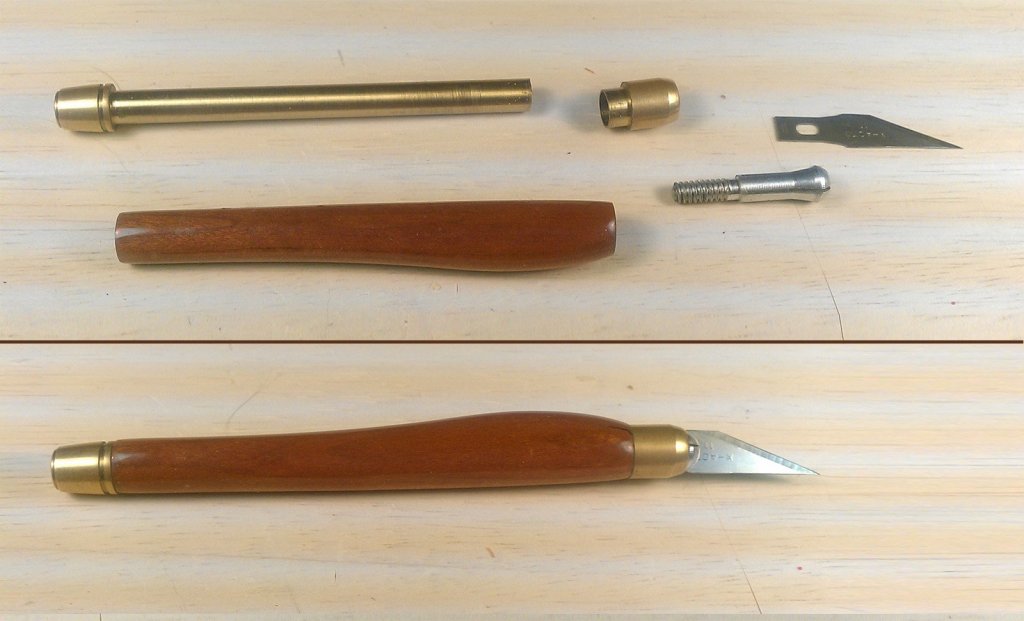
Anyone here who can build a ship can make a pretty knife. All you need is:
- a drill press that can drill a 3/16" hole accurately
- some 3/16 brass rod
- Epoxy
- Knife and sandpaper
- Large bottle of thin CA glue
- Blade with pre-drilled holes
Check link below, scroll down to Violin Knife Blades. Buy the middle one. Take a piece of nice-looking wood and machine it down to handle-size and then rip it in half. Mortise each side of the handle to 1/2 the depth of the knife blade, with the back of the knife edge lining up with one edge of the handle. Basically you want the knife's "back" to be one straight line from handle to point.
http://www.hocktools.com/products/knives.html
The tip angle is a bit less than typical X-Acto, if you want to refine that, just use a bench grinder, regularly dipping the blade in ice water. You don't want any part of the blade to get warmer than warm to the touch or the temper will be ruined.
Cut brass rod pieces that are just a tad too long, drill the holes, and test the fit.
Epoxy everything, tap the rods through the holes in handle and blade, and clamp the hell out of it. After however long, declamp and start shaping the handle. If you have an oscillating spindle sander, that works well here. I don't, and what I do is take out one of my other knives and I just start carving the handle down. Round it fully with files and rotary tools and sandpaper, and then sand the handle out to 1500 grit or so so it's very, very clear and clean. This controls how pretty the grain looks under the crystal-clear CA glue, so it's worth it to spend a few more minutes and take it out to 2000 grit so the wood looks polished before the finish goes on.
Take a tube of some kind that's a bit bigger than the knife handle and attach it to a base, then mostly fill it with thin super glue. Most of this glue can be recovered if you're worried about using that much glue. Tape a crosspiece on the blade so the handle will be suspended in the thin super glue tube, and dunk it in there, ensuring all the wood is under glue.
After 10 minutes or so, take it out and let it dry, but do NOT set it aside- you have to work the finish right now before the CA glue fully hardens. If you do it now, you can work down the super glue to a smooth finish in little time, working from 320 grit up to 2000. If you let it fully harden, it will take quite a while and you'll go through lots of sandpaper getting there.
If you want super-bright gloss finish, take some Novus Plastic Polish Fine Scratch Remover and buff the handle. Once the glue fully hardens, the handle and its finish are almost indestructible. Mine have been rolling around on my bench for years and hardly show a scratch, the biggest "dings" come from accidentally spilling CA on them, I then have to sand them down again.
The brass end-pieces I add are there not just for looks, but to move the knife's balance point back to just ahead of center, and to increase its mass a bit. This improves control and feel. If you want something similar, you'll need a lathe and some 3/8 or so brass rod. I just Mark One Eyeball them, face the end and use files to taper them. Once tapered, I use a parting tool to add the little reveals. Feel free to be creative, all you need is about the right weight in brass, the shape can be whatever you like.
All in all, several orders of magnitude less tricky than planking a hull
- No Idea, thibaultron, Canute and 9 others
-
12
-
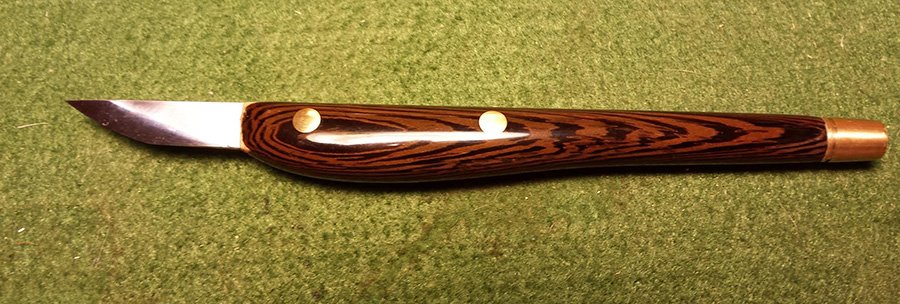
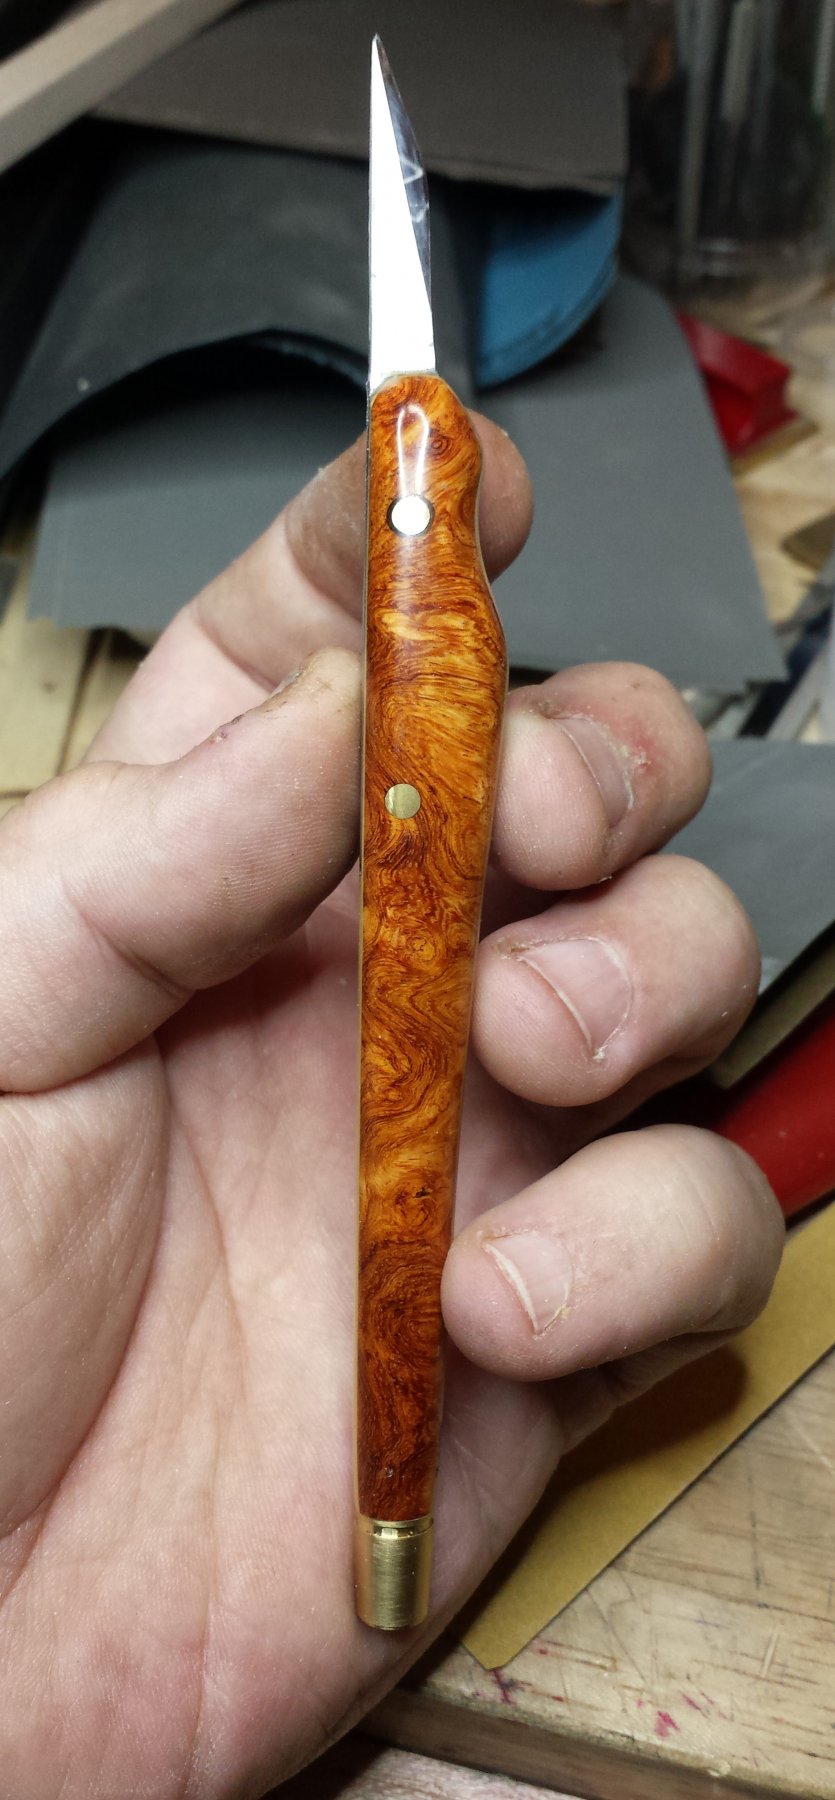
I wish I could get more people to convert over to using real knives with Rc62 blades and learning how to sharpen them instead of using X-Acto
X-Acto blades aren't very sharp by knife sharpening standards, their steel isn't very good and probably Rc55 or so (so they lose an edge very quickly), and they're very thin and weak and as such can only handle very low-stress cuts. A real knife is so much more capable.
There are many makers of carving knives, just buy one that is in the $25-$35 range and you'll stop using Xacto. Well that's not quite accurate, I still use an X-Acto knife (a replacement I made), but it's only there for cleaning out glue and scraping things, the tasks I would rather not use my good knives for.
Below is my X-Acto and my main knife.
- mtaylor, John Allen, thibaultron and 5 others
-
8

.jpg.4cc98d6f9eb9bba36d2b4acae9472789.jpg)


French 74-gun ship by matiz - scale 1:56 - Tiziano Mainardi
in - Build logs for subjects built 1751 - 1800
Posted
When you're amazing Amalio, you're hovering somewhere above Valhalla in model ship-building skill. Truly stunning work.