


vossiewulf
-
Posts
1,477 -
Joined
-
Last visited
Content Type
Profiles
Forums
Gallery
Events
Posts posted by vossiewulf
-
-
When it comes to colors, look at what Backer said above - colors should either be red/yellow if it was painted in Spanish colors (semi likely on his Caribbean adventures) or green/white/red if it's wearing English colors. I'm pretty sure we have a reasonable amount of evidence to show that Spanish and English warships at least adhered to those colors, with geometric patterns common. I think the patterns are pretty wide open to interpretation but the colors less so. Unless you just prefer it otherwise, in which case you paint it as you like it and move on.
-
Ah yes, thin CA glue is for special purposes. The most cost effective thing to do is go to Amazon and get a 8oz bottle of medium CA glue. This is a bit thinner than gel but gel is rather expensive, you'll go through that little Loctite bottle in no time. Put the big 8oz bottle in your refrigerator, it will last a very long time.
Then get tattoo ink cups. You can get 500 for $15. Drill the right size hole in a 3"x5" piece of 1/2" plywood or something else about that thick, this will keep you from ever spilling a cup. When you're ready to work you pour some from the fridge supply into a cup, after a few days you toss the cup and grab a new one.
The best and cheapest glue applicator is some 24 gauge brass wire. You want something relatively thin for when you need precision. To control how much glue you pick up, you can either dip the straight wire or add a small loop in the end, the bigger the loop the more glue you'll pick up.
Do not try to smear it on surfaces, it's messy and is likely to cause the glue to start to set before you're ready. Instead, apply it in dots with spacing and size such that you never get squeeze out, you've made a mistake if it ever squeezes out. By placing it in dots, you're minimizing the glue's exposure to both air and the surface it's on, minimizing the rate at which it will set. Glue applied this way has a much longer open time than you get smearing the glue.
-
Thanks Pat and Jorgen
")
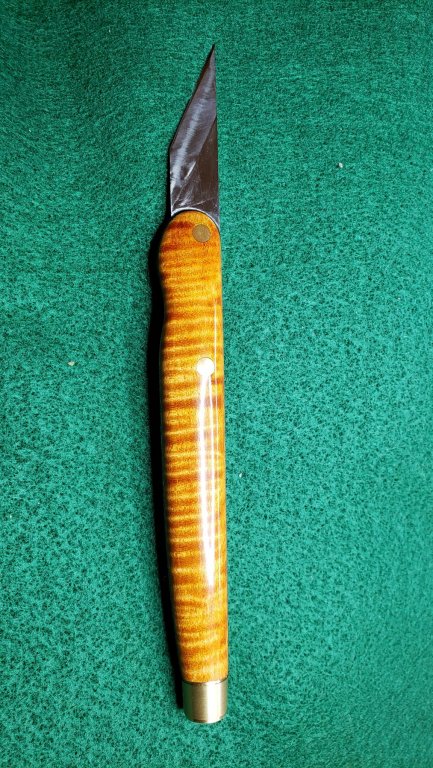
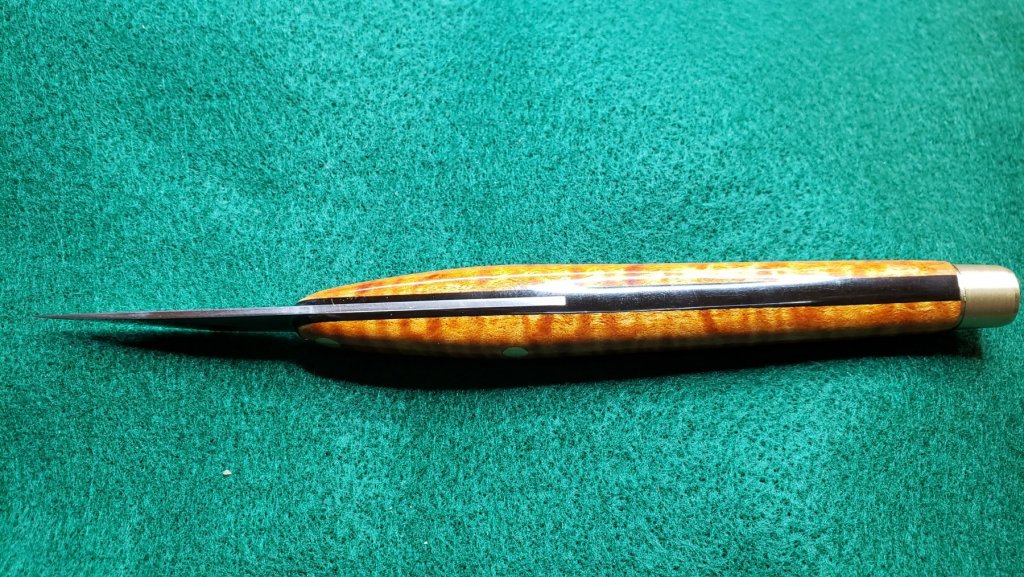
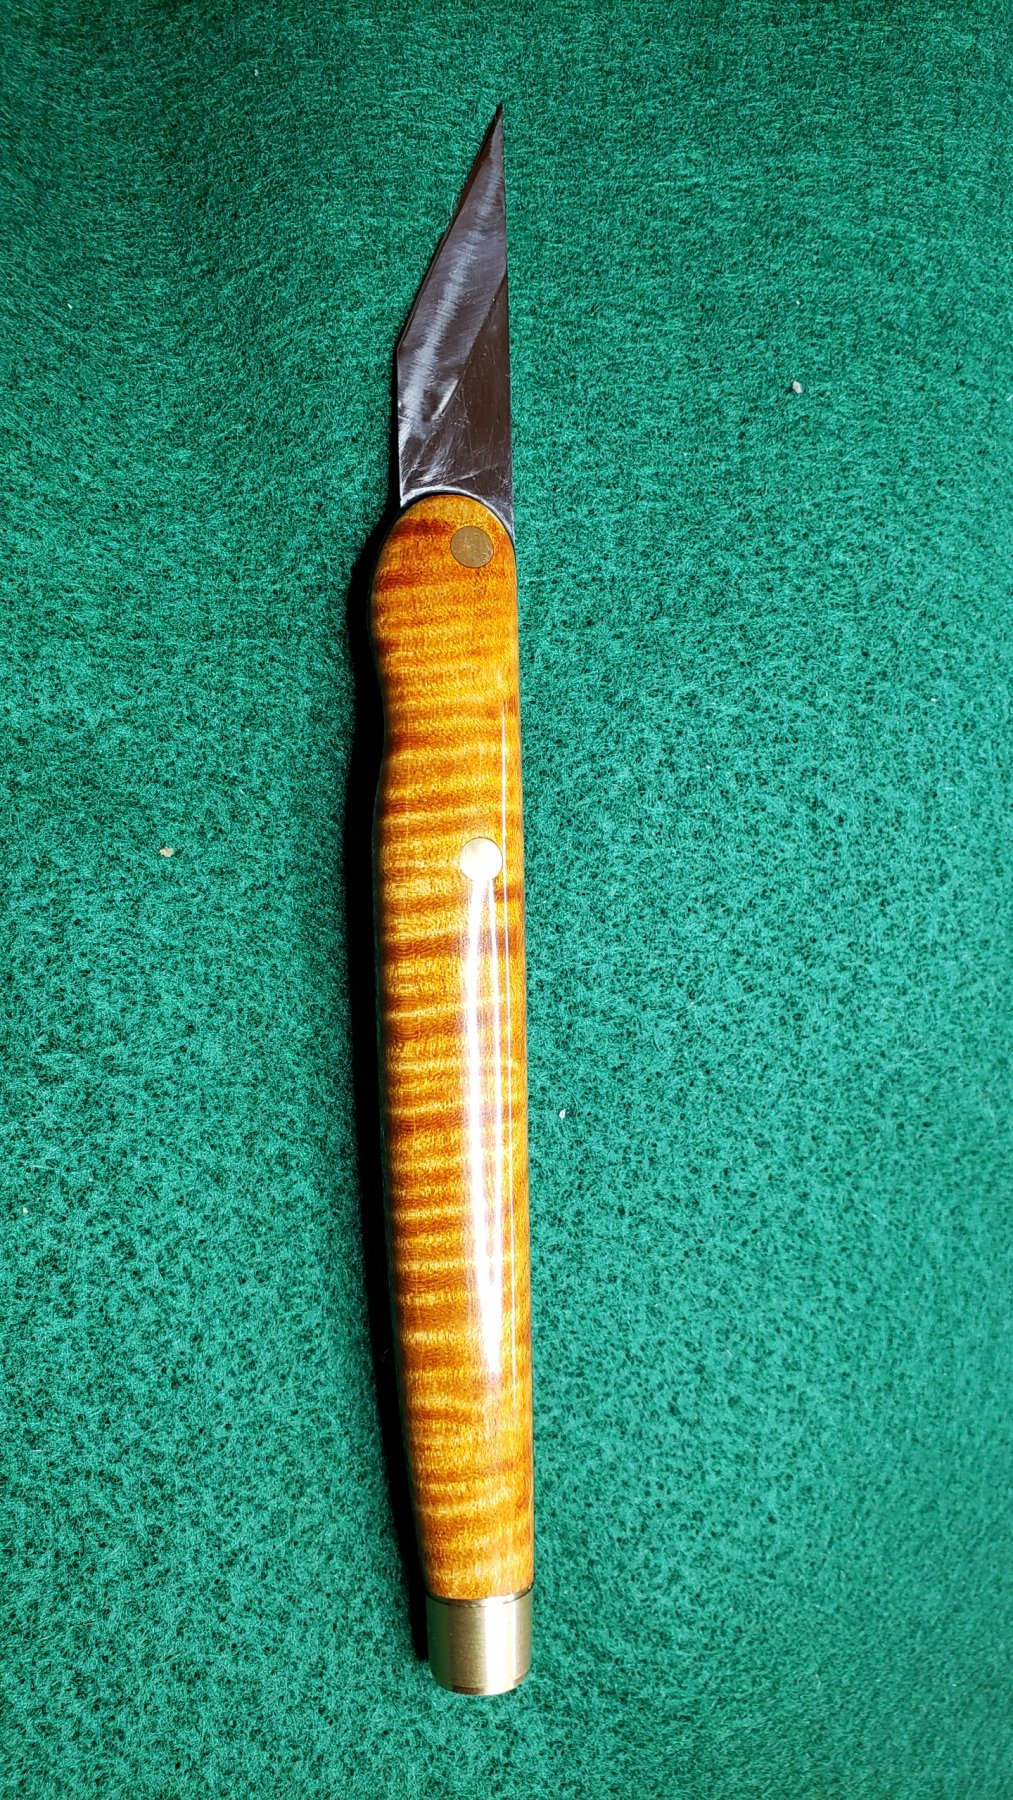
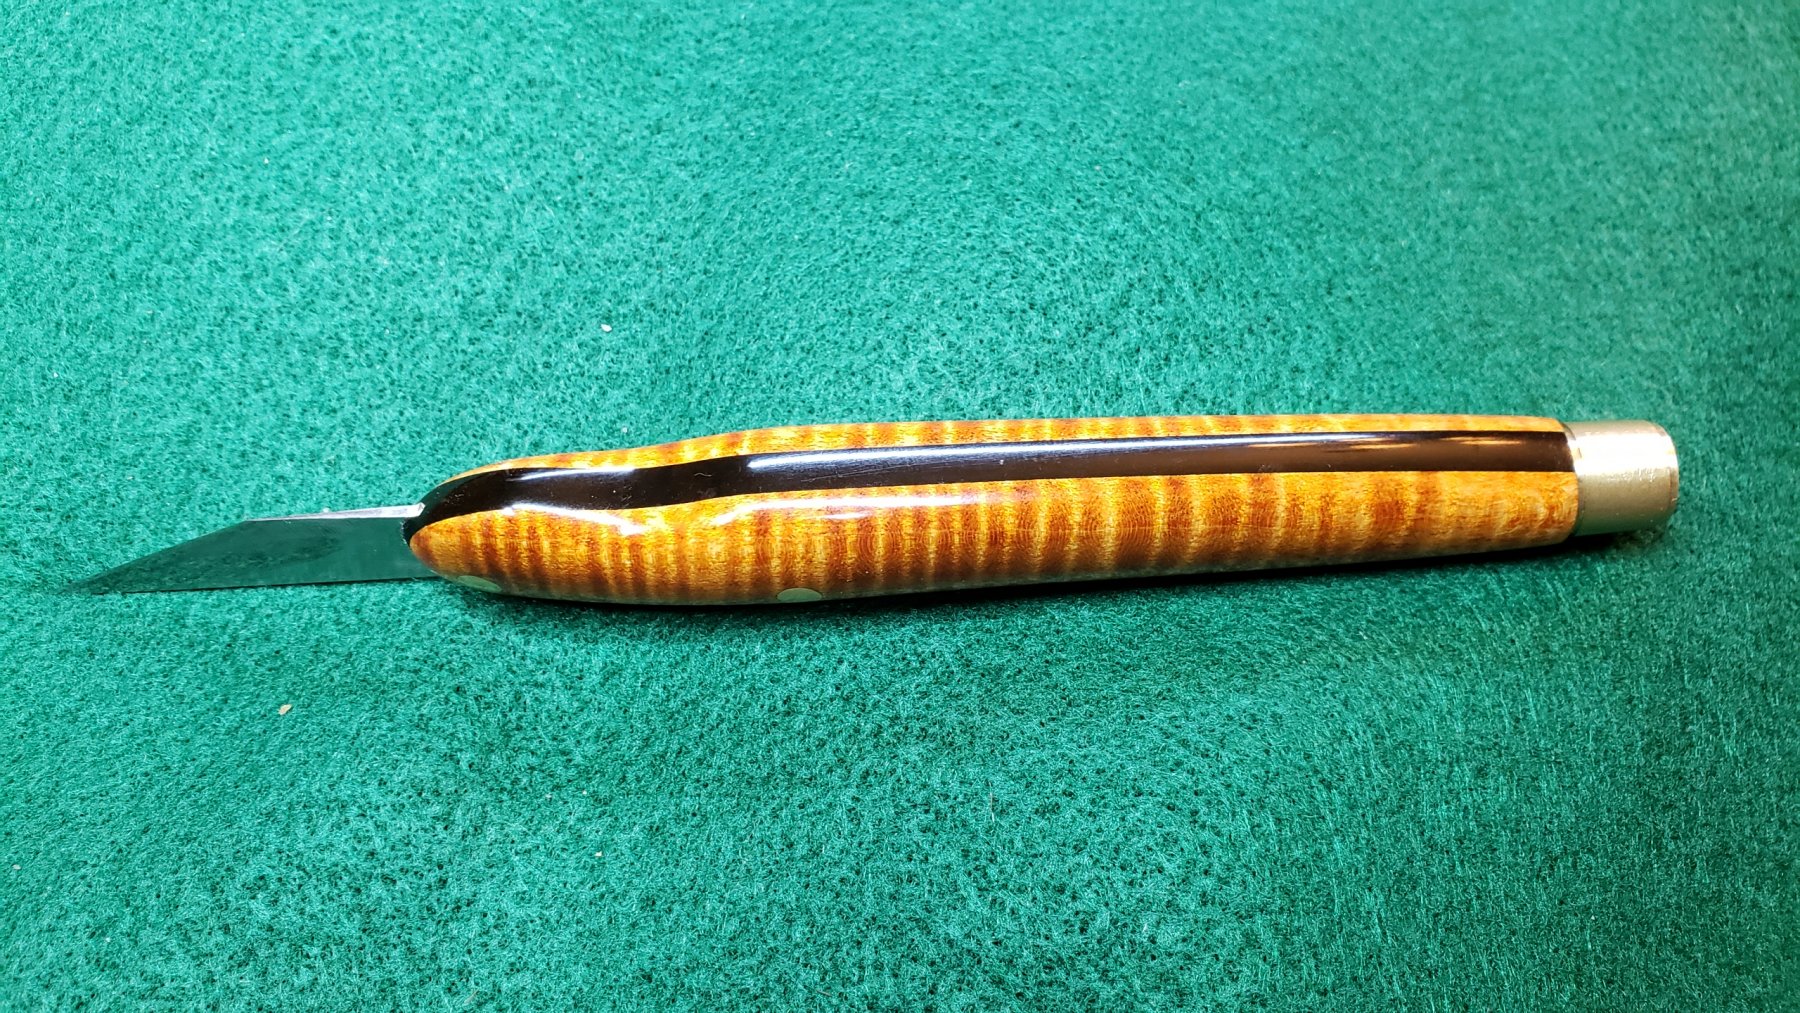
I mentioned I stopped for a few days to make a knife for Gaetan, he's now received it so not spoiling the surprise. It's curly maple and macassar ebony, although the ebony is suspiciously black. But it weighs a ton like ebony and machines like ebony (rock hard) so who knows. The blade is a Hock blade that I had forgotten I had.
It's considerably bigger than the knives I've made for myself, but then again Gaetan is building a 1/24 74, maybe I should have made him an adze.
.thumb.jpg.62fc901c18795db37354874c145e17c2.jpg)

-
Did you steam the planks first Mark? That's generally accepted as the best way to bend planks, although some people just use a hair dryer. The only point is to get the wood hot enough that the cells become somewhat flexible.
And trust me, I've seen worst first efforts at planking a ship than that, it looks fine.
One thing, you need to put a finish on, even if it's just clear oil. The most important function of a finish is to slow the rate of moisture exchange in the wood and thereby mitigate the extremes of shrinking and expanding from changing humidity. Your ship won't last very long at all with no finish, whereas it can last decades or centuries with a good finish.
Your list of improvements sounds great, you have the idea now- it's your ship and you don't have to accept just what the manufacturer gave you, you can do better in lots of places. And yep, that's an exciting feeling
- pontiachedmark and BETAQDAVE
-
 2
2
-
Also, guns worked the same then as during the 18th century, and that means the gun crew had to be able to move the gun into and out of battery for firing and loading, they had to be able to control the azimuth and elevation of the gun, and they had to stop it from recoiling through the other side of the boat when fired. If you provide logical means to do those things for each gun, not even a museum could tell you that you're doing it wrong.
- mtaylor, olopa67, pontiachedmark and 3 others
-
6
-
-
Well I'm probably one of the least knowledgeable people here, but as far as I know we don't know very much about the details of how cannon were mounted and rigged this early. As I recall, the Spanish were still mostly using land-type carriages, and they and the English both carried about 9 different types of guns on board so it's at least a complicated question. Maybe someone else who knows more can step up.
- mtaylor and pontiachedmark
-
2
-
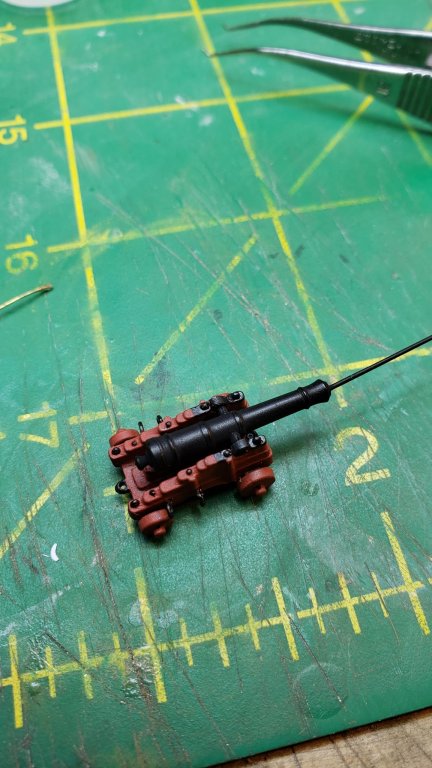
Work on the guns, they're all painted, carriages have breeching rope and gun tackle rings, just need to add the middle piece to the trunnion cap irons (guessing that would be the name). Next they'll be mounted and rigged.
I also took a few days to make a knife for Gaetan, I felt bad about having talked him into knives rather than scalpels and then he couldn't find what he wanted. I'll show pics of that once he gets to see it, it just shipped today.
I used my favorite gun technique of painting the guns with Tamiya XF-1 flat black and then rubbing them down with my fingertip once they are dry. This makes the high points shiny and leaves the low spots flat, much more realistic than dry brushing. I'm not aware of any other paint for which this technique will work.
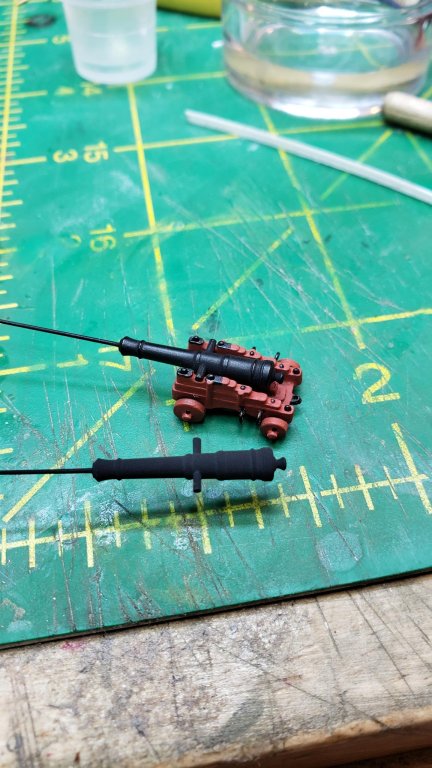
To make the middle piece of those cap irons, I cut a styrene tube lengthwise on the Byrnes saw and then sanded and filed it a bit, slices off that will make the cap pieces.
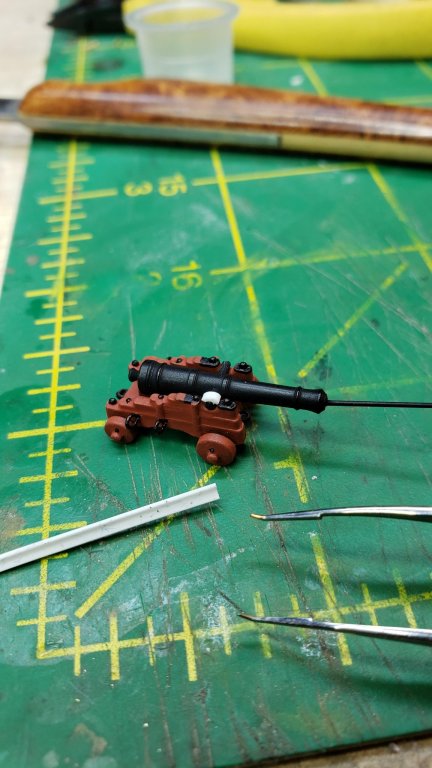
Once the caps are painted and rubbed down, you have to get very very close to see that they don't actually connect with the pieces on either side.
-
I suggest the Master Korabel kits. Every part including the planking is laser cut, they seem to almost fall together with very little effort.
- grsjax, Keith Black, mtaylor and 1 other
-
4
-
-
On 2/24/2019 at 7:08 AM, irishrover1970 said:
Very interesting Vossiewulf. I looked at your link and this stuff sounds like a great idea. Do you mix it with lacquer ? Or how do you use this?
What Roger said except I don't generally let it sit on, I wipe on, clean dry cloth wipe off. Repeat as necessary. Although it looks like it penetrates deeply, it generally does not, and therefore another nice thing about dyes is that if you screw up and don't like the color, grab a piece of sandpaper and it's gone very shortly and you can try again.
Get some mason jars. When you mix a color, you'll never use it all and there's no reason to throw it away, put it in a mason jar, label it, and use it again later. I always mix up enough to fill up a small mason jar, doing that you rapidly build up a library of stain colors and the cost is just a bit of denatured alcohol.
This is just a plain old piece of maple, see how dyes enhance the grain rather than obscure it:
-
-
That looks a little far up the stem to me.
-
1 hour ago, Jaager said:
repeat using a blade with fewer teeth. If that blade also flexes away from the fence, try it with a thicker blade.
Alternatively, you can just slow down the feed rate if doing so doesn't cause burning.
The other day I was ripping some stuff and got sloppy and the saw was trying to kick back this piece of wood at me, but all it could manage was a groaning sound and tugging the piece in my hand a little bit. I laughed and told it not to worry, it would grow up to be a big dangerous saw one day.
-
-
Love the randomized deck planking, very realistic for the period.
- mtaylor, John Allen and Baker
-
3
-
I don't think he'd need to stock both, he could stock the basic kit and do a wood upgrade package on demand, that would be the most efficient. Or again on demand, he could produce a cut-down version of the kit with everything but the planking wood, and leave it to the builder to purchase the wood they need.
If I was setting up as a kit manufacturer these days, I'd try to have as many upsells as possible, and only assemble the kits with the common parts and with each sale pack the right wood and upgrades and ship. Upgrade to brass cannons, upgrade to fancier blocks (Syren), upgrade to better rope (Syren), upgrade to better/different wood, upgrade to add super CNC machined decorations, upgrade to add photoetched parts, and allow the customer to choose. I would think most will rationalize themselves to all the bells and whistles and you make more money than with just a basic kit. The downside is that probably limits you to mail order, but if the Chinese pirates are making it and Chuck is making it mail-order only, I think that's viable.
- paulsutcliffe, Bob Cleek, Canute and 1 other
-
4
-
Very nice work Valeriy, as usual. The thing about torpedo nets is how many ships carried them for... maybe 25 years? And as far as I know, they only did what they were designed to do once, at the Japanese attack on Port Darwin in 1904.
- mtaylor, popeye the sailor, Canute and 1 other
-
4
-
37 minutes ago, Backer said:
Greetings Patrick
Thanks Patrick for the additional info! And your build is beautiful, no matter how accurate it is or isn't.
There you go Mark, you look just a little bit, and you start learning all sorts of interesting things. If you haven't, you should read up on Drake's depredations of the Spanish both in Europe and in the Americas, there was extremely good reason the Spanish hated the man so much.
-
I use dye stains. It's what guitar makers use because there are no pigment blobs, it doesn't obscure their fancy 5A bookmatched flame maple tops.
So go to Luthiers Mercantile Internationale. I recommend alcohol-based as that means no raised grain of the water-based. Get the 6 color set plus maybe a few other browns, with those you can mix anything you like and that supply is enough to last many, many ship models.
-
Mark, search MSW for Golden Hind. There are a couple promising build logs, the one below has numerous links to informational sources on 16th century ships.
-
10 hours ago, mfrazier said:
I was not so interested in historical detail as much as doing a good job on how the build turned out. Now my thinking is changing some in that respect, so my next build will require more thought and research.
This is where much of the challenge is, researching what the ship really looked like and deciding which improvements you're going to make to the basic kit. Just following the instructions is a parts assembly exercise, stepping out of that into making your own better parts is where you'll keep pushing the edges of your envelope.
And when I build something, much of the fun is not the process or the finished product, but educating myself as to how that thing was designed, built, and operated, and how it fit into the history of the technology tree. Ships were the space shuttles of their day, the most complex machines operated by man for hundreds of years. Learning the details of how it all worked is a REAL challenge, and it's fascinating to see the highly engineered solutions they had to problems when they were limited to wood, rope, and pieces of iron.
Many people start as you did by mostly assembling a kit, then they cross into making some of their own parts, then they move on to full scratchbuilding because that's where the hardest challenge is.
-
On 2/14/2019 at 1:12 PM, Fred stickel said:
Any tricks on not getting the ca all over the place.
Go to Amazon and get several hundred tattoo ink cups for about $10.
Drill a hole in a 3"x5"x1/2" or so piece of wood to hold the ink cup. Set in there it will never spill.
Fill the cup with the CA container, put CA container away where you can't knock it over.
Use a piece of wire with a loop in the end to apply the glue. Cut off and make a new loop as necessary.
Apply the CA in dots, don't try to smear it around. This increases the open time of the glue and will result in fewer mistakes of glue where you don't want it.
Also, keep your CA glue container in the refrigerator, it will last far longer. You can purchase a better buy bigger container and not worry about having to throw half of it away.
-
Go to Crown Timberyard. Order whichever you like of his woods. Most prefer Castello boxwood or Swiss pear both for appearance and working characteristics.
.jpg.83e8a82490e63b0635a1527fc0e954a3.jpg)


Golden Hind by mfrazier - OcCre - scale 1:85
in - Kit build logs for subjects built from 1501 - 1750
Posted
The lines running vertically to the mast top are called shrouds. The ratlines ran perpendicularly across the shrouds.
Shrouds are served over their length, which means another very fine line was wrapped tightly with no gaps around the shroud. At one end is a big loop, at the other are deadeyes. The loops go over the mast top and the line is tensioned with the deadeyes at the other end.
Rigging in the Age of the Spritsail Topmast is the best book I'm aware of about rigging close to this period. You'll need to delve into it pretty deeply to be sure you understand how the standing and running rigging worked and how they were set up and belayed.