Jump to content

Recommended Posts

Posted

Hello everyone,

For my first build log on Model Ship World, I’m stepping away from ships and showcasing something different—a plane: the Sopwith Camel. But I promise, my next build log will feature a scratch-built boat!
The Sopwith Camel build has been discussed in several topics, both for the Artesania and Model Airways versions. However, in this topic, I’ll be focusing specifically on the modifications I plan to make to the Artesania version.

My ambitious goal is to improve its functionality as much as possible—particularly by enabling movement in the ailerons, rudder, and elevator, which are static in the original kit.

Rather than documenting the entire build, I’ll be highlighting only the modifications I make along the way.

For a complete build guide on the Artesania Sopwith Camel, I recommend checking out this topic.


image.png.c956843a995a71ff8286eb7e294b609d.png

(picture from Artesania)


Current: Sopwith Camel (Artesania)
Current: Millennium Falcon (Deagostini)

Planned: La Barbinasse - French sardine shallop - (scratch building from own plans)
Planned: Blériot XI (scratch building from own plans)
Planned: Pen Duick 1:28 (Artesania)
Planned: Cousteau's Calypso (scratch building from own plans)
Planned: Wright Flyer (Model Airways)

Completed: R2D2 (Altaya)

Posted

My plan is to redesign and scratch-build a fully functional two-axis control stick for the plane, capable of controlling both the (1) ailerons and (2) elevator (see sketch below). I am still considering the best construction method—whether to use 3D printing, brass, styrene, wood, or a combination of these materials.


image.jpeg.a46f57761177ee659e9d5b5719071bed.jpeg


Additionally, I will need to incorporate working pulleys wherever necessary to ensure smooth cable movement, minimizing friction and preventing potential cable (sewing thread or nylon thread) damage from sharp edges. Below is a sketch, modified from Model Airways, showing how the mechanism works for the ailerons.


image.jpeg.bbaf35a752e59f758240cdcb1031444c.jpeg


I will also need to redesign the rudder control part with a moving (red arrows in the image below) wooden part where the pilot places his/her feet. I will also need to incorporate, in the same part, working pulleys (green circles in the image below). These pulleys are linked to the plane control stick to control the elevator.

image.jpeg.6e7f2e6d5904e1950e2e969ecc76742b.jpeg

Current: Sopwith Camel (Artesania)
Current: Millennium Falcon (Deagostini)

Planned: La Barbinasse - French sardine shallop - (scratch building from own plans)
Planned: Blériot XI (scratch building from own plans)
Planned: Pen Duick 1:28 (Artesania)
Planned: Cousteau's Calypso (scratch building from own plans)
Planned: Wright Flyer (Model Airways)

Completed: R2D2 (Altaya)

  • The title was changed to Sopwith Camel by Blibul – Artesania Latina - 1:16 – modified to be fully functional
Posted

I’ve begun creating detailed technical sketches to reproduce the original parts while incorporating my desired modifications. Below is part M20 from the Artesania kit, shown in both front and back views. After modeling the modified part in Fusion 360, I plan to 3D print it.


image.jpeg.ae7e022373157b4544fb20c2bb4f936b.jpeg


My primary objective is to ensure that the wooden part can rotate about its vertical axis for rudder control. Additionally, I need to integrate two moving pulleys that will transmit elevator motion from the control stick via threads. The brass pulleys (already ordered), in red in the technical drawing, I intend to use have a 4 mm diameter, a 1.5 mm hole for the axis, and a thickness of approximately 1.4 mm.


image.jpeg.230c80416f3ceebd2fa6f362d1689ac9.jpeg

Current: Sopwith Camel (Artesania)
Current: Millennium Falcon (Deagostini)

Planned: La Barbinasse - French sardine shallop - (scratch building from own plans)
Planned: Blériot XI (scratch building from own plans)
Planned: Pen Duick 1:28 (Artesania)
Planned: Cousteau's Calypso (scratch building from own plans)
Planned: Wright Flyer (Model Airways)

Completed: R2D2 (Altaya)

Posted

Here is the modeled part with Fusion 360.

image.png.55b566221c0f4a9cff6388b8f64ea869.png


And with animation ...


Current: Sopwith Camel (Artesania)
Current: Millennium Falcon (Deagostini)

Planned: La Barbinasse - French sardine shallop - (scratch building from own plans)
Planned: Blériot XI (scratch building from own plans)
Planned: Pen Duick 1:28 (Artesania)
Planned: Cousteau's Calypso (scratch building from own plans)
Planned: Wright Flyer (Model Airways)

Completed: R2D2 (Altaya)

Posted

For long thin parts such as the stick, 3D resin parts would likely be too fragile. The resin is brittle. For things like the pulleys, and the larger assemblies 3D printed parts should be fine. I don't think 3D filament printers could give you the smooth surfaced parts you want, and have much courser print abilities.


For the stick mechanism, #d parts for the clevises and hinged parts should be OK, though you may have to fabricate the actual clevis tabs. The thinner shafts should be metal.

Posted

First, thanks for the pointer to my build log.  I hope it helps you or others.


I'll be interested to follow along this ambitious project.   The kit was, at times, challenging, and your modifications will only add to that.  I admit though that I was both a bit disappointed and a bit relieved when I realized the kit did not have moving control surfaces as you propose to do.


Looking at your plans above, I have two concerns.  First, on the finished model, the rudder pedals are barely visible, let alone accessible to move with your finger.  So while it might be cool to have the rudder pedals move the rudder you might need some alternate way to actually cause that motion.   Second, in your picture of the wings and ailerons, it appears that the control horns are on the top of both the upper and lower wing.  I believe that the control horns on the lower wing must be on the bottom, else you would end up trying to move something by pushing the cable.   On the AL kit, the lower wing control horns are on the bottom so I assume you would have discovered this at some point but thought it better to point it out now while you are still planning.


Posted
3 hours ago, thibaultron said:

I don't think 3D filament printers could give you the smooth surfaced parts you want, and have much courser print abilities.

Ron, Brother,


FDM printing has come a long way in the last few years... My X1C will produce parts that are just as smooth as most Resin printers... I suspect the Clones by Anycubic and Prusa will as well...

I've actually gotten bead lines from the X1C at .007" off the build plate...  Structural parts like he's proposing are no longer the private purview of SLA printers, they can be readily printed on a filament printer....


IMG_0567.JPG.ee48542c5742341fa84b6f17c8cd7798.JPG

That's at 1/72 scale from a Bambu labs X1C.... That part in the upper right corner of the pic is the cowling section of the nose part for a '77 Pontiac Freeway Enforcer (Buford T Justice's car) printed off the X1C at 1/25th scale in ABS... Resin isn't the only option for fine details anymore...

Current Build: F-86F-30 Sabre by Egilman - Kinetic - 1/32nd scale

In the Garage: East Bound & Down, Building a Smokey & the Bandit Kenworth Rig in 1/25th scale

Completed: M8A1 HST  1930 Packard Boattail Speedster  M1A1 75mm Pack Howitzer  F-4J Phantom II Bell H-13's P-51B/C

Temporary Suspension: USS Gwin DD-433  F-104C Starfighter "Blue Jay Four" 1/32nd Scale

Terminated Build: F-104C Starfighter

----------------------------------------------------------------------------------------------------------------------------------------------------------------------------

Quote:

"Relish Today, Ketchup Tomorrow"

Posted

Excellent project and will love to follow along.

1 hour ago, Egilman said:

Ron, Brother,


FDM printing has come a long way in the last few years... My X1C will produce parts that are just as smooth as most Resin printers... I suspect the Clones by Anycubic and Prusa will as well...

I've actually gotten bead lines from the X1C at .007" off the build plate...  Structural parts like he's proposing are no longer the private purview of SLA printers, they can be readily printed on a filament printer....


IMG_0567.JPG.ee48542c5742341fa84b6f17c8cd7798.JPG

That's at 1/72 scale from a Bambu labs X1C.... That part in the upper right corner of the pic is the cowling section of the nose part for a '77 Pontiac Freeway Enforcer (Buford T Justice's car) printed off the X1C at 1/25th scale in ABS... Resin isn't the only option for fine details anymore...

EG

You have piqued my interest with the Bambu printer. Will definitely be looking that up. I gave my older printers away.

Posted
3 hours ago, CDW said:

Excellent project and will love to follow along.

EG

You have piqued my interest with the Bambu printer. Will definitely be looking that up. I gave my older printers away.

The X1C and it's clones are a tool... fire and forget, load your file and print right out of the box... They are so good that both Anycubic and Prusa cloned it... It's the future of FDM... Resin still has it's place, but for some things FDM is now the turn to.......


This is an excellent project YES, and I don't want to take it off course, if you want to discuss it, hit me up with a PN brother... Gladly share what I know...


EG

Current Build: F-86F-30 Sabre by Egilman - Kinetic - 1/32nd scale

In the Garage: East Bound & Down, Building a Smokey & the Bandit Kenworth Rig in 1/25th scale

Completed: M8A1 HST  1930 Packard Boattail Speedster  M1A1 75mm Pack Howitzer  F-4J Phantom II Bell H-13's P-51B/C

Temporary Suspension: USS Gwin DD-433  F-104C Starfighter "Blue Jay Four" 1/32nd Scale

Terminated Build: F-104C Starfighter

----------------------------------------------------------------------------------------------------------------------------------------------------------------------------

Quote:

"Relish Today, Ketchup Tomorrow"

Posted
13 hours ago, thibaultron said:

For long thin parts such as the stick, 3D resin parts would likely be too fragile. The resin is brittle. For things like the pulleys, and the larger assemblies 3D printed parts should be fine. I don't think 3D filament printers could give you the smooth surfaced parts you want, and have much courser print abilities.


For the stick mechanism, #d parts for the clevises and hinged parts should be OK, though you may have to fabricate the actual clevis tabs. The thinner shafts should be metal.

Thanks for your comment! I didn't mention it earlier, but all axes and long, thin parts will be made of metal—either 1.5 mm or 1.0 mm piano wire. Additionally, I'll be using brass pulleys that I've already ordered. I hope these choices will enhance the stability and durability of the resin-printed mechanism.

Current: Sopwith Camel (Artesania)
Current: Millennium Falcon (Deagostini)

Planned: La Barbinasse - French sardine shallop - (scratch building from own plans)
Planned: Blériot XI (scratch building from own plans)
Planned: Pen Duick 1:28 (Artesania)
Planned: Cousteau's Calypso (scratch building from own plans)
Planned: Wright Flyer (Model Airways)

Completed: R2D2 (Altaya)

Posted
12 hours ago, gsdpic said:

First, thanks for the pointer to my build log.  I hope it helps you or others.


I'll be interested to follow along this ambitious project.   The kit was, at times, challenging, and your modifications will only add to that.  I admit though that I was both a bit disappointed and a bit relieved when I realized the kit did not have moving control surfaces as you propose to do.


Looking at your plans above, I have two concerns.  First, on the finished model, the rudder pedals are barely visible, let alone accessible to move with your finger.  So while it might be cool to have the rudder pedals move the rudder you might need some alternate way to actually cause that motion.   Second, in your picture of the wings and ailerons, it appears that the control horns are on the top of both the upper and lower wing.  I believe that the control horns on the lower wing must be on the bottom, else you would end up trying to move something by pushing the cable.   On the AL kit, the lower wing control horns are on the bottom so I assume you would have discovered this at some point but thought it better to point it out now while you are still planning.


Thanks so much for your comments and advice! I hadn’t realized that the rudder pedals wouldn’t be accessible for movement. I’ll also take a closer look at the aileron mechanism before making any modifications.

Current: Sopwith Camel (Artesania)
Current: Millennium Falcon (Deagostini)

Planned: La Barbinasse - French sardine shallop - (scratch building from own plans)
Planned: Blériot XI (scratch building from own plans)
Planned: Pen Duick 1:28 (Artesania)
Planned: Cousteau's Calypso (scratch building from own plans)
Planned: Wright Flyer (Model Airways)

Completed: R2D2 (Altaya)

Posted

I should have included this initially....here's a picture of the cockpit of the completed model.  You can just see the rudder yoke.  I can fairly easily stick my finger in and touch the control stick but no way to get all the way to the rudder pedals.


IMG_2097.jpg.919c15ef793ec4f2d105a63660b1cd29.jpg

Posted
1 hour ago, gsdpic said:

I should have included this initially....here's a picture of the cockpit of the completed model.  You can just see the rudder yoke.  I can fairly easily stick my finger in and touch the control stick but no way to get all the way to the rudder pedals.


IMG_2097.jpg.919c15ef793ec4f2d105a63660b1cd29.jpg

Thanks for the image. Indeed, it will be difficult to access the rudder pedals.

Current: Sopwith Camel (Artesania)
Current: Millennium Falcon (Deagostini)

Planned: La Barbinasse - French sardine shallop - (scratch building from own plans)
Planned: Blériot XI (scratch building from own plans)
Planned: Pen Duick 1:28 (Artesania)
Planned: Cousteau's Calypso (scratch building from own plans)
Planned: Wright Flyer (Model Airways)

Completed: R2D2 (Altaya)

Posted (edited)

For those unfamiliar with how both old and modern planes are controlled, here are some sketches I’ve made to help explain or clarify.cabling_03.jpg.d9ebc3a5915dc19f10173855b123f10c.jpg


image.jpeg.eb3b8840055dc618dcfee9a8a5d83f10.jpeg

Edited by Blibul

Current: Sopwith Camel (Artesania)
Current: Millennium Falcon (Deagostini)

Planned: La Barbinasse - French sardine shallop - (scratch building from own plans)
Planned: Blériot XI (scratch building from own plans)
Planned: Pen Duick 1:28 (Artesania)
Planned: Cousteau's Calypso (scratch building from own plans)
Planned: Wright Flyer (Model Airways)

Completed: R2D2 (Altaya)

Posted
5 minutes ago, Blibul said:

For those unfamiliar with how both old and modern planes are controlled, here are some sketches I’ve made to help explain or clarify.


I gave a lesson on the names of various rigging wires not too long ago. Maybe you should draft a quiz. 😉

Chris Coyle
Greer, South Carolina

When you have to shoot, shoot. Don't talk.
- Tuco

Current builds: Brigantine Phoenix, Mitsubishi A6M5a

Posted

This is the 3D-printed M20 part I designed in Fusion 360.
For reference, I’m using a Uniformation GK2 resin printer with Siraya Tech Blu (Nylon Black) resin, which should be well-suited for mechanical parts. The part measures about 40 mm in length.
I’m still waiting for the pulleys I ordered, which should fit into the two slots.
The axes, 2 for the pulleys and 1 for the rudder pedals will be 1.5 mm piano wire.


image.png.e48415cab673cd40a8de752dcebdb7f1.png1739084853874.png.fc8c6a6bc10bc2969770dfab38975215.png

1739084827093.png.32b8e8f082f20802b9d34ba780e112ba.png

Current: Sopwith Camel (Artesania)
Current: Millennium Falcon (Deagostini)

Planned: La Barbinasse - French sardine shallop - (scratch building from own plans)
Planned: Blériot XI (scratch building from own plans)
Planned: Pen Duick 1:28 (Artesania)
Planned: Cousteau's Calypso (scratch building from own plans)
Planned: Wright Flyer (Model Airways)

Completed: R2D2 (Altaya)

Posted

Probably a bit late but this is the general arrangement drawing of the controls of a Pup which would be very similar to that of a Camel.


1919s.thumb.jpg.3e951e6e42b6d0b6c8d85c8a05a77b14.jpg

Craig.


I do know, that I don't know, a whole lot more, than I do know.


Current Build: 1:16 Bounty Launch Scratch build.   1:16 Kitty -18 Foot Racing Sloop   1:50 Le Renard   HM Cutter Lapwing 1816  Lapwing Drawings

Completed....: 1:16 16' Cutter Scratch build.

Discussion....: Bounty Boats Facts


Posted
4 hours ago, Blibul said:

For those unfamiliar with how both old and modern planes are controlled, here are some sketches I’ve made to help explain or clarify.

image.jpeg.4a645bbb487432165aa19673f874f1b7.jpeg


I think you have the UP/DOWN reversed. Pulling the stick will decrease the tension on the red wires, leading to the plane diving....


Yves

Posted

Yeah he's got it right for the cockpit portion only, somewhere between the cockpit and tail empennage, the cable will cross within the rear fuselage giving the proper direction to the elevator...

Current Build: F-86F-30 Sabre by Egilman - Kinetic - 1/32nd scale

In the Garage: East Bound & Down, Building a Smokey & the Bandit Kenworth Rig in 1/25th scale

Completed: M8A1 HST  1930 Packard Boattail Speedster  M1A1 75mm Pack Howitzer  F-4J Phantom II Bell H-13's P-51B/C

Temporary Suspension: USS Gwin DD-433  F-104C Starfighter "Blue Jay Four" 1/32nd Scale

Terminated Build: F-104C Starfighter

----------------------------------------------------------------------------------------------------------------------------------------------------------------------------

Quote:

"Relish Today, Ketchup Tomorrow"

Posted
10 hours ago, yvesvidal said:

I think you have the UP/DOWN reversed. Pulling the stick will decrease the tension on the red wires, leading to the plane diving....


Yves

Yes you are right, I will correct that. Thanks

Current: Sopwith Camel (Artesania)
Current: Millennium Falcon (Deagostini)

Planned: La Barbinasse - French sardine shallop - (scratch building from own plans)
Planned: Blériot XI (scratch building from own plans)
Planned: Pen Duick 1:28 (Artesania)
Planned: Cousteau's Calypso (scratch building from own plans)
Planned: Wright Flyer (Model Airways)

Completed: R2D2 (Altaya)

Posted

While waiting for the pulleys I ordered, I’ve been focusing on the new control stick. I started by creating detailed technical sketches to ensure the mechanics are well thought out. Then, I modeled the parts in Fusion 360.

Next, I’ll 3D print the components and incorporate piano wires for the rotating axes, using 1.5 mm and 1 mm diameters.


Capture.JPG.191b5276308d1222c9c234a79cd98a3e.JPG


Current: Sopwith Camel (Artesania)
Current: Millennium Falcon (Deagostini)

Planned: La Barbinasse - French sardine shallop - (scratch building from own plans)
Planned: Blériot XI (scratch building from own plans)
Planned: Pen Duick 1:28 (Artesania)
Planned: Cousteau's Calypso (scratch building from own plans)
Planned: Wright Flyer (Model Airways)

Completed: R2D2 (Altaya)

Posted

I have 3D-printed and assembled the parts that make up the control stick. It includes three piano wires:
- one with a 1.5 mm diameter for the long horizontal axis (ailerons control)
- one with a 1.5 mm diameter for the stick itself
- one with a 1.0 mm diameter for the smaller axis, which is perpendicular to the long axis (elevator control).


The short video demonstrates how the two axes work together.

image.png.4d767e847c517cafbd003526eb2d9bb4.png
image.png.0bae5b16331eeee8ee362785974926c6.png


Current: Sopwith Camel (Artesania)
Current: Millennium Falcon (Deagostini)

Planned: La Barbinasse - French sardine shallop - (scratch building from own plans)
Planned: Blériot XI (scratch building from own plans)
Planned: Pen Duick 1:28 (Artesania)
Planned: Cousteau's Calypso (scratch building from own plans)
Planned: Wright Flyer (Model Airways)

Completed: R2D2 (Altaya)

Posted

Here are the details of the next modification required to achieve a fully functional aircraft.
This section of the aircraft, located in the central lower part of the fuselage, serves as a conduit for all the cables that control the rudder and elevator, guiding them toward the rear of the plane.
The current photoetched part (parts B47 and B46) appears too sharp to accommodate moving threads safely.
The objective is to rebuild this component with pulleys to facilitate smoother thread motion and prevent potential thread damage or cuts.
 

image.png.e1d2bddace2447e073394d9241ad3327.png


image.png.8dcb04ea1d66ab908246e2b97ffeccfe.png

Current: Sopwith Camel (Artesania)
Current: Millennium Falcon (Deagostini)

Planned: La Barbinasse - French sardine shallop - (scratch building from own plans)
Planned: Blériot XI (scratch building from own plans)
Planned: Pen Duick 1:28 (Artesania)
Planned: Cousteau's Calypso (scratch building from own plans)
Planned: Wright Flyer (Model Airways)

Completed: R2D2 (Altaya)

Posted

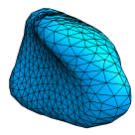
Here is the Fusion 360 model and 3D printed part.


image.png.0dc387c643a19eb49920130b29ca48a7.png


image.png.e2105b876c513fe9f8e88817a08e9f59.png

Current: Sopwith Camel (Artesania)
Current: Millennium Falcon (Deagostini)

Planned: La Barbinasse - French sardine shallop - (scratch building from own plans)
Planned: Blériot XI (scratch building from own plans)
Planned: Pen Duick 1:28 (Artesania)
Planned: Cousteau's Calypso (scratch building from own plans)
Planned: Wright Flyer (Model Airways)

Completed: R2D2 (Altaya)

Posted

• The total length of this part is 35 mm.
• I used eight pulleys, each with a diameter of 3 mm. The hole (axis) of the pulleys is approximately 1.6 mm.
• For the axis, I used a 1.5 mm diameter piano wire.


image.png.fc735577effbb7f51ee0beb430624c98.png

Current: Sopwith Camel (Artesania)
Current: Millennium Falcon (Deagostini)

Planned: La Barbinasse - French sardine shallop - (scratch building from own plans)
Planned: Blériot XI (scratch building from own plans)
Planned: Pen Duick 1:28 (Artesania)
Planned: Cousteau's Calypso (scratch building from own plans)
Planned: Wright Flyer (Model Airways)

Completed: R2D2 (Altaya)

Posted
7 hours ago, yvesvidal said:

Excellent work. Very impressive.


Yves

Thanks! I hope all this effort pays off at the end and that the commands will be fully functional. Someone (Gary) in this content recently pointed out to me that once the aircraft is finished, the rudder pedals won’t be reachable with a finger!

Current: Sopwith Camel (Artesania)
Current: Millennium Falcon (Deagostini)

Planned: La Barbinasse - French sardine shallop - (scratch building from own plans)
Planned: Blériot XI (scratch building from own plans)
Planned: Pen Duick 1:28 (Artesania)
Planned: Cousteau's Calypso (scratch building from own plans)
Planned: Wright Flyer (Model Airways)

Completed: R2D2 (Altaya)

Create an account or sign in to comment

You need to be a member in order to leave a comment

Create an account

Sign up for a new account in our community. It's easy!

Register a new account

Sign in

Already have an account? Sign in here.

Sign In Now
  • Recently Browsing   0 members

    • No registered users viewing this page.
×
×
  • Create New...