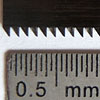
nobotch Posted October 3, 2014 #1 Posted October 3, 2014 (edited) My "Jim Saw" it arrived this week a mere 19 days after having placed the order! Although this little beauty would work out of the box I have scheduled some task-specific add-ons of which I have completed three so far. The first one is a provisional splitter (permanently integrated in a zero clearance insert) which in the first place served to figure out the dimensions of its parts but also is fully functional: The splitter itself is made of "1 mm" birch plywood which in reality is 1.2 mm thick. This is the perfect thickness for the 36 teeth blade whose disk is a bit over 0.9 mm and which leaves a kerf of about 1.5 mm. As plywood is not really stiff I did not want to make it too big. I hope it will do its job until I'll have made a better one. Even if noise is on the low side with the Byrnes saw, the next modification I made reduces noise . The belt guard is made of a sheet of aluminium which acts as a resonator. So I lined it inside with some cardboard (glued on with epoxy). This was my standard procedure for silencing the tower case of all computers I ever owned. In the following pictures you also can see how the belt guard can be slid off and on after only loosening four screws through dedicated holes, without completely removing them - a feature I almost always missed on computer cases... You can further see that the more expensive of my two Phillips N°1 screwdrivers did not fit through the holes, I had to use the cheaper one which obviously complies better with international standards! I don't like spinning parts that theoretically could be touched by accident, even if it is very unlikely to happen. This is why my third modification was covering the opend side of the belt guard, leaving open only a slot big enough to grab the axle with a wrench when changing the blade. The cover fits snugly but gets secured with a single screw which only has to be removed (3 full turns) when changing the belt - that is, almost never. I thought the following picture might be an interesting view for those technically inclined who are lusting for a Byrnes Saw Well, I think that's it for today. No, wait! I forgot to say that after having made a few cuts it really looks like this saw will meet my high expectations I had. A couple of long and thin rip cuts were all within half a tenth of a millimeter tolerance, without having used any more sophisticated add-ons than a to the "fence extension" clamped short fence, and the zero clearance insert with splitter. Cheers, Markus Edited October 3, 2014 by nobotch dvm27, mtaylor, shihawk and 14 others 17 - Markus
AntonyUK Posted October 3, 2014 #2 Posted October 3, 2014 Hi Markus. Very intresing mods. I have done the splitter mode on my saw. For use on the TCT blade only. But I find this very useful when cutting very thin strips The Splitter should only be the same thickness as the blade Kerf.. But even this is not needed if you feed in the timber straight. I can see that this topic might be usefull to Jim. Regards Antony. WackoWolf and nobotch 2 Best advice ever given to me."If you don't know ..Just ask. Completed Mayflower Completed Fun build Tail boat Tailboat Completed Build Chinese Junk Chinese Pirate Junk Completed scratch built Korean Turtle ship 1/32 Turtle ship Completed Santa Lucia Sicilian Cargo Boat 1/30 scale Santa Lucia On hold. Bounty Occre 1/45 Completed HMS Victory by DeAgostini modelspace. DeAgostini Victory Cross Section Completed H.M.S. Victory X section by Coral. HMS Victory cross section Completed The Black Pearl fun build Black Queen Completed A large scale Victory cross section 1/36 Victory Cross Section
nobotch Posted October 3, 2014 Author #3 Posted October 3, 2014 Thank you Brian and Anthony for your encouraging comments! The Splitter should only be the same thickness as the blade Kerf..But even this is not needed if you feed in the timber straight. Common safety recommendations say that the splitter or riving knife sould be thicker then the blade plate and thinner than the kerf. I'm inclined to think that, if the splitter is perfectly aligned it is better if its thickness is as close as possible to the kerf, but of course not even a hair thicker. For my taste, my splitter is a bit on the thin side, maybe I'll glue on a thin piece of paper on each of its sides.I agree that theoretically it is not necessary if feeding the timber straight. Unfortunately reality has shown countless times that we (all of us) don't always feed it straight, sometimes with disastrous consequences. This is why I am convinced that a splitter, or much better a riving knife is an absolute must for a table saw. Of course, the teeth's linear speed of a 10 inch saw is much higher (assuming 3500 rpm it would be ca. 165 km/h or ca. 100 mph) than on the 4" Byrnes saw (110 V 60 Hz version 3450 rpm -> 65 km/h or 40 mph; 230 V 50 Hz version 2850 rpm -> 53 Km/h or 33 mph). But still, getting hit by a piece of wood at that speed can lead to more or less serious injuries, and I think it is a good idea to minimise the risk. It's a bit like wearing a helmet when riding a push bike. AntonyUK and WackoWolf 2 - Markus
GuntherMT Posted October 4, 2014 #4 Posted October 4, 2014 So I've never used a table saw (and probably won't in the near future either) - what is the purpose of this splitter or 'riving knife'? nobotch 1 Brian Mystery project coming soon! Current build - Medway Longboat Complete - Armed Virginia Sloop Complete - Carmen (First Build)
nobotch Posted October 4, 2014 Author #5 Posted October 4, 2014 (edited) - what is the purpose of this splitter or 'riving knife'? Its purpose is to prevent kickback. Kickback can happen when the wood gets in contact with the rising teeth of the blade, which then will grab the wood and throw it back to the operator, most likely hitting him in the chest, shoulder or face. The splitter sits at a fixed spot on the table respectively in the insert plade and has the disadvantage that as you lower the blade the distance between it and the splitter widens, so that the splitter can not do its job until the wood has overcome this distance. As the height of the splitter is fixed it does not allow cuts shallower that the wood thickness. Whereas a riving knife always keeps the same distance and height in relation to the blade. When using a guard that is not attached to the riving knife the latter one even allows cuts shallower than the wood thickness. In the video on this page the whole thing gets explained pretty well (with the exception that he apparently is not aware of the fact that a piece of wood that has gotten caught by the blade's teeth does not travel horizontally but rises up at about a 30° - 45° angle. Only long pieces of wood that got caught between the fence and the blade get ejected horizontally). Edit: Another thing the guy in the video gets wrong is when he says that the riving knife without the guard simply gets used to "offer a better view to the blade". That's a bit a weird statement indeed! Why would someone want to look at the blade? Of course, the blade is beautiful, but once the fence is set or the wood is positioned on the miter gauge the cut gets made, no need to watch the blade! If one needs to watch the running blade to make a cut it means that the setup has not been done properly! Edited October 4, 2014 by nobotch WackoWolf, Jack12477, CaptainSteve and 2 others 5 - Markus
GuntherMT Posted October 4, 2014 #6 Posted October 4, 2014 Excellent link, completely explained it. I assume then that the 'kerf' is the width of the cut that the blade makes in the wood. Brian Mystery project coming soon! Current build - Medway Longboat Complete - Armed Virginia Sloop Complete - Carmen (First Build)
mtaylor Posted October 4, 2014 #7 Posted October 4, 2014 Excellent link, completely explained it. I assume then that the 'kerf' is the width of the cut that the blade makes in the wood. Yes it is. WackoWolf 1 Mark "The shipwright is slow, but the wood is patient." - me Current Build: Past Builds: La Belle Poule 1765 - French Frigate from ANCRE plans - ON HOLD Triton Cross-Section NRG Hallf Hull Planking Kit HMS Sphinx 1775 - Vanguard Models - 1:64 Non-Ship Model: On hold, maybe forever: CH-53 Sikorsky - 1:48 - Revell - Completed Licorne - 1755 from Hahn Plans (Scratch) Version 2.0 (Abandoned)
GuntherMT Posted October 4, 2014 #8 Posted October 4, 2014 Come to MSW to build little model boats, learn how table saws work. CaptainSteve, WackoWolf, nobotch and 1 other 4 Brian Mystery project coming soon! Current build - Medway Longboat Complete - Armed Virginia Sloop Complete - Carmen (First Build)
Gaetan Bordeleau Posted October 4, 2014 #9 Posted October 4, 2014 May be instead to install a splitter to prevent kickback, I would read the manual how to use the saw, especially the part on how to hold the plank to prevent kickback. For modifications, i like this one, a simplified version which appeared in NRG journal. Archi 1
nobotch Posted October 4, 2014 Author #10 Posted October 4, 2014 May be instead to install a splitter to prevent kickback, I would read the manual how to use the saw, especially the part on how to hold the plank to prevent kickback. No, you want take all known measures against kickback and other kinds of accidents. Believing that just doing things correctly wil prevent accidents is a wrong assumption. Nobody in the real world is free from committing mistakes. If someone (most of us!) didn't have a severe woodworking accident in the last 20 or 50 years of woodworking, this does not mean he has been on the safe side - he just has been lucky, as Kelly Mehler said. For modifications, i like this one, a simplified version which appeared in NRG journal. Looks interesting! - Markus
mtaylor Posted October 4, 2014 #11 Posted October 4, 2014 I'm headed off topic only that I don't have a Jim Saw but the MM (old style) tablesaw. This topic got me to get off my butt and do something I've been meaning to do. The Micromark saw has a high fence with featherboard option. What I did was cut it down like this (a bit more than half) : A brief test with some scrap and I'm happy.... nobotch and themadchemist 2 Mark "The shipwright is slow, but the wood is patient." - me Current Build: Past Builds: La Belle Poule 1765 - French Frigate from ANCRE plans - ON HOLD Triton Cross-Section NRG Hallf Hull Planking Kit HMS Sphinx 1775 - Vanguard Models - 1:64 Non-Ship Model: On hold, maybe forever: CH-53 Sikorsky - 1:48 - Revell - Completed Licorne - 1755 from Hahn Plans (Scratch) Version 2.0 (Abandoned)
Remcohe Posted October 5, 2014 #12 Posted October 5, 2014 Marcus, that are some interesting modifications. "For modifications, i like this one, a simplified version which appeared in NRG journal." Can somebody elaborate on this mod? Remco nobotch 1 Treat each part as if it is a model on its own, you will finish more models in a day than others do in a lifetime. Current build HMS Kingfisher MSW 1.0 log click here
nobotch Posted October 5, 2014 Author #13 Posted October 5, 2014 I'm pleased that you found my modificatoins interesting, Nemco. "For modifications, i like this one, a simplified version which appeared in NRG journal." Can somebody elaborate on this mod? He took off the blade guard because "it was in the way". As I understand it, the other part of that modification consists in making it possible to move the fence to the other side without lowering the blade. I'm not able though to figure out the practical advantage over lowering the blade. Mark, I like your mod of the high fence of your MM saw. Very simple and effective, congrats!. Actually, this weekend Im working on a short fence for my saw, I'll show it when it's finished. - Markus
Gaetan Bordeleau Posted October 5, 2014 #14 Posted October 5, 2014 The modification is to fix a problem that I have with this saw. Archi 1
nobotch Posted October 5, 2014 Author #15 Posted October 5, 2014 (edited) Gaetan, I don't have the proble you have. For lengths of that size I have a Dozuki or Kataba (Japanese saws) that do the "rough" cutting of timber of this cross section in half a stroke, and even small panels are done in a few seconds. Of course, everybody has his own procedures, but taking off the guard for having to loosen only one instead of two screws (in case one still want tho take off the fence) is definitely not in my book!Edit:I have to admit though that the replacement of the allen key screw (red circle in picture) is very nice! Bravo!There are way too many srews on this that need an allen key quite often, Key for locking the blade height being in my personal opinion the most awkward one. Edited October 6, 2014 by nobotch - Markus
rtropp Posted October 6, 2014 #16 Posted October 6, 2014 (edited) Mark, I guess I was wondering if the MM feather board would fit the Byrnes slots and fence. I cannot find their measurements at the MM site. The slots on the Byrnes are 1/2" wide and 1/8" deep. Jim sells an extended fence so I suspect could adapt it as you have... but will check with him to see if feasible. I was considering adding a slitter but not sure how to attach it to the zero clearance insert which is metal. A metal insert would make sense but not sure if know enough to fabricate and attach correctly :-) Richard Edited October 6, 2014 by rtropp Richard Member: The Nautical Research Guild
Landlubber Mike Posted October 6, 2014 #17 Posted October 6, 2014 I'm headed off topic only that I don't have a Jim Saw but the MM (old style) tablesaw. This topic got me to get off my butt and do something I've been meaning to do. The Micromark saw has a high fence with featherboard option. 80898_R.jpg What I did was cut it down like this (a bit more than half) : DSCF2062.JPGDSCF2064.JPG A brief test with some scrap and I'm happy.... Hi Mark, this looks great. Just so I'm reading the pictures correctly, you are using the high fence pre-cut, and then on the exit side of the blade, you now have extra space between the blade and the standard fence? Very interesting idea. This leads me to ask - is it necessary to have a fence that runs the full length of the table? I have a Byrnes saw, and used to experience kick back until Jim suggested I push the back end of the fence slightly further out. That seemed to work pretty well, but kick-backs are a pretty scary thing. Has anyone asked Jim or Micromark the reason for not including a splitter? I'm just curious as safety books videos seem to say to use a splitter. WackoWolf 1 Current Wooden builds: Amati/Victory Pegasus MS Charles W. Morgan Euromodel La Renommèe Plastic builds: Hs129B-2 1/48 SB2U-1 Vindicator 1/48 Five Star Yaeyama 1/700 Pit Road Asashio and Akashi 1/700 diorama Walrus 1/48 and Albatross 1/700 Special Hobby Buffalo 1/32 IJN Notoro 1/700 Akitsu Maru 1/700 Akitsushima 1/700 Crane Ship Seishu Maru 1/700 Completed builds : Caldercraft Brig Badger CLC Annapolis Wherry Amati Hannah - Ship in Bottle Pit Road Hatsuzakura 1/700 Hasegawa Shimakaze 1:350 F4B-4 and P-6E 1/72 Accurate Miniatures F3F-1/F3F-2 1/48 Tamiya F4F-4 Wildcat built as FM-1 1/48 Special Hobby Buffalo 1/48 Eduard Sikorsky JRS-1 1/72 Citroen 2CV 1/24 - Airfix and Tamiya Entex Morgan 3-wheeler 1/16 Terminated build: HMS Lyme (based on Corel Unicorn)
mtaylor Posted October 6, 2014 #18 Posted October 6, 2014 Mike, I'll give the answer a shot.... they do things like that because "that's the way they've always been done". The high fence fits over the normal fence and normally is full length. I've cut the high fence down. Here's a pic from a different angle. What Jim and Jeff at Hobbymill have said seems to work for their saws. I know Grant Dale modified his using some aluminum to get the result I'm using. If you look at what Nobotch (Markus) posted in the PDF's and links, the fences do not run the full length. See my answer above for the reasoning... I think that's probably it. The MicroMark does come with a splitter but with the blade guard (I'm asking for a blast on this) I took it off for two reasons: 1) It's too thin (smaller than the kerf) to do any good. 2) The blade guard gets in the way big time when working with small bits of wood. To work properly, several splitters would need to be provided for each kerf width.. One could also put the feed stock in next to the fence and have the cut off wood come off the non-fence side. Being lazy (I am and obviously others) moving the fence for every cut and getting it exact is a pain so we have the cut wood come off the fence side. If the cut comes off the non-fence side, kickback shouldn't (he holds his breath) be an issue but the feed stock could still kickback. I've done some more testing, I couldn't induce any kind of kickback using the modified fence. And here's a link to the topic that has Grant's mod: http://modelshipworld.com/index.php/topic/6978-help-with-a-byrnes-saw-end-of-cut-problem/?hl=byrnes Edit: Oh.. if anyone's curious, I'm left handed and I stand to the right normally. However, I have been known to put the fence on the other side use it like "normal" folks. themadchemist, Landlubber Mike, Archi and 2 others 5 Mark "The shipwright is slow, but the wood is patient." - me Current Build: Past Builds: La Belle Poule 1765 - French Frigate from ANCRE plans - ON HOLD Triton Cross-Section NRG Hallf Hull Planking Kit HMS Sphinx 1775 - Vanguard Models - 1:64 Non-Ship Model: On hold, maybe forever: CH-53 Sikorsky - 1:48 - Revell - Completed Licorne - 1755 from Hahn Plans (Scratch) Version 2.0 (Abandoned)
mtaylor Posted October 6, 2014 #19 Posted October 6, 2014 Richard, I can't answer your questions. However, there's two discussions going on about this: http://modelshipworld.com/index.php/topic/8250-the-byrnes-saw-inside-and-around/ and http://modelshipworld.com/index.php/topic/1223-saw-kick-back/ Mark "The shipwright is slow, but the wood is patient." - me Current Build: Past Builds: La Belle Poule 1765 - French Frigate from ANCRE plans - ON HOLD Triton Cross-Section NRG Hallf Hull Planking Kit HMS Sphinx 1775 - Vanguard Models - 1:64 Non-Ship Model: On hold, maybe forever: CH-53 Sikorsky - 1:48 - Revell - Completed Licorne - 1755 from Hahn Plans (Scratch) Version 2.0 (Abandoned)
Jack Panzeca Posted October 6, 2014 #20 Posted October 6, 2014 Mark, I guess I was wondering if the MM feather board would fit the Byrnes slots and fence. I cannot find their measurements at the MM site. The slots on the Byrnes are 1/2" wide and 1/8" deep. Richard I just happen to have both saws and the Micro Mark feather board set and extended fence. This is the older Micro Mark (Proxxon) saw with the extended fence and feather board. This one is the Byrnes saw with the Micro Mark accessories and as you can see the slot is larger on the Byrnes saw. You could probably solve the problem pretty easily by replacing the aluminum piece with a custom wood part. The opening in the extended fence is not wide enough to fit over the Byrnes fence. themadchemist, Archi, WackoWolf and 3 others 6 Jack "I Love the smell of sawdust in the morning" apologies to John Melius Current Build: Bomb Vessel Granado, 1742 - Cross Section Scratch Build Previous Builds: Oseberg Billing Boats 9th Century Viking Ship Modified Bluenose ll, AL, Lightly Bashed Louisa Morrison Half Hull, Scratch Build Photography Website: http://www.27birds.com
Perls Posted October 6, 2014 #21 Posted October 6, 2014 Hi All, At the risk of being off topic, I'm new to the idea of a riving knife. I've got two questions; Wouldn't one need an appropriate width knife to match the kerf of different blades? and, Can riving knife be retro-fitted to an old table saw? I have a old, solid, workhorse of a table saw. It's an old Rockwell (pre-Delta) saw which was completely overhauled with a new motor etc. by the previous owner. Thanks. Best, Steve nobotch 1
nobotch Posted October 7, 2014 Author #22 Posted October 7, 2014 Hi Steve, In my opinion you're not really off-topic with your questions. Actually, each blade needs its appropriate riving knife or splitter. As a rule of thumb they say that it has to be thicker than the blade body but thinner than the kerf. There may be some blades that can share the same riving knife, but there is no such thing as an universal thickness that fits all or almost all blades, the margins are quite narrow. There is at least one product that can be retrofitted to some table saws, but I guess not to all. The one I read of is called "Bolt on Ripping Knife" or BORK. If it turns out it would fit your saw make sure you get the stainless steel version and not the (older, obsolete) aluminum one which can get grabbed by the blade and thrown against the operator if it gets loose. It seems that this can not happen with the steel version, also because its slot is now closed (iirc it was an opened slot on the aluminum version, and there was at least one reported accident [1], [2] which easily could have turned out worse than it did). I have no idea in which thicknesses the BORK is available. - Markus
Perls Posted October 7, 2014 #23 Posted October 7, 2014 Thanks Nobotch. I'll check it out and if it fits my old saw, I'll let you know.. Best, Steve
michael mott Posted October 7, 2014 #24 Posted October 7, 2014 The problem with splitters is that can get in the way when cutting low rabbets and other small accurate cuts. I have always found them more trouble than they are worth. But hey that just me. Michael Bill Hime, src and mtaylor 3 Current builds Bristol Pilot Cutter 1:8; Skipjack 19 foot Launch 1:8; Herreshoff Buzzards Bay 14 1:8 Other projects Pilot Cutter 1:500 ; Maria, 1:2 Now just a memory Future model Gill Smith Catboat Pauline 1:8 Finished projects A Bassett Lowke steamship Albertic 1:100 Anything you can imagine is possible, when you put your mind to it.
nobotch Posted October 7, 2014 Author #25 Posted October 7, 2014 (edited) Michael, that's why riving knifes are such a great invention: they don't get in the way when doing rabbets or when tilting the blade. Cheers, Markus Edited October 7, 2014 by nobotch - Markus
michael mott Posted October 7, 2014 #26 Posted October 7, 2014 The riving knife seems like a good idea, with the following caveat, if your saw is not fitted up for one it can be complicated to set it up so that it works as the video shows . I also see that one would need different thicknesses and heights to accommodate different blade widths and diameters. In the video the chap just drops the knife into a slot. the video uses styrofoam as a demo material, I would not cut Styrofoam on a table saw in the first place it is a sticky material that can grab regardless of slitters or knives. He also is using much thicker material than most model-builders would use. All that said safety is a concern, on long work top fingers clamped to the fence work very well. on short work a long push board or push sheet that engage with at least 6 to 9 inches of the length of wood are a hundred times safer than the tiny push stick that the chap used in the video, in fact it is my own personal opinion that the type of push stick that was used in the video should be made illegal to sell because they are inherently dangerous because of their design. There are many approaches to working safely, unfortunately not all of them are transferable to working with very small pieces of wood. I have seen kickbacks and in one case the wood a piece of 1/4 inch by 1/2 inch maple that was wedged between the fence and the blade was ejected horizontally and went right through a gallon can of paint 10 feet away like an arrow. Most of the incidents that occur are combination of poor set ups and rushing and not taking the time to set up the appropriate finger boards or hold down fingers or using a scrap bit of wood as a push tick that only has a miniscule grip on the trailing edge. My advice is hold it down properly in the first place, set the blade height according to the thickness of the wood, use zero clearance insets, change them regularly as they wear or for different thicknesses. Happy cutting Michael src, Bill Hime, dvm27 and 5 others 8 Current builds Bristol Pilot Cutter 1:8; Skipjack 19 foot Launch 1:8; Herreshoff Buzzards Bay 14 1:8 Other projects Pilot Cutter 1:500 ; Maria, 1:2 Now just a memory Future model Gill Smith Catboat Pauline 1:8 Finished projects A Bassett Lowke steamship Albertic 1:100 Anything you can imagine is possible, when you put your mind to it.
gjdale Posted October 7, 2014 #27 Posted October 7, 2014 Just to add to what Mark wrote in post #19 above, the mod I made has been working beautifully for me (see link from Mark's pist). I also ran this past both Jeff Hayes at HobbyMill, and Jim Byrnes himself. They both thought it a good idea. Jim would consider offering this as an option if there were sufficient demand for it - so all you Byrnes saw owners out there, start asking! themadchemist, mtaylor and Bill Hime 3 Grant ____________________________________________________ Current builds: African Queen - Radio Control / Live Steam Previous builds: The Shipyard at Foss' Landing (Diorama), Hannah - Ship in a Bottle, NRG Capstan Project, 1869 Allerton Steam Pumper, Medway Longboat , Alfa Romeo Spider Gran Touring (Pocher) , Da Vinci Flying Machine, 1949 Chris Craft 19' Racing Runabout - Dumas - Radio, Bomb Vessel Granado, 1742 - Cross Section - Scratchbuild, HMS Victory (Mamoli 1:90), Cutty Sark, Armed Pinnace, Bounty, Santa Maria At another place: Stephenson's Rocket (OcCre 1:24) (click the title to follow the link) In the Gallery: Lancia Armata 1803, Bomb Vessel Granada, 1742 Cross Section, 1949 Chris Craft 19' Racing Runabout
nobotch Posted October 8, 2014 Author #28 Posted October 8, 2014 Actually, this weekend Im working on a short fence for my saw, I'll show it when it's finished. Well, it took a bit longer than just some hours on last weekend. Short fence, high and low profile: Switch from high to low, and to the left the dedicated push stick: The handle assembly screwed to the push stick has an protruding rear pin which prevents the handle from being run into the blade: The push stick (or maybe I'd better call it push board) has a squared front edge, and the piece of wood to be ripped is supposed to be narrower than the push board and to have a squared rear edge. With this, when sliding the push stick along the fence the tendency of the ripped pieces rotate once the lateral push stick is released (shortly before the cut is completed) gets minimized or even eliminated, so that also the las millimeters of the cut should be perfectly accurate. Here some details of the fence and push board, after a completed cut: The next item on my to-do list is an out-feed table. Thanks for watching. Cheers, Markus Archi and Landlubber Mike 2 - Markus
rtropp Posted October 8, 2014 #29 Posted October 8, 2014 I emailed Jim and let him know I would buy one also. Richard Richard Member: The Nautical Research Guild
nobotch Posted October 10, 2014 Author #30 Posted October 10, 2014 Baseplate and outfeed table: themadchemist, Archi and Landlubber Mike 3 - Markus

Recommended Posts
Create an account or sign in to comment
You need to be a member in order to leave a comment
Create an account
Sign up for a new account in our community. It's easy!
Register a new accountSign in
Already have an account? Sign in here.
Sign In Now