Jump to content

James H

Administrators
  • Posts

    5,613
  • Joined

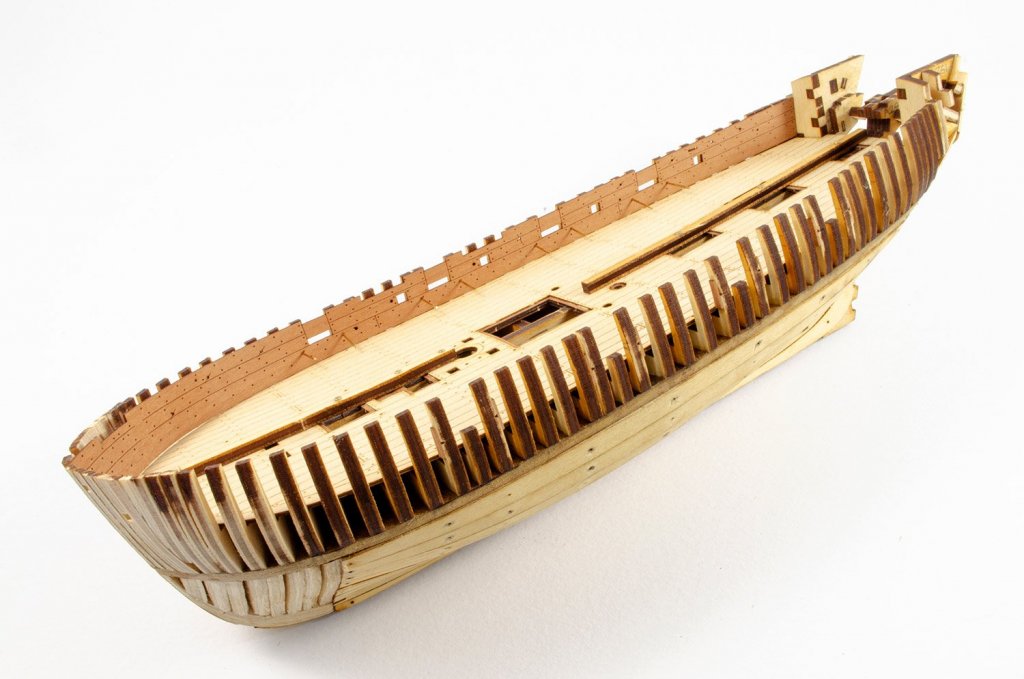
  • Last visited

Posts posted by James H

  1. Hi all,


    All members of MSW are entitled to publish their kit reviews in this area. It isn't just a privilege for staff members. We want a collective voice as to the evaluation of kits, both old and new. However, there are some very simple guidelines that really must be adhered to in order for this section to work as designed. Also, all kits under review must be un-started. This is the only balanced way to get an overall initial feel for the kit.


    Kit reviews must:


    1. Give an initial assessment of the overall package with regards to standard and presentation.
    2. All materials must be assessed for quality, including ply and other timbers including strip and dowel, fittings, photo-etch, rigging blocks and cord, sail materials, decals (where supplied), cast materials including cannon and culverins etc, 
    3. Kit design approach.
    4. An overall, personal assessment of the model construction and other interesting and pertinent things you note as you look through the plans, instructions and other drawing materials.
    5. Your review must contain clear photographs. Nothing hazy or fuzzy etc.


    Please do not use this area for starting new topics asking questions about models that aren't under review. Where you do wish to ask a question about a review, then post it as a reply to the review topic, and hopefully those questions can be answered. 


    This area isn't a general model kit discussion place. Please respect the intention of this area and keep other discussion within the other relevant forum areas.


    Thanks,

    Jim

  2. 1:72 Ragusian Galley 18thCentury
    MarisStella

    Available from MarisStella for €147 plus shipping

    box.jpg


    The Republic of Ragusa was a maritime republic centred on the city of Dubrovnik (Ragusa in Italian, German and Latin; Raguse in French) in Dalmatia (today in southernmost Croatia) that carried that name from 1358 until 1808. It reached its commercial peak in the 15th and the 16th centuries, before being conquered by Napoleon's French Empire and formally annexed by the Napoleonic Kingdom of Italy in 1808. It had a population of about 30,000 people, out of whom 5,000 lived within the city walls. Its Latin motto was "Non bene pro toto libertas venditur auro", which means "Liberty is not well sold for all the gold".


    The Dubrovnik galley was an integral part of Dubrovnik's war fleet, which in the seventeenth and eighteenth centuries, had only a few small warships (at most ten), operated solely because of frequent harassment and looting by pirates and cargo ships at that time. The Galleys were stationed in Dubrovnik and Mali Ston. Other Croatian coastal centres had this type of ship, along the eastern Adriatic coast: Kotor, Omis, Senj, and others. The Dubrovnik galley was driven by both wind and rowers (Galiot), who were both sailors and soldiers, as was appropriate, but there were also condemned criminals that rowed the State ships. Their main feature was their speed, and they were used for military, police and customs purposes, courier services, and for the transport of diplomats and senior civil servants. They were also used for the transportation of goods at the expense of the State.


    The kit

    DSC_8382.JPG

    MarisStella’s kit range is currently undergoing an upgrade, and most certainly in terms of their boxing. This one comes to me in its original incarnation, with a deep midnight blue thin card lid with all printing and imagery in gold ink. This does look quite stark but very attractive. I’m told that the new appearance will have finished model imagery on the box. MarisStella have said they will send over examples of the upgraded kits for us to look at on MSW, so we’ll get to see those changes first-hand in the next months. This release comes in a fairly weighty box, and lifting the lid off, we are first presented with a product leaflet, sheet of printed flags and a thick 122-page manual which is spiral-bound. All of these items sit on a cardboard tray which when lifted out, reveals the kit materials below. A large cardboard cover first needs to be lifted out to access the kit itself.

    DSC_8383.JPG

    DSC_8384.JPG

    DSC_8386.JPG

    Inside, several bundles of timber and dowel sit on top of two laser-cut sheets of plywood for the main bulkhead and keel construction, two sheets of laser-cut walnut, several fittings packets, another very thin sheet of laser-cut ply, one fret of photo-etch brass parts, pre-sewn sails, and a packet of rigging cord. Apart from the main sheets of ply and the timber bundles, all other elements within this kit are packed into clear sleeves that are either stapled closed or heat-sealed. My sample arrived with everything in good order.

    DSC_8387.JPG

    This POB model is designed very traditionally and is constructed around a 3-part false keel and a set of 15 bulkheads. The ply used for this is 4mm thick, and like all other parts on the main two constructional ply sheets, everything is very cleanly laser-cut, with an absolute minimum of scorching.

    DSC_8390.JPG

    DSC_8391.JPG

    DSC_8392.JPG

    DSC_8393.JPG


    One thing I noticed on all of the ply sheets is the laser-engraving and marking of where other components will fit to. I quite like this approach as it helps to ensure correct and precise construction throughout. That engraving has also been put to good use on the display stand elements that can be seen on these two sheets. These are also supplied in English, Italian and Croatian text, and contain a little engraved scroll work. You may opt for something a little glitzier with your build, but then again you may be perfectly happy with the parts that MarisStella provide here.

    DSC_8412.JPG

    In between the various bulkheads, some 8mm² lengths of lime have been included that can be cut to length and wedged in to keep everything straight. I believe some of the other kits have lengths of dowel which slot continuously through the bulkheads. I would’ve liked to have seen similar here, but at least the timber is included. It is also suggested that this material be cut up and used to create the bow and stern filler blocks, although you might like to use balsa for this purpose.

    DSC_8395.JPG

    DSC_8397.JPG

    Two sheets of walnut are supplied, one of which (the narrower and thicker sheet) contains the keel components. Although you will need to cut the rabbet into these, the positions for this are engraved onto the parts and the manual clearly shows how this is done. 

    DSC_8398.JPG

    DSC_8400.JPG

    DSC_8401.JPG

    The other walnut sheet is lighter in colour and thinner than the previous, containing parts for the gun carriages, rail cap strips, cabin bulkhead, and transom, channels etc. Again, and where appropriate, more engraving is present for constructional accuracy. All walnut sheet timber is of high quality with good grain that shouldn’t split etc.

    DSC_8423.JPG

    A very thin sheet of birch ply is included for the head rails, transom and cabin door detail etc. 

    DSC_8402.JPG

    DSC_8403.JPG

    DSC_8405.JPG

    DSC_8407.JPG

    All strip stock in this kit is also of the same standard, with numerous bundles of timbers of different sizes and types, including European Walnut for the hull planking. There is some natural variation in the colour of the walnut planks, so I would look at possibly grouping them, so wood of the same tone is used the same for both sides. This model also has a single-planked hull, unlike the double-planked that we so commonly see these days. However, the deck is double-planked, and the planks sit directly atop of the bulkheads, with no thin ply deck to lay first. The second layer of deck planking is supplied as beech strips.

    DSC_8408.JPG

    Various lengths and diameters of dowel are included, and all supplied in walnut. These are tightly grained and have excellent natural colour. 

    DSC_8415.JPG

    This is one model that really would benefit from having sails fitted, just to highlight the elegance of the shape. A feature of MarisStella kits is that the sail material is pre-sewn. By this, I mean that the shapes are lightly printed to a piece of pre-aged sheet and the inner stitched lines are present. All you need to do is to cut out the sails and sew the outer edges. Sail colour is akin to natural linen and looks good to use without any further ageing trickery.

    DSC_8416.JPG

    Two anchor packs are included. These contain a metal anchor that is painted black, a separate walnut stock, and some brass bandings that would look nice if they were also blackened. 

    DSC_8418.JPG

    Another pack contains 3-eye rigging blocks, single blocks, eyelets, belaying pins, and parrel beads. There is some colour variation in the block colour and all look to be made from walnut.

    DSC_8419.JPG

    One length of 1mm brass wire is included in one fittings pack, as are two 4mm cannon for the bow. These are finished with an antique patina and may benefit from being blackened in some way. I would use Gunze Dark Iron paint which is then burnished to an iron finish. 

    DSC_8420.JPG

    DSC_8422.JPG

    A reasonably thick sheet of photo-etch parts is also included, containing head rail decoration, transom decoration, rudder straps etc. Quality is again excellent, with reasonably thin tags to remove the parts from their positions. Tag positions are the only clean-up that will be required with these parts.

    DSC_8425.JPG

    A single packet is included that contains four spools of natural finish rigging cord in 0.25, 0.5, 0.75 and 1mm diameters. One length of 1.25mm is included separately, as is a 1mm length of black rope.

    DSC_8426.JPG

    Every vessel of course needs a flag and both this and a pennant are supplied here, laser-printed in colour onto paper. You’ll need to furl these realistically and they could’ve done with been thinner, possibly from tissue paper, but will still look very attractive when flown.


    Instructions
    This 121-page spiral-bound A4 manual also has a clear plastic cover to protect it. Each of the constructional stages are illustrated by generally uncluttered CAD line drawings that are annotated in English, Italian and Croatian. Some drawing details are a little small, such as the eyelet positions, footplates etc. so maybe magnify those a little. A very comprehensive section on making the sails is also included. Illustrated construction takes place over 83 pages, and this is then followed by the building instruction text and list of parts.

    1.jpg

    3.jpg

    5.jpg

    7.jpg

    9.jpg

    10.jpg


    Plan
    A large single sheet plan is included that contains pretty much every dimension/measurement you'll need and the line drawing quality is excellent. To prevent any piracy, I have only included a portion of that plan here, with no bulkhead shapes.

    plan.jpg


    Conclusion
    A very nice kit of a very unusual subject. I’ve seen so many model ships of antiquity, but this is one that seems to bridge the gap by being of a generally ancient style, whilst being an 18thCentury vessel. MarisStella’s design is nice and easy to follow and is coupled with high quality materials and drawings. In all, an excellent package that will provide many hours of pleasure for a very reasonable price. As this is single-planked, I would recommend this to intermediate modellers.


    My sincere thanks to MarisStella for sending this kit out for review on Model Ship World. To purchase directly, click the link at the top of the page, or head over to your local MarisStella stockist.


    logo.jpg

  3. 6 minutes ago, Jasseji said:

    Nice, happy to see Polish products advertised like this ;)


    I have just received my Professional Building Slip today and will be putting it together 

    Be careful with assembly.


    There are a couple of little areas that may not be too clear. Wojciech has asked me to do a full step-by-step of this build, and it should be online within the next week. All will be shown in technicolour, including parts orientation etc.

  4. 20 minutes ago, vossy said:

    this exact modified soldering iron and associated wooden bending form have been around for years. well at least I have been using one for about 15 years. are you associated with the company who make this version? 


    cheers


    chris


    No, I was sent this to test for myself and publish here.


    You did of course see that I mentioned that there were similar products available, yes?

  5. Electric Plank Bender
    Hobbyzone

    Catalogue # HX-GDL1
    Available from Hobbyzone for £20.63 (as of 10-7-18)


    DSC09361.JPG


    There are numerous ways of bending those awkward planks that we regularly see at stern and bow, including soaking in water/macerating fluid that breaks down fibres, and then twisting. You can of course use a plank nipper, such as that from Amati, drum roller such as the Mantua release, or you can use an electric plank bender. The latter isn’t exactly a new way of shaping your planks to the required curve, but this new release from Hobbyzone is certainly a quality and affordable way to achieve it.

    DSC09370.JPG

    DSC09371.JPG

    Hobbyzone’s electric plank bender is packed into a sturdy plywood box which is then heavily wrapped in plastic film onto which the product label is affixed. Once the packing is removed, the lid of the box is lifted via a finger hole in the centre of the lid. Inside, we have the electricplank bending tool itself, lying alongside the curved forming tool.

    DSC09372.JPG

    The electric part of this is a 240v unit and comes with a European standard 2-pin plug. For my tests, I converted this with a 3-pin UK travel adapter. I think that the basis for the plank bender is possibly a soldering iron or similar, but instead of a pointed tip, this unit has been fitted with a circular brass head that is the correct size to roll around the smaller of the curves on the forming block. Inside the bottom of the box is a sheet that explains that your planks must first be soaked, and that you may well experience some smoke emanating from the unit for the first 10 minutes after the very first use. Note also that the underside of the lid has a rest for sitting the electric tool whilst not in use. *CAUTION* NEVER LEAVE THE PLANKIG TOOL UNATTENDED WHILST POWERED**….simple safety tip!

    DSC_8380.JPG

    The forming tool is made from very thick MDF and contains two different sized scoop profiles, plus a gentler curving sweep. You can of course use different sections of these profiles to greater or lesser degrees, and it does seem very similar to the formers in other manufacturer’s products.

    DSC_8374.JPG

    To test, I first soaked my limewood planks for about 30 to 40 mins in plain cold water, and then with the forming iron fully hot, the plank was laid across the shallow curve and the iron gradually rolled into it. The timber formed itself into the curve very quickly and with minimal physical effort for me to achieve it. The tool was gradually rolled until the wood dried out and the curve remained.

    DSC_8375.JPG

    For the deeper curves, I first placed only a short length of the timber into the former, and then rolled the iron, pushing the timber into the former a little extra each time until I had achieved the full curve. I did experience a little scorching on the internal area, but nothing too major. I think that longer soaking for more pronounced curved would minimise this even more, but the plank shaped superbly.

    DSC_8376.JPG

    Resting the iron, whilst hot, onto the stand, caused almost zero scorching from the iron, so I have no qualms about using the stand for just that.


    Conclusion
    A superb tool at a very reasonable price. This currently retails for just over £20, minus shipping, and is very easy to use. The whole lots packs neatly into that plywood box too, so no loose tools lying around. I couldn’t see a wattage listed on the unit, and I don’t think this is currently available in anything other than 220/240v, but it could be worthwhile approaching Hobbyzone to clarify that.


    hz-logo.png.742e2e546cfe1f1e0801bc4f6d07b9be.png

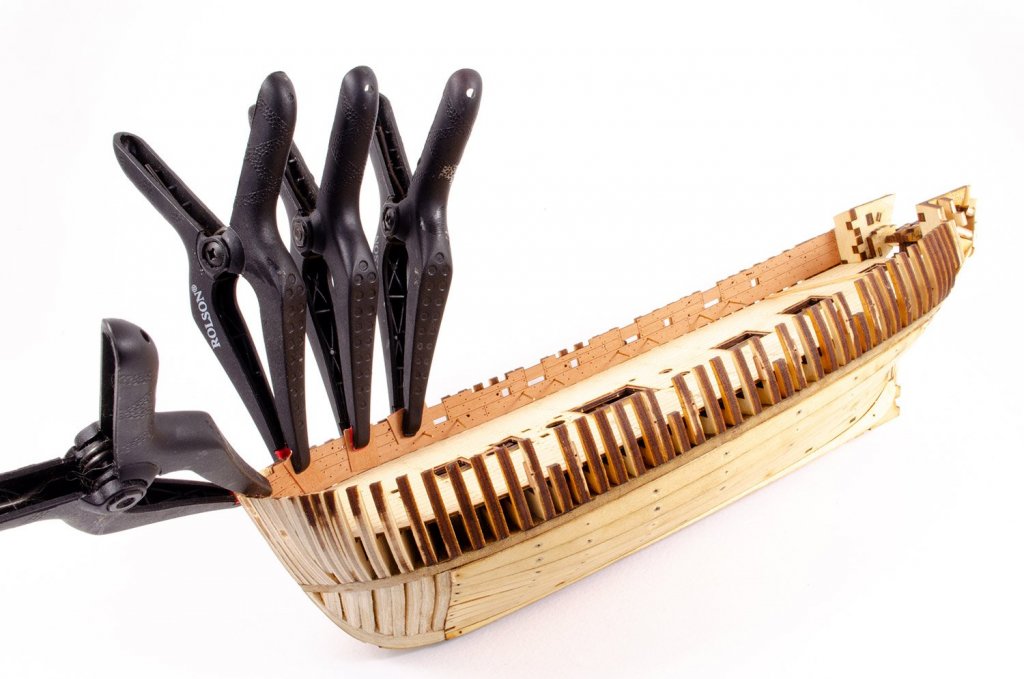
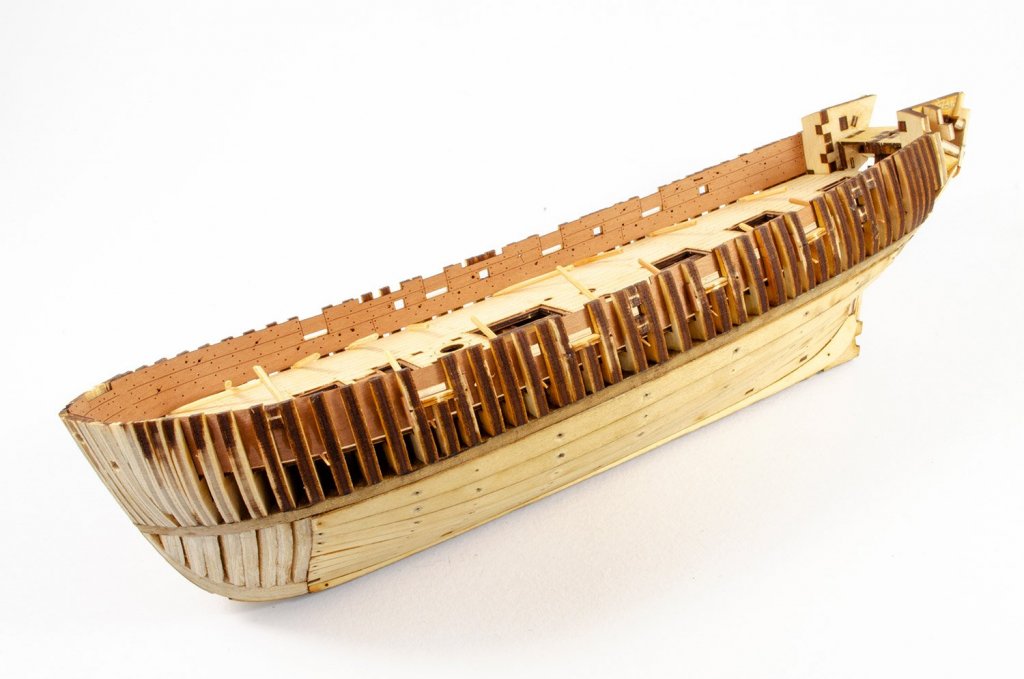
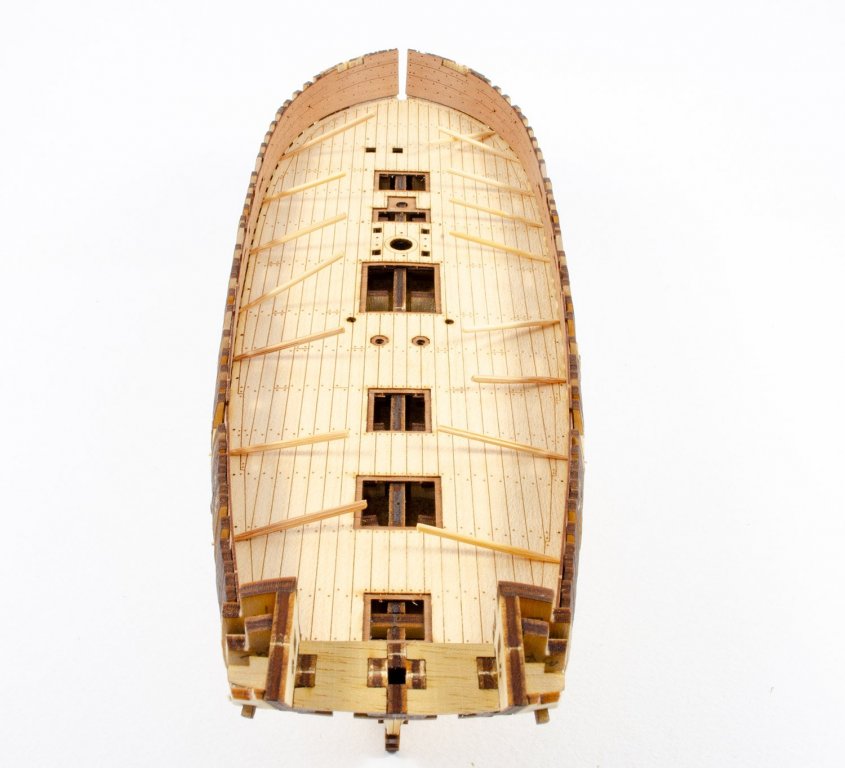
  6. Before any planking can be contemplated, those bulkheads need to be faired in. This is probably one of my least favourite jobs, but at least with the Drakkar, it's not too big a task. To do this, I use a coarse sanding stick. This has some flexibility and curves nicely to the shape of the hull. I think this was about 2hrs work in total.


    DSC_8351.JPG

    A plank of Lime from my Mary Rose kit was used to check the curves all around the hull and to highlight any areas that weren't sanded enough.

    DSC_8352.JPG

    There are two sheets of planks for this model, one for port and one for starboard. There is a difference in the sheets as one plank for the starboard side has a riser for the rudder attachment. Using the plans, each plan was numbered and then an arrow added to indicate the bow.

    DSC_8359.JPG

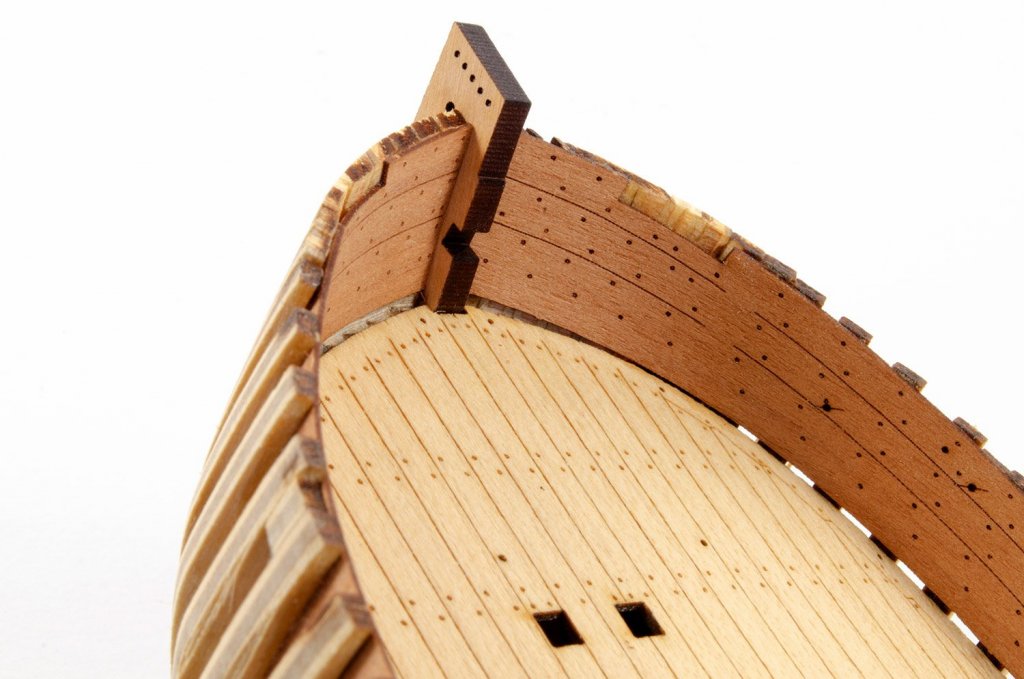
    The planks on this model are all pre-shaped and laser-cut from very, very thin ply. If the fairing isn't done correctly, then the planks will look wavy. This was my worst fear with this model. First of all, the two inboard planks have a slight bevel added to the inner edge so that they mate up properly to the keel.

    DSC_8353.JPG

    Each of the inboard planks are now fitted using III and some very careful measurements to ensure the are the same on both sides. Some shaping of the ends had to be done so the planks matched the curve that had been drawn on the keel previously.

    DSC_8355.JPG

    DSC_8356.JPG

    Adding one plank per side and alternating each side as I went, the first four per side were added. Now, I know many don't like CA (superglue), but it's ideal for spotting things into position before proceeding with wood glue. If measurements are out, then the CA joint can be cracked apart and re-positioned. With the first four in place, I painted the interior of the hull with wood glue to strengthen it. 

    DSC_8358.JPG


    I hope to have all planking done for the next update and then to look at fitting the decks.

  7. Waterline Marker
    Hobbyzone

    Catalogue # HZ-PW
    Available from Hobbyzonefor 25.00zł (£5.21 as of 6/6/2018)


    DSC09360.JPG


    If you’re new to the hobby and setting up a list of essentials for purchase, or if you need to replace your current waterline marker for some reason, then Hobbyzone has a pretty inexpensive way of doing this. In case you’ve never heard of Hobbyzone, they are a Polish company who produce some excellent workshop workbench modules to store your tools and other items, all with magnets which lock the individual units together. This range is totally flexible and can grow as your own needs must. Maybe you have heard of Hobbyzone but didn’t realise that they now have a set of products aimed specifically at our hobby?

    module.jpg

    Screen Shot 2018-07-06 at 11.17.10.jpg

    For our first look at this range of tools, I thought the waterline marker was a good introduction. Hobbyzone products tend to be made from MDF parts, which are CNC routed to very fine tolerances, which fit superbly. I can say this because I have been a customer of them for about 3yrs now. The waterline marker is packed into a clear plastic sleeve wrap with a couple of product labels. Opening the packet, you’ll note that all MDF parts are held together with elastic bands. A packet of hardware is included, as is a single instruction sheet. No tools re needed for this except for clamps. Clean-up of parts isn’t necessary. 

    DSC09373.JPG

    DSC09374.JPG

    DSC09375.JPG

    DSC09376.JPG

    A quick test fit of parts shows that everything does indeed fit snugly, with just a little playfor the glue joints. For glue, I use Titebond III which has a relatively quick grab time and sets with an amazingly strong joint. I first glue the two upright parts together and leave for 15 minutes before then gluing this assembly to the base. Any excess glue is removed with the corner of a steel rule. One of those upright parts has a channel milled into it for the pencil unit to slide along.

    DSC09383.JPG

    DSC09384.JPG

    Assembling the pencil holder is very simple indeed. Two MDF parts are supplied, and one of these has a V-channel machined into it for holding the pencil, and holes for the bolts. The other part has those holes, but the exterior is machined to accommodate the hex head of the bolts. The bolts are first slotted into this piece and the v-slot dropped into position. The two parts are now fitted to the slot on the upright assembly and the washers and wingnuts used to secure. Before tightening, a pencil is added to the unit, and the wingnuts tightened evenly. It’s a good idea to use a short pencil for this as you want to keep the waterline parker relatively close to your boat/ship so that there’s no flexing of the pencil.

    DSC09385.JPG

    DSC09386.JPG

    That’s it! This tool can be adjusted for heights between 45mm and 225mm, so certainly big enough for most applications. Another real bonus here is the price. At just over a Fiver sterling, then this can’t be beat!

    DSC09377.JPG

    DSC09378.JPG


    My sincere thanks to Hobbyzone for kindly sending out this item for review here on MSW.


    Hobbyzone products can be bought directly or through one of their global distributors. Tell them you saw this review on Model Ship World


    hz-logo.png


  8. As promised, here's the start of my build. The weather here is way too hot for me to do my usual airbrushing of plastic models, so it was just the opportunity I needed to crack open this lovely kit, from Amati.

    DSC09358.JPG


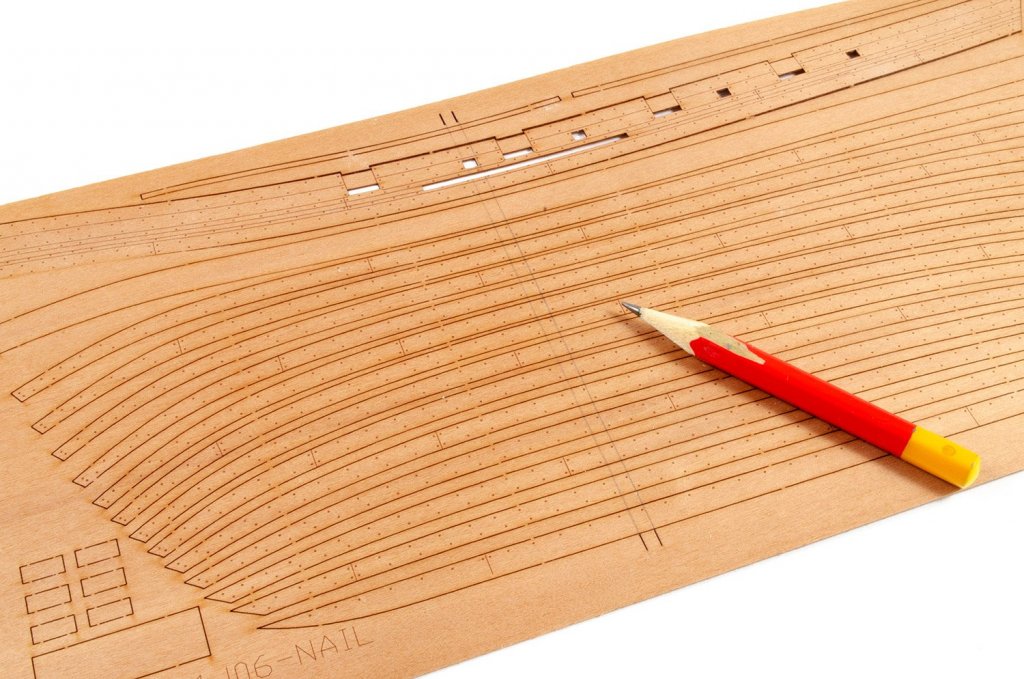
    First of all, I removed all of the parts from the thick ply sheet. These parts are the keel, bulkheads, dragon head mounting post....and a part not on the schedule. This is a replacement for the curved tail. The original keel has quite a simplified shape which is a little unsatisfying, and instead of reworking the keel, Amati has included a reworked section for the modeller to use, should they wish. As this is heaps better than the keel shape, I carefully marked out the new joint onto the keep and then sawed off the section. The new shape was now grafted into place with Titebond III adhesive.

    DSC_8282.JPG

    Here are the bulkheads. These will of course need fairing slightly when fitted. Notice how the middle frame #6 has a stepped profile to aid locating the shaped planks. There's no real need to remove the char from any of these edges.

    DSC_8283.JPG

    After test fitting the bulkheads to the keel, it became obvious that the joints were way too tight. To correct this problem, I ran a coarse sanding stick a few times through the slots on both the keel and the frames. As the stick is slightly spongy and will compress a little, it only took a few seconds to remove the required amount of material.

    DSC_8286.JPG

    Before I can fit the bulkheads to the keel, I needed to draw the line on the keel to where the planks would terminate. Amati suggests tracing the shape from their lower half of their plan sheet, containing a keep profile. As this was only a parts list section, I cut the shape from the plan and transferred it to the keel where I then used a pencil to draw around the paper template. I found the stern keel to differ very slightly from the shape of the plan, but it didn't present any real issues.

    DSC_8292.JPG

    Each bulkhead, except for #2 and #10 were now glued into position using Titebond III aliphatic adhesive, along with the dragon's head mounting post. The reason I left the two bulkheads unglued is because these will need most shaping as the planks sweep steeply upwards here. They will be rigid enough to be faired with the other bulkheads, but allowing me to remove to finely tune them.

    DSC_8287.JPG

    At this stage, note the tops of the bulkheads aren't flush with the keel. This doesn't matter, as confirmed in Amati's instructions, as the deck more or less sits on top of the bulkheads and not the keel itself. 

    DSC_8288.JPG

    One thing I noted was the curved notches in the two false deck sections. These needed to be squared off so they would sit to the frames properly.

    DSC_8284.JPG

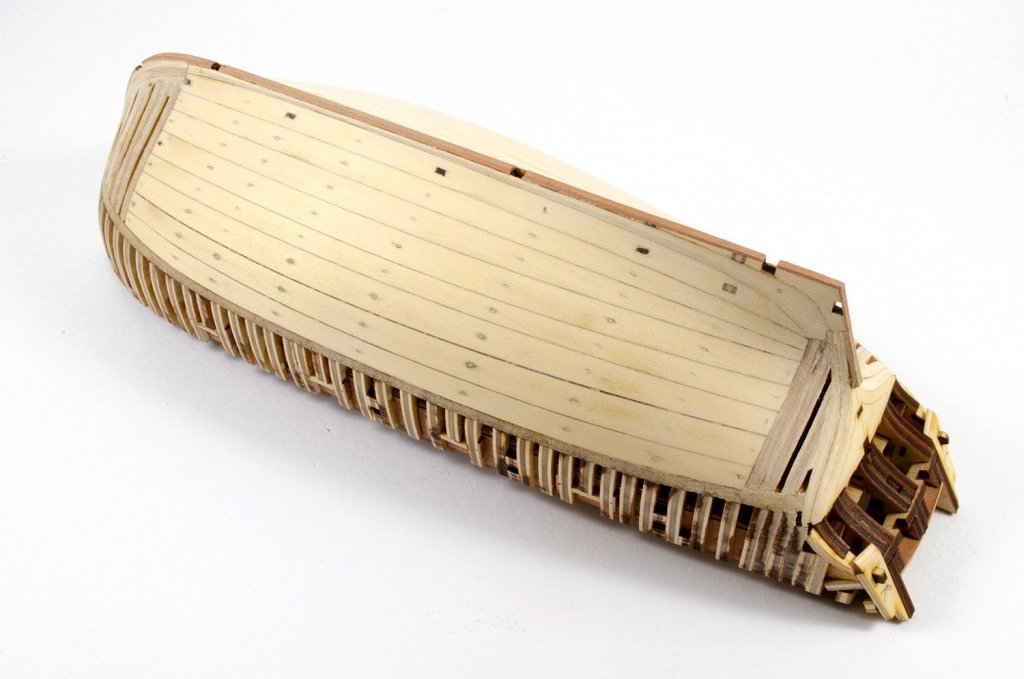
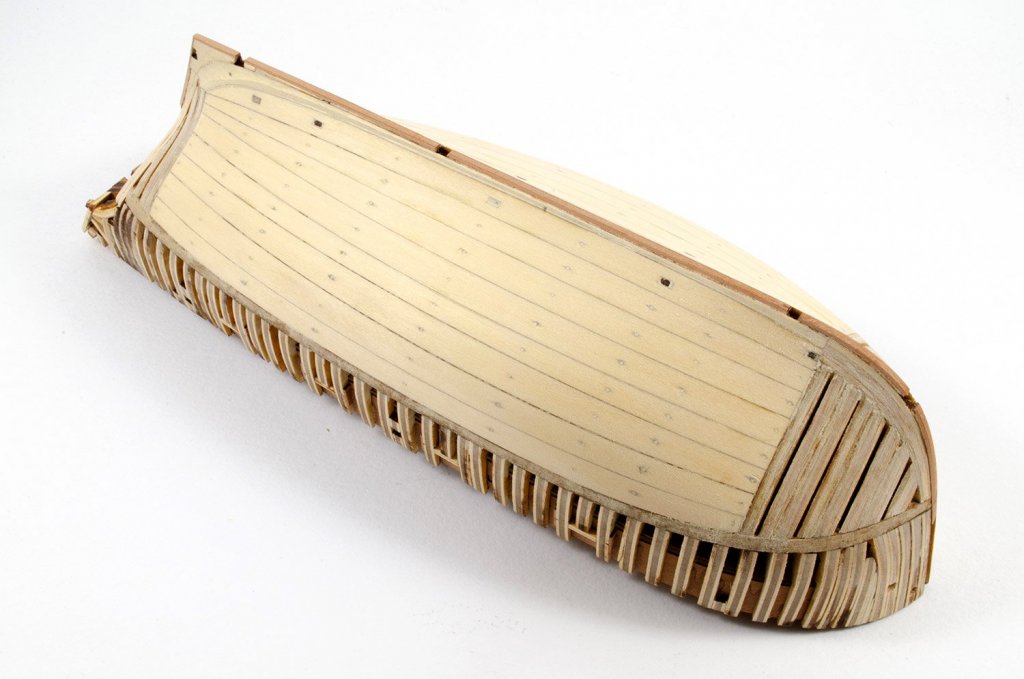
    I now sit the two decks in place, temporarily, whilst the bulkheads set. A quick check proves that assembly is nice and square.

    DSC_8293.JPG


    More soon as I then fair the bulkheads in readiness for planking....


  9. 1/2” Scale Queen Anne Style Royal Barge 1705
    Syren Ship Model Company

    Catalogue # SKU QABK01
    Available from Syren Ship Model Company for $225.00


    flags1.jpg


    A royal barge is a ceremonial barge that is used by a monarch for processions and transport on a body of water. Royal barges are currently used in monarchies such as the United Kingdom, Sweden and Thailand. Traditionally the use of royal barges was of high importance in southeast Asian monarchies such as Siam, Burma, Brunei, Riau and Cambodia. The River Thames in London was a regular thoroughfare for the Sovereign until the middle of the 19th century, on state occasions or between the Royal Palaces of Windsor, Westminster, Hampton Court, Greenwich and the Tower of London. In the UK, there is currently no State Barge in active service, but until 2017 the Royal Nore, owned and maintained by the Port of London Authority, was used whenever a member of the Royal Family travelled on the river Thames for an official engagement.


    Royal barges are typically elegant in style, and those built in the period of Queen Anne were still striking, despite their relative simplicity in relation to other vessels of the same stature. Resplendent in ornate carvings and decorative panels, these barges provided a comfortable and stylish method for the monarch to move between their residences and their courts.

    Edit courtesy of Wikipedia


    The kit

    DSC09332.JPG

    This is my first experience of dealing with Syren Ship Model Company, and of course, the Royal Barge kit is designed and produced by them. My kit took around 9 days to reach UK shores from New Jersey, via USPS and Royal Mail. Of course, I got hit by the obligatory import duty, but it wasn’t too bad. After paying their ransom, I picked up the package a couple of days ago and now spent some time flicking through the contents. The kit itself is packaged into an extremely sturdy corrugated cardboard box with tabs that release so you can flip up the lid.

    DSC09357.JPG

    DSC09333.JPG

    With the lid open, the plans are the first thing seen, and these are gently curved over the components underneath, along with a contents checklist which has been manually marked to show the contents are indeed in there. A nice system that gives peace of mind to the buyer. I’ll look at the plans further down the review. With these lifted out, some very soft packing foam is included so stop the contents rattling about. Inside the box, there are two robust clear sleeves which contain all of the timber planks, three narrower sleeves with strip and dowel, a card box with resin, wood, wire and black fishing line, a length of thick black cartridge paper with laser-cut elements, a packet with friezes for the interior of the barge plus some decorations for the sweeps, and two flags.

    DSC09334.JPG

    DSC09335.JPG

    Onto the sheet timber. Syren has produced all of the main parts from a superbly milled cherry wood, and the finish is silky smooth. The quality of the wood is also amongst some of the best I’ve seen since I started in this hobby almost 20yrs ago. The colour, which I hope I’ve captured in most of my photos, is a very pale golden colour which looks quite muted. The grain, as you would expect, is very fine. Laser-cutting quality is also on a par with the best kits I’ve seen, with almost zero heat effect, and small tags that only just hold the parts in position. Edge scorching is also very minimal, and it’ll only take a few swipes with some sandpaper to remove them totally. You will of course need to do that thoroughly as this model is only partially planked, as it the style of barge models of the era Circa 1700. Cherry was also chosen because it best replicates the colour of the wood used on these models and allows the kit to be affordable too. 

    DSC09336.JPG

    DSC09338.JPG

    DSC09341.JPG

    Also among the thicker sheets of cherry wood is a two-part building jig which needs to be assembled. The zig-zag edging of this will make the job easier. Each frame slot is also numbered so there’s less chance of human error. When the model is later released from this jig, it will be modified to accept the keel for the remaining construction, using more supplied parts. This is probably the time to explain roughly how this model actually does assemble, and I’ll add a few images here to illustrate things. Each of the frames has an infill piece still attached, and this is what will slot into the building jig. When the outside planks are added, this can later be carefully cut away to reveal the interior of the barge which then needs to be fitted out. Before slotting those frames to the jig though, you will need to add the floor frames. The position for these is finely engraved onto the waste material within each frame. You can use a straight edge along this and then fit the floor frame up to this mark. This way there’s no reason to use pencil on the parts faces themselves. This technique is superbly illustrated here by Rusty, in his MSW build log: https://modelshipworld.com/index.php?/topic/17889-queen-anne-barge-by-rustyj-syren-ship-model-124/


    Screen Shot 2018-06-27 at 22.30.38.jpg

    Screen Shot 2018-06-27 at 22.30.55.jpg

    Looking at the timber, you can see that just about every shape is either cut with laser or engraved for reference. All planks for this are supplied spiled, need bevelling from the laser-etched line. These planks are supplied in suitably thin sheets of cherry, and for extra clarity, each sheet is labelled PORT or STARBOARD. The keel is built up from scarfed sections, as the real thing would be. Very impressive. The rabbet is created my inserting thinner keel parts on the inner edge of the keel, creating a recess into which the limited planking will sit. When it comes to the thwarts, these are also laser-engraved to create the stepped edges to them. 

    DSC09337.JPG

    Also included with the laser-cut parts are the mounting pedestals (you just need a nice piece of polished/varnished timber to use as plinth), and also the sweep (oar) racks so those can be decoratively mounted on the plinth, adjacent to the barge. 

    DSC09339.JPG

    DSC09340.JPG

    DSC09342.JPG

    DSC09343.JPG

    DSC09344.JPG

    Now, this model has some ornate and intricate carvings adorning it and these are provided as laser-cut items for which you can try your hand at carving. Does that sound scary? If so, don’t worry because also available for this kit is a set of resin-cast carvings which are more or less all ready to be attached and provided as an upgrade set which you can buy either at the same time as the kit, or later if you struggle with the boxwood blanks. The resin parts are supplied in a small white box to protect them. With this sample, they were supplied directly in that small box that sits within the main package, and the extremely delicate filigree parts were packed into two zip-lock wallets. Very little clean-up is required with these, and to give them a nice natural appearance, weathering powders are suggested. You can also airbrush them and apply an enamel-based wash which would bring out the details superbly. It’s all a matter of preference. These carvings include the scrollwork for the port and starboard side, the quarter-based figurines and the Royal monograph. They really are superb to look at.

    DSC09345.JPG

    DSC09346.JPG

    DSC09347.JPG

    DSC09350.JPG

    DSC09349.JPG

    Screen Shot 2018-06-27 at 22.31.11.jpg

    Screen Shot 2018-06-27 at 22.31.47.jpg

    Screen Shot 2018-06-27 at 22.32.03.jpg

    Other parts were included inside this box. These include some extra boxwood parts for things like the internal panelling that the friezes will sit within. Extras are included in case you screw up. There is a length of wire and also some black 20lb fishing line that you will use to simulate the black nail heads on the planking. 

    DSC09348.JPG

    DSC09351.JPG

    A length of resin-impregnated black card is also to be found in this kit, and like the timber, all parts are laser-cut. Parts here are provided for the keel banding and rudder straps etc. 

    DSC09352.JPG

    Screen Shot 2018-06-27 at 22.31.31.jpg

    Three sheets of colour-printed paper are included that hold the parts for the friezes and the ornate decorations for the sweeps. These will need to be carefully cut out with a fresh blade and then attached to the model using a very dilute PVA or children’s glue stick. 

    DSC09353.JPG

    Two period flags are also included, printed on thin tissue paper and with good colour definition. Note the union flag, minus the diagonal red cross, which is of course accurate for 1705. I’m presuming the quadrant flag is either of the period or even related to the monarch of the period. It should be quite easy to make these drape realistically due to the thinness of the paper. Certainly easier than some of the materials some companies use for their flags.

    DSC09355.JPG

    DSC09354.JPG

    DSC09356.JPG

    Two large plan sheets are included, clearly depicting construction in clean line drawings, and of course, the images are at full scale for any measurements you need to take. Please note that no instruction manual is included with this release as it helps to cut down on price. It also helps reduce weight for shipping. There are three manuals for this, in full colour PDF format, and these can be downloaded from the Syren Ship Model Company’s website. These are extremely comprehensive and beautifully describe the whole build process, including hints and tips for your project.


    Conclusion
    I’m not usually the sort of guy who gets enthused by barges and narrow/longboats etc. but the sheer beauty and ingenuity of this kit appealed to me instantly and I followed the kit development here on MSW. The kit is just exquisite, with beautifully milled timber and laser-cut parts, printed materials etc. The construction process has been made as easy as possible at every stage of construction with such things as the laser-shaped thwarts and planks that have been spiled ready for you to shape. An amazing kit, intelligently designed, and with the very best in materials. Syren has this model on sale for $225.00 and I think that represents excellent value for money for what will give many hours of building pleasure and a real ornate stunner for the display shelf!


    My sincere thanks to Syren Ship Model Company for sending this kit out for review on Model Ship World. To purchase directly, click the link at the top of this article.


    logo.jpg


  10. 1:70 Hannah 
    Ship Model Okumoto

    Catalogue # 
    Available from Ship Model Okumoto for ¥ 33,000 (approx. $290)


    DSC09316.JPG


    The schooner Hannah was the first armed American naval vessel of the American Revolution and is claimed to be the founding vessel of the United States Navy. She was a fishing schooner owned by John Glover of Marblehead, Massachusetts and was named for his daughter, Hannah Glover. The crew was drawn largely from the town of Marblehead, with much of the ships ammunition being stored in Glover's warehouse now located at Glover's Square in Marblehead before being relocated to Beverly, Massachusetts. The schooner was hired into the service of the American Continental Army by General George Washington. Washington commissioned Nicholson Broughton to command the Hannah on 2 September 1775 and ordered the vessel to, "...cruize against such vessels as may be found . . . bound inward and outward to and from Boston, in the service of the [British] army, and to take and seize all such vessels, laden with soldiers, arms, ammunition, or provisions . . . which you shall have good reason to suspect are in such service." Hannah set sail from the harbour of Beverly, Massachusetts on 5 September 1775, but fled to the protection of the harbour of Gloucester, Massachusetts two days later under the pursuit of HMS Livelyand a second British vessel. Leaving Gloucester Harbour, Hannah captured HMS Unity.

    USSHannahModel.jpg

    Hannah's brief naval career ended on 10 October 1775, when she was run aground under the guns of a small American fort near Beverly by the British sloop Nautilus. After a 4-hour engagement between the British ship and Beverly and Salem militias on the shore, Hannah was saved from destruction and capture. According to legend, soon after Hannah's decommissioning, the schooner was towed to Lee's Wharf in Manchester, where its name was changed to Lynch. There, the vessel was restored to working condition by 7 carpenters over the course of 3 weeks. In March of 1777, Lynch was sent to France with congressional correspondence for Benjamin Franklin, who was there as U.S. Ambassador. Upon embarking on their journey back to the U.S., Lynch and its crew were captured by British ship HMS Foudroyant. Lynch was sold as a prize by the British and documentation indicates that the schooner was used as a merchant vessel thereafter.
    Edit courtesy of Wikipedia


    The kit

    DSC09317.JPG

    Hannah is the fourth release from Ship Model Okumoto and has only been on sale for a week or two, so my thanks to those guys for getting this out to me from Japan so quickly. According to their website, this is the kit specification:


    • Scale:                                     1/70
    • Total length:                            335mm
    • Height:                                    90mm
    • Width:                                     100mm
    • Wood:                                     Agathis
    • Build time:                              100 hours
    • Parts count:                             310 laser-cut parts, dowel


    As with my previous reviews for La Couronne, Endeavour and Santa Maria, this kit is packaged into a transparent, lockable box. However, this one is smaller, and our postie actually managed to pop it through our letterbox! As well as being smaller in general size, it’s about half of the depth of the previous releases and has some separate green plastic locking clips to hold it together. Inside, we have eight sheets of laser-cut Agathis wood, a small bundle of dowel, plans, instructions and a parts list. 

    DSC09318.JPG

    DSC09319.JPG

    A hallmark of Okumoto’s kits is the very low scorch that results from cutting via laser. You can see that very little heat has crept into the area adjacent to the cut, and there is no discolouration of the parts. A simple clean-up of the edges is all that’s needed, so remember to do this to each inner frame edge and component before assembly. All parts are also nigh-on cut through in their entirety, so lengths of tape have been attached to the rear of the sheets, holding each part securely in place. Removal of the parts shows that no sticky residues are left behind either. As with the other kits, there is no part nomenclature on the sheets, and you need to refer to the paper plan sheets to identify each component. There is a little laser etching on each sheet which indicates the sheet number, for reference, and also the sheet thickness. 

    DSC09320.JPG

    DSC09321.JPG

    DSC09322.JPG

    Timber quality is excellent, with the Agathis being very fine grained. This should be nice and easy to work with, and you shouldn’t get any splitting etc. The slightly golden colour is also very attractive. Note that whilst these kits are POF, there are some simplifications in their construction. For example, these models don’t have cant frames. However, each frame is constructed from a number of individual components that would be similar to the way the actual ship frames were constructed. 

    DSC09323.JPG

    A small bundle of short dowel lengths concludes the timber items in this kit.

    DSC09324.JPG

    Underneath the colour image of the completed Hannah, lies a profile plan that’s roughly A3 in size. This contains a port elevation as well as a partial upper and lower plan. Annotation is in English.

    DSC09325.JPG

    We next have three sheets that contain the parts maps for the eight sheets of timber supplied. These are exact duplicates of the timber planks with regard to layout. 

    DSC09326.JPG

    DSC09327.JPG

    DSC09328.JPG

    DSC09329.JPG

    Now, unlike the previous Okumoto releases, this one has a far more comprehensive instruction manual, again making this an ideal introduction to POF. Twelve sheets of paper are printed double-sided and stapled, creating a 24-page manual. Whilst this is still in Japanese, the photos are very good at explaining the steps. You can also use a smartphone app, such as Google Translate, so scan the text and convert it in real time. 

    DSC09330.JPG

    Lastly, a series of sheets are included which show the frame and detail assemblies. For the frames, you simply put these together over the top of the printed paper, after applying a little wax, maybe, to prevent the timber from sticking to your plans.


    Conclusion
    Out of all the Okumoto kits now on sale, Hannah has to take the place of Santa Maria as the first one that a newcomer to POF should tackle. Whilst Santa Maria is a beautiful and relatively uncomplicated in comparison to La Couronne and Endeavour, I feel that Hannah is well-pitched in complexity and price, to possible be the first POF from Okumoto that you consider due to its straightforward design. It’s worth noting that despite being an easier build subject, it still has almost twice the number of parts, according to their website, than Santa Maria.  It’s also a little gem with its length of just over one imperial foot (13 inch, 335mm). A superb project that will look perfect on the mantlepiece and one that also won’t break the bank. Estimated building time is around 100hrs too. 


    Please let Ship Model Okumoto know that you saw this review on Model Ship World.


    My sincere thanks to Ship Model Okumoto for sending this sample out for review on Model Ship World. To purchase directly, click the link at the top of the article.


    hannah01.jpg

    hannah05.jpg

    hannah06.jpg

    hannah08.jpg

    hannah09.jpg


    logo.jpg


×
×
  • Create New...