Landlubber Mike
-
Posts
4,543 -
Joined
-
Last visited
Content Type
Profiles
Forums
Gallery
Events
Everything posted by Landlubber Mike
-
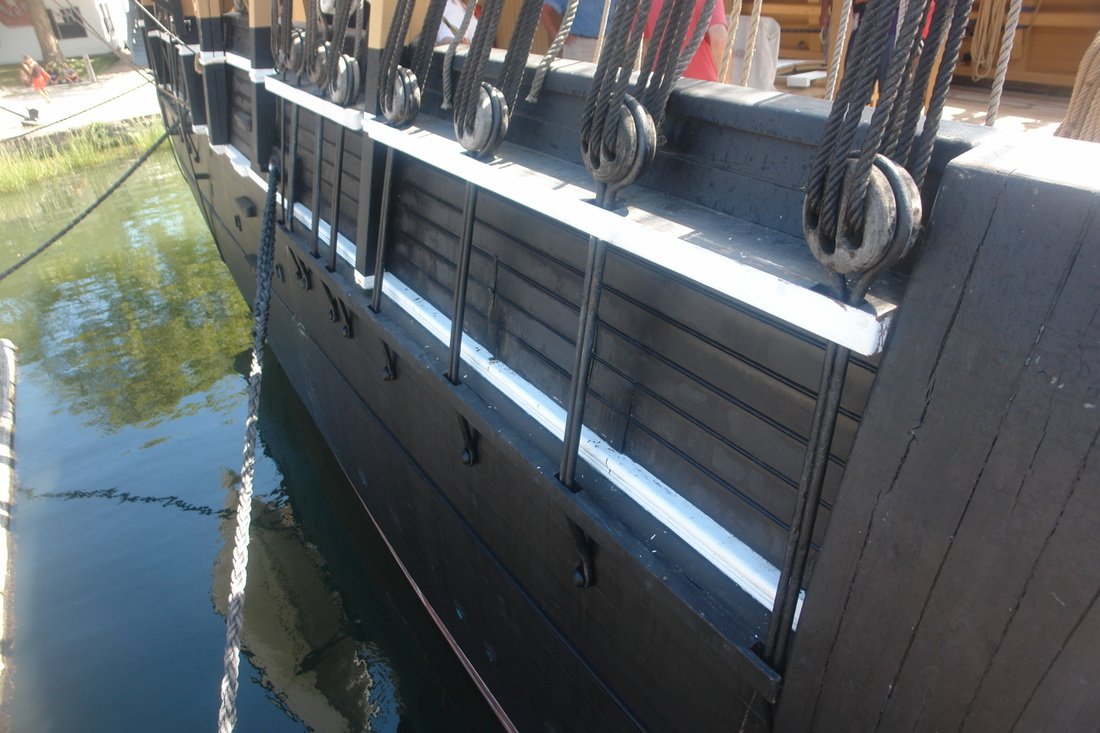
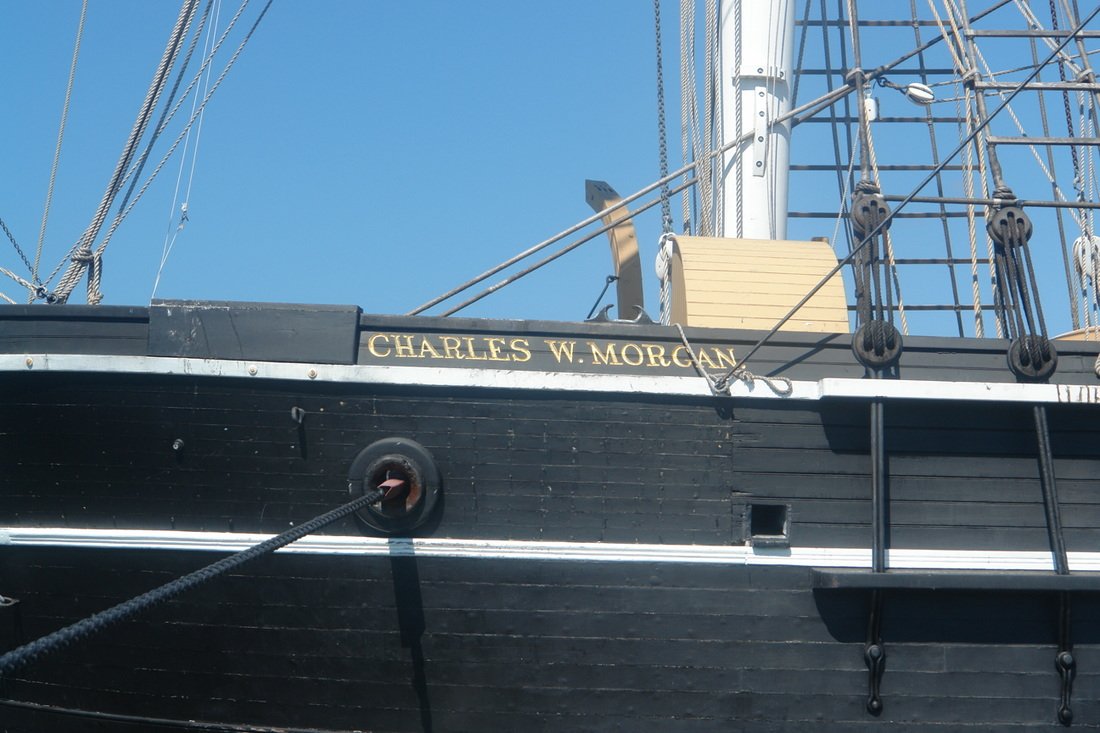
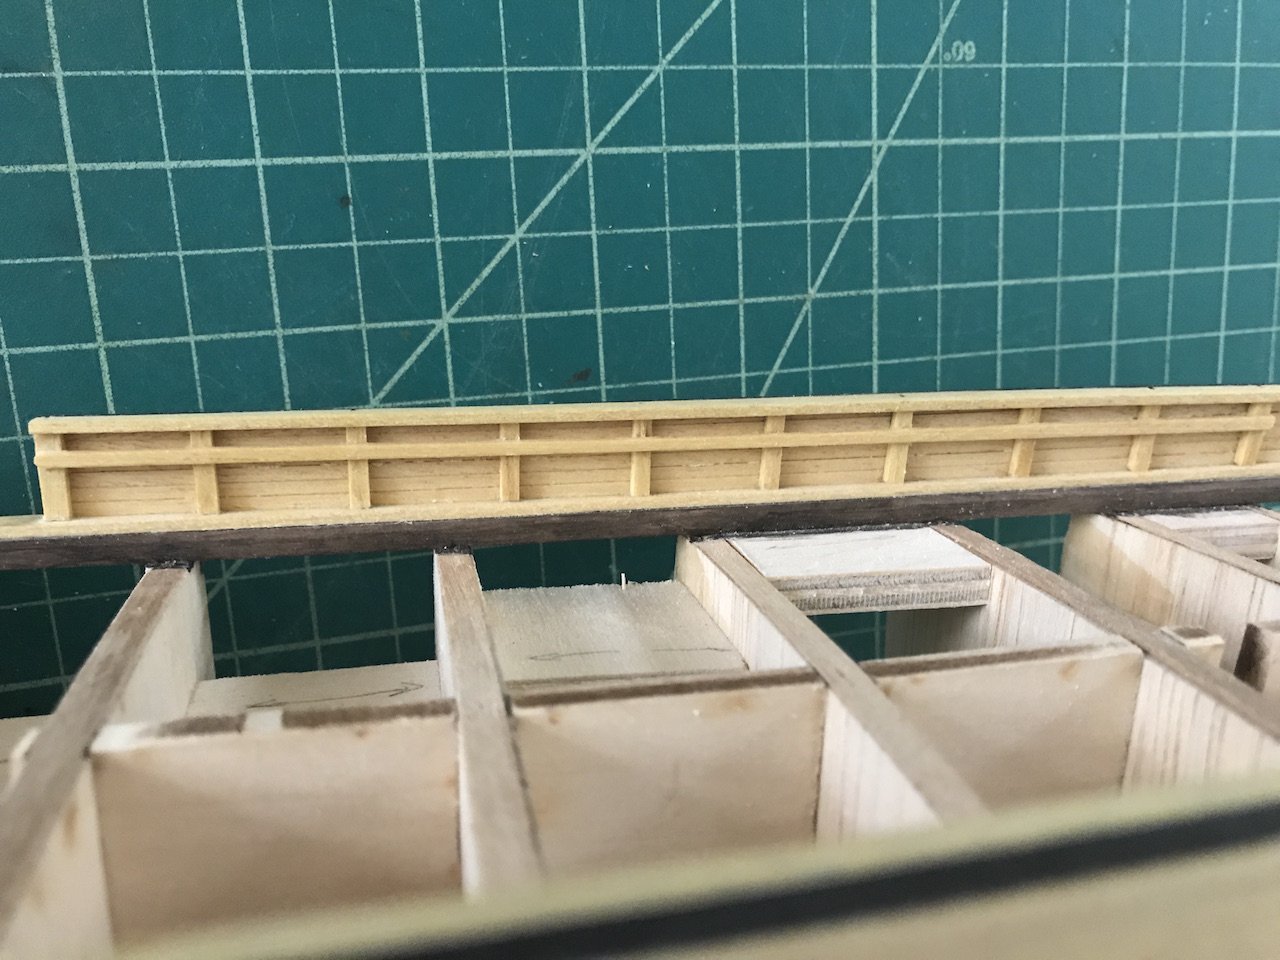
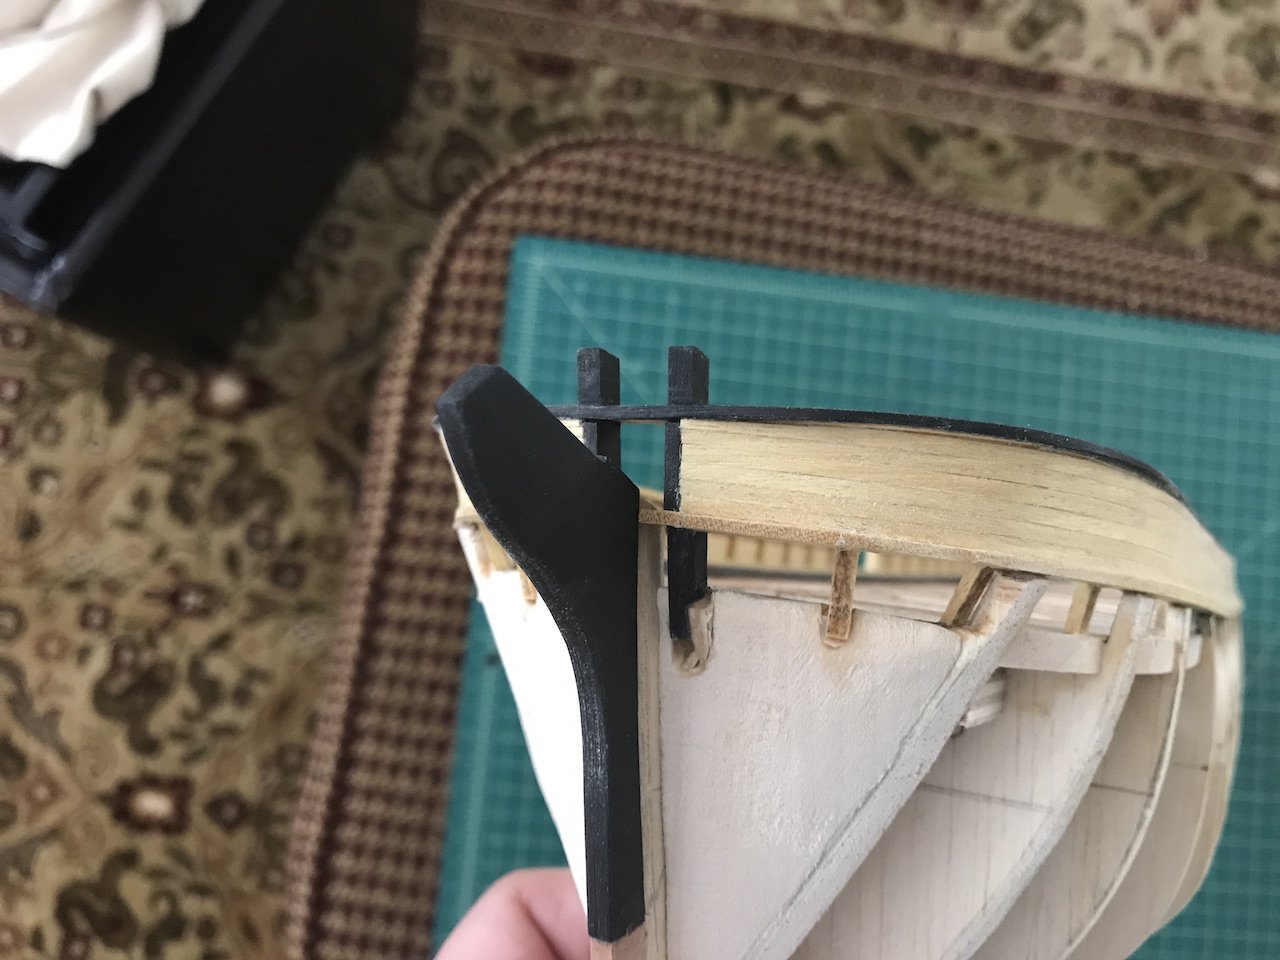
 Long overdue update, but spring is a busy time for me with kids, yard stuff, etc. I've been making progress over the last couple of weeks, planking the section of the hull between the main rail and planksheer (which is in yellowheart). It really wasn't all that bad using ebony. It's not as easy to work as pear or boxwood, but it cuts very cleanly and sands to a beautiful sheen. I'm cutting strips about 0.7mm in thickness, so they are pretty flexible. It's probably hard to tell from the pictures, but the first section of the bow to about the third bulkhead is comprised of 10 rows of planks (approximately 1.2mm in width). The remainder is six rows. In looking at pictures of the Morgan, the planks in the six-row section of the hull are beveled at the edge. With the ebony planks only being 0.7mm in thickness, beveling was out of the question. So, what I ended up doing is taking a scalpel and slowly working it between the plank rows to add a little more definition between the planks. Seems to have worked out ok, I'll try to take close-ups soon. After that, I sanded the planksheer back to the edge of the ebony planking. This will ensure that when I put the holly molding along the planksheer, it will be a uniform thickness along the hull. I also planked the transom with some thin basswood strips, and added wood filler to the filler block areas since I did a crappy job with the filler blocks in sanding back certain areas too much. Thanks for looking in!


-
I've been focused on my Morgan build the past few months and haven't turned back to my LAR. In part I'm still considering what kind of color scheme, and whether and to what extent I will use paints or try to paint with wood. Given the castings and the quality of the materials, I'm considering just building the kit as is, with maybe some minor replacement of the wood with better modeling woods. I might actually try using weathering techniques, not necessarily to make the ship looked aged and beaten up, but to add highlights and lowlights, etc. to approximate more of a patina'd look. So I managed to get my hands on the Ancre monograph of La Belle Poule (1765) for a good price on eBay. The monographs have so much detail they are fun to look through. Flipping through it today, I noticed a reference to a La Renommee of 1767 and the Chapman 'Architectura.' The version I have is in French, and not speaking French I need to use Google translate which does a pretty good job. Here is the translation of the discussion which is summarized above regarding the provenance of the ship. The monograph has plans for the 1767 La Renommee, which don't look like they match up with the kit/Chapman plate. Anyway, here it is. The Fame 1767. Among the hundred frigates of 12 of our navy, there are two that will be (pierced to fifteen) being designed by the engineer Nicolas Groignard man of great reputation, notably author of the three-point ship Brittany. These frigates, by their great length and strength, are special cases. The Renommee had been preceded by the Terpsichore, built at Nantes in 1757, we do not possess the plans of this frigate. The Fame, was theoretically pierced on each side of fifteen ports, but on the number two were not open being masks by the curling and the linings. It was only planned to open them in the event of hostilities. The plans of the Fame are preserved in the Danish archives and there exists at the Museum of the navy in Paris, a fairly complete numerical estimate of this frigate. The Fame, presented the singularity for a French frigate to have the big bitts on the false bridge, the hawks being pierced between the jottereaux. In the methodical Encyclopedia Vial du Clairbois (see Monograph of Dawn, page 18, footnote 1), the model of a Swedish frigate, directly borrowed from the The great work of Fr. DE CHAPMAN: ARCHITECTURA NAVALIS MERCATORIA ... In his text Vial du Clairbois warns the reader of the foreign model of his example and indicates that only the frigate Fame, has big bits on the false bridge and consequently the Lower capstan bell is at this level. Admiral Paris, in his (Preserved Naval Memories), took again the plate of the Methodical Encyclopedia, but without taking notice of the text, and presented this frigate (born Swedish) as being Renown; But this is only to be found in detail in the considerable mass of information gathered by Admiral Paris.
-
Your Fly is looking really nice. I really need to get back to my Pegasus one of these days.
- 467 replies
-
- 1
-

-
- fly
- victory models
- (and 1 more)
-
Wow Jason, amazing work! Did you paint those letters free-hand, or with a stencil or some other way? They really look perfect.
-
Don, this is turning into a real beauty. Love the finish you put on the model - it really makes the wood come alive.
- 653 replies
-
- 4
-
-
- trabakul
- marisstella
- (and 1 more)
-
These are a lot better than what I do, which is spread them on my kitchen table, kitchen island, or even the floor
-
Wow Jason, just catching up with your log. Very nice work!
-
Really amazing work Greg. Your woodworking skills are truly master class. I'll be happy if I can ever reach a tenth of your skill level 😊
-
Hey Bob, just getting caught up on MSW after being away for a while. Was happy to see you start on a new build - looking really great! Hope all is well.
- 682 replies
-
- 4
-
-
- halifax
- lumberyard
- (and 1 more)
-
Hey Martin, thanks for looking in. I didn't do the exterior hull planking yet - I'm going to be using 0.5mm or so ebony for that. It's going to be tough for a number of reasons, including (1) using very thin ebony around a curved surface, (2) needing to squeeze 10 planks between the plankshear and one of the railings, and (3) did I mention I'll be bending 10 strips of very thin ebony around a curve? Now I remember why I took a break for a bit to try and plan out how I would plank this section.
-
Hey Martin, great to see you back on here. I agree with finding some way of securing the cannons. I can't tell you how many times I busted them off my Badger. Thankfully, there were only a few cannons, and they were all accessible. I think BE's approach makes a lot of sense - sleeves or no sleeves Weather is heating up here too, and I too end up with more modeling time in the refuge of my cool basement.
- 467 replies
-
- 1
-
-
- fly
- victory models
- (and 1 more)
-
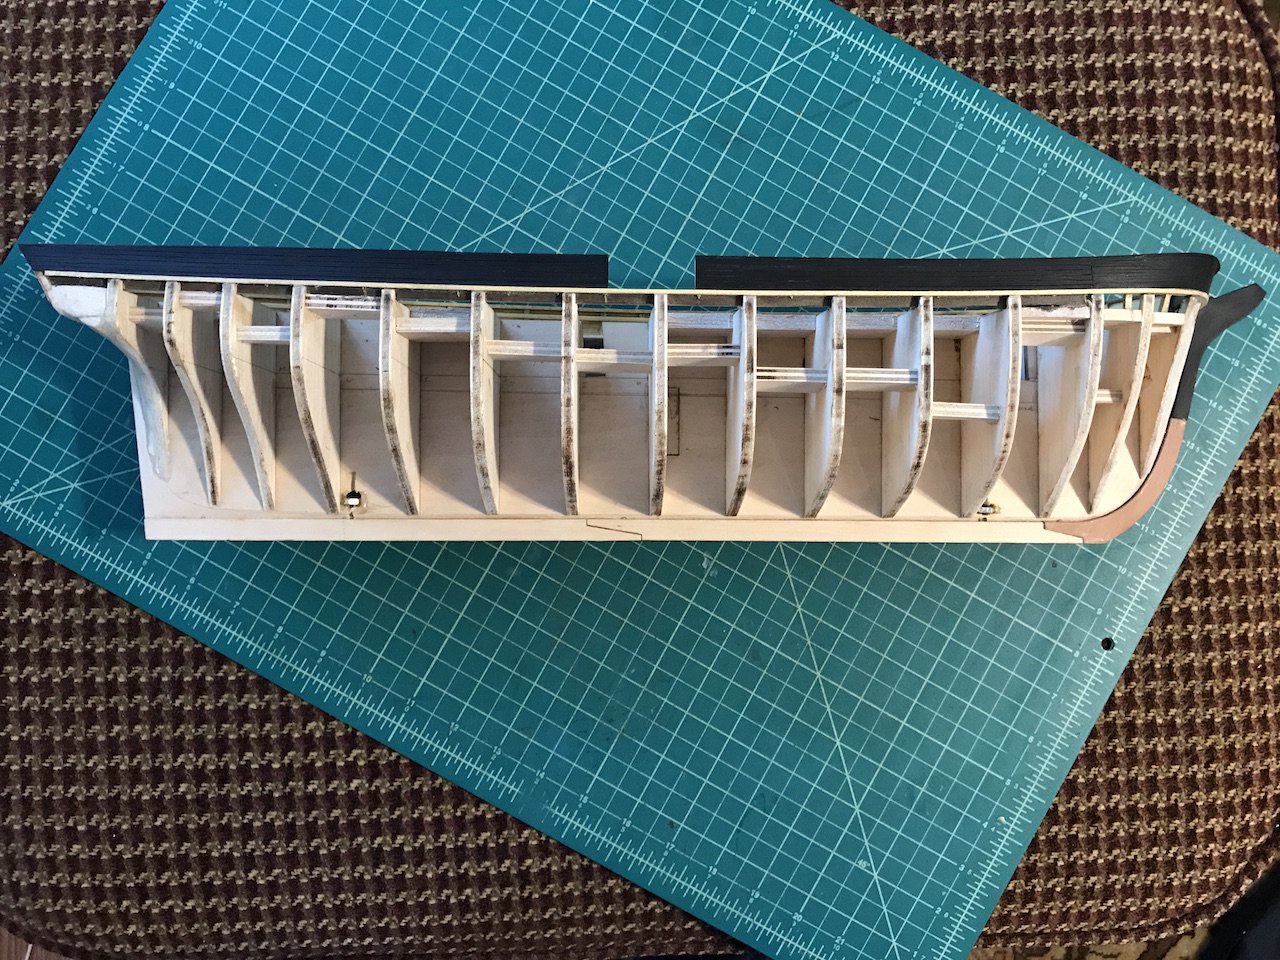
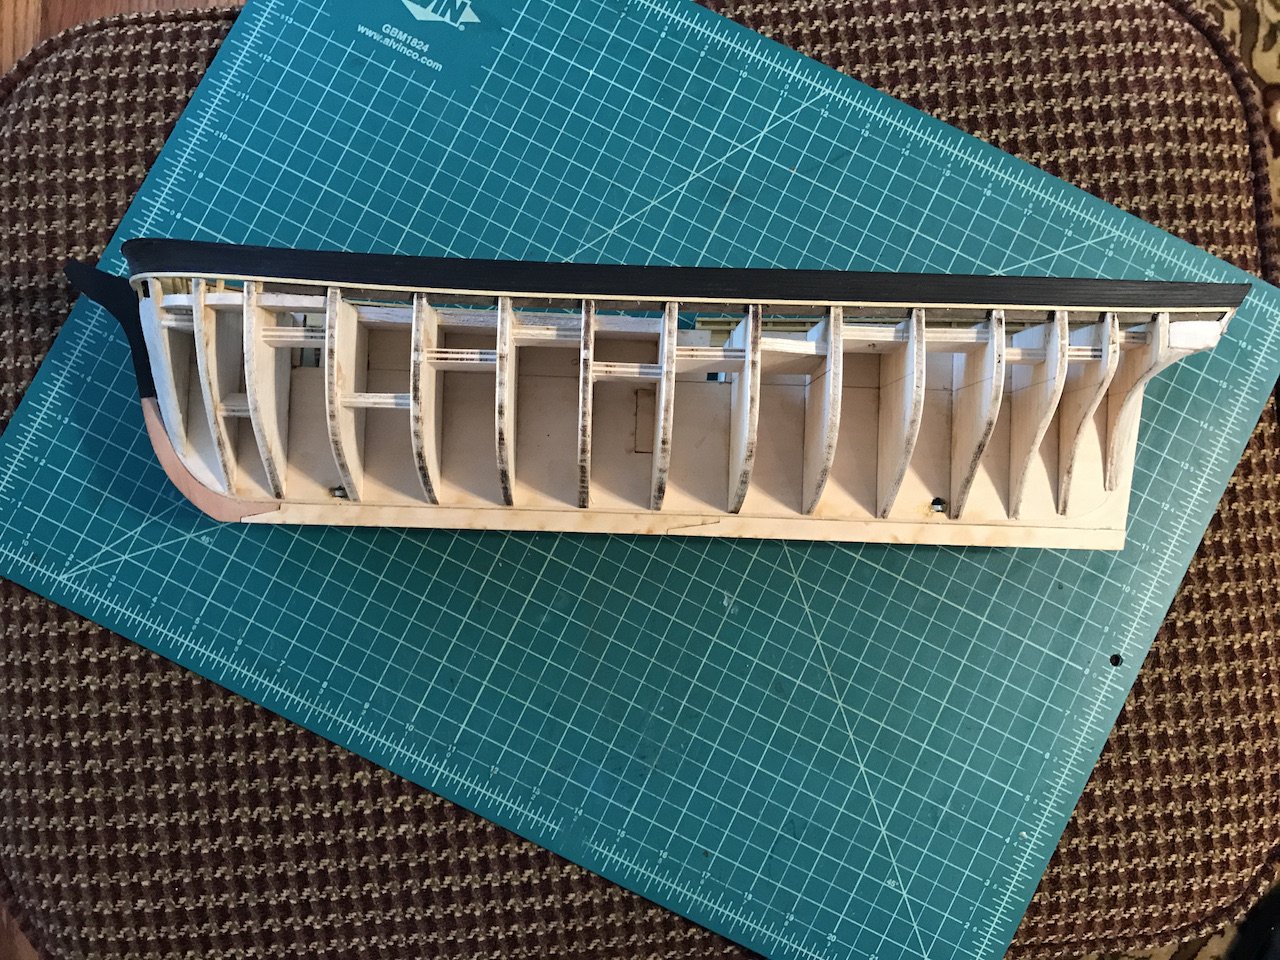
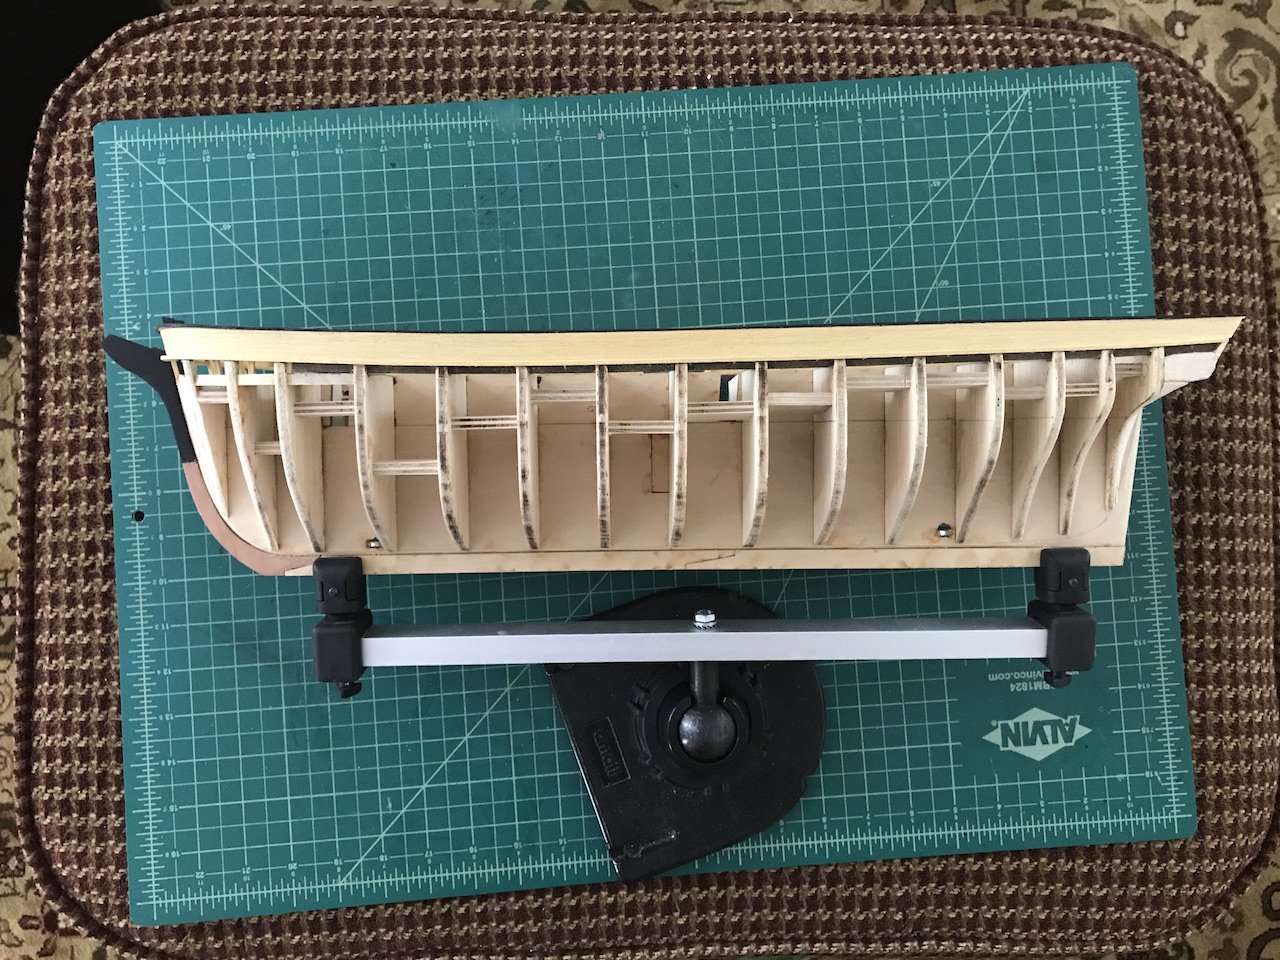
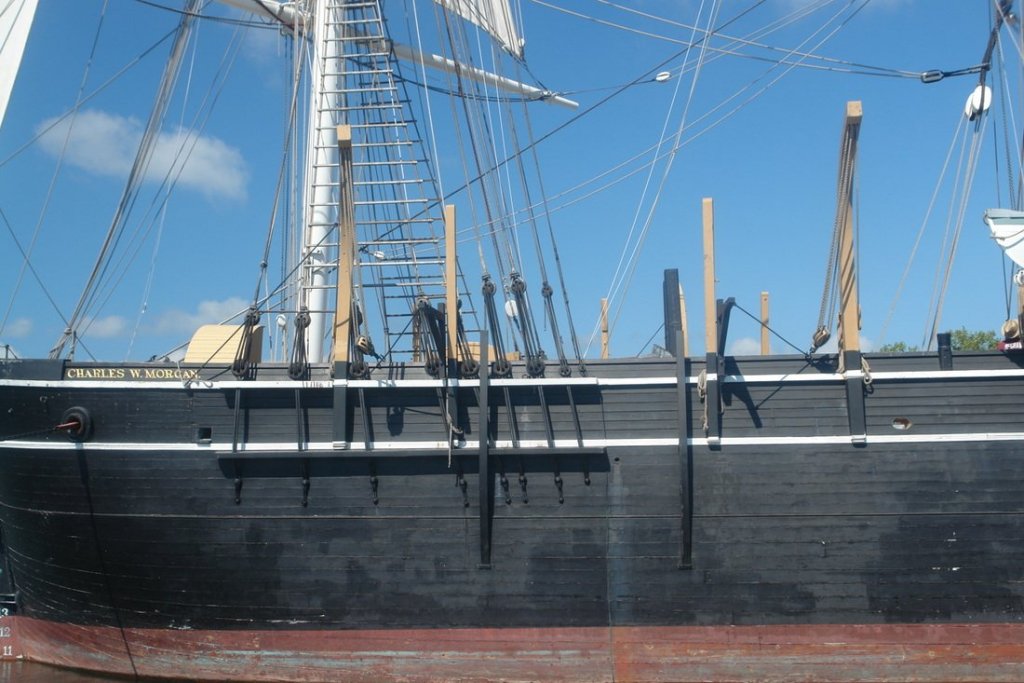
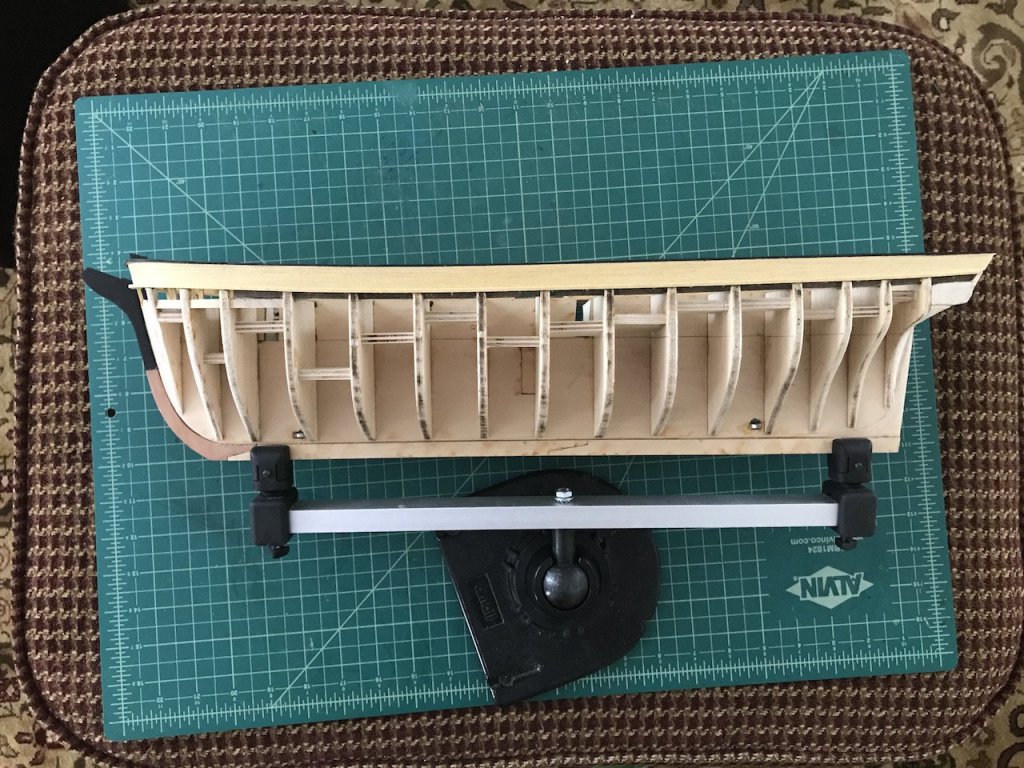
Hey guys, I haven't been on much lately with a family vacation, setting up a fish tank for my kids, the warmer weather coming on which means my other hobby (bonsai) starts up and gets very busy, etc. With this model being a heavy kit bash for me, it takes a lot of time just to plan out how I'm going to approach certain things. This makes me lean towards starting up the La Renommee and build it straight from the box. I don't know, we'll see. Anyway, I'm at the point where I have free time again, so I've been trying to remember where I was with this build and my other builds. Last I worked on the ship, I had planked the bulwarks with yellowheart. Interestingly on this kit, the inside of the planking serves as the inner bulwark planking, so you have to take your time and get it right as there is no other planking for the inner bulwarks. It ended up coming out pretty nicely I think. I've already pre-cut and curved the pieces for the log rail and topgallant rail, but I think I might wait to install those until the hull planking is completed as those two rails might be a bit fragile on the build (and I tend to be a lap modeler). So, next up I have to start thinking about the outer hull ebony planking, which should be interesting. There's a section of the outer hull near the stem where the run of planks goes from 6 to 10 strakes. So, the planks will be very narrow, and hopefully bend ok. Here are a few pictures of where I am at the moment. Thanks again for looking in.


-
Putting aside the cost and dust issues, I haven't found ebony to be that hard to work with. It cuts very well and cleanly, sands nicely, takes glue just fine (I use Gorilla brand wood glue, which I've used on all my models, and all different kinds of woods), and can be bent with soaking and heat if you are patient. Take a look at my Morgan build log and you can see the kind of work that can be done with ebony. It's not as easy as let's say pear, but it looks much nicer than ebonized pear in my opinion.
-
Gorgeous work, and I'm jealous of your outdoor surroundings! How do you like the serving machine? I've been thinking about getting one, even if to just strop blocks which was a painful endeavor on my Badger using "helping hands" and other gizmos.
- 653 replies
-
- 4
-
-
- trabakul
- marisstella
- (and 1 more)
-
Eddie, try this vendor - he was very great to work with to buy custom sized ebony for my Morgan build. Not sure how shipping will work out as I see you're in Australia, but hopefully he can be a resource if you're not finding anything local. www.inlaybanding.com
-
Thanks very much Robert for the kind words. It is nice to be able to contribute at least in a small way after the immense help I've received on here. Welfack, I totally agree with the Harland book. It was a critical resource for me in learning out how sails were furled, set, tacked, etc. The diagrams on how sails and the running rigging operated were very helpful. It definitely fills a unique niche in the ship modeling book space if you are interested in adding sails to your build.
-
BE, really gorgeous work. Congratulations! This is the pinnacle and gold standard of Swan Class builds here. Thanks so much for sharing your journey with us, and for taking the time to share your techniques. Live the display play by the way - I wish I went with an acrylic case like you have on my Badger. Having wood molding for the panels distracts the eye from the model in my opinion.
- 366 replies
-
- 2
-
-
- pegasus
- victory models
- (and 2 more)
-
Looks like I had to go back in and change the display name from the login tag. Thanks for pointing that out!
- 366 replies
-
- 2
-
-
- pegasus
- victory models
- (and 2 more)
-
BE, let me add my voice to the loud chorus of people that appreciate all the time you have put into not only posting your very detailed build log -- one of the very best logs ever on MSW -- but also for reposting it twice! I have to say, you are a saint in being so patient and good hearted about all this. I have to confess that I don't think that I would do the same one time, let alone twice.
- 366 replies
-
- 7
-
-
- pegasus
- victory models
- (and 2 more)
-
Fantastic work Elijah, beautiful job! Looking forward to your next project.
- 701 replies
-
- 6
-
-
- phantom
- model shipways
- (and 1 more)
-
Coming along really nicely Joe. Great work on the decorative elements.
- 136 replies
-
- 2
-
-
- caldercraft
- Cruiser
- (and 2 more)
-
Thanks Homer, really appreciate the kind words. I've made a little progress, planking the bulwarks with yellowheart. So far so good. I'm about to start planking the exterior hull with ebony, which should be interesting. Things have just been a little busy, and with the warm weather, I've been working on the yard and with other things. Will try to post an update soon