Landlubber Mike
-
Posts
4,544 -
Joined
-
Last visited
Content Type
Profiles
Forums
Gallery
Events
Everything posted by Landlubber Mike
-
 Looks great Mark. Good to see you putting the Death Star to good use Hey, just think of it this way - if you tackle the small one first, everything will be downhill from there!
 -
Really nice work OC. Very crisp and clean, looks fantastic!
- 455 replies
-
- 5
-

-
- slightly modified
- greyhound
- (and 1 more)
-
Looks like you made some sweet tasting lemonade despite being given lemons. Nice job!
- 331 replies
-
- 1
-
-
- nuestra senora del pilar
- occre
- (and 1 more)
-
Very nicely done! Amazing how you guys building these plastic models with the PE add-ons don't go cross-eyed in the first hour, let alone after a ship or six.
-
Looks fantastic Mark, really nice job. Interesting how the quarter galleries have that ledge.
- 331 replies
-
- 2
-
-
- nuestra senora del pilar
- occre
- (and 1 more)
-
Very nice work! Well done! Im reading the second book in Ian Toll’s series on the Pacific War. Spruance plays a key role in the war effort, cool to see someone building the ship named after him.
-
Great start Nils - so happy that you are adding sails, they make a model come alive in my opinion.
- 692 replies
-
- 5
-
-
- eagle of algier
- chebec
- (and 2 more)
-
They look great Mark. How did you make the tops to the stove? Are those metal? Wood?
-
Coming along great BE. I have a square tuck on my La Renommee too which I'm scratching my head on. Looks like the Cheerful is slightly different than typical, and you have clear plans that show you what you need to do at least. The framing on it will look really sharp when you figure it out!
- 574 replies
-
- 1
-
-
- cheerful
- Syren Ship Model Company
- (and 1 more)
-
Nice work Jason. I pulled up the Dark Iron paint on Amazon and saw it was brown and was a bit confused - looks like it works perfectly though! That notch in the ladders worked out great. Seems like a good way generally to ensure that the ladder stays fixed in place. I'd hate to have a ladder come loose in the lower decks.
-
That's what I use: https://www.gorillatough.com/product/gorilla-wood-glue/ I haven't tried Titebond or some of the other glues people use here, but the Gorilla glue dries clear and has very good adhesive power. It's all I've been using since starting the hobby.
- 455 replies
-
- 4
-
-
- slightly modified
- greyhound
- (and 1 more)
-
Very nice Mark. I was looking for something similar for the try works for my Morgan and saw that plastic sheet stuff. Looks great! If you're a masochist, these look interesting. I've considered trying them out to see how the finish: https://www.ebay.com/itm/100-Extremely-Tiny-Real-miniature-bricks-HO-OO-N-scale-railway-wargame-diorama/161304880942?hash=item258e85272e:g:AG4AAOxyBvZTQ9PQ
-
Beautiful work Mark. Everything looks so crisp! Interesting result with the Danish oil. I used it on some test pieces and it seemed to impart a little more of a yellow hue, but maybe I was using a lighter colored wood.
- 331 replies
-
- 2
-
-
- nuestra senora del pilar
- occre
- (and 1 more)
-
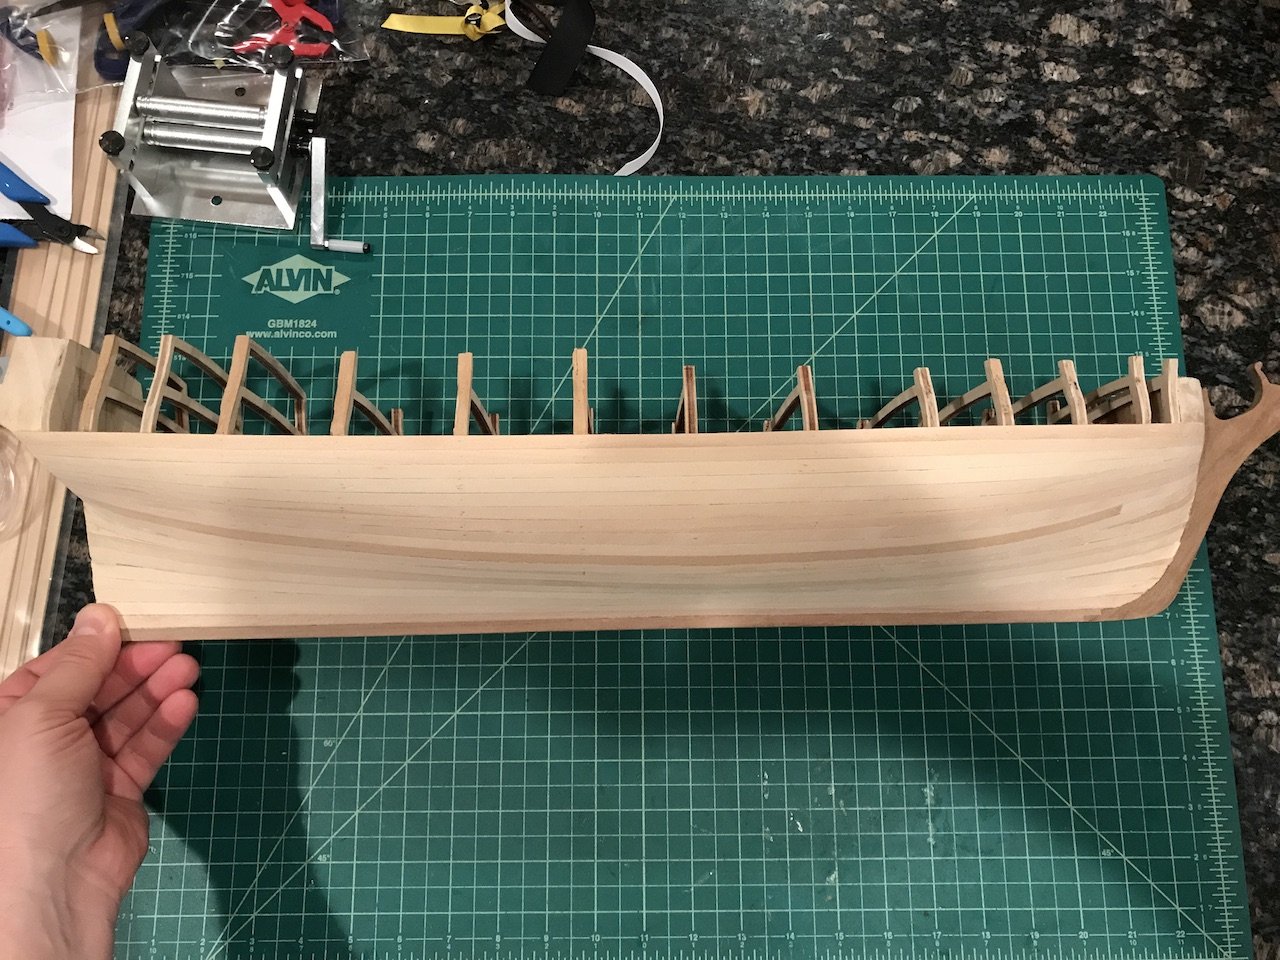
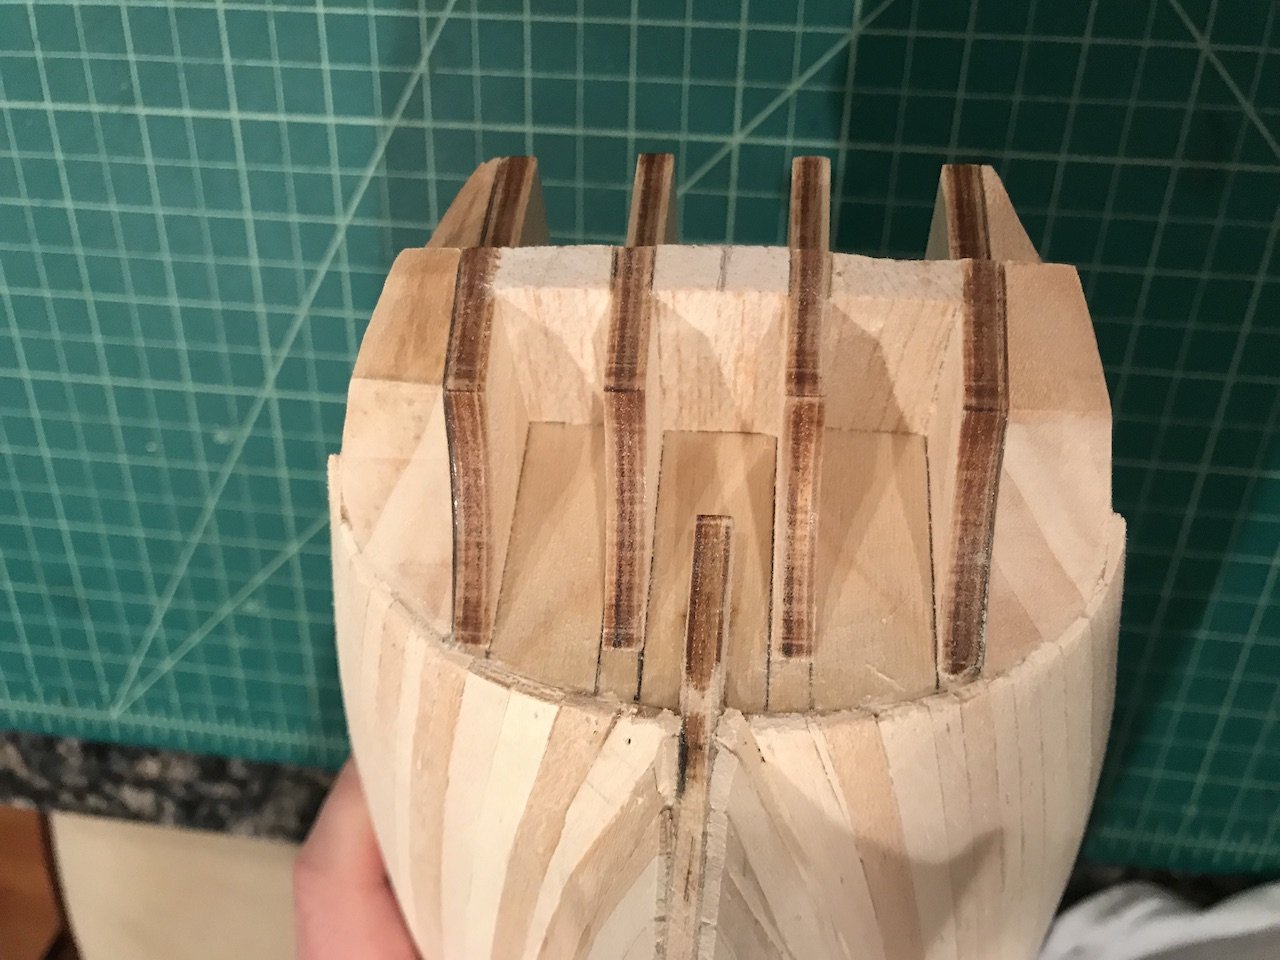
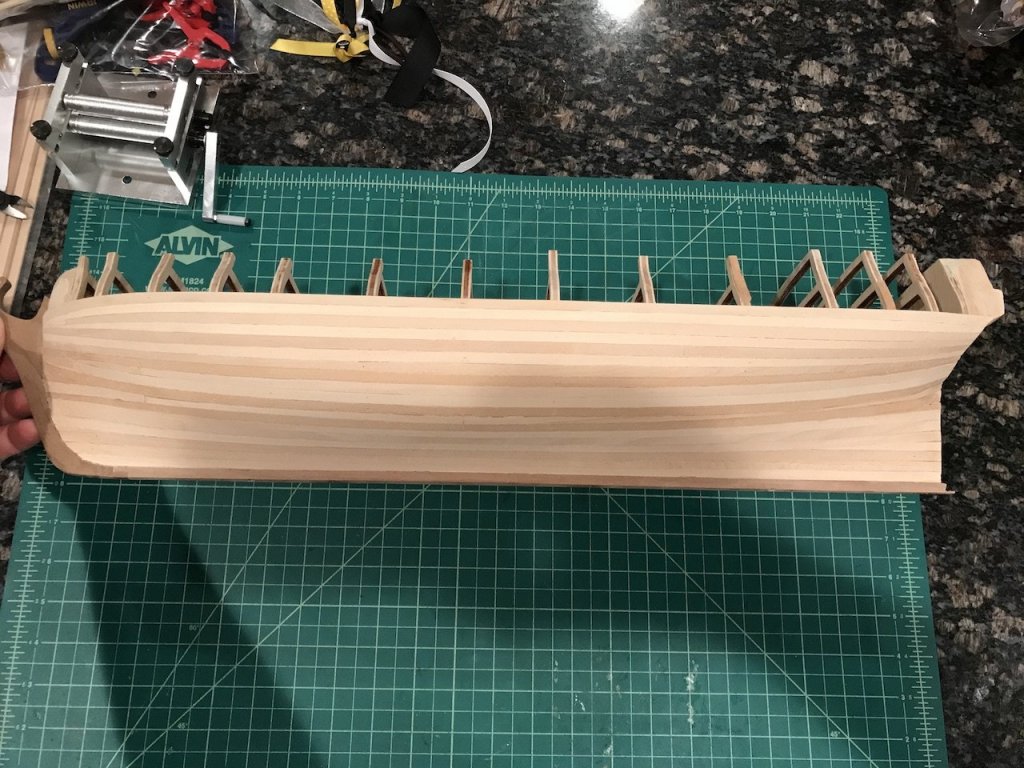
Finally finished the first planking of the lower hull. Ended up coming out really nicely I think - I might not have to use any filler at all, except maybe around the stern area with that turn up into the counter. I still need to clean up a bit around the stern and bow, which I'll need to do by hand, but I used a palm sander outside today to sand the planking down. Wow, does that make life much easier! Was so quick to sand the hull, I still remember doing the Badger by hand and it taking forever. I'm now a big convert to bow and stern filler blocks, they really help! A big thank you to Pete who suggested using them in his build notes. One thing I started wondering is whether even if you're doing a POB kit, whether just adding filler blocks through the full area such that you don't even have to bother with a first planking would be quicker and easier than going through the first planking, sanding, filling, etc., and then adding the second (essentially, converting it to a solid hull). Guess it depends how easy it is for the person to do filler blocks. Some pictures of where I am: One issue that has been bothering me is the fact that the kit provided different wood for the stem/rudder versus that for the keel. The stem/rudder I believe is walnut, and the keel might be ramin. The color difference between the two is too striking for my liking: I was originally thinking of painting the lower hull white which would have made this a non-issue, but given how far I'm pushing on this build, I think I'm going to leave the hull natural. I don't want to chance using a stain to even the colors out, because then I would have to use stain on the planking itself which leads to more chance of something looking out of place. So, instead, I think I'm going to buy new wood for the stem, rudder, and lower hull planking. I dropped the hull while planking it a while back and the stem snapped right off, so I think taking it off again should be ok. The keel is a bit of a different story because I drilled the pedestal holes into it, and it's secured into the false keel by brass rod. So, what I'll likely do is laminate the keel with thin walnut, and then maybe try darkening the very bottom a bit to avoid any oddities (people shouldn't really be able to see the bottom of the keel though). Going this route will also be helpful in that I think I would like to spile the full hull as a challenge to myself (for my Pegasus, I only spiled planks up to the copper plating line. Jason from Crown Timberyard is back up and running and has been very helpful in answering some of my questions. He sells both a dark walnut and mahogany. I want the upper hull to be lighter in color than the lower hull, and I found a nice lighter cherry veneer that should do nicely. I'm leaning towards using Jason's walnut over the mahogany as I think the colors will work better together. Mahogany looks beautiful, but as a chocolate/orange/rich brown, I don't think that using cherry for the upper hull will work well. Walnut and cherry though seem to complement each other nicely, at least what I've seen in other build logs. Certainly welcome to any thoughts, ideas or suggestions! Next, I'm thinking of working on the gun deck - planking, hatches, etc. A nice respite before having to go back to planking the hull.


-
Dave, it's been a while since I last visited your log but wow, wonderful work! Very cool to see you involving your grandkids like that too
- 742 replies
-
- 5
-
-
- constitution
- frigate
- (and 1 more)
-
I'll echo Chris, that came out very nicely. Do not paint it I like the effect you achieved with the alternating colors of the planks. Very striking!
- 126 replies
-
- 2
-
-
- fly
- victory models
- (and 1 more)
-
I bought those too, but haven't had a chance to use them yet. Glad to hear that they work great!
-
Really nice work Al, well done!
-
David, that's gorgeous planking! You should be giving us advice!
- 126 replies
-
- 2
-
-
- fly
- victory models
- (and 1 more)
-
The one thing I learned the hard way is that while it seems like you can get away with tapering closer to the stem, you really should be starting your tapers much further back as Spyglass suggests. If you start tapers too close to the stem, you will get that clink effect as you are bending your planks laterally against their width. Even a slight bending will cause it. You won't notice it at first, but after about three or four planks you realize you have a problem. I spiled the upper hull planking on my Pegasus. It was really a worthwhile exercise to set up the hull in planking bands and run calculations along each bulkhead. It gives you a good idea of where along the hull, and how much, the planking narrows (it's not consistent across all sections). The stern area for example tends to be wider than the middle section of the hull - but, in some cases, there is a slight narrowing of the hull about 3/4 of the way back. So, you run into a situation where if you are using long planking strips, you taper at the stem, no taper in the middle of the hull, start a taper just beyond the middle of the hull, and then run the full plank to the stem (with stealers). Conceptually I got the bigger concept, but it wasn't until I went through the exercise that I really understood how the curves of the hull really come into play.
- 126 replies
-
- 1
-
-
- fly
- victory models
- (and 1 more)
-
This is an absolutely incredible model in every detail - your father is quite skilled! It's a nice story that you are helping to finish this and complete his vision. I wish I could help with the sails...but just wanted to say thank you for sharing this immaculate model. Good luck!