
HOLIDAY DONATION DRIVE - SUPPORT MSW - DO YOUR PART TO KEEP THIS GREAT FORUM GOING! (Only 20 donations so far - C'mon guys!)
×


Piet
-
Posts
3,568 -
Joined
-
Last visited
Content Type
Profiles
Forums
Gallery
Events
Everything posted by Piet
-
 Hello Jan, good seeing you here and in the meantime I have changed my login name to Piet. I have to apologize to you. Remember you asked me the question if they welded the pressure hull on the O19? My answer was a shot from the hip without any research in responding that 'they were not advanced enough in the welding technique.' Well, I was wrong by assuming that. In doing the research in the O16 I found out that the O16 was a unique prototype by employing a few new techniques. The main one was a new steel alloy called St52-3, which is now S355. They reduced the carbon content to 1/4% and added 1.6% manganese. This made the steel more malleable, improved cold forming and weldable. It was also stronger allowing for a greater max dive depth. As a metallurgist, among other things, I am familiar with the different steels and aluminum alloys. S355 has now been superseded by better materials but never the less it really was a step in the right direction. So, long story short, because the O19 was designed by the same engineer and laid down not long after the O16 was laid down, I surmise that they must have used the same technique and also welded about 49% of the O19 pressure hull. That allowed the O19 to go to a unheard of depth of 100 meters. We must remember that metals tend to get more brittle the colder they get and that was a great concern, and still is today. At a depth of 100 meters water is rather cold. When I worked for the US government as an airworthiness safety inspector I got acquainted with a non-destructive testing engineer from GE, who did the weld tests on the atomic subs. I asked him what the steel alloy was on the atomic subs they build - - - yeah, you guessed it, a big laugh. He could not tell me, it was classified, but rest assured it was rather special stuff. Okay, I hope that clears that up Cheers,
- 83 replies
-
- 9
-

-
- o16
- pacific crossroads
- (and 2 more)
-
Caught up on this one too Denis but only put one like - - - however - - consider all your posts a like Cheers,
-
Thanks for the tip on Gator Grip glue, I hnave made a note on it. Where did you purchase it? I have used a medium thick CA for the O16 build, seems to work quite nice, when using it VERY sparingly. Cheers,
- 151 replies
-
- 4
-
-
- duke of york
- tamiya
- (and 2 more)
-
Hi JesseLee, another good thing about using brass for the pins is that they wont break when you start belying your lines to them. I'll do the same for my Surabaya model. Cheers,
- 1,306 replies
-
- 8
-
-
- syren
- model shipways
- (and 1 more)
-
Wow Kevin, she looks magnificent. So glad you stuck with her and finishing that beautiful build. Please keep at it my friend. Cheers,
-
Truly impressive work Craig. My question on those pom pom guns, how are you managing all those gezillion parts holding hands? Solder? Glue? If glue what kind? My guess on machining the gun barrels is either hot pressing in dies, extruding, or a good quality jeweler's lathe. I guess that I could do it on my old Unimat.
- 151 replies
-
- 4
-
-
- duke of york
- tamiya
- (and 2 more)
-
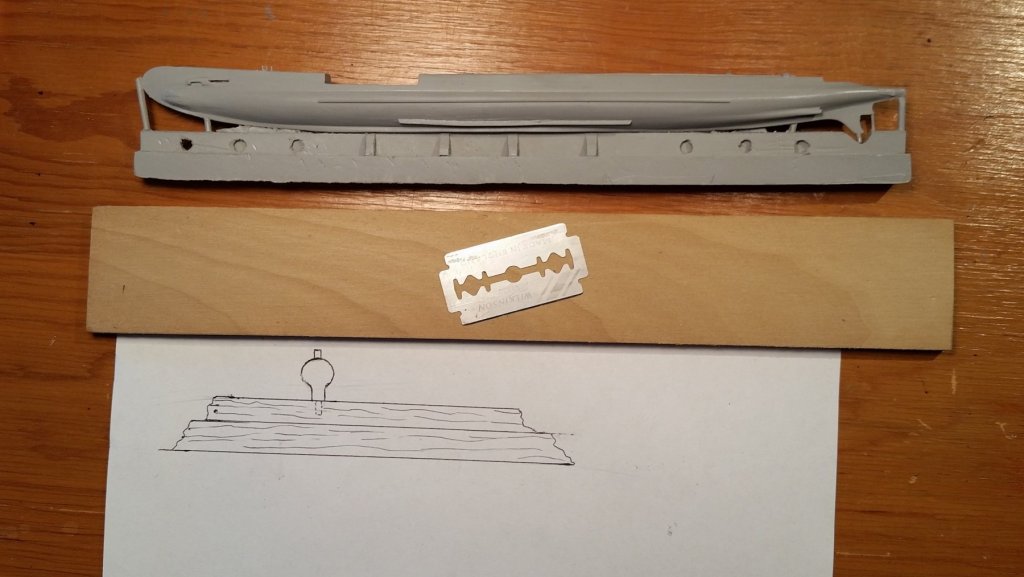
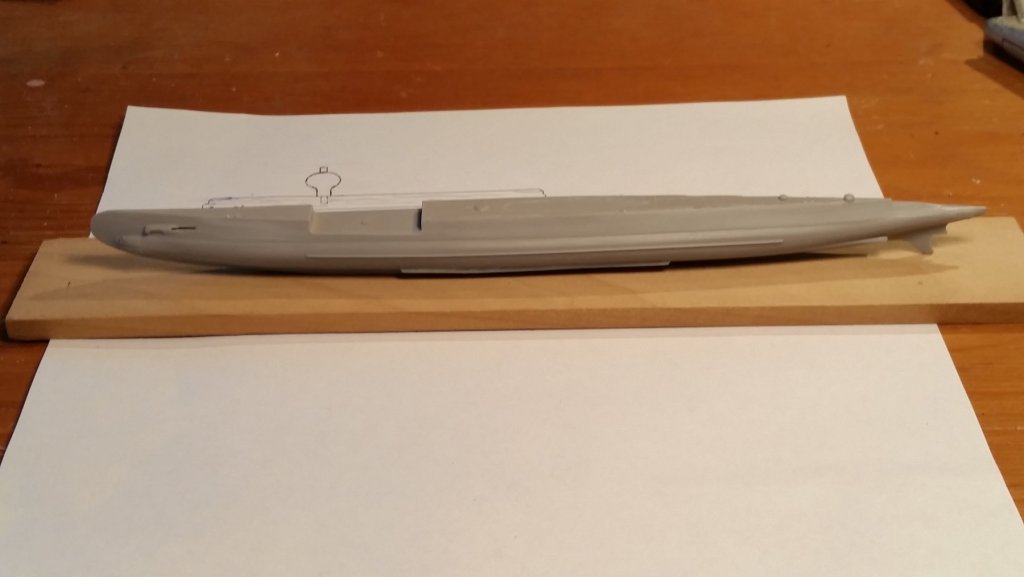
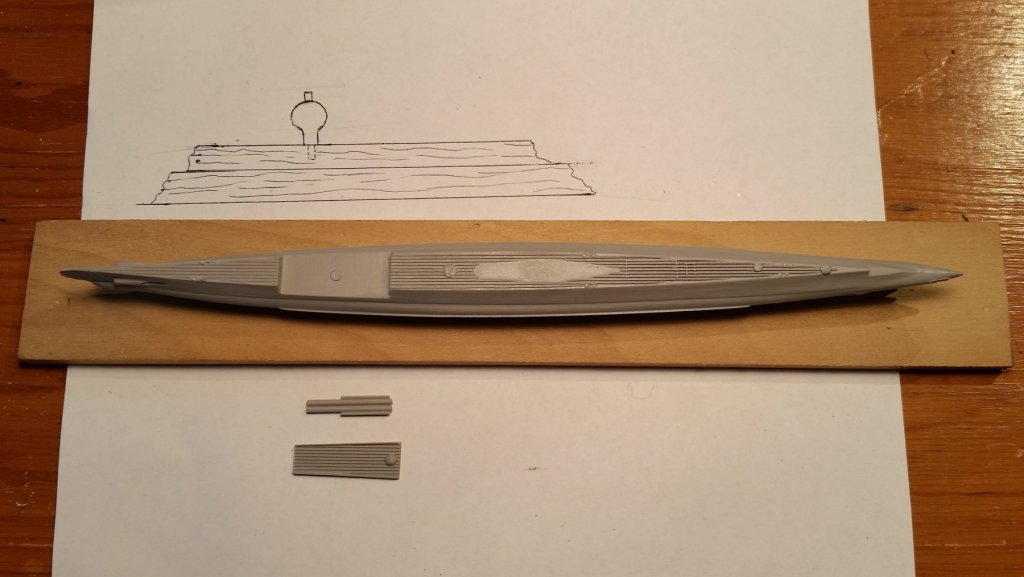
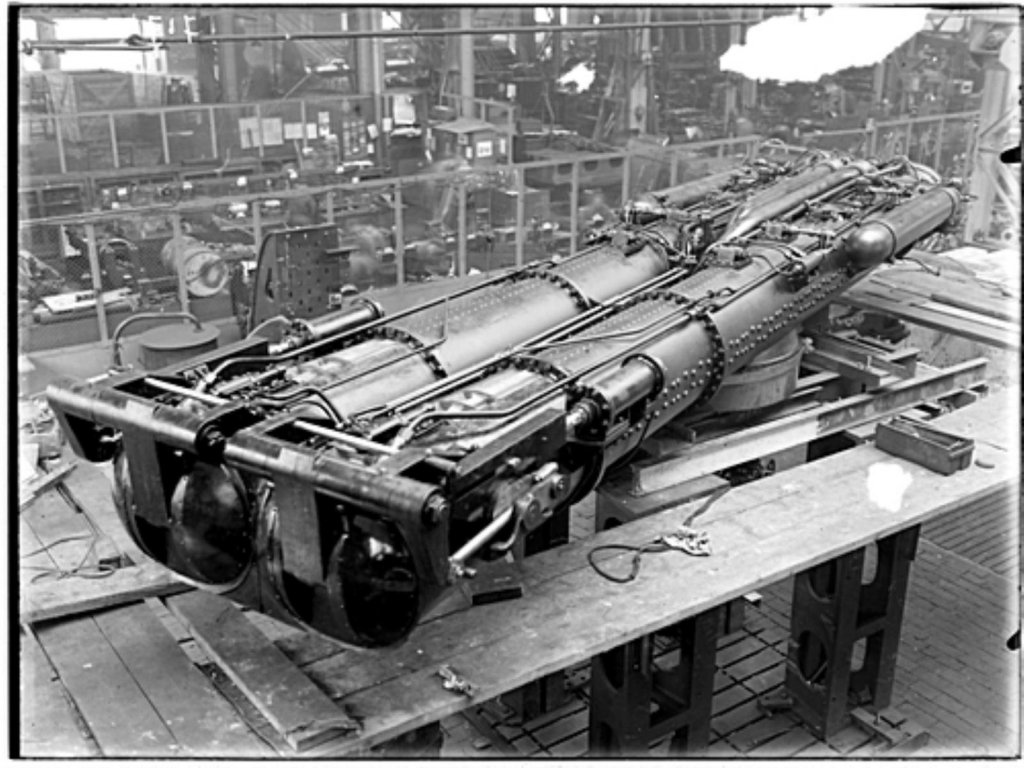
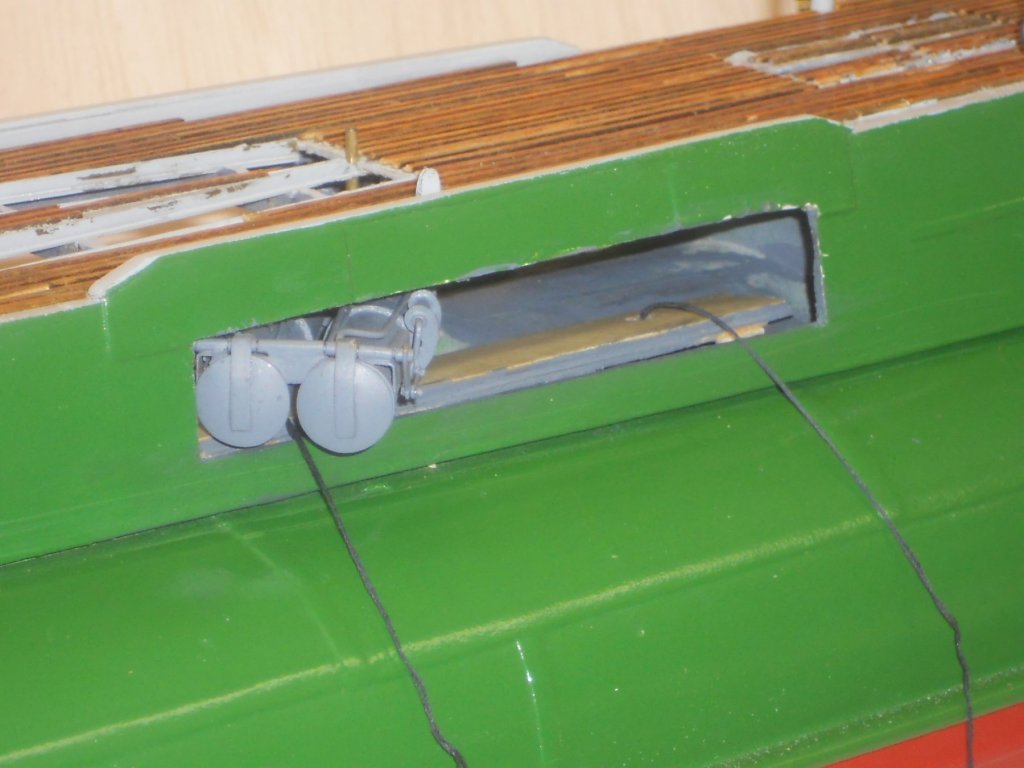
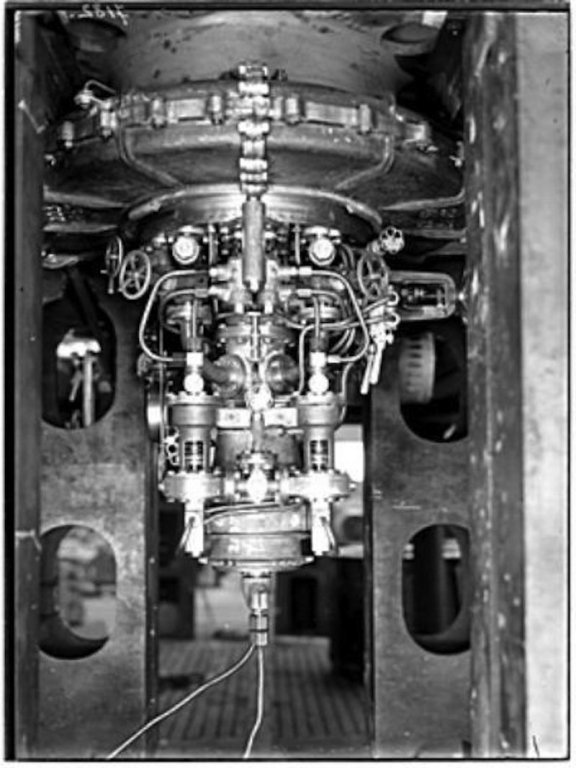
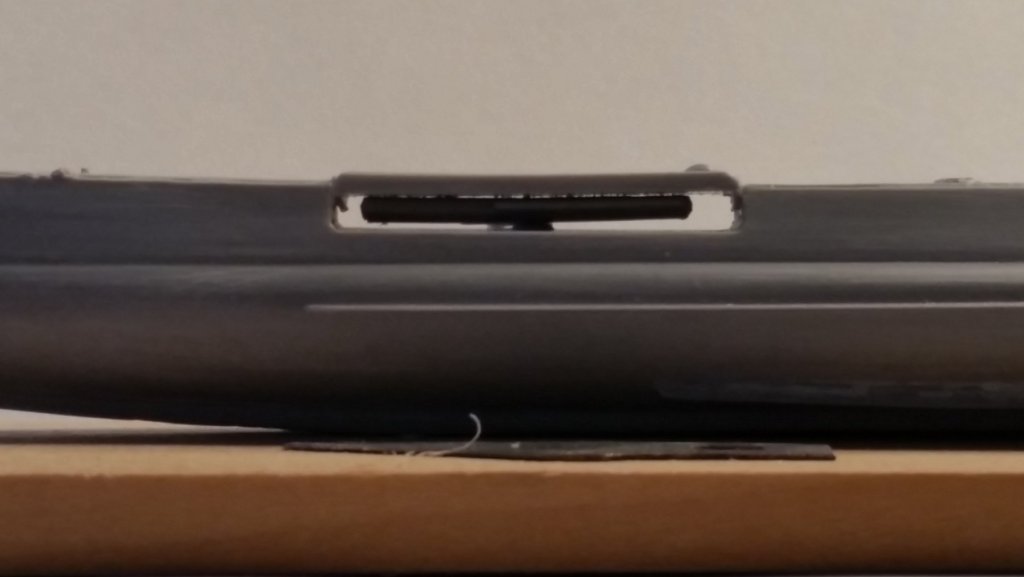
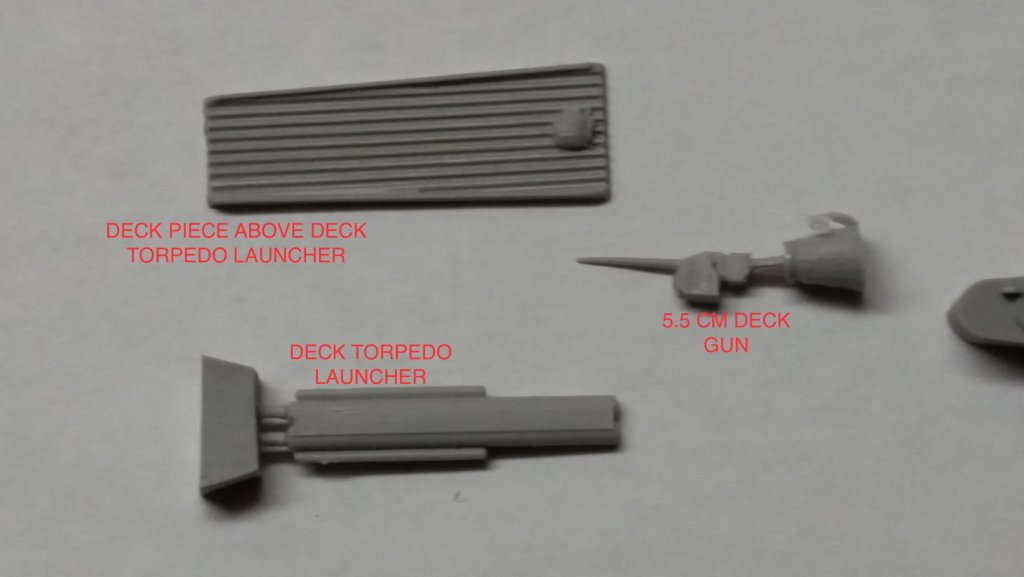
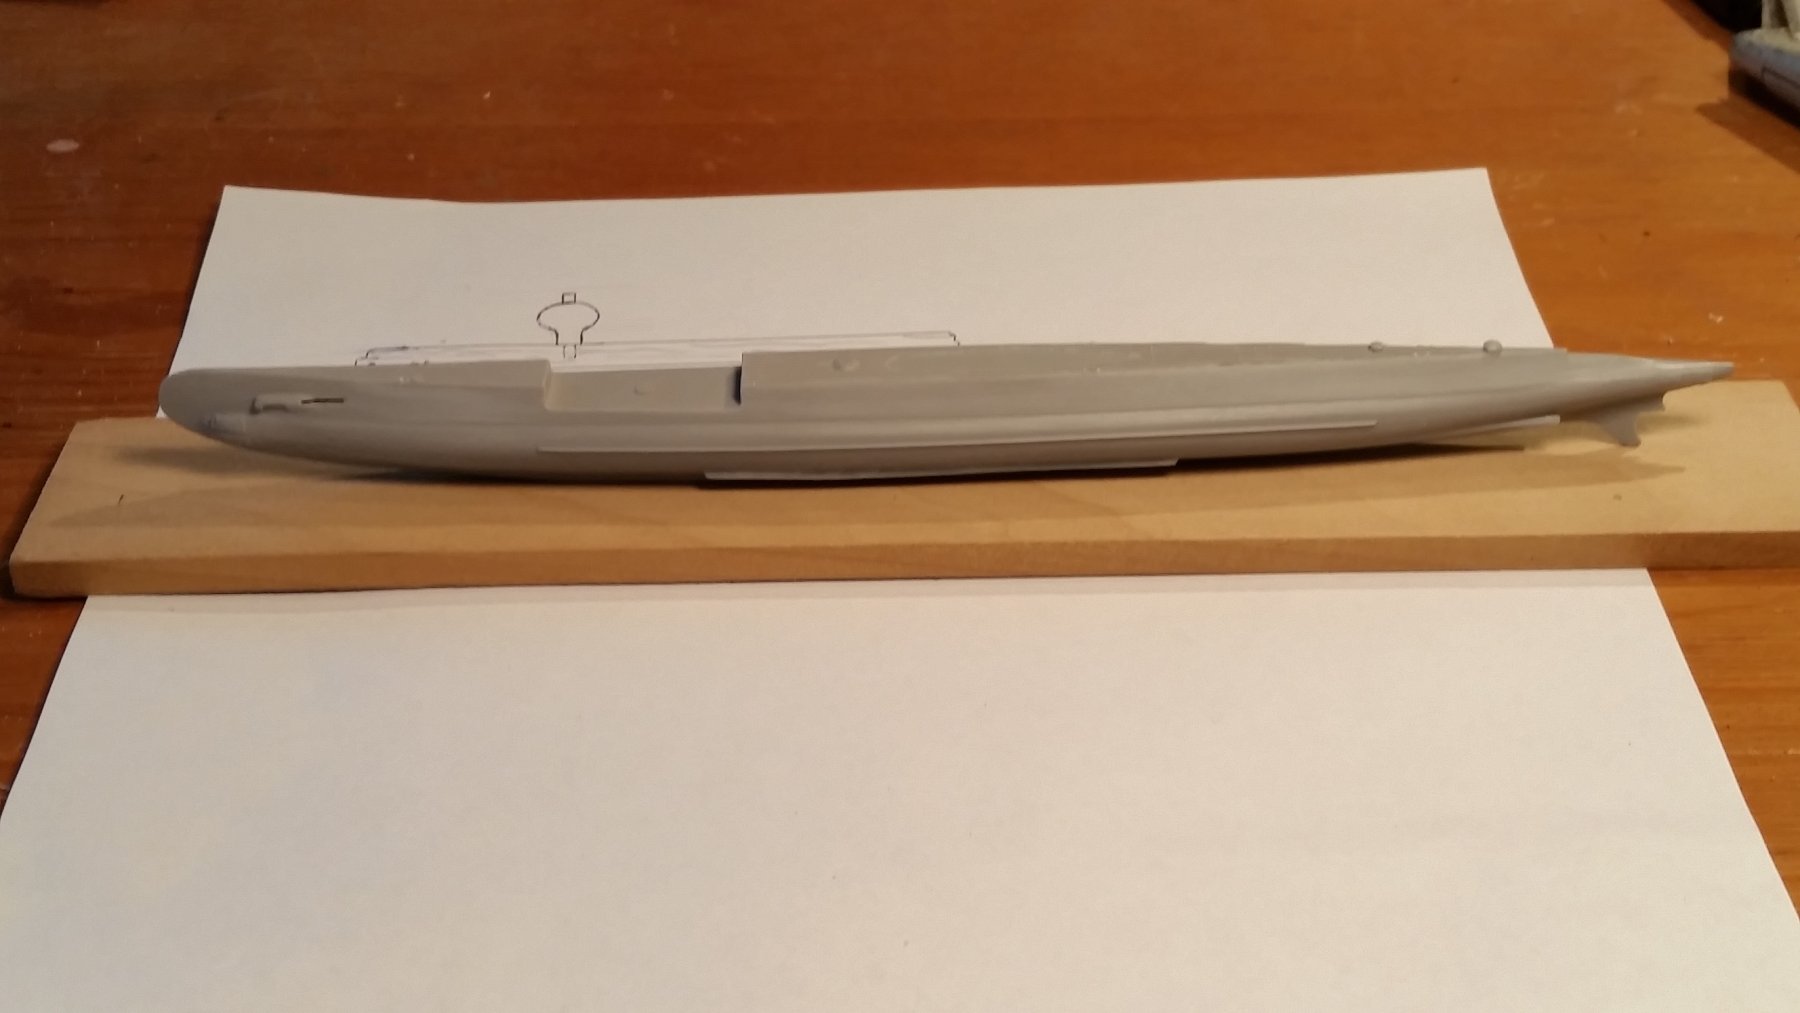
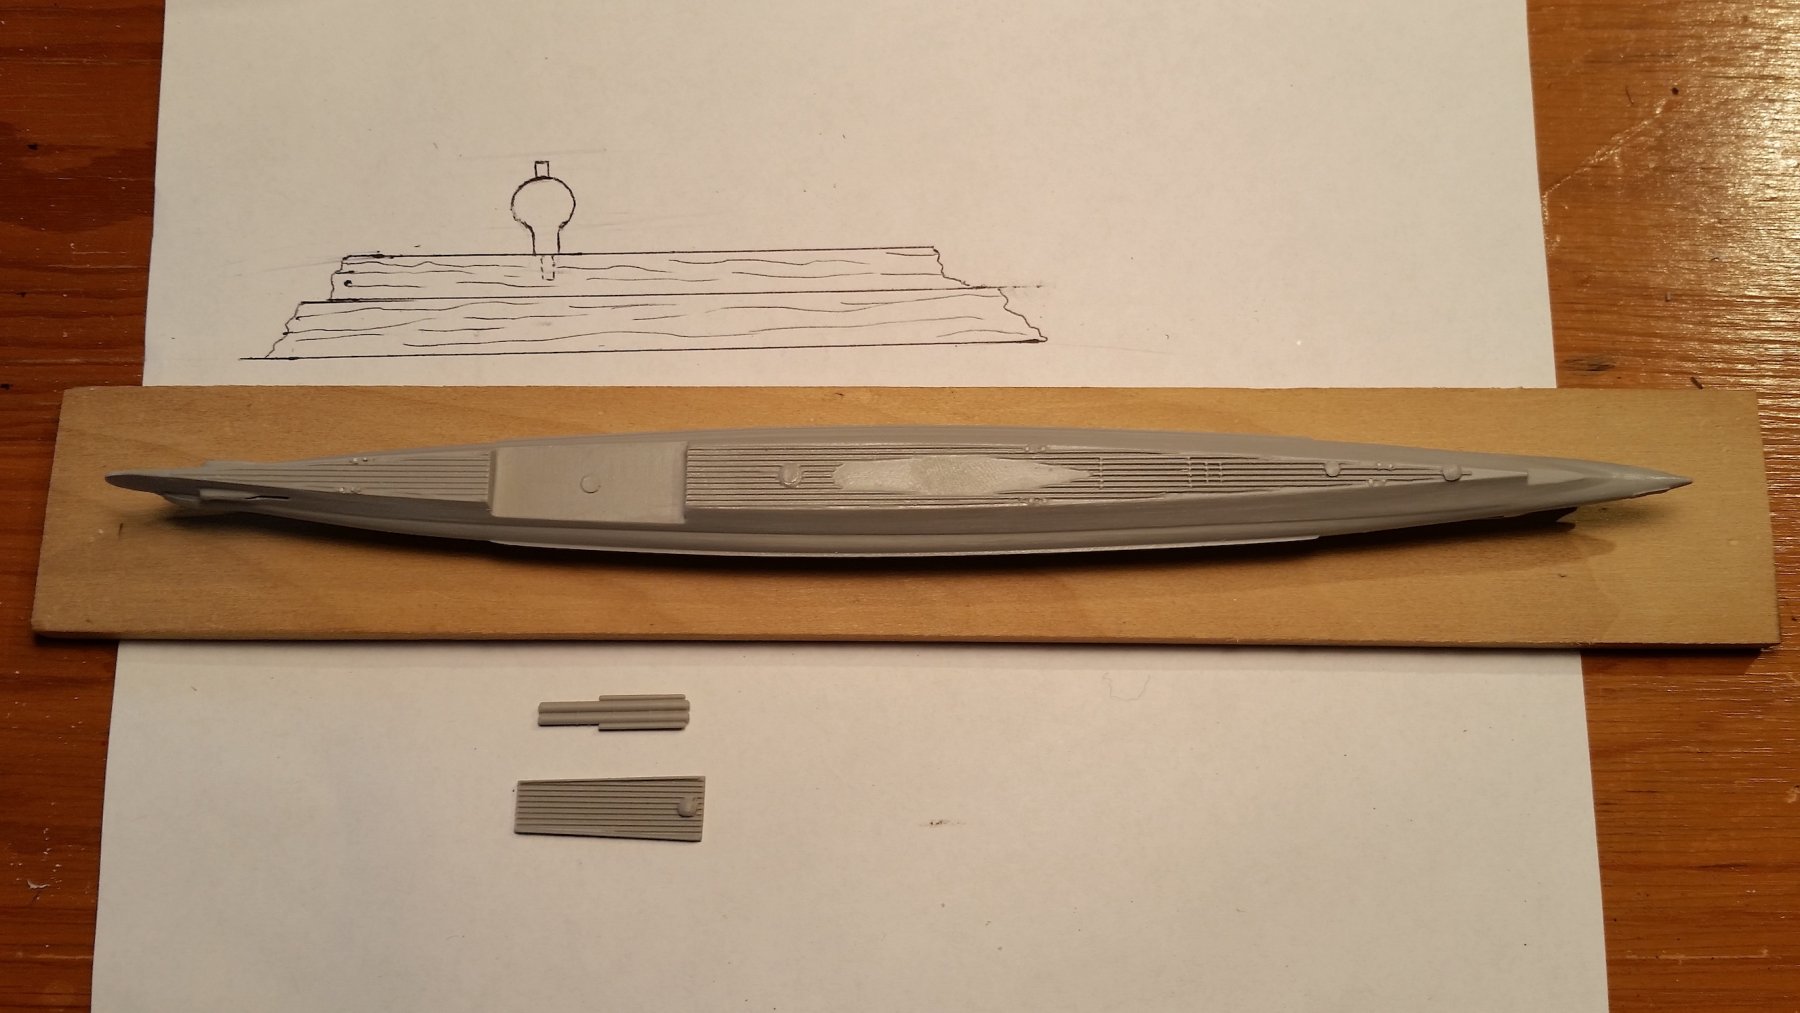
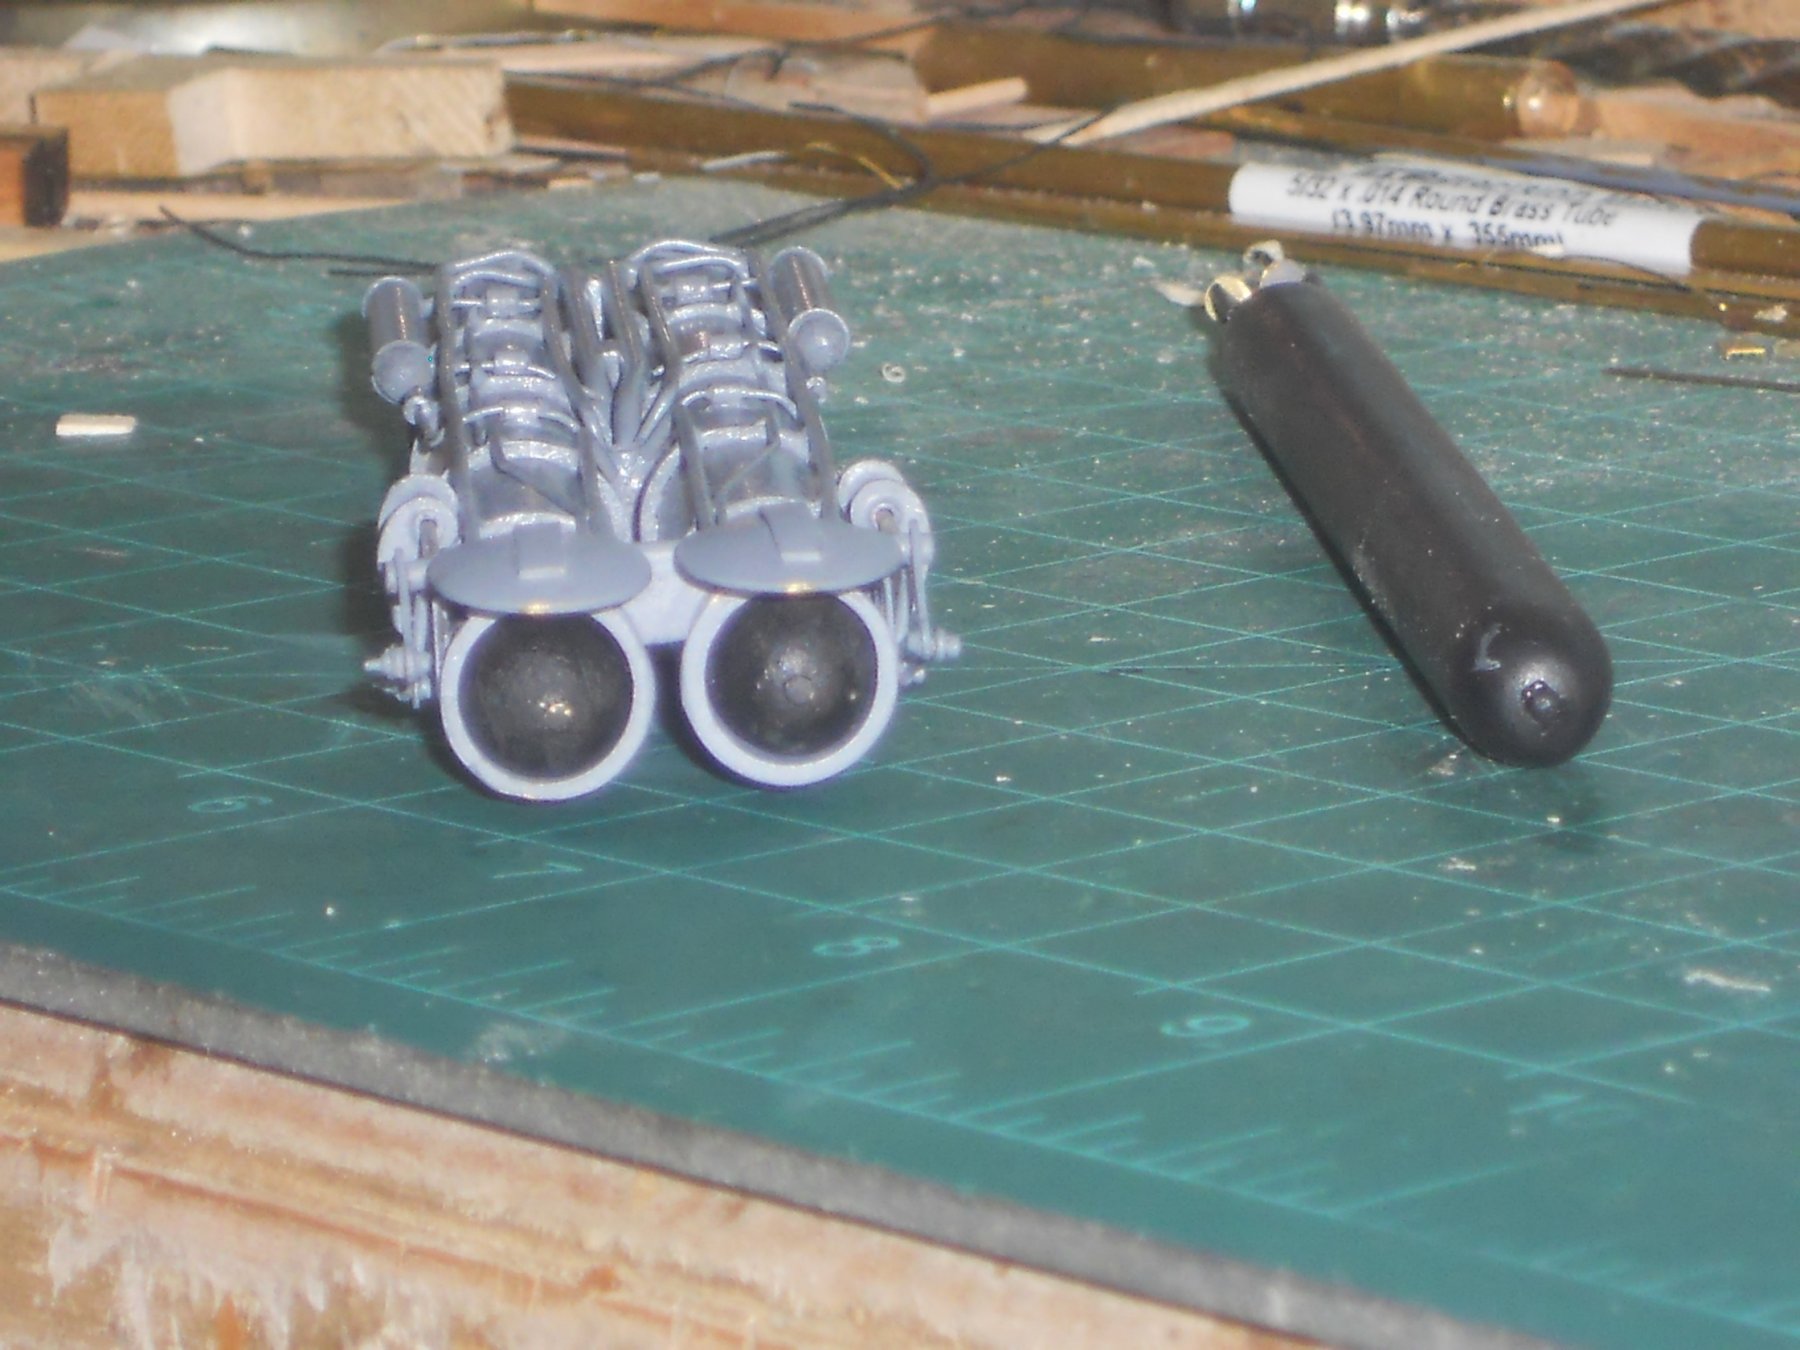
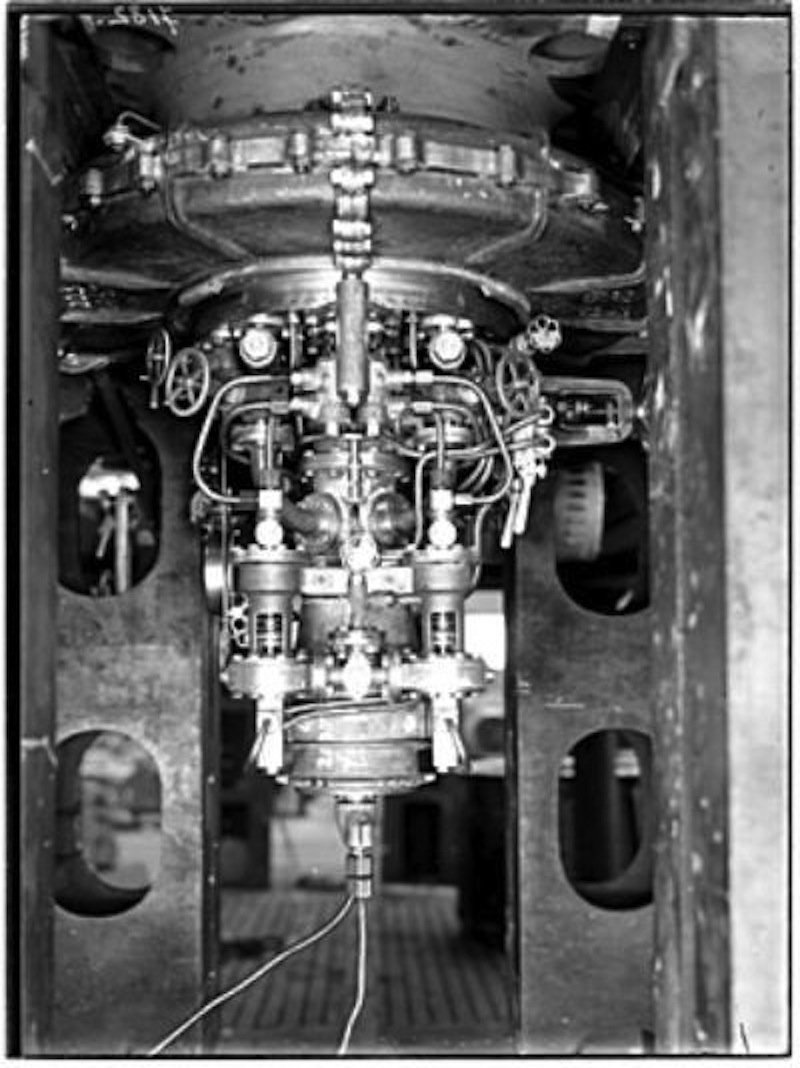
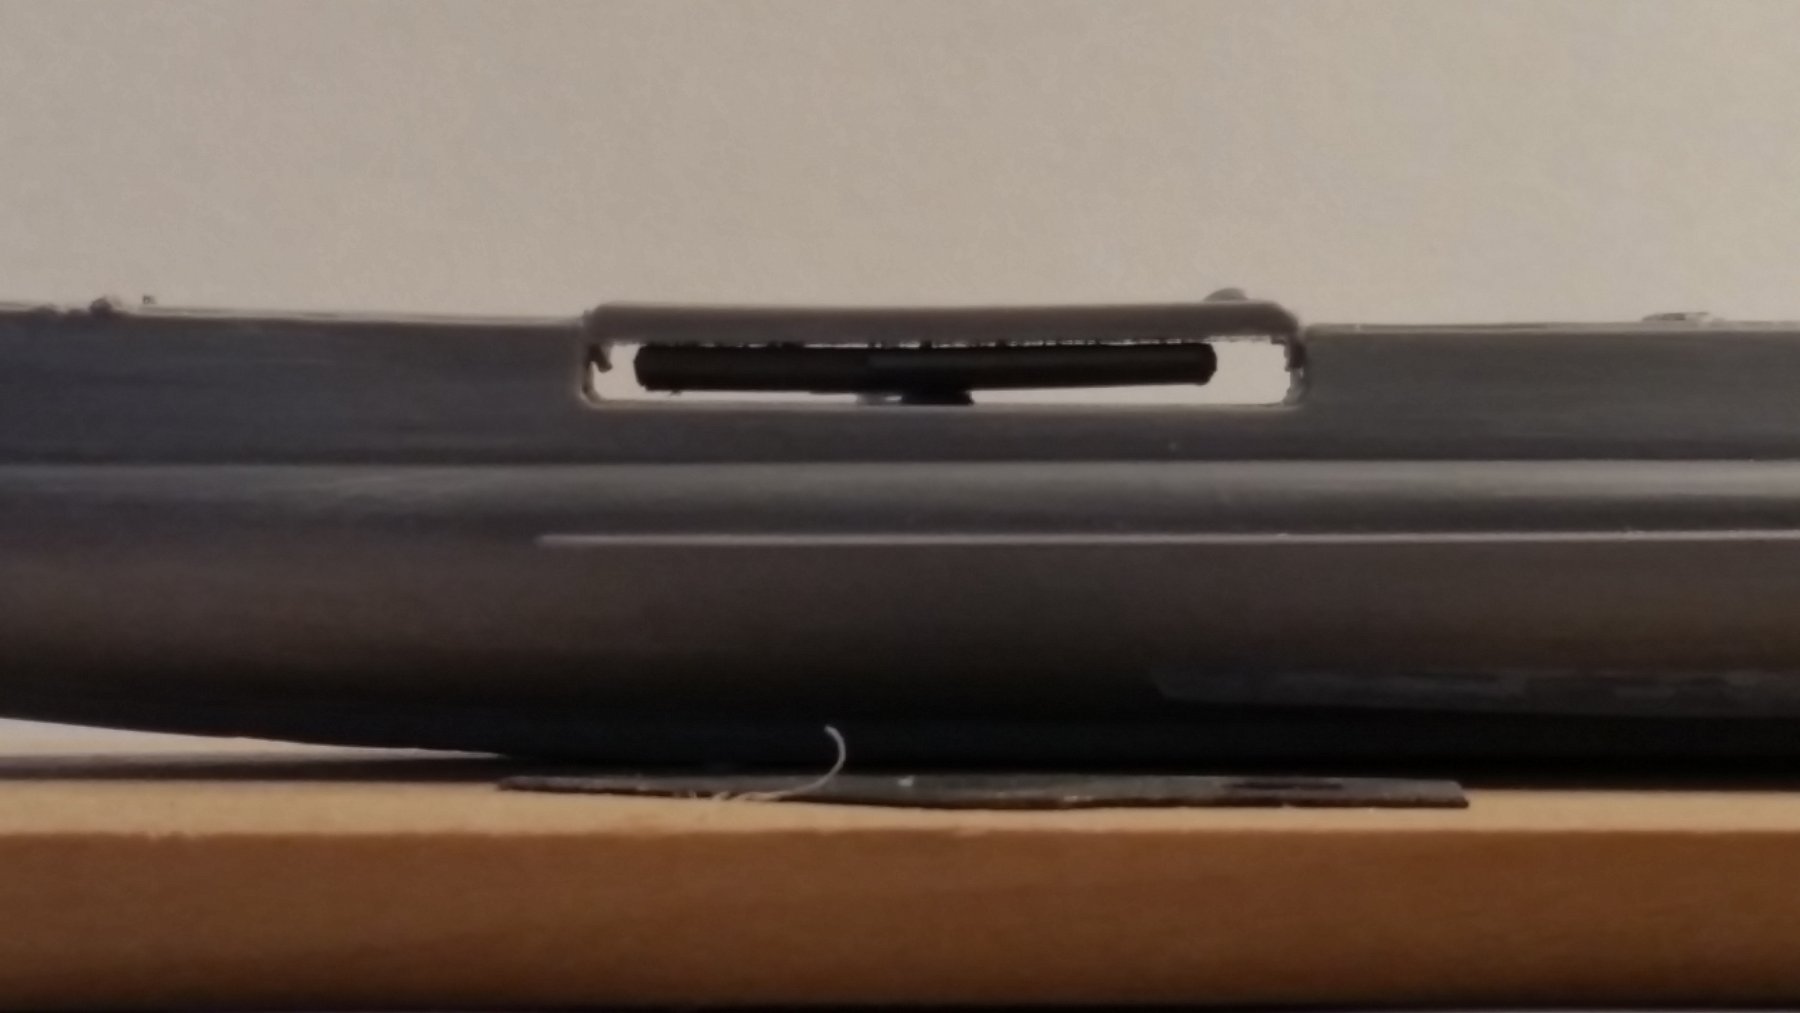
Hello all, and thank you Denis and JesseLee for dropping in. I sure hope all y'all don't mind me adding some history to this build, it's kinda personal you know. In any case I like to start with actually putting this model together. It may be a small model with few parts but it looks like I'll have a few challenges with it. I started with removing the hull from the mold entry and cleaning it up from the attaching lugs. I then carefully inspected the rest of the hull for any imperfections in the mold. As mentioned in my intro, few were found. There were a few spots at the edges of the deck torpedo cutout at the deck slats that I could remove with a knife-edge file. I then sanded the outside of the hull with some 360 grit sandpaper using a very light touch. I also had to sand the keel area to make the boat lay level on the my drafting table. I used a long strip of 180 grit and moved the hull length wise back and forth, checking for lateral level. The actual construction of the keel is a whole other story I won't bother you with here. Whenever my link to the O19 build log is reestablished you could go there and see. Or try dadodude O19 submarine - or something like that. I also decided to make myself a build plate for the future display base. I took a piece of 1/4 inch poplar 1 1/2 wide by 10 inches long. I thought of placing the finished model on two brass bollards and pinned to the base with bamboo pins. You can see my sketch in the photos. Next I cleaned the deck torpedo launcher and the deck piece. Not much was needed. Trying to place the launcher on the intended place didn't work too well so I had to file the little raised round mounting spot. It was also a little too high for the deck piece to fit properly and not level. After all that was done and now trying to cement the launcher and the deck piece with regular plastic kit cement didn't work for me. So, I reverted to medium thick CA and had good results. It allowed me some time fitting it and holding with a pair of tweezers. All this took a few hours and had to close the dockyard for a belated lunch and other chores. Here are few pics and I included a few from the actual construction photos as well as as from my O19 build for added clarification. The actual deck torpedo launcher assembly at the shipyard waiting to be installed This is the deck torpedo launcher I fabricated for my O19 model My O19 launcher installed in my O19 build The deck torpedo launcher aiming, calculating and trigger mechanism called "kerstboom" by the Dutch and meaning Christmas tree. This was located in the crew compartment. This shows the deck torpedo launcher and the deck piece installed on the model of the O16 Here is a photo of the O16 being build showing the section of the hull where the deck torpedo launcher will be placed. As a note of interest, this was an innovation developed by the French. The advantage was that the enemy would not find the sub by tracing the bubble track, the sub would simply move ahead and away from the lunch source. The disadvantage was that it was prone to leak and difficult to use, complicated arithmetic. The bow is to the left in this photo. Hope youns like it. Cheers,


- 83 replies
-
- 19
-
-
- o16
- pacific crossroads
- (and 2 more)
-
Caught up on your build Craig, now that it's almost done. Nice bit of work. Cheers,
- 44 replies
-
- 4
-
-
- schnellboot s-100
- revell
- (and 2 more)
-
OOOOOH - WOW JesseLee, great looking stanchions there! Cheers,
- 1,306 replies
-
- 5
-
-
- syren
- model shipways
- (and 1 more)
-
HMS ROYAL KATHERINE 1664 by Doris - 1/55 - CARD
Piet replied to DORIS's topic in - Build logs for subjects built 1501 - 1750
Beautiful work Doris and thanks for sharing your expertise with us. Cheers,- 1,035 replies
-
- 4
-
-
- royal katherine
- ship of the line
- (and 1 more)
-
ancre La Salamandre by tadheus - 1:24
Piet replied to tadheus's topic in - Build logs for subjects built 1751 - 1800
Beautiful work Pawel, a believable hearth no less. Cheers, -
Thanks Mark and Lawrence for looking in and the helpful info. Yes, Mark, I got to make that very long link thingy to work but I have seen so many using only a short link. That's what I was after. I have tried every which way but can't seem to get it. I have printed all the instructions regarding this issue but am still in the dark. Still struggling and trying though. Hey Lawrence, yeah, I have put the "Surabaya" on the back burner for a while. I got busy with studying physiology and nutrition to try and stay ahead of physical i.e. medical problems. I have started a build log in the model section of a resin model of a Dutch submarine. After that one is done I'll attempt to make a diorama with the Young America at sea. The scale for that one will be 1:3000, at least I'll try. It'll have a glass lamp as dust cover, like I did for the topsail schooner diorama. After this project is done I'll get back with the "Surabaya". I'm also trying to set some time aside to make a paintings with colored pencils. I like the medium, especially now that they are colorfast and wont fade. cheers,
-
Back with you Nils after my absence. Nice work on all the life boats, something for us to remember trying. Cheers,
- 2,625 replies
-
- 2
-
-
- kaiser wilhelm der grosse
- passenger steamer
- (and 1 more)
-
Back with you Dave. Great progress since my absence. The copper plating 2.0 looks really very good. Glad you enjoyed your visit with the real Conny and quafing a few with Tom. Yeah, I hate flying too - - commercial and in the back Next July I'll be flying to Quebec City with our daughter to see the "tall ship" event. Hope to see a few friends there. Love to see you do that beautiful eagle carving Dave, that'll be a nice addition to your model. Cheers,
- 742 replies
-
- 7
-
-
- constitution
- frigate
- (and 1 more)
-
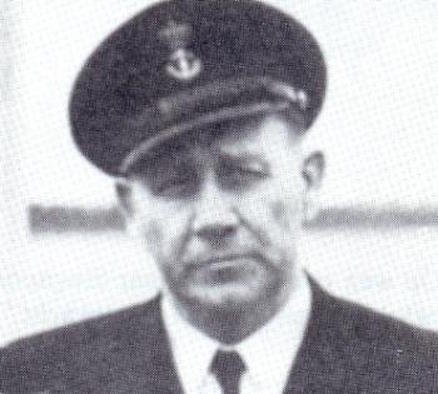
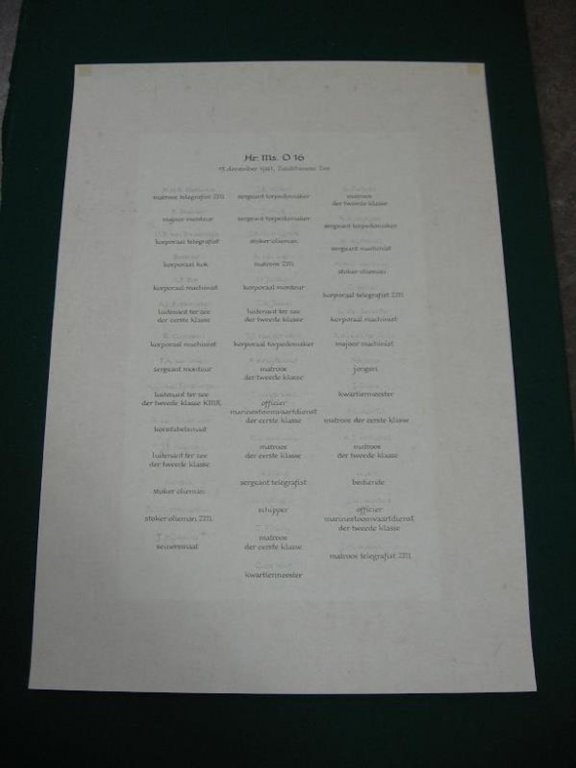
Okay, I guess it's about time now to introduce you to the O16 and her crew. I'm still translating some of the historical data and sorting things out. If I know how link you to a few YouTube videos you can then also see and hear the discussions about the search of the O16 and her compatriot, the KXVII, on that fateful day in December of 1941. If I have some time left over this evening I can try to add the first steps in the build. First a few photos of the boat, I may add a few more as the build progresses. Here you see the O16 being readied for launch on January 27, 1936, at the Koninklijke Maatschappij "De Schelde" in Vlissingen (Flushing), The Netherlands. The keel was laid down on December 28, 1933 and commissioned October 26, 1936. The O16 first time in the water after a successful launch. A photo of the crew, most likely done in 1937 when the O16 sailed across the Atlantic to visit Bermuda and Washington, DC. The civilian gent is Professor Dr. F. A. Vening Meinz; B.Sc who accompanied the O16 to conduct gravity measurements. May they rest in peace. Luitenant ter zee der 1ste Classe (Lieutenant Commander) Antonie (Anton) Jacobus Bussemaker - February 1, 1900 - - December 15, 1941. May he rest in peace. The only survivor of the crew after the O16 ran into a minefield on December 15, 1941, after a very successful patrol. The list of the crew that was lost on December 15, 1941. Let me now get back to putting her history together before I add my first steps in actually putting this model together. Cheers,
Tewaterlatingop1936-01-27teVlissingen2copy.thumb.jpg.faed4d8f6cddb1c1275d45919d8cdbe3.jpg)
Tewaterlatingop1936-01-27teVlissingen4copy.thumb.jpg.23a41d3a3f530e24c8c8cfc1a6b3ed33.jpg)
copy.thumb.jpg.4fdd439e53dee8fcad8202971035e755.jpg)
.thumb.jpg.944a336b3e70768ced167ae937758111.jpg)
AntonieJacobusBussemaker.jpg.55f0c74561d97e0855322f28c6903ab1.jpg)
- 83 replies
-
- 18
-
-
- o16
- pacific crossroads
- (and 2 more)
-
Hello friends, Thanks to all who clicked the like button and hi to Denis, Ken and Carl. Yes, Denis, Ken is correct. Boris didn't get started till a few years ago. He also followed my O19 build and wanted to make a resin kit of her in the 1:350 scale. He wanted to wait till I was done with the build, in not wanting to be a distraction. But he's so busy with the Java now that the O19 may come much later. The O16 and O19 are entirely different and requires a new mold system. Oh, some things are identical but knowing Boris he is a stickler for details and accuracy. Yeah Ken, just handling these small parts gives me the shivers specially never having worked with PE. The scale doesn't worry me too much though, not after having made a diorama in 1:2000 scale. My hands are still firm enough and eye sight is pretty good after a double cataract operation, that I can handle these small parts okay. Next small project is the Young America diorama in 1:3000 scale. Yeah Carl, she'll be a nice project for you or wait till he has the O19 done or do both. If Boris is planning to make kits of all the ships that were involved in Java Sea campaign then you have ample choice. In the meantime you are rather busy with your giant Japanese battle ship. Cheers,
- 83 replies
-
- 8
-
-
- o16
- pacific crossroads
- (and 2 more)
-
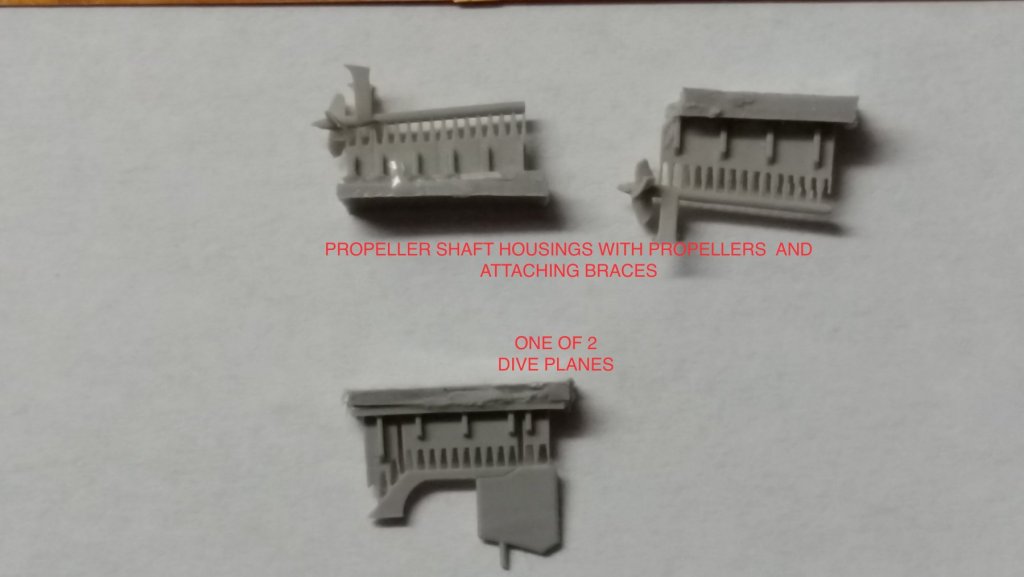
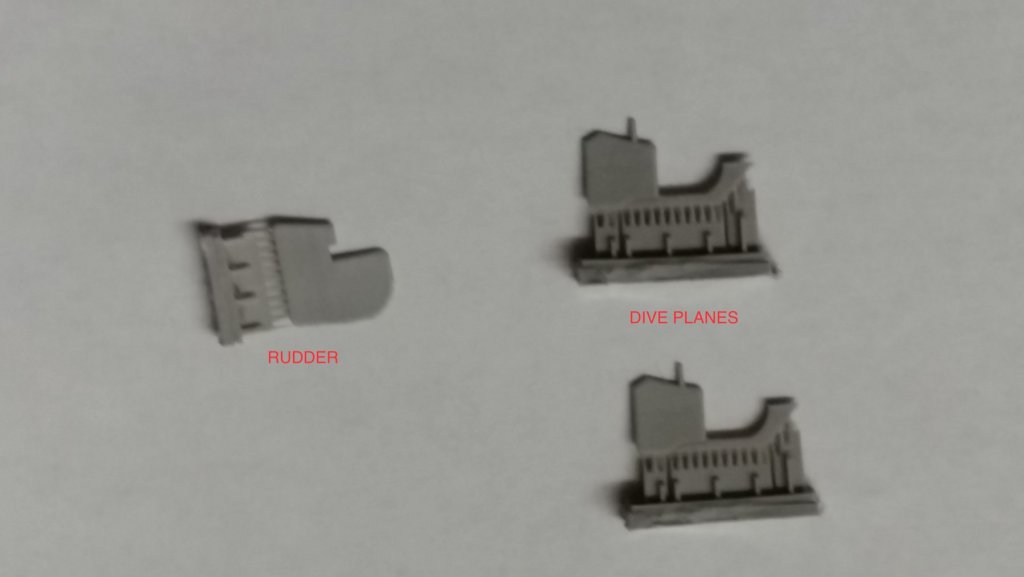
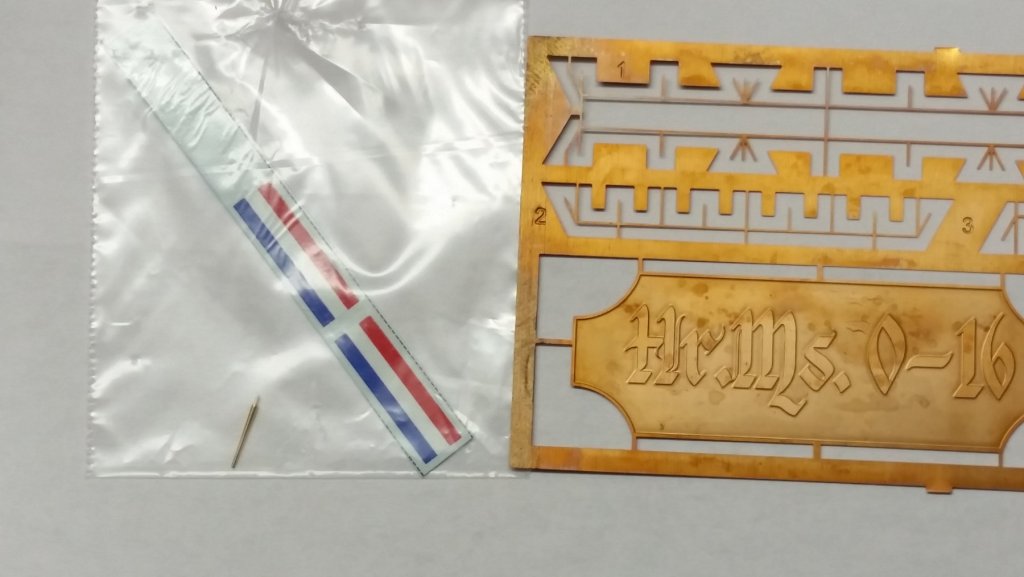
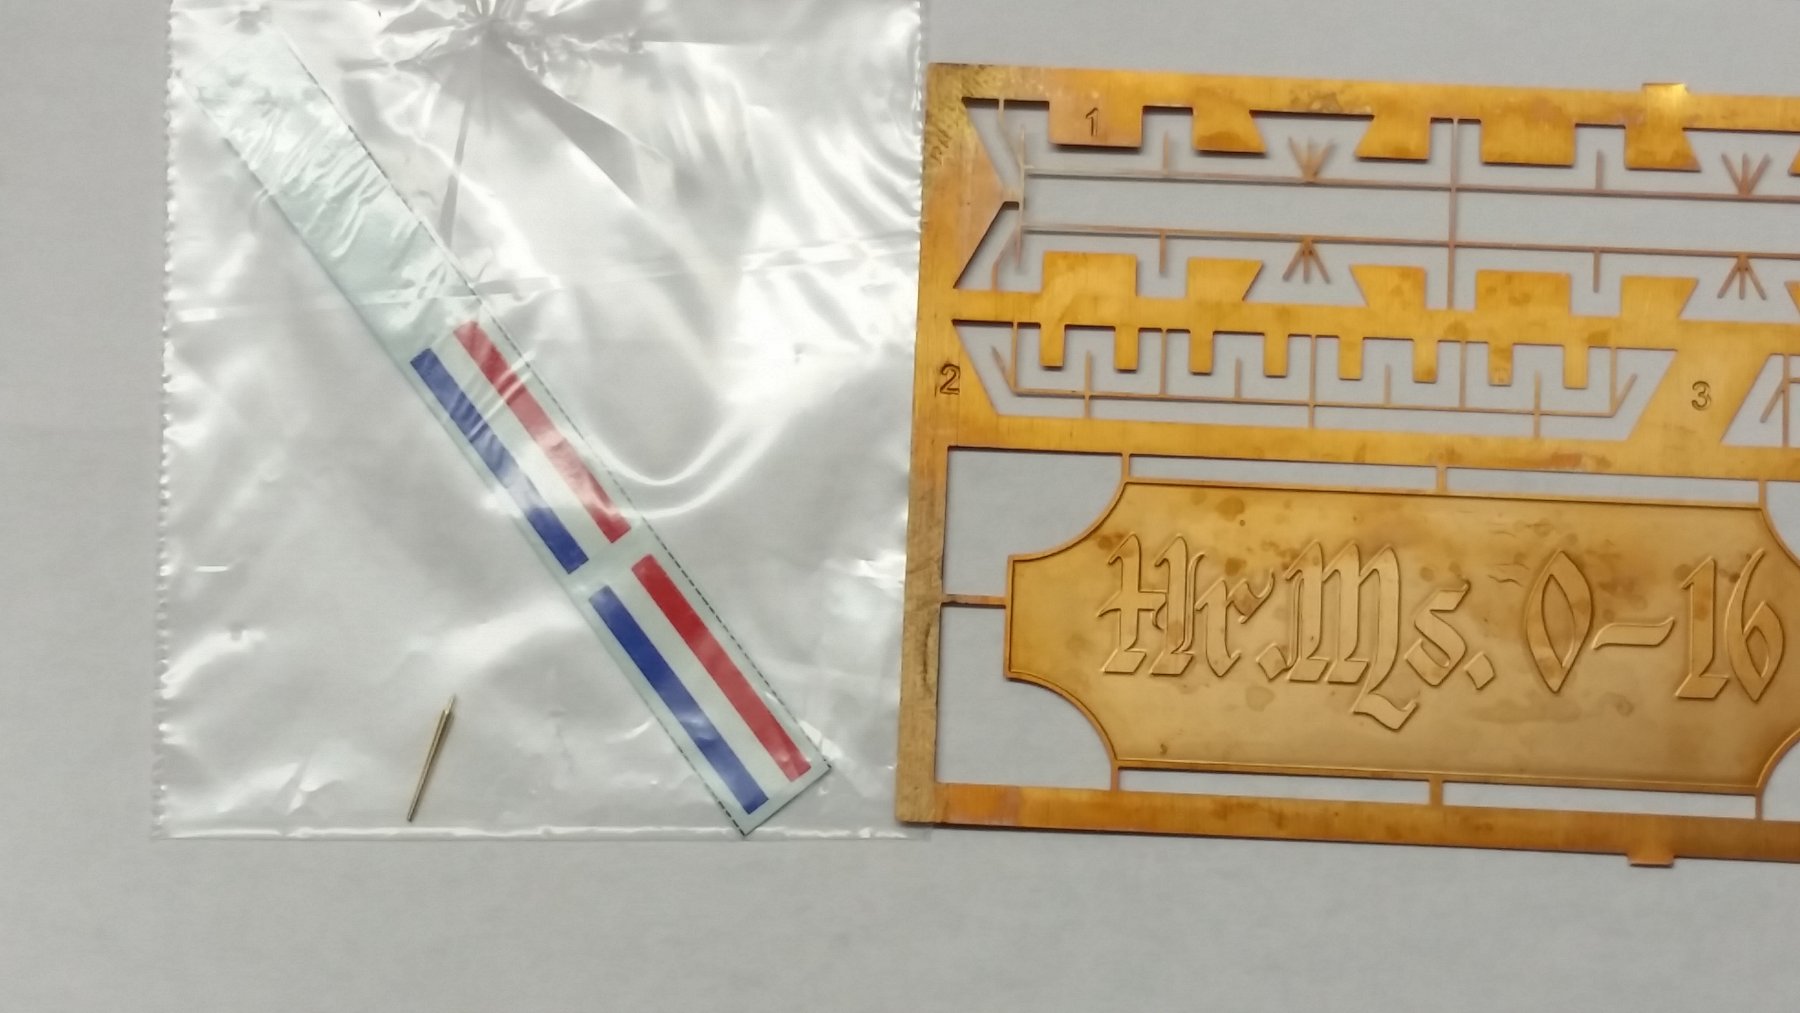
Kit intro continued: Close-up of the two 40 mm AA guns Close-up of propeller, shaft housing and attaching braces Close-up of dive planes Close-up of the Dutch National flag , brass deck gun and name plate This may not look like a lot of parts for such a complicated boat. For those not familiar with submarines, they have been and are called boats, not ships. This will also be a new adventure for me because of the PE. I never had the pleasure working with it, specially not at this scale of 1:350. Also the plastic is from molded resin and softer then the plastic found in kits. As you can see the hull and conning tower are solid molds. So, naturally I was excited like a little boy unpacking his birthday present and could not wait examining all the parts and pieces. I found the quality EXTREMELHY high! There should VERY little or no dressing up work to do. The only dressing necessary seem to be the removal of where the part is attached to mold pour. Looking at the propeller blade I made a mental note to be extra careful with them. Just gently touching them they gave was ever so slightly and can not handle any pressure. The PE also was extremely well done. Here too I noticed that some of the parts are extremely tiny. The dressing off of the attaching tits should prove a real challenge for my eyes and hands. I for one want to give Boris Mulenko, the designer and producer of this kit, a heartfelt BRAVO. Okay folks, the next post we'll start with putting this kit together and let all y'all know how it's all working out. I also like to include the history, life and death of the O16 and to honor the gallant crew. As I have mentioned before this is living history with a personal involvement through my father and having been the innocent victim of the aftermath. Sure hope you don't mind. Cheers,
.thumb.jpg.734335a8a018249412077995f6b2964f.jpg)
- 83 replies
-
- 17
-
-
- o16
- pacific crossroads
- (and 2 more)
-
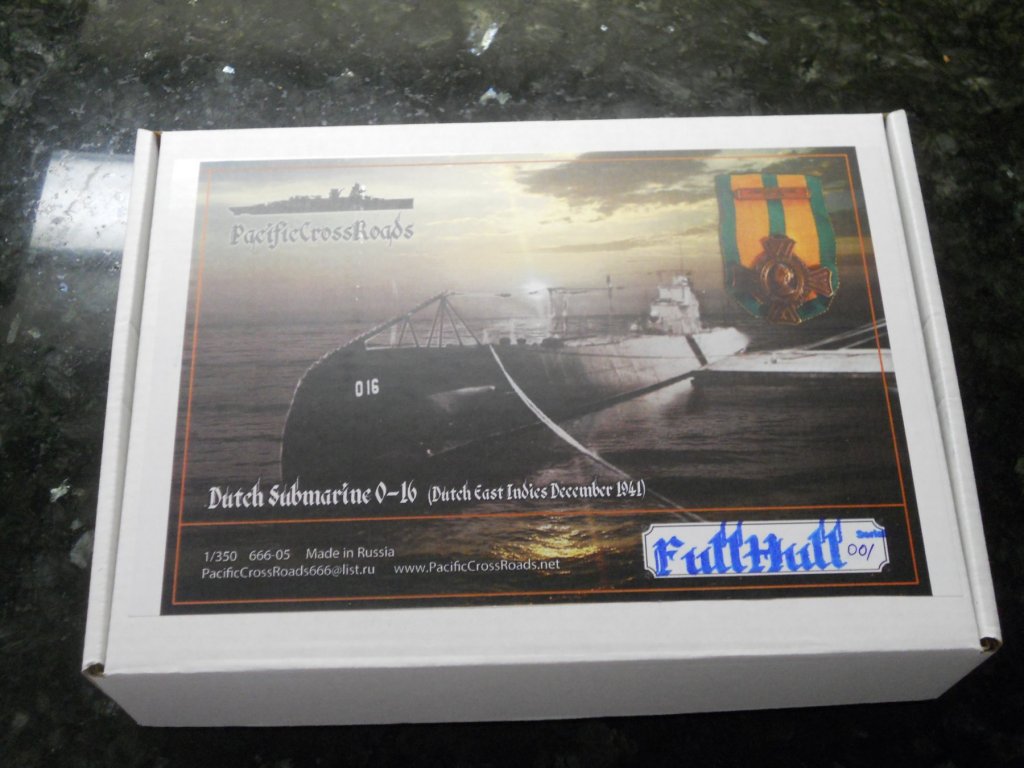
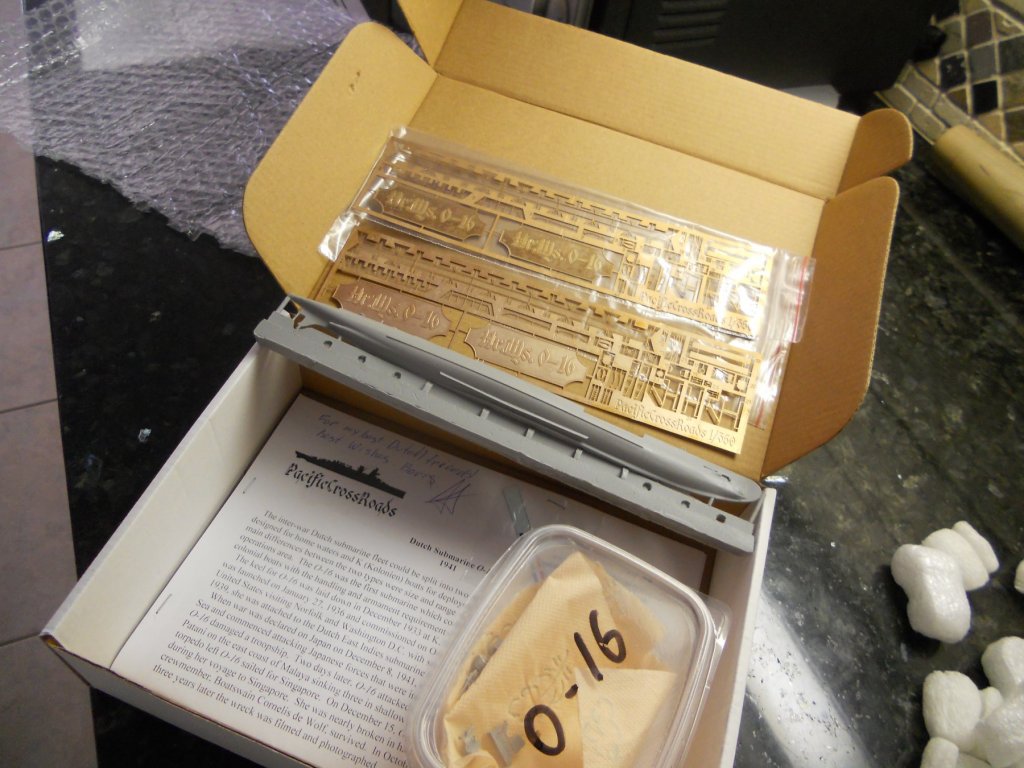
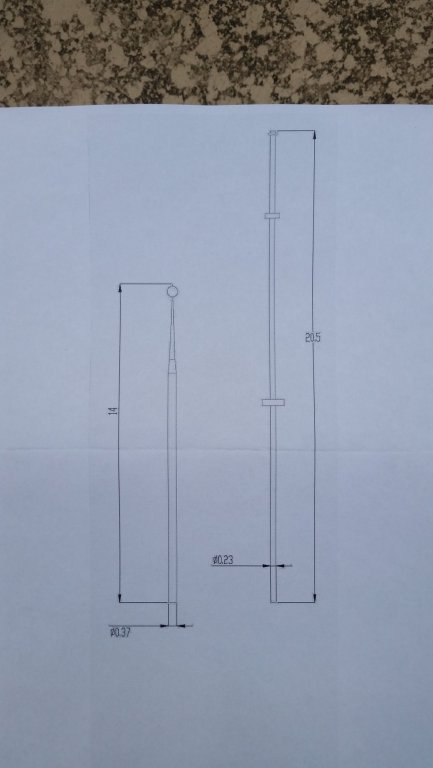
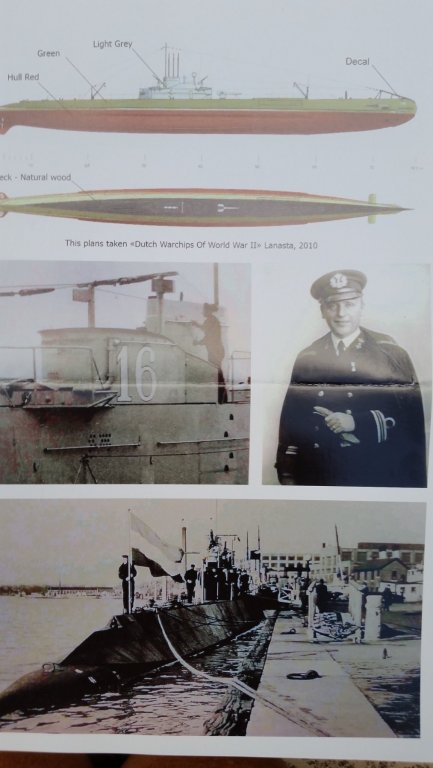
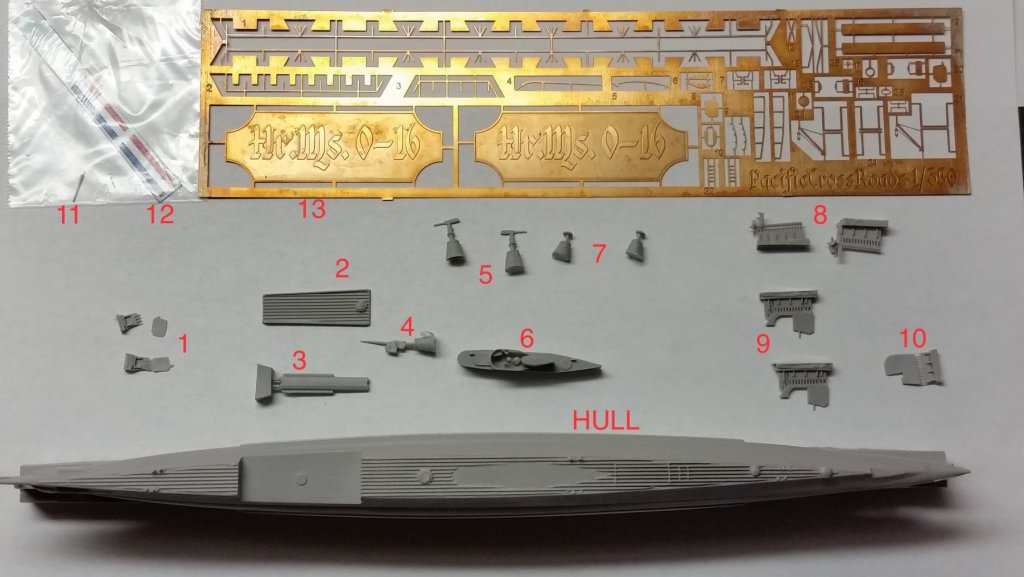
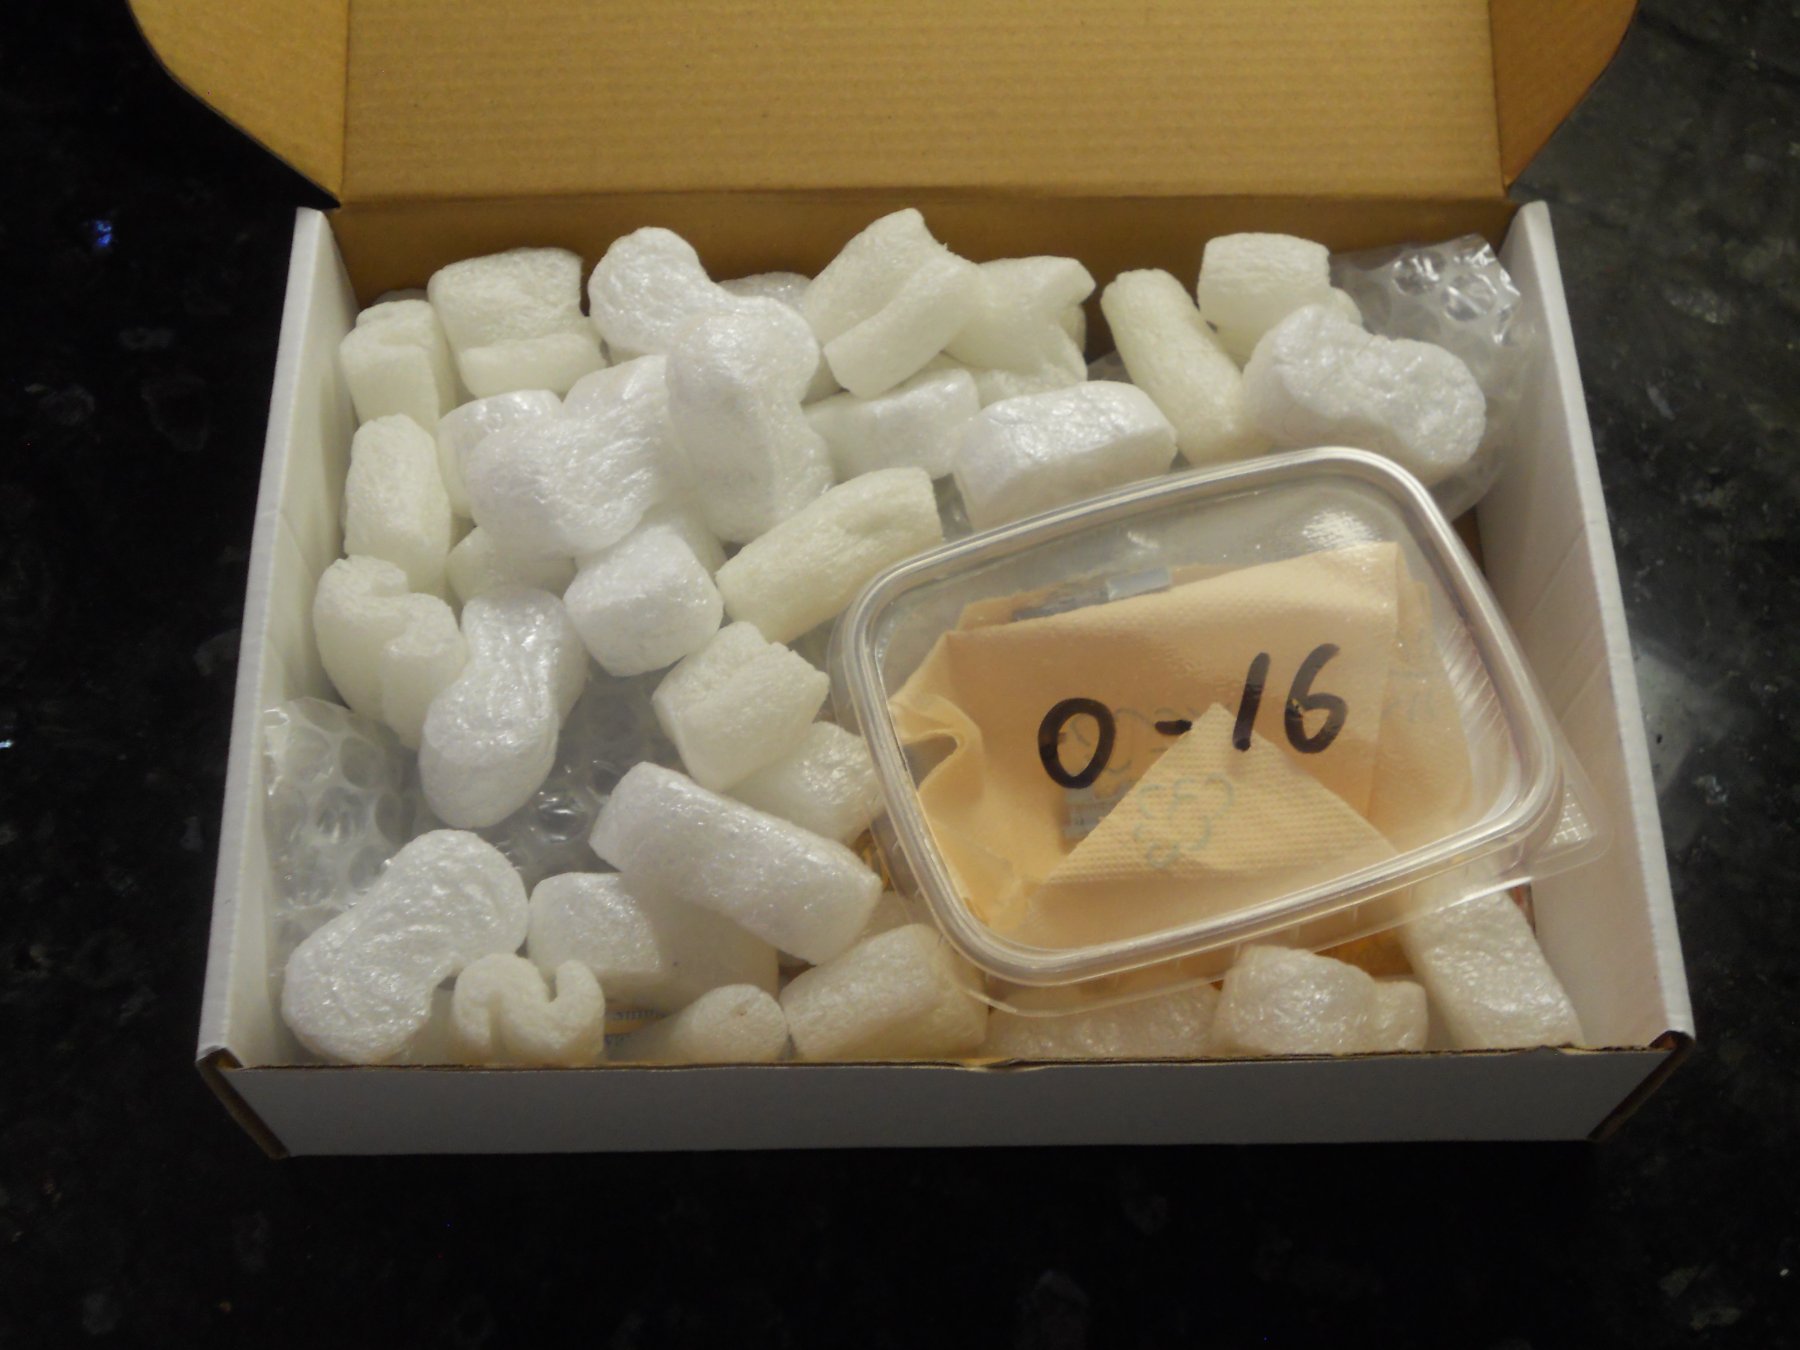
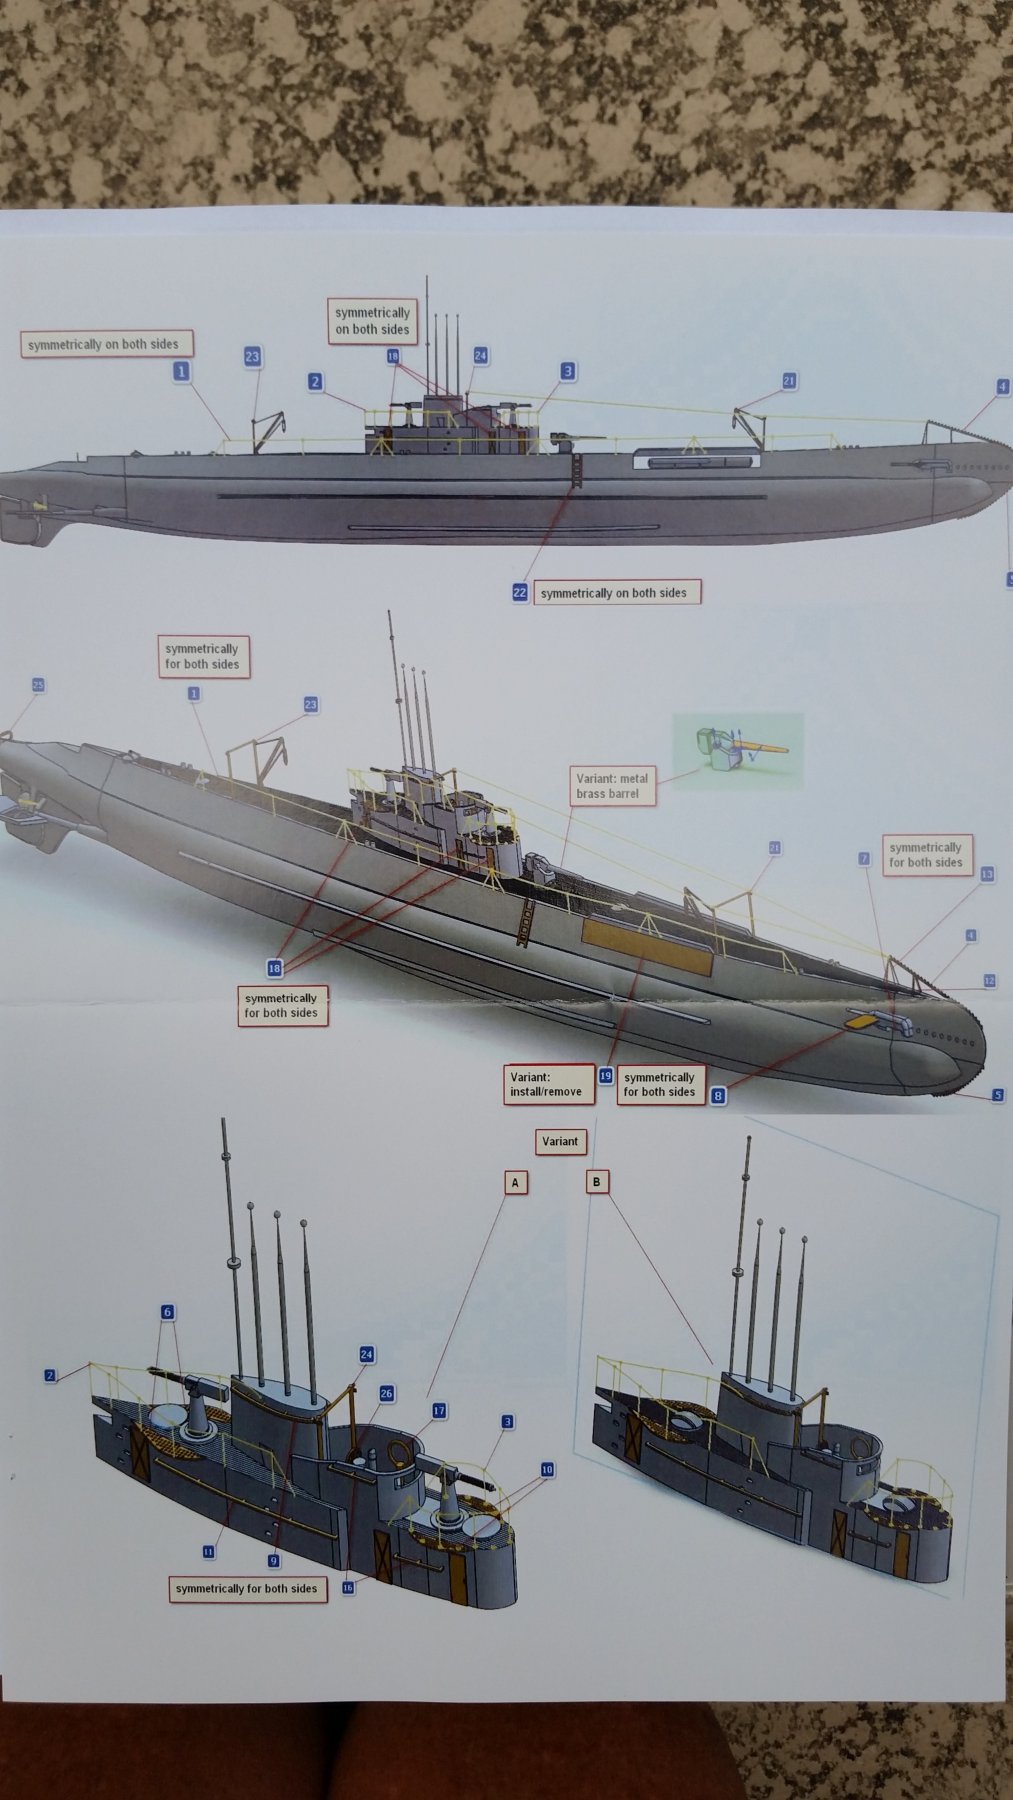
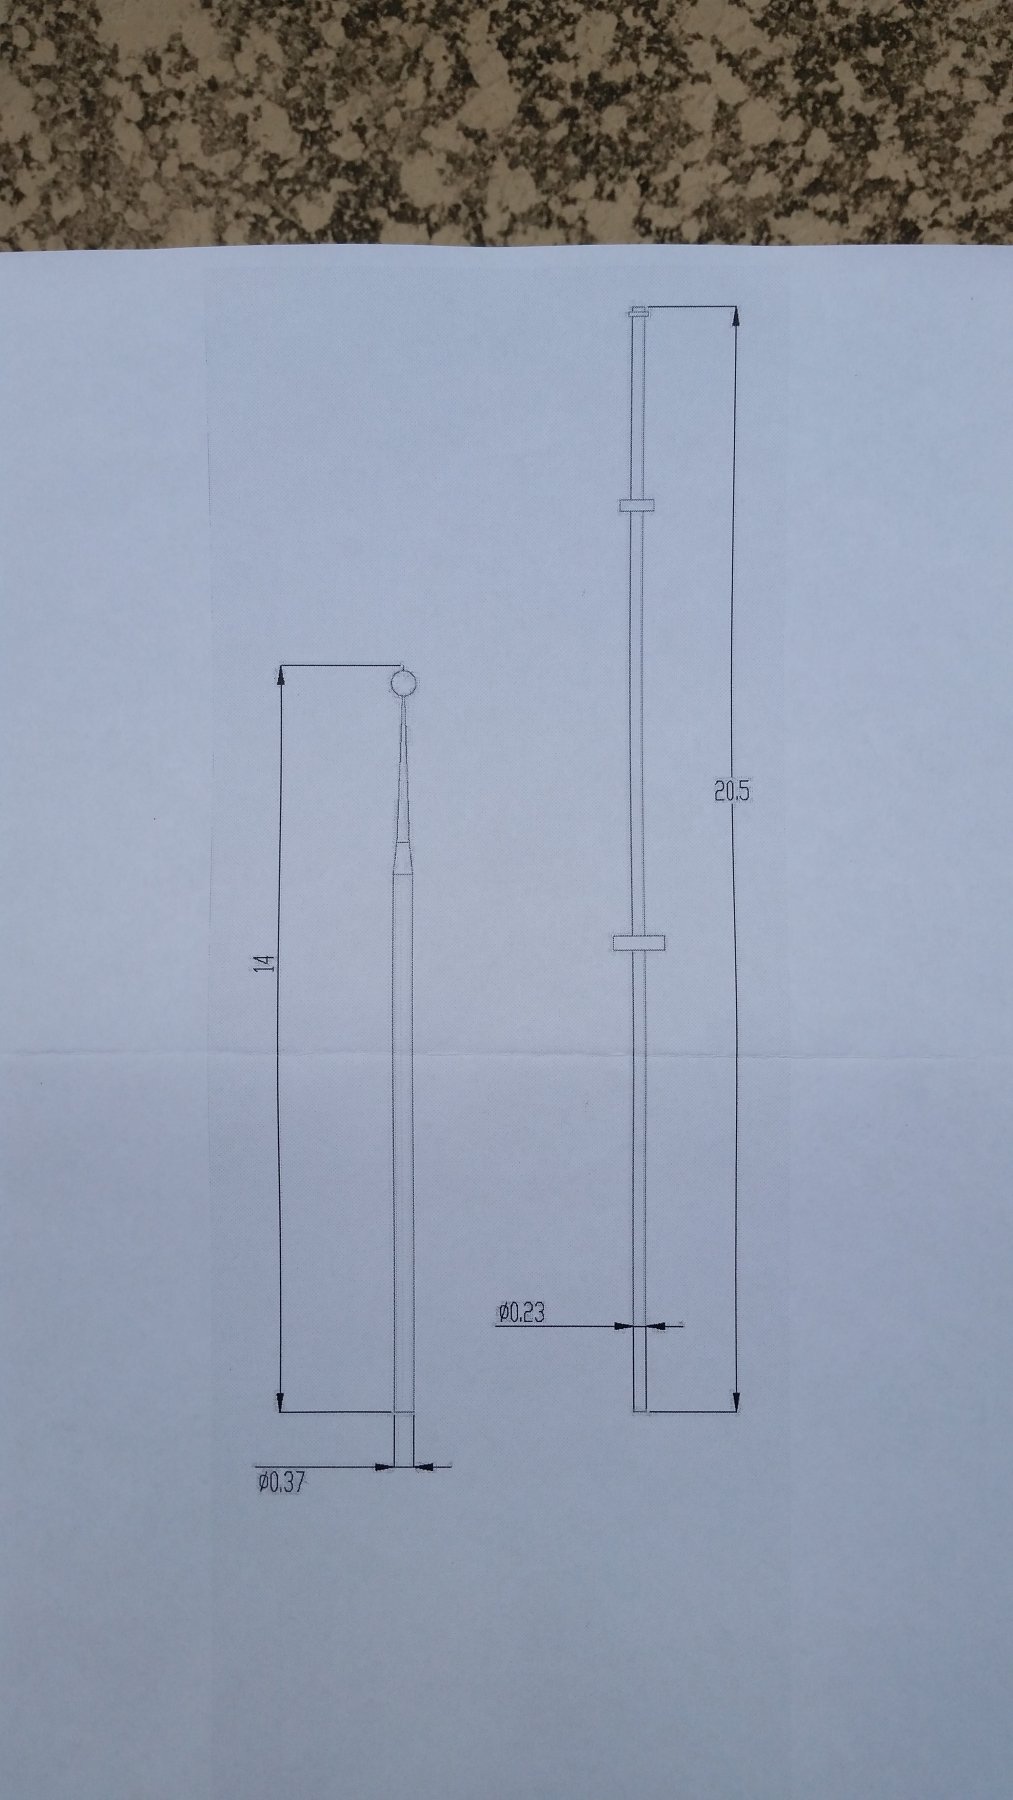
Hello everyone, Traditionally we show what's in the kit we received. So today I like to I like to do just that. Here are a few pics of what came in the box from PaccificCrossRoads for the O16 kit. The Kit Box Little box (110 X 80 mm or 3.4 X 3/1/8 inch) of all the small parts and pieces. Kit included 2 identical PE Assembly instructions Instructions for the periscopes and transmit anttenna Detail photos with pre war paint scheme All the parts and pieces in the kit. #1) trim planes, #2) deck piece above the deck torpedoes, #3) Deck torpedoes, #4) 88MM/3.4 inch deck gun, #5) 40 mm AA guns, #6) Conning tower, #7) AA gun retract bun lids, #8) Propeller shaft housing with propellers and attaching braces, #9) Dive planes, #10) Rudder, #11) Brass cannon barrel, #12) Dutch National flag, #13) the double PE. Close-up of the deck gun, side launch torpedoes and deck piece Close-up of conning tower Continue on next post. Cheers,


.thumb.jpg.ddd2030790b3f908af0296533a42c8da.jpg)
- 83 replies
-
- 17
-
-
- o16
- pacific crossroads
- (and 2 more)
-
N ice going Vivian, and lots of good advice. With all that good info coming to you it'll be exactly the way you envisioned it. Sorry to say, I'm not much help for you, I am an airplane guy but love ships. Cheers,
-
Wow Craig, you are moving quite fast, no wonder Carl dubbed you as Mr. Bunny We could have used a few these magnificent ships in the East Indies, things may have turned out different for us there. Love those ships and I'll stay tuned to all your next builds. Cheers,
- 151 replies
-
- 5
-
-
- duke of york
- tamiya
- (and 2 more)
-
Thanks Denis, I read your post. but that boat is the Hr. Ms. O16 not the O19. Blame it on dyslexia of the fingers mate Cheers,
- 453 replies
-
- 7
-
-
- thermopylae
- sergal
- (and 1 more)
-
Hi Craig, good having another Floridian in the dockyard. I have been in Tampa several times, vacation and work. Also Clearwater and Indian Trails, nice area. Hey Old, good having you here as well. Make yourself comfortable because there will be some history being told. And here is my old buddy Carl. No worry mate, plenty of first row seats. Well, these deft fingers will get a real workout on this one, just as trying as my topsail schooner diorama. I sure hope to do this model justice. Cheers,
- 83 replies
-
- 9
-
-
- o16
- pacific crossroads
- (and 2 more)
-
Hi Ken, you are quite welcome. PacificCrossRoads has also completed Hr. Ms. Tromp, a Dutch light cruiser. That ship has quite some interesting history. He is currently working on Hr. Ms. Java, a Dutch light cruiser. This is the ship my father was killed on when it got hit by one of those long range torpedoes. After my father was promoted he had to be transferred to a surface ship because that rank was not on the subs, pity that. All his scales are in 1:350. He was also thinking about adding kits of the airplanes involved. Hello CDW in Tempa, welcome to my dockyard. By what name can I address you? Hey John, good seeing you here too. I hope to make this log a little more interesting by adding some history to it. At least it's history in living memory, for a few that is.
- 83 replies
-
- 7
-
-
- o16
- pacific crossroads
- (and 2 more)


Tewaterlatingop1936-01-27teVlissingen2copy.jpg.200a37b31ca9f0b01c88120180558820.jpg)
Tewaterlatingop1936-01-27teVlissingen4copy.jpg.0c2f95d9d4c810958f11ebe0f560bbf7.jpg)
copy.jpg.114eaaf97ca56ce60f08b117375b712b.jpg)
.jpg.dc148f176b0df5a321b990b344cdfb7e.jpg)

.jpg.0edfcd634c3f613f7def564f8b3a1ea1.jpg)


.jpg.e56a49c76a8f903b01c8ef5d1e6b40b2.jpg)