Ryland Craze
-
Posts
1,570 -
Joined
-
Last visited
Content Type
Profiles
Forums
Gallery
Events
Everything posted by Ryland Craze
-
 Thanks for your comment, Captain and also for the tip on getting clean painted edges. I enjoyed your AVS build log and it is one of the best constructed AVS models that I have seen.
- 263 replies
-
- 4
-

-
- Medway Longboat
- Syren Ship Model Company
- (and 1 more)
-
Congratulations Bob. You should be proud of the finished model and your craftsmanship. I have enjoyed your build log and will be referring to it, especially the pictures, as I continue with my Longboat build. Your build is truly an inspiration for any Medway Longboat builder.
- 170 replies
-
- 2
-
-
- medway longboat
- Syren Ship Model Company
- (and 1 more)
-
There is an IPMS Chapter located in Indianapolis. The Club may have someone willing to take on a commission build. There website link is: http://www.ipmsroscoeturner.org/
-
Perfection is an understatement of you work. Truly a piece of art.
-
Alan, Welcome to Model Ship World. Thanks for the memory of building balsa planes and the smell of the Ambroid glue and the dope. I always enjoyed painting the planes. I look forward to seeing your Scottish Fifie Fishing vessel and I hope you will start a build log. This is a very enjoyable hobby and you have come to the right place to get advice and share your success on your build.
-
Justin, I use tape most of the time when I paint my models. I use tape to get a straight edge such as the red top of the rudder and also use tape to cover up the natural wood in case I should accidentally drop or splatter some paint. My Longboat was pretty well taped up for over two months during the painting process. I mainly use blue painters tape for general cover up and use Tamiya Fine Line or 3M Fine Line tape to get a sharp edge. A good cover up of tape, paper or cloth is cheap insurance when painting, as I have learned this the hard way. I remember taping up my 1/48th Longboat and it was a pain with all of the tight turns of the exposed bulwarks. The design of the Medway Longboat eliminated this as there is an inboard sheer strake attached to the inboard edge of the caprail. All I had to do was tape below this strake to keep paint from hitting the natural wood bulwarks. When I saw Chuck demonstrate his painting technique, he had squares drawn on a sheet of wood. There was never a model that he demonstrated his painting technique on, but I would not doubt that he uses very little, if any, tape in his painting of his ship models. He is that good.
- 263 replies
-
- 5
-
-
- Medway Longboat
- Syren Ship Model Company
- (and 1 more)
-
Welcome to Model Ship World. You have built some nice models and I look forward to seeing you start a build log on your Lady Nelson. The Connecticut Marine Model Society is a club that meets in West Haven, CT that has modelers of all skill levels and also some musicians. I am sure their meetings are on hold due to Covid-19, but hopefully will start back up in the fall. Here is a link to their website: http://www.ctshipmodels.org/index.html
-
Photo Etching - do it yourself
Ryland Craze replied to Dziadeczek's topic in Metal Work, Soldering and Metal Fittings
Thomas, I am glad you have experienced success in your photo etching of your parts. It is an interesting process and I have been very fortunate to have seen Gene Berger demonstrate how he makes his photo etched parts. Gene continues to improve his photo etching expertise with each project he completes. He shows that it can be successfully done in a home workshop. For those that want more information on do it yourself photo etching, check out Gene's photo etch tutorial at this link: http://geneberger-models.com/photo-etching/ -
I have never used Humbrol Acrylics but I always thin my acrylic paint. The more I thin it, the less you will see of the lap marks and brush strokes. This will require many coats of thinned paint. Test on some scrap wood first.
- 436 replies
-
- 3
-
-
- vanguard models
- alert
- (and 1 more)
-
Your Speedy is coming along nicely. I love the boxwood. This is going to turn out to be a beautiful model.
-
Assuming this hull is to be doubled planked, I would smooth the run of the bottom plank along the bulkheads G to L. This could be accomplished by taking a small amount off of the bottom plank where it dips down. The problem lies with the plank above the bottom plank. If the hull is to be singled planked, I would remove the last two planks installed and start over. You should definitely consider lining off the hull using the procedures in the links below. This would prevent this type of error. Chapter Two of the Medway Longboat instructions also explains the process of lining off the hull. https://www.syrenshipmodelcompany.com/medway-longboat-1742.php The link to the download of Chapter Two is located about midway down the page. I hope this helps.
-
You have done a beautiful job. I love the pear wood and the contrast between the different planks. Can't wait to see more.
- 642 replies
-
- 1
-
-
- winchelsea
- Syren Ship Model Company
- (and 1 more)
-
Congratulations on completing your Syren. You did an excellent job on building this model. I have enjoyed following your detailed build log and it will be an excellent resource for future Syren builders.
- 1,306 replies
-
- 5
-
-
- syren
- model shipways
- (and 1 more)
-
Congratulations on completing your Picket Boat. You have completed a beautiful model and I have enjoyed following your detailed build log.
- 54 replies
-
- 1
-
-
- picket boat
- model shipways
- (and 1 more)
-
Jeff, it depends on the type of paint you are using. The Grumbacher artist acrylic paint that I use on my Longboat comes in a tube. The paint is thick like tooth paste. I have never measured the amount of distilled water that I use to thin it, but I would guess that it is around 70% water and 30% paint. I want it thin like water color. If the paint starts to thicken up during a painting session, I will add more water. I have used some other paints like Badger and Vallejo that are pre-thinned for airbrushes and add little or no water. I always test the paint on scrap wood before I apply it to my model. Glenn, I still have my AVS. All that is left to complete is the masting and rigging. Maybe some day. Richard, I use distilled water and have not experienced any problems. You should test the thinning of your paint before you apply it to your model. I know that some brands of acrylic paint have their own thinning agents. We are glad to have you on board here at Model Ship World. Derek, Thank you for your kind remarks. I really liked the modifications that you did on your Pinnace. It turned out to be a beautiful model and I too am impressed with your level of craftsmanship. Your HMS Speedy is coming along nicely and it too will be a beautiful model. You will not have a problem building the Queen Anne's Barge or the Medway Longboat. Both of these models by Syren Ship Model Company are uniquely different. I have seen Chuck’s QAB in person and it is a terrific model. The boxwood carvings look really nice on the cherry wood. Having planked the Pinnace and the Speedy, you will find the Longboat a pleasure to build as the Alaskan yellow cedar planks are pre-spiled. Both of these kits are in 1:24 scale and will fit nicely with your Pinnace. Thanks John. I will be glad when we can meet in person, although I thought last Saturday's HRSMS meeting on Zoom went very well.
- 263 replies
-
- 3
-
-
- Medway Longboat
- Syren Ship Model Company
- (and 1 more)
-
Thanks Glenn. I remember when you were building your Armed Virginia Sloop on another forum many years ago. You will not have any problem painting with highly thinned paint. Try practicing on a piece of scrap wood and you will find the color starts to look good around the eighth coat.
- 263 replies
-
- 1
-
-
- Medway Longboat
- Syren Ship Model Company
- (and 1 more)
-
Thanks Rusty. I know that you use Chuck's painting techniques in your builds. Your paint jobs always look nice. I took many pictures of your Medway Longboat at the Northeast Joint Clubs Conference and Show last year and have referred to them many times in my build. Stay safe up in your area of New York.
- 263 replies
-
- 1
-
-
- Medway Longboat
- Syren Ship Model Company
- (and 1 more)
-
Many years ago I had the opportunity to see Chuck do a demonstration on his painting techniques. I remember that he had a piece of wood that had several squares drawn on it and he had a jar with water that contained several paint brushes. The brushes had been in the jar for some time as the tips had curled due to the weight of the brush. He explained that in art school he had to do a color pallet with one inch squares that he had to paint perfectly square and with no lap marks or brush strokes. Failure to do so would result in failing the class. He showed how to thin his artist acrylic paint with water and paint within the squares. The demonstration was only 30 to 45 minutes long but he was able to build up the color after many coats of paint to reduce the opaqueness of the thinned paint. The curled tip of the brush helped to get a fine line as he stroked the brush along the border of the squares. He also talked about breathing and "pinky" control. He also had a brush with clear water and a piece of sandpaper that was cut in an arc to touch up places where the paint was outside of the area he wanted to paint. I wish I had videoed the demonstration as it would have been a good reference tool. I have tried his painting technique and find that it works very well. Before this technique, I was painting my models trying to cover everything in one coat and wondering why I had brush strokes and lap marks. If you use Chuck's technique, you will find that your paint jobs and confidence will get better with each coat of paint that you apply.
- 263 replies
-
- 6
-
-
- Medway Longboat
- Syren Ship Model Company
- (and 1 more)
-
Pride of Baltimore with Bob Hunt Practicum
Ryland Craze replied to Tony Dee's topic in Wood ship model kits
I agree with Gregory that you should use the 3/16" planks. This should not cause you any problems during the planking. Good luck on your build and I look forward to following your progress. -
Thanks Chuck. A compliment coming from you like that means a lot to me.
- 263 replies
-
- 2
-
-
- Medway Longboat
- Syren Ship Model Company
- (and 1 more)
-
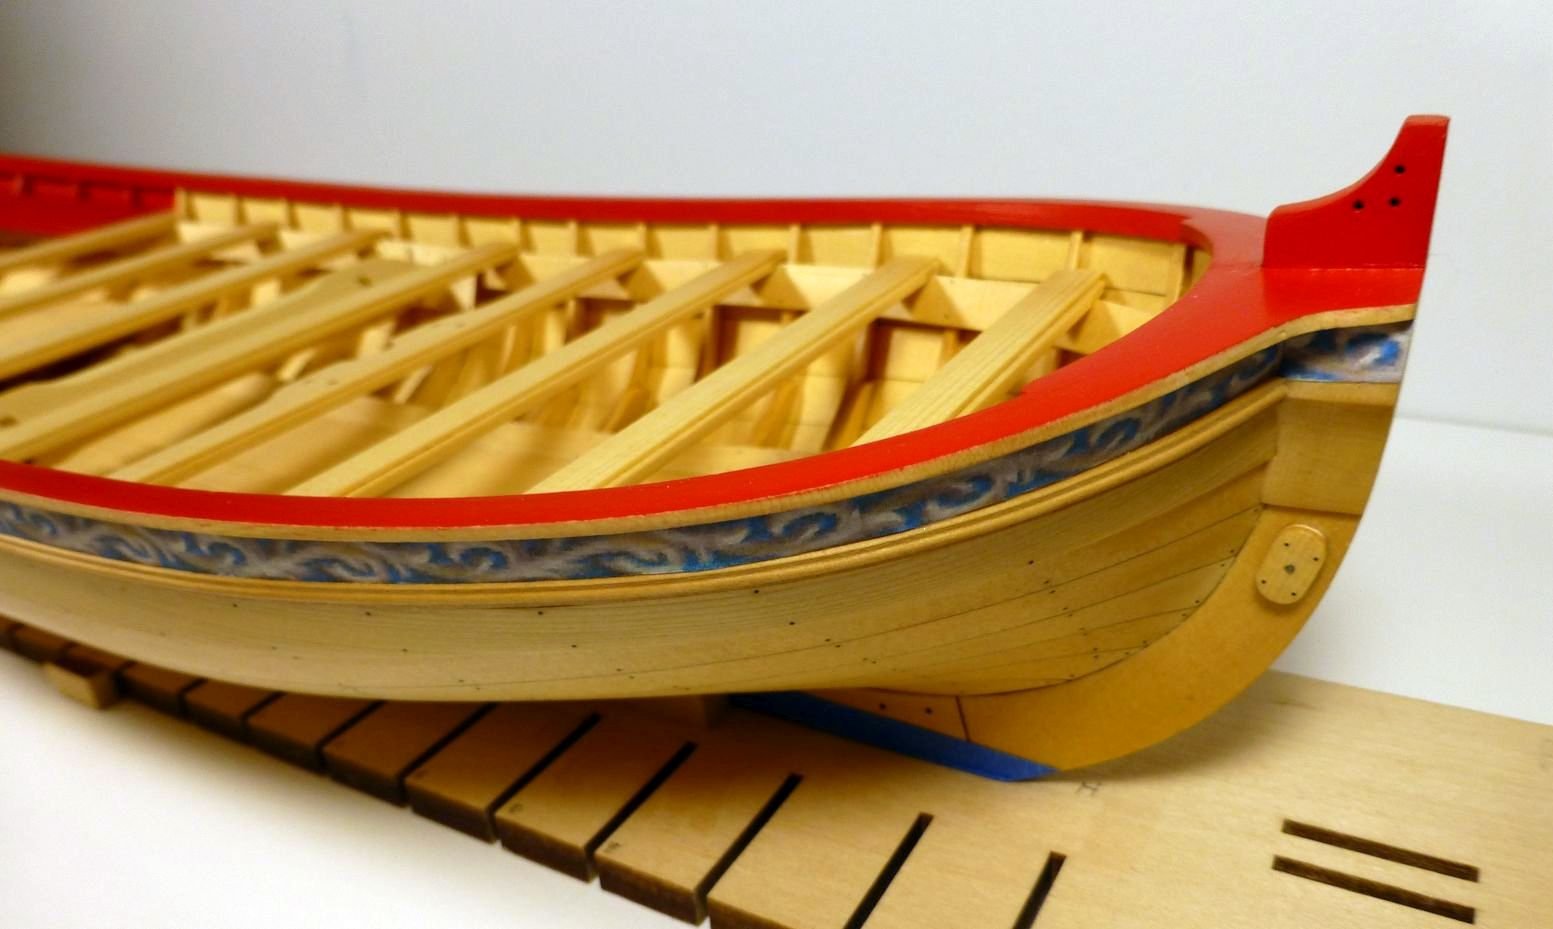
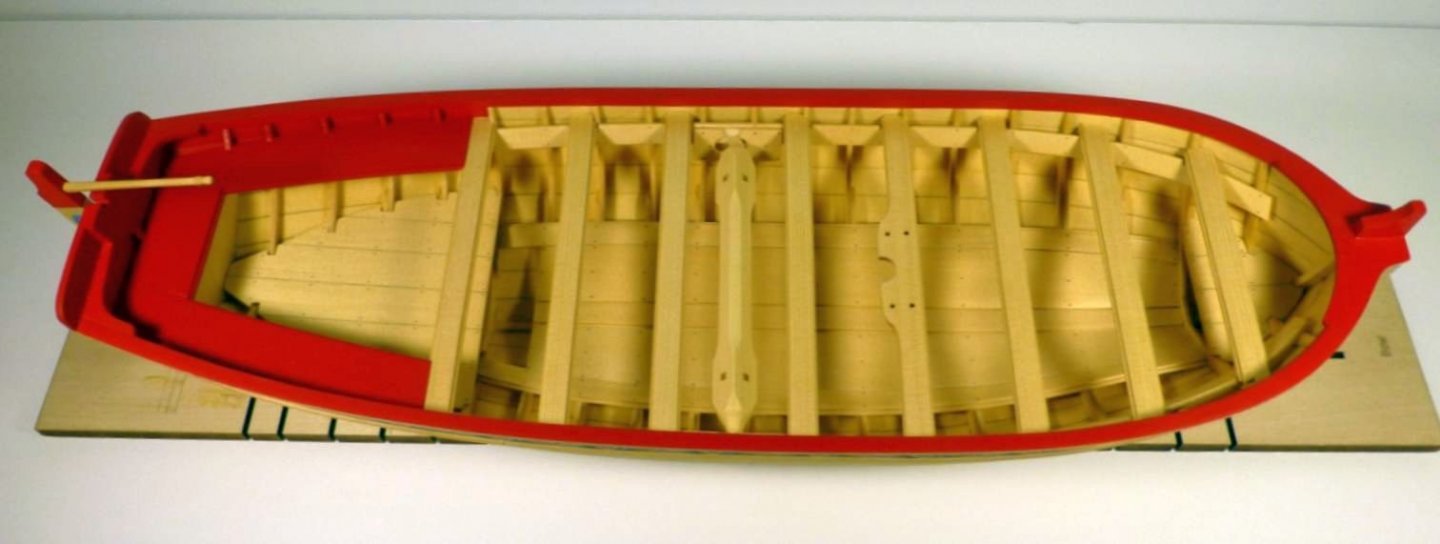
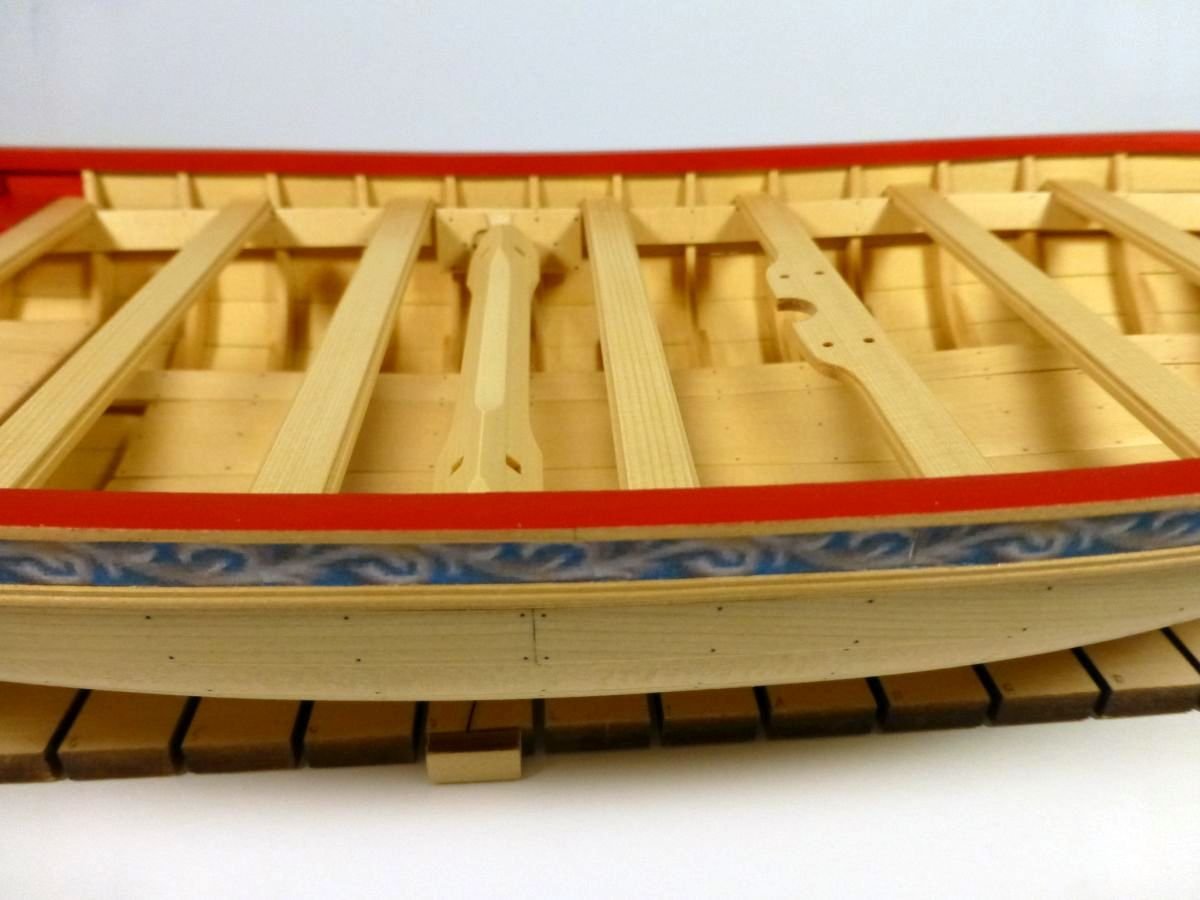
Thanks everyone for your comments and for the "Likes". I am really appreciative of those Medway Longboat builders that have created build logs as I refer to them often to see how they constructed a certain component of their build. This has helped me in my build. Michael and Jean-Paul, I like the Grumbacher Red as it gives a low sheen, almost matt finish. I like the red color as it does not have the orange tint that some of the reds do. Don, thank you for checking out my post and for your comment. I am very pleased with the model and I cannot wait to see it finished. This is a really nice kit and the instructions and materials are first class. Bob and Rich, my paint job is far from perfect, but I am very happy with it. The thin coats are the key to getting a good paint job. I must have around 20 coats of paint on this model and it is just like painting with water colors. I feel the more that you paint, the better your technique gets. Bill, thanks for your comment. I am following your progress on your Cheerful as I have this model on my shelf and considering it for my next build. Chuck, the cedar has worked out great. The WOP over the cedar has made it look like boxwood and I have used your technique for the painting. I am striving to get to your level of craftsmanship, but realize that I am no where near that. However, just trying has made me a better modeler than not trying at all. Thanks everyone for looking in. Please stay safe and wishing everyone the best of health and happiness.
- 263 replies
-
- 6
-
-
- Medway Longboat
- Syren Ship Model Company
- (and 1 more)
-
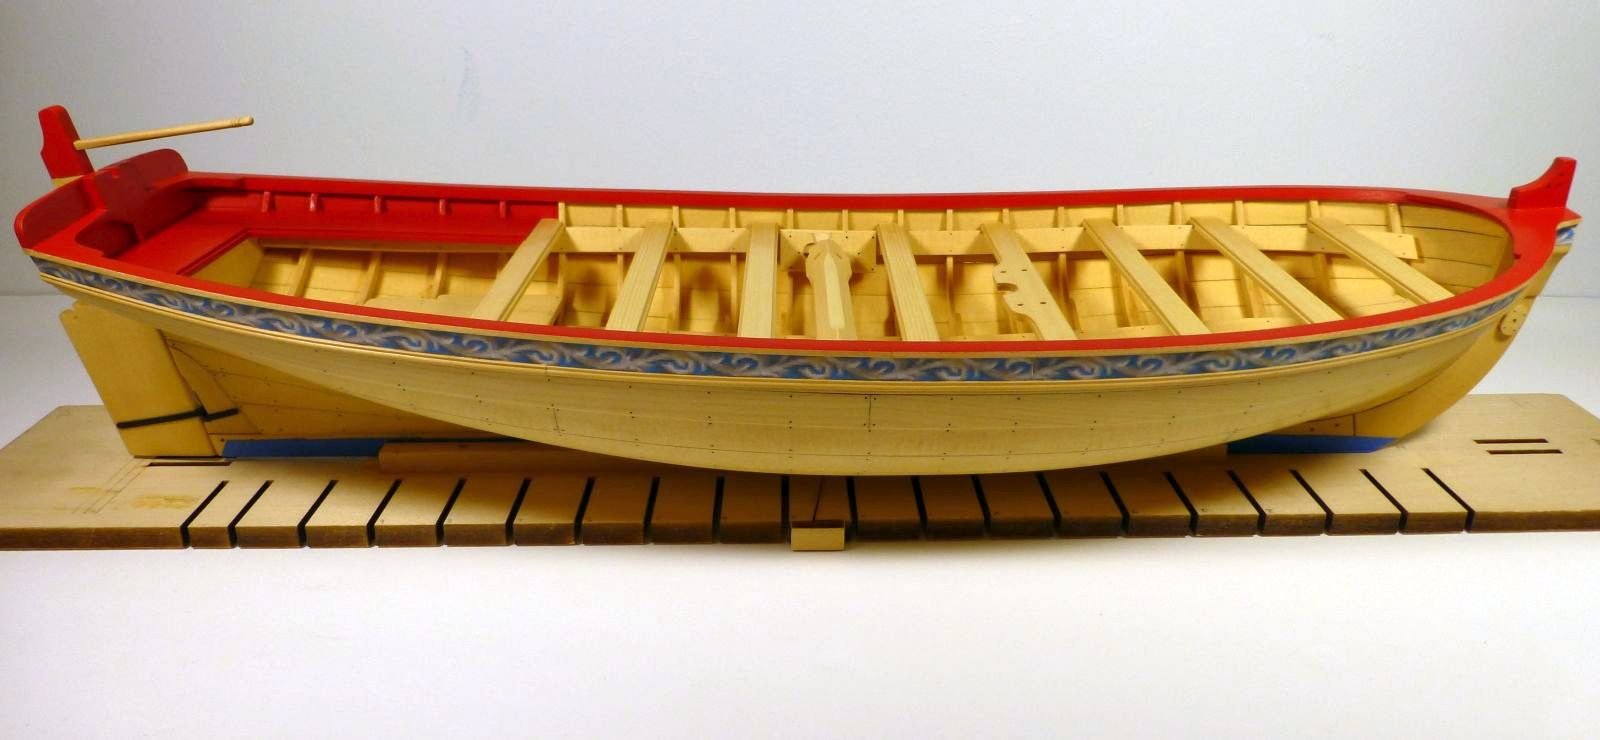
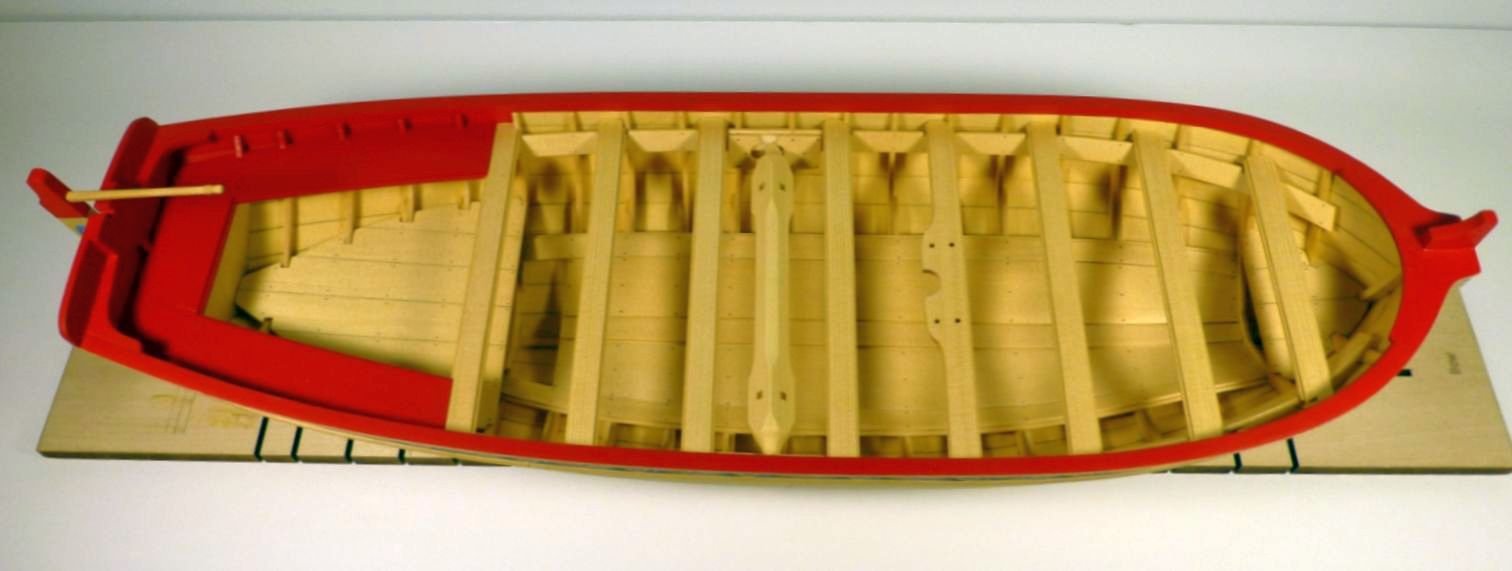
It has been a while since I posted my progress on my Medway Longboat. The world has changed a lot since my last post. I have completed the painting using many coats of thinned Grumbacher Red Cadmium Medium Hue. I am satisfied with the outcome. It found that I achieved a better finish using a fatter round brush than the one that I posted a picture of in a previous post. I believe it laid down a much smoother coat than the smaller brush and the color was a consistent flat, slightly satin finish. I have a few more items to complete and I will be finished with the hull. Please stay safe.


- 263 replies
-
- 20
-
-
- Medway Longboat
- Syren Ship Model Company
- (and 1 more)
-
Very nice job on your Sherbourne. You are making good progress.
- 40 replies
-
- 2
-
-
- sherbourne
- caldercraft
- (and 1 more)
-
Nice job on the fairing. You will enjoy planking. Bob has offered good advice. Just remember to not over bevel the upper inner edge of the plank as this could cause gaps to open up when sanding the hull. Plus, since you can see the planks from the inside, you want to keep the planks tight there also. Go slowly, do multiple fits and your planking will turn out just fine.
- 217 replies
-
- 2
-
-
- medway longboat
- Syren Ship Model Company
- (and 1 more)