HOLIDAY DONATION DRIVE - SUPPORT MSW - DO YOUR PART TO KEEP THIS GREAT FORUM GOING! (Only 20 donations so far - C'mon guys!)
×


Canute
-
Posts
6,370 -
Joined
-
Last visited
Content Type
Profiles
Forums
Gallery
Events
Everything posted by Canute
-
 David, Jack, I'm sitting here reading your kind suggestions and thinking to myself "I've said the same things". I have to think this through, better. I use an unfolded paperclip to apply glue to the parts. I'm used to putting the glue on the edge of a part, which has a thickness, say 1/32". The paper is hair thin, so I get drips and runs. I have to use more backing on the joints. "This ain't no Ambroid boxcar, Spanky." And neatness does count. Like I said, it's my first pure card ship. Another learning opportunity. Thank you both for sharpening my focus.
- 80 replies
-
- 6
-

-
- choctaw
- heinkel models
- (and 1 more)
-
Mick, I'd like to follow along, too. Interesting little vessel.
- 504 replies
-
- 1
-
-
- washington
- galley
- (and 1 more)
-
I just got one last week. I think it was the last one before the re-order.
-
David, thanks for reading this. And thanks for the likes, too. Half the fun is sitting at the the cutting board, deciding how best to cut a part out. There are a bunch of nooks and insets and some parts have to interlock. I found the beta build on a papermodeler website, so I will study his pictures closely. The instructions are mostly pictures showing parts, but not too much in the way of closeups. The web pages will be a help. I'm not shooting for hyper accuracy, just trying to get my technique down. I have to work on my gluing, still using too much. The full hull is a poser; should I glue it all into one piece and attach to the bulkheads or do it segment by segment. I'm leaning towards the segments. The original builder went from exposed bulkheads to covered without any explanations.
- 80 replies
-
- 5
-
-
- choctaw
- heinkel models
- (and 1 more)
-
George, I could re-glue the thicker,laminated parts, which I did with one deck on the paddle wheel housing. If I flub with a piece printed on the heavy paper, I can reprint the sheet. Some archival tape may work, but I don't know where I'd get any, short of mail order. The cost of a sheet of 110 lb. paper and printer ink is low, so just reprint your part. The "kit" is a download on your computer, so once you have it; it's yours. I like to think I'm fairly safe, although I did have a trip to a hospital ER after slicing open my had while cleaning up a pour stub on a boxcar kit Took 4 hours, four stitches and two tries at getting a Tetanus shot. My left hand bears a few scars from sharp objects over the years. As for Choctaw, I'm not sure if I should glue up all the hull segments first and skin the hull or attach each segment individually, stern to bow.
- 80 replies
-
- 6
-
-
- choctaw
- heinkel models
- (and 1 more)
-
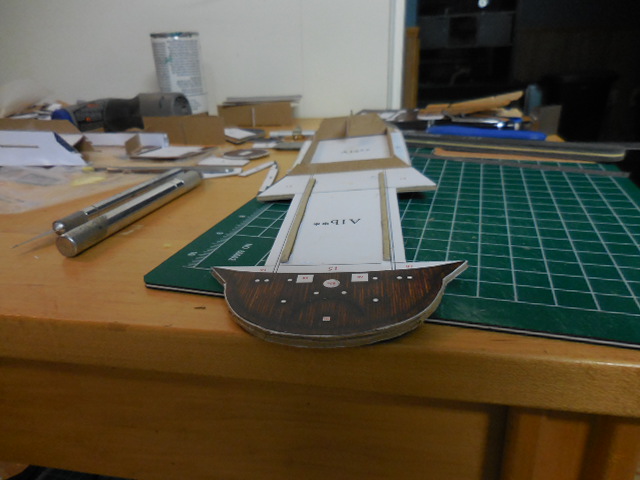
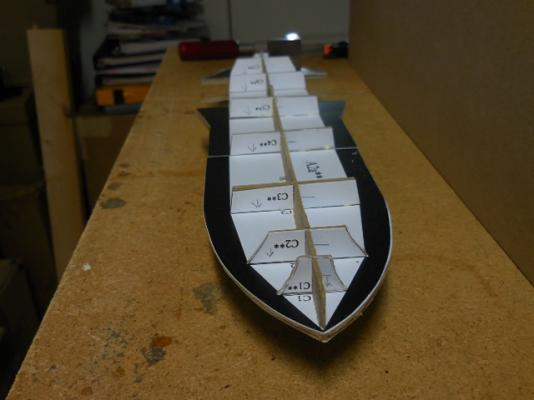
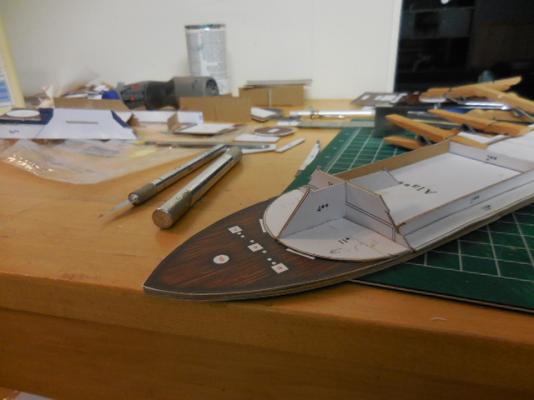
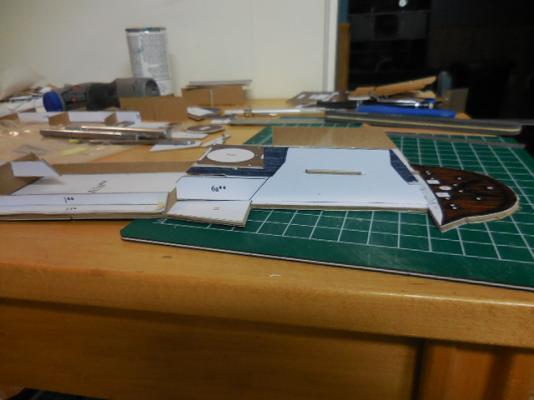
Went to cut out the hull skins with my new scalpel with the curved blade, a #12 I believe. Worked really well cutting into the corners of these pieces. The skins appear to go on like shingles on a roof, since they have uncolored tabs along the axis of the hull. Looks like I skin this boat from stern to bow. Origami skills needed. Glue tab on the near side of the part. I had laid the skin sheet on a light table so I could mark where the curves go in pencil, before I cut any of them out. You can see the lines in the top picture. I did up four sections out of 10, so far. The stern piece will need some judicious molding to cover just above the rudder. each section's mounting tabs get folded inboard to glue the skin to the decking. I lightly scored the backside of each part so I could fold them. I used the backside of a #11 blade. Score it, don't cut it. I got into one of the curvier parts and decided I could free hand the curve. Dug in too deep and pulled the blade back, mostly away from me. I did anoint the hull skin with some type O+, but no further bloodshed followed. Nipped up to the bathroom, pulled out the ointment and a Band-Aid and I was good to go. Twas naught but a scratch, Ma! Thanks for reading.

- 80 replies
-
- 14
-
-
- choctaw
- heinkel models
- (and 1 more)
-
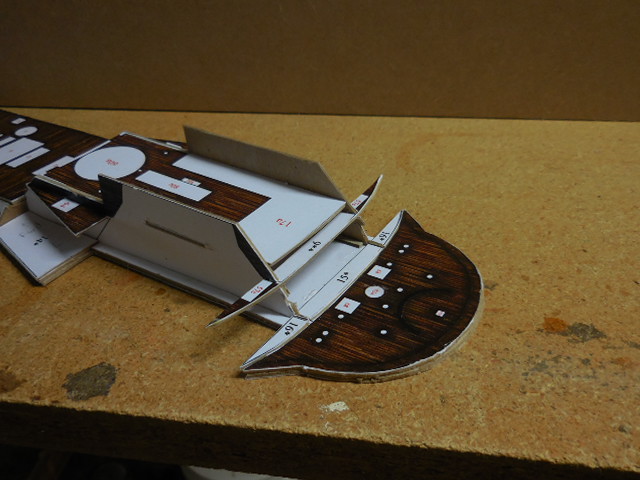
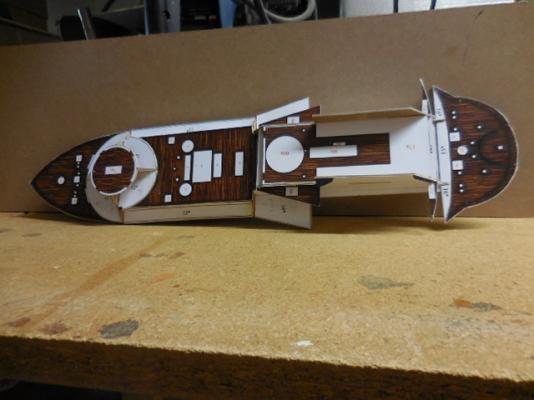
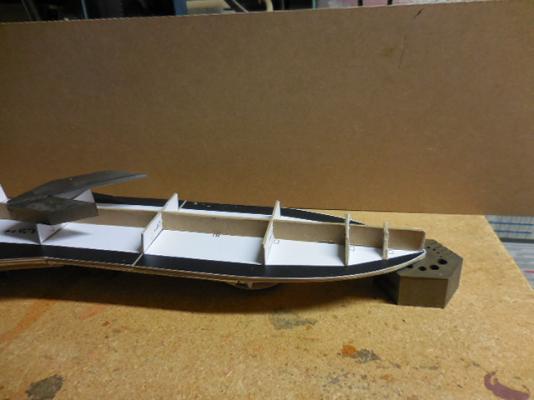
As promised, the overall superstructure base: Here's the front casement: And the paddle wheel housing: A little more detail on the aft end of the paddle house: Looks like one of those floating hotels. I glued the formers/bulkheads to the underside of the hull. Not very many. And a closeup of the bow formers This ship was built as a ram, although they couldn't get going fast enough to be effective. So, after I skin the hull, I have to make up the ram. Some of these parts are pretty curvy, so I'll be having fun keeping on top of the cut lines. Thanks for following along.

- 80 replies
-
- 18
-
-
- choctaw
- heinkel models
- (and 1 more)
-
Nice weathering to highlight the bunker joints. The coal looks appropriately lumpy, but looks a tad brown. May need to add more black. I'm following along because I have one of these jewels in my stash.
- 105 replies
-
- 2
-
-
- picket boat
- model shipways
- (and 1 more)
-
Grant, thank you for following along. I plan to finish the base walls of the superstructure later and start on gluing up the hull bulkheads and the 2 part keel. The keel joint is a butt joint, but gets sandwiched between 2 pieces of laminated card. Thank you all for following along.
- 80 replies
-
- 5
-
-
- choctaw
- heinkel models
- (and 1 more)
-
Mark, Patrick thank you for the comments. And thanks for the likes, folks. Mark, most definitely wood and maybe styrene could be used. The flagstaffs and some other parts will be cut from wire and I'm looking at using wood for the masts. The moisture effects may be mitigated by spraying the cardboard with the Krylon spray. I only did the heavy paper, since it was laser ink and figured I'd smear the ink somehow while doing all the handling. Oh well, it is my first card kit.
- 80 replies
-
- 5
-
-
- choctaw
- heinkel models
- (and 1 more)
-
George, that's basically it. The hard part will be rolling the masts and cannon barrels. The flat parts are pretty much the same. Wait till I add the keel and formers/bulkheads.
- 80 replies
-
- 5
-
-
- choctaw
- heinkel models
- (and 1 more)
-
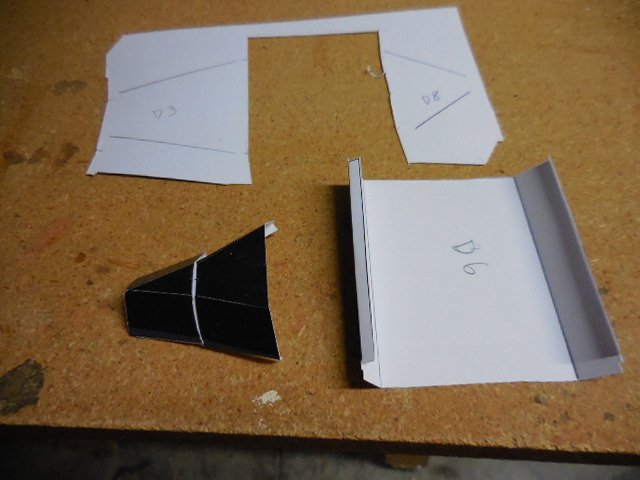
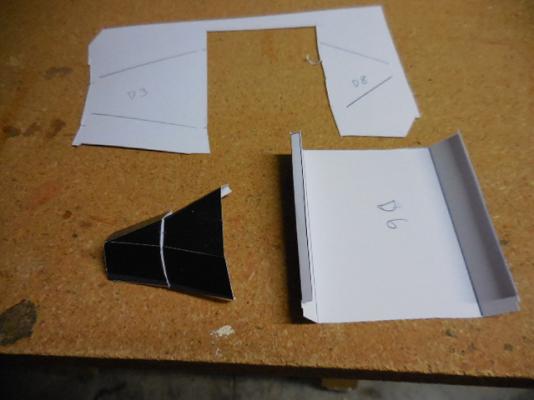
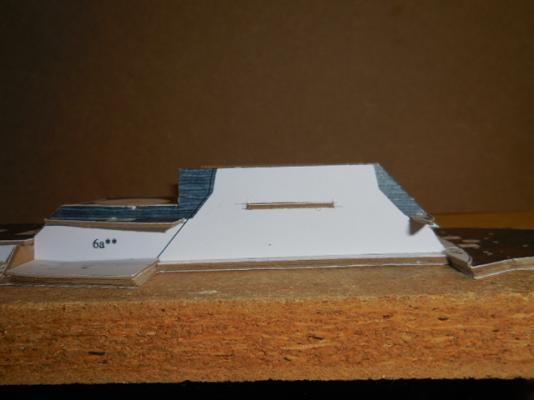
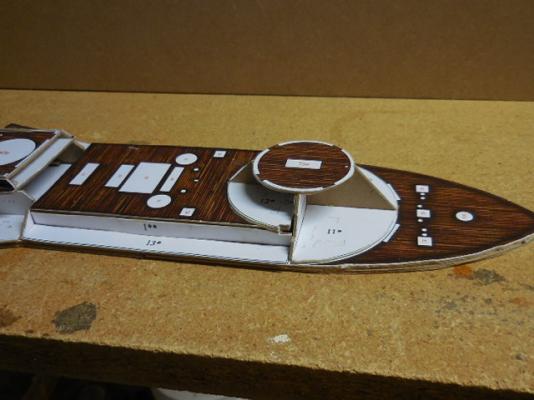
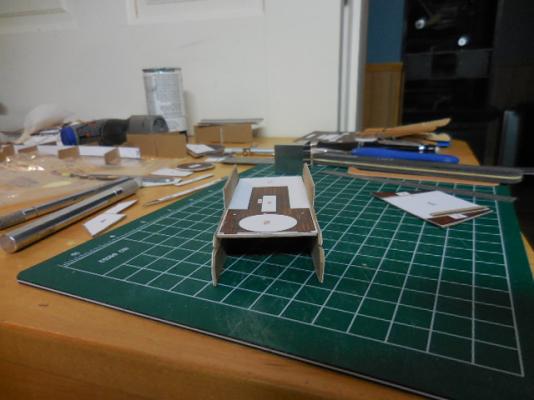
I finally had enough parts cut out to start assembling the base parts of the superstructure. I started with the area between the paddle wheels, towards the stern. There are 5 parts and as I glued the deck to one side piece I realized the assembly was going to be way out of square, if I didn't brace it. The paper and cardboard absorbs some moisture, so the parts are a little wavy. Falling back on a resin kit trick, I ran two strips of wood down behind the lines where the deck house would sit. This will keep the structure square and centered on the hull. I switched to the forward gun "turret" to start the base parts up forward. The "turret" really isn't a turret; it's a truncated cone but since it's round and will eventually have four cannon ports, I called it a turret. Here's where I am on the upper works. I have a few more intermediate decks to add to the paddle section and the decking between the paddle wheels and the "turret". The model has you add additional thickening parts to add extra support around the paddle housings and the "turret, too. Wrapping the paddle wheel housing looks like it will be an experience. The hull will come next. It consists of 9 thickened bulkheads and the keel, with a cardstock outer hull skin wrapped over them. Stay tuned.

- 80 replies
-
- 13
-
-
- choctaw
- heinkel models
- (and 1 more)
-
The engineering mind at work. Great at working out the tech side of things, but downright miserable at writing, grammar and spelling. I'm a prime example, so spell check is my friend. Although I do re-read stuff to make sure auto-correct is using the right word.
- 962 replies
-
- 4
-
-
- sovereign of the seas
- ship of the line
- (and 1 more)
-
Very nice job making the decking look like wood. I like your technique.
- 18 replies
-
- 2
-
-
- S-100
- KreigsMarine
- (and 1 more)
-
Brig Eagle by robnbill - 1:48
Canute replied to robnbill's topic in - Build logs for subjects built 1801 - 1850
Like that brass barrel, Bill. The carronade looks good, too. Eagle is looking good. -
Two thumbs up, mate! The boat and the pup both excellent.
- 188 replies
-
- 2
-
-
- Sherbourne
- Caldercraft
- (and 2 more)
-
Matt, checking dimensions in "Arming the Fleet" by Tucker, the 32lb. carronade length was 4' 0.5" with a bore of 6.25 ". The book has a table of long guns and carronades from about 1810. How long is that brass jewel you're holding?
-
Mark, guess I better not drop it, eh? It was the first thing I spotted for weighting. All the heavy books were up in my library and the paint cans weren't heavy enough(?). If a little is good, more is better (fighter pilot philosophy 101). I'm finding the cardstock & paper absorbs some moisture out of the air (house is at about 45% humidity, air conditioning on). I sealed the heavy paper with Krylon Matt Finish, recommended by the Admiral, a former commercial artist. Having worked with Homasote, on model railroads, for years, I know the best way to keep paper products from warping is to paint all sides and then weigh it down. But, no matter what I do, it will warp a little. The keel and formers/bulkheads have some twist already. Getting them glued up, with my squaring devices, should get rid of most of that.
- 80 replies
-
- 6
-
-
- choctaw
- heinkel models
- (and 1 more)
-
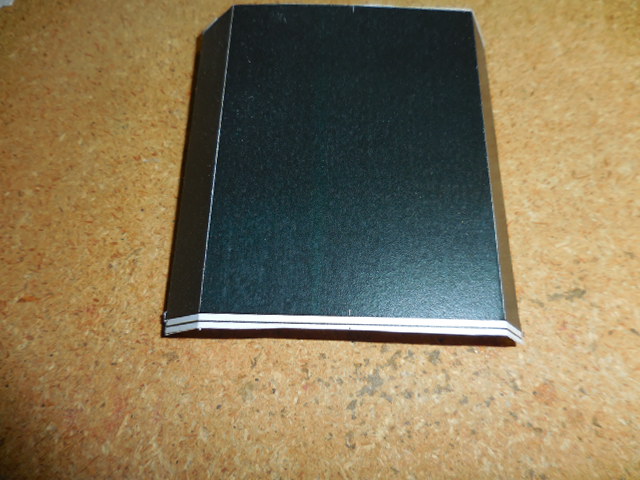
Well, a bit of an experiment. I glued the upper and lower decks together with the Scotch Positionable Mounting Adhesive. This glue is one step more forgiving than contact cement. I used it because I wanted to keep the decking flat; wood glue may cause the parts to warp. And I don't have to spray on any aerosol glues. The deck is resting comfortably, under a manila envelope and a 15" section of 100 pound rail (anvil and occasional paperweight). I'll be able to start some assembly later.
- 80 replies
-
- 6
-
-
- choctaw
- heinkel models
- (and 1 more)
-
Amazon, mate. The local office supply folks were semi-clueless.
- 80 replies
-
- 4
-
-
- choctaw
- heinkel models
- (and 1 more)
-
Best of luck with the pup! Patience, too. Love 'em and they'll love you right back. :) And always remember: dogs are unconditional love wrapped up in fur.
- 188 replies
-
- 1
-
-
- Sherbourne
- Caldercraft
- (and 2 more)
-
Richard, I'm going to follow along, also. I have a Hacchoro inbound from Zootoyyz; may see it tomorrow.
- 45 replies
-
- 4
-
-
- yakatabune
- woody joe
- (and 1 more)