HOLIDAY DONATION DRIVE - SUPPORT MSW - DO YOUR PART TO KEEP THIS GREAT FORUM GOING! (Only 24 donations so far out of 49,000 members - C'mon guys!)
×


gjdale
-
Posts
4,891 -
Joined
-
Last visited
Content Type
Profiles
Forums
Gallery
Events
Everything posted by gjdale
-
 If you're even thinking about re-doing Michael, then I would go ahead and do so. If you don't, it will continue to bug you for the rest of the build. And it will give you the opportunity to try it with the grain oriented correctly. Go on.........you know you want to..............
 -
Hi David, At the risk of pushing a point, you could have a crack at scratch building the Cutters. It's really not that difficult. Anyway, enough said. Your build, your decisions. Your ship looks excellent as it is.
-
Nice fixes Michael, until ............. oops! A timely reminder about understanding the properties of wood and the importance of grain direction. I'm sure this one will stick with you! You're doing a great job here Michael. Don't let theses minor setbacks get you down. Mistakes are how we learn best. Of course, if it's someone else's mistakes, then all the better!
-
Hi Sherry, Just found this thread via your San Felipe log. I'm afraid I can add precisely nothing to the knowledge base here, but I'm fascinated by the process and will follow your learning journey with great interest. Good luck!
-
Dave, I'm sharin' your pain brother - particularly the "expensive" part!!!!
-
Ah the challenges of model ship building! I look forward to seeing your solution(s) to your current dilemma Michael.
-
Ah, so I gather that the "Taj Ma Chook" is all completed now! Good to hear you also had a positive experience with Cornwall Model Boats - that certainly reflects my own experience. If the figures aren't the right size for this build, there's always the next one, or the next, or............... Planking seems to be going well. Don't forget that steam can be really useful for bending planks in addition to soaking. Any old steam iron will do - just not the one you are about to press your nice new white shirt with!
-
I know how that feels Nigel - you are in good company on that aspect! Do your tutorial when you have both the time and the inclination - most of us will be patient !
-
Very nice indeed Augie. As I recall, Remco did a rather magnificent job of the brickwork for the stove on his Swan class - there may be a few tips to pick up there as well.
- 2,191 replies
-
- 1
-

-
- confederacy
- Model Shipways
- (and 1 more)
-
Looking good Sjors. Don't try and keep up to Mobbsie's pace - those "gentlemen of leisure" have it too easy! We workers will just have to plod along at our own pace. Luckily, it's not a race, and as long as we're enjoying the journey, it doesn't matter when we finish.
- 1,616 replies
-
- 5
-
-
- caldercraft
- agamemnon
- (and 1 more)
-
Lovely pictures of some outstanding work Bob. She really does look magnificent.
-
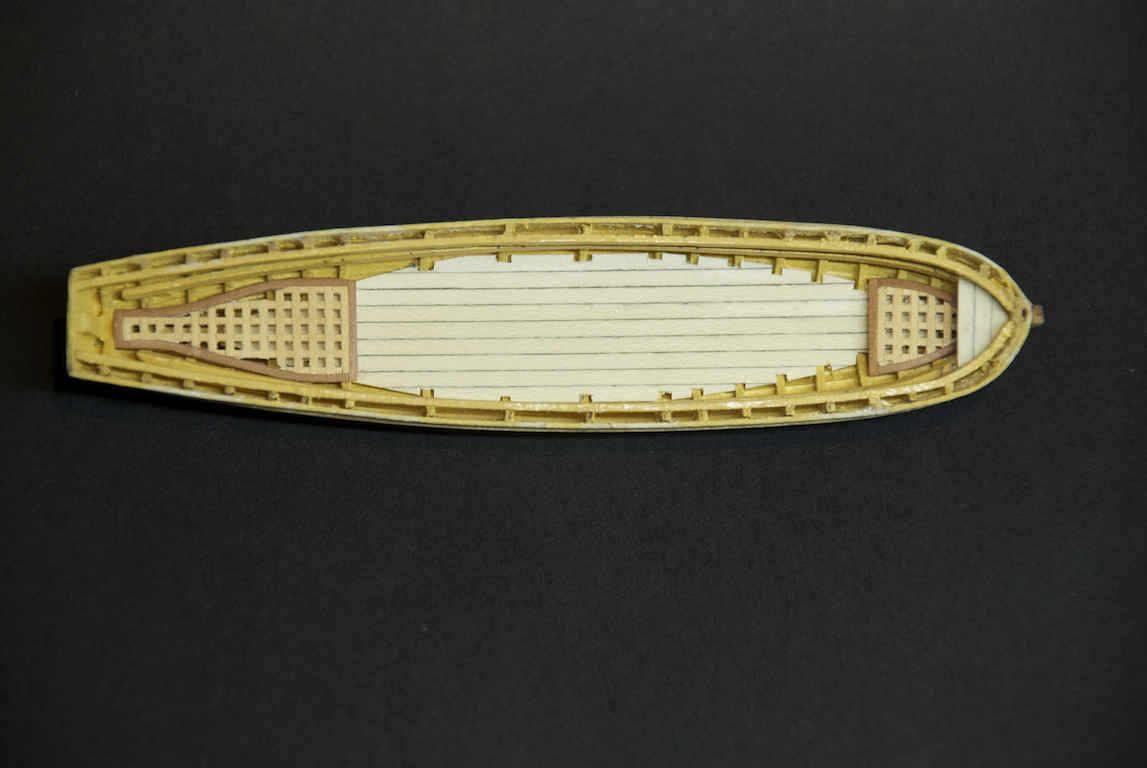
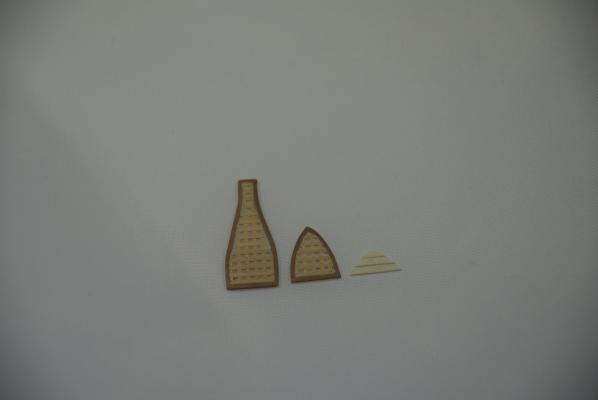
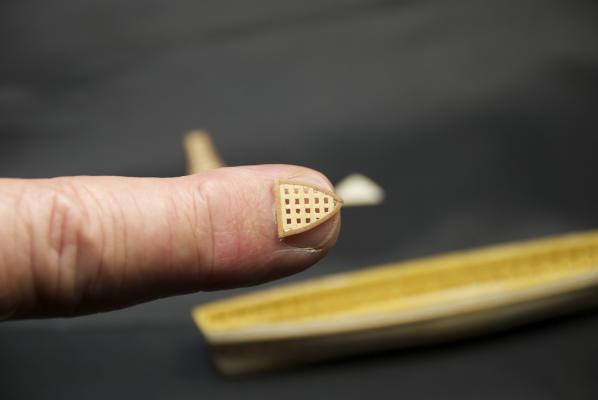
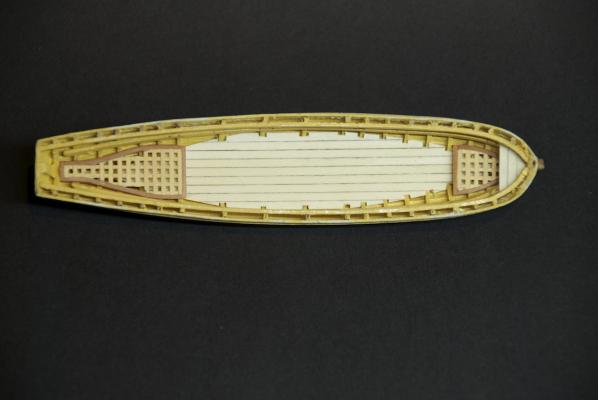
Ship's Boats continued: Not a lot of time in the shipyard this weekend, but a little progress to report. I've been working on the gratings for the Pinnace. These are made from 1/32" x1/32" Boxwood stock that Jeff Hayes (Hobbymill) very kindly milled for me with notches, so that task was made a lot easier (thanks Jeff ). The gratings are quite a tricky shape, especially the stern grating. They are framed in in Pear wood of the same dimensions. I also made up a small bow deck, that will go in front of the foremost thwart. This was made from the same stock as the footwaling. I've also been furthering my quest for improved photography.... Here's a few pics of the parts: And here's the "fingernail shot" to show the size of the bow grating: This shows the two gratings loosely in place, with the monster hand for overall scale: And here's an overall shot with all parts in place: I've also prepared the stock for the thwarts. These will be made from Pear wood trimmed with Boxwood (the opposite colour combo to the gratings), much the same as I did with the Launch. However, I decided that I'd better paint the exterior of the hull before moving on to fitting out the interior any further. At this stage, I've just applied a coat of white Gesso as an undercoat. I've gotta say, I've become a big fan of this stuff - it makes subsequent coats of paint go on a whole lot easier. More pics once painting is complete - hopefully by next weekend.

-
Love your attitude Pops. Can't wait to see your pictures.
-
Hi Vivian, Whichever you decide, I can't wait to see your venture into full scratch building.
-
That is one beautiful deck Nigel - well done indeed!!! As for treenailing, I'm sure it will look fantastic whichever way you choose. As long as you keep them to correct scale size (which I know you will anyway) then I think they will be fine. You've gone to such trouble already to make "authentic" changes/additions, I guess I'd be leaning towards a "yes" vote on their inclusion.
-
A tricky operation beautifully executed Danny. Spyglass - there's no reason the spot gluing technique shouldn't work with CA, using acetone as your de bonding agent. I still wouldn't use CA unless I absolutely had to though.
-
Very nicely done Danny!
-
Lovely John, she's shaping up to be a real beauty!
-
Very nice work David. As far as positioning goes, my understanding from reading AOTS by McKay, is that the Barge was carried on the skid beams in the waist, along with the Launch, Pinnace and an 18ft Cutter. I believe that the quarter davits were used for two 25ft Sea Cutters. Happy to be corrected, but that is my understanding. Regardless, your work looks terrific.
- 439 replies
-
- 1
-
-
- victory
- caldercraft
- (and 1 more)
-
Druxey, This may be like asking "how long is a piece of string?", but do you have any particular blade specs in mind here? What are your favourite "go to" blades?
-
Can't wait to see the workshop photos Danny. With your knack and ingenuity I'm sure it will be well designed and highly functional.
-
Excellent Johann! Thanks for sharing such detailed photos of your methods.
-
Careful there Bob, you'll be needing a house extension for all the visitors you're about to receive!!! Have golf clubs, will travel!
-
Nice to see an update after all the refurb work Mobbsie, she's looking quite splendiferous! Really nice job on the ratlines. At the rate you work, I expect you'll be completely finished by the time Sjors and Anja arrive. Speaking of which, congrats on the significant milestones (damn spell checker tried to say "millstones" - maybe that was just the Aussie dictionary ). Noting all those celebrations, perhaps pictures aren't such a good idea.......... As for Sjors's age, it could be said that when he joined MSW he was a bit of an old woman. Since then he has aged considerably! :P
- 1,279 replies
-
- 5
-
-
- agamemnon
- caldercraft
- (and 1 more)
-
Sorry to disappoint you Floyd, but I was born in the UK. I am multi-lingual though - I speak English AND Strine. And I can understand American most of the time! Now let's hand this log back to its owner.
- 2,191 replies
-
- 2
-
-
- confederacy
- Model Shipways
- (and 1 more)