HOLIDAY DONATION DRIVE - SUPPORT MSW - DO YOUR PART TO KEEP THIS GREAT FORUM GOING! (Only 24 donations so far out of 49,000 members - C'mon guys!)
×


gjdale
-
Posts
4,891 -
Joined
-
Last visited
Content Type
Profiles
Forums
Gallery
Events
Everything posted by gjdale
-
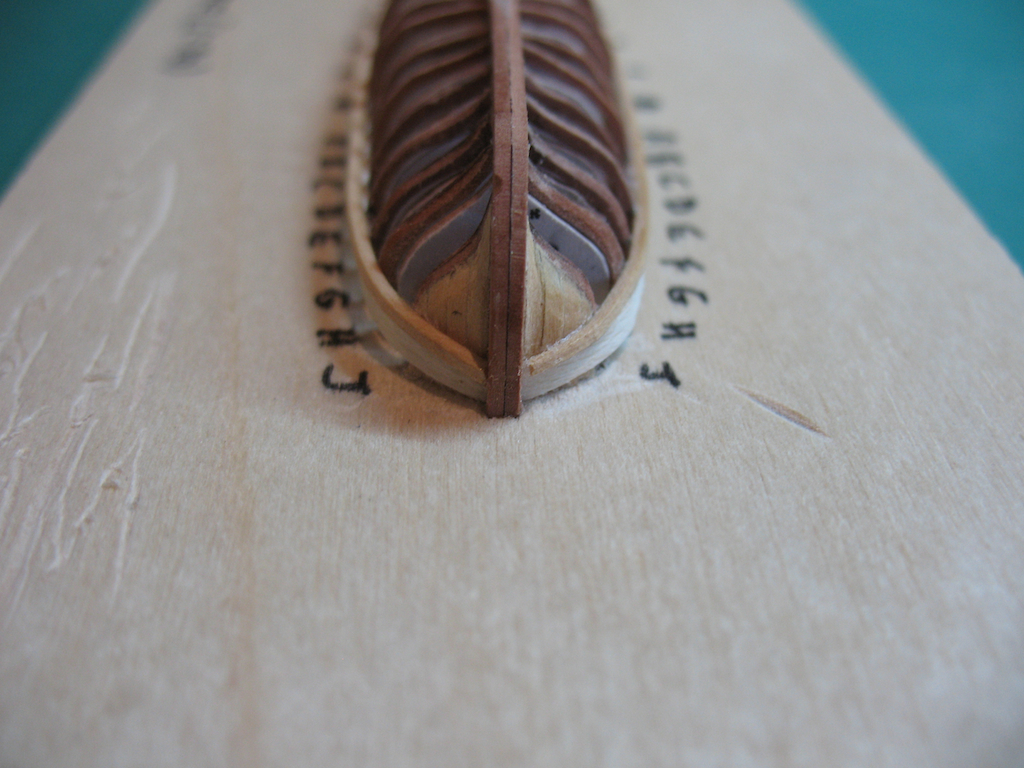
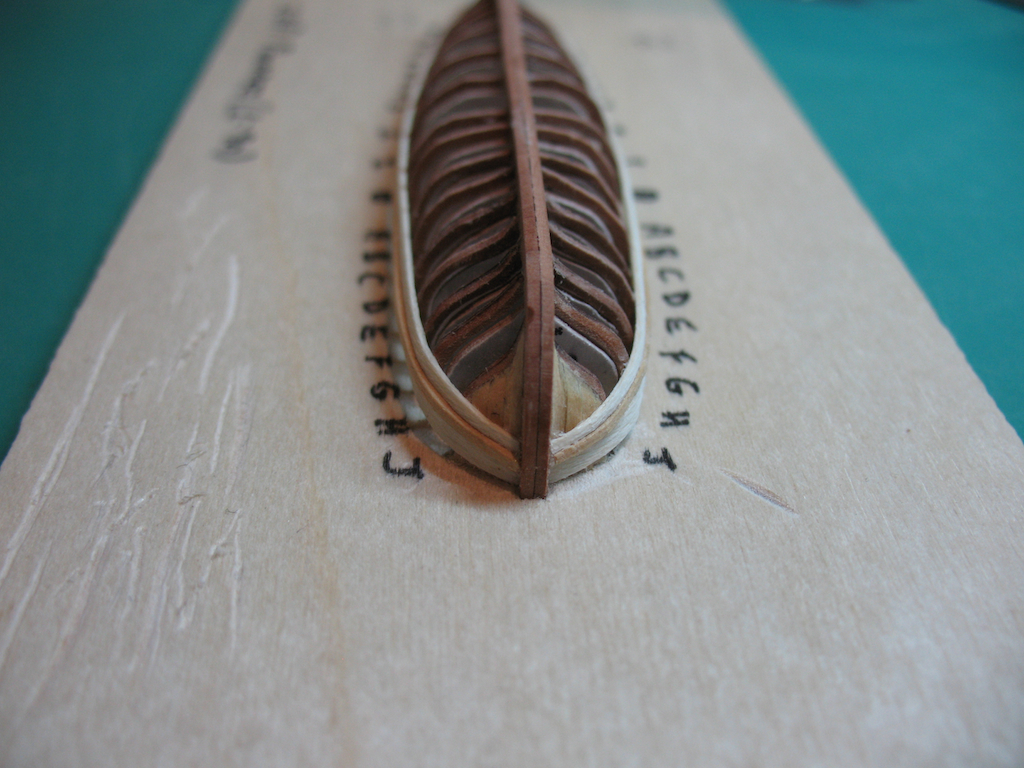
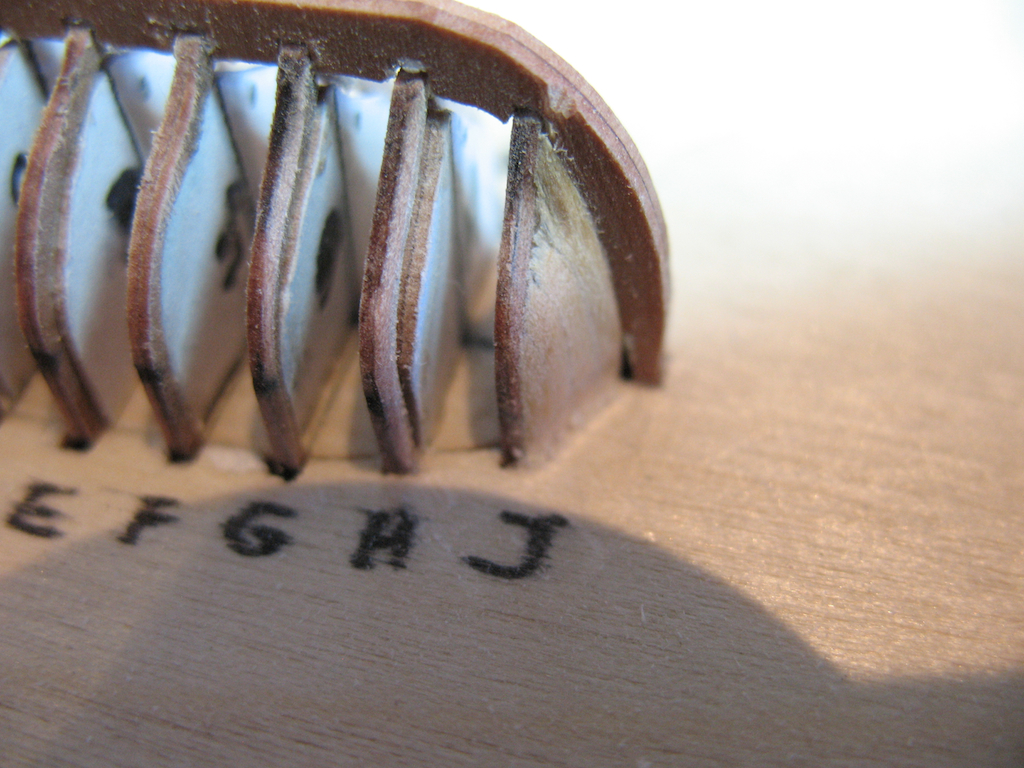
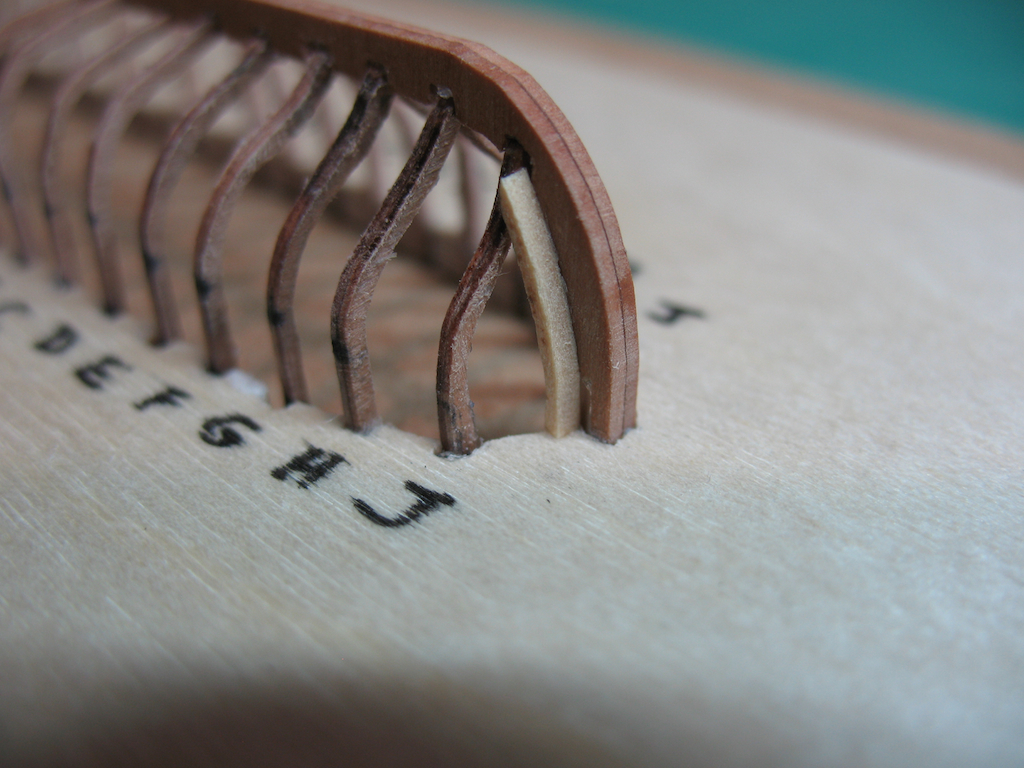
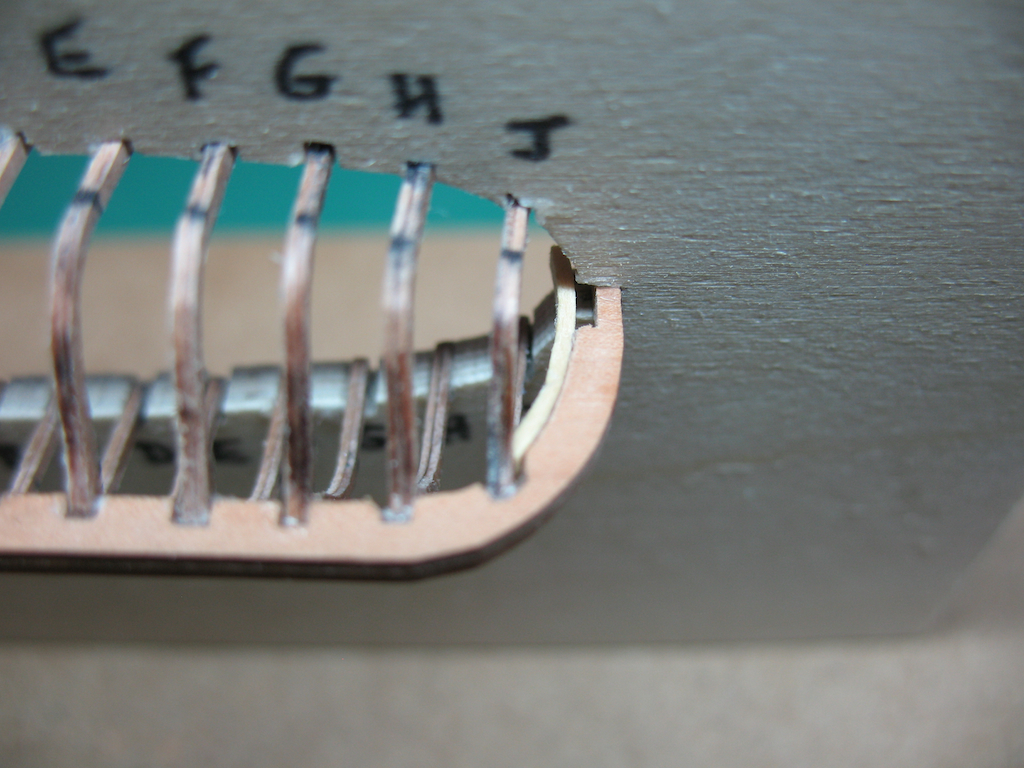
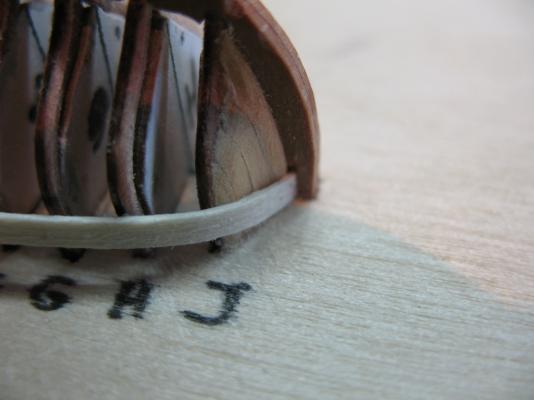
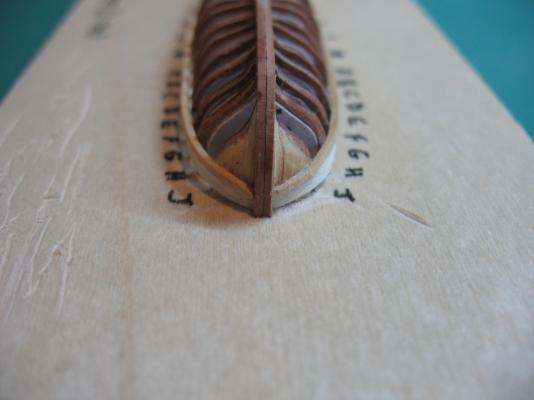
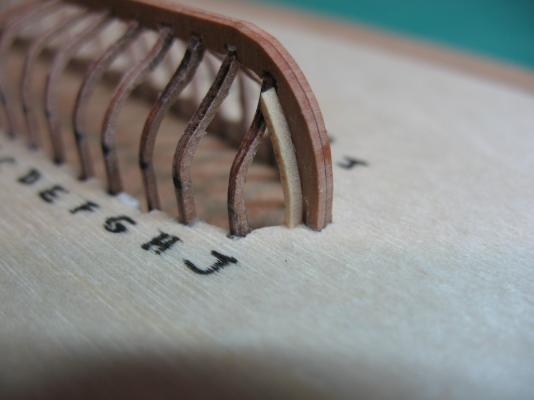
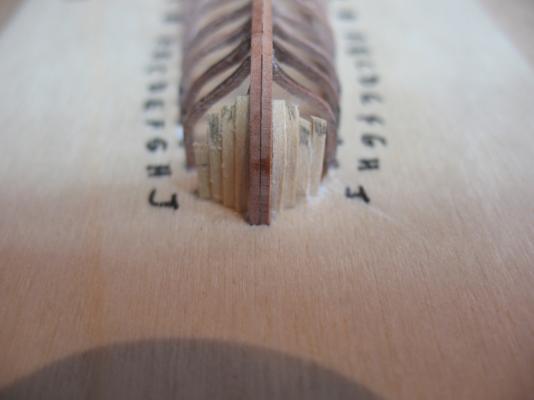
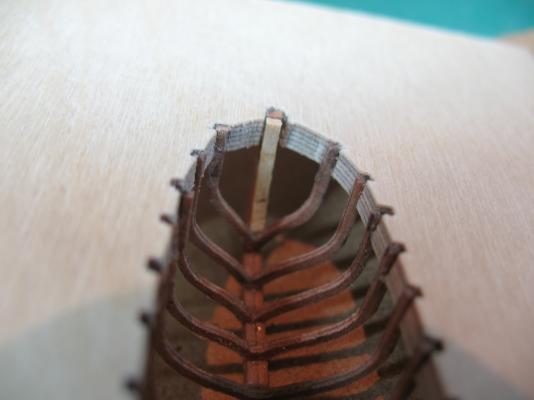
 Ship's Boats continued: With the Hawse timbers completed, it's time to start planking. I'm using 1/64" x 1/16" Holly for the planking. The first plank to be installed is the Sheer plank. All planks are soaked briefly in water, then pre-bent using a small travel steam iron. I find the steam iron gives me good control of the bends - especially the tighter ones. The gap mentioned in the last post comes into play here as it seats the forward end of the plank neatly while it bends around the bow. The second photo below shows a close-up of this. The next plank is the Rubbing Rail. This is thicker, but narrower plank, and I used 1/32" x 1/32" Costello Boxwood plank for this. Again, pre-bending with the steam iron is essential. The next plank is the first of the tapered planks. There is not a lot of science applied here. While it would be nice to do this the "proper" way, the scale and size of the actual materials make this impractical - at least for this apprentice shipwright. in this case, I have simply tapered the plank to half it's original width at the bow, starting from about the fourth frame back. More planking to come. It will take another 7 or 8 strakes of planking to complete the hull. Hopefully, I'll get to finish that tomorrow. The beauty of these little boats is that while they are fiddly and delicate, they do come together quite quickly.
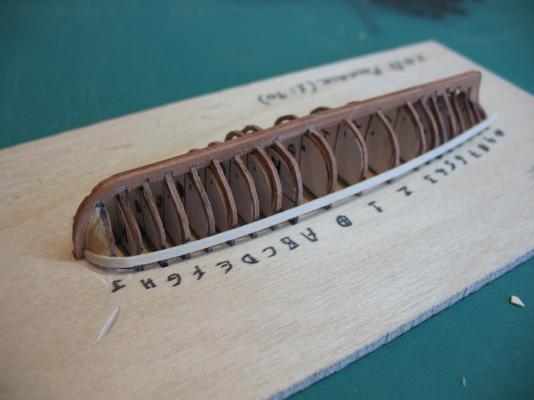

-
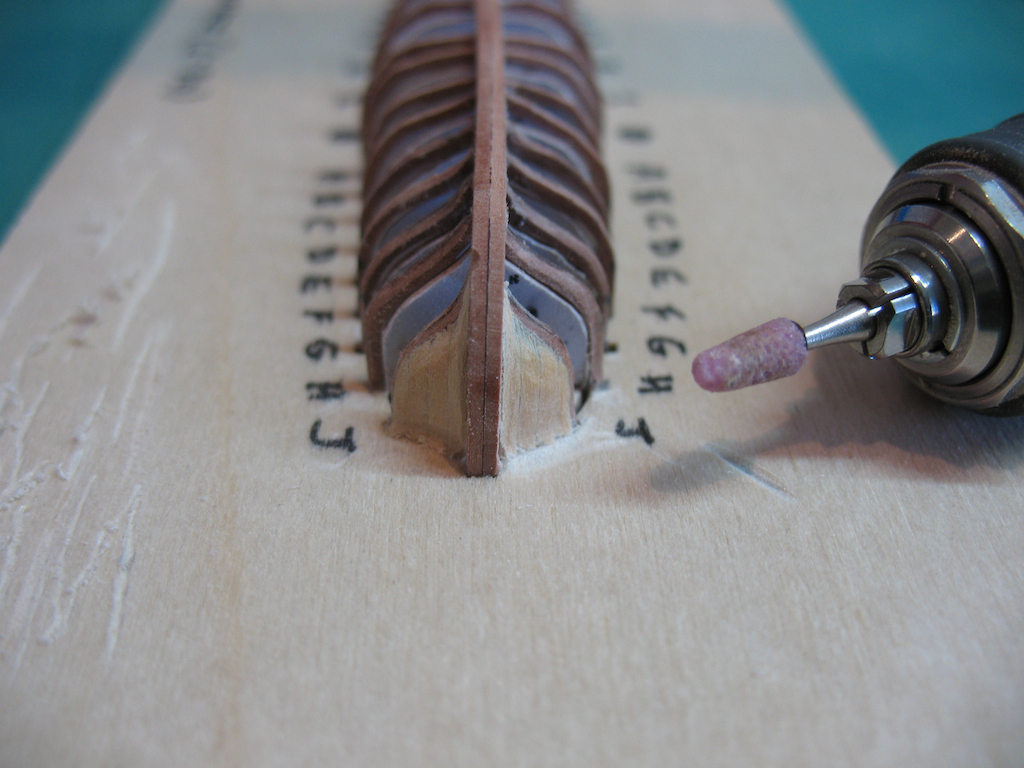
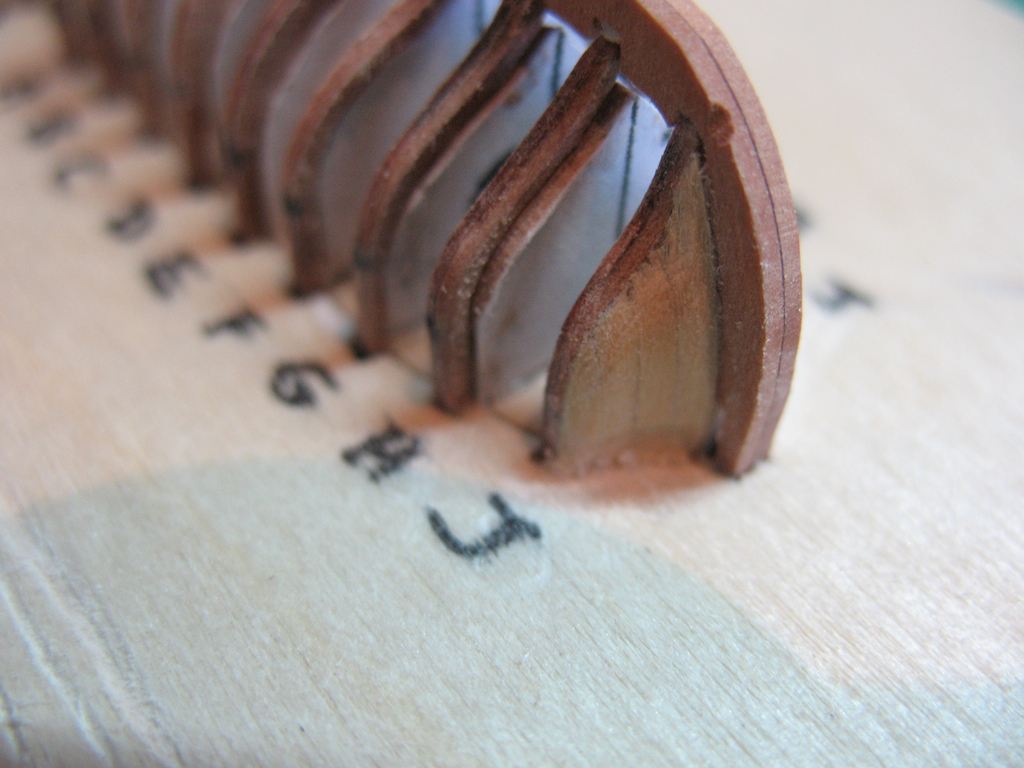
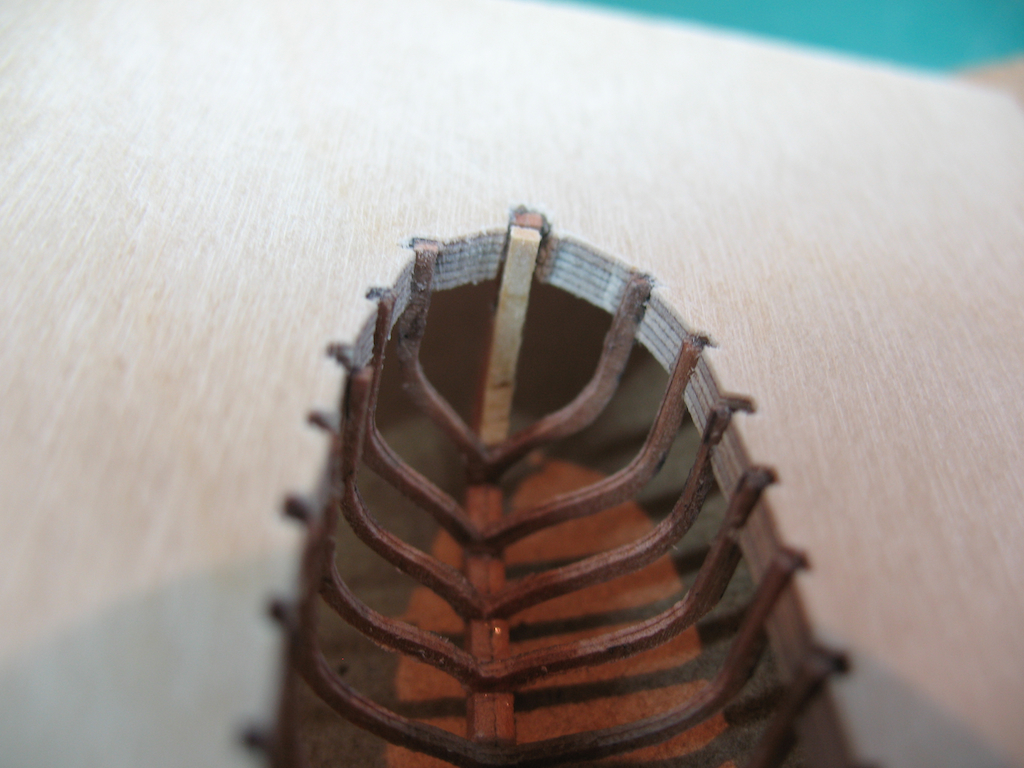
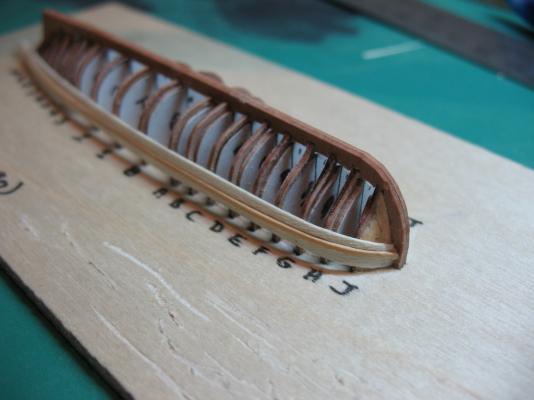
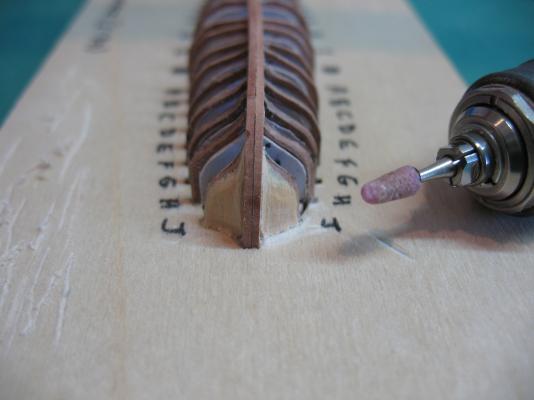
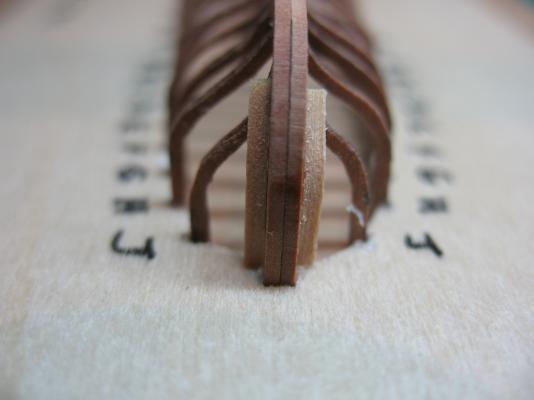
Ship's Boats continued: Back home for the weekend and have managed to get a little bit more done on the Pinnace. First up was trimming and shaping the hawse timbers. The weapon of choice for this task was the micro motor dental polishing unit that Janos had put me onto some time ago: While it looks large in comparison to the task at hand, using the polishing stone tip makes this task controlled and quite easy. The unit has a variable speed foot control that I am growing to love very quickly. I can see the Dremel being relegated to the "used technology drawer" in the near future. In the last photo above, you can just see a small gap between the Stem and the Hawse timbers at about the junction with the build board. This is important and the reason will become apparent in the next post............


-
Wow! And here I was thinking that one Optivisor was the answer to my needs!
- 728 replies
-
- 2
-

-
- le fleuron
- 64 gun
- (and 1 more)
-
Fascinating, educational, and beautiful, all at the same time Ed.
-
This could get REAL interesting................ Don't forget to take the camera! Incriminating evidence to be enjoyed discretely among just the 11,000 or so MSW members.
-
Glad to see you remembered the camera at last John! She's looking very nice indeed. And certainly easier to fix some frames that are a little too long, than a little too short!
-
Congratulations on completing an excellent build Mike. You can and should be very proud of your achievement.
- 137 replies
-
- 1
-
-
- finished
- model shipways
- (and 1 more)
-
Thanks, Mobbsie, Andy, Augie, Sjors and Keith. Your comments and encouragement are always appreciated. Keith - the hawse timbers are glued to the top surface of the build board. Andy - a ship-in-a-bottle is on my "one day" list, but I don't think it will a fully framed one! Not even I am that mad!!!
-
Fantastic detail addition Johann. I love your "test bed" approach using the section model, which is proving to be a work of art in itself.
-
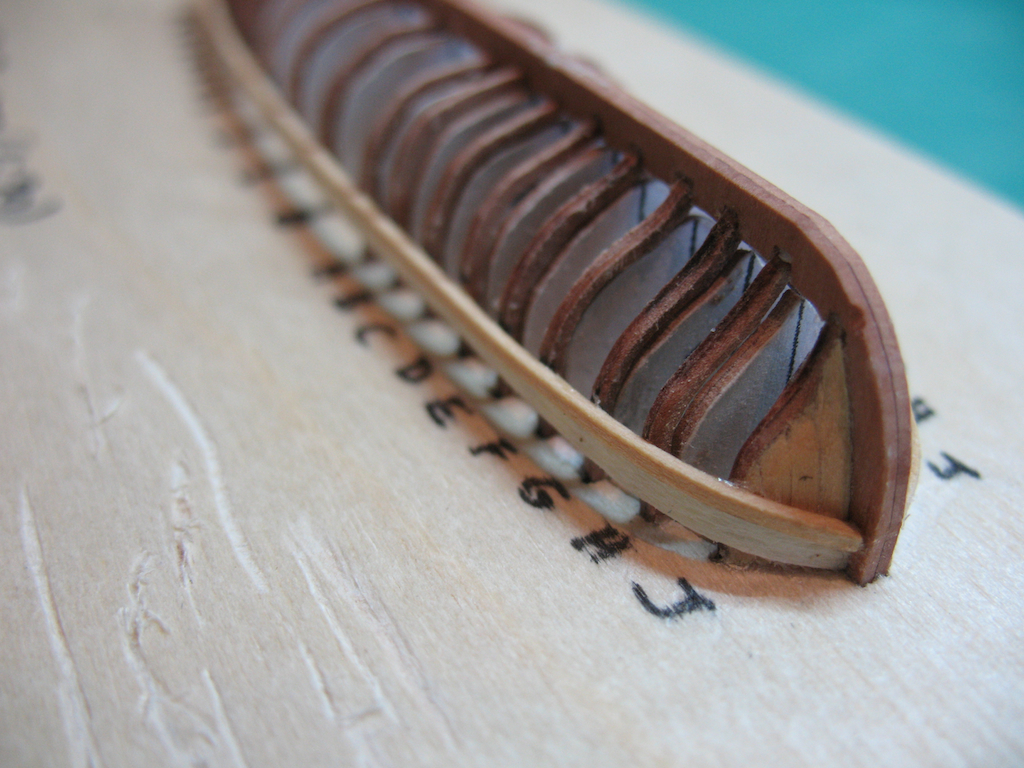
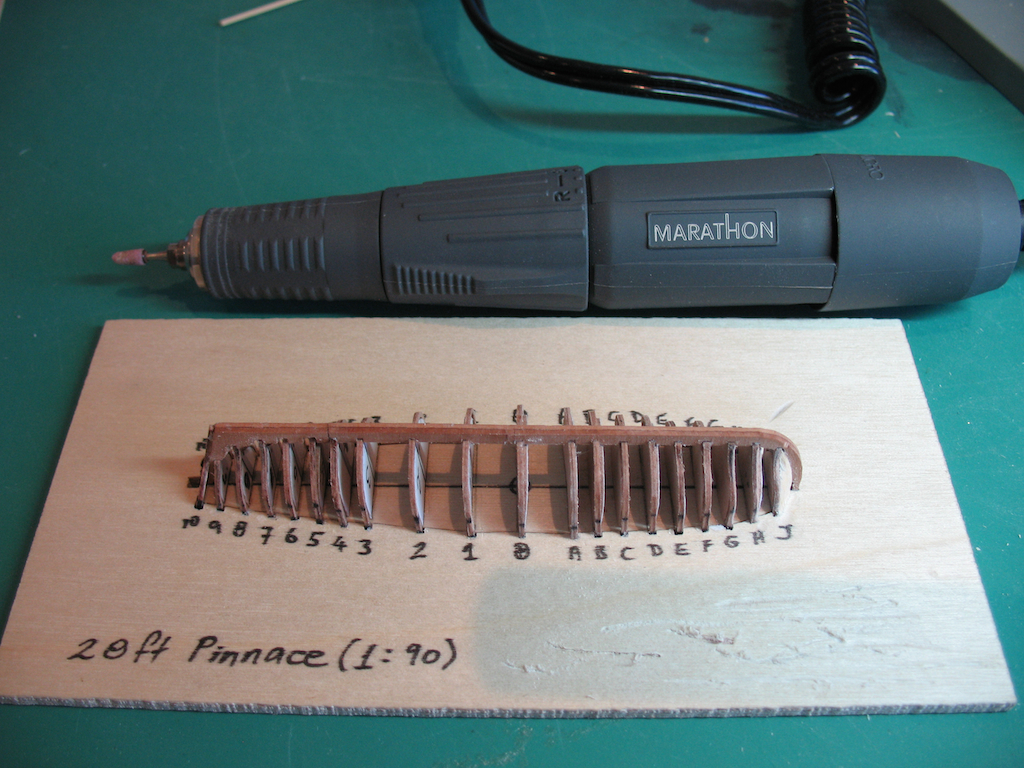
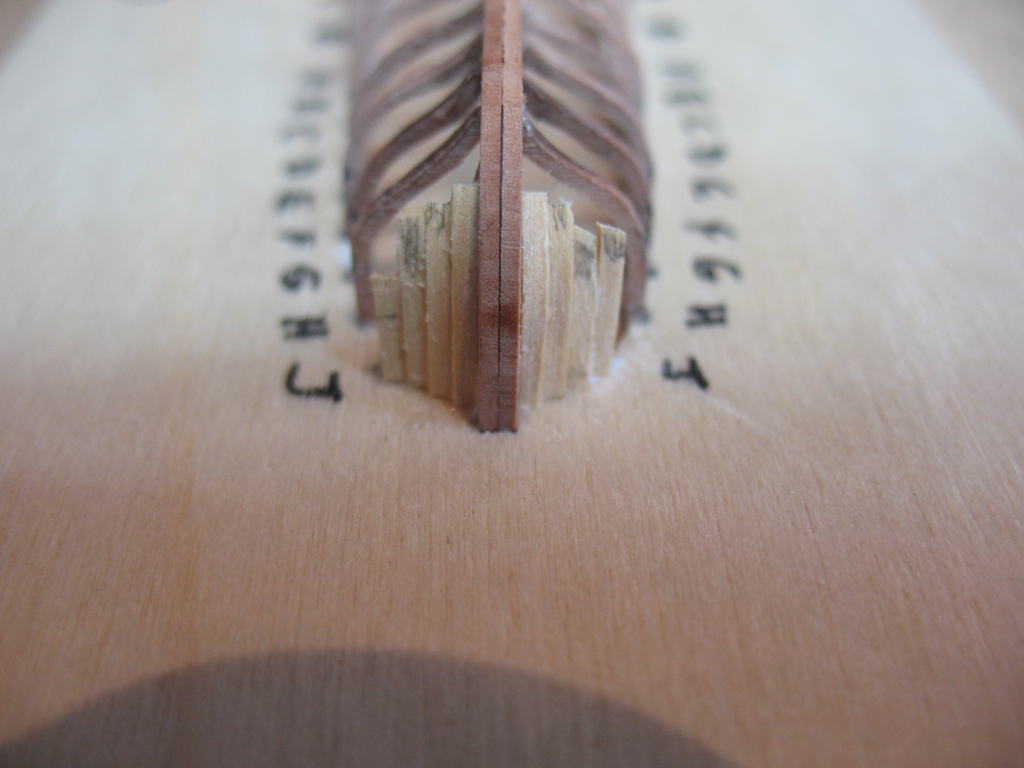
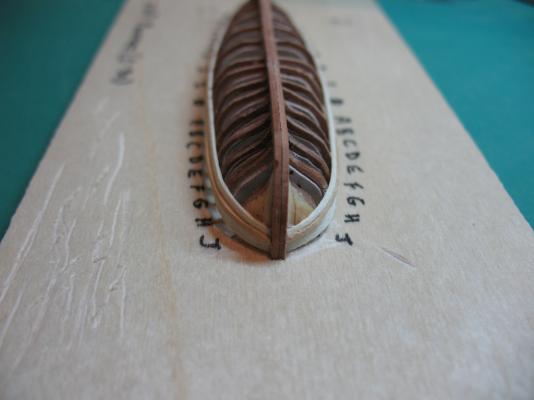
Thanks Mark, Keith and Danny, and once again, all the "likes". Just a brief update. I've had to head off to Sydney again on family business, but did manage to take a couple of pics of progress on the Pinnace before leaving. Now I've had a chance to upload these Having fitted all the frames in place, the next stage was to install the Stemson. I used some 1/32" x 3/64" castello box for this. It is simply bent (with the aid of a small travel steam iron) to follow the curvature of the keel/apron: Next was the creation of the Hawse Timbers. The same 1/32" x 3/64"stock was used for these, and again they were simply bent to follow the shape of the Stemson. Here are the first pair of Hawse timbers going in - they have yet to be trimmed to shape: The remaining Hawse timbers were then created in similar fashion, following the curve of the last piece and stepping back along the curve of the bow, to eventually fill in the space between the keel/stem and the first frame. They are yet to be trimmed to length and faired in. Next job will be to trim the ends of these to match the shape of the first frame, and then fair them to form a smooth, solid surface around the bow. This will provide a good foundation for the planking at the bow. Sounds easy enough - what could possibly go wrong?

-
When you do get to the great cabin Augie, you will need to refer to Doris's log for the correct way to outfit it. Now that the "standard" has been set, we expect no less from you!
- 2,191 replies
-
- 2
-
-
- confederacy
- Model Shipways
- (and 1 more)
-
casting metal parts including cannon
gjdale replied to rtropp's topic in Metal Work, Soldering and Metal Fittings
That's some impressive work there John! -
Congratulations Gary, planking looks great.
-
Nice to see the workshop back open Alan.
-
Fantastic work as always Bob. She just looks better and better.
-
Just lovely Sherry. Your carving work is quite exquisite.
-
The transformation is incredible Danny, as is the speed at which you've accomplished this. The owner should be delighted! Don't forget to post a final "before" and "after" series of photos before you close the log.
-
Looks like an interesting build Vincent. Think I'll pull up a chair and follow along.
-
She's developing into a very impressive build Nigel. Wait, what do I mean by "developing"? She IS a very impressive build!
-
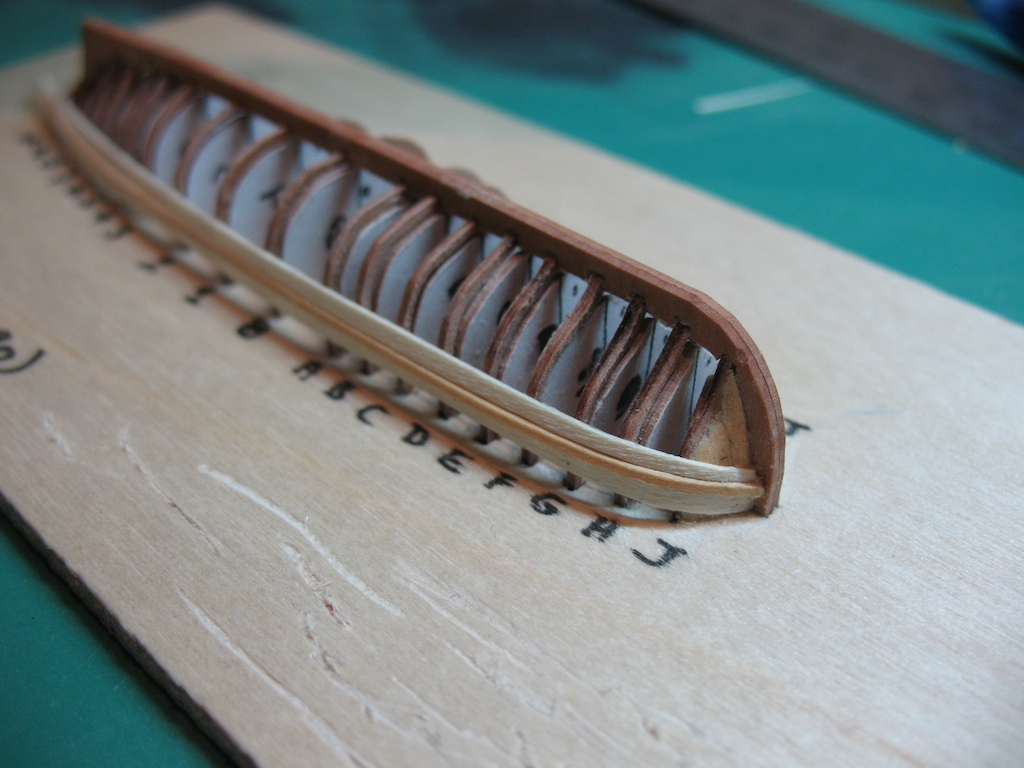
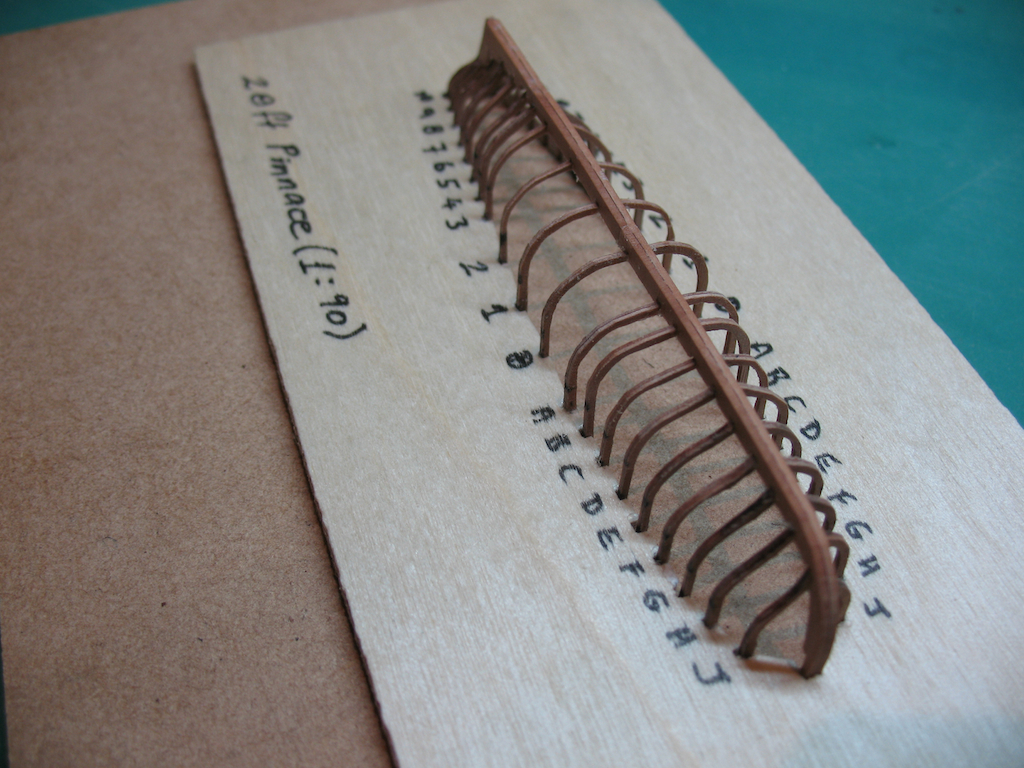
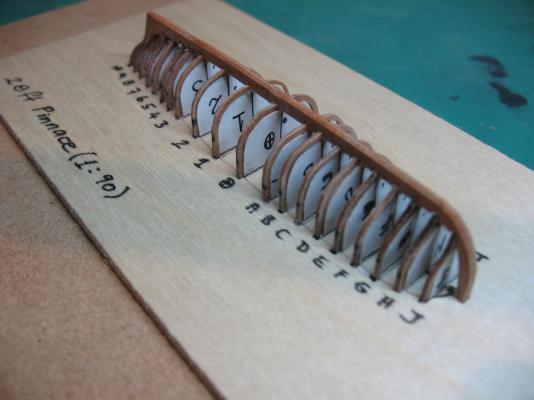
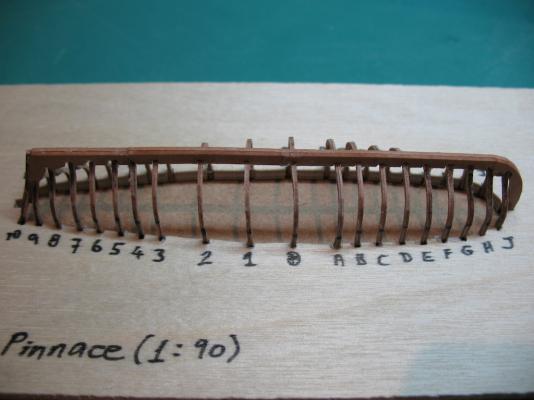
Thanks Andy, Alan, B.E., Sjors, Bob, Keith, Sherry, Leanne, Ben, John, and Lawrence, and once again, all of the "likes". Ship's Boats continued: Last night I glued the frames and their inner pieces into the building jig. The trick with this is to ensure that the inner frame pieces are glued only to the main cutout insert and not the frames themselves, and that the frames are glued only to the jig slots and to the keel, and not to the either the frame inner pieces or main cutout insert. Here's what that actually means: The above is the completed assembly. During planking, the inserted pieces will give stability and strength to the frames. Here is what it looks like without the inserts: In this next shot you can notice two things. Firstly, that my keel slots were not aligned as well as they might have been, so I had to widen some of them (this won't be visible later, so no big deal). The second thing is that you can see where the pressure of the Mk 1 Finger Clamp was slightly above tolerance and resulted in snapping the keel in two places. Once again, I don't think it will be too noticeable in the end as the entire hull will be painted, allowing me to apply a little filler as/where needed. And in the final shot below, the inner support pieces removed from the jig. When in place, they are quite a snug fit so won't drop out accidentally if I pick the whole thing up. Overall, I'm reasonably satisfied with the outcome so far and will proceed to the next step - making the stemson and hawse timbers. This should be fun!


-
More meticulous work Bob. You really know how to add that touch of class.
-
Nice to see you back on the forum again Leanne. Now we're all looking forward to an update on your build. No pressure................... Alan is right, there are a lot of Canberrans here - maybe we should all get together sometime.
-
Welcome aboard Alan - always happy to see another face here, especially a fellow Canberran! Thank you for your very kind words. And no, the next project is not a Romero one, although that may be the one after........ All will be revealed in due course.
-
Some great progress there Michael. I'll bet you're looking forward to releasing her from the jig!