HOLIDAY DONATION DRIVE - SUPPORT MSW - DO YOUR PART TO KEEP THIS GREAT FORUM GOING! (Only 24 donations so far out of 49,000 members - C'mon guys!)
×


gjdale
-
Posts
4,891 -
Joined
-
Last visited
Content Type
Profiles
Forums
Gallery
Events
Everything posted by gjdale
-
 I'd like to point out, as an international customer, that Jeff does accept payment via Western Union money transfer. This can be done online, or if you prefer, at your local post office. Admittedly there are fees involved, but these are paid directly by the customer, not by the supplier and then passed on to the customer. While PayPal might be widely accepted, I can certainly understand Jeff's perspective and don't find the Western Union transfer too much of an inconvenience. And yes, you need to be alert for scams, just as you do with any other online purchasing system.
 -
Sorry Augie - couldn't resist that one. I'll get my coat now and go quietly.......
- 2,191 replies
-
- 1
-

-
- confederacy
- Model Shipways
- (and 1 more)
-
What an incredible detail to include! Magnificent Daniel, just magnificent!!!
-
Would that be Chapelle's book or your friend's? :P
- 2,191 replies
-
- 1
-
-
- confederacy
- Model Shipways
- (and 1 more)
-
Stunning Ed - just gorgeous! Alan - ouch!
-
Thanks Mark and Danny. Danny - maybe I should have got a quote from your mate! A few cases of beer and maybe a bottle of scotch thrown in............
-
Hi Pontus, Glad to hear you might go ahead with these books. You won't regret the investment, regardless of whether you pick them up cheaply or pay full retail price for them. Winter here is slowly taking hold. We do see snow here in Canberra from time to time - usually on the foothills in the distance but very occasionally in the back yard. The view of the foothills is my preferred way of experiencing snow - having read of the snow-shovelling exploits of some of our Canadian brethren, I'd like to keep it that way!
-
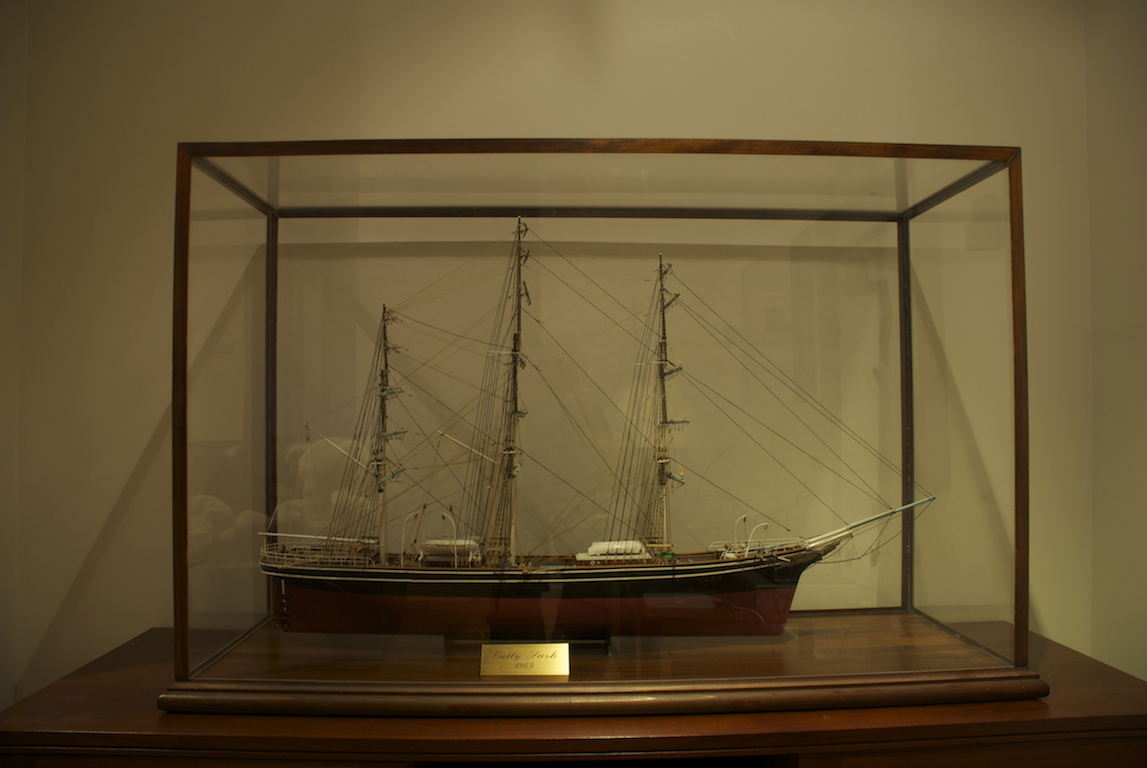
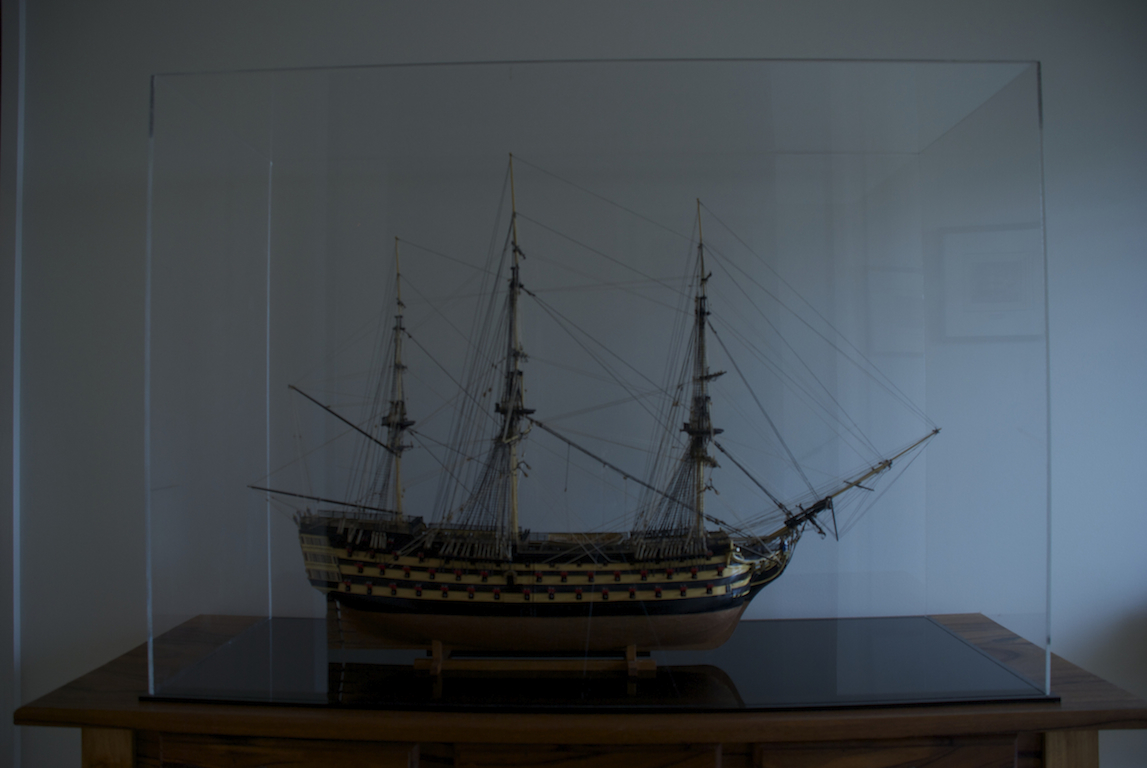
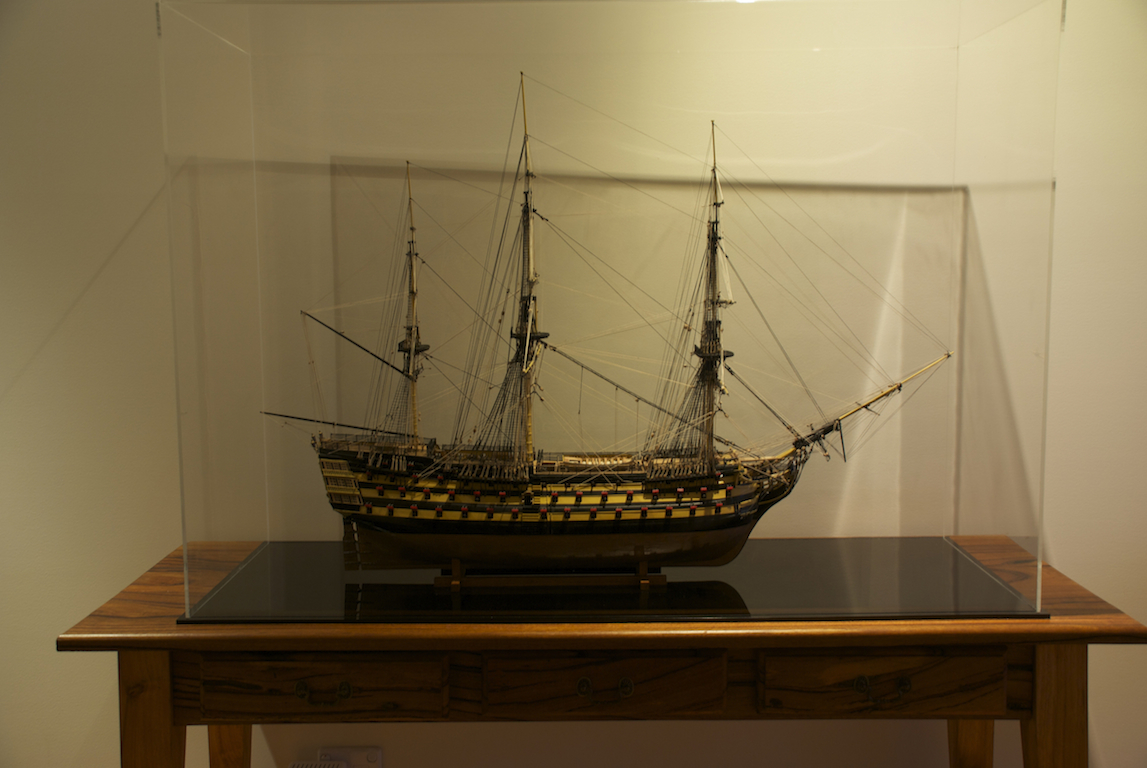
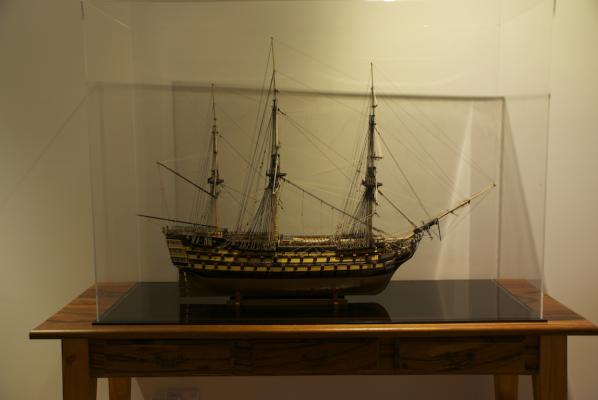
Thank you all so very much for all the comments on the display case. What I failed to mention, and what may not be immediately apparent form the photos, is that the front, top and back are all one continuous piece that has been bent to shape using a very tight radius bend. The end pieces are then cut to fit this shape. The effect is two fold - it removes two long joints from the equation, AND it makes it even more expensive! And Mobbsie is right - this case actually cost more than the original kit (although that was 20 years ago). Perhaps in time-adjusted prices it wasn't. Either way, I'm very happy with the result and don't regret spending the extra to achieve this effect.
-
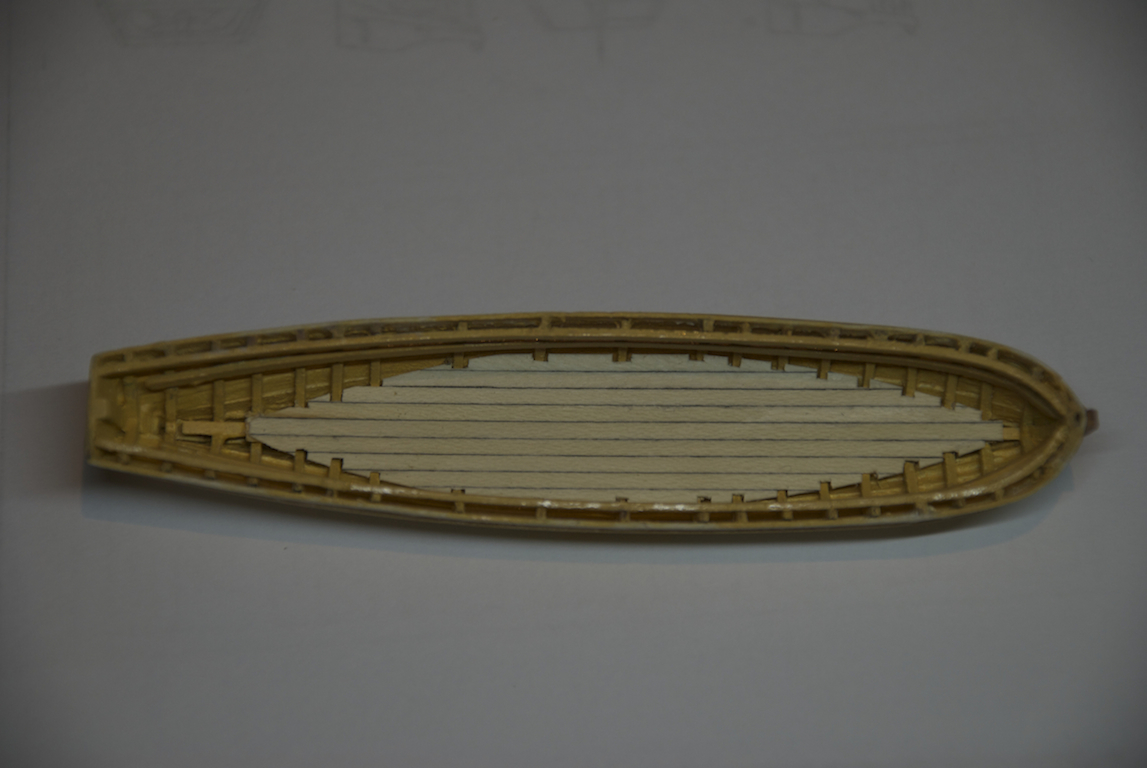
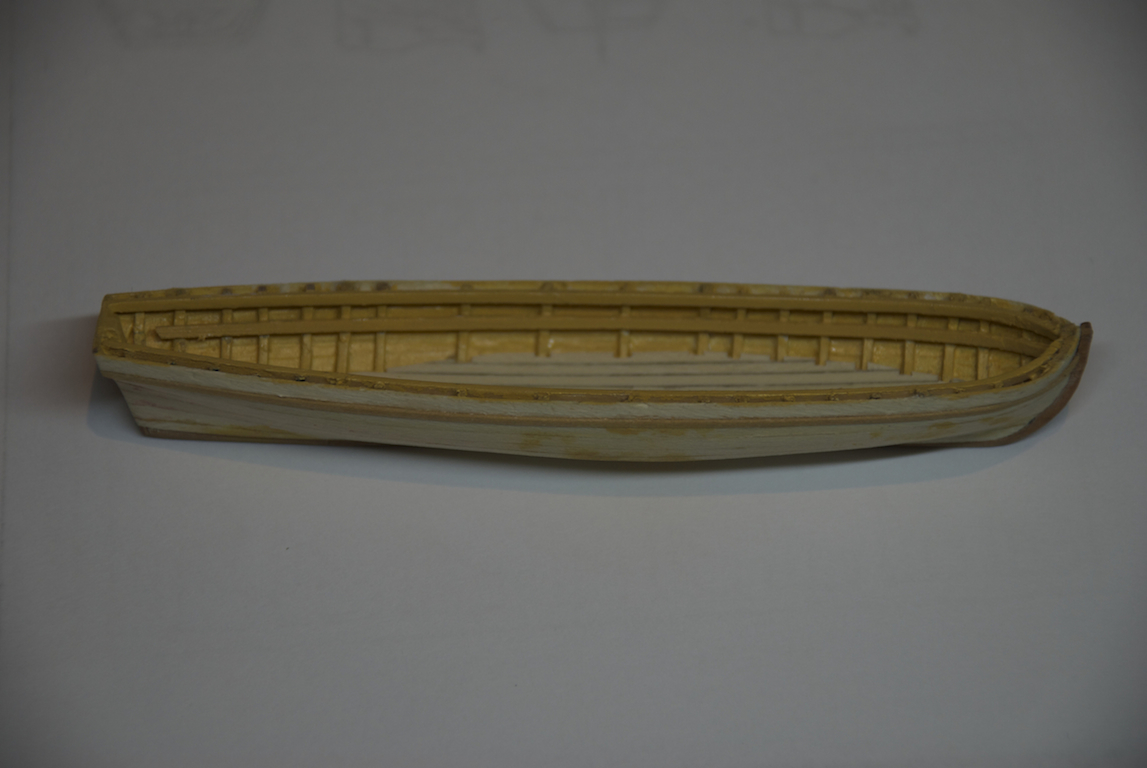
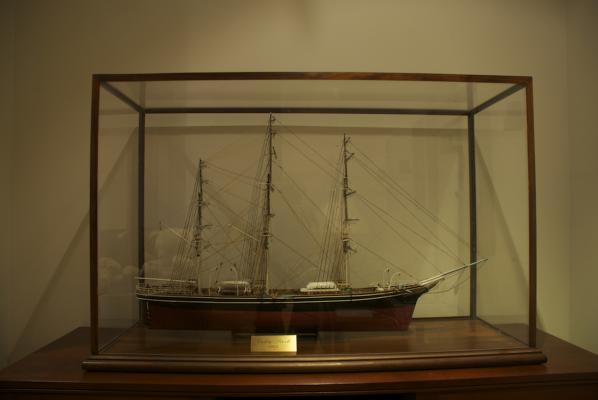
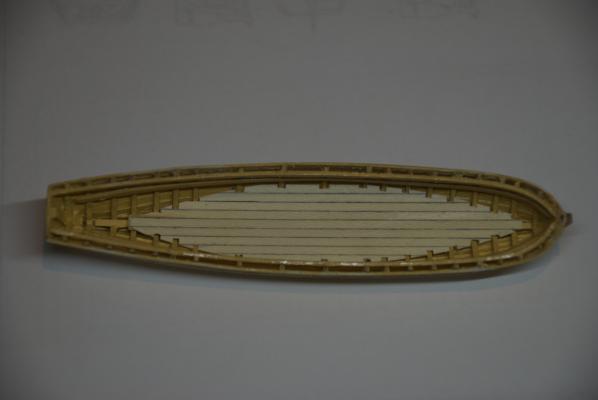
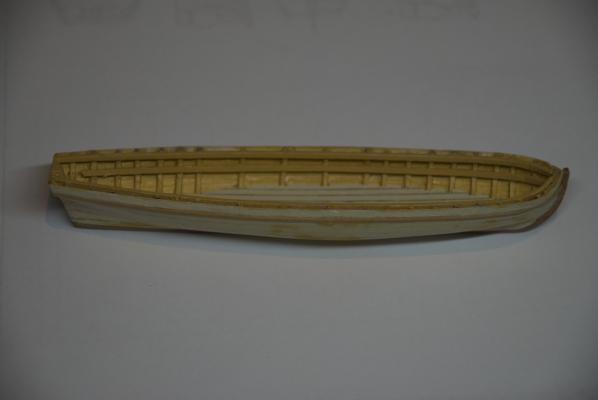
Thanks Augie, Mark, Bob, Sherry and Mike, and once again to all the "likes". Even though it has been a long weekend here this weekend, I'm afraid I didn't get too much time in the shipyard. I did however, get to collect my new case for Victory. Even though I haven't quite finished her, I wanted to get her under a cover to protect her from damage and keep the dust off while I finish off the last few bits and pieces. I know I could probably have made a case for a fraction of the price I paid for this (which was a lot!), but I wanted a "frameless" look for this model, so had it professionally made by a local plastics firm (Plastic Creations in Fyshwick for the local Canberrans - highly recommended). I also decided that rather than use a wood base, I would continue the theme and had a black perspex base made at the same time, with a channel routed in it to accept the "box". The idea of the black base (which is also partially reflective) was to tie in the black and yellow colours of the ship. I like the effect. I took a few pictures of it this afternoon, but it was getting a bit dark. I've shown a couple of pictures here, but they don't really do it justice. Here's one with only what's left of the daylight: And here is one with the overhead downlights on. The table that it sits on I originally made to display my Cutty Sark model. I think the timber is Yellow Stringy Bark if memory serves me correctly. While I had the camera out, I thought I may as well take a picture of the Cutty Sark that has sat proudly in this position (just inside the front door) for many years until usurped by Victory. This was a Billings kit and was my first serious foray into wooden ship building. As such, it is fairly basic - if only I knew then what I know now! The case that this one is in I made myself. It has survived four house moves, including from one side of the country to the other and back again. The only damage it received was to the rigging on one move, which I then replaced and did a better job on. Even so, when I look at that rigging compared to Victory, it seems ever so basic. It is now in the lounge room as a "temporary" measure until we figure out what to do with it. A "Viking Funeral" is still on the cards.......... You can see in the reflection of this photo my wife's collection of stuffed animals - they at least are an appreciative audience! Ship's Boats continued: With the limited time I did manage in the shipyard this weekend, I did manage to paint the internal hull of the Pinnace, fit the Risers for the thwarts, and fit the previously made footling. I'm now making up some gratings to fit, using 1/32" pear stock that Jeff Hayes at Hobbymill made up for me some time ago. It's the same stuff that I used on the Launch. Hopefully I'll get that installed next weekend and then be ready to paint the exterior of the hull before moving on to the fittings.

-
Pontus, While the Antscherl books may SEEM expensive, they represent extraordinary value for money as they are an excellent general reference book as well as a specific guide for the Swan class. They should be on the shelves of every serious modeller (right alongside Ed Tosti's Naiad books, which are also a treasure trove of information and advice).
-
Welcome home Robbyn. Glad to hear the vacation went well, but sorry to hear of illness on return. Best wishes for a speedy recovery. Perhaps investing in some more new toys for the shipyard will speed up the recovery process.
-
Those bollard timbers look very nice Ben. Have a safe trip, we'll keep a stern light on for you.
-
Congratulations Gaetan - thoroughly well deserved. Great to see such recognition for a true master of our craft (if craft is the right word - somehow it seems inadequate for what you do).
-
A great reminder about being able to devote time and attention to anything other than "mindless" tasks in the shipyard Rusty. This is the reason I rarely get anything done during the working week - I'm usually brain dead by the time I get home, so unless it's a coat of paint on a minor part, then the shipyard remains closed. Sorry for your need to re-do, but the results speak for themselves.
-
ancre LE BONHOMME RICHARD by Jeronimo - FINISHED
gjdale replied to Jeronimo's topic in - Build logs for subjects built 1751 - 1800
Just delightful Karl. What marvellous photography too!- 662 replies
-
- 2
-
-
- bonhomme richard
- frigate
- (and 1 more)
-
Gotta agree Sjors, nicely done with the symmetry on the wales.
- 1,616 replies
-
- 1
-
-
- caldercraft
- agamemnon
- (and 1 more)
-
Help with a Byrne's Saw - end of cut problem
gjdale replied to rtropp's topic in Modeling tools and Workshop Equipment
Having had the same issues and having tried all of the advice above, including an email discussion with Jeff Hayes, I decided to try adding an extra piece of fence to the front half of the high fence. I used some aluminium flat bar, drilled and tapped some holes in the existing high fence and screwed it on. The additional fence extends from the front of the table to approx the centre of the saw blade. The theory is that this will allow extra clearance on the back half of the blade, without the need to offset the rear of the fence, which should make setup a lot simpler. I discussed this with Jeff before leaping in, and he agreed with my theory. I've yet to have a chance to test the completed modified fence, but will post here when I do if that will help folks. -
HMS Druid by Krug - FINISHED - 1:48 - Hahn
gjdale replied to kruginmi's topic in - Build logs for subjects built 1751 - 1800
Lovely work Mark. I'm intrigued to see the development of your figurehead. -
Very nice Augie. Isn't it a privilege to use Jeff's timber? Don't think of it as a "scrap" box, but more of a "spare stock" box for making smaller parts!
- 2,191 replies
-
- 4
-
-
- confederacy
- Model Shipways
- (and 1 more)
-
More delightful work Bob. Your work always looks so crisp and clean. You are setting a very high bar with this one!
-
Well done with the re-re-re-re-do Sjors! Well worth that extra effort and I'm sure you're pleased with the result.
- 1,616 replies
-
- 1
-
-
- caldercraft
- agamemnon
- (and 1 more)
-
Nice work David - just need a couple of Cutters to hang from them now.
- 439 replies
-
- 1
-
-
- victory
- caldercraft
- (and 1 more)
-
That's one very pretty lady Wayne! Looks like you are doing her justice, and taking her out for such a scenic photo shoot is bound to please her. She is certainly very photogenic! Looks like both the builder and the photographer have earned their keep this month.