HOLIDAY DONATION DRIVE - SUPPORT MSW - DO YOUR PART TO KEEP THIS GREAT FORUM GOING! (Only 24 donations so far out of 49,000 members - C'mon guys!)
×


gjdale
-
Posts
4,891 -
Joined
-
Last visited
Content Type
Profiles
Forums
Gallery
Events
Everything posted by gjdale
-
 Looks like this will be an interesting build Mike. Think I'll pull up a chair in the front row for this one.
- 968 replies
-
- 1
-

-
- hahn
- oliver cromwell
- (and 1 more)
-
Nice job on those curved rails Danny. And I think a wise choice on leaving the brass au naturale - it seems to suit this model.
-
what is the ideal modelling table?
gjdale replied to AON's topic in Modeling tools and Workshop Equipment
Impressive table Alan. Looking forward to seeing the playroom extension! -
Hi John, A belated Happy Birthday from Downunda. Glad to hear you're enjoying the trip and I look forward to the resumption of your build log in due course. Re your missing pics, yes simply edit the page, delete the old links and re-post the pics.
- 2,250 replies
-
- 1
-
-
- model shipways
- Charles W Morgan
- (and 1 more)
-
Now that's impressive Michael! Fancy that - using your entire living room as the display case!
-
Handy neighbour to have David! I can foresee you spending a bit of time with your new "best friend"!
- 439 replies
-
- 1
-
-
- victory
- caldercraft
- (and 1 more)
-
Nice job on the stove Vince.
-
Kevin, Don't sell yourself short - your build is of an excellent standard. Wanting always to do better is good - that what keeps us all going for the next model. But wanting to achieve our idea of "perfection" is not so healthy and has the potential to rob us of the joy we find in modelling. Be inspired by others achievements, but don't be intimidated by them. I look forward to resumption of play with your excellent Victory.
- 1,319 replies
-
- 8
-
-
- caldercraft
- Victory
- (and 1 more)
-
Nicely done Bob. Your choice of how much and where for the deck planking is an interesting one. A little bit "unusual" (if there is such a thing), but this will add to the models uniqueness and I'm sure will look terrific. The important thing is that YOU are happy with the decision and you clearly are.
-
Very nice indeed John.
-
Sweet! You SHOULD be very pleased with that deck Augie - it looks terrific.
- 2,191 replies
-
- 1
-
-
- confederacy
- Model Shipways
- (and 1 more)
-
Hi JesseLee, Just been catching up on your log. Some very impressive modifications you've done there - a huge improvement over the kit supplied parts. As for rigging thread, I switched over to using Chuck's thread for most of my Running Rigging (it wasn't available when I did my Standing Rigging) and all I can say is Wow - what a huge difference it is to work with and in final presentation. Well worth the extra investment, so keep sucking up to the Admiral until she caves and agrees to release funds! It's also worthwhile doing a bit of extra research to work out the various diameters needed for your scale. Using an appropriate variety really adds to the overall appearance. Hope the hands are continuing to heal - don't overdo it in the shipyard!
- 607 replies
-
- 1
-
-
- scottish maid
- artesania latina
- (and 1 more)
-
Scroll saws and their use
gjdale replied to AndrewNaylor's topic in Modeling tools and Workshop Equipment
Andy, I'm no expert with the scroll saw, being a relative newcomer to this piece of machinery, but to overcome the issue with the large-ish hole in the centre of the table, I just made a new table top from 3mm MDF. It is exactly the same size as the original but with only a very small hole in the centre - just large enough to pass a blade through. The new top is simply placed on top of the original and held in place with clamps. It works a treat. One "upgrade" to this idea might be to coat the MDF with wax of some sort to make it easier to glide the workpiece over, but I haven't found this to be an issue........yet. From trial and error, I have found that the thinner the workpiece stock, the greater number of teeth you should have in the blade (which I think reduces the tendency for the blade to "grab" the work piece). Also, the thinner the workpiece stock, the slower the blade speed - for the same reason. As I said though, these are only my observations from trial and error with some very thin stock (1/32"). I believe Greg Herbert posted something about recommended blades at one point - might have been on MSW 1.0 though. My only other observation is that scroll saw blades are just as capable of inflicting serious bodily harm as any other power tool. Don't ask me how I know, but I was lucky! -
While I don't envy you the re-do Remco, it is re-assuring to we lesser mortals to know that even someone of your skills and talent sometimes needs to do so. I look forward to seeing your solution to this pesky problem.
- 1,215 replies
-
- 7
-
-
- sloop
- kingfisher
- (and 1 more)
-
Very nice planking job Mike. Thanks also for posting those other pics - very interesting, and some lovely examples of modelling at 1:1 scale!
-
ancre LE BONHOMME RICHARD by Jeronimo - FINISHED
gjdale replied to Jeronimo's topic in - Build logs for subjects built 1751 - 1800
Just stunning! I'm sitting here with my mouth agape in awe. What wonderful craftsmanship Karl! Bravo!- 662 replies
-
- 4
-
-
- bonhomme richard
- frigate
- (and 1 more)
-
Wow! What a HUGE undertaking, both literally and figuratively! Think I'll pull up a chair and come along for the ride. If you're going to invest in some quality tools, I strongly recommend Jim Byrnes's tools. His miniature table saw and disc sander are absolute "must haves" for scratch building (IMHO) - you simply can't buy better quality.
-
Happy Birthday Sjors. Let's have some pictures from the party. Hang on a minute......your'e with Mobbsie now aren't you....on second thoughts, don't post party pictures!!!!!!! :P
- 1,616 replies
-
- 1
-
-
- caldercraft
- agamemnon
- (and 1 more)
-
Nicely done Jack.
-
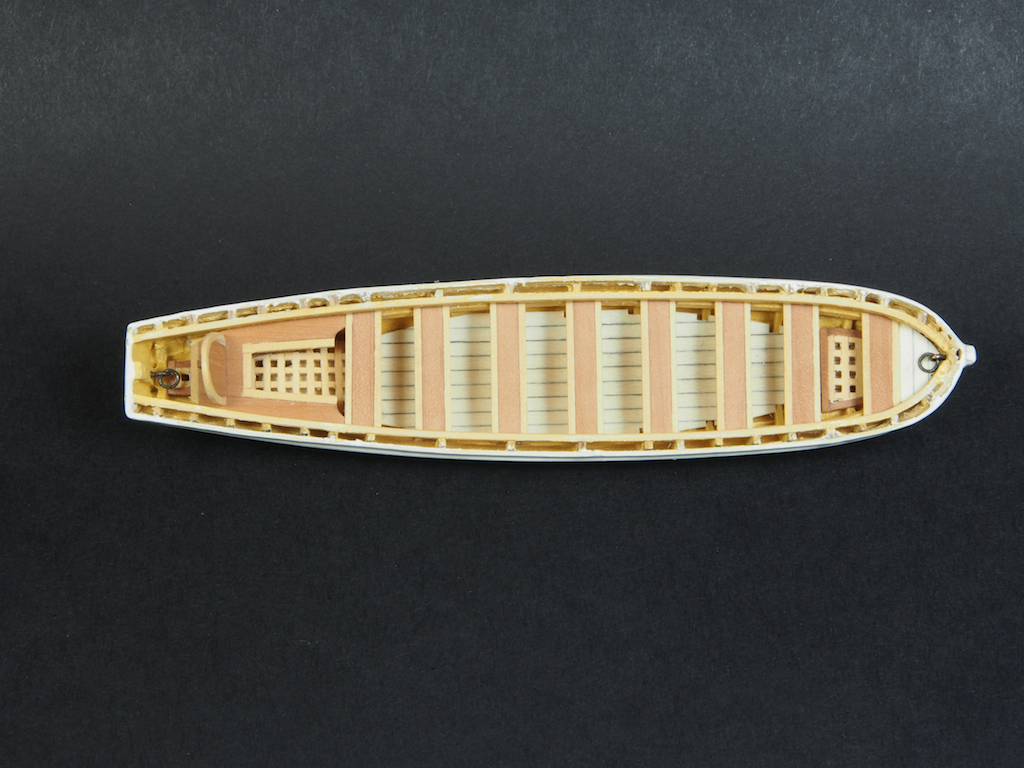
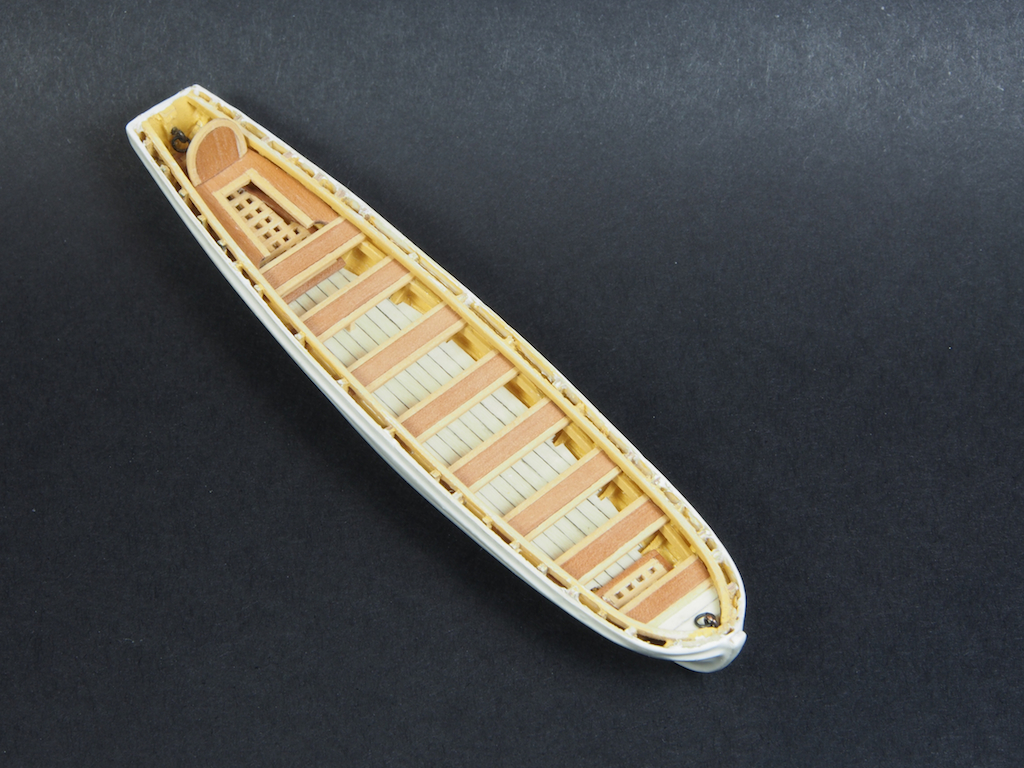
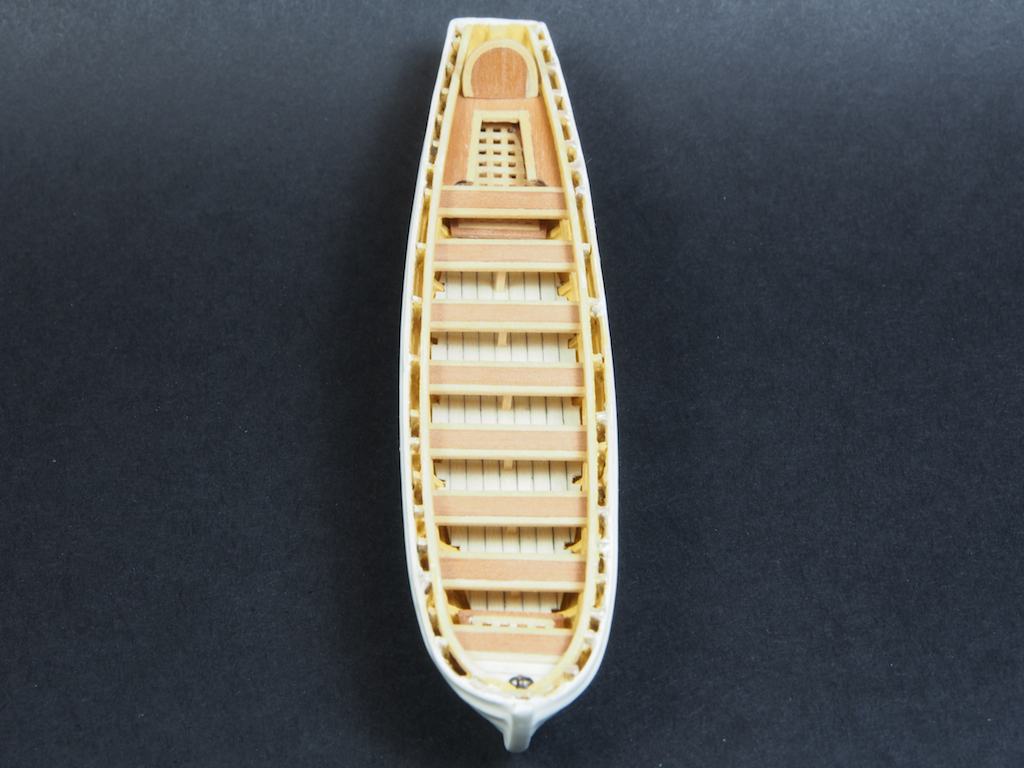
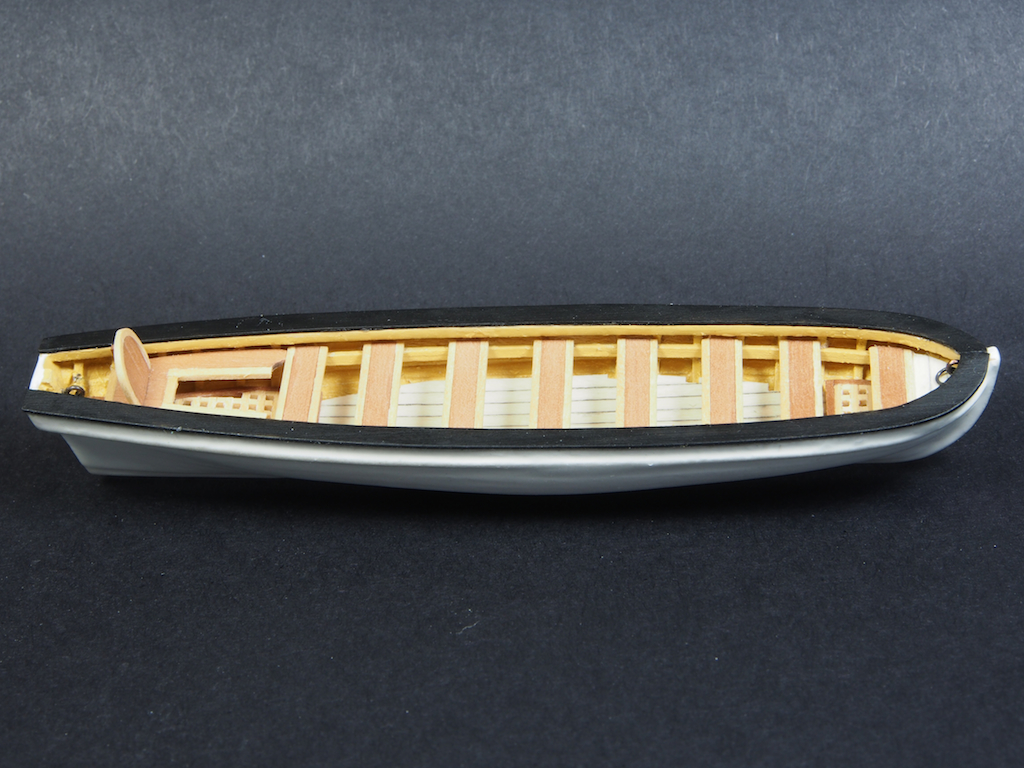
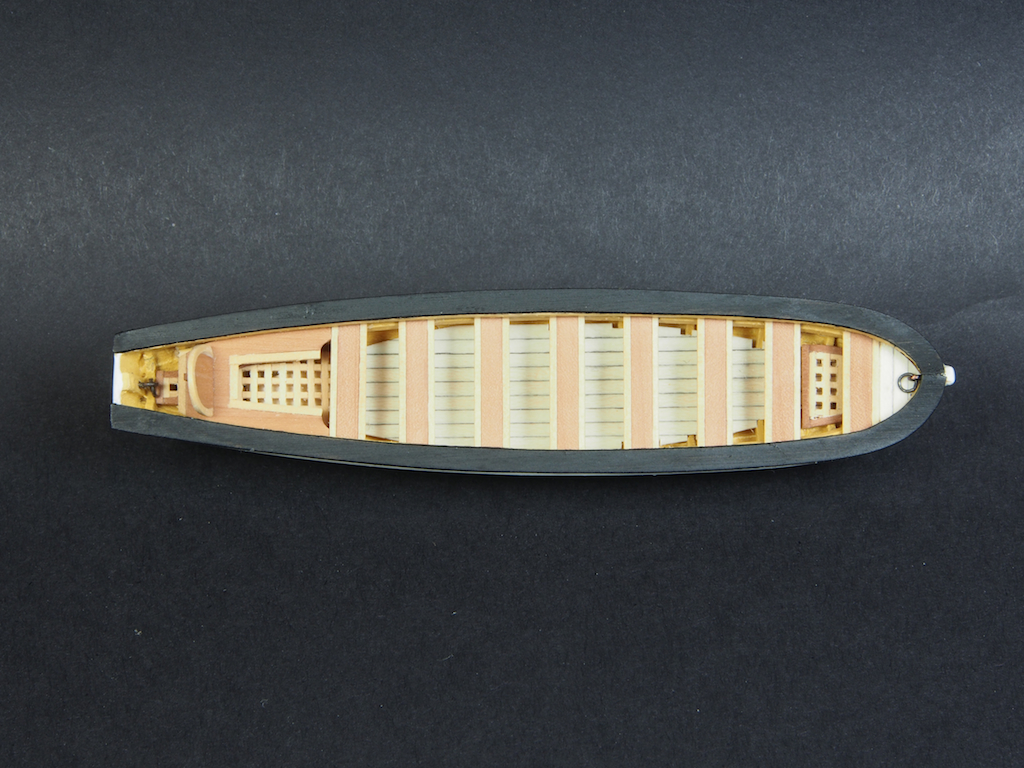
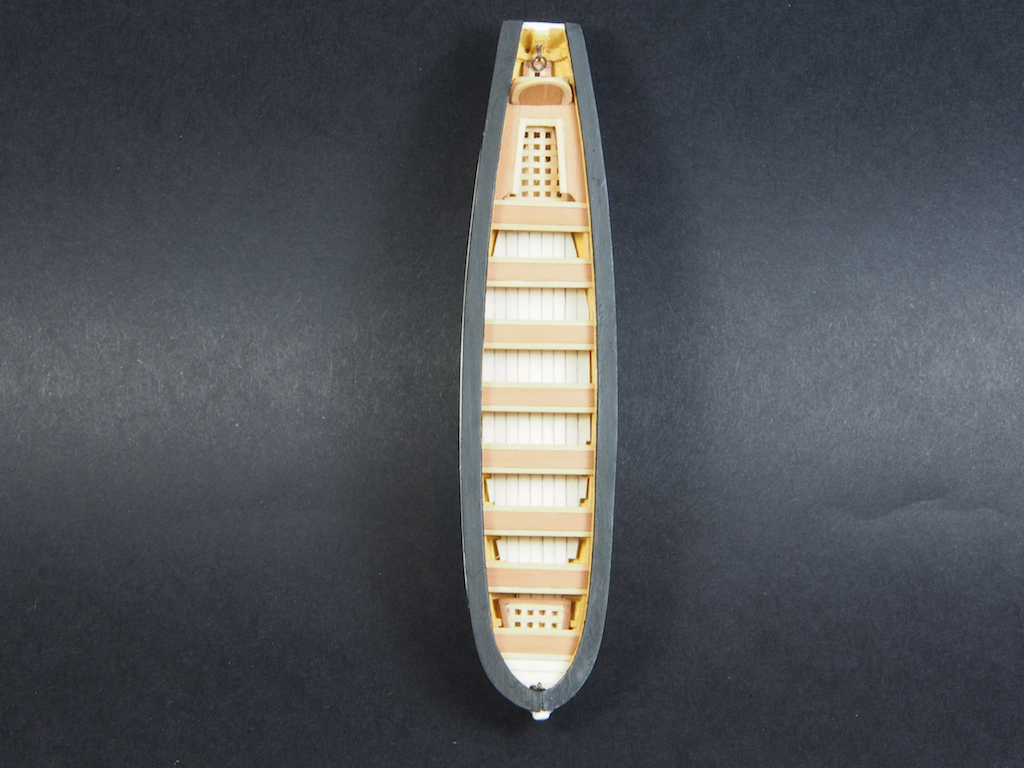
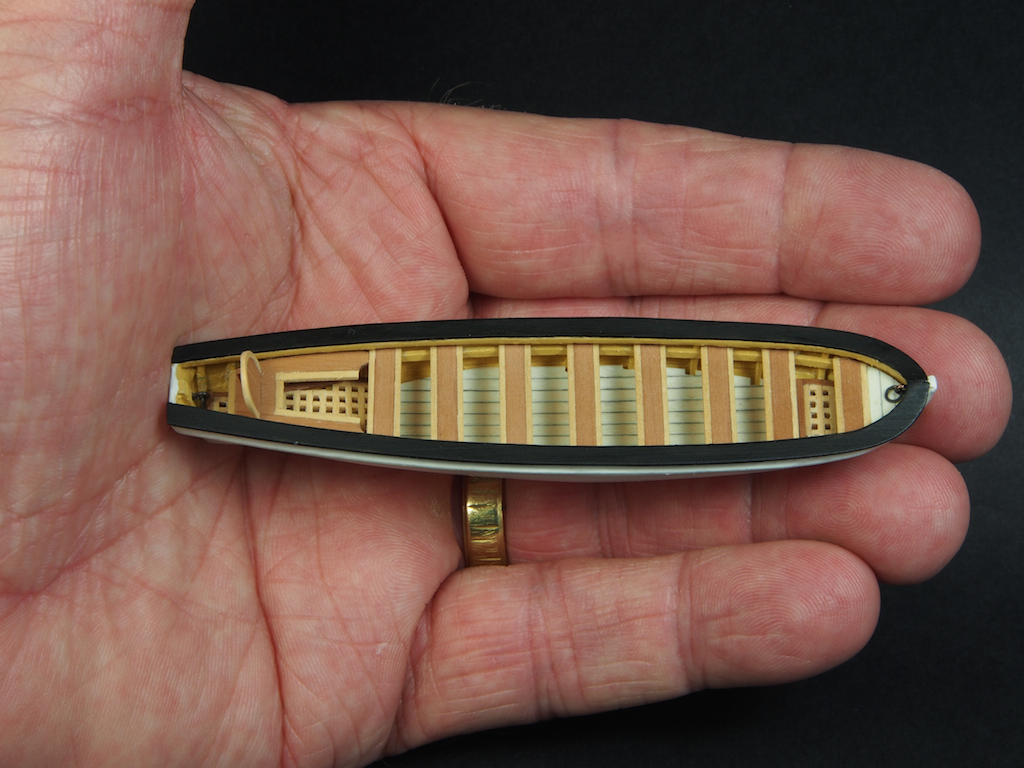
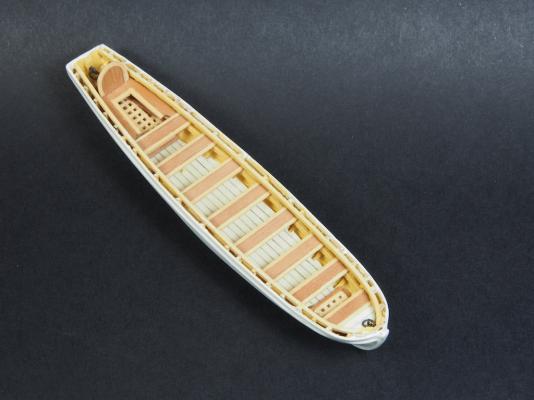
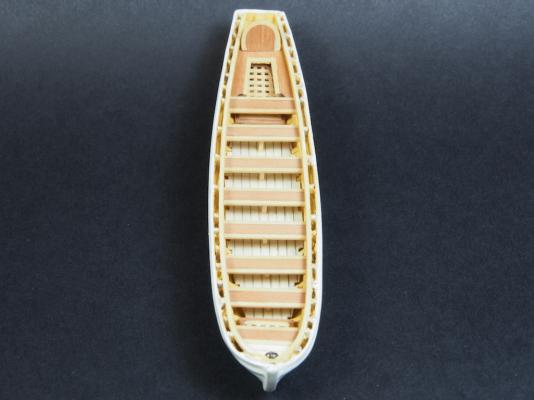
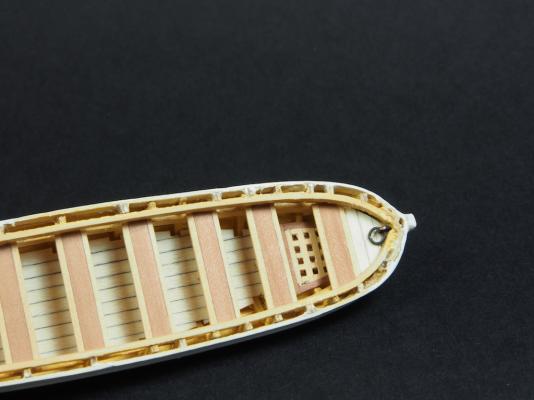
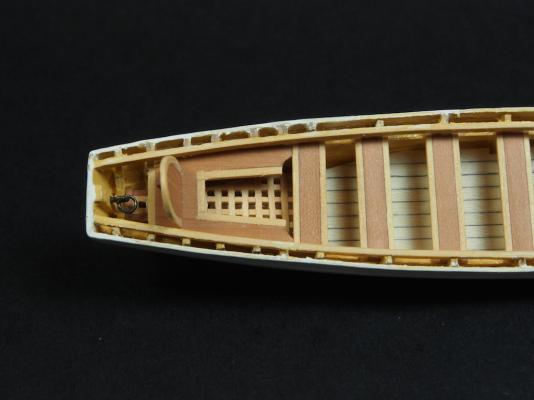
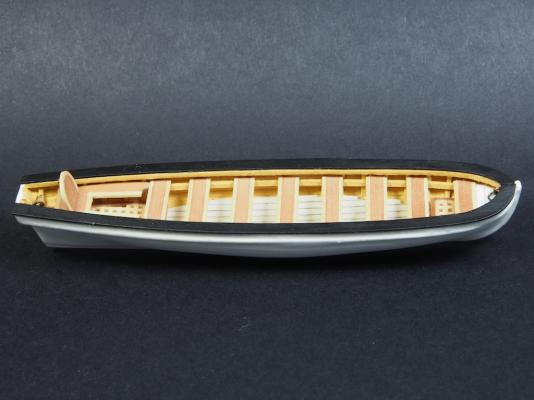
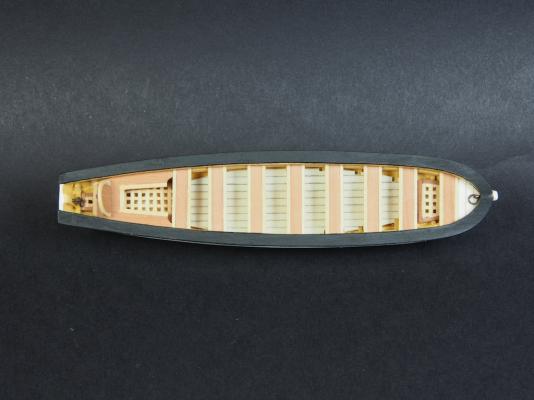
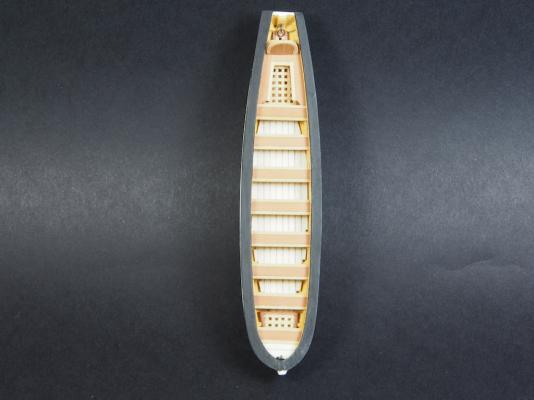
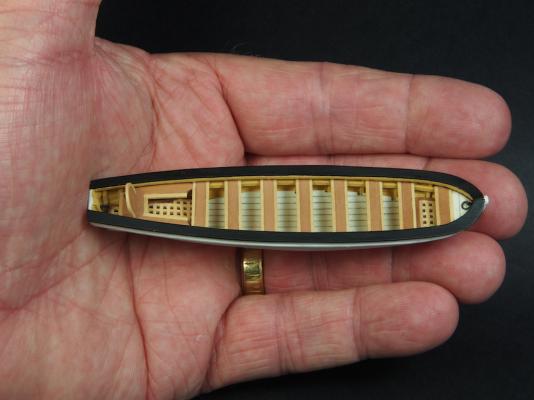
Thanks again everyone for all the encouraging comments and the "likes". Mark - not having a unicorn to hand, I just asked the dog. He's not sure, but as long as I keep feeding him he's prepared to say I'm sane! Remco - I've been following (mainly) my Warrior practicum for constructing these boats. Thanks for the reminder about the Antscherl cutter practicum - I'm pretty sure I downloaded that some time ago, so I'll have another read through that as well before I start the clinker planking. Ship's Boats continued: Today I concentrated on constructing and installing the Sternsheets, along with the lifting rings fwd and aft, and the Caprails. For the Sternsheets, I opted to include a seat-back as well. To keep the colour theme going, I trimmed the sternsheets with 1/32" square Boxwood, but for the seat-back, I used two laminates of 1/64" Holly to achieve the curvature required. Here's couple of overall shots of the sternsheets in place. Continuing the photography experimentation, I've gone back to a black background for this series of shots. I think that for this little boat it works better than the blue, particularly with the white hull. Here's a couple of close-ups of the Lifting rings installed: Note in this pic, the cutouts at the fwd end of the sternsheets. This is to allow some extra leg room for those on the aft most thwart. And here's a couple of shots of the Caprail in place. This really makes the whole thing really pop. And finally, just for another scale check, here's a pic of that giant fake hand again All that's left now is the washboards/oarlocks. I've started preparing the stock for these, and all I can say is thank goodness for my Byrnes saw, and all the practice I had in preparing stock for very small blocks!!!! That's all for now folks.

-
Where to find 28 gauge black wire?
gjdale replied to David Spindle's topic in Masting, rigging and sails
David, Black thread coated with diluted PVA (egvTitebond) works very well. -
Great Jack - I'll look forward to it. I need all the help I can get when it comes to photography!