gjdale
-
Posts
4,891 -
Joined
-
Last visited
Content Type
Profiles
Forums
Gallery
Events
Everything posted by gjdale
-
 Augie, Seems I neglected to post my admiration for your update a couple of pages back. Please accept my belated congratulations - the addition of the yards looks just fantastic! Can't wait to see the rest in place.
 -
Ingenious Danny! Very, very clever indeed.
-
Thanks Joe and JP for your kind words.
-
I've done as Danny suggested and posted this as PDF file in Wooden Tips and Tricks. Here's a quick link: http://modelshipworld.com/index.php?/topic/1978-block-tumbler/
-
Safe travels Gil. Will miss your log and guidance in the coming months. There's every chance that I will overtake you now, and that's not good! (I've been relying on you to show me the way.)
-
Welcome home Andy. Looking forward to some updates soon.
-
Well done Sarah. A very interesting little build. Good luck for the next project - I'll keep an eye out for it.
-
Very crisp and precise joinery there Danny! PS. I sent you a PM the other day and its still showing as unread.
-
Great work Paul. Your attention to detail is terrific!
-
Congratulations Jim, you've done a wonderful job of her (or should that be him?) and you should be justifiably proud. What site will your stage coach be on? Oh, and by the way, if those photos were taken at your house, I wanna come visit!
-
That's looking great Hec. Don't be afraid to be quite vigorous in rubbing back the copper if you want some of the green to show through. Alternatively, you can just go with a "fresh from the dockyard" look. Captain's choice as we say. Did you manage to get a hold of a copy of Longridge?
-
Thanks everyone for your kind words and encouragement. It feels really good to be back in the shipyard and making sawdust. Kevin - I wrote this Tumbler up in a word document, which wouldn't take much to tidy up. If you are interested I can post it here so you can download it for future reference.
-
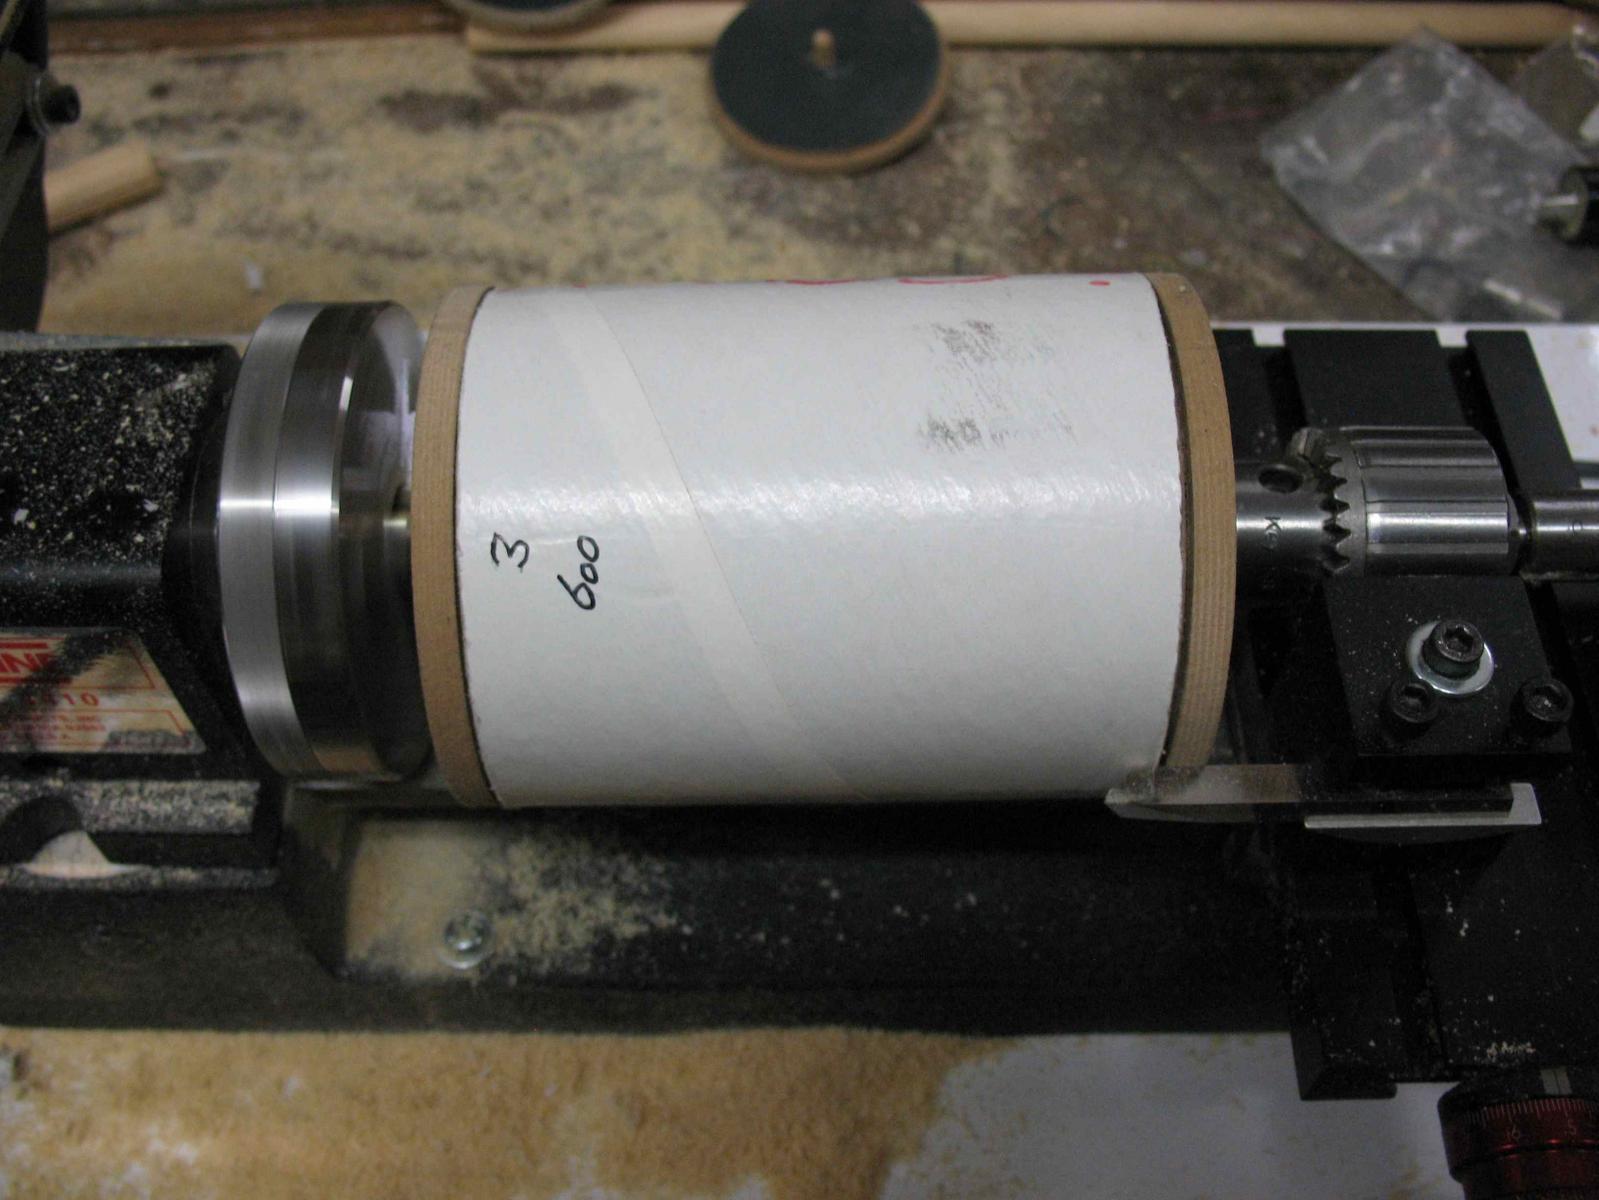
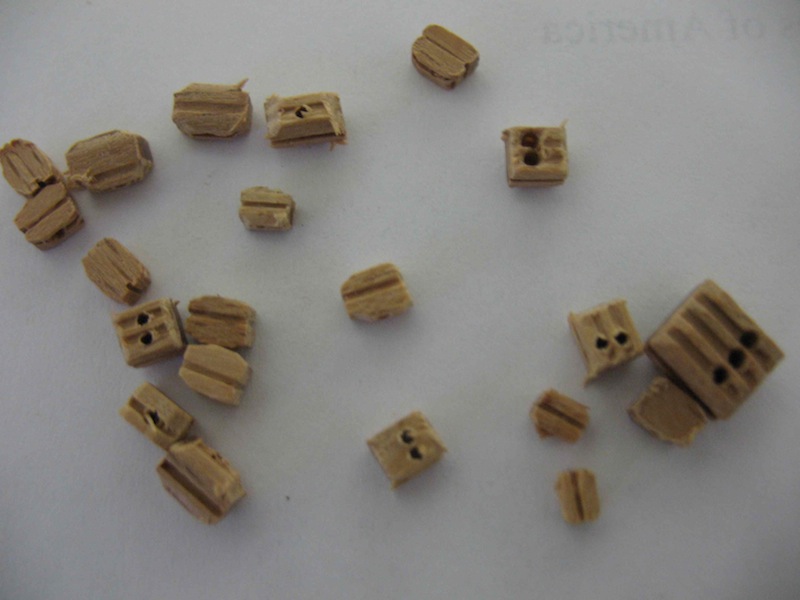
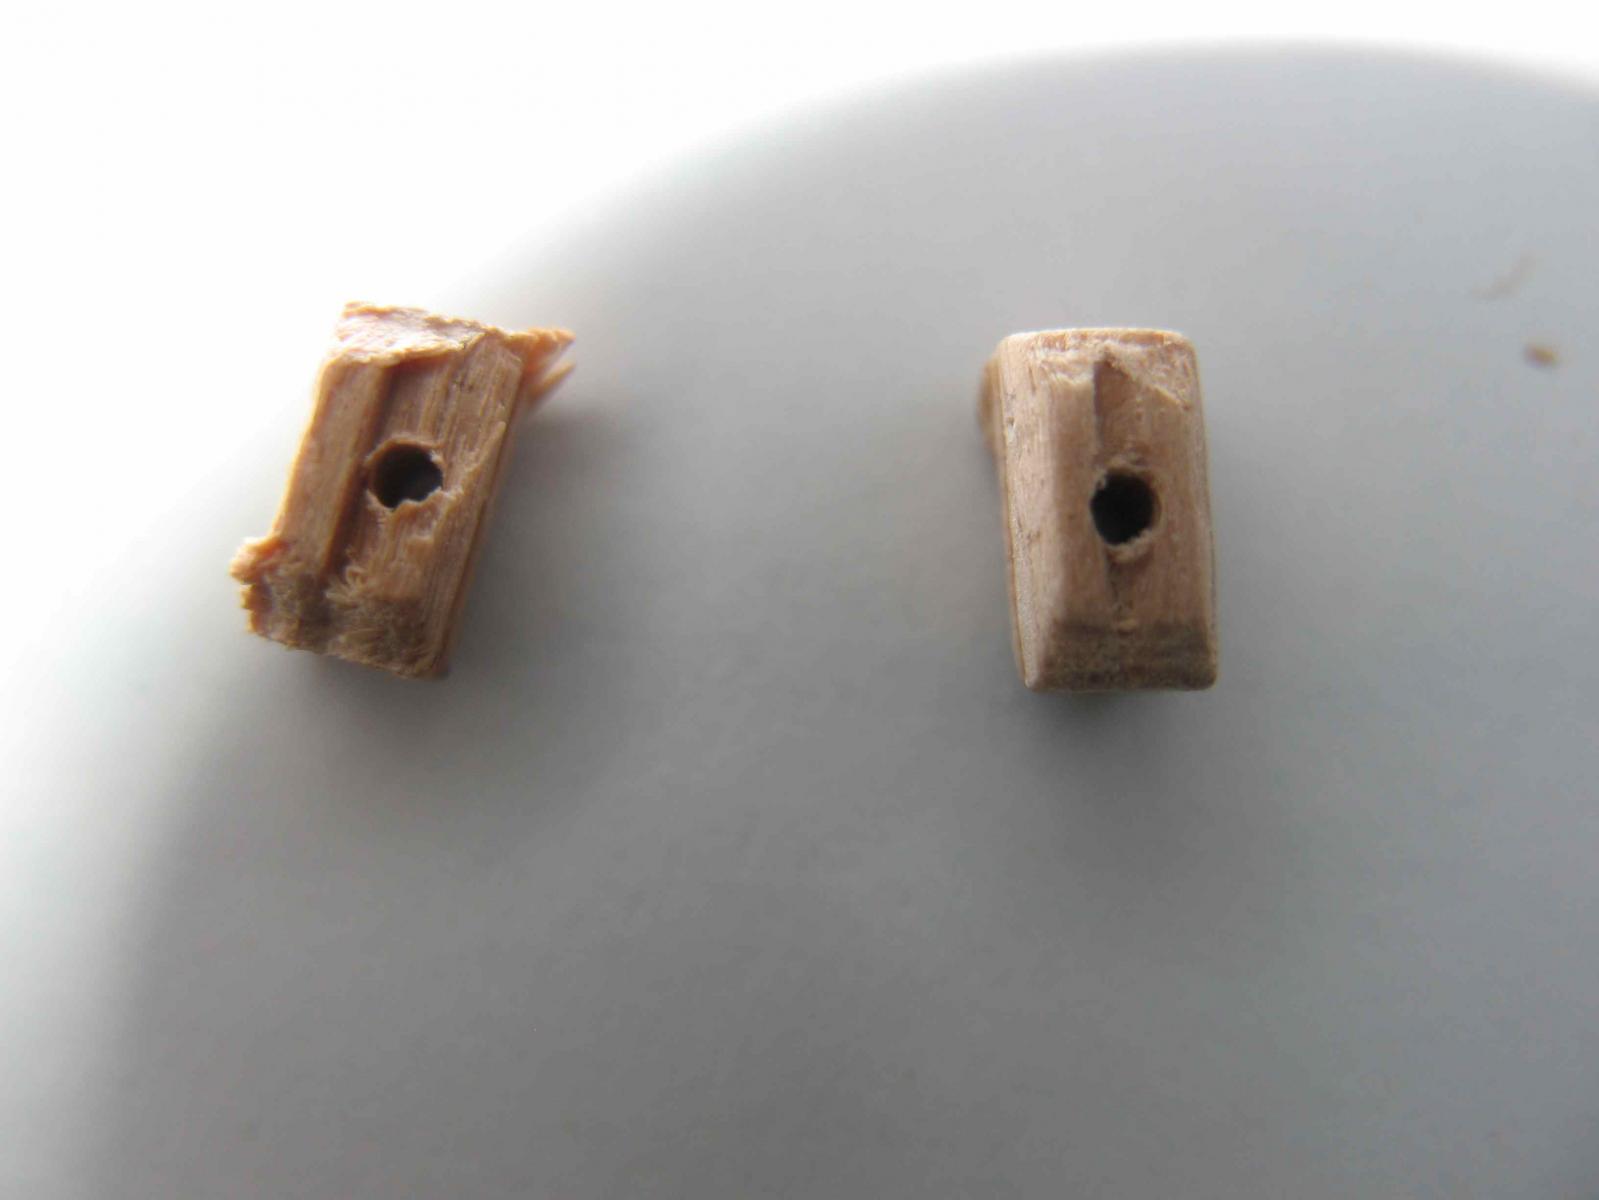
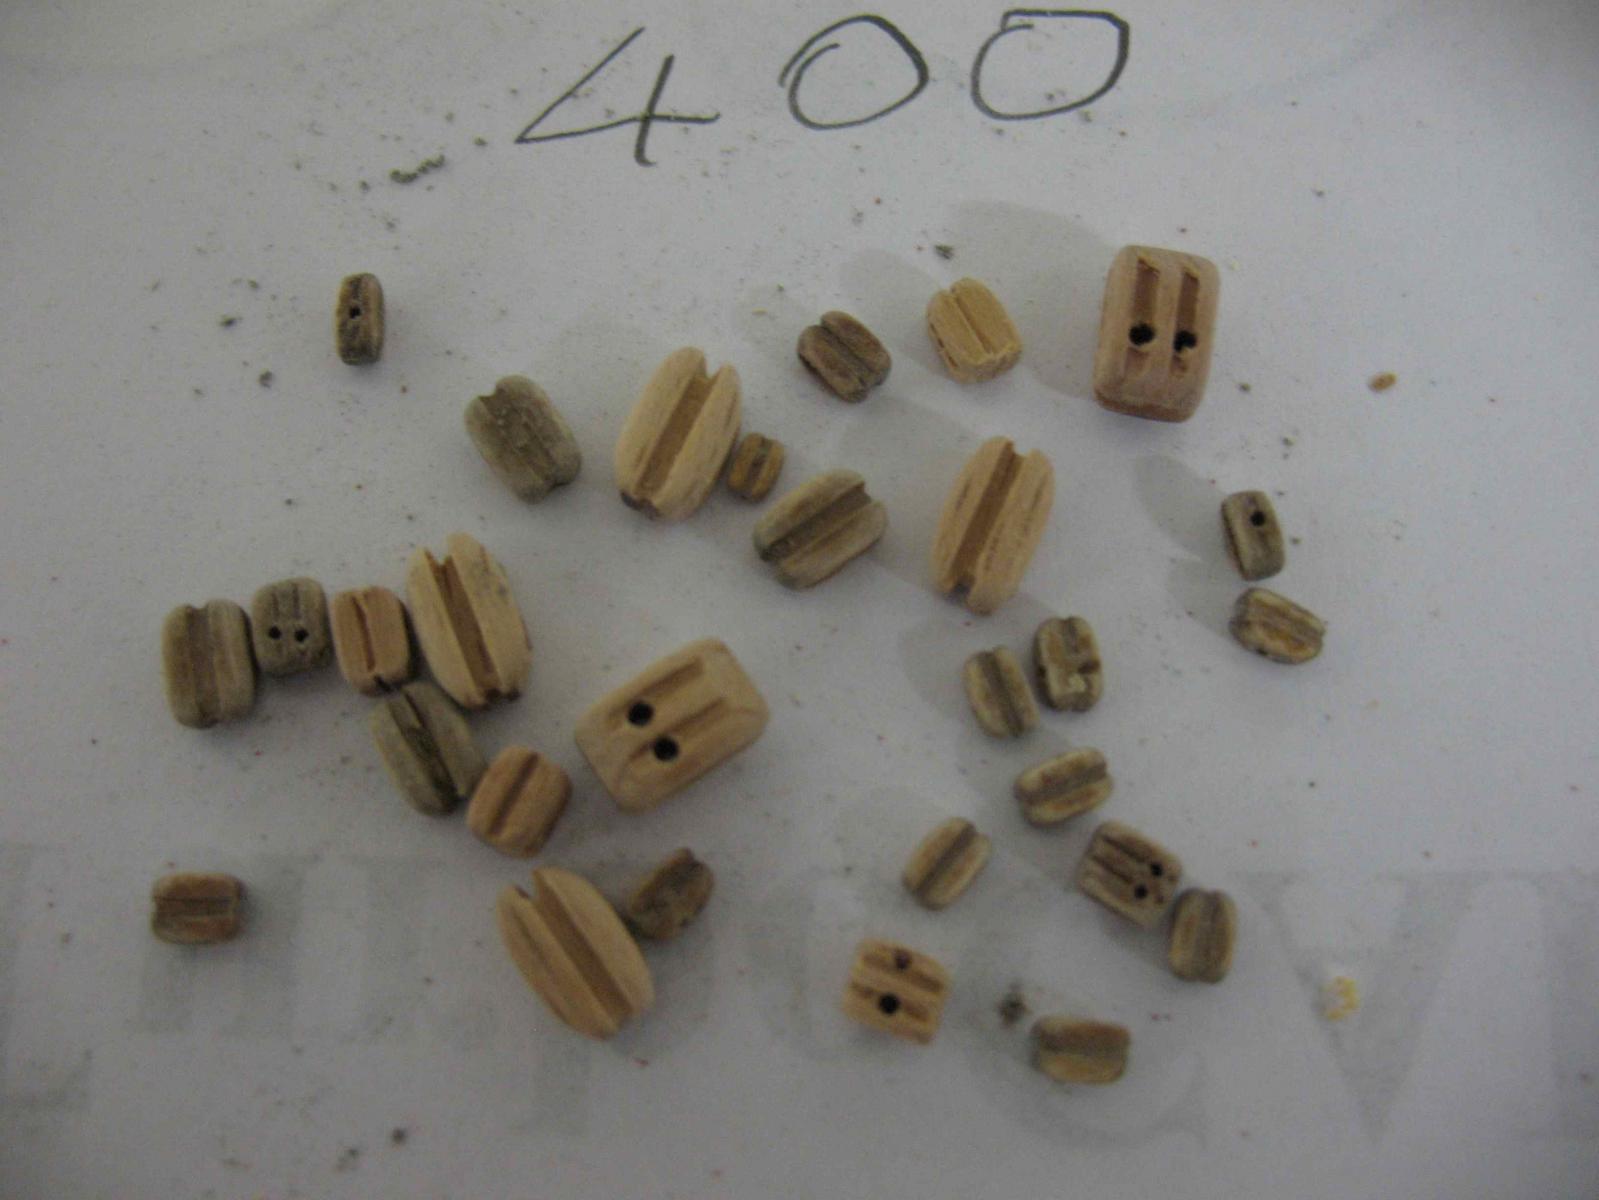
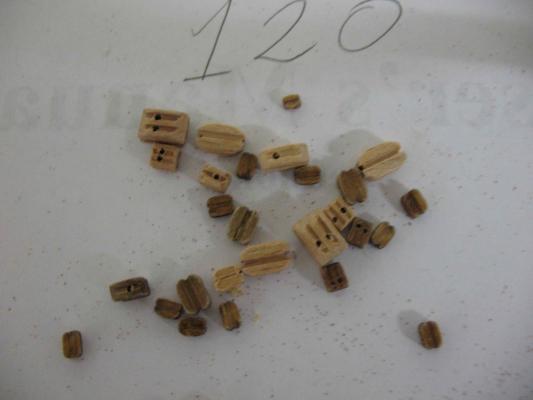
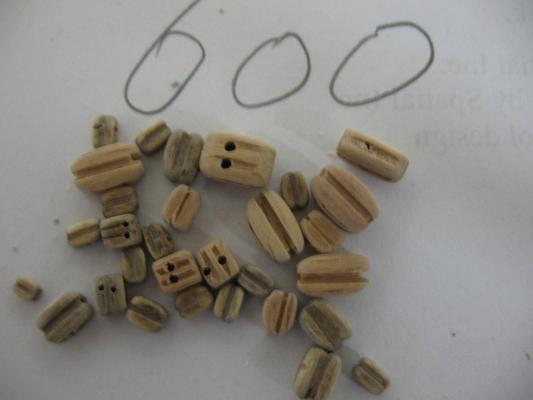
Okay, as promised, here's the final instalment on the Block Tumbler. Mod 2: I had an epiphany while thinking about the drive shaft problem and decided that the only way it was going to work was for the drive shaft to be a single piece running through the top end cap. The limitation was that the “business” end needed to be no larger in diameter than 10mm in order to fit through the headstock spindle of the lathe. So new drive shafts were manufactured with the “business” end turned down to a 10 mm diameter. Here is the new setup running on the lathe. The cutting tool is lightly held agains the canister body to prevent it from turning. In this picture the lathe is actually running, with the drive shaft turning within the canister. Functional Test No. 2 The functional test on the new design worked perfectly. To further the testing, a selection of kit blocks was put through a short spin in each of the grades of sandpaper. To begin with, this is how the blocks look “as provided” in the kit: It’s pretty obvious from this picture why a block tumbler is needed. Up until now, I have been individually hand sanding all blocks prior to use - a very tedious process! Here’s a comparison of an untreated block (on the left) with one that has had a very short tumble. I then proceeded to a larger test with a range of block sizes. Time spent in the tumbler was very short for these tests - no more than 2 minutes in each grade of sandpaper. After Tumbling in 120 grit: The same blocks after then Tumbling in 400 grit: And after then Tumbling in 600 grit: So just for comparison let’s look at a “before” and “after” shot side by side: I think this proves the concept. Even better results should be achievable with a longer duration in the Tumbler. Finishing with 600 grit does seem to produce quite a nice end result that is ready to use. Reflections / Observations The Tumbler works well and is relatively simple to construct. If I were doing it again, I would reduce the size of the canister considerably. This canister I made is 100mm long with a diameter of about 85mm. I think a canister length of 50 mm, with a diameter of 50 mm would probably be quite larger enough for the purpose. The drive shaft is key. It must be a single piece that runs through the top end-cap. Boring a 6.5mm hole in the tail end allows it to be located on a 6mm dowell spigot through the tail end cap. This both supports the end of the drive shaft and allows it to spin freely. The outer end of the tail end cap spigot is held in the lathe tail-stock chuck. The whole assembly could be modified for hand held use. To do that, cut the tail stock spigot off flush with the outer end of the tail end cap. Then make and attach a “winding handle” to the drive shaft. Happy Tumbling. May all your blocks be smooth!

-
Thanks Augie and Keith. Keith, I have edited my original post on the Block Tumbler to include a link to Janos's thread. I feel that now gives due acknowledgement to Janos and allows other readers to go direct to the source.
-
Nice to see you back Rosemarie. I look forward to updates on your Vic soon (after your card model show).
-
Nice fix Kevin.
-
Just beautiful Bob. Thanks for sharing.
-
Hi Janos, Your post just crossed mine in the ether. Thanks for those extra thoughts too, particularly the caution about not mixing large size difference blocks at the same time. In retrospect, I agree that the tube could have been much shorter. Perhaps 50mm would be a better length. I can always modify that aspect later on - its like cutting hair - you can take more off, but it's much harder to put it back on
-
Thanks Mobbsie, I had an epiphany over dinner. Although you might call it a BGO (Blinding Glimpse of the Obvious)!!!! In order for this to work, the drive shaft needs to be a single piece that passes THROUGH the top end cap. The only catch is that the diameter at the lathe headstock needs to be no more than 10mm in order to fit through the head stock spindle (which means there is plenty of "meat" for the lathe chuck to grab. Simple solution really. I cut new drive shafts equal to the existing drive shaft length PLUS the extra for the external part (another 45mm). I then turned down on the lathe, the external part to a diameter of 10mm. Bored a 6.5mm hole in the tail stock end (to seat the end cap). Cut the slots for the "flappers". Drilled new holes in the top end cap to give a "slide" fit over the drive shaft. And it's done. Functional Test 2 this evening and it worked a treat! Have done a short test run on some sample kit blocks, putting them through each tumbler in turn (120; 400; 600) and I'm quite pleased with the results. Have taken pics but won't be able to post until tomorrow as its quite late now and the Admiral has banned me from the computer for the evening. All in all, a successful day. Thanks Janos for your original design and inspiring me to have a go.
-
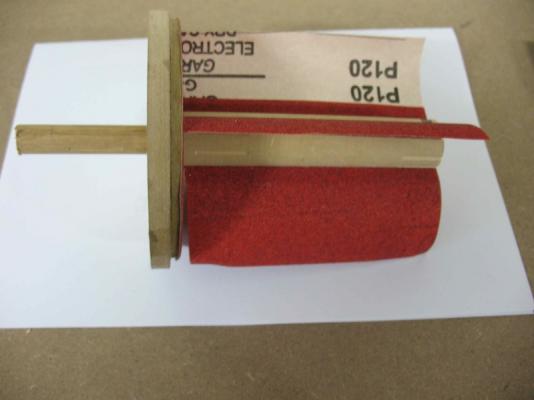
Continued from previous post..... Cutting the remaining sandpaper to size is just a matter of “eye-balling” it. We need one piece to go around the inside of the central chamber, and four “flappers” which go into the slots on the central shaft. The end cap and chamber sandpaper was fixed in place with spray-on adhesive. The flappers are simply folded over and slid into the slots without glue (which makes them easily replaceable). Functional Test No. 1 It was time to test the design. I assembled the tumbler and mounted it in the lathe as previously described. My joy was short lived however, as the torque from the lathe sheered the drive pin (dowel). Mod 1: This is a first mod to the drive shaft, for which I’m not holding too much hope. I have replaced the dowel and inserted it into a larger dowel “handle”. The new handle will be mounted in the lathe headstock chuck. I will test this tomorrow, but suspect that it will sheer again. I think the solution will be to make the drive shaft longer and extending right through the end cap. Any advice/opinions welcome. More to follow.............
-
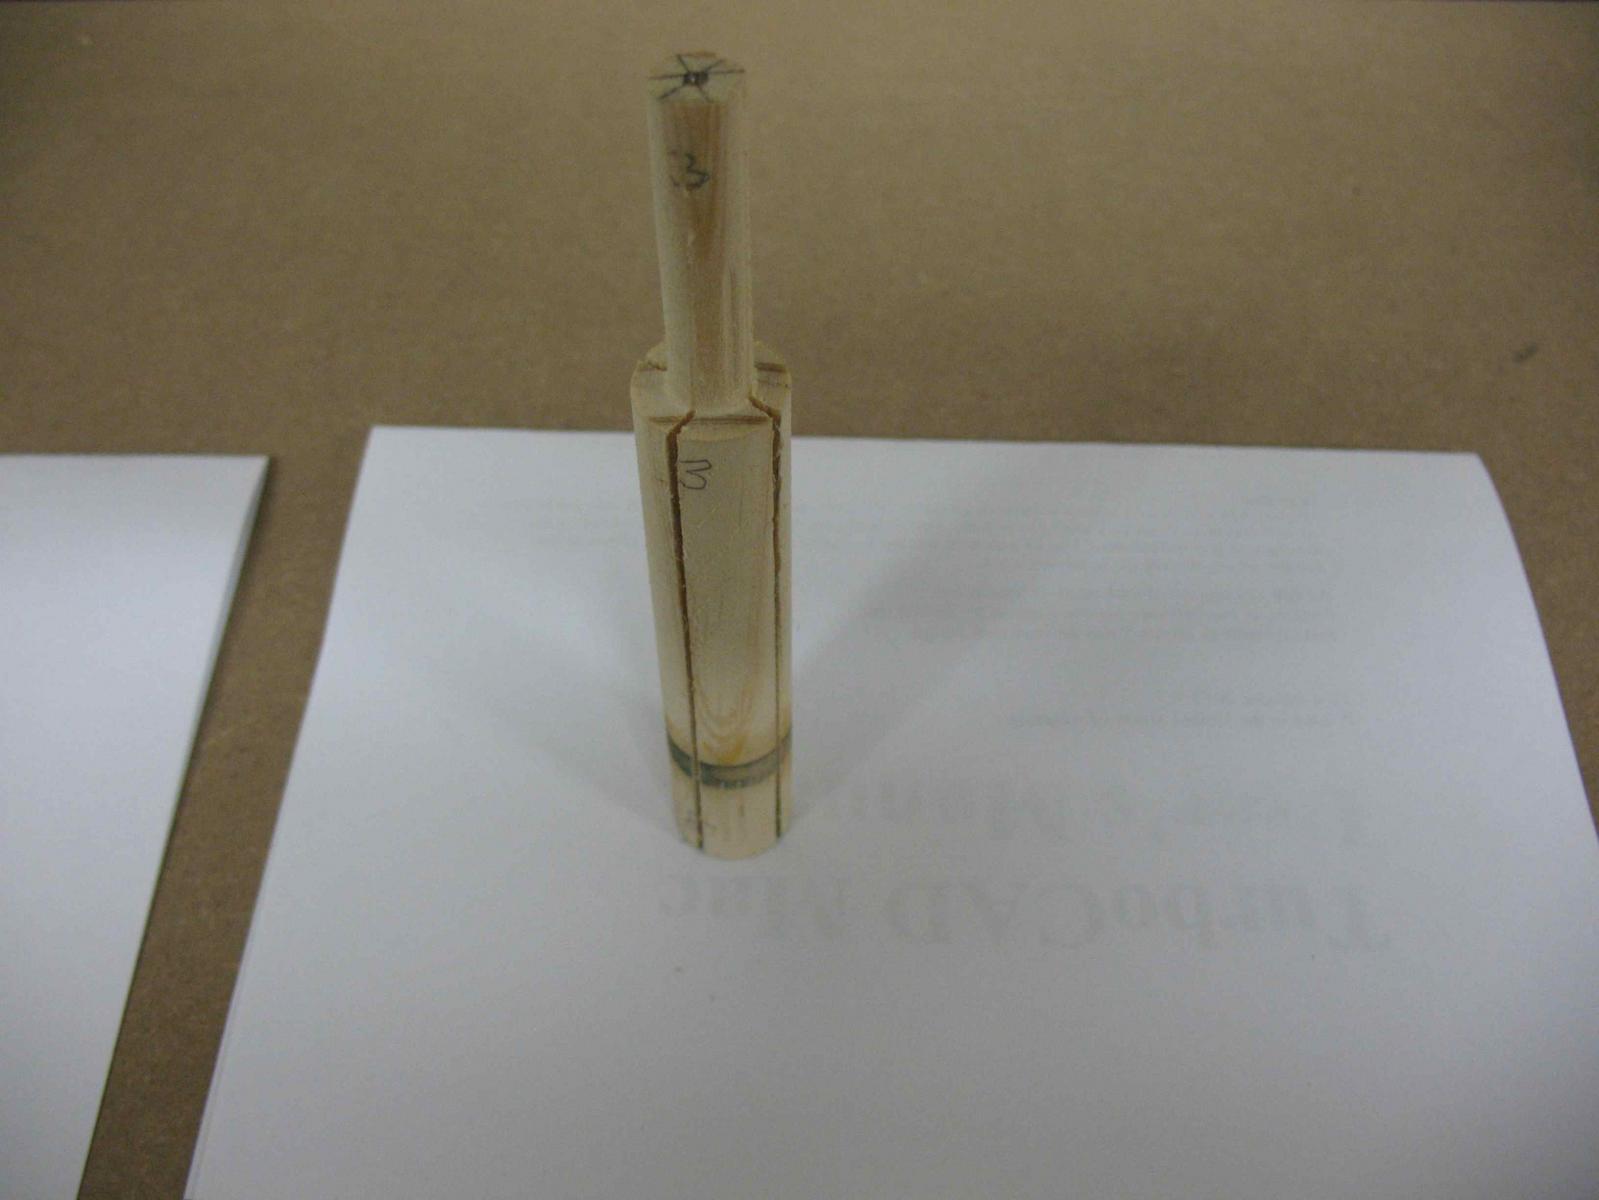
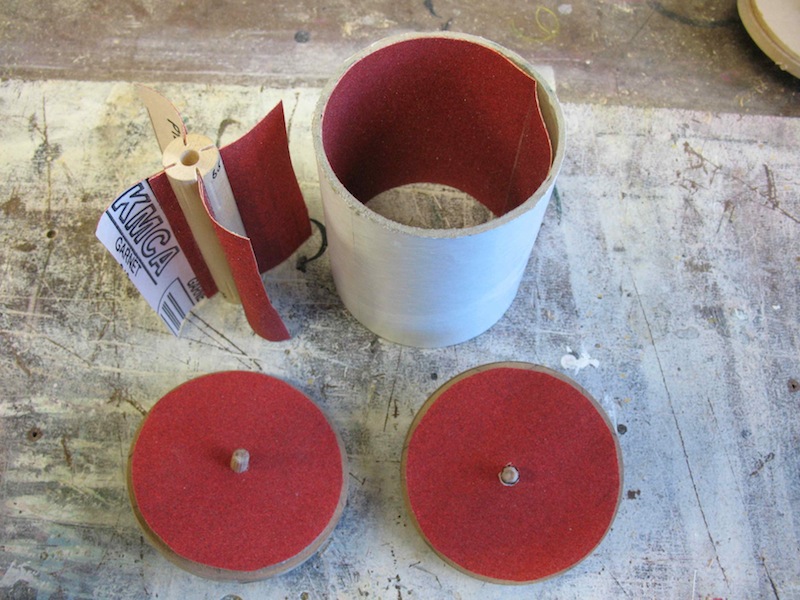
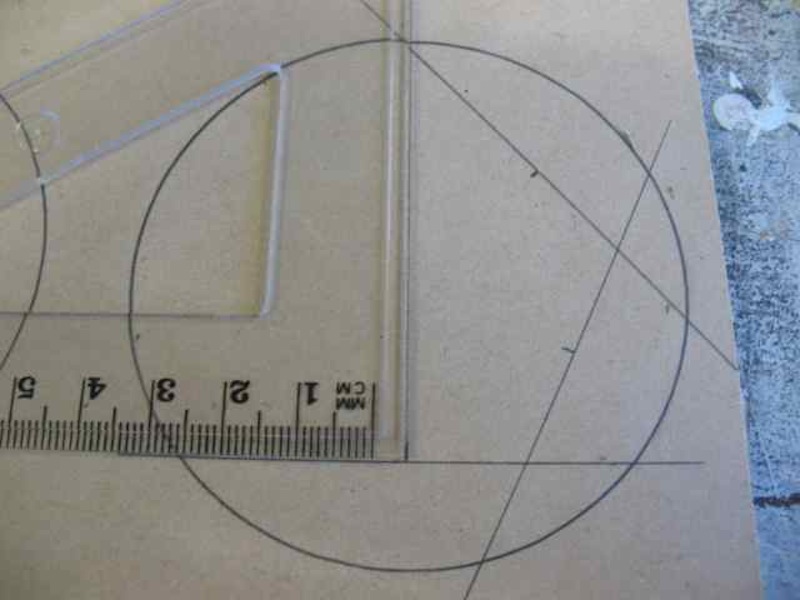
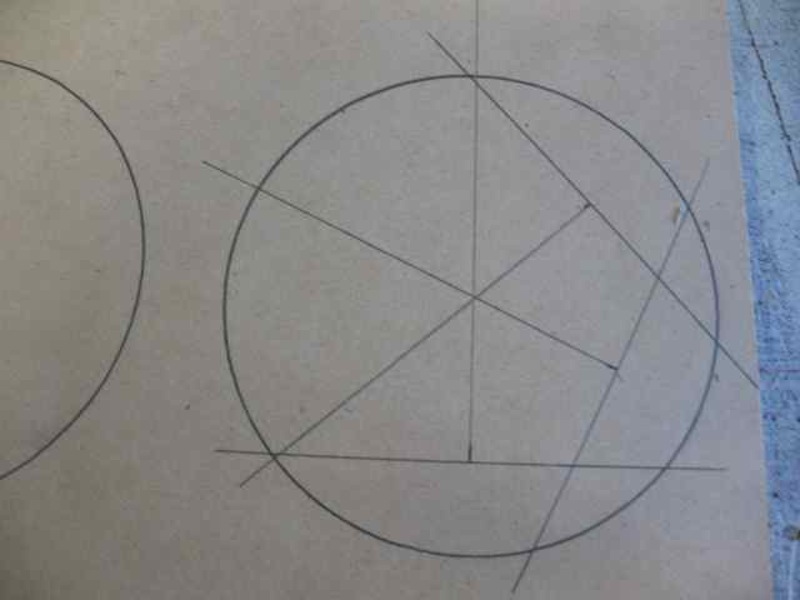
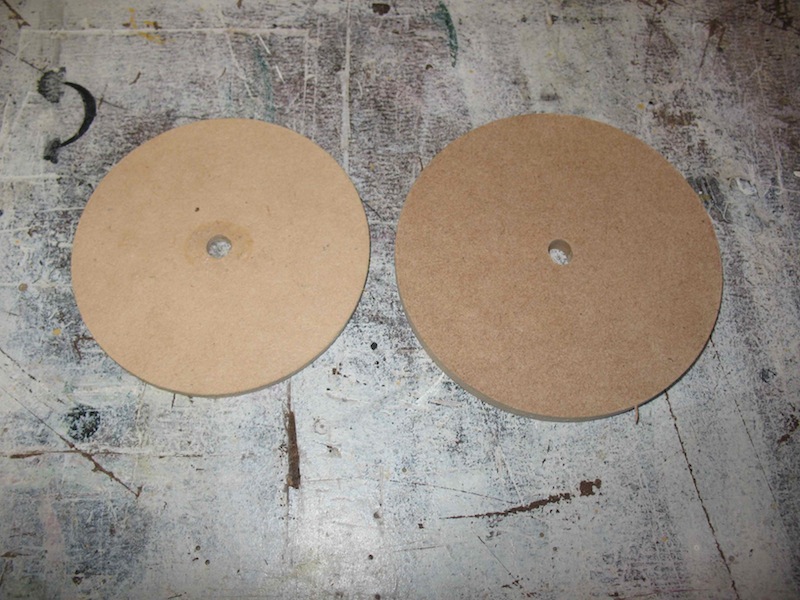
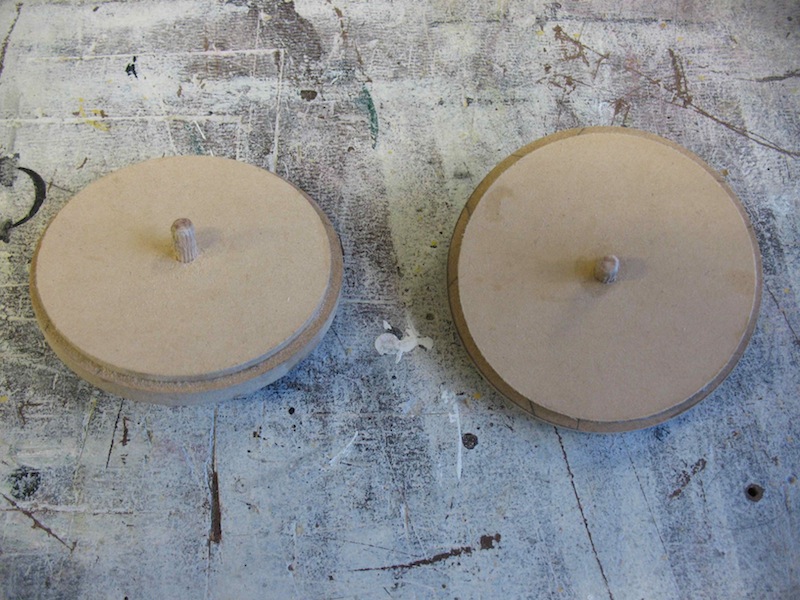
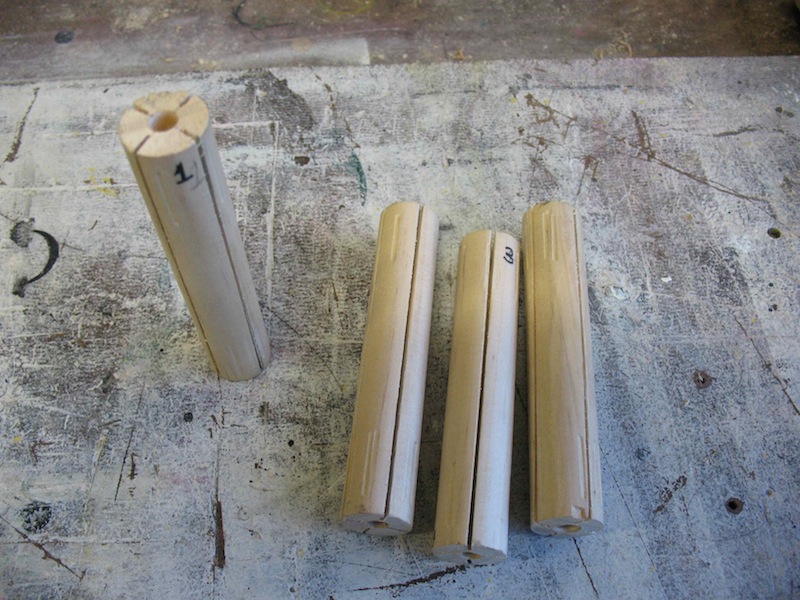
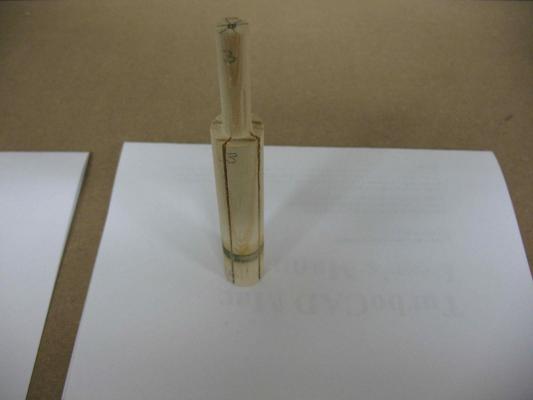
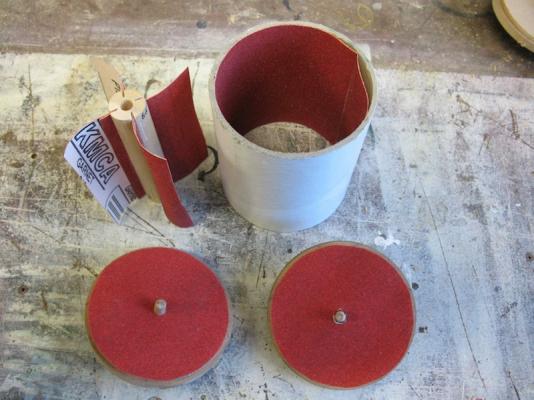
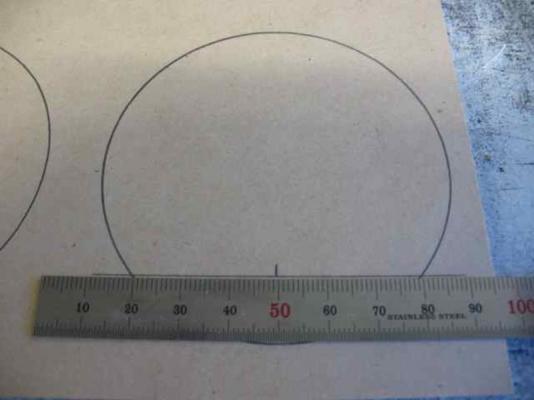
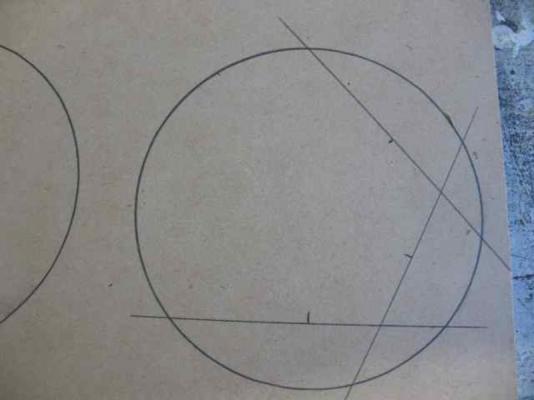
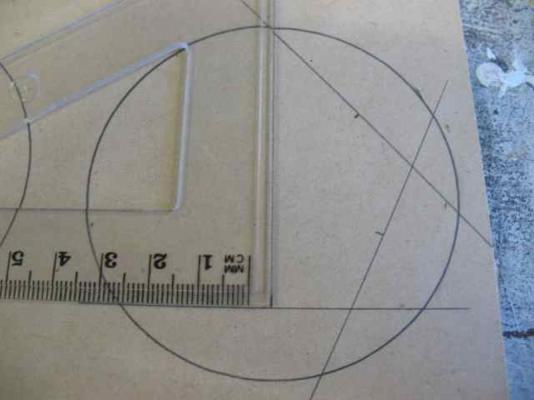
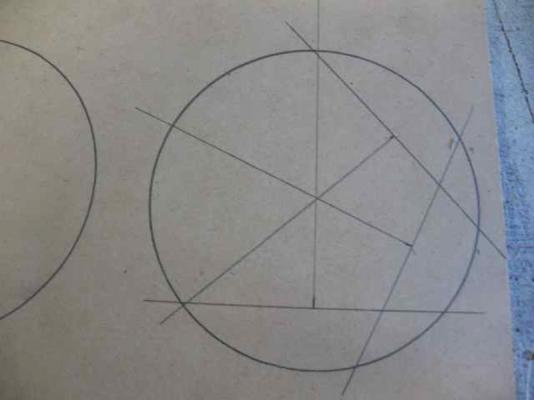
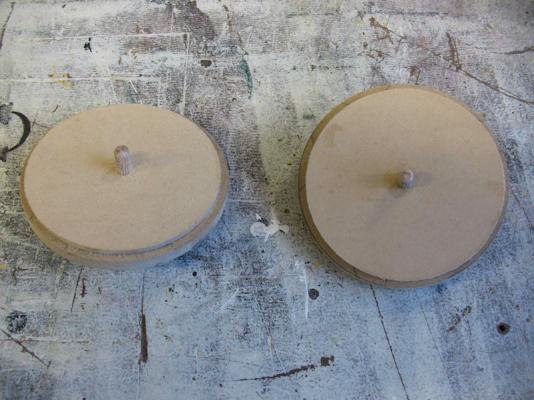
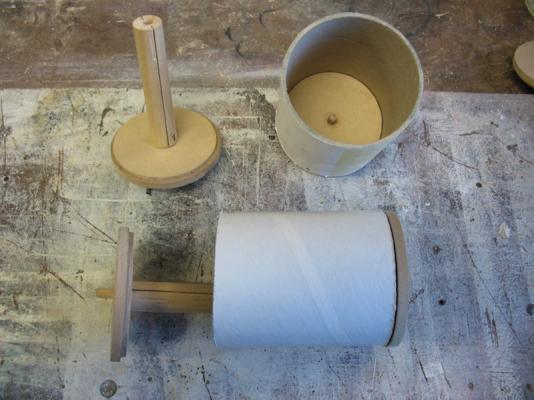
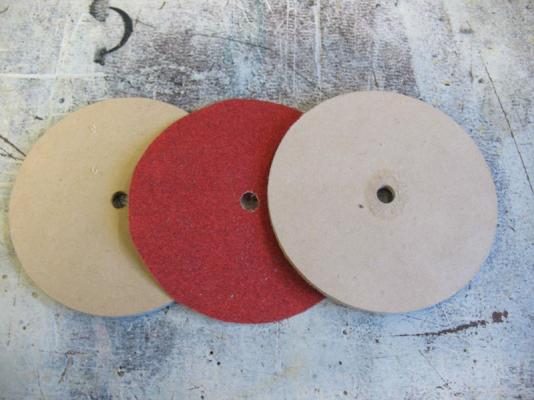
Hi all, Well I promised an update on the Block Tumbler so here it is. I have some good news and some bad news . To start with, here is a little treatise on how I made Block Tumbler 1.0 First up, I wish to acknowledge that the basic design of this tumbler is not my own. I was inspired by a post made by Janos and have simply modified the construction somewhat to suit my own needs. Here is a link to Janos's thread, which is mainly about making blocks, but includes discussion of his tumbler design: http://modelshipworld.com/index.php?/topic/1885-block-making/?hl=%2Bblock+%2Bmaking Materials used include: 100mm long section of a used cardboard postal tube of about 85mm diameter (PVC tubing could be used in lieu) 19mm diameter dowell rod for the central shaft 6mm dowells 3mm MDF (end caps) 6mm MDF (end caps) Sandpaper - grit of your choice. I’ve made up three tumblers with 120, 400, and 600 grit Spray-on adhesive PVA glue Tools required: In putting this together, I used: Scroll saw Drill Press Milling machine Lathe However, the entire project could just as easily be completed with only hand tools. Design intent: The intent for this design is to attach it to my lathe, with one end held in the 3-jaw chuck and the other in the tailstock chuck. This actually determines the maximum diameter of the main body of the tumbler, as it needs to fit over the lathe bed. The tumbler could equally be driven by a drill press, a hand held drill, or even manually turned. Any of these drive options would free the size limitation. It had been my intention to use some PVC tubing for the main body, but the tubing I bought (90mm) was just a tiny bit large to fit across the lathe bed. Rather than re-visit the hardware store, I happened to have the postal tube lying around and it seemed to be just right in terms of size. End Caps: Having cut the postal tube into 100mm long sections, the next task was to make the end caps. These were made up of an outer cap of 6mm MDF and an inner cap of 3mm MDF, joined together to make a snug seal over the end of the tube. The tube section was used to trace circles of the requisite sizes for both Outer and Inner caps onto the MDF sheets. I needed to mark the centre of each of these circles, so here is some basic high school geometry that makes this task easy: Step 1: Draw a chord of convenient length (in my case 60mm) across a section of the circle and mark its mid-point: Step 2: Repeat this twice more, so that you have three chords drawn, all with centers marked. (It is only necessary to use two chords, but the third will reveal any errors in the construction). I chose to draw chords at an angle of about 120 degress to each other - the reason will become obvious shortly. Step 3: Using a set square, draw a line perpendicular to each of the chords, passing through that chord’s mid-point previously marked. Where these three lines intersect is the centre of the circle: Step 4: Cut out each of the circles using a scroll saw (or hand held fret saw / jeweller’s saw). Then drill a 6mm hole through the centre of the circles. Step 5: As I was making several tumblers at once, I temporarily spot glued the rough-cut circles together in gangs of the same size, over a central dowell. This then enabled me to mount the gangs in the lathe in order to turn them down to a consistent diameter with a smooth finish. You can avoid this step if you take more care than me with the cutting out. Here is the result of the lathe turning process, once the discs had been separated from each other: Step 6: Join together one each of a large and small disc, using a 6mm dowell for alignment and protruding a roughly equal distance either side. Central Shafts: Step 7: Prepare the central shafts by cutting them to length, drilling a 6mm hole in one end and a 6.5mm hole in the other. The idea here is that the 6mm end will be attached permanently to one end cap, while the 6.5mm end will provide a locator for the other end cap but with room for the shaft to turn around it. Complete the shafts by sawing slits along the length of the shaft. This is take the sandpaper “flappers” later on. It was at about this point that I ran into some trouble with my Mill. My intent had been to cut these slots with a slitting saw in the Mill. However, during the cutting of the first one, the Mill’s motor died - whether as a result of this operation or some other reason I do not know. Regardless, this left me no choice but to complete this operation by hand. In fact, the slots are quite easily cut using a hacksaw - the kerf of the blade is just the right width to accommodate the sandpaper flappers. So, here is how our overall construction looks so far: Sandpaper: Step 8: Now it’s time to fit the sandpaper to our machine. First up, I used a couple of spare smaller discs to trace the outline for the end caps, then sandwiched the sandpaper between them and drilled a hole through the centre. This now fits neatly over the end caps. Continued in the next post ..............


-
Thanks for dropping by Gary. If you need any info from the work I've been doing, just let me know - I'm quite happy to share. Anja - we'll be visiting UK and Europe throughout September. Although we are spending the majority of our time in the UK, we will also be spending some time in Paris, Florence and Venice. If you happened to be visiting Paris around the time we're there, it would be nice to meet up. Or you could come back to visit Mobbsie again too.........
-
Thanks Mark. Much as I'd like to take some extra time, I do actually need to get back to work. I have a great team who have done a splendid job in my absence, but any longer might start putting some unnecessary strain on them. Okay, I'm off to finish off that tumbler and hopefully make some blocks too.
-
Good question Kevin, and one for the mods I guess. From my perspective, I think it's perfectly okay. In fact I think it's great that you do this of your own initiative. It's a great thread and seems to be very popular. It's allowed a lot of us to be introduced to builds that we otherwise might have missed. So, take this as a big THANKYOU from me.