gjdale
-
Posts
4,891 -
Joined
-
Last visited
Content Type
Profiles
Forums
Gallery
Events
Everything posted by gjdale
-
 Nice progress Mick. I think I've gotten the hang of your photo bucket now Those sanders look interesting. I'd be interested to hear how they go in practice.
 -
Thank you both very much Sjors and Anja, and also Mobbsie for the kind offer of photos during your forthcoming visit to Portsmouth. I don't think I need any particular shots at the moment (I do have quite a few already), although if the ship's boats are on display I would like some pics of them - as many as possible, showing paint schemes and internal details if possible (you know the sort of thing a modeller needs to know ) Sjors - looks like you'll have to find another way to earn some money for your Aggy. Perhaps if you take your clown suit with you, you can do some street theatre while Anja and Mobbsie go for a tour of the ship! And Mobbsie - I hope you don't get bored with visiting Portsmouth and Greenwhich, because I'll be over there in September and will be expecting your services as my local Shipmodelling tour guide
-
I see that ME has the Camel on sale again today - 50% off..............
-
Augie, Mobbsie, I'll reveal all on the block tumbler tomorrow (after a successful functionality test of course). The design is based on that posted by Janos a few days ago in his thread on making blocks. I've made some mods to the construction process, but it's basically his design. Hmmmm...... Yep, could certainly do with another week off to recover from my recovery!
-
This is just lovely work Bob! Very inspirational.
-
Thanks Bob, Your message dropped in while I was posting my last message.
-
Thanks David. I hear what you say about not rushing. It is very tempting to do so, especially as you near the end. Diverting into some little side projects like these jigs is a good way to force oneself to slow down a bit and avoid that temptation. The other thing I did last night was to spend several hours poring over different reference texts and plans trying to make sense of the fitting of the various blocks for the Fore Lower Yard. My primary source was of course Longridge, but he wrote this section of the book in a way that is very difficult to follow. By cross referencing with Antscherl's TFFM Vol 4, I was able to decipher most of what Longridge wrote. While TFFM is written for a sixth rate, there was enough similarity for me to start to get the picture. I also cross refernced against my Warrior Practicum, which is based primarily on Steel. Again, while I suspect this text contains some errors, there was enough commonality/similarity to help sort the jigsaw puzzle. I also cross checked these against the kit diagrammatic plans and was pleasantly surprised to find them to be very close to correct (now there was an unexpected outcome!). In studying all of this, I made up a spreadsheet with the names of all the blocks and their actual sizes. Antscherl provides the formula for the three dimensions of a block, and so I used this in the spreadsheet as well. The advantage of doing this is that I could simply enter the one principal block dimension and then let the computer do the work of calculating the remaining dimensions and converting all of the real world sizes (in inches) to my model scale of 1:90 in mm. Part of the reason for doing this was that I wanted to have a go at making some of my own blocks, and now I have all the dimensions I need to do so. Again, somewhat surprisingly, the kit instructions were generally close in the block sizes indicated. That is good news for anyone else doing this kit and not wanting to go to the same trouble that I just did. Antscherl also gives a suggested order or sequence to fitting the various blocks, so I entered this into the spreadsheet as well, and re-sorted by sequence number to produce my very own personalised rigging guide. I plan to have a crack at making blocks over the weekend (hence the need for the block tumbler). Will let you all know how that goes.........
-
Thanks Mobbsie. That little jig ended up taking most of the day to make, though having done it once, I could probably repeat it in about one hour. Spent most of today making a block tumbler. Well, four of them actually. Decided to try making one each of three different grades of sandpaper, and one "spare". Once I had the design aspects worked out, I could see that it would be easiest to do them using a "production line" method. Again, it has taken a lot longer than I first anticipated and when play was halted this evening at the Admiral's orders, they were not yet complete. However, things have been working out according to plan/design and it won't take long to finish them tomorrow. I'll post full construction techniques and photos tomorrow. Had to take time out this afternoon for a review by the ENT surgeon. The good news is that he's very happy with progress and has given me the all clear to resume all aspects of a normal life The bad news is that this includes returning to work on Monday
-
Glad to hear that Judy is doing well under your ministrations Gil, but sorry to hear you'll miss your boating extravaganza.
-
Nice to see masts rising Robbyn. In all seriousness though, Adrieke is quite right about inventorying the kit contents (check out his experience with his Gorch Foch). At least that way by the time you get to start you'll be confident that everything that should be there is. I think ME are pretty good with their QC on kit contents, but you can never be too sure.
-
I've got that Camel kit sitting in the cupboard too - it calls to me occasionally. I bought it when ME had it on sale for about 50% off - couldn't resist! You could always post a picture of yours with your ship in the background - that way you couldn't be accused of being off-topic!
-
Thanks Toni
-
Looking good Kevin. The wabbits obviously know their stuff!
-
Thanks Ben and Keith, I'm feeling positively dangerous today. Off to make a block sanding tumbler now, and if time permits I'll have a crack at some blocks as well.
-
HMS Victory by EdT - FINISHED - 1:96 - POB
gjdale replied to EdT's topic in - Build logs for subjects built 1751 - 1800
Ed, It's such a joy to re-read this log - I must have read it in its entirety at least three times now - because every time I do, I pick up another wonderful tip about the "how to" of some very clever operations. Your description above of making those gunport lift tackle sleeves is an excellent example. I would never have been able to figure out how to achieve such a delicate operation, but now I've filed that one away - the technique is broadly applicable and adjustable for a variety of similar delicate operations. ThanK you so much for being such an excellent tutor. I do hope you include this type of info in your next Naiad volume. If not, perhaps you should consider writing a general text on "modelling techniques" - I'm sure it would be a best seller. -
That makes a big difference Dan. Looks like you've got this plating thing covered (pun intended!)
-
Very nice Toni. The fly tying line looks great. Can you give us any more detail on the actual line used?
-
Now you're talkin'
-
Slog, Thanks for stopping by and for the good words (sorry, missed your post earlier). Mick - thanks also for stopping by and your kind words. There will be more scratch built boats to come, using different techniques. Just need to finish off the yards first. And there is always room for one more model - you just need to decide what else to get rid of to make room!
-
Thanks Augie - it's good to be back!
-
Getting the holes in line was the easy part Sjors. I just drew a centreline, marked out the hole centres, started the holes with a brad point, then moved to the drill press, set a depth stop, and drilled. Easy as.......making coffee!
-
Hi Sjors, Great to see some string going on at last! Are you using a jig to get even spacing on your dead-eyes? If not, I'd recommend that you do. I used one that I pinched from EdT's Victory log (he has a great drawing of it there) and it worked well for me. You can see a picture of it in action on my log too.
-
Thanks Mick, Call me lazy, but using an iPad most of the time for reading logs, I have to click on each image, which then opens in a new window. Ends up taking a long time to review the one log. As I said, call me lazy. It's your log - you do it how YOU like it.
-
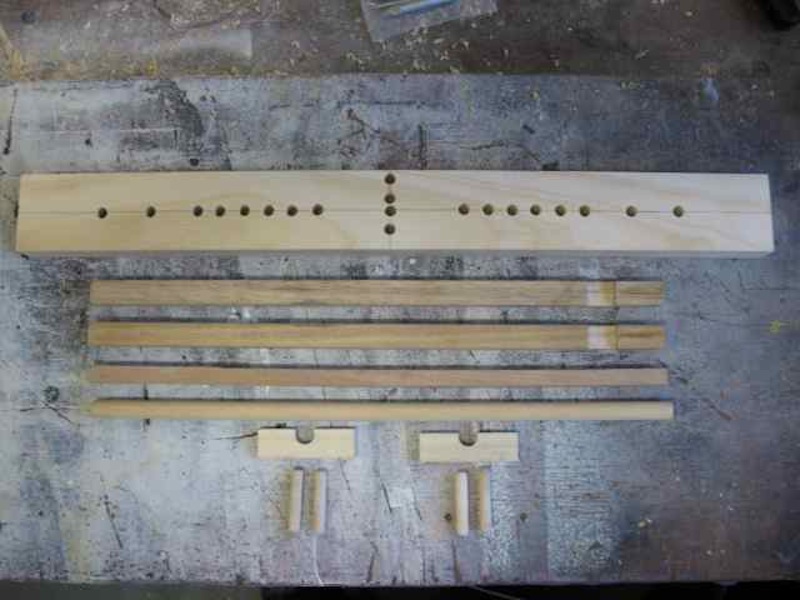
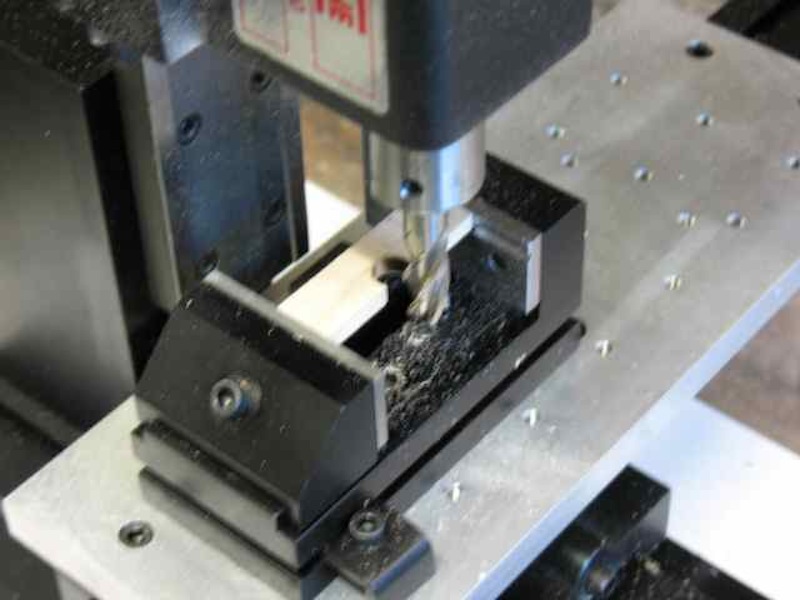
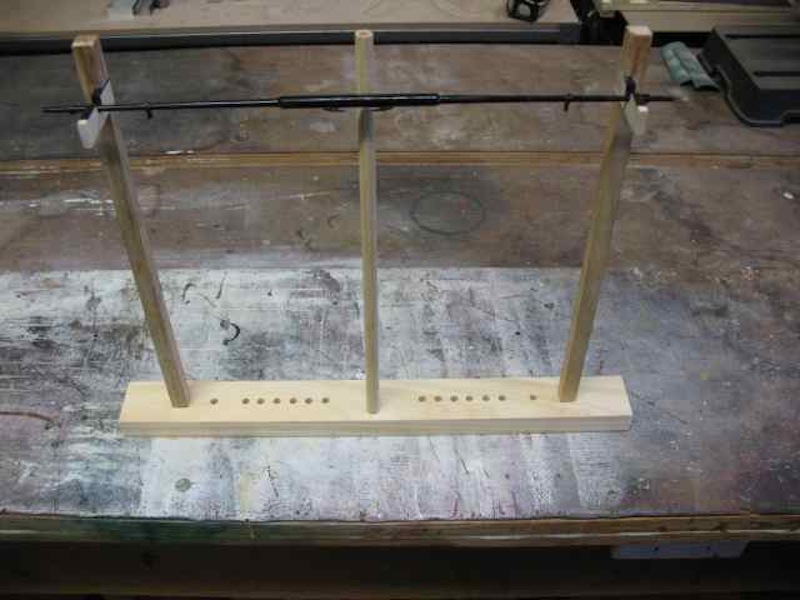
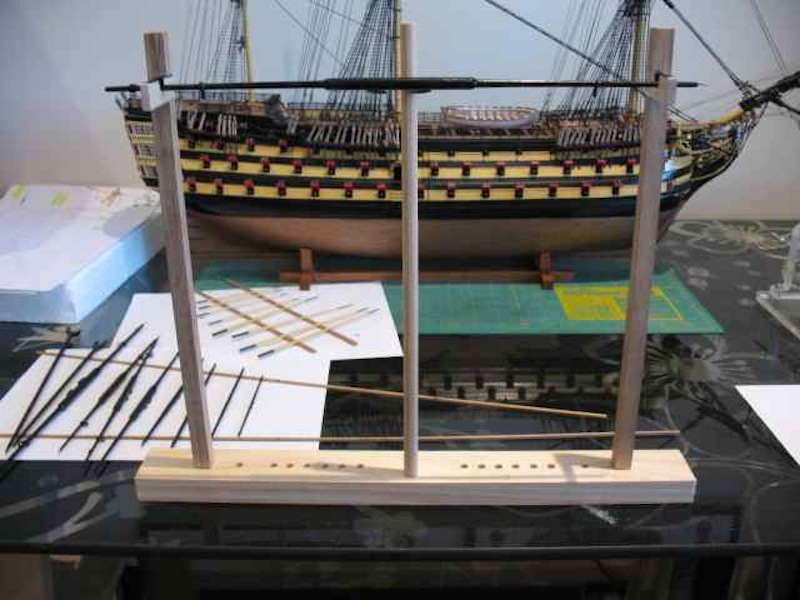
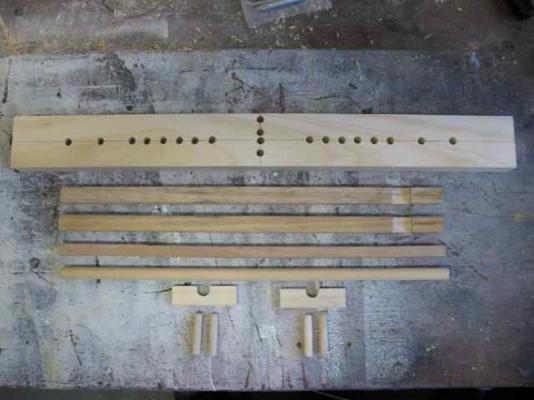
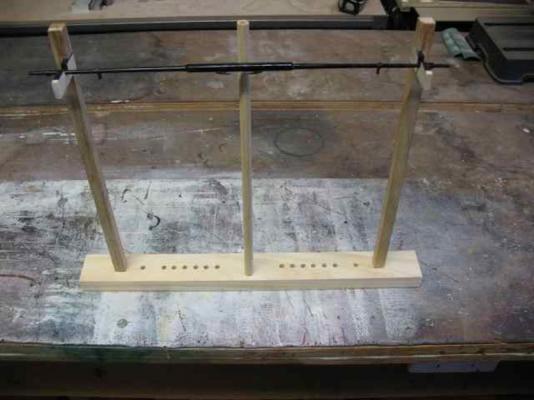
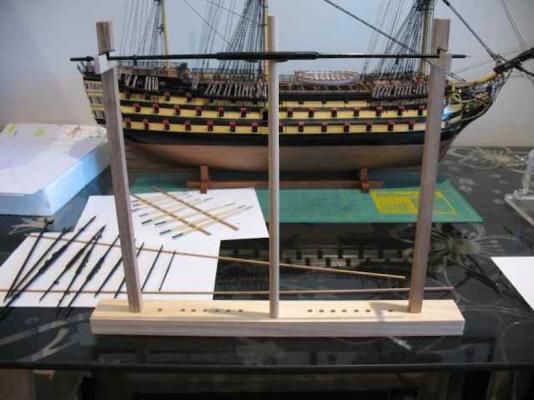
Hi all, Big news - I'm finally feeling human again!!! And that means - sawdust!!!!!!! After almost three weeks of being able to do nothing and feeling like s&@%, my body seemed to flick a switch sometime yesterday and today I'm feeling almost normal - dangerously so! So, I'd been thinking about what's next in terms of preparing the yards and decided it would be a good idea to make a small jig to hold the yards while I was working on them. I can't take credit for the original idea as I found it in my Warrior practicum books. It showed a picture of one, from which I made my own design. It's pretty basic really. It consists of a base and a pair of uprights, with two "arms" for supporting the yard. The base has a series of holes to allow the width of the uprights to be adjusted. The uprights have a dowel glued into the bottom end for locating in the base holes. The "arms" are rebated into the uprights and have a slot cut into them to take the yards. The "arms" are also covered with some velvet drawer liner to protect the yard paintwork while in the jig. I also made a dummy mast that attaches in the same way as the uprights. The best part was, I got play with a bunch of my toys, er, I mean tools.......including Byrnes Saw, Lathe and Mill - not so much because they were needed - more because I could. Here's a pic of the parts pre-assembly: One question I do have though is regards to milling. I'm hoping some of you experts can set me straight on this. I get confused about direction of cut and/or feed. I've read about the difference between "normal" cutting and "climb" cutting, but can't get it into my head in a way that makes sense. Here is a picture of the set-up for how I cut the slots in the "arms" using an end mill. It should be clear from the photo the direction of feed/cut that I used. My question then is, is this the "right" way to have cut, or is this a "climb" cut (and why)? Okay, so here's the assembled jig, complete with yard in place. And here it is back on the modelling desk. It holds the yard at a very convenient height for attaching all those fiddly bits. Having been inspired by a recent thread by Janos, I've decided that I'm going to have a go at making some blocks tomorrow. Along with that, I'll be making a sanding tumbler following Janos's simple but clever design. I'll post more pics when that is complete.

-
Silver Soldering Tools
gjdale replied to bundybear1981's topic in Metal Work, Soldering and Metal Fittings
Jason, As you noted, you can buy the torch and butane from Bunnings. I would recommend the type with a self-ignition system - constantly re-lighting will be a pain otherwise. What you really need to go with it is some silver flux paste (the stuff that comes in a syringe). You can get this in varying "temperatures" - ie different melting points, which can be useful if multiple joins need to be done in close proximity. I think I ordered mine from Model Expo and had no problem with importing. You can also order this through on-line jewellery making suppliers. Hope this helps.