HOLIDAY DONATION DRIVE - SUPPORT MSW - DO YOUR PART TO KEEP THIS GREAT FORUM GOING! (Only 20 donations so far - C'mon guys!)
×


gjdale
-
Posts
4,891 -
Joined
-
Last visited
Content Type
Profiles
Forums
Gallery
Events
Everything posted by gjdale
-
 Such a treat to see another of your updates Doris. A truly remarkable work and an absolute joy to watch. Thank you for taking the time to share your art with us.
- 1,035 replies
-
- 6
-

-
- royal katherine
- ship of the line
- (and 1 more)
-
Can i live without a BYRNES TABLE SAW
gjdale replied to shihawk's topic in Modeling tools and Workshop Equipment
Thanks so much for posting these details Keith. 😊 -
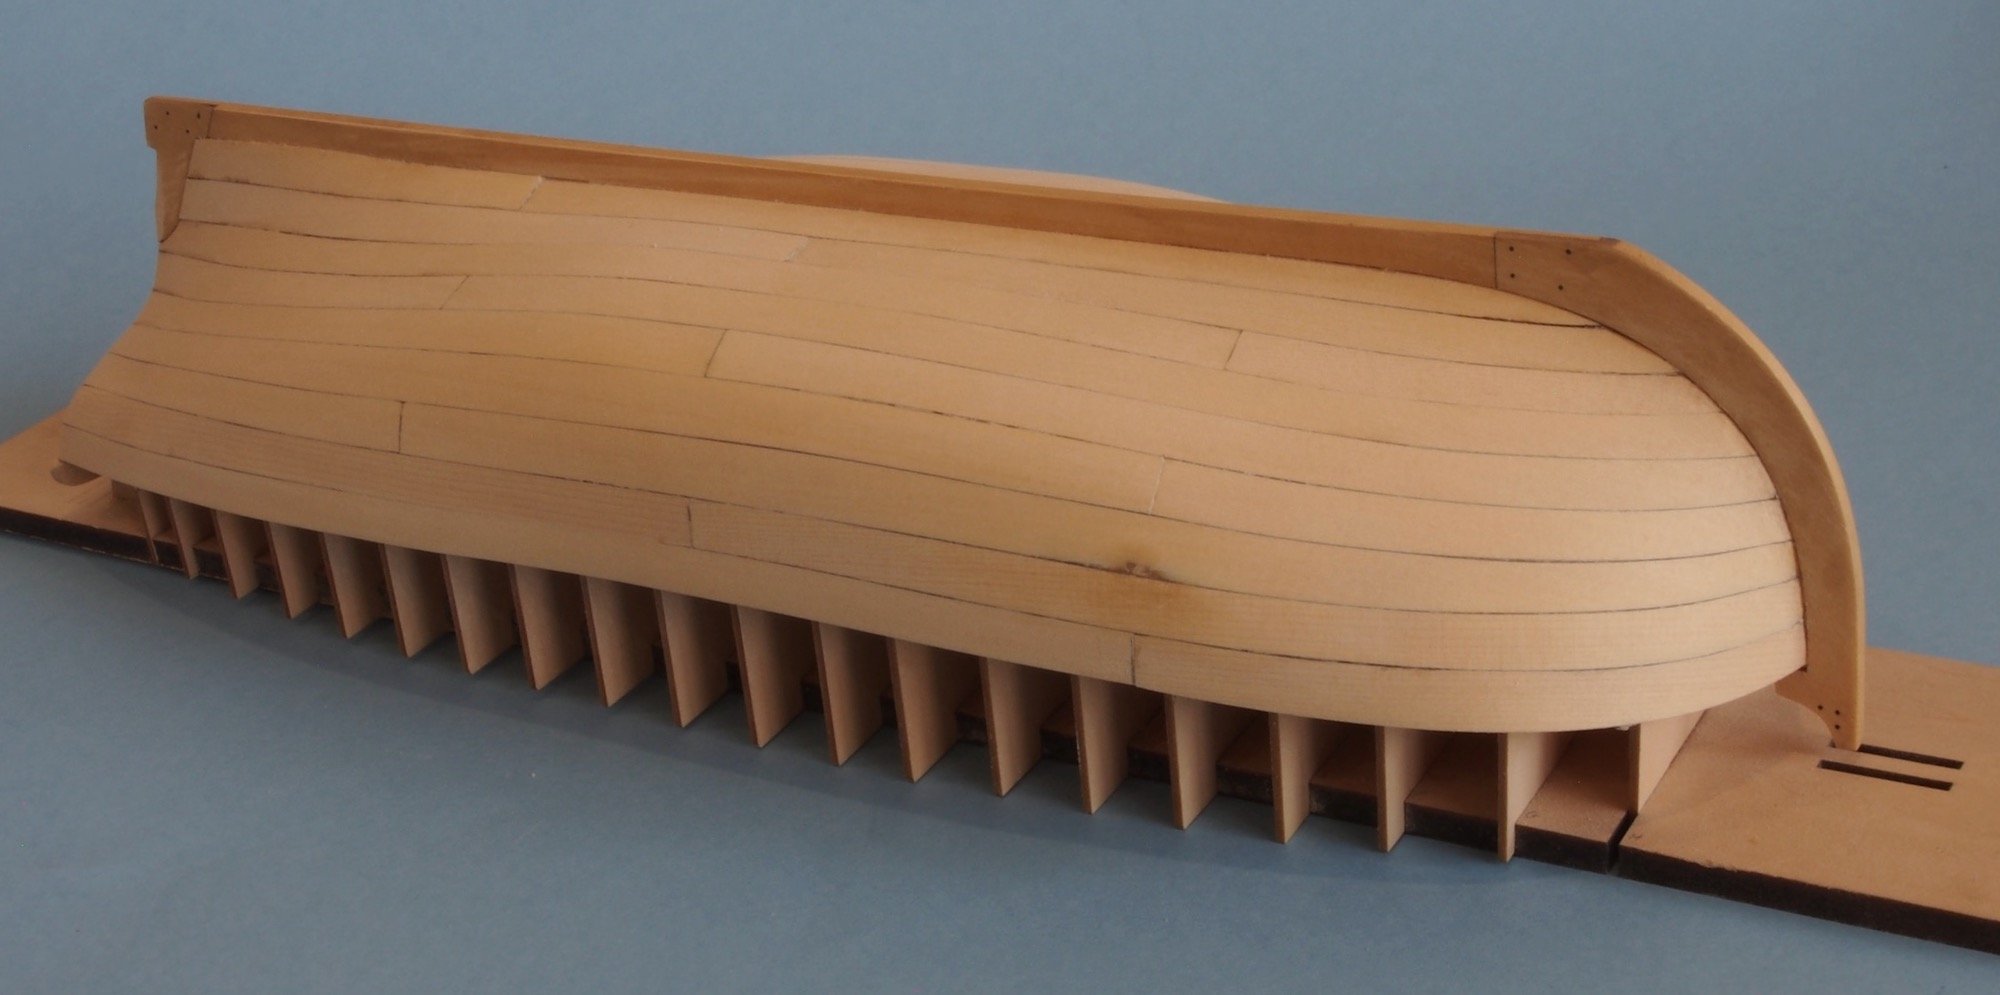
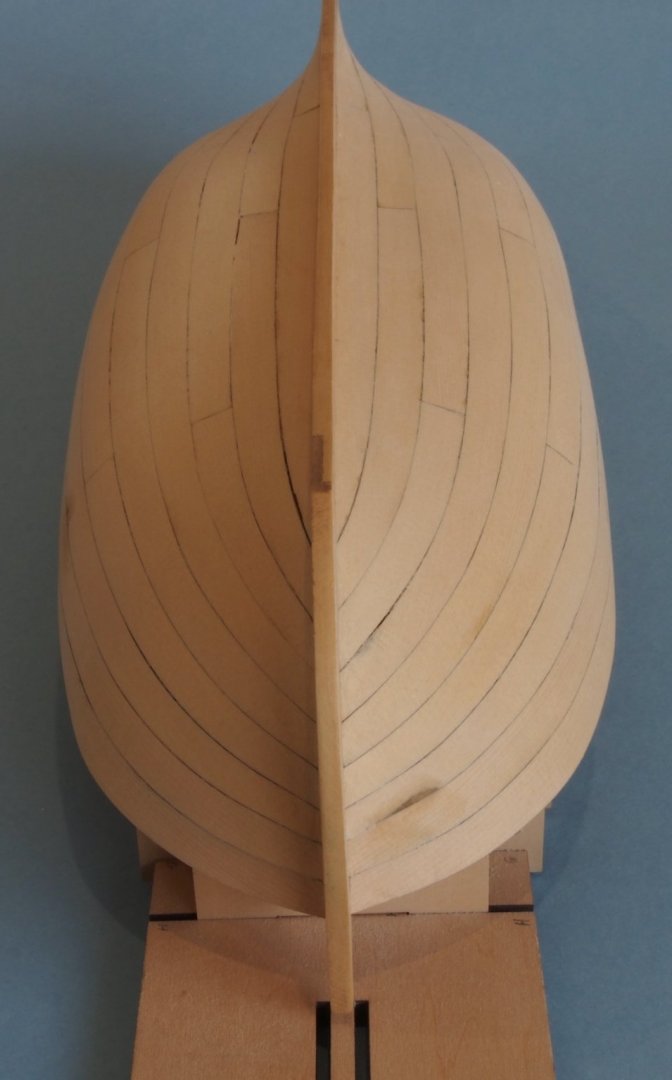
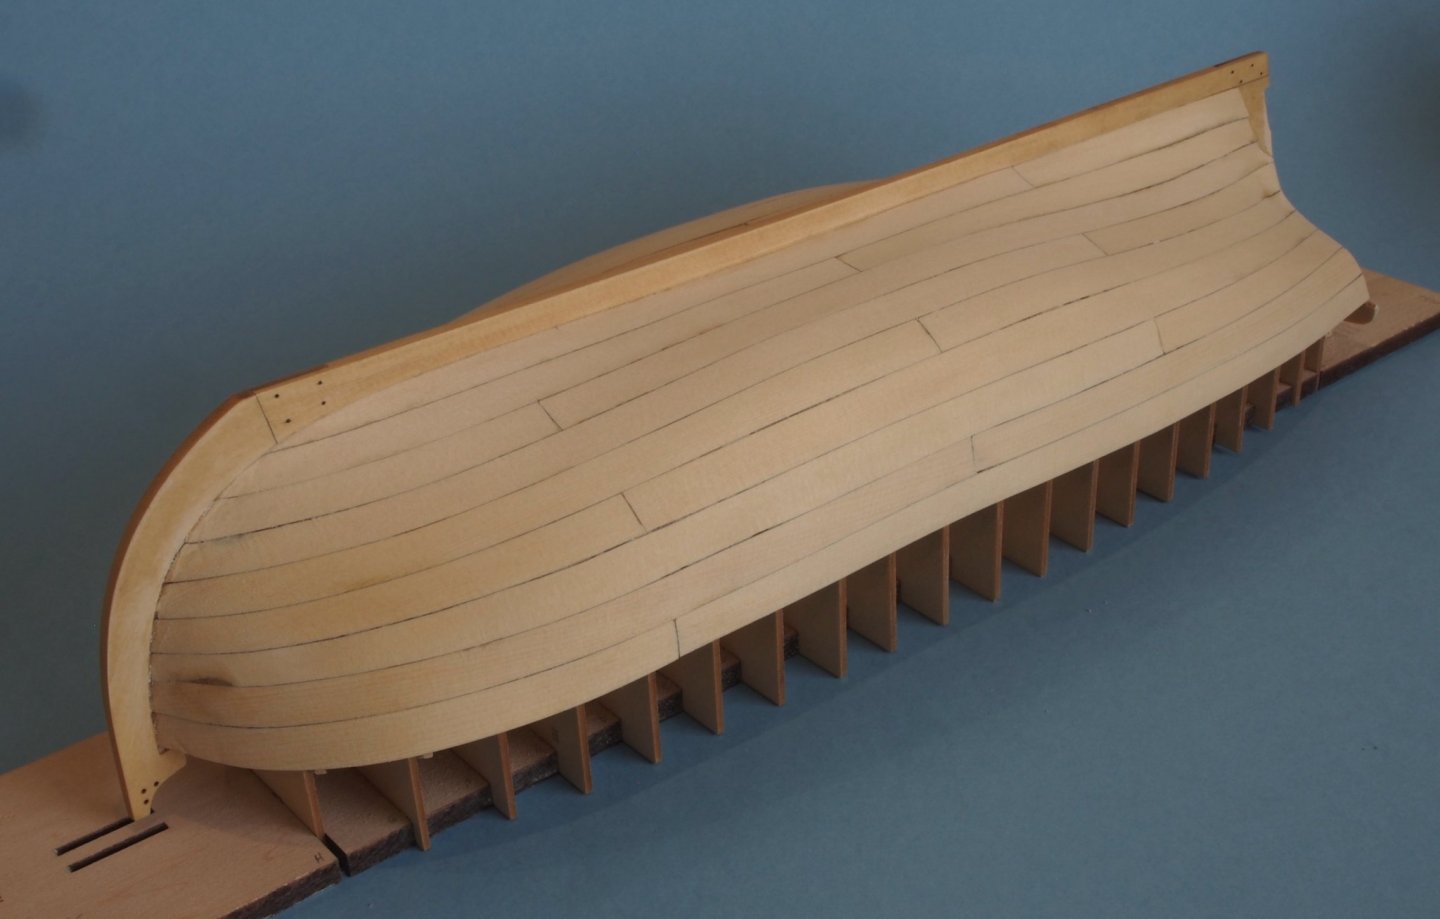
I quickly discovered that using PVA glue for this planking was going to be problematic in terms of clamping. Reluctantly, I started using CA glue and completed the first layer of planks. The next day, I started suffering flu-like symptoms. As I’d been wearing my respirator while using the CA, I wasn’t sure if this was a virus, or was in fact still a reaction to the glue. I checked the date I’d last changed the filters and let’s just say that I went straight out and bought some new ones! It has taken a couple of weeks to get over the resultant symptoms, and then of course the usual excuses that keep one away from the shipyard! I was not terribly happy with the outcome of the planking. Despite Chuck’s best efforts to make this build fool proof, I managed to prove that it’s still possible to get it wrong! Although I did pre-bend and twist all of the strakes, I still managed to get a considerable “staircase” effect at the bow. I also ended up with dirty marks all over the hull as my fingers, graphite from the pencil “caulking”, and CA glue, combined to make quite a mess. On the plus side, I found that taking the trouble to line off the hull iaw Chuck’s instructions was a big help in monitoring the evenness of the planking on each side. There was one strake that “got away” a bit, but I was able to correct that with the next strake. Today I finally got back to addressing that mess. I spent quite a lot of time sanding out the "staircase" as well as the other irregularities and the dirty marks. Overall, it has come up to an acceptable level, though not even in the same league as some of the other builds here. There was one place in particular where I had done such a bad job that when sanding I ended up with a hole in the planking. I made up a filler of sanding dust and PVA glue to patch the hole and fortunately both it and one other “untidy” patch will eventually be hidden by the frieze. The hull is now ready for the additional layer of planks for the upper two strakes. That is going to have to wait for a couple of weeks as I’ll be away this week for work, and then taking a short trip up to Brisbane for my niece’s wedding. Will be nice to catch up with family for a few days. Here’s a couple of shots of the planking as it stands today.

- 109 replies
-
- 13
-
-
- medway longboat
- Syren Ship Model Company
- (and 1 more)
-
Well, that just cost me a pretty penny! I’ve been wanting some decent files for a while and I can resist anything except temptation!!!!😮🤑😀
-
Lovely job Bob. Shame about the missing deadeye - that must have been quite frustrating for you!
- 78 replies
-
- 1
-
-
- medway longboat
- Syren Ship Model Company
- (and 1 more)
-
Can i live without a BYRNES TABLE SAW
gjdale replied to shihawk's topic in Modeling tools and Workshop Equipment
Congratulations Derek - prepare to fall in love! I recall when I bought mine, shipping to Australia added 50% to the price. Now, I couldn’t even tell you how much it actually cost me - only how much I love it. As the old adage goes, quality is remembered long after price is forgotten. -
Congratulations on the new addition to the family Mike! Now you will have even less time for modelling. 😮 Maybe you should enlist Daria’s help now that she has so much experience with her own build......🤗
- 968 replies
-
- 4
-
-
- hahn
- oliver cromwell
- (and 1 more)
-
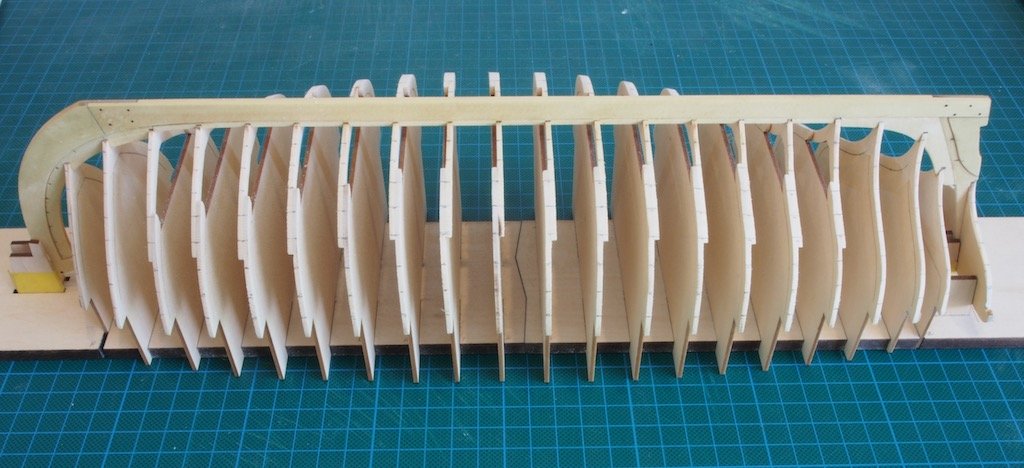
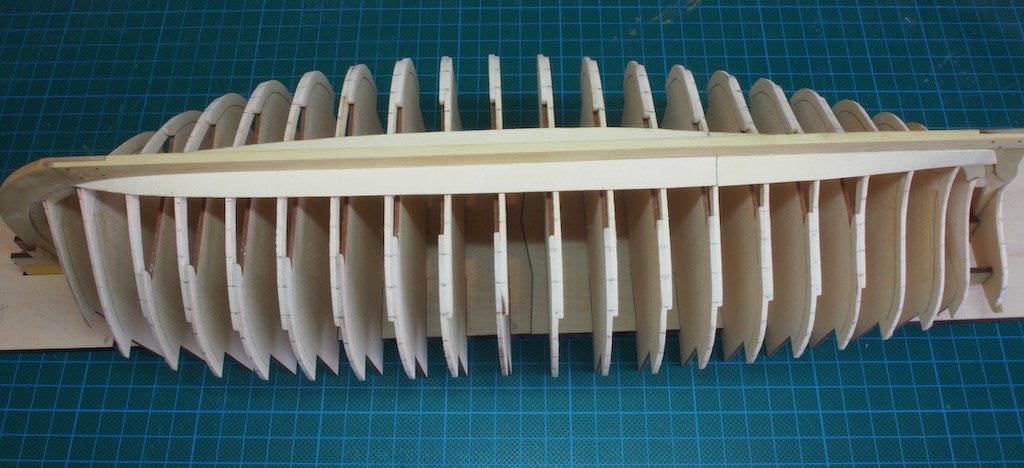
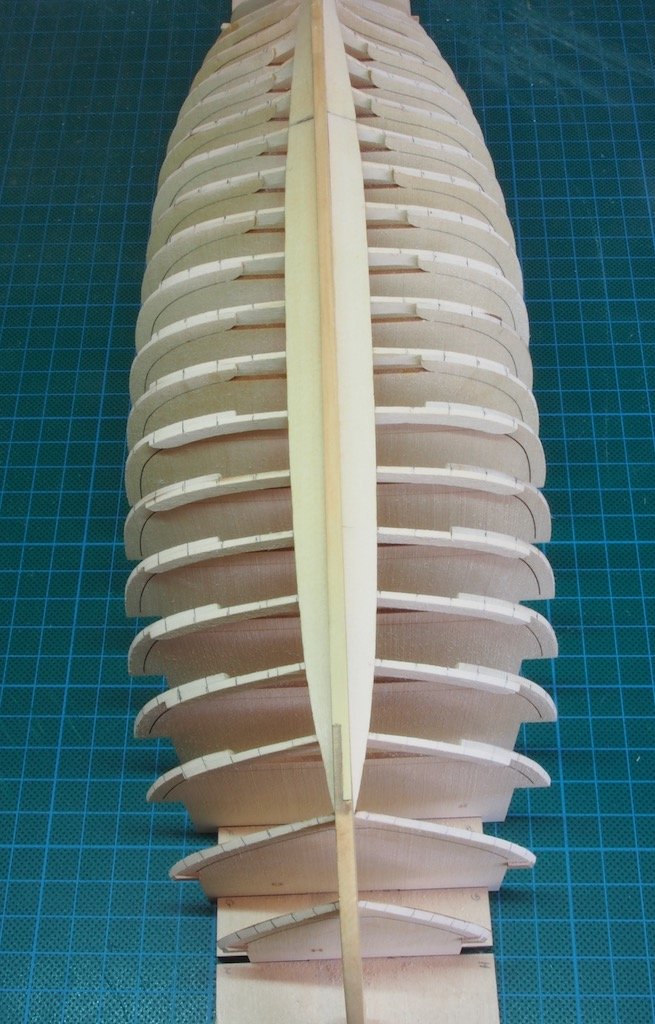
It has been six months since this log was last updated. It seems that the usual culprits of work, life and other projects and priorities have conspired against making progress. I did at last return to the build last weekend, although did not update progress as there was nothing really to show. The frames have been permanently attached to the keel, and then faired ready for planking. I then lined off the hull following Chuck's excellent instructions. Planking commenced with the Garboard strake, per the instructions. A small travel iron was used to provide the twist and bend required for these strakes. I cut one of the aft sections too short and so had to cut a new plank – no problem thanks to the extra material provided and the laser cut outline providing the template for the new plank. Then, when attempting to place the second (forward) plank, I discovered I’d made the new aft one too narrow. Fortunately, I'd used PVA rather than CA (which I have an allergic reaction to), so out with the isopropyl alcohol and off it came. Third time is the charm as they say, and so it was. Both Garboard planks on both sides now fitted. Hopefully it won't be another six months before the next update!
- 109 replies
-
- 11
-
-
- medway longboat
- Syren Ship Model Company
- (and 1 more)
-
Congratulations Ben - lovely work, as we’ve come to expect from you!
-
Excellent work Daria. You sure are showing Dad how it should be done!
-
Looking forward to following another “Danny Special” 😀
-
Great videos Chuck! They may have been a pain to produce but they are absolute gold. Thank you for taking the time to do this for the community - I know that many, many people will benefit from this demonstration. If a picture tells a thousand words, then how much does a video tell? Well done, Sir!
-
Dust port - hoover connector
gjdale replied to Matrim's topic in Modeling tools and Workshop Equipment
I found this in the local hardware store for AUD $9.98. It’s a reasonably soft rubber and you just cut the section to fit both the dust post on the saw and the vaccum hose. I use a Festool CTL 26 and it works like a charm.
-
Welcome home Sherry. The violin is an outstanding piece of workmanship - I’m sure your daughter is delighted and you can be justifiably proud. Now, get back to work! 😉
-
I guess this officially makes you a “rivet counter” Danny! 😀
-
Great to see you back at the bench Daria. Looks like you’ve got everything under control there - except Dad! 😉
-
Lovely work Bob - just what we have come to expect from you!
-
Sorry to hear of your health problems Ryland, but glad to hear that you are on the road to recovery. The build is looking is looking lovely.
- 263 replies
-
- 2
-
-
- Medway Longboat
- Syren Ship Model Company
- (and 1 more)
-
I can’t say it any better than Pat has Mark, so I’ll just add my support and best wishes through these troubled times. We’re here for you whenever you’re ready.
-
Congratulations on finishing a fine model - she looks superb on that display base - what a great idea!
- 366 replies
-
- 1
-
-
- granado
- caldercraft
- (and 1 more)
-
Congratulations Danny! No surprise to me, but nice to see you get the recognition you so thoroughly deserve.
-
Congratulations on completing a truly fine model Vince. You can be justifiably very proud of your achievement.
- 593 replies
-
- 2
-
-
- royal william
- euromodels
- (and 1 more)
-
For Landlubber Mike, Paul Budzik, who is an occasional contributor on this forum, has his own website and has produced a number of very useful videos about airbrushes (and other aspects of modelling), how they work, how to use them, and which one is right for you. The videos are really well done and worth a look. Here’s a link to his site: http://www.paulbudzik.com/tools-techniques/Airbrushing/airbrushing_for_modelers.html
-
https://www.harder-airbrush.eu/en/infinity.html
-
Thank you very much GrandpaPhil and Michael for your kind words.