gjdale
-
Posts
4,894 -
Joined
-
Last visited
Content Type
Profiles
Forums
Gallery
Events
Everything posted by gjdale
-
 Great to see you back Kevin and making some progress on your lovely Miss Vicky.
- 1,319 replies
-
- 1
-

-
- caldercraft
- Victory
- (and 1 more)
-
Thanks folks. Carl - I have no idea of the answer to that question. Perhaps one of our more knowledgeable brethren can answer that for us both.
- 456 replies
-
- 3
-
-
- finished
- bomb ketch
- (and 2 more)
-
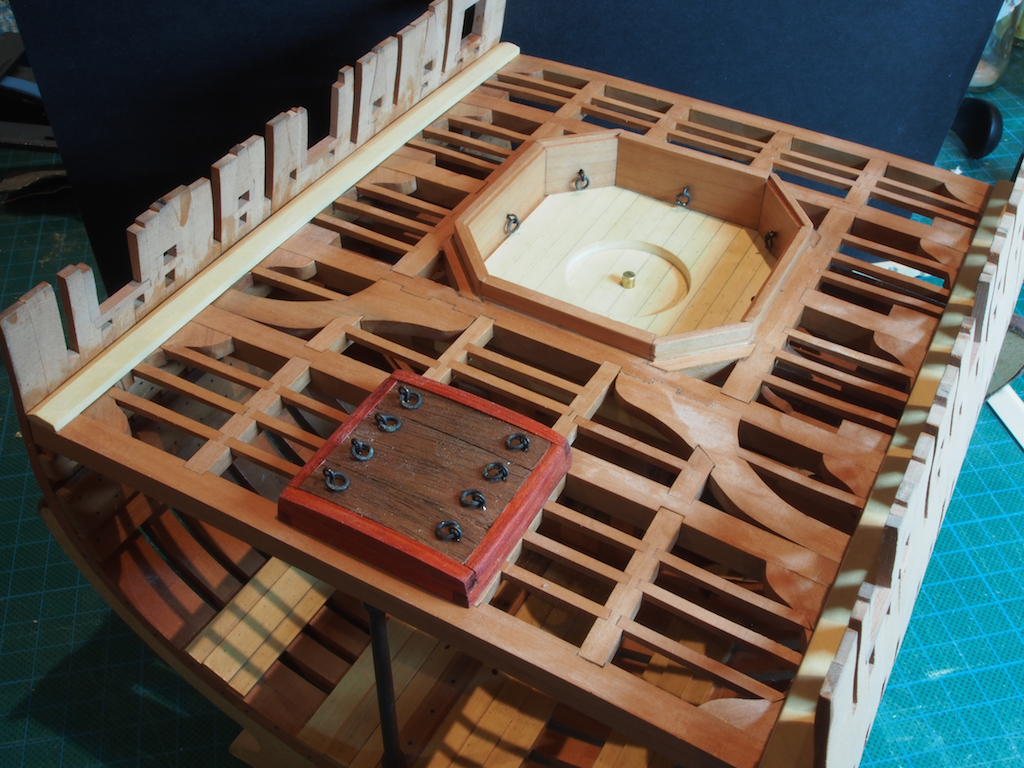
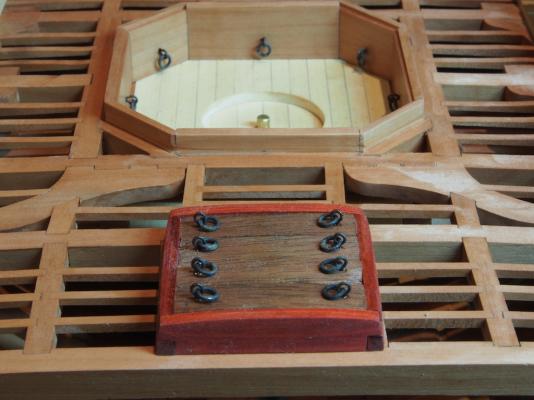
Thanks once again for all the kind words folks and to all those who hit the "like" button. The Main Hatch The main hatch was a fairly simple construction using Redheart for the Coamings and Head Ledges, and Walnut for the Hatch Cover Boards. Templates were made from the drawings to assist with the lap joints and round up. Once the timber components of the hatch had been completed, two coats of Wipe-On Poly were applied to the Hatch, the Mortar Pit Housing and the deck frames on the Starboard side (which will not be planked). Lifting rings for both Mortar Pit Housing and the Main Hatch were made from brass wire formed around a drill bit, cut off with a rotary cutting disc and then soldered closed (I cheated and used a lead/tin soft solder). These were blackened chemically using a new (for me) product called Jax Pewter Black. Its claim is that it blackens all sorts of metals, including solder. After a bit of experimentation, I settled on diluting the solution 50/50 with distilled water, and after the usual cleaning process with vinegar and acetone beforehand, it seems to work fairly well. The same process was used to install lifting rings in the mortar pit housing. The Waterways were next to be tackled. These are made from boxwood and have two angled faces on the top side, which are not even. I thought about how to mill these for quite some time. After a tip from Danny, I tried to follow his technique of making a scraper from an old exacto chisel blade. Although I managed to make a reasonable shape for one angle, I couldn’t get an edge on it sufficient to scrape the timber. After some more thought, I marked out the profile along the length of the timber, and then used a couple of very small planes – one Veritas squirrel tail palm plane, and one even smaller Japanese finger plane. These worked a treat and the job turned out to be much easier than I had expected. Here’s a couple of pictures showing the current state of play.

- 456 replies
-
- 20
-
-
- finished
- bomb ketch
- (and 2 more)
-
Nice to see another of your Woody Joe kits Clare. I like the look of these.
- 106 replies
-
- 1
-
-
- Japanese boat
- Wasen
- (and 2 more)
-
Lovely work Sherry and nice to see you back and posting again.
-
How would you improve your Byrnes tools?
gjdale replied to Keith_W's topic in Modeling tools and Workshop Equipment
Thanks Danny for the much needed guidance. Keith - sorry for hijacking your thread. Let's now resume normal programming. -
How would you improve your Byrnes tools?
gjdale replied to Keith_W's topic in Modeling tools and Workshop Equipment
Thanks guys, I also have Ken's book and I've had private correspondence with him before as well - he is a very helpful gentleman as well as an extraordinarily talented modeller. I was thinking of using aluminium for the splinter, but I guess copper or brass would work equally well and as you say is readily available in a number of thicknesses. -
How would you improve your Byrnes tools?
gjdale replied to Keith_W's topic in Modeling tools and Workshop Equipment
Richard, Good questions - to which I have no answers! I might have mentioned that I am not an engineer , and I have very little experience in soldering. My plan was to experiment and see what worked. My current thinking is that it doesn't need to be terribly strong as it shouldn't be taking a lot of direct force. I envisage that most of the soldering would be from underneath so as not to impede the passage of the timber. I would be most grateful for any advice from more experienced/qualified folks here. -
How would you improve your Byrnes tools?
gjdale replied to Keith_W's topic in Modeling tools and Workshop Equipment
Thanks Markus, That makes sense. I was thinking of trying to use an all aluminium version, with the splitter soldered in place. I might still give that a go, just to see how it works. If it doesn't, you've already proved that a wooden version does work. -
How would you improve your Byrnes tools?
gjdale replied to Keith_W's topic in Modeling tools and Workshop Equipment
Thanks for posting th extra info on your splitters Markus - that's next on my "to-do" list. Any reason you couldn't use a "stock" aluminium zero clearance plate to start with? -
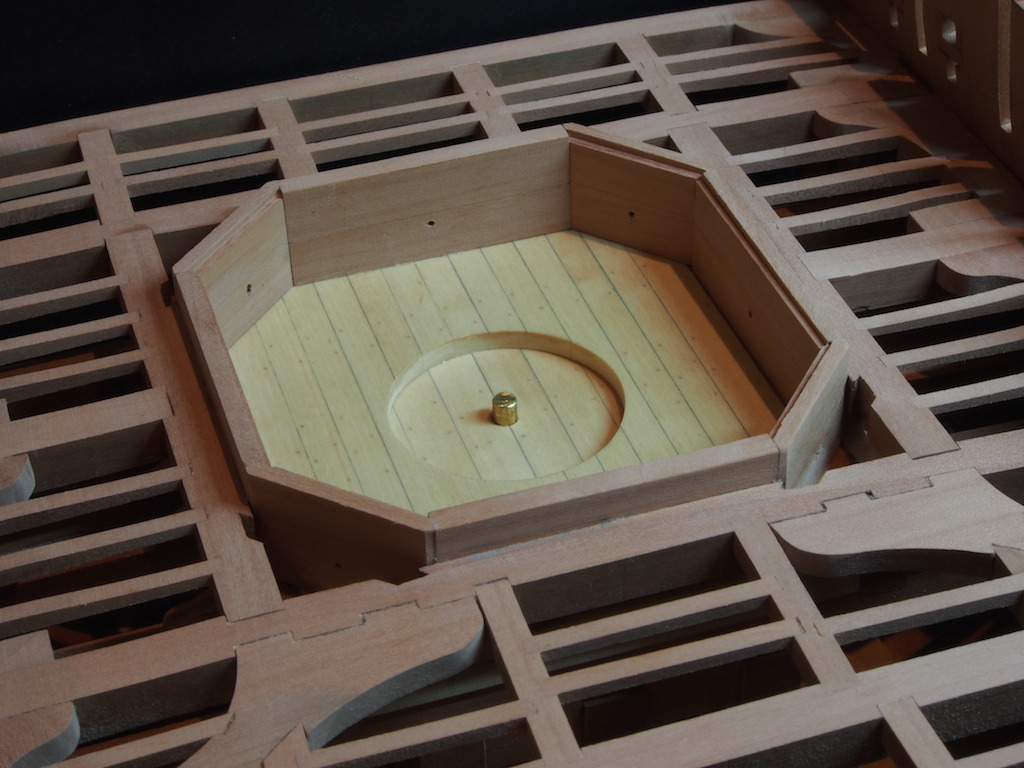
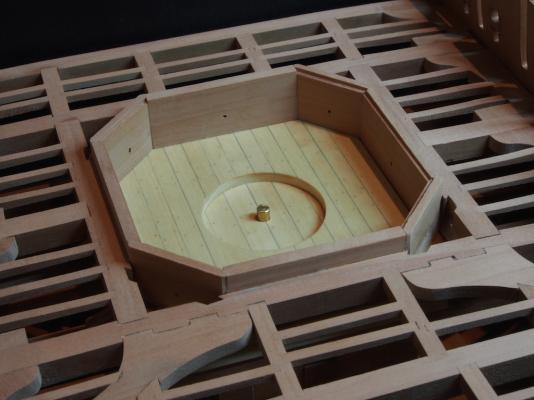
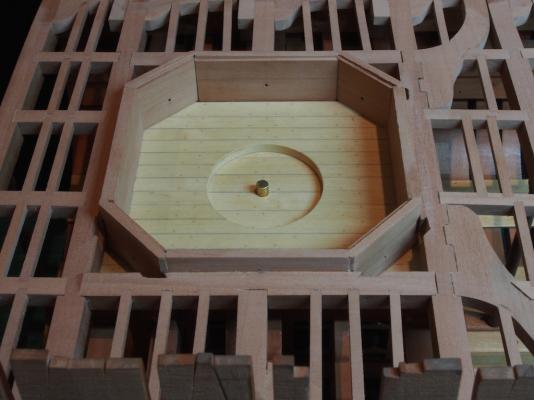
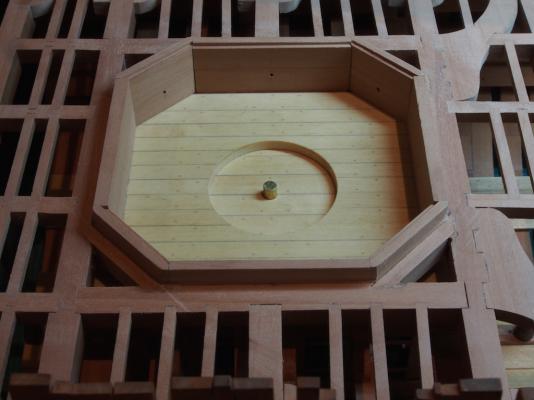
Thanks everyone for the kind words and also to all of the likes. Progress continues at a glacial pace, but I'm slowly catching up to Mobbsie (albeit that will only be a temporary state of affairs!). Mortar Pit Housing Construction of the Mortar Pit Housing is relatively straight forward, once you get your head around the angles involved. Although the corner diagonal walls have two 45-degree faces, the faces need to be of different widths in order to align properly with the side/end walls. It only took me three attempts to work this out…… The other thing that became immediately obvious once I started to fit the Mortar Pit walls, was that the pre-cut notches in the surrounding beams (for the angled carlings), were very poorly cut and positioned. I decided to glue the Mortar Pit Housing in place and then adjust the notches to allow a proper fit of the carlings. This left some unsightly gaps, which I have filled with a mixture of sawdust and diluted PVA glue. The end result looks okay, but the lesson learned is that it would have been better to NOT pre-cut the notches for the angled carlings. It was not as difficult as might be imagined to cut them in-situ (with a sharp chisel) once the mortar pit housing was in place.
- 456 replies
-
- 18
-
-
- finished
- bomb ketch
- (and 2 more)
-
How would you improve your Byrnes tools?
gjdale replied to Keith_W's topic in Modeling tools and Workshop Equipment
Keith, Good idea for the thread. Like Nobotch, I've made a few of my own mods to the saw. A half length fence would be a good addition, but the thin ripping guide is also a good alternative - both easy to make, but an aftermarket option would be nice. As noted by Nobotch above, the fence only requires two screws to be removed to take the whole thing off - four additional screws to remove/insert the high fence. I do agree that a riving knife or splitter would be a nice addition - still contemplating making my own for these to match the more commonly used blade sizes. I would like to see a video, or pictorial instruction booklet for using the tilting angle table. I'm not smart enough to work this out properly - yet. I'm sure it's really easy, but I'm equally sure I'm not the only one............ I totally agree re changing paper on the disc sander. I overcame this by using some Proxxon stuff. They offer a silicone sheet that goes onto the metal face plate, and then their own sanding sheets stick to the silicon sheet. They work well and are easy to remove/replace. Proxxon also provides a separate silicon backing sheet to temporarily store used sheets when changing grits. The silicone sheet is only sold in the size for their larger sander (250mm), but you can cut two pieces from one sheet for the Byrnes machine. Sanding sheets are offered in th smaller size (125mm) which is a very close match to the Byrnes machine. I've been using this system for a little while now and it works well - a few seconds to change paper now instead of at least 30 minutes. Again, would be nice to have some "made to measure" for the Byrnes machine. -
Wonderful job on the windows Nigel.
-
Great stuff Harvey! I like your Cutters - very neat planking job. No one would know they are card, which is just another form of wood anyway isn't it? I definitely don't consider that "cheating" - more "ingenious", and "creative" I would say.
-
Very nicely done on the planking Mark. Can't wait to see your laser cutting results.
-
Sorry to hear you've needed radiotherapy Harvey, but glad the boats have been a welcome distraction for you.
-
Nice to see you back at it Remco. Lovely work, as always!
- 1,215 replies
-
- 1
-
-
- sloop
- kingfisher
- (and 1 more)
-
Wow! They look great Harvey - well done Sir!
-
Missing parts Mamoli HMS Victory (moved by admin)
gjdale replied to John Allen's topic in Wood ship model kits
John, The top of the skylight has 4 rows of 8 panes each. The sides have 1 row of 7 panes each, and the ends have 1 row of 3 panes each. -
You could use a drop of glue to simulate the rivets Jay. You could even add colour to the glue before applying. I've seen this technique used to great effect.
- 572 replies
-
- 2
-
-
- constitution
- frigate
- (and 1 more)
-
Missing parts Mamoli HMS Victory (moved by admin)
gjdale replied to John Allen's topic in Wood ship model kits
Nice to see some pictures there John. I agree with you about the skylight. If you're going to rebuild it, you may wish to have a close look at some source photos to check the number of panes on the roof, sides and ends. I can provide you with some photos if you need/want them. Interestingly, it was re-building the skylight that marked my own entry to MSW 1.0 - so it's definitely not too late to start a build log (hint, hint). -
ROYAL CAROLINE 1749 by Doris - 1:40 - CARD
gjdale replied to DORIS's topic in - Build logs for subjects built 1501 - 1750
Simply wonderful Doris. Just stunning work all round. Thank you so much for sharing your talent with us.- 883 replies
-
- 2
-
-
- royal caroline
- ship of the line
- (and 1 more)
-
Missing parts Mamoli HMS Victory (moved by admin)
gjdale replied to John Allen's topic in Wood ship model kits
Don't know if it's just me John, but I'm not seeing the pics - only the file names. And yes, a flogging followed by a keel hauling is in order for not maintaining a build log!