


aliluke
-
Posts
1,358 -
Joined
-
Last visited
Content Type
Profiles
Forums
Gallery
Events
Posts posted by aliluke
-
-
Hi
Just found your log. What you are doing with this model is great - I really like the rail to transom mods that you've done. I've just ordered the kit and now I need to find a copy of the AOTS for Alert - that's not easy...
I use epoxy glues a lot. By far the best I've come across is Epiglass Epiglue but it doesn't cure in 5 minutes - more like 24 hours.
Cheers
A
- Obormotov and Thukydides
-
 2
2
-
Hi Whitejamest
Just found your Speedy log after you replied to my copper treatment post.
I also intend to try out a couple of VM boats for my Fly. Your work is exceptionally good on the yawl and on Speedy itself! I will follow along from now on.
Cheers
A
-
I'm glad that my method has generated this discussion. I never thought of boiled eggs. I guess my urine trick allows some control for a large area as it is brush on and you can re-visit areas that haven't worked. Plus it is free and something you otherwise flush away at all hours of the night apparently. I might try the egg method on some copper leaf that I plan to use for the belfry on my ships bell - that is a tiny bit that might be a little hard to pee on...
Cheers
Alistair
- thibaultron and mtaylor
-
2
-
Hi Ron
Following your message to me I caught up on your log for HMS Camilla. I'm not fond of dioramas or figures on ships but what you have done with both and all else blows me away. From the details to the sails to the swirling pennant and the deep blue sea is just extraordinary. I swallow my words. This is a ship in real seaborne flight - I love it and it is a work of art.
Cheers,
Alistair
- BobG, Jack12477, Ryland Craze and 1 other
-
4
-
Hi Ron
That coppering and the whole model looks really great. I'm sure we crossed paths here in the past!? I have returned to MSW after an eight hiatus as I pick up my HMS Fly build. If you which to age your copper quickly I recently posted my (dodgy but free) technique for doing that in the planking and plating section of the forum and in my rebooted HMS Fly log.
I don't think I'd ever have the guts or stamina to take on Victory but it is always great to watch those who do.
Cheers from a sunny and very still Wellington,
Alistair
- Ryland Craze and Mr Whippy
-
2
-
Hi Bob
No smell afterwards at all. I think the key component of pee is uric acid and this is what reacts with copper. I wouldn't go near ammonia for this...that would be much more scary. No blood in my urine - just weird colours in the photo. I found the morning pee was better than the late afternoon's - much more concentrated in the am! 😁 That might be related to pm's beer. 🙃
A
-
Hi
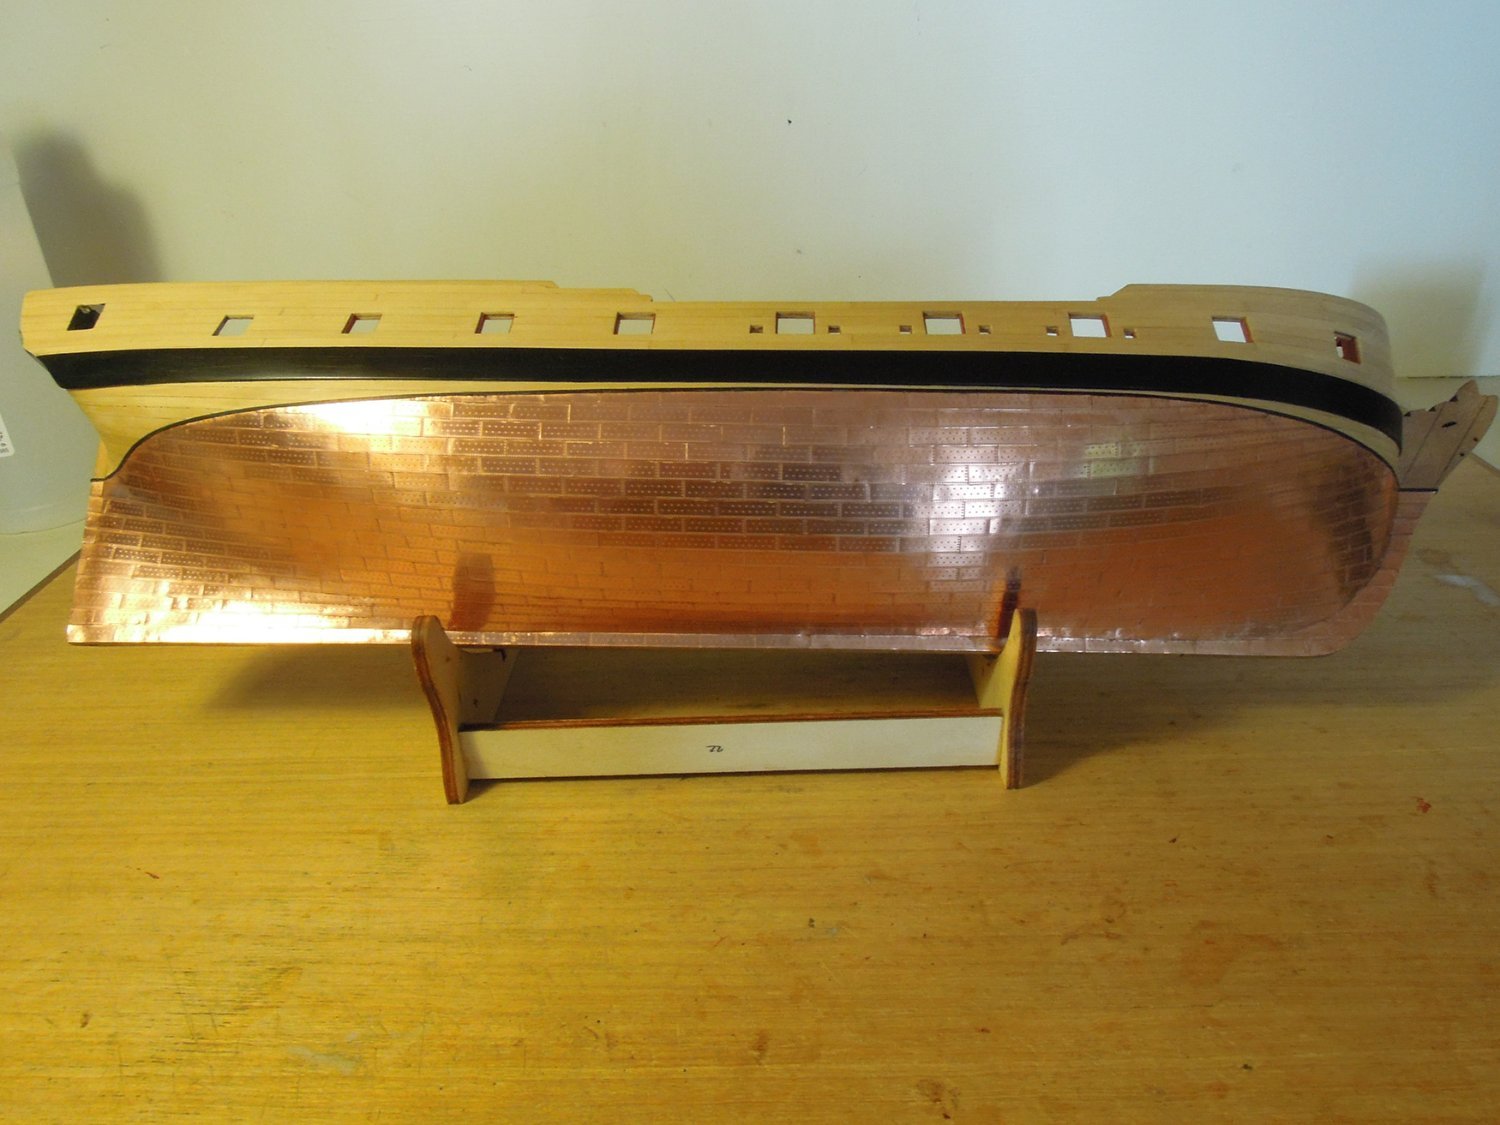
Another member suggested I post this here. Like you - presumably - bright copper on hull plates doesn't sit well to my eyes. But there is a way to age copper very quickly - in three days - if you have the nerve to do so. I offer this technique at your own risk. When I used it on my model of HMS Fly I had no idea if it might destroy all of my work to date. I tested it on some spare copper plates before embarking on the main experiment but it still felt risky.
Very bright copper plating when the install is complete. By itself it might take a year or two to tarnish. Why wait?

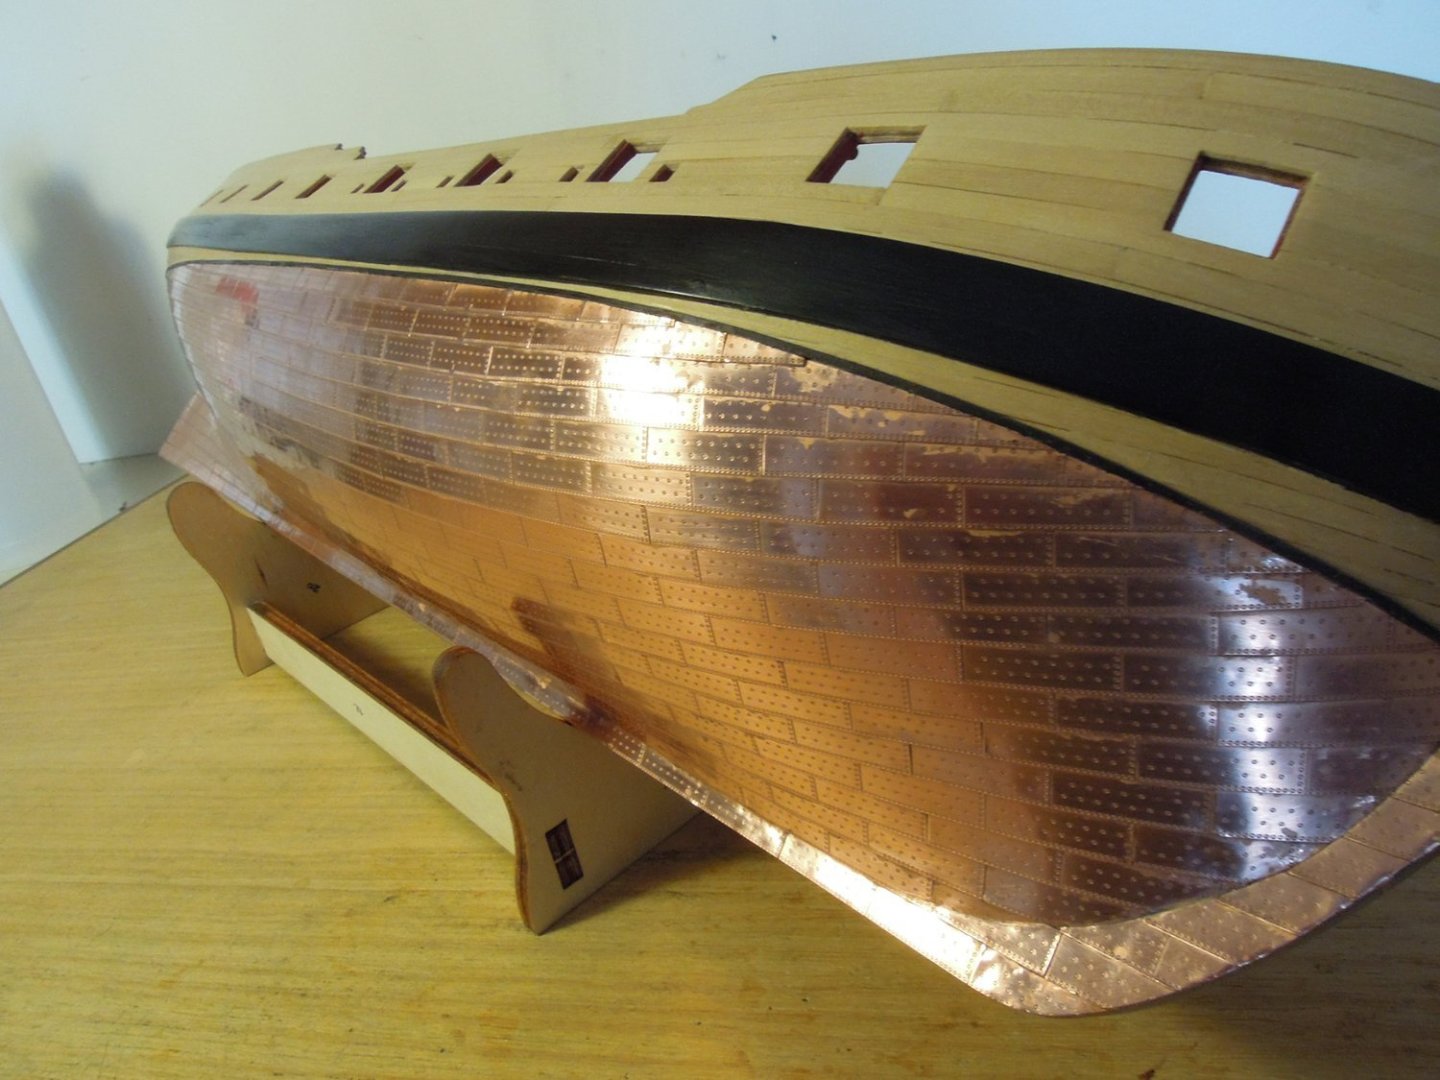

My wife who is an architect used to work on high end resorts in Bali. Many had copper roofs but the developers hated the shine. Solution? Paint them with horse urine (whose job that was I have no idea). The copper tarnishes very quickly. I don't own a horse and even if I did I wouldn't want to collect its pee but...I make urine too so decided it was worth a try. Not a pleasant smelling chemical although it's a smell that I'm kind of used to until I flush.

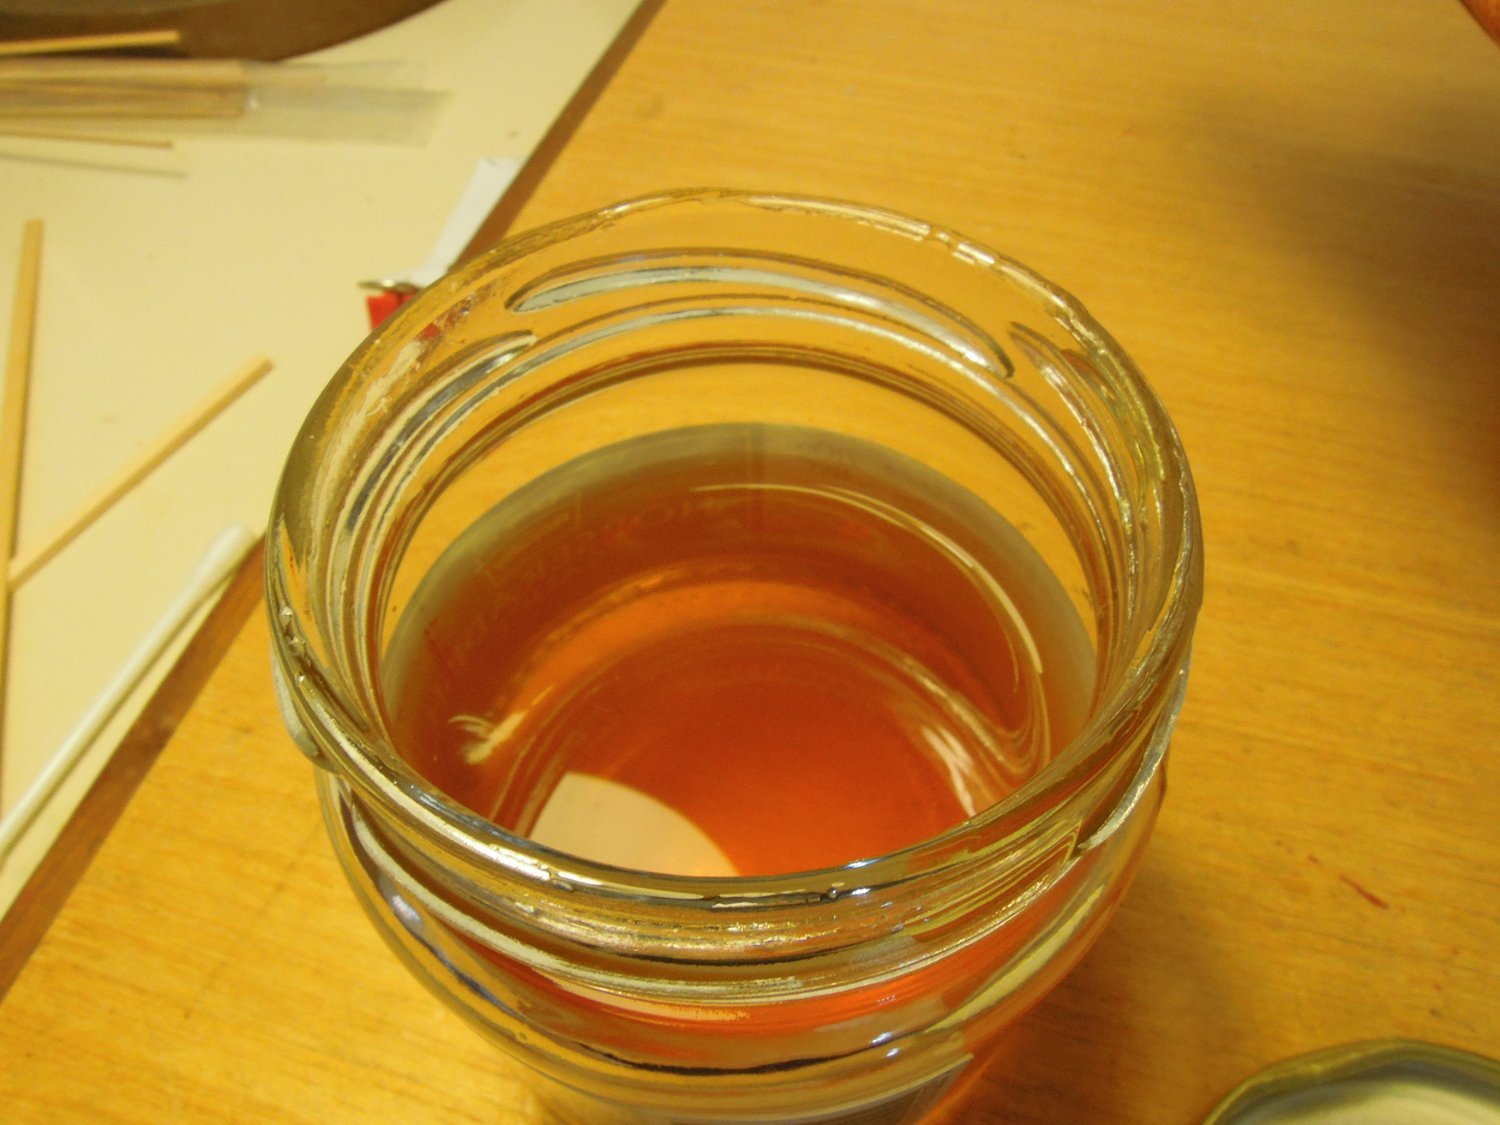
To ensure it didn't soak into the upper boxwood woodwork, or anything else., at first I did a very intense job of masking (I don't have a picture of that) but I found out that I didn't need it and it actually wicked my pee up into the woodwork which caused a panic. So I took off the masking. Then I brushed my urine onto the copper plates with fingers crossed. The reaction is very fast, in some areas it was almost instant. Some verdigris happened and then some spots of bright copper remained. You can wipe back the verdigris and the bright copper bits turned out to be CA glue residue which is easy to scrape off. Early applications. It tends to bead (first photo) and I just carefully spread it ot with a brush.
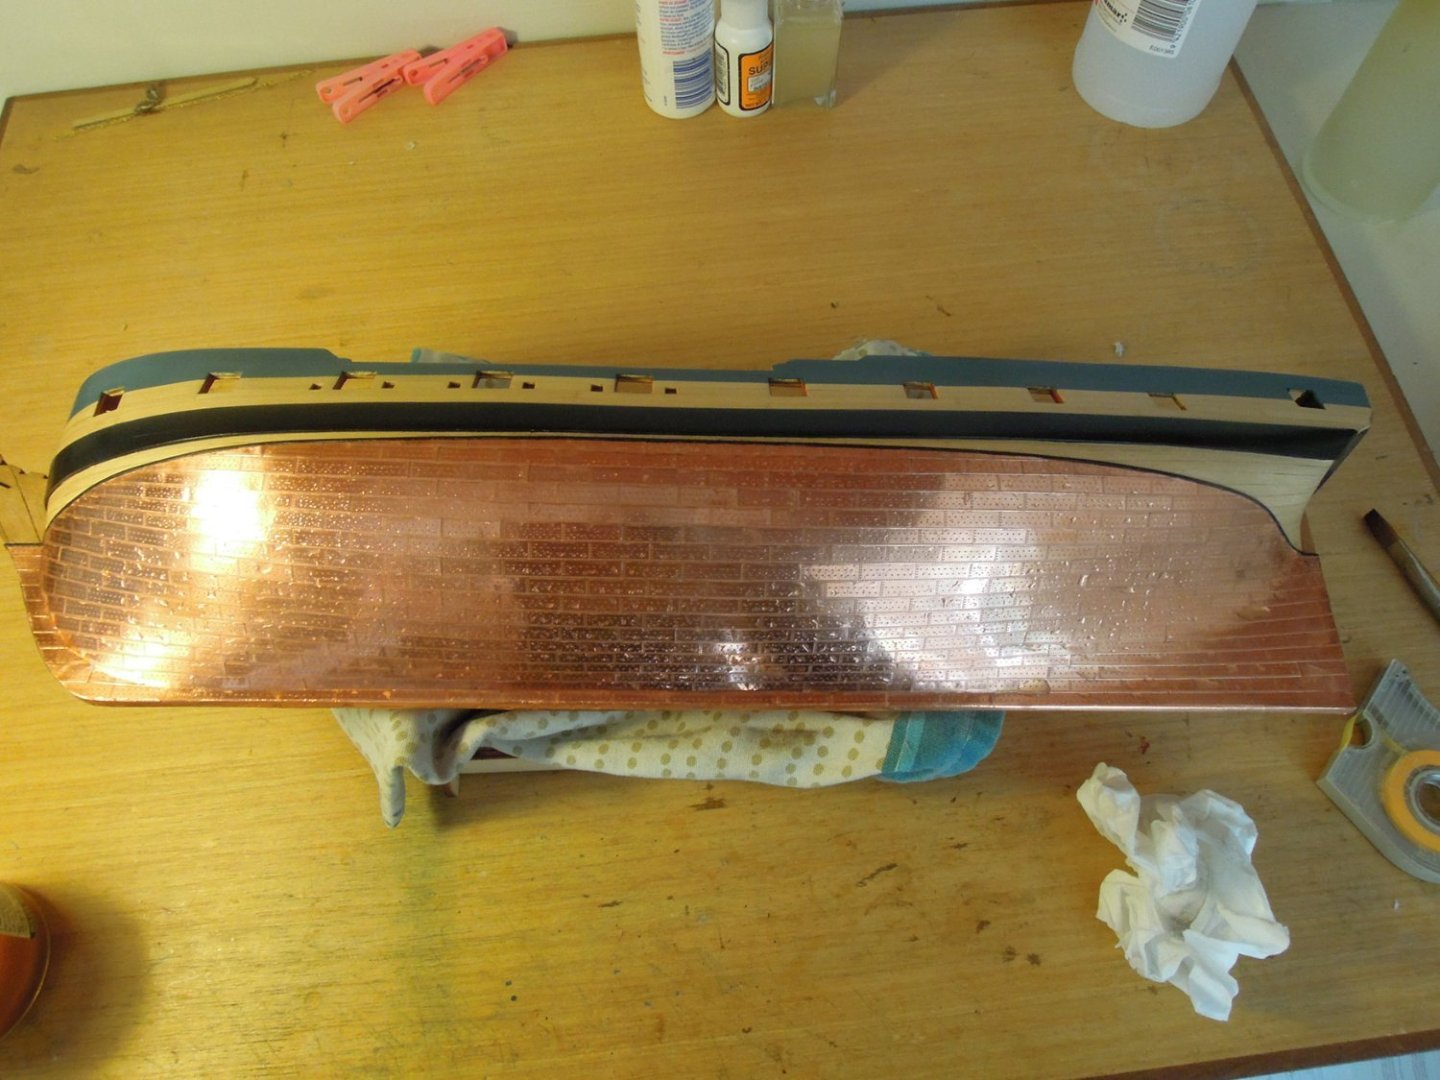
Verdigris kicking in on first application. You can also see the little bright spots where glue is covering the copper.
Second application. the copper is turning brown but more bright spots appear. Get rid of the glue.
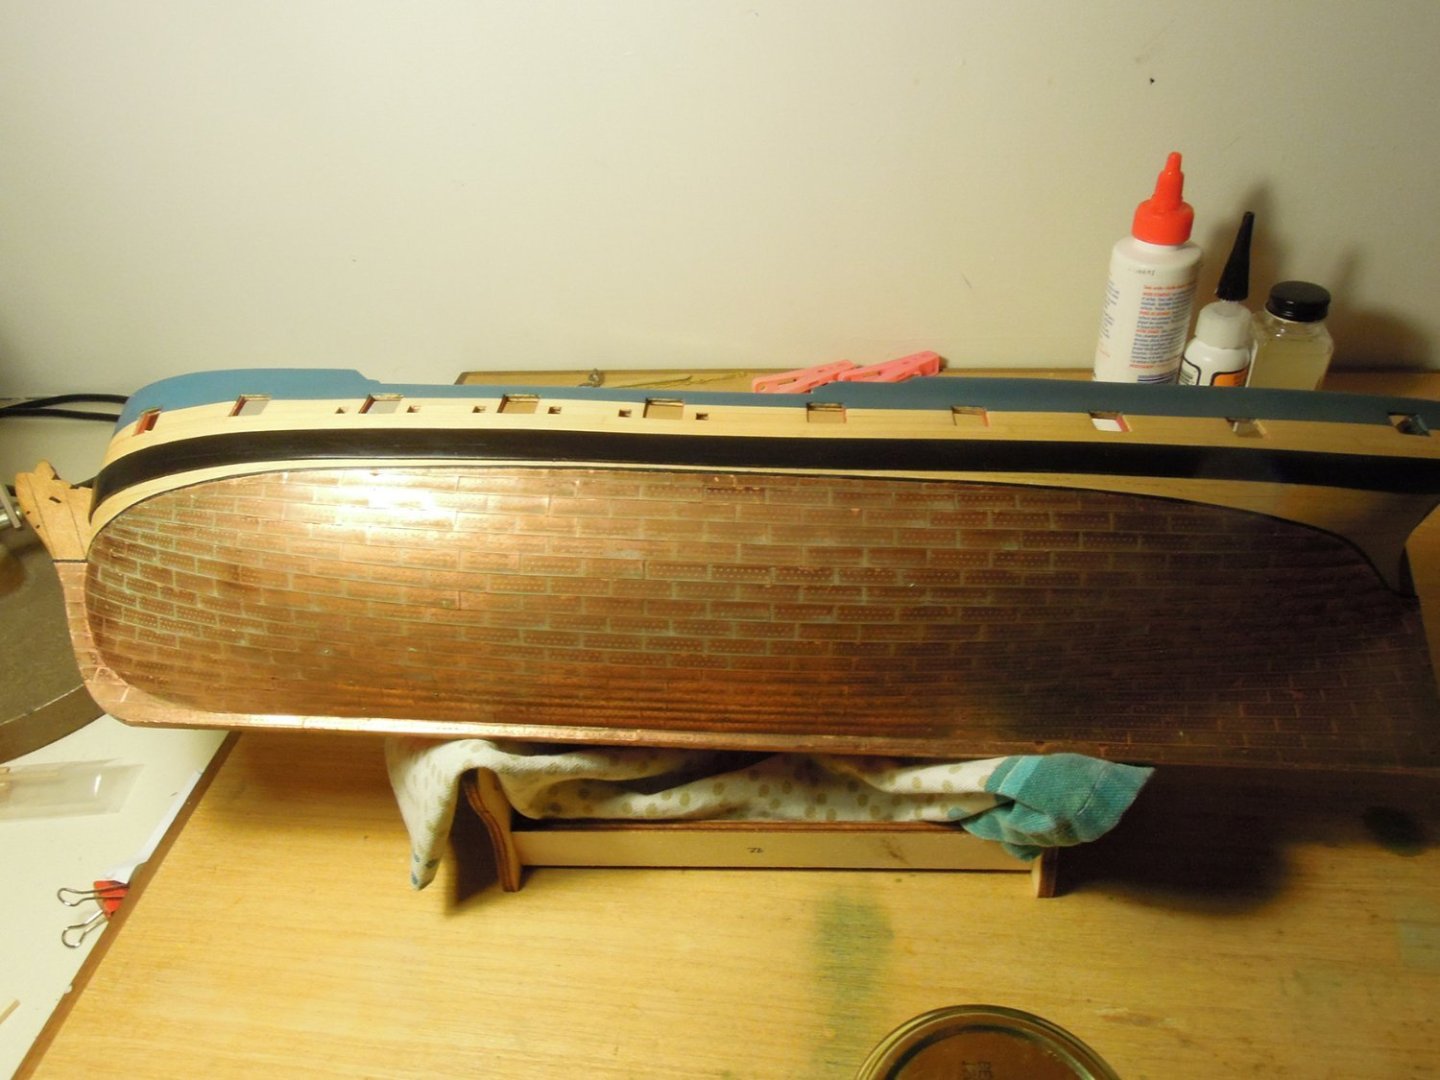
Applications continued - two per day which suited my bladder. Between coats I wiped it off with water before applying my urine. Still some bright spots to work on...
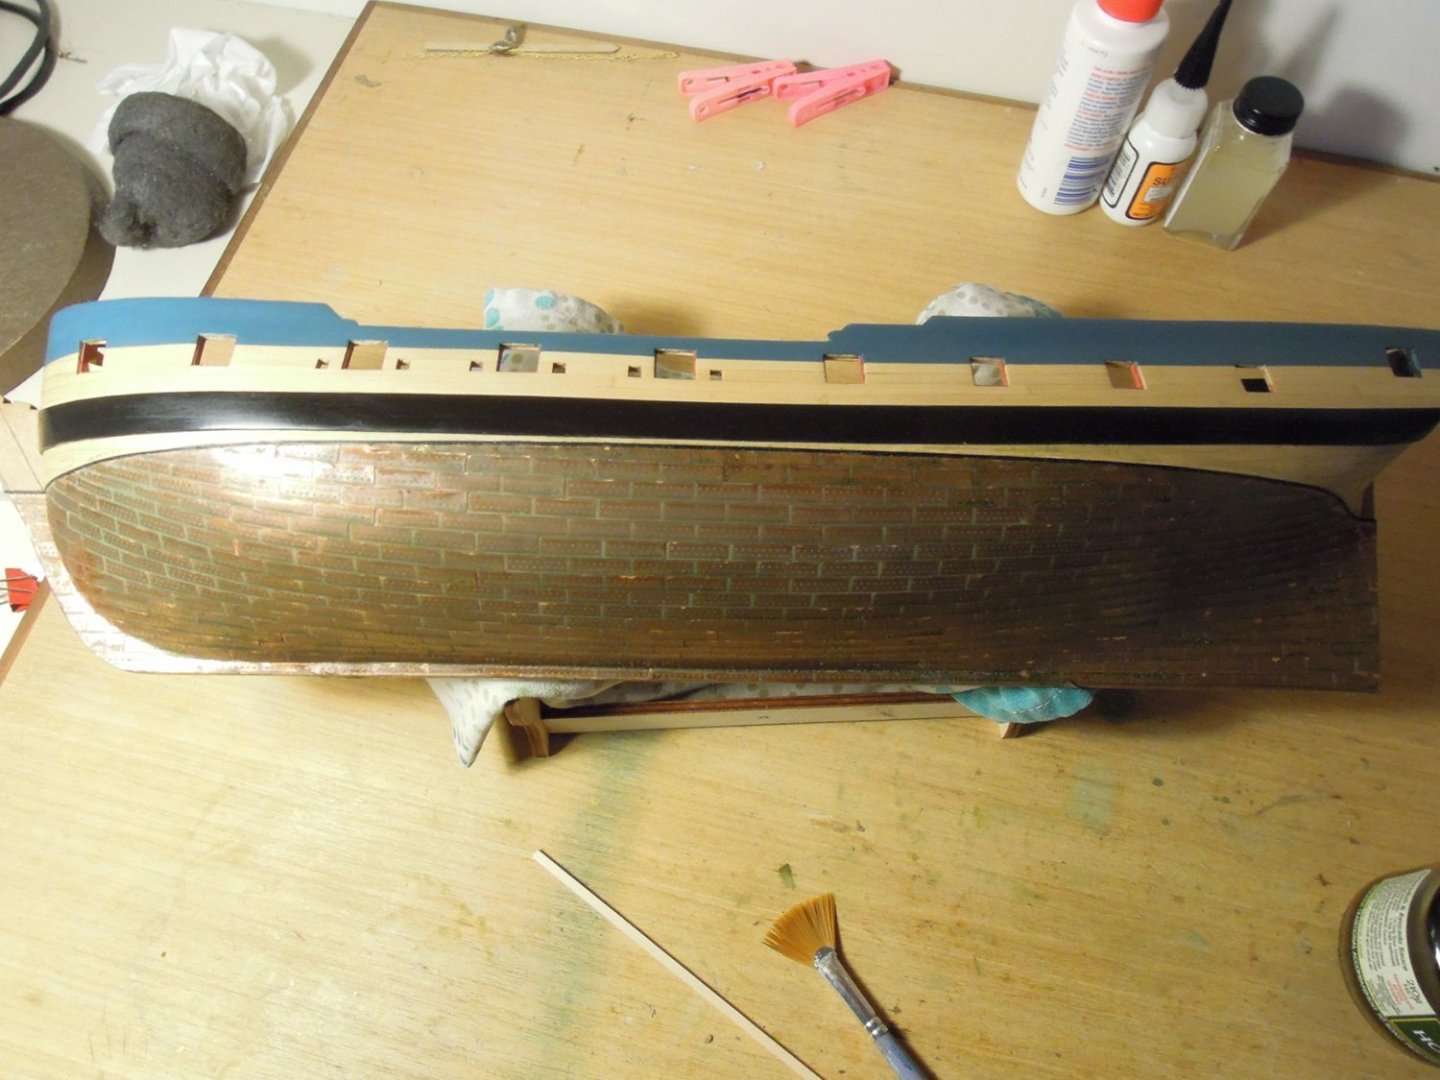
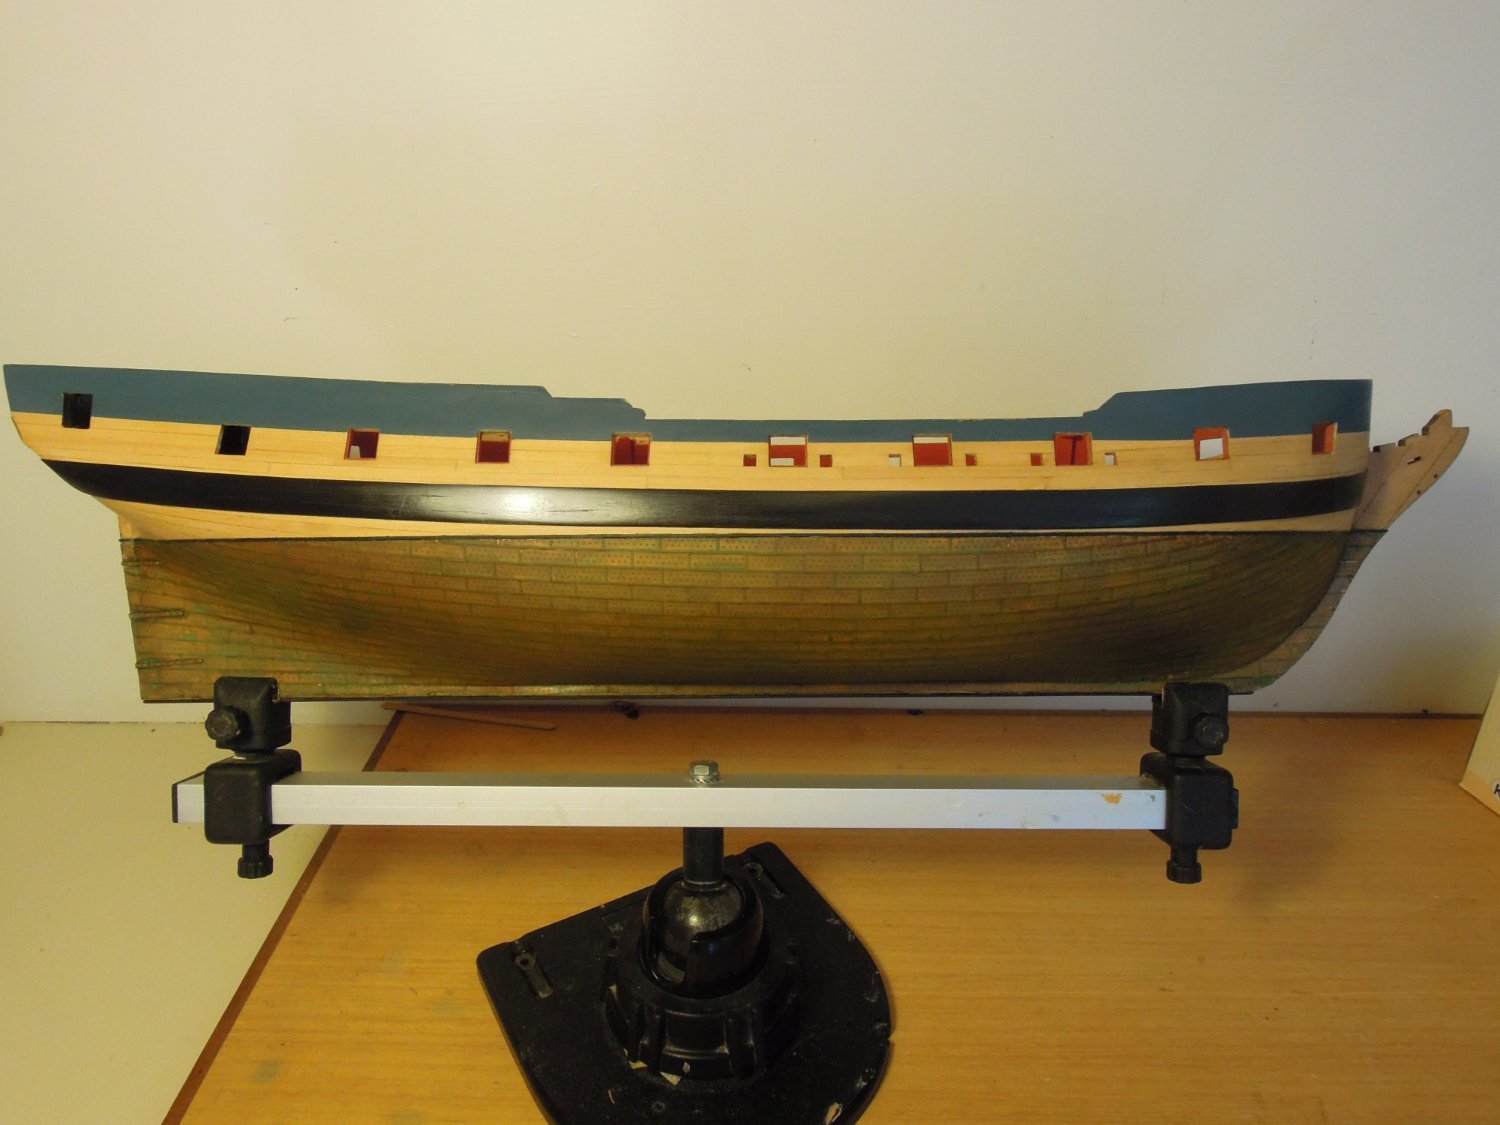
I was unsure if my urine would keep eating at the copper so I wiped all of it off with water and then sealed the copper with Testors Dullcote. End result after three days. Variable with some verdigris but I like the look. Eight years later it still looks the same.
Port:

Starboard:
Good luck if you want to try. It worked for me but no guarantees.
Cheers,
Alistair

-
Thanks B.E.
I always wanted to make the Revell kit of Snowberry. It is just the right scale and somehow a ship you might of imagined when you were a kid and reading The Adventures of Tintin - I don't know how to otherwise describe that feeling but I love being in rough seas, the sound of the propellers and the groans of a ship at sea. Bluebell feels like a ship...I might track down the Revell model.
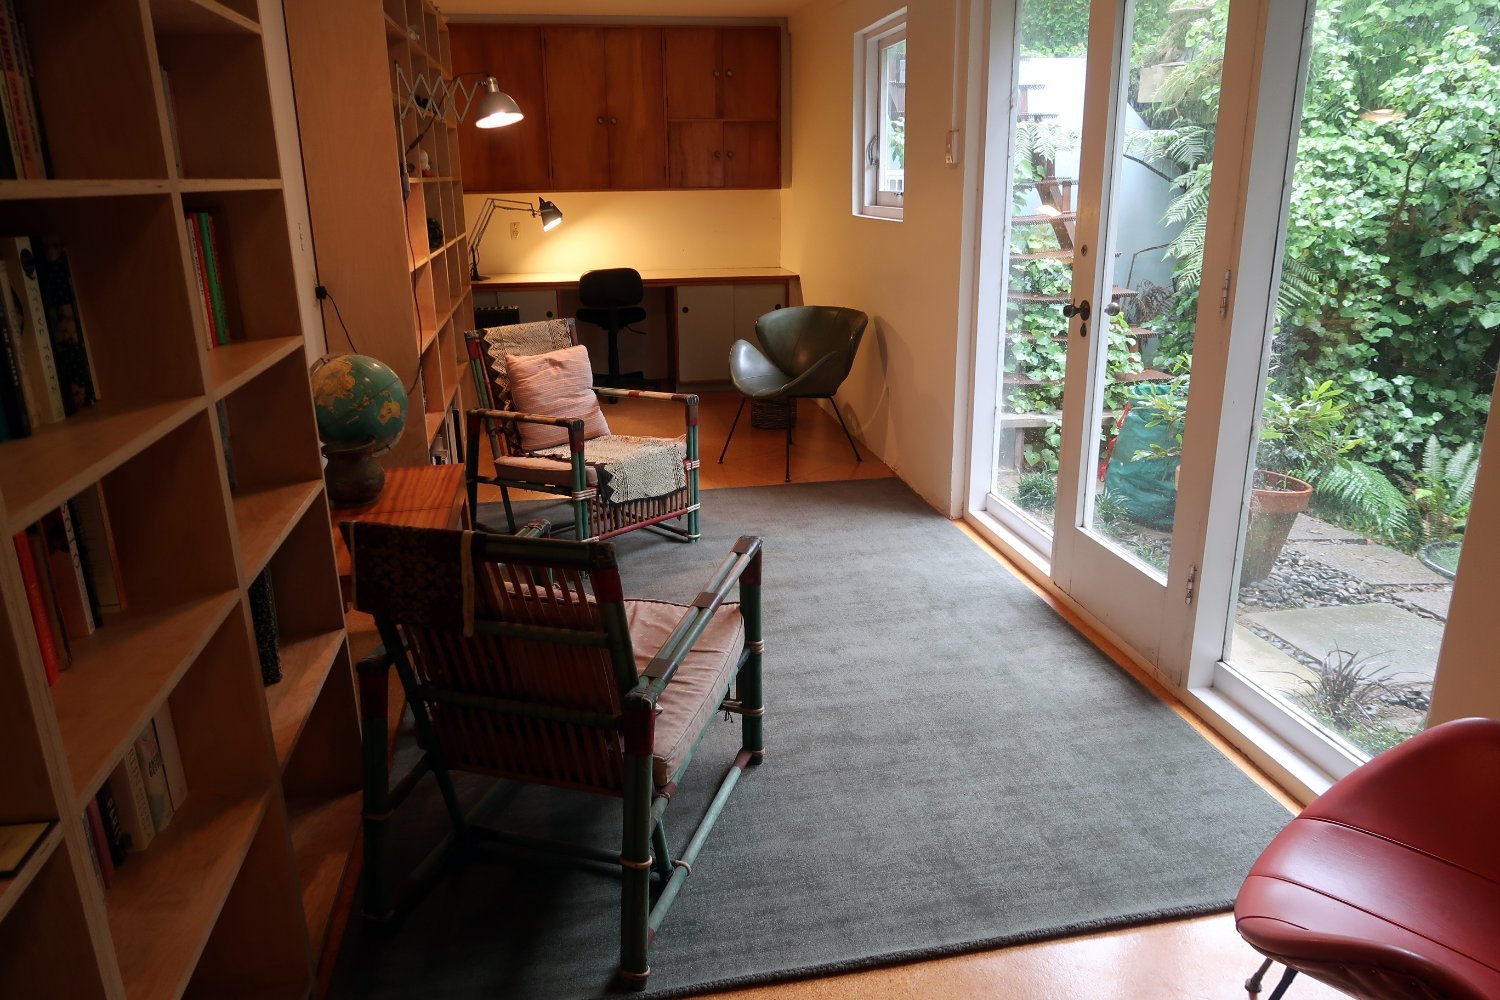
The anchor rig for Fly still baffles me but otherwise I think I have the next steps sorted out. I did a major clean out of my work space in the weekend - Fly plus everything else is in those overhead cupboards and I'm ready to get back into it.
Cheers,
A

- CiscoH and Ryland Craze
-
2
-
Continued...
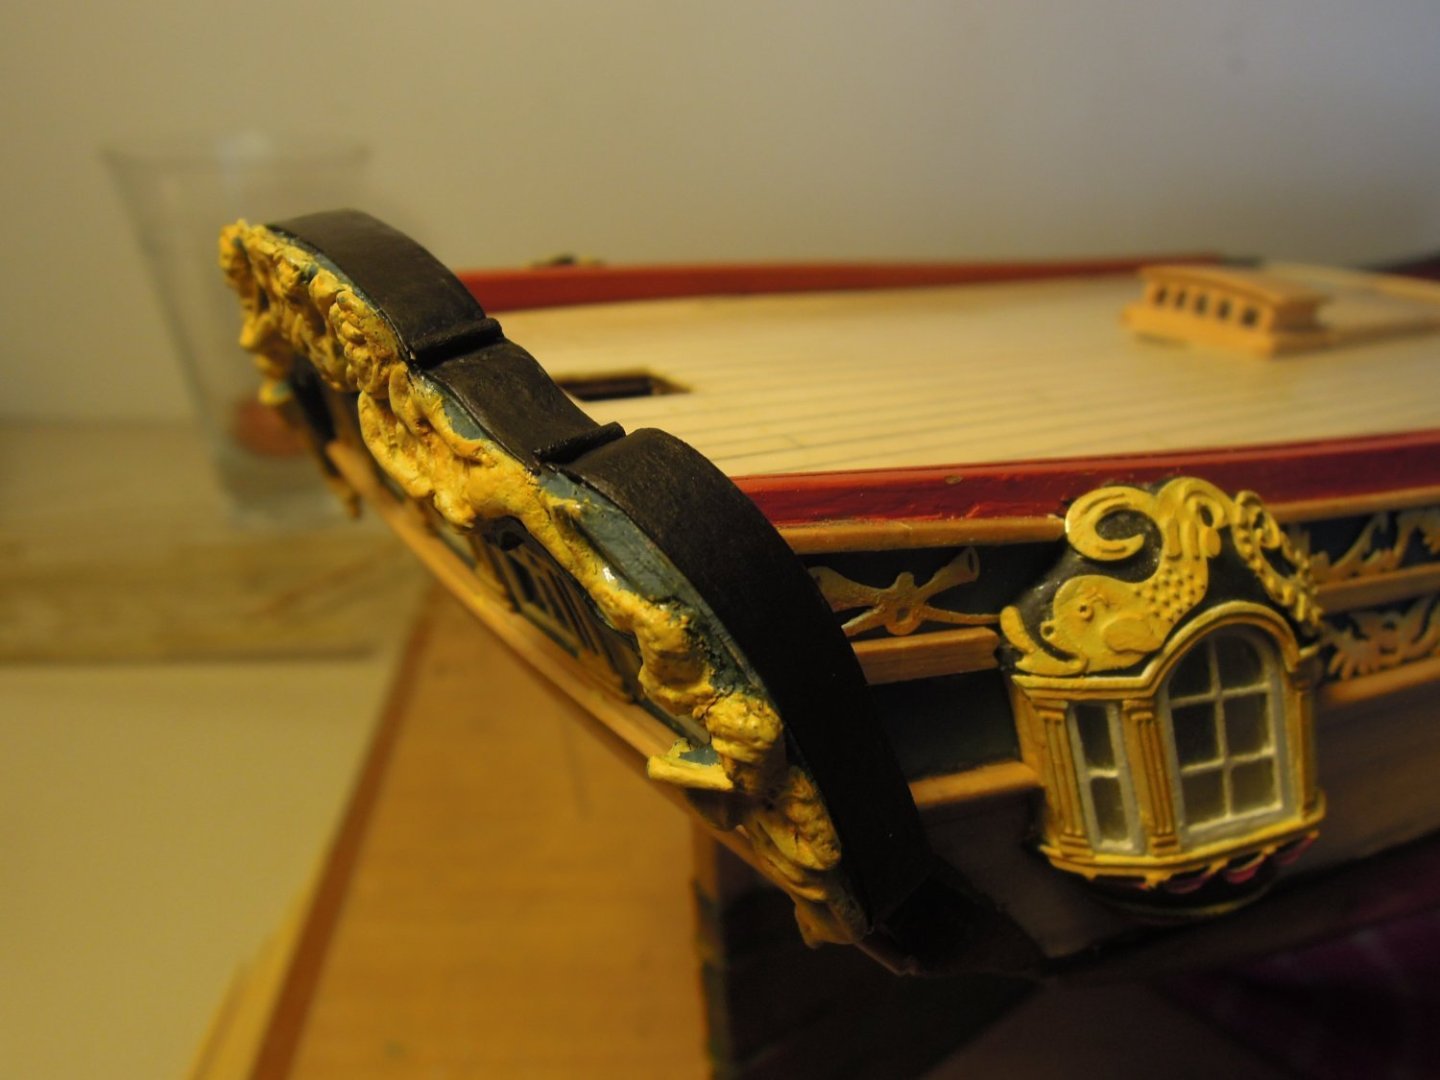
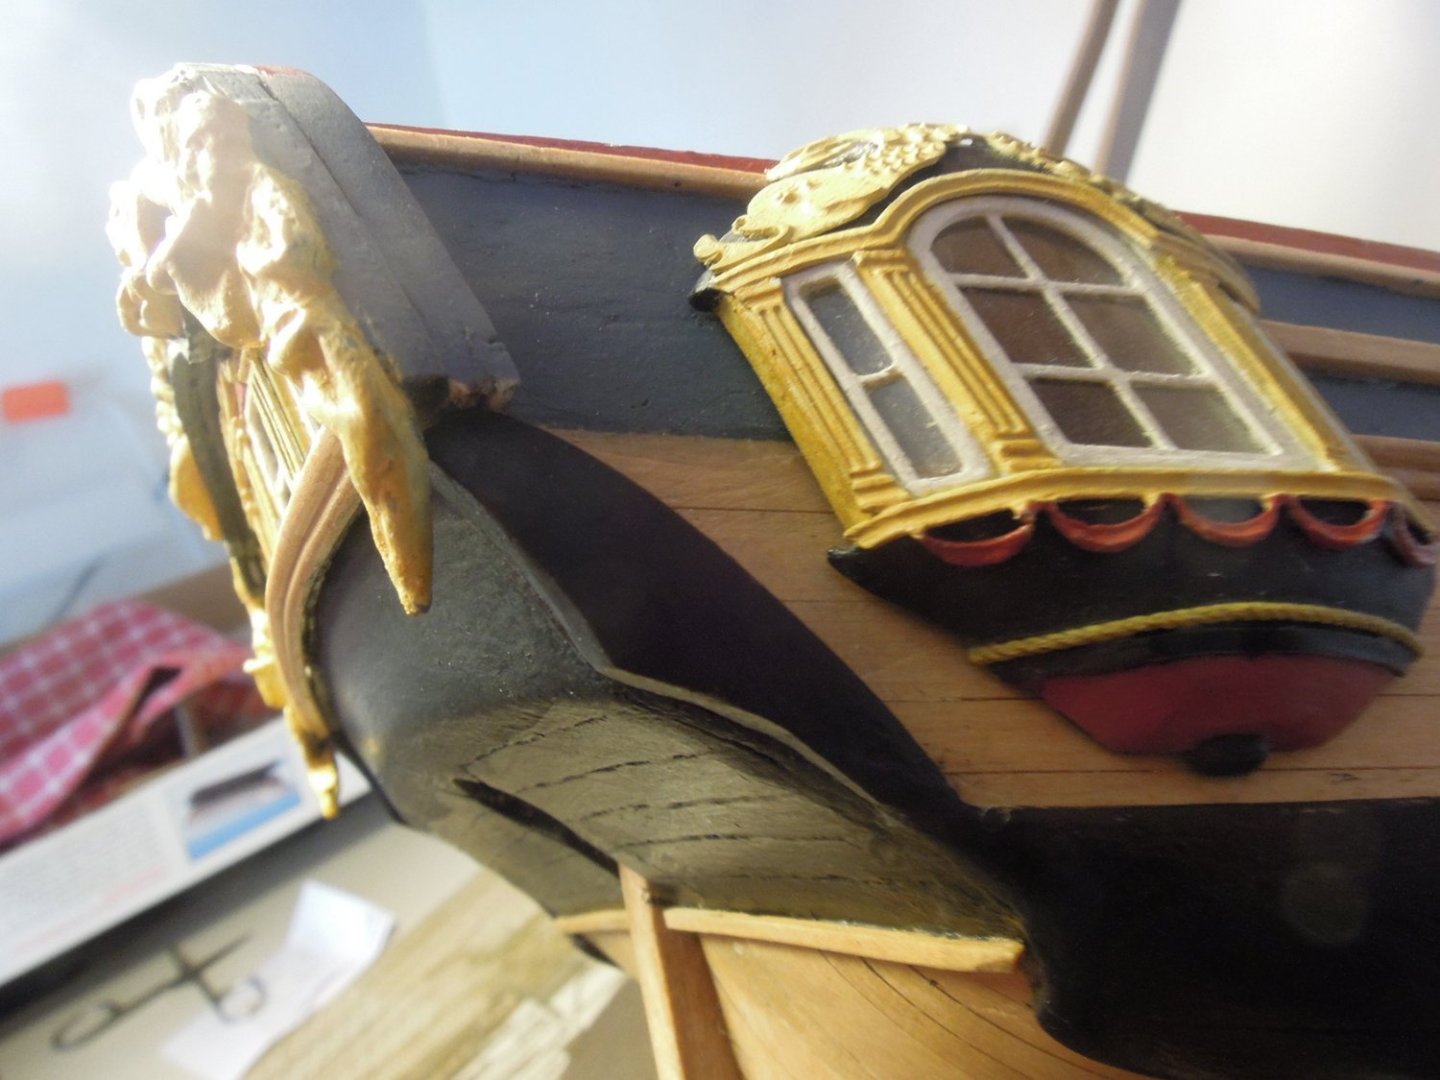
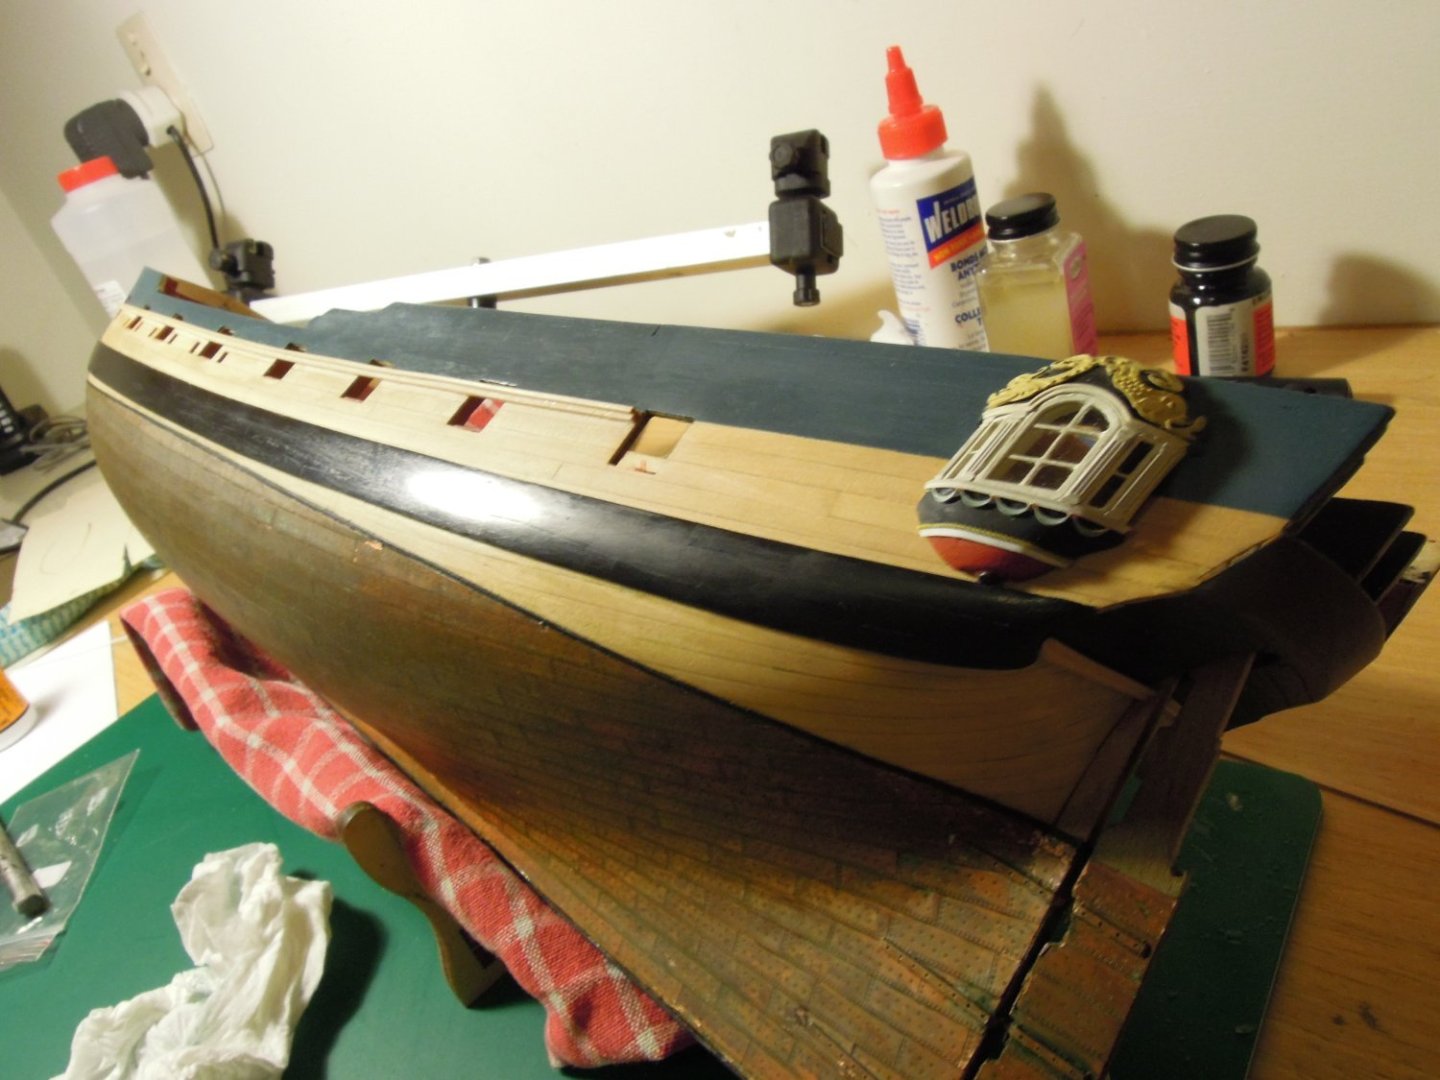
I wrapped the stern rail with a styrene strip and fixed the quarter badges. Started to fiddle with the brass friezes but i hate these parts and may delete them altogether - we'll see. If kept I'll rework the painting of them but they'll always look like planted on brass bits which annoy me...

Added the closed rear gun port. Not quite a match to the hull planking.

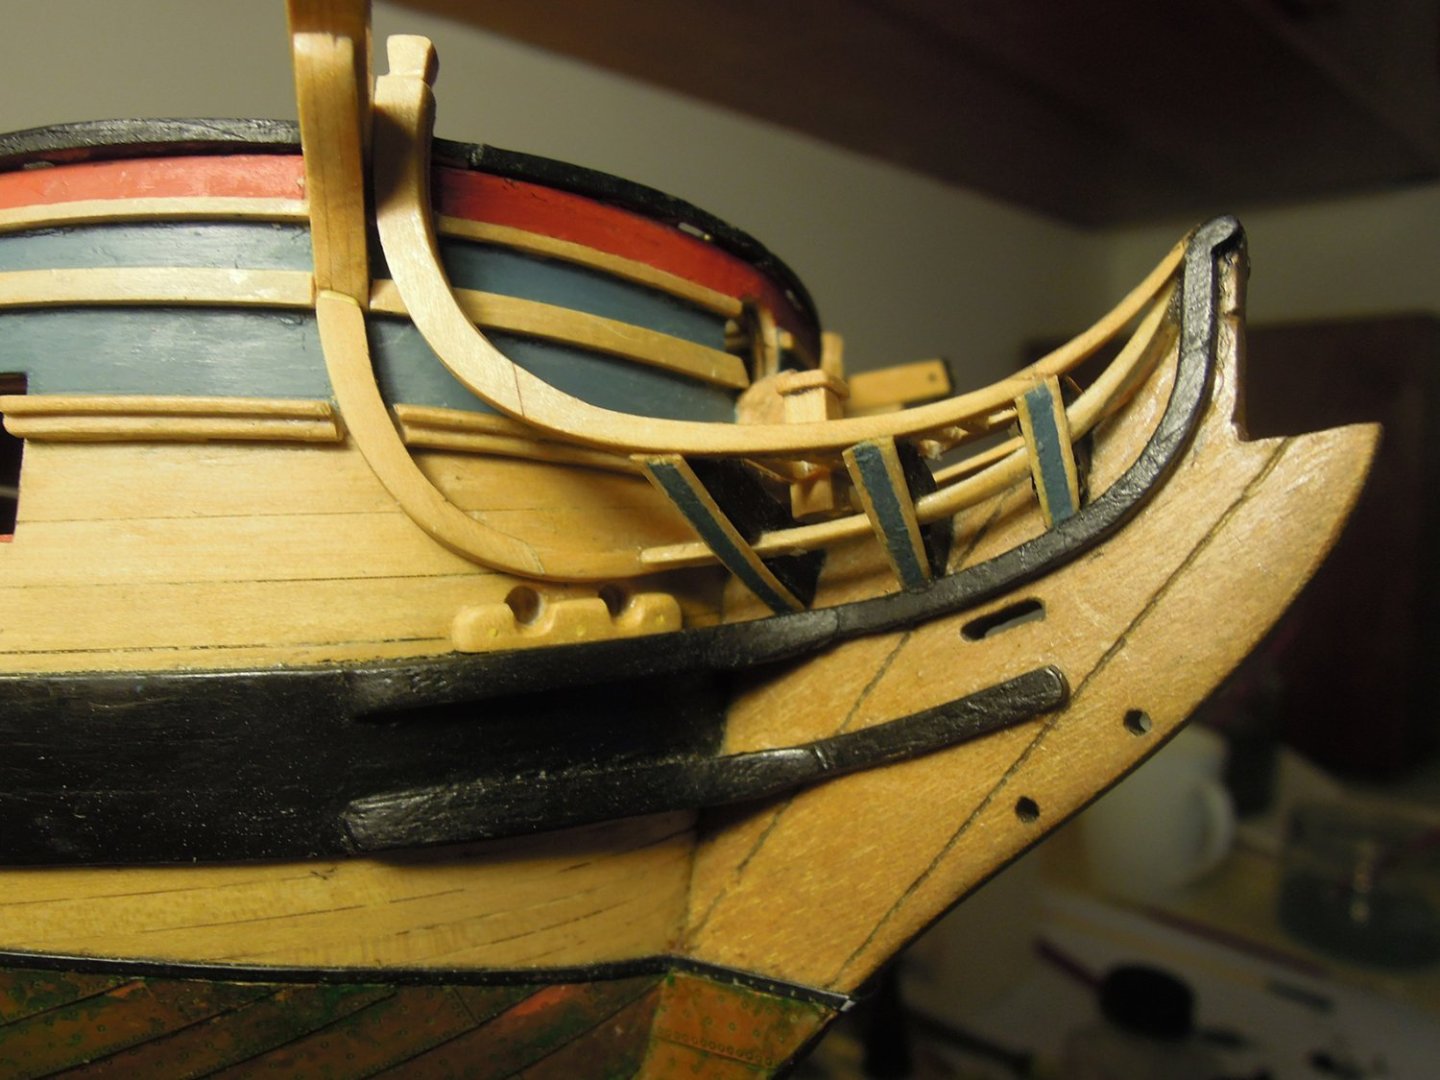
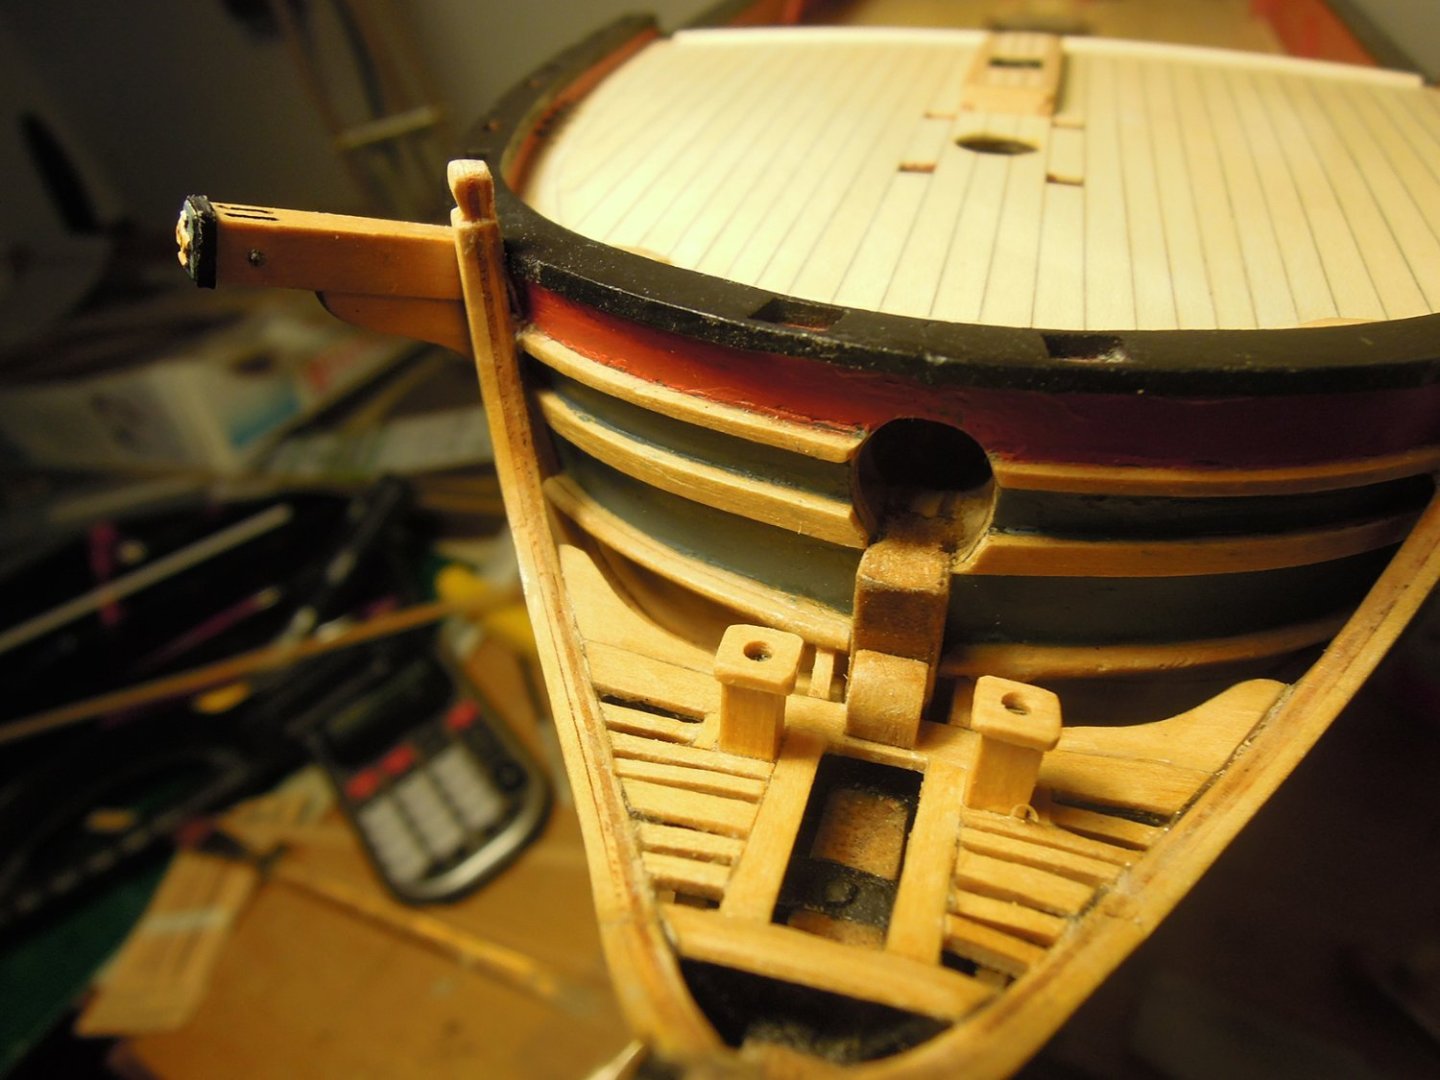
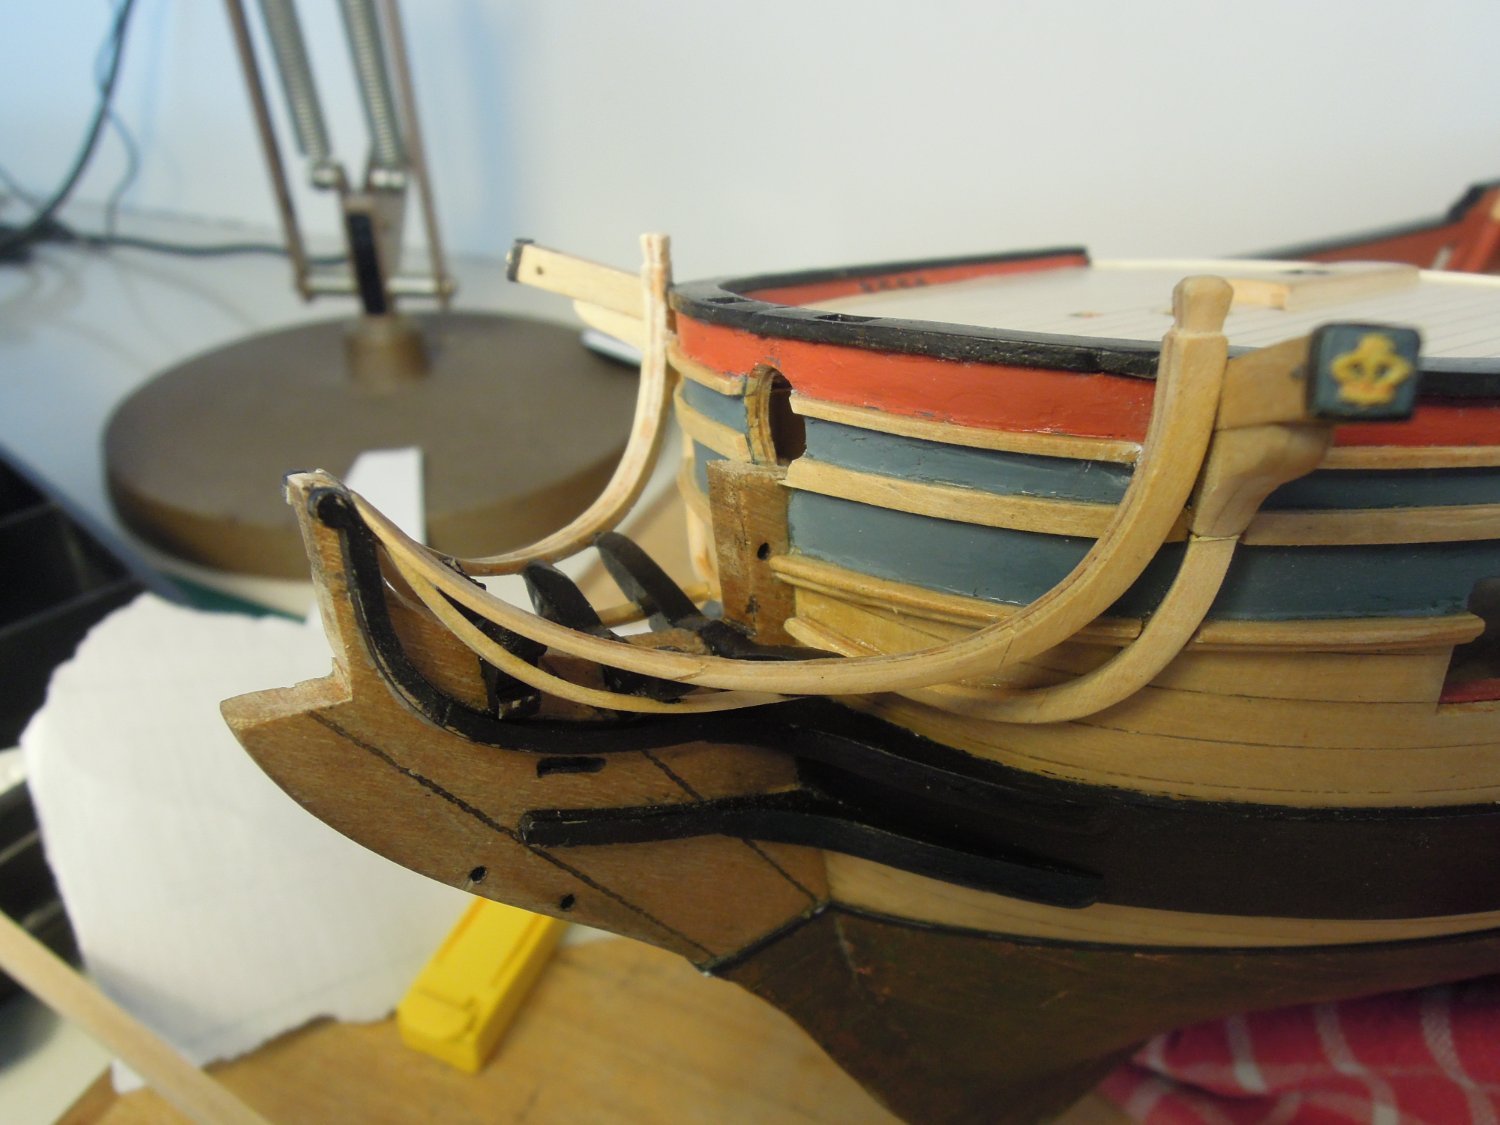
Next was the head works. I mixed kit parts with scratch - mostly scratch. Probably the most challenging element so far. I'll live with the outcome but vow to do better the next time I grapple with these geometries.
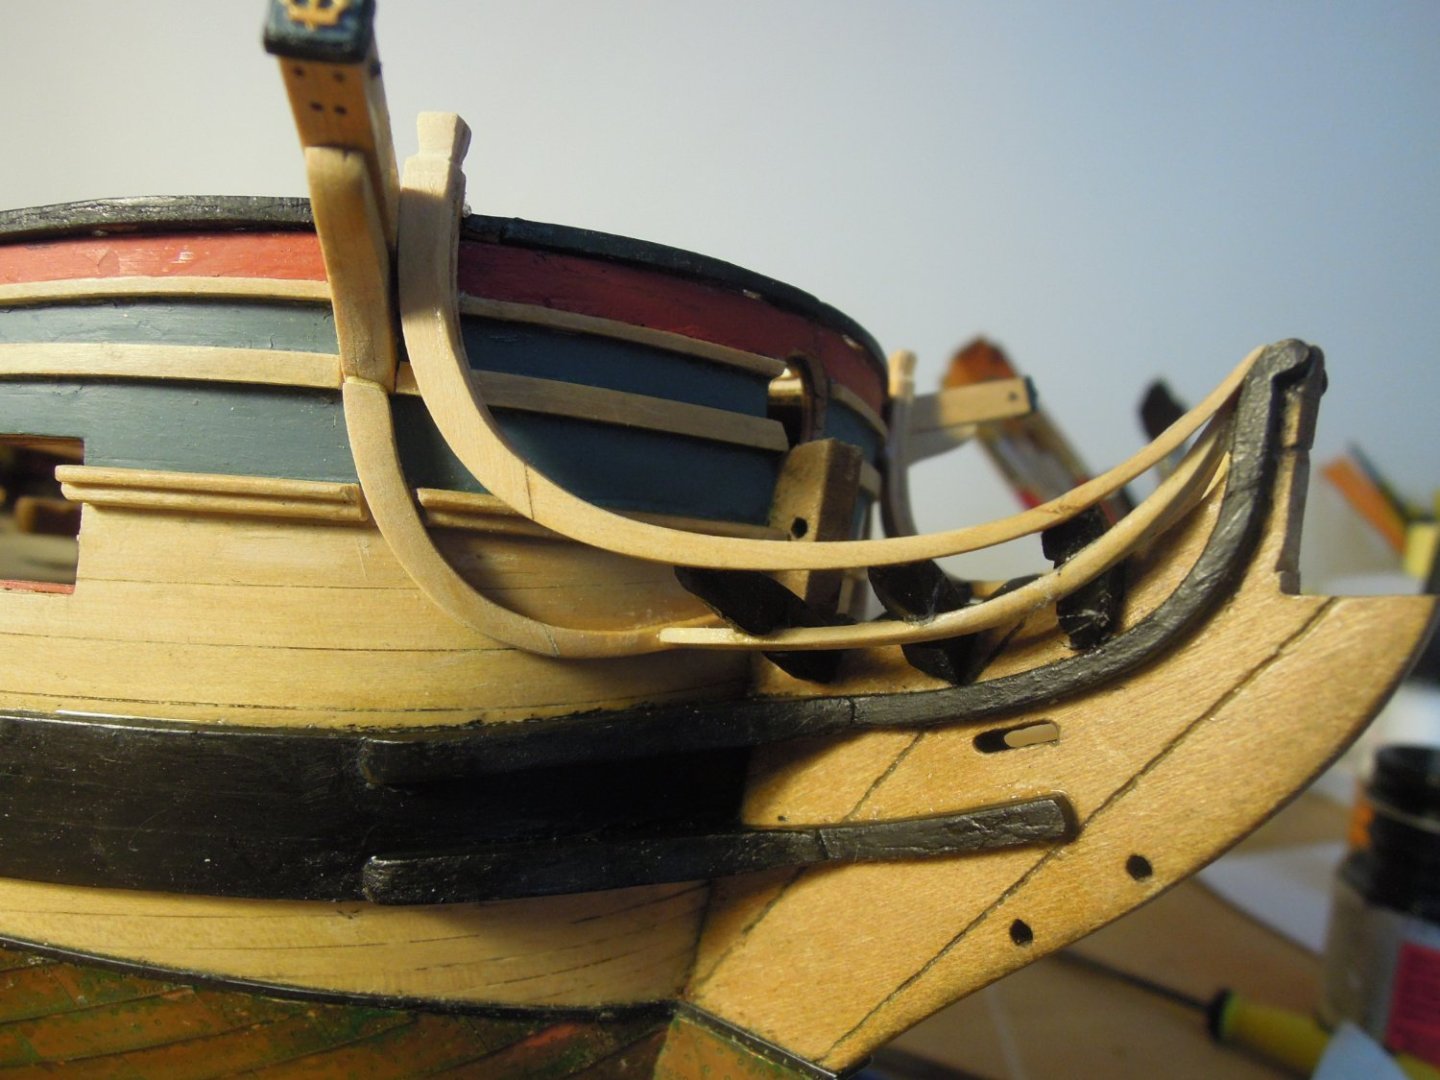
At this point I have already got the rails on but that's another story.
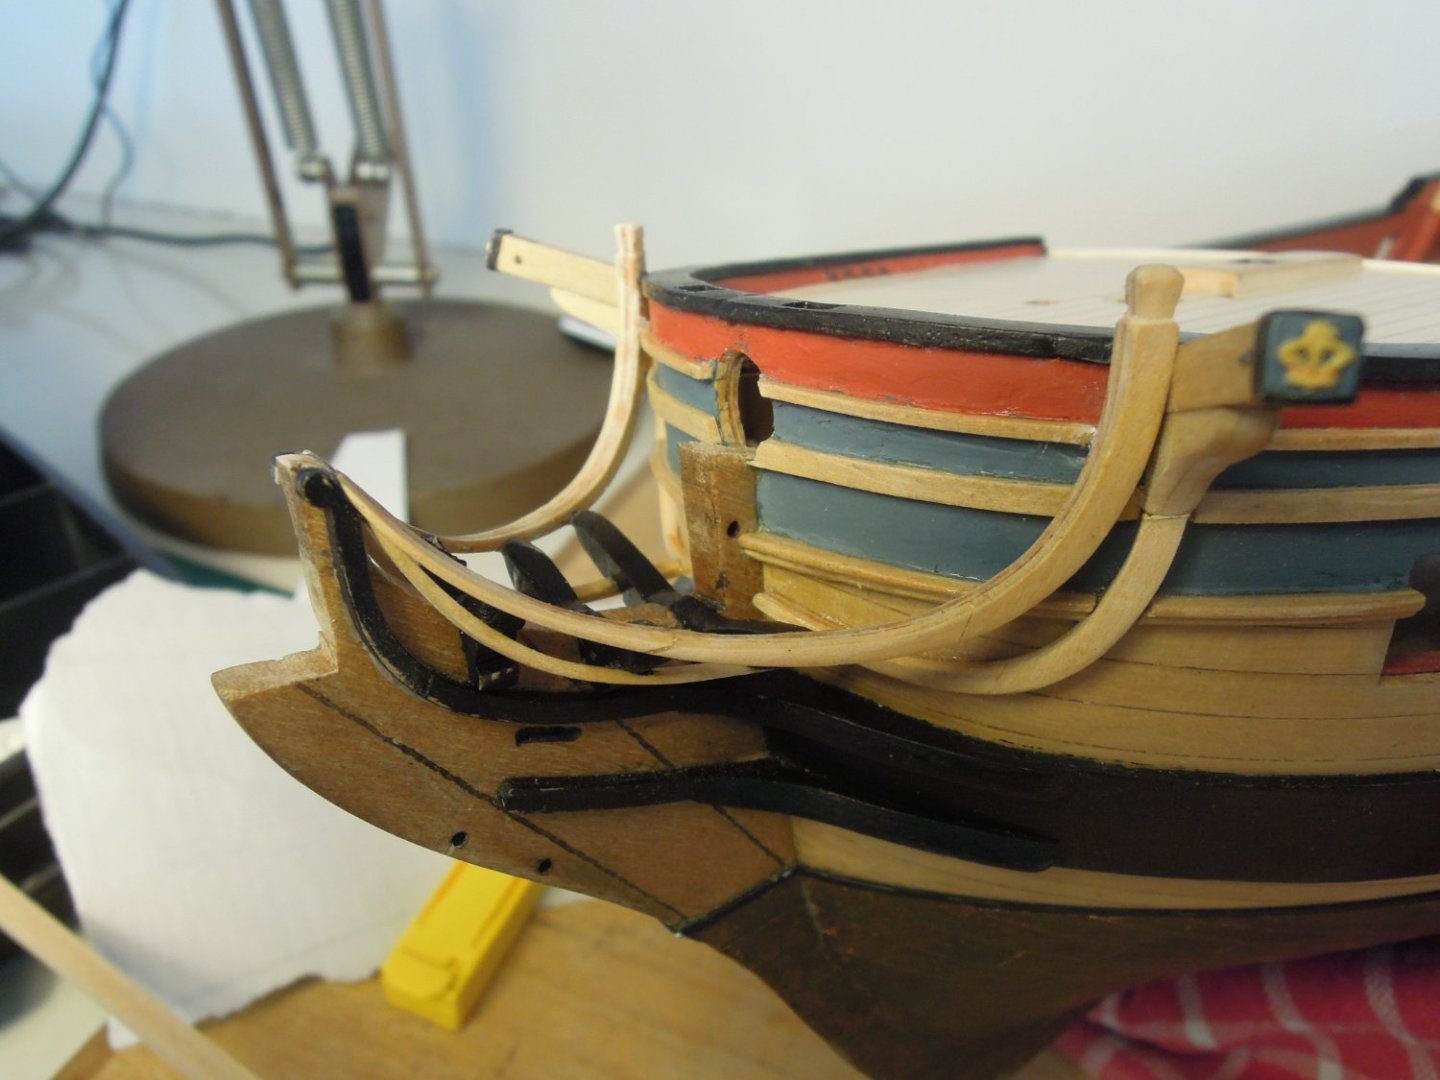
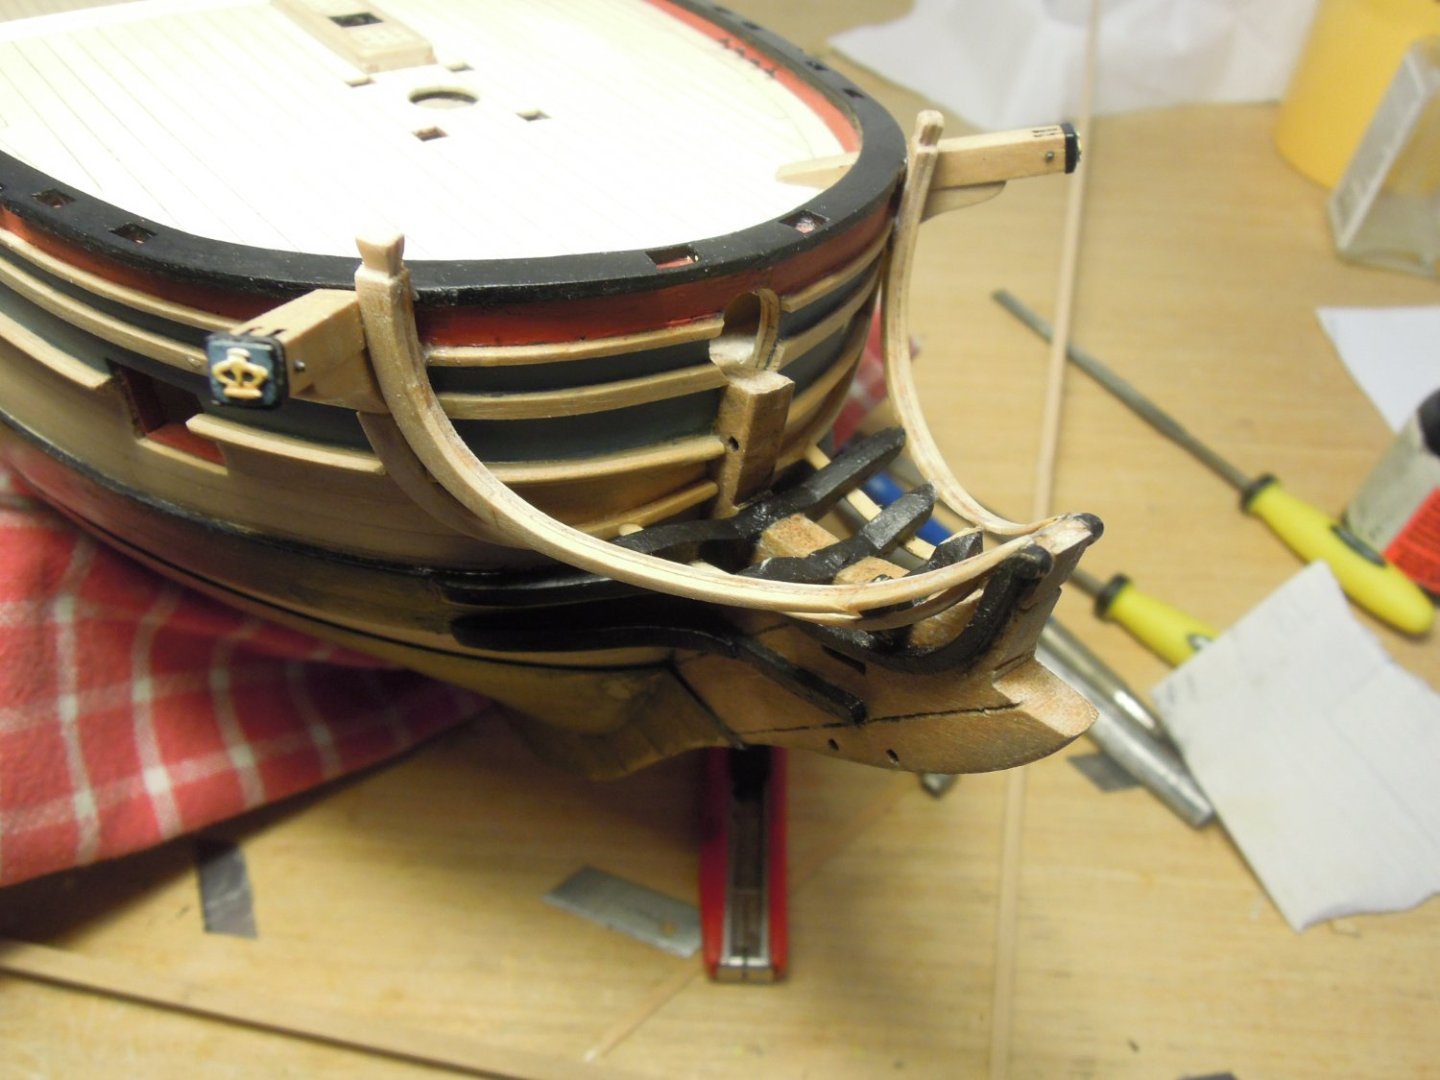
Not by best modelling work but I'll live with it.
Added the last piece of scroll work.

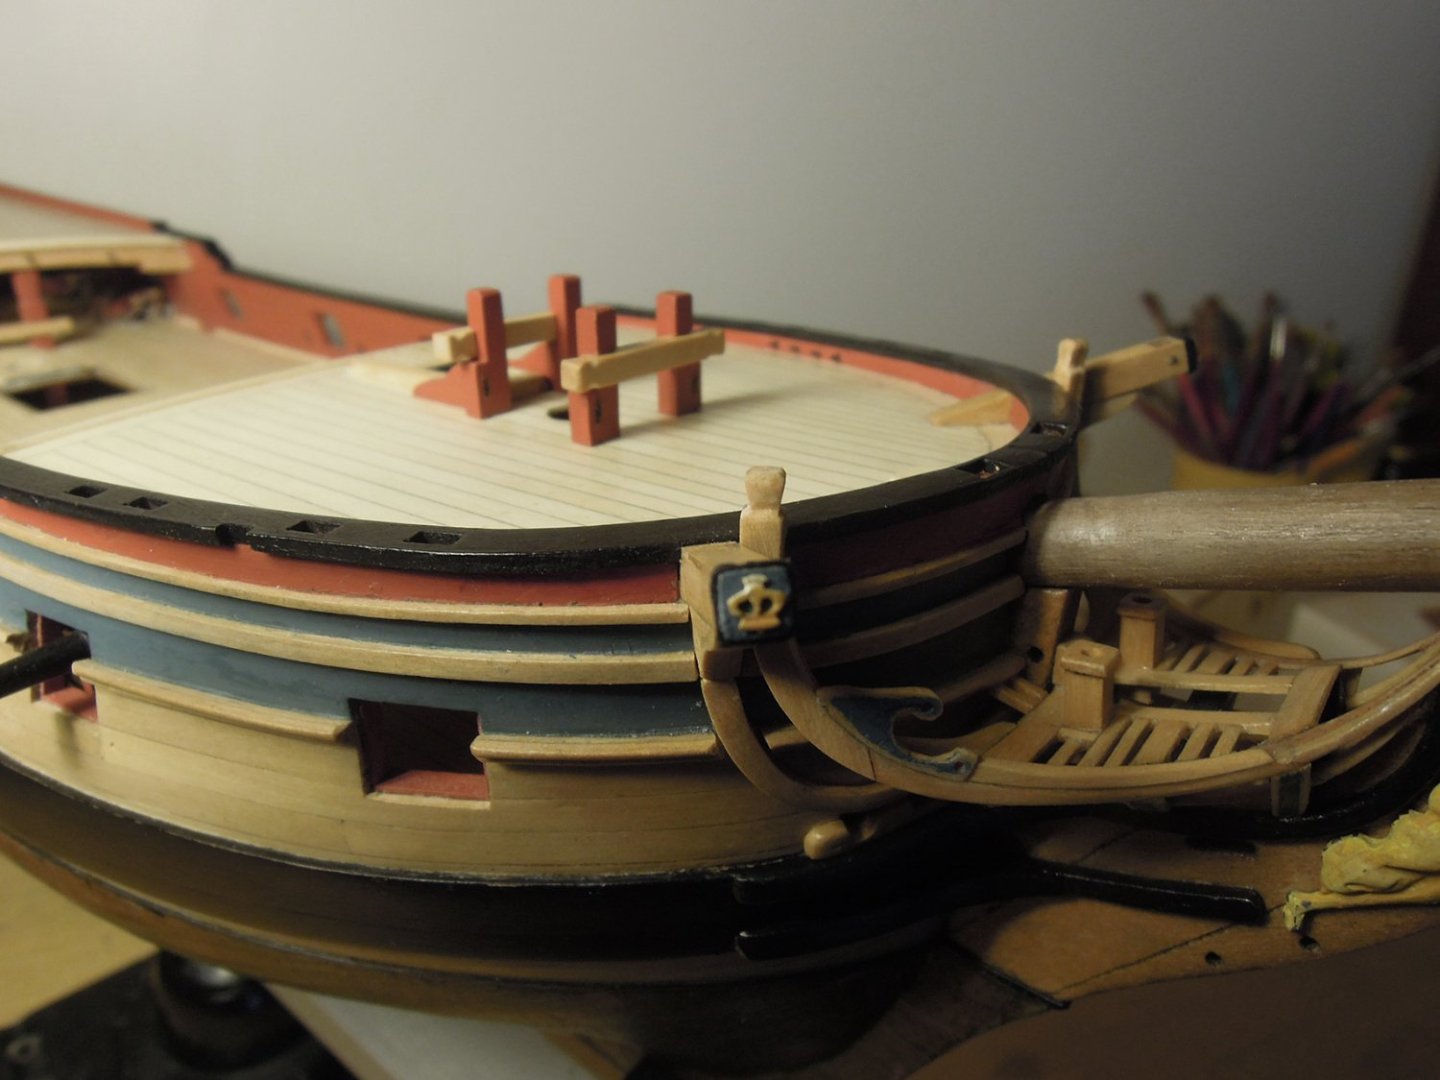
The rails were installed - this another defining build element. I used the kit parts with only minor alterations - they fit really well.


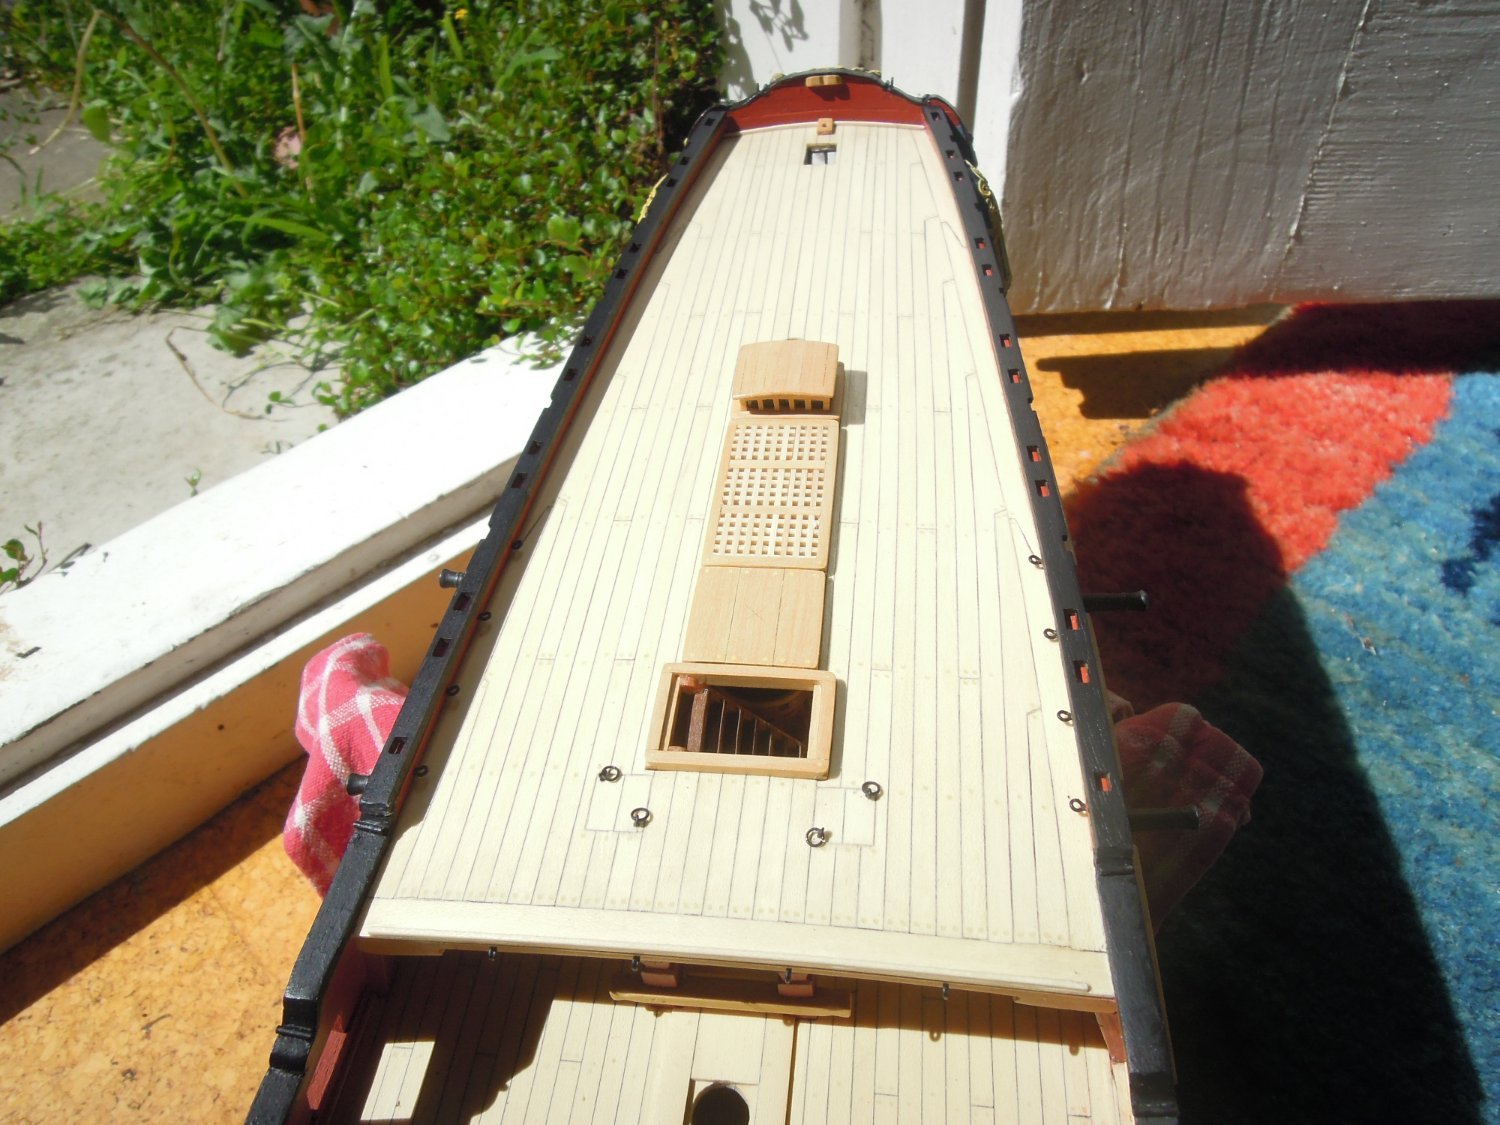
I think the kit calls for grated hatches for the scuttles - I think this is wrong. Here scuttles as solid hatches with eyebolts.

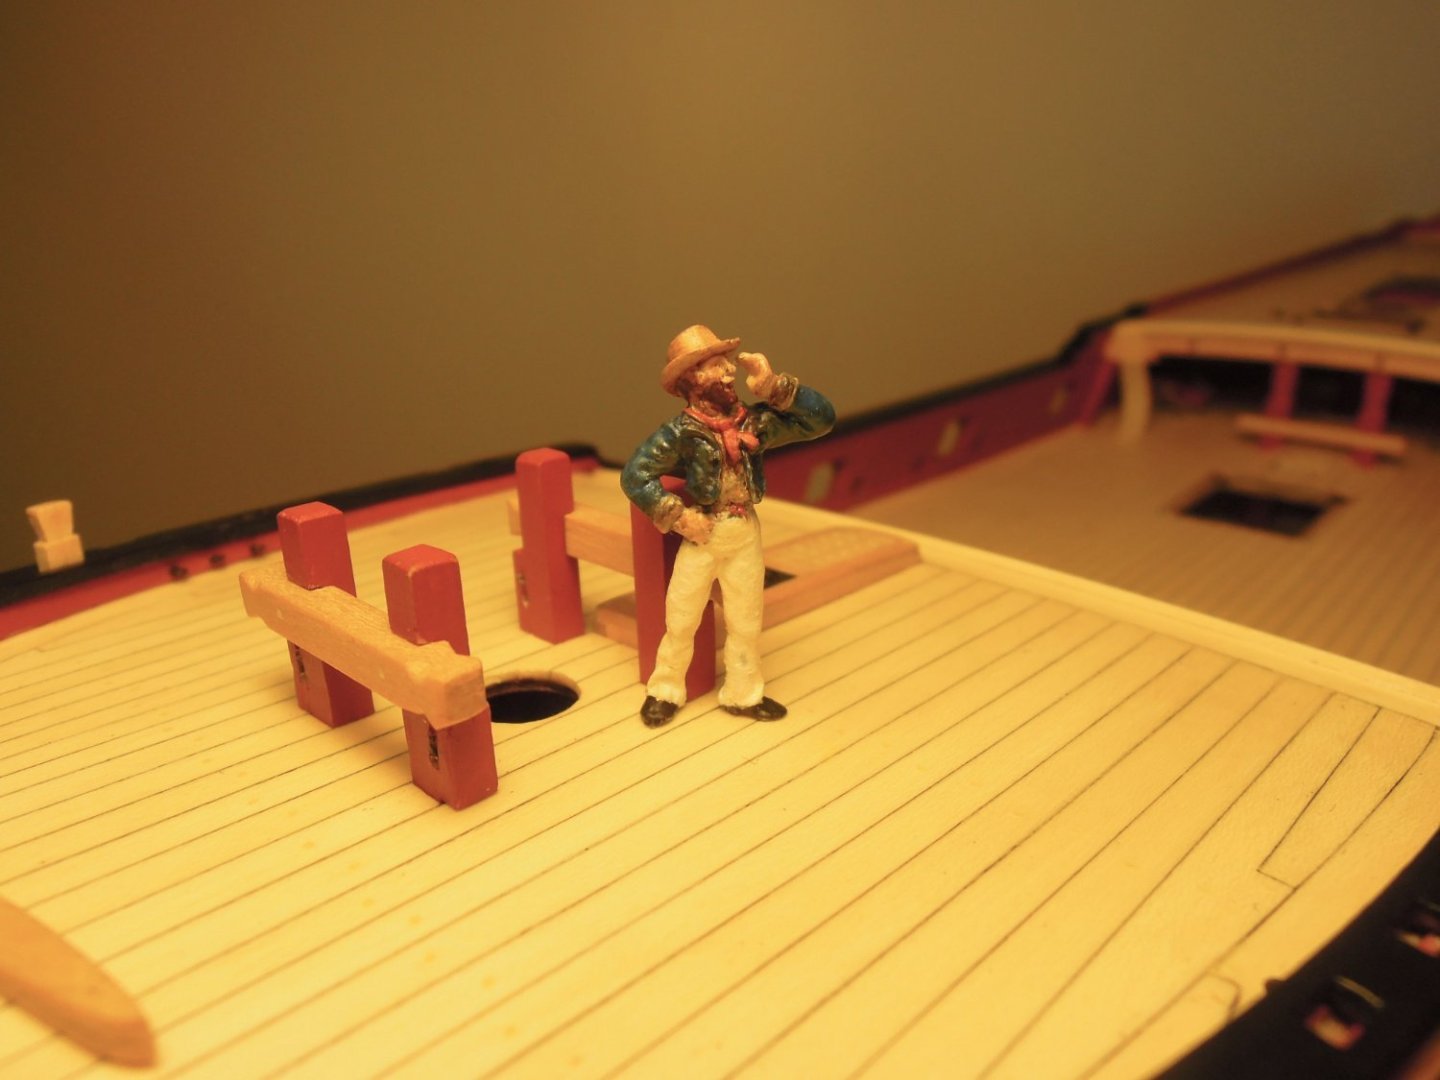
Sailor on the fore deck shouting. "Where are the masts?"

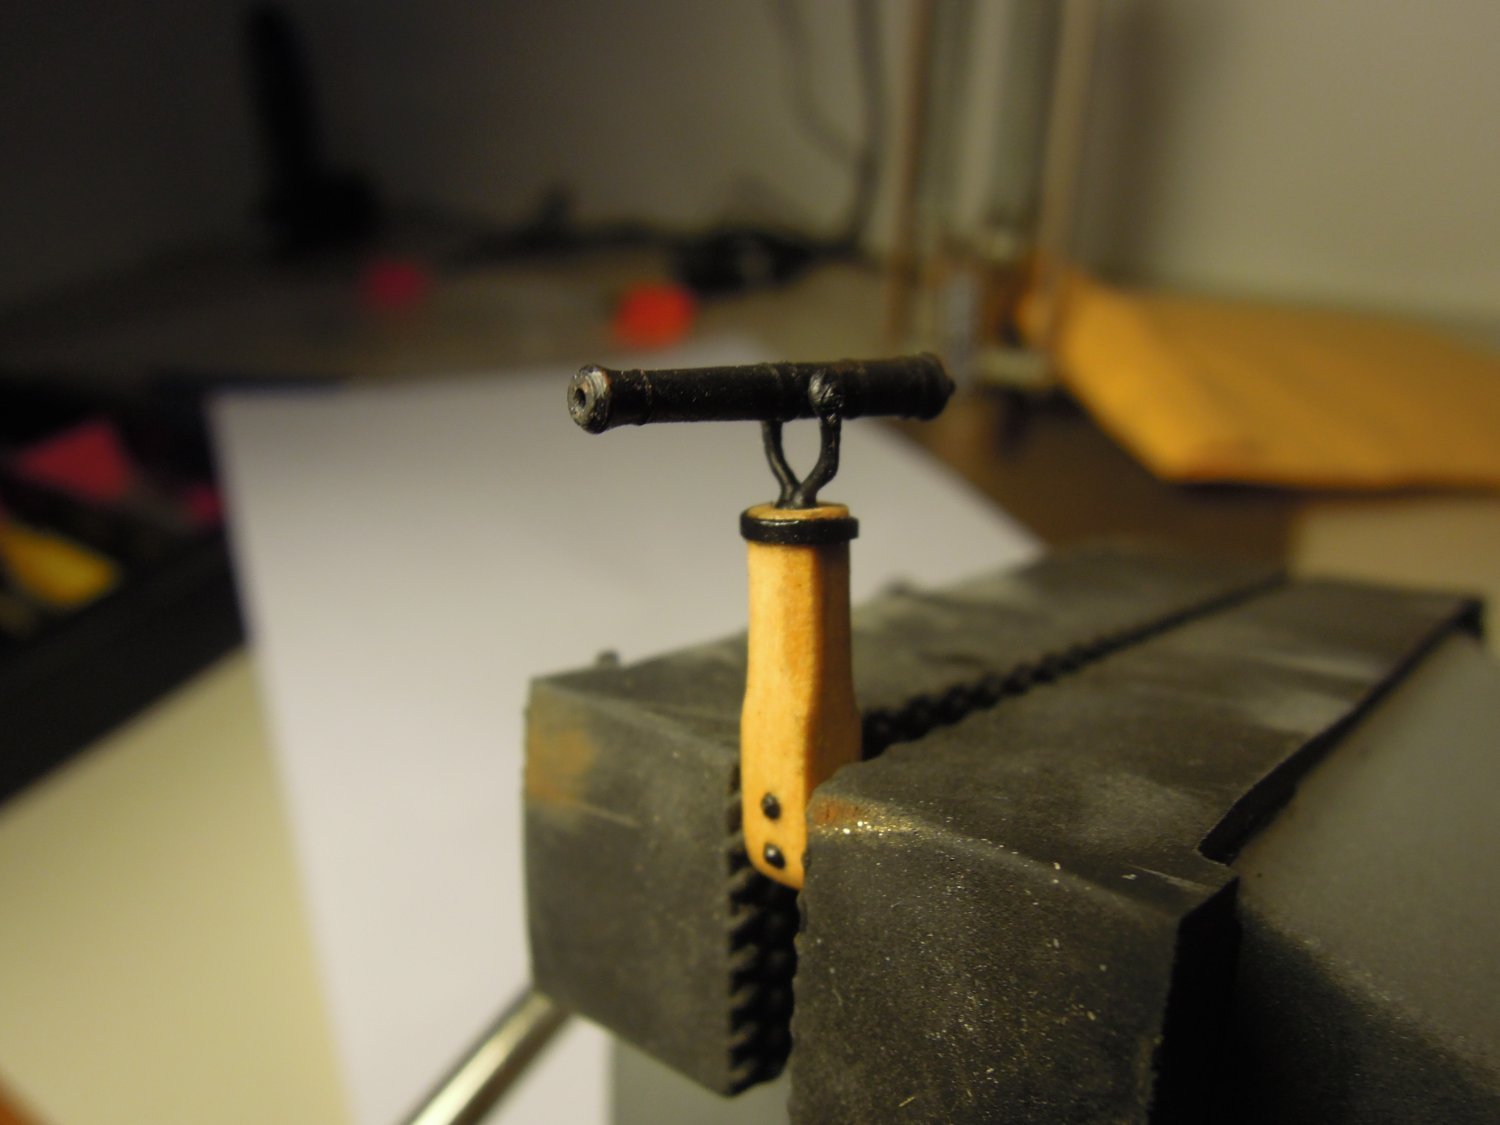
Lastly back then I played with the swivel cannons. I think the barrels are from Syren - I'll check that but pretty sure. The rest is scratched.
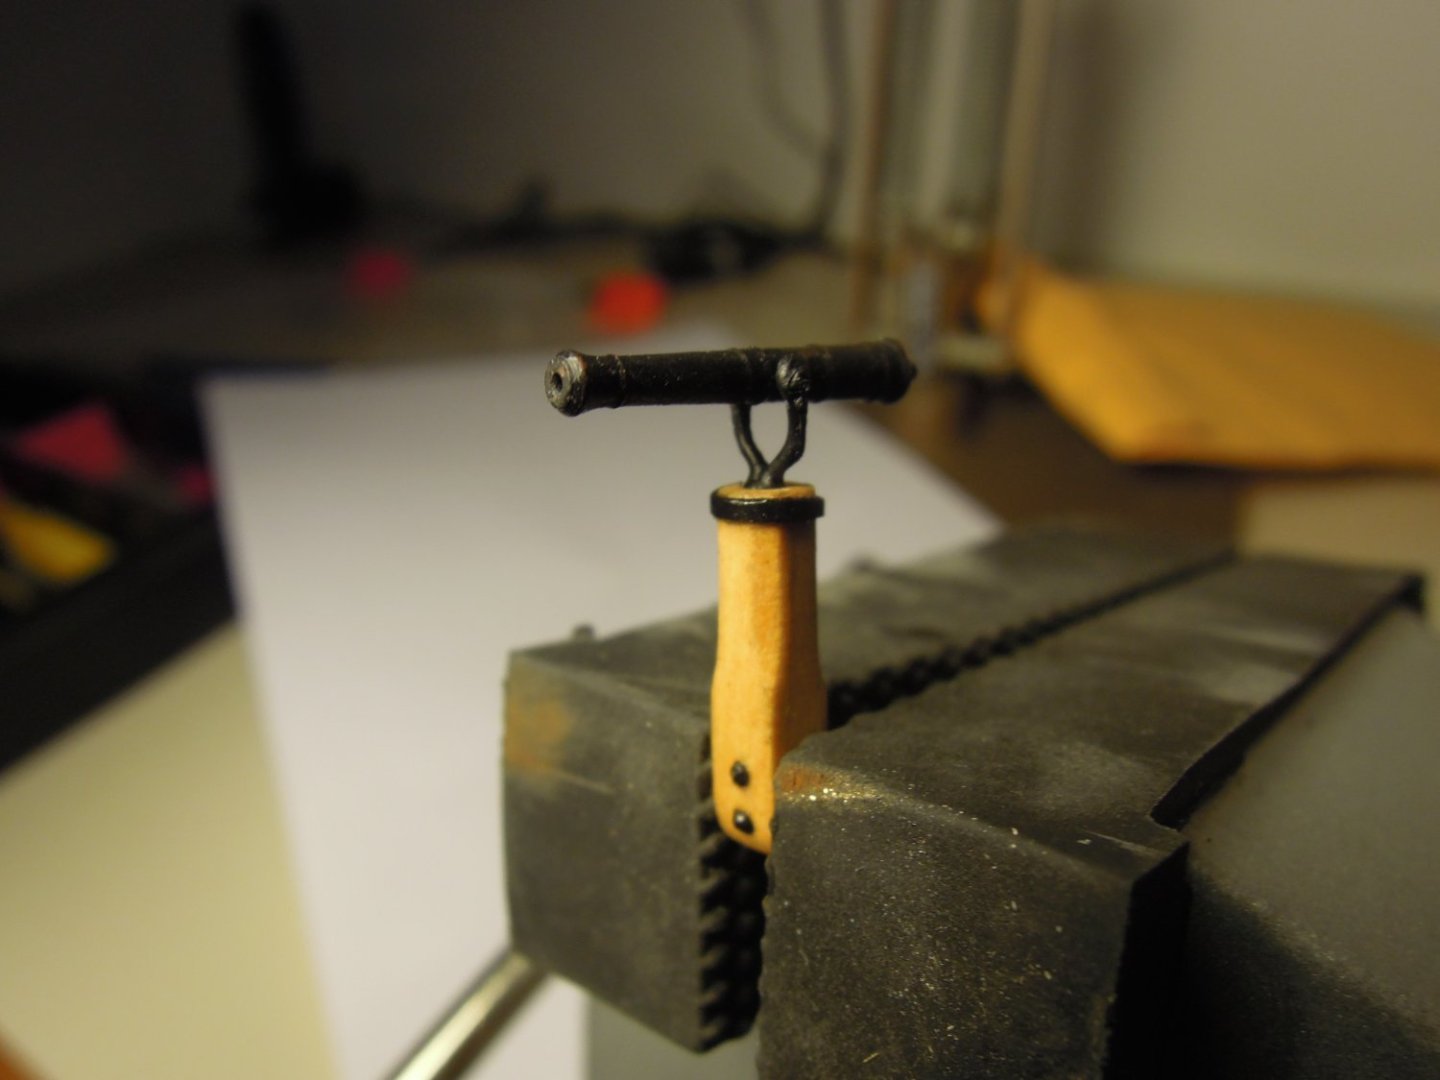
Compared to the kit offer...

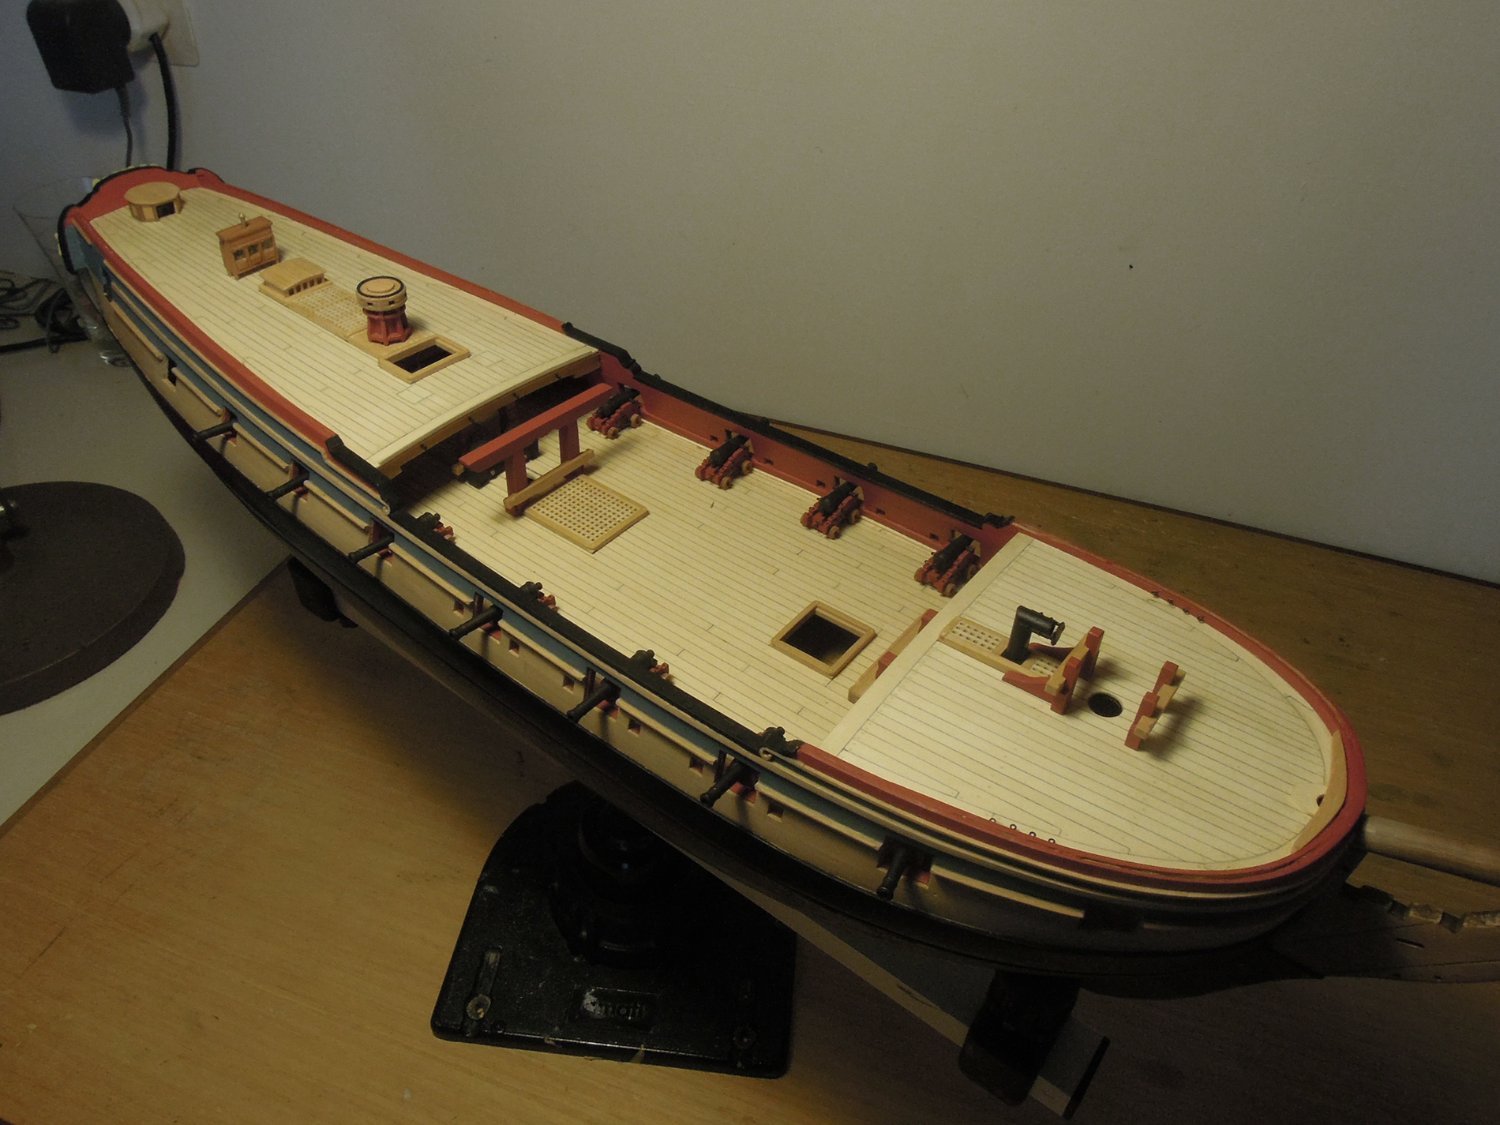
Finally before I move along with the model some overall pictures:
Aft, fore rails and various other parts not fitted in this one.
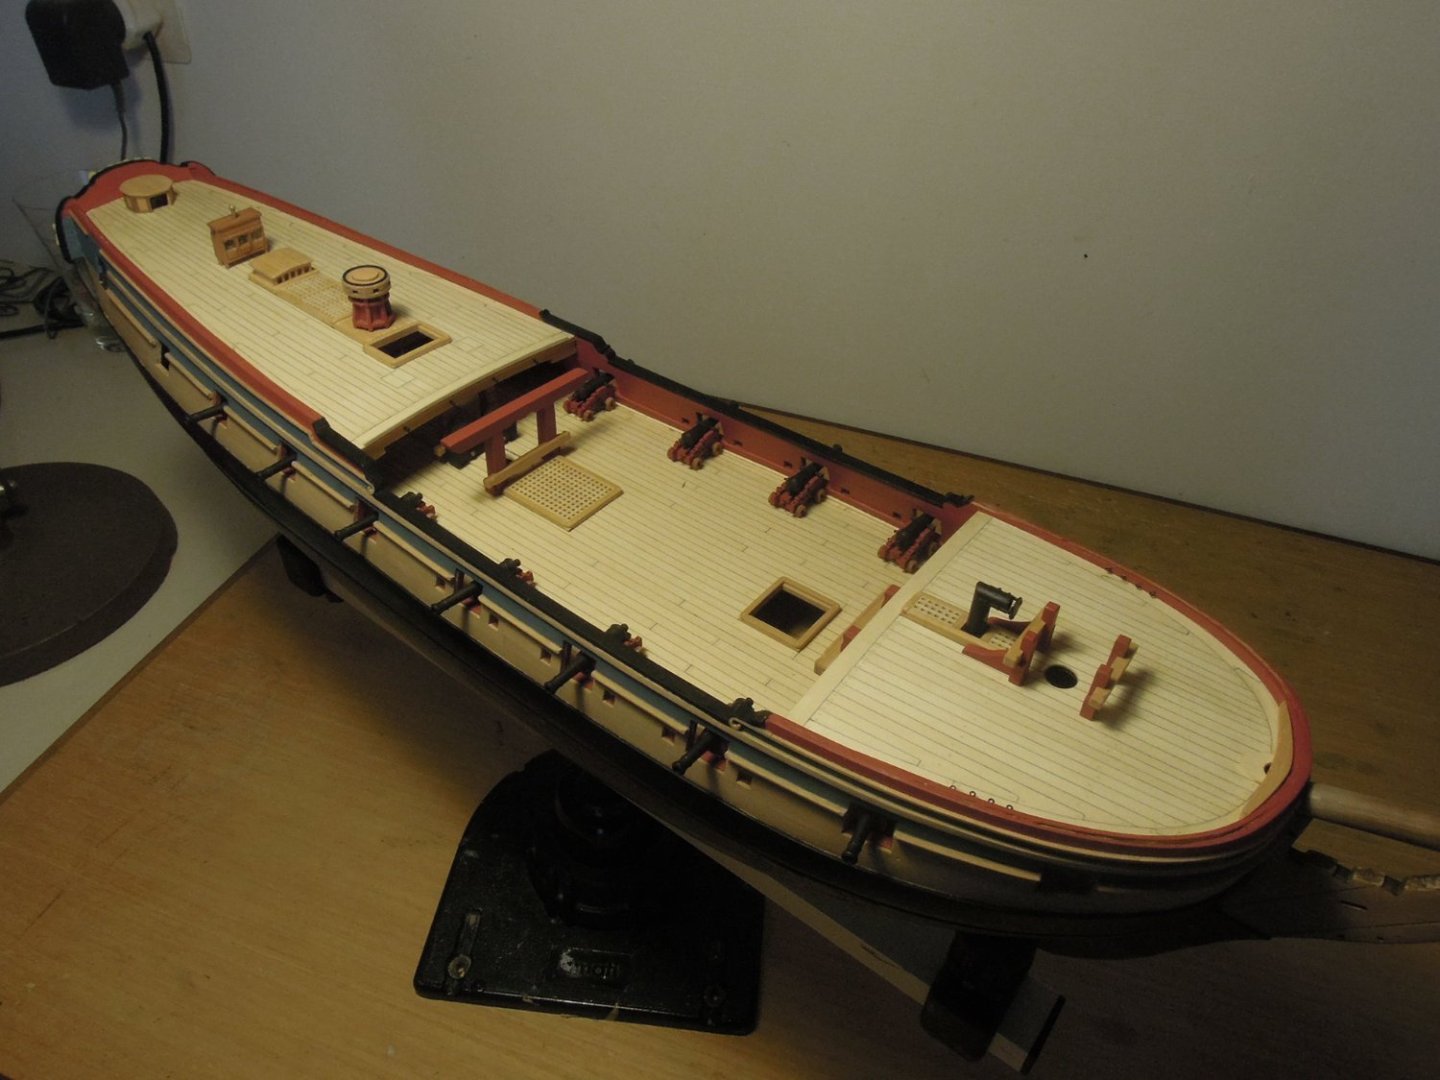
That'll do. That sort of shows where I got to and now I'll carry on. First up will be removing the build-up of dust. I was seriously lazy and just left the hull on a side table in my studio - it is very dirty. Very, very dirty.
Cheers,
Alistair
- Ryland Craze, Ondras71, KARAVOKIRIS and 4 others
-
6
-
 1
1
-
Continued...
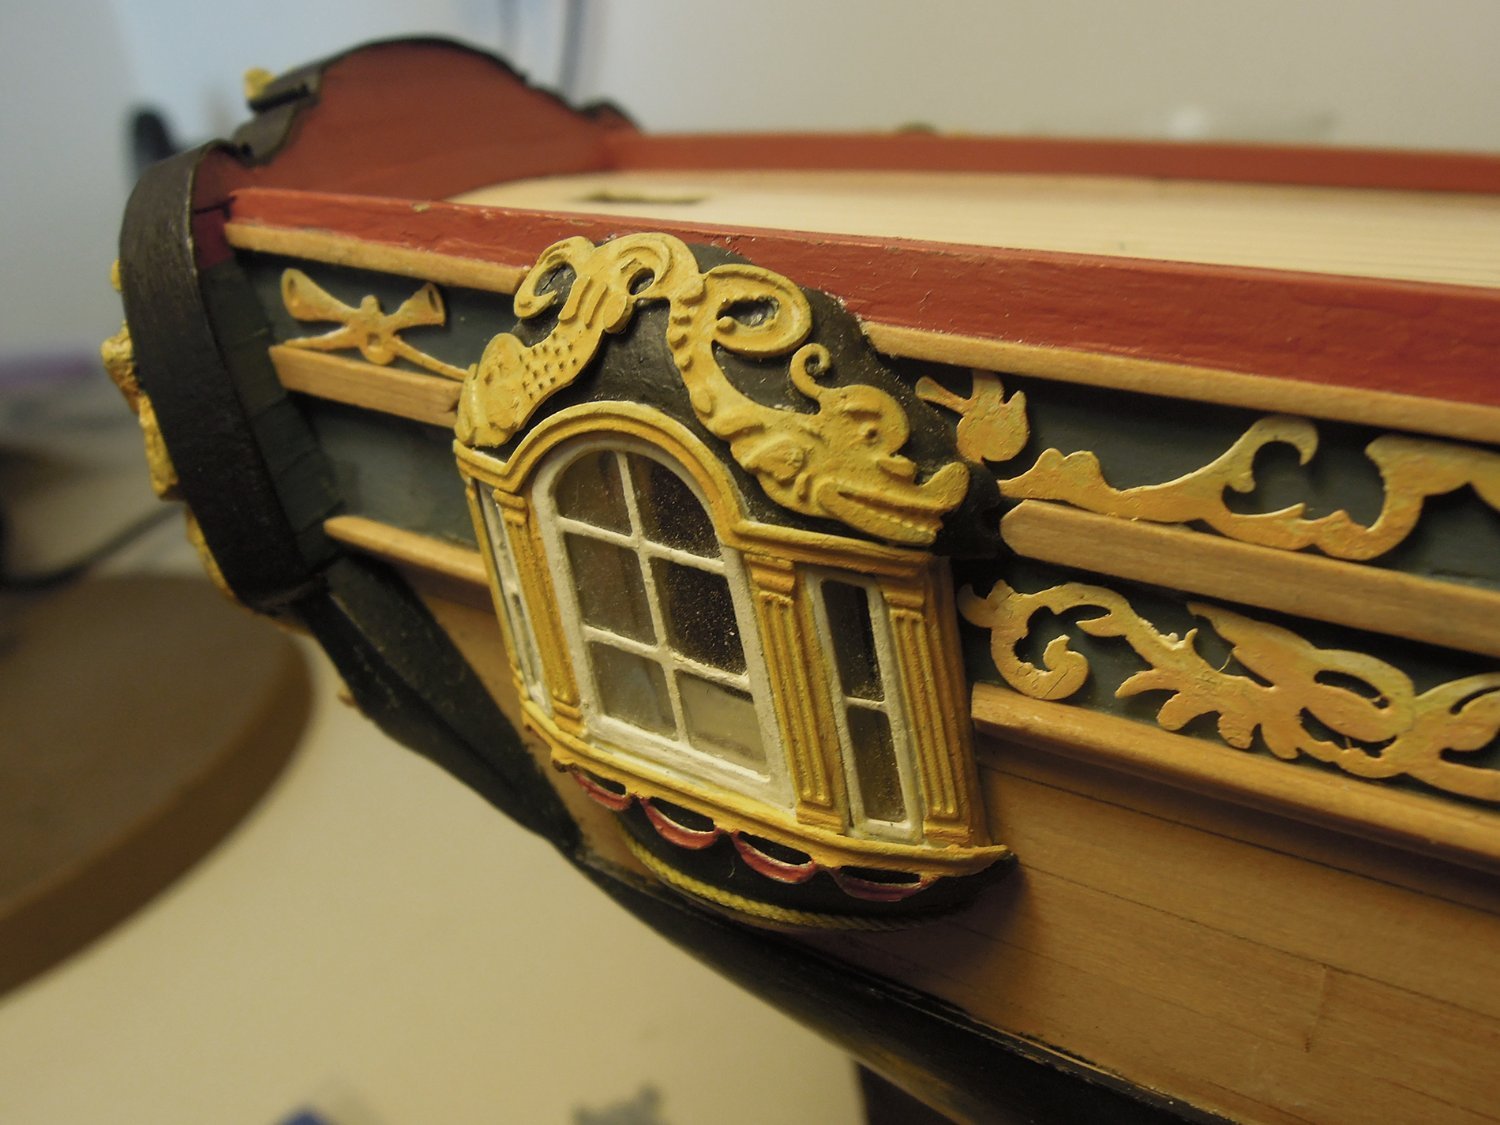
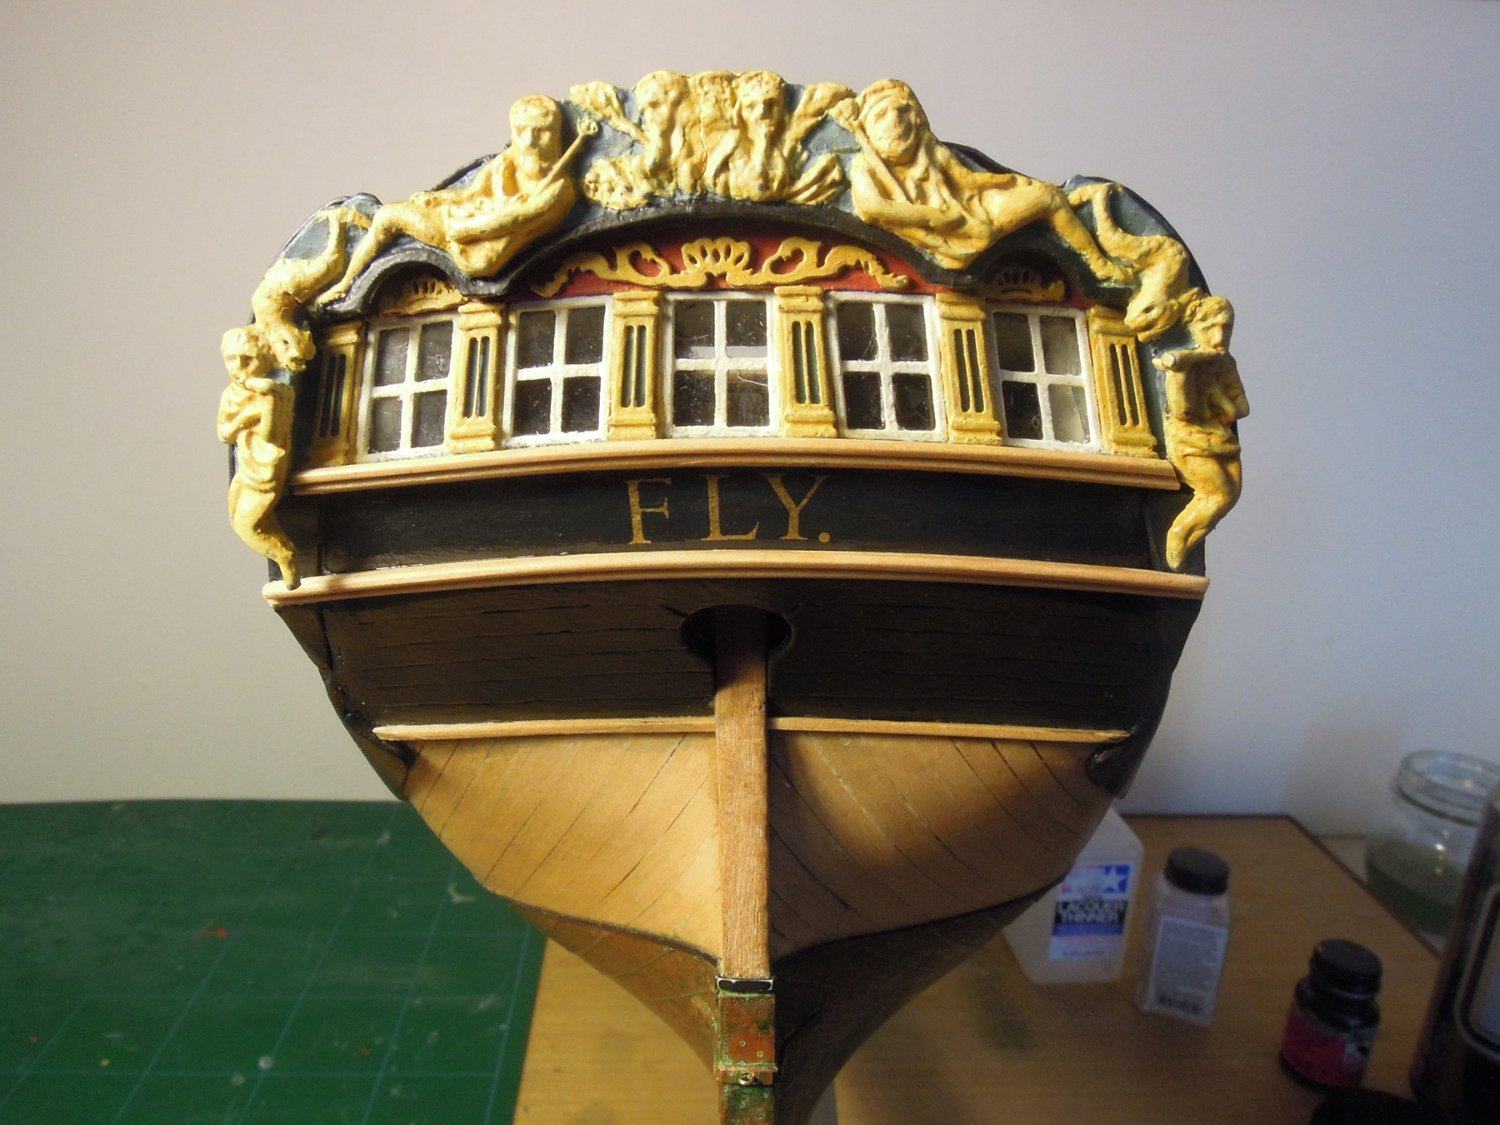
Stern transom decorations with quarter badges. I intend to improve these to make them look more like carved wood.

Installed. I'm jumping around as I can't remember the build sequence...I wasn't happy at this point with my 'F' for Fly placement and replaced it. The letters are gold Letraset.

Placed with the quarter badge.
Then closing out the forecastle.

The bitts and the crosstrees are a combo of scratch parts and modified kits parts. At the time I was asked about the rounded head rivets that i used on the gun carriages and the bitts. They are from www.scalehardware.com and are 0.7 mm rounded head rivets.
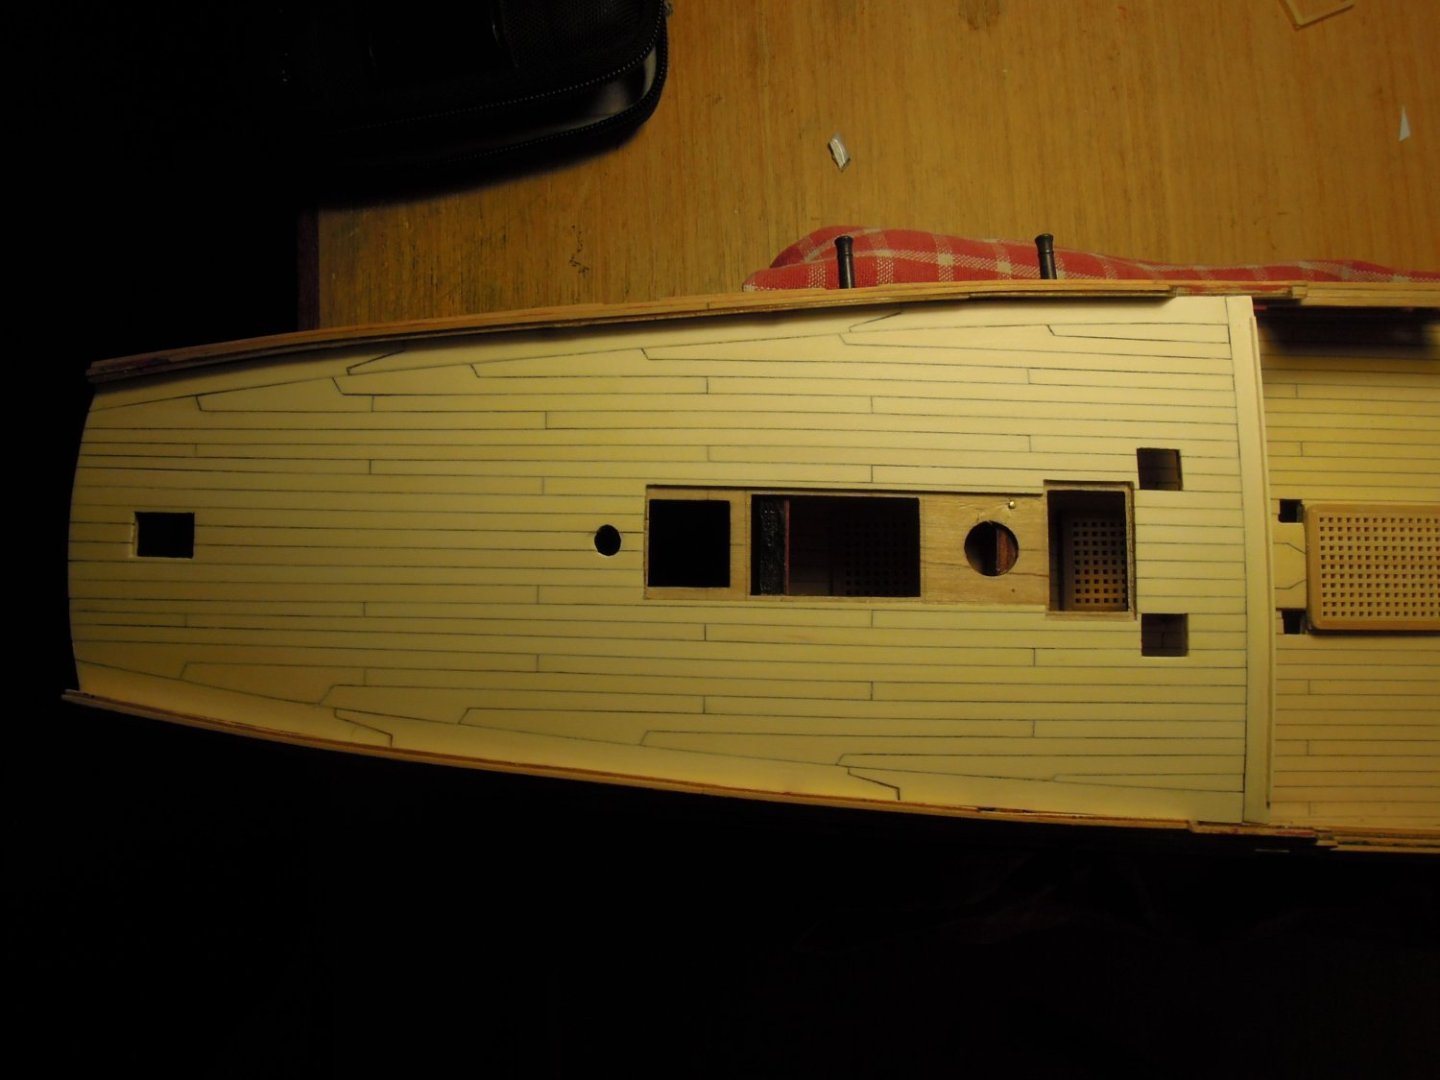
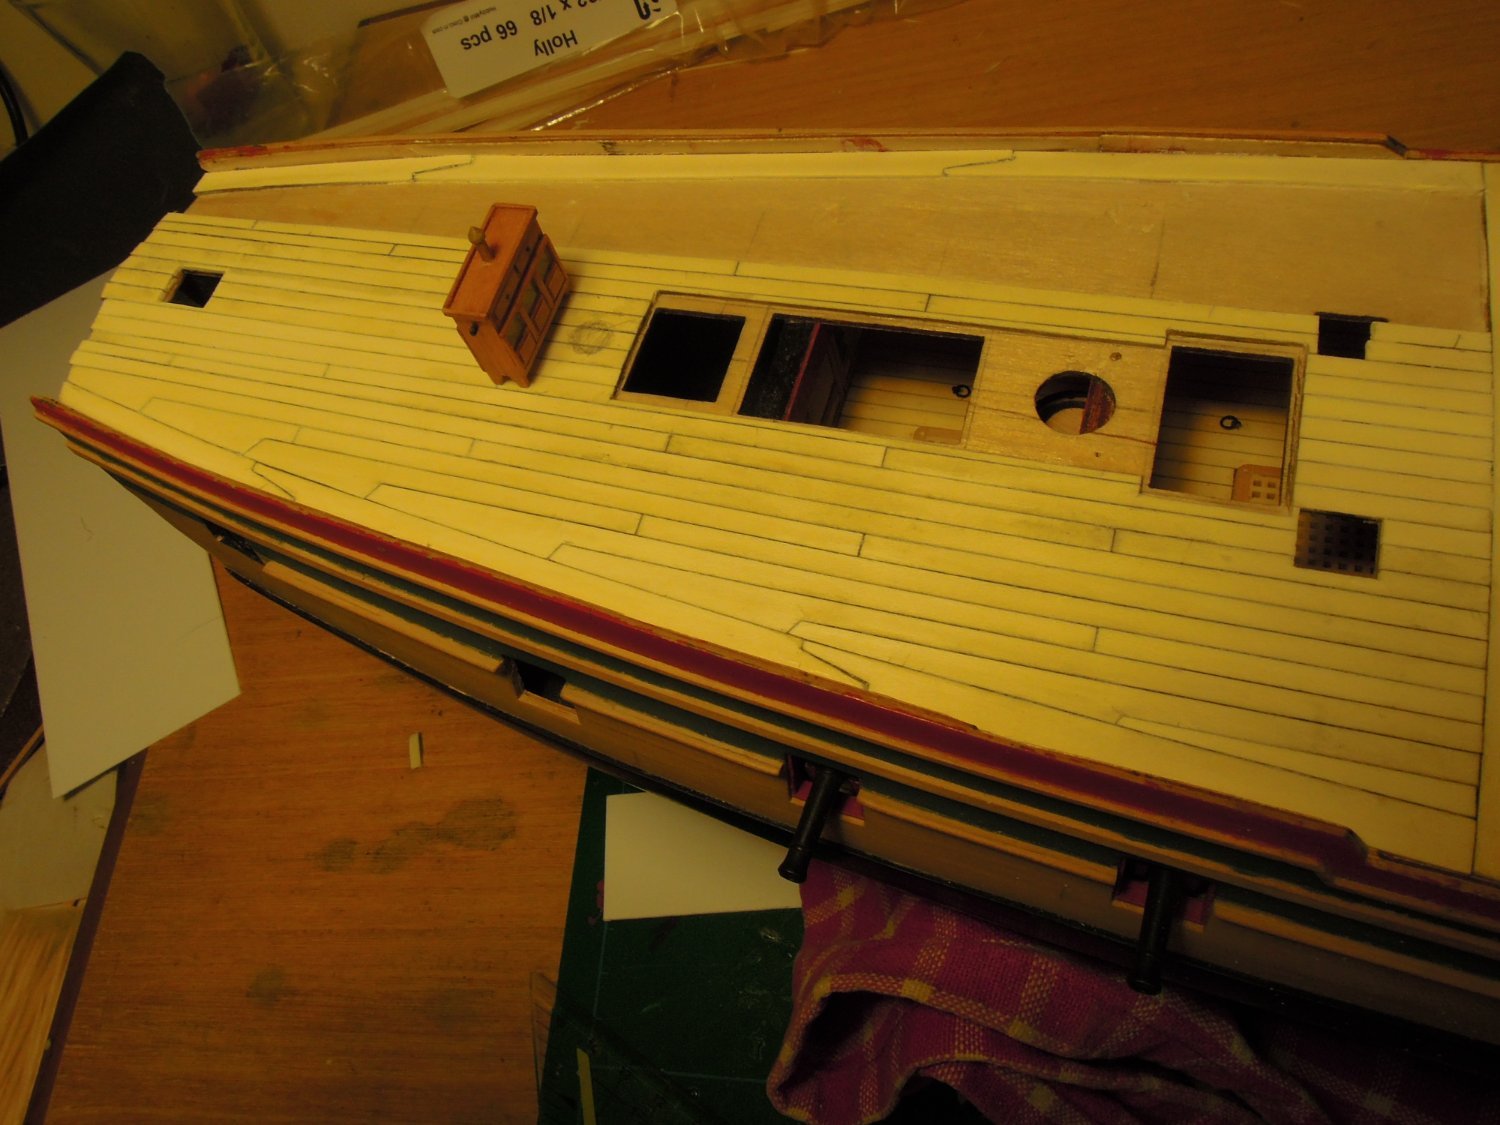
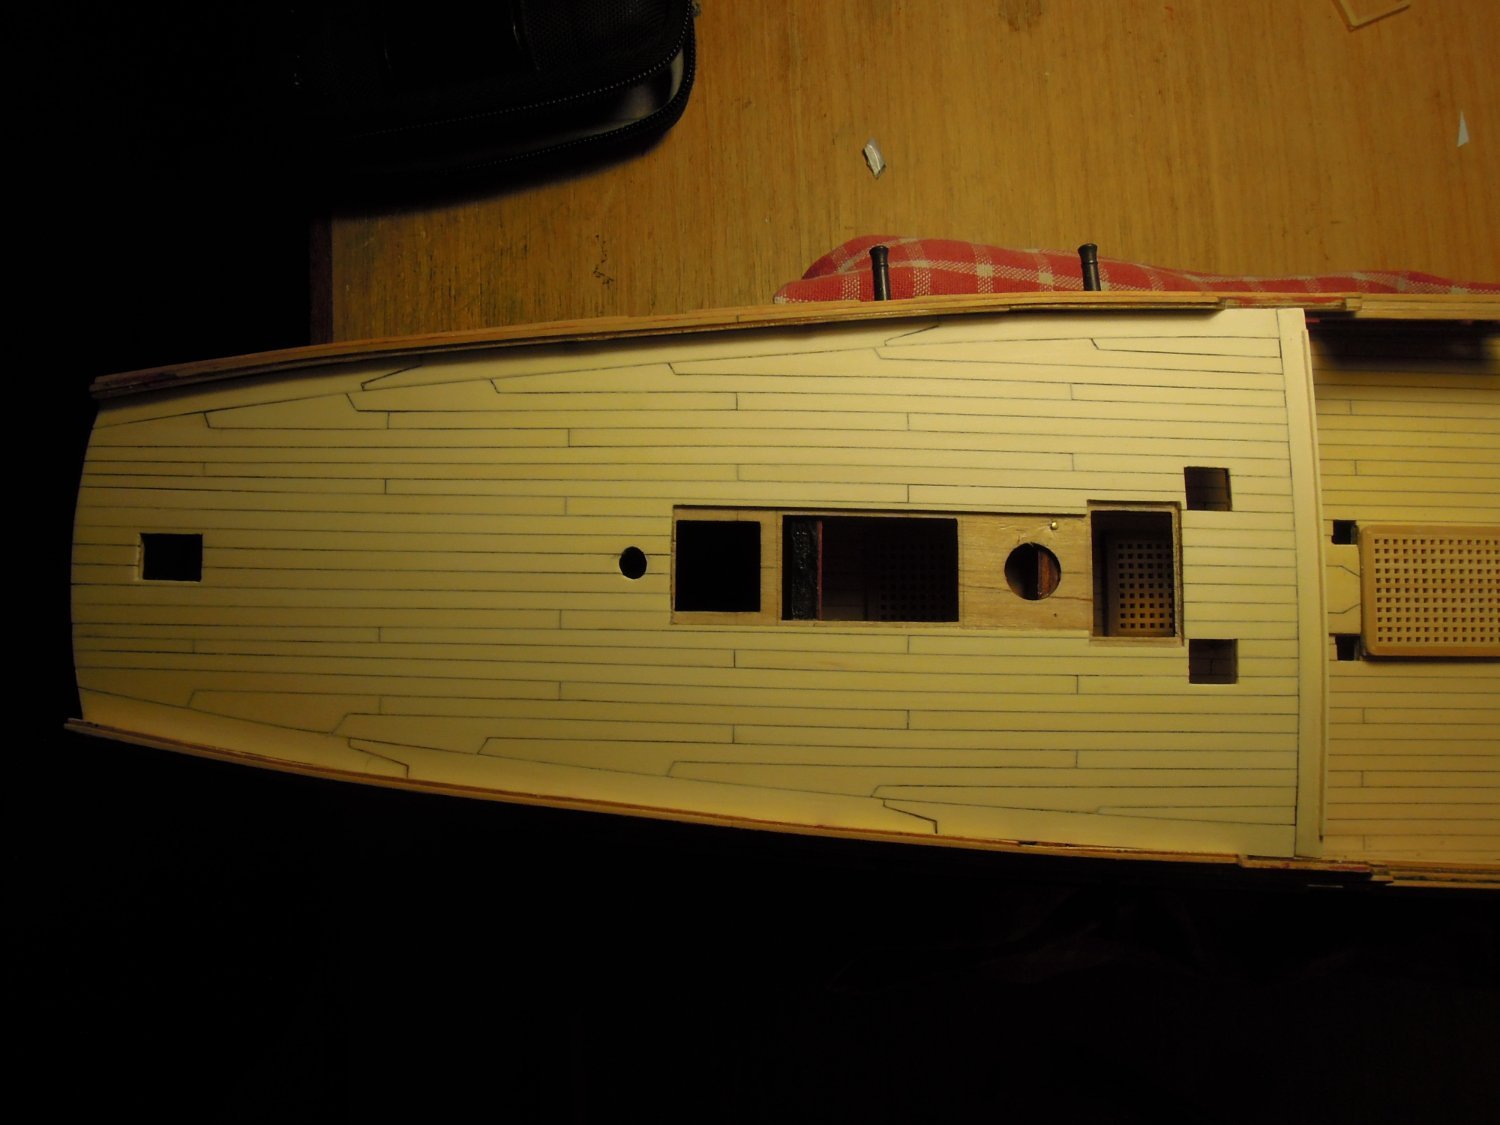
Lots of things here never to be seen again when the deck goes on. And on it goes with planking complete.
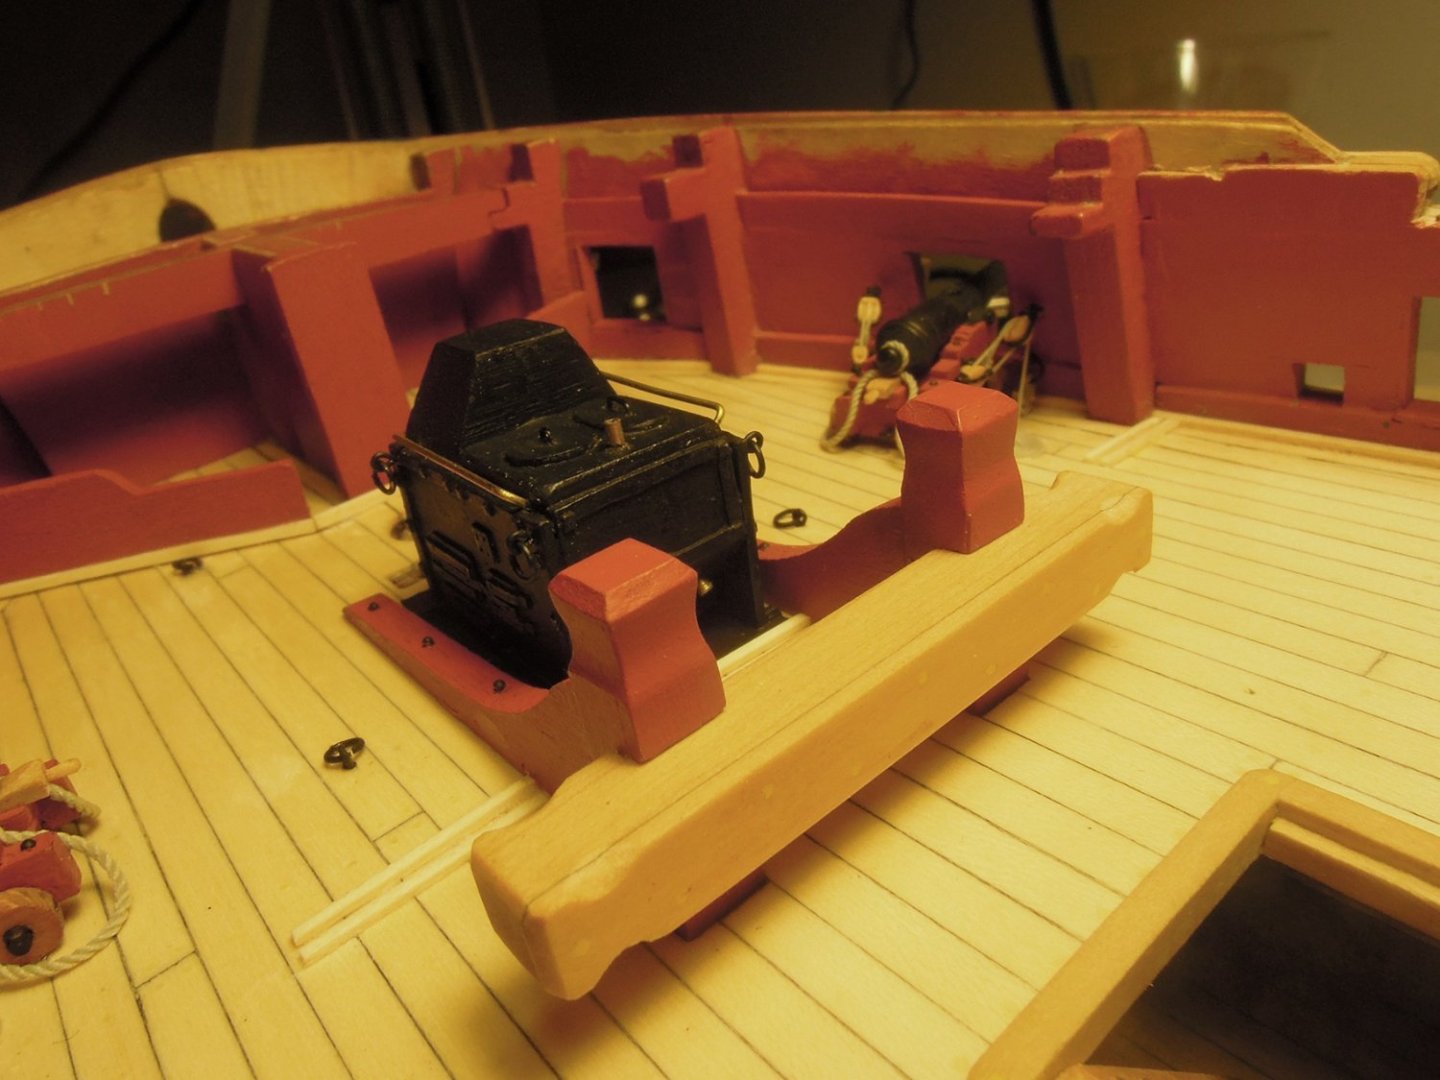
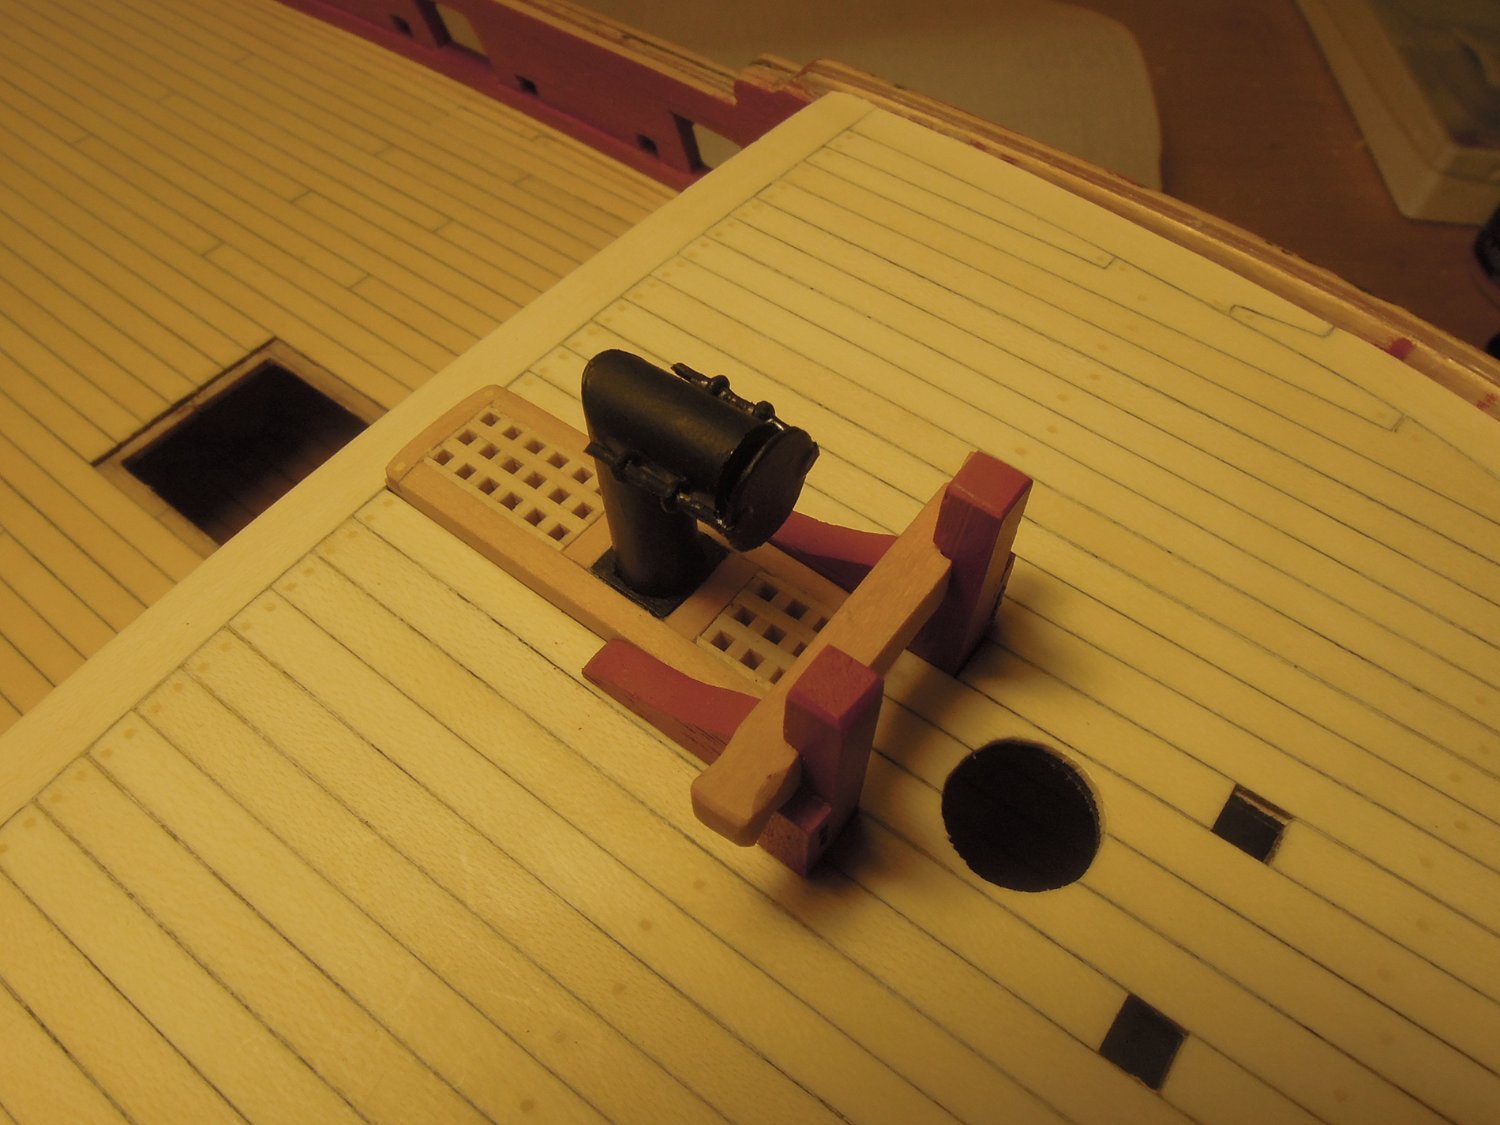
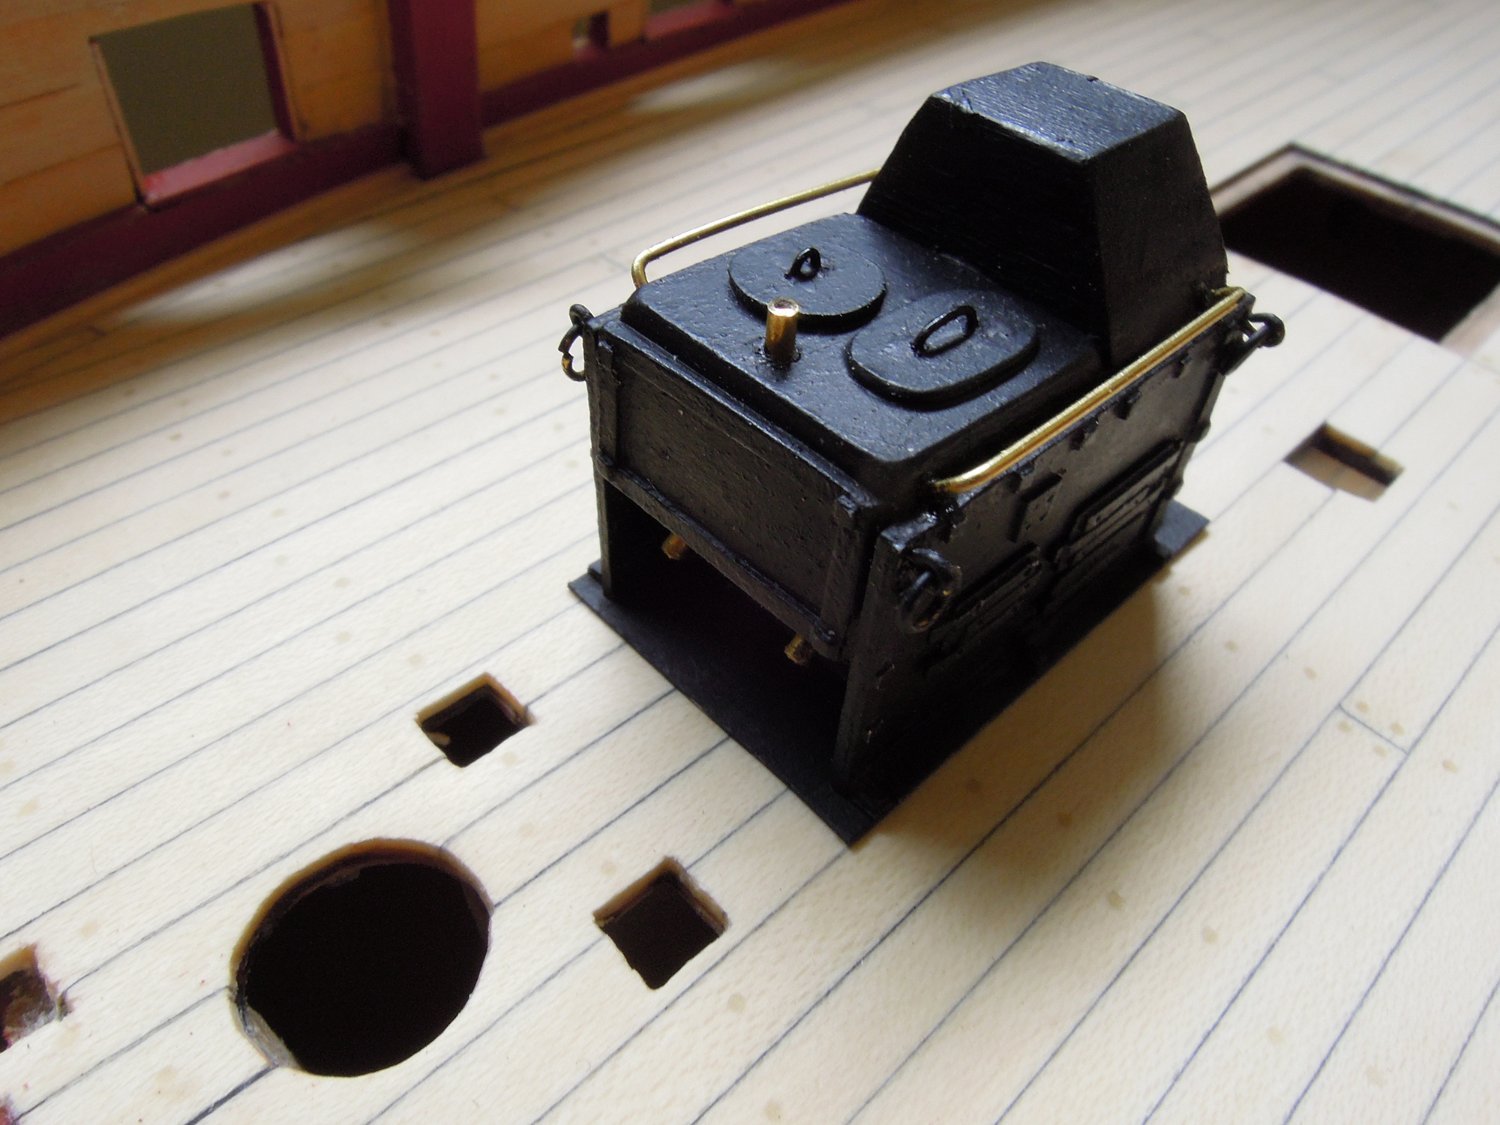
Added hatches and the stove flue. I ganged the hatches and flue together as I found keeping them as three separate elements was difficult and looked wrong to me. The flue is a very easy scratch with styrene tube, styrene baffle, brass rod and eyelets. The bitts need their rivets but are otherwise a hybrid of kit parts plus scratch.

Returning aft. I continued with other bits...

Scratched the rudder head housing - I will probably paint this red. It looks enormous but is just 7 mm high.

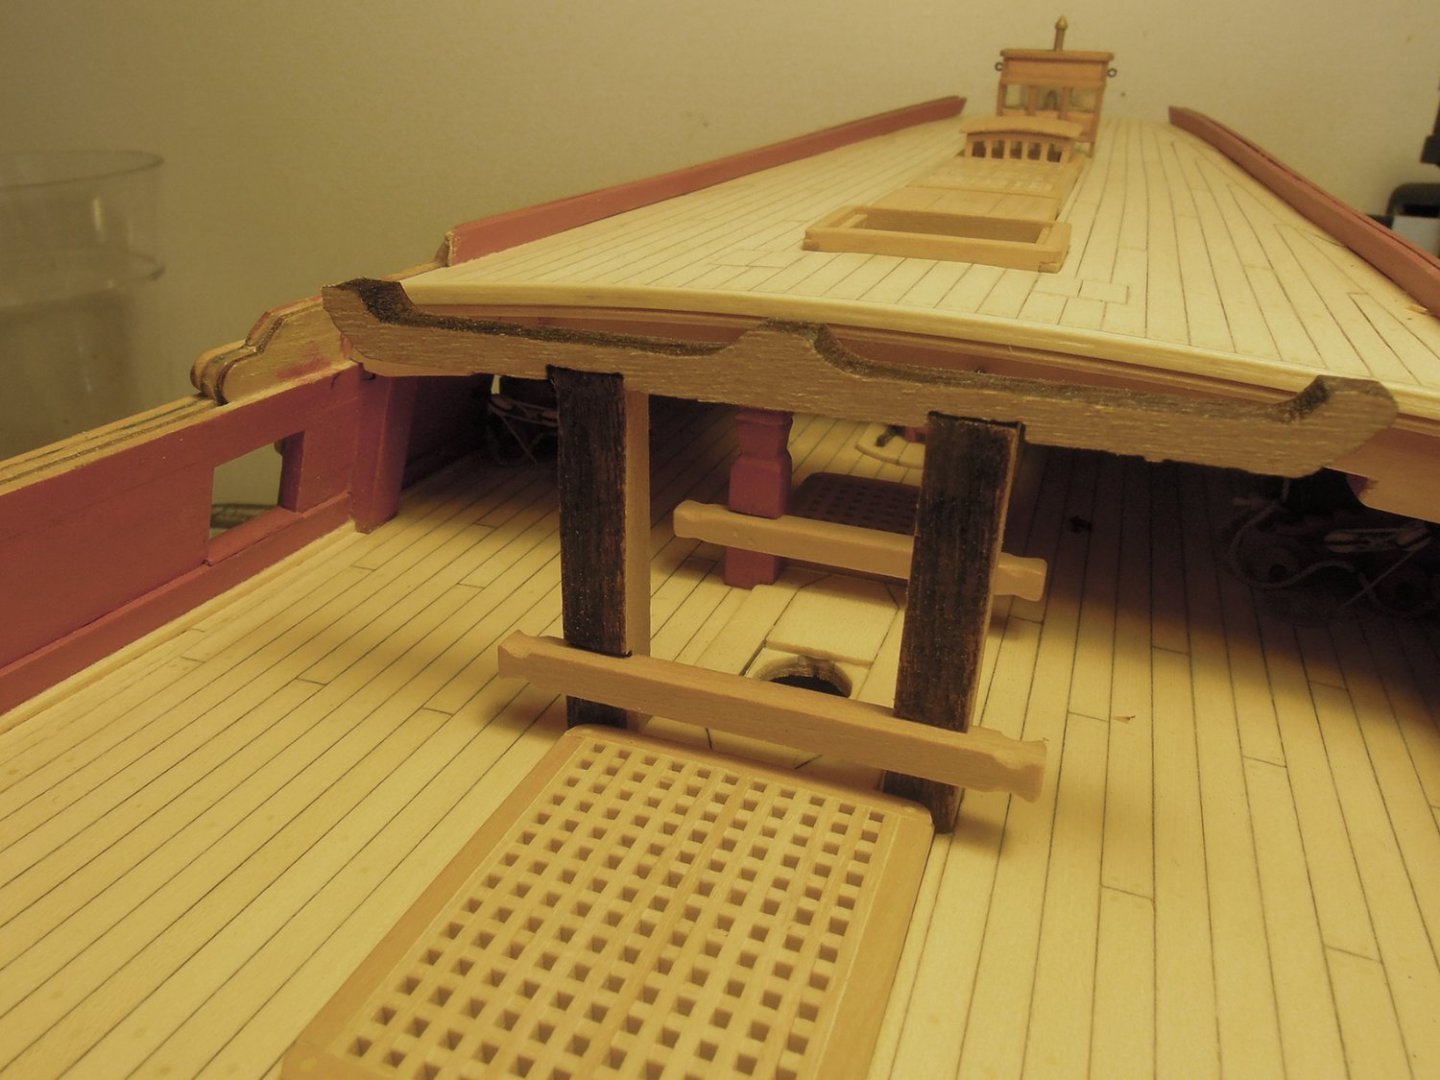
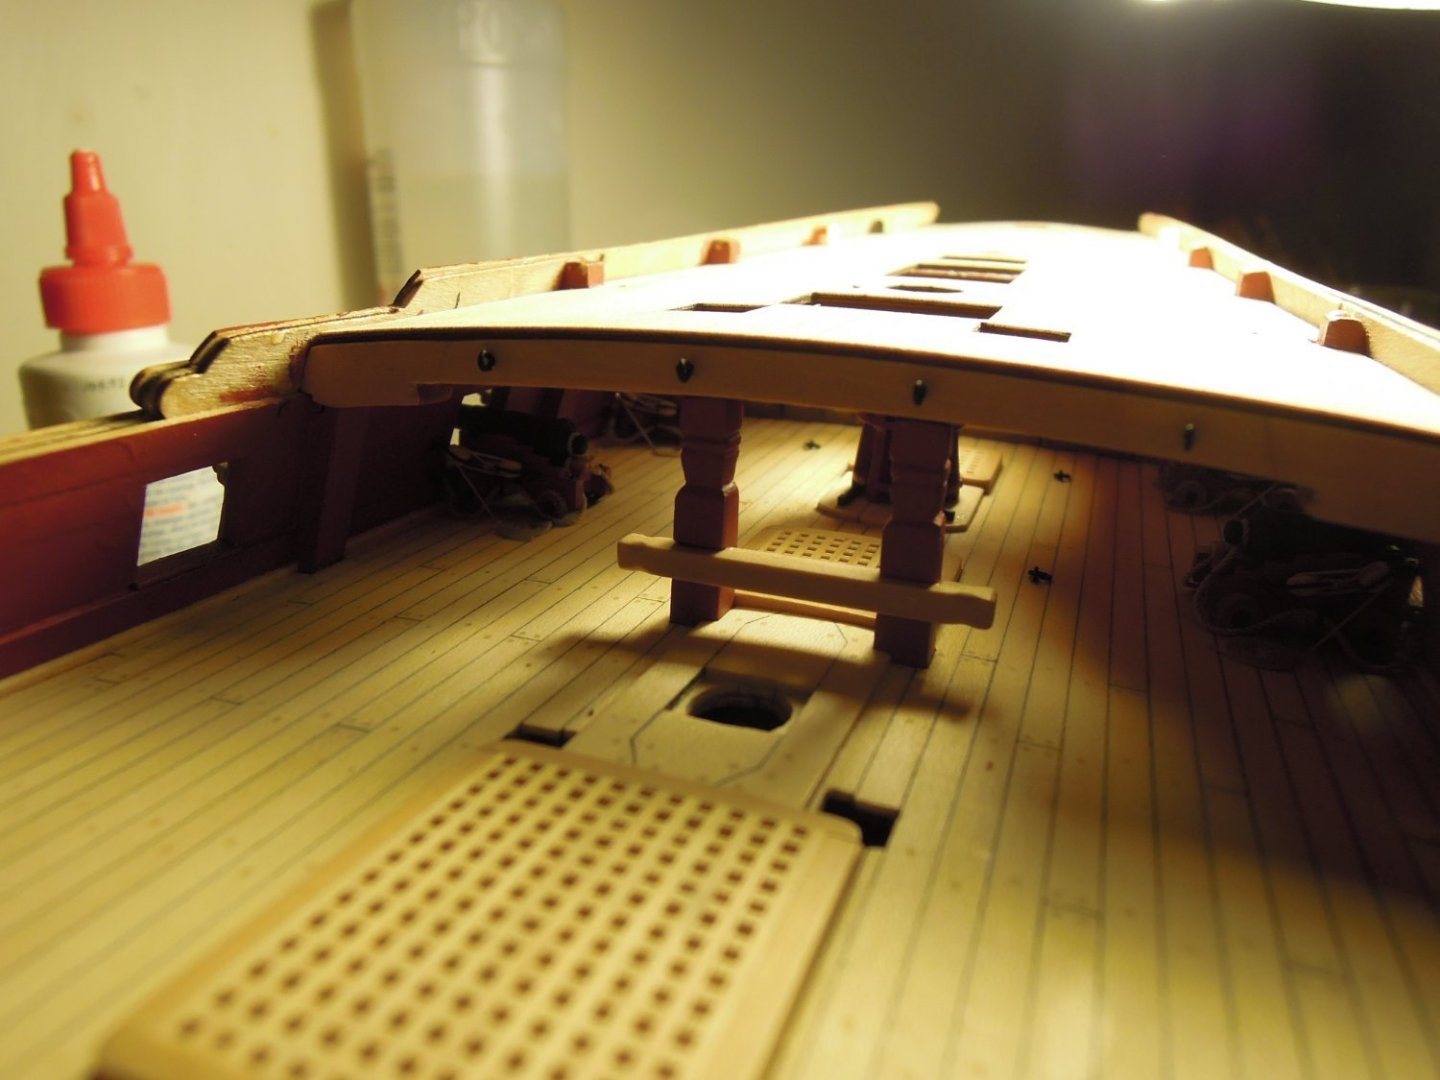
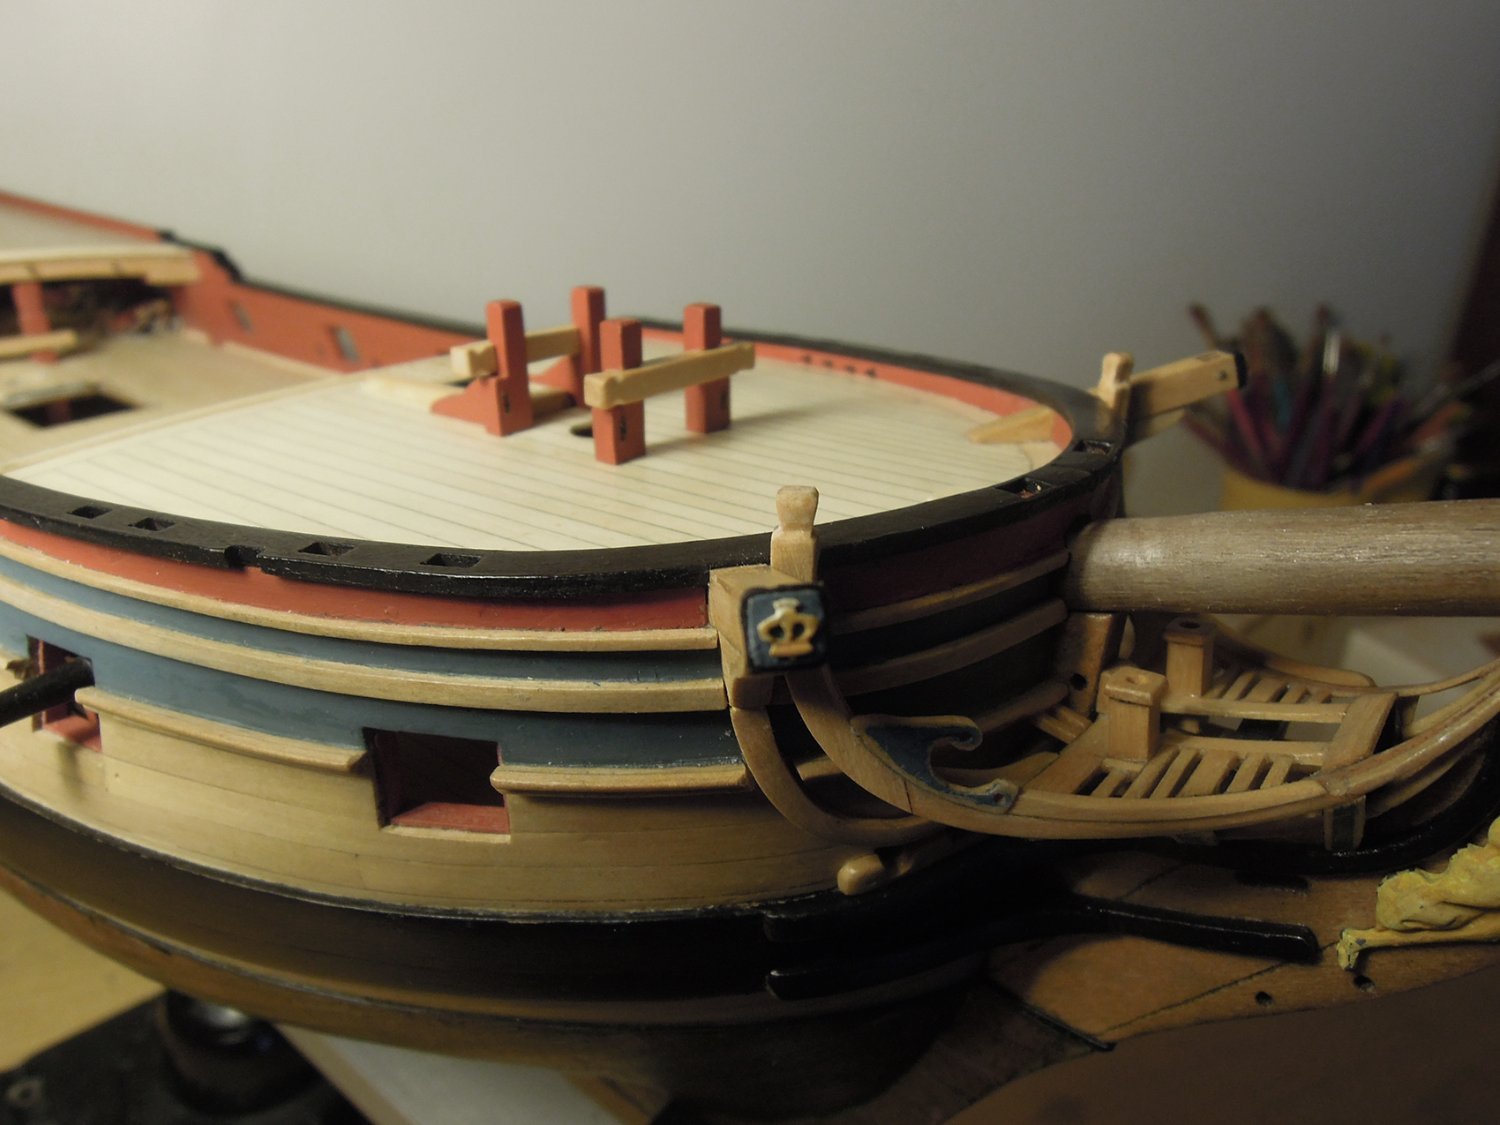
The gallows were an issue - the kit supplied version is slightly strange and I went with a scratch of the FFM version. Kit first followed by scratch. the camera is doing weird stuff with quarter deck planking...

Another break...
-
Thanks all,
Liking your Speedy Spyglass!
Hi B.E. The K80 in your studio photo catches my eye - is that HMS Bluebell? Is it from a kit? I'm still studying your Pegasus log - the definite volume to be read alongside The FFM. I've just ordered prints from the NMM of the Fly profile and deck plans. I'm guessing you have the same for Pegasus in your studio?
Hi Allan - Yes I will post my copper trick in the plating forum but with a big caveat - use at your own risk...
Hi Hamilton - Just catching up on your logs - Bluenose is looking superb.
Carrying on with my compacted log...
Attached the quarter deck - a nerve-wracking element to install but all went well.
Beginning the planking the quarter deck. I planned this using the FFM but probably oversized the hooded planks.

Completed quarter deck planking. Although this is telling most here how to suck eggs, my approach is first to plan the deck - butt joints and scarfed joints at the edge - then to lay the central plank and run it the full length of the deck. Check this for any waver off the line and then plank out from that to the rails. As I am also insetting the hatches into the decking, I make them beforehand and trim the deck to suit as I go. As said, probably old rope to most people here.
Hatches test fitted and deck treenailing complete.
I made the clerestorey skylight - adding the sidelights was beyond me...

Tested in place.
Taking a break - will continue shortly.
-
-
Thanks Spyglass & Allan
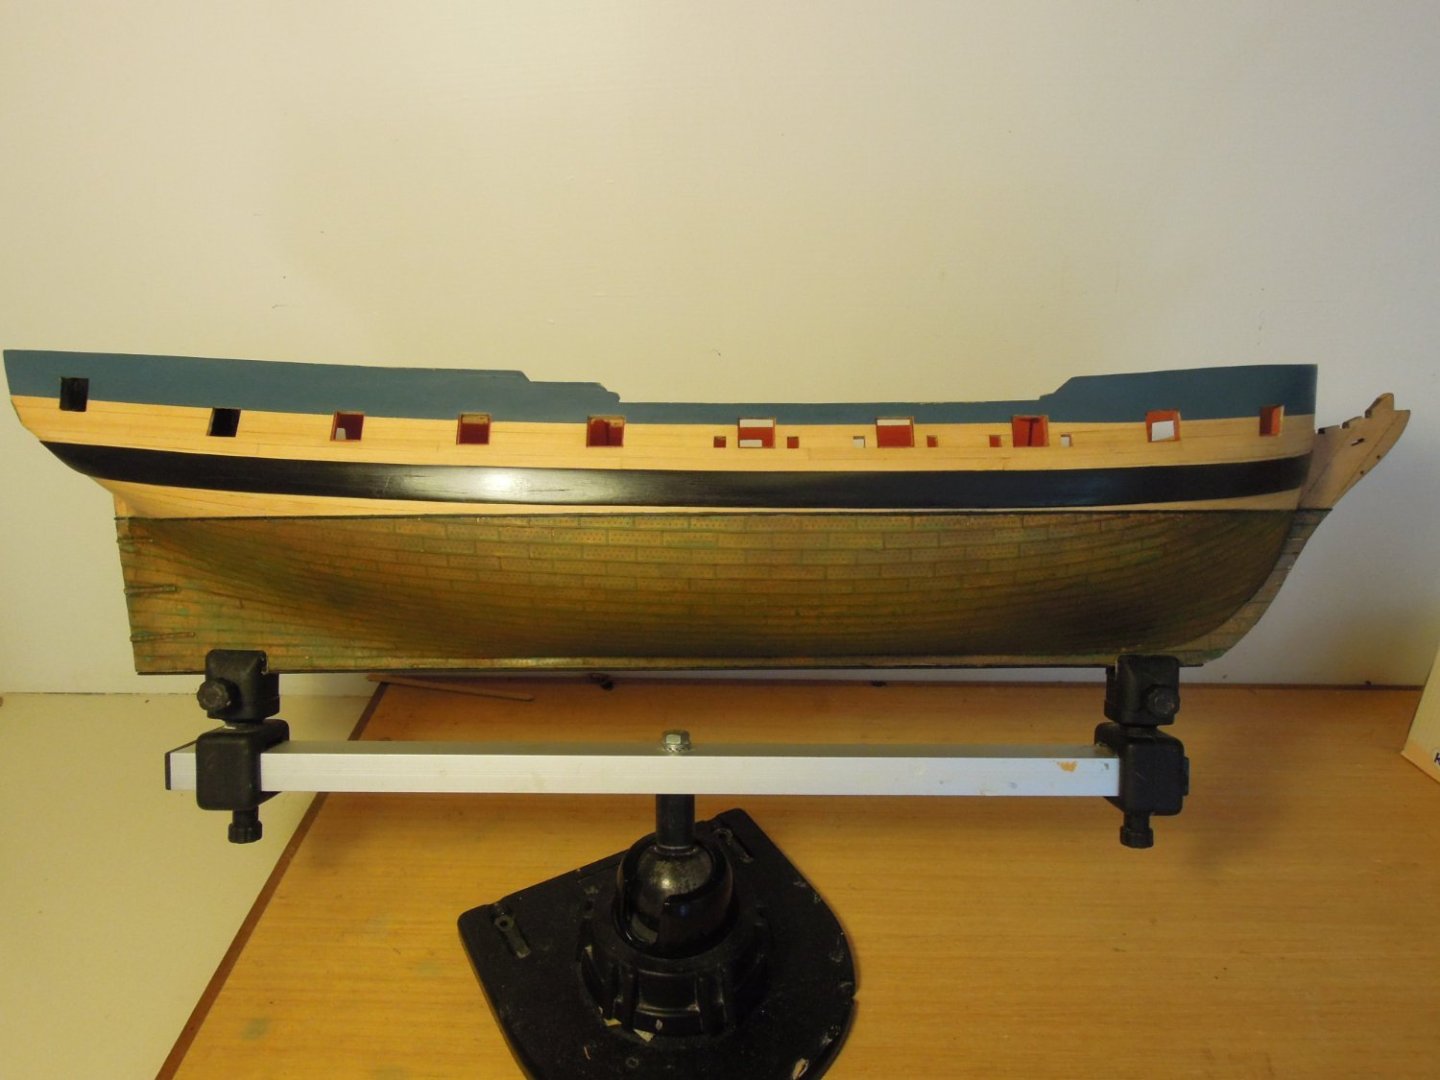
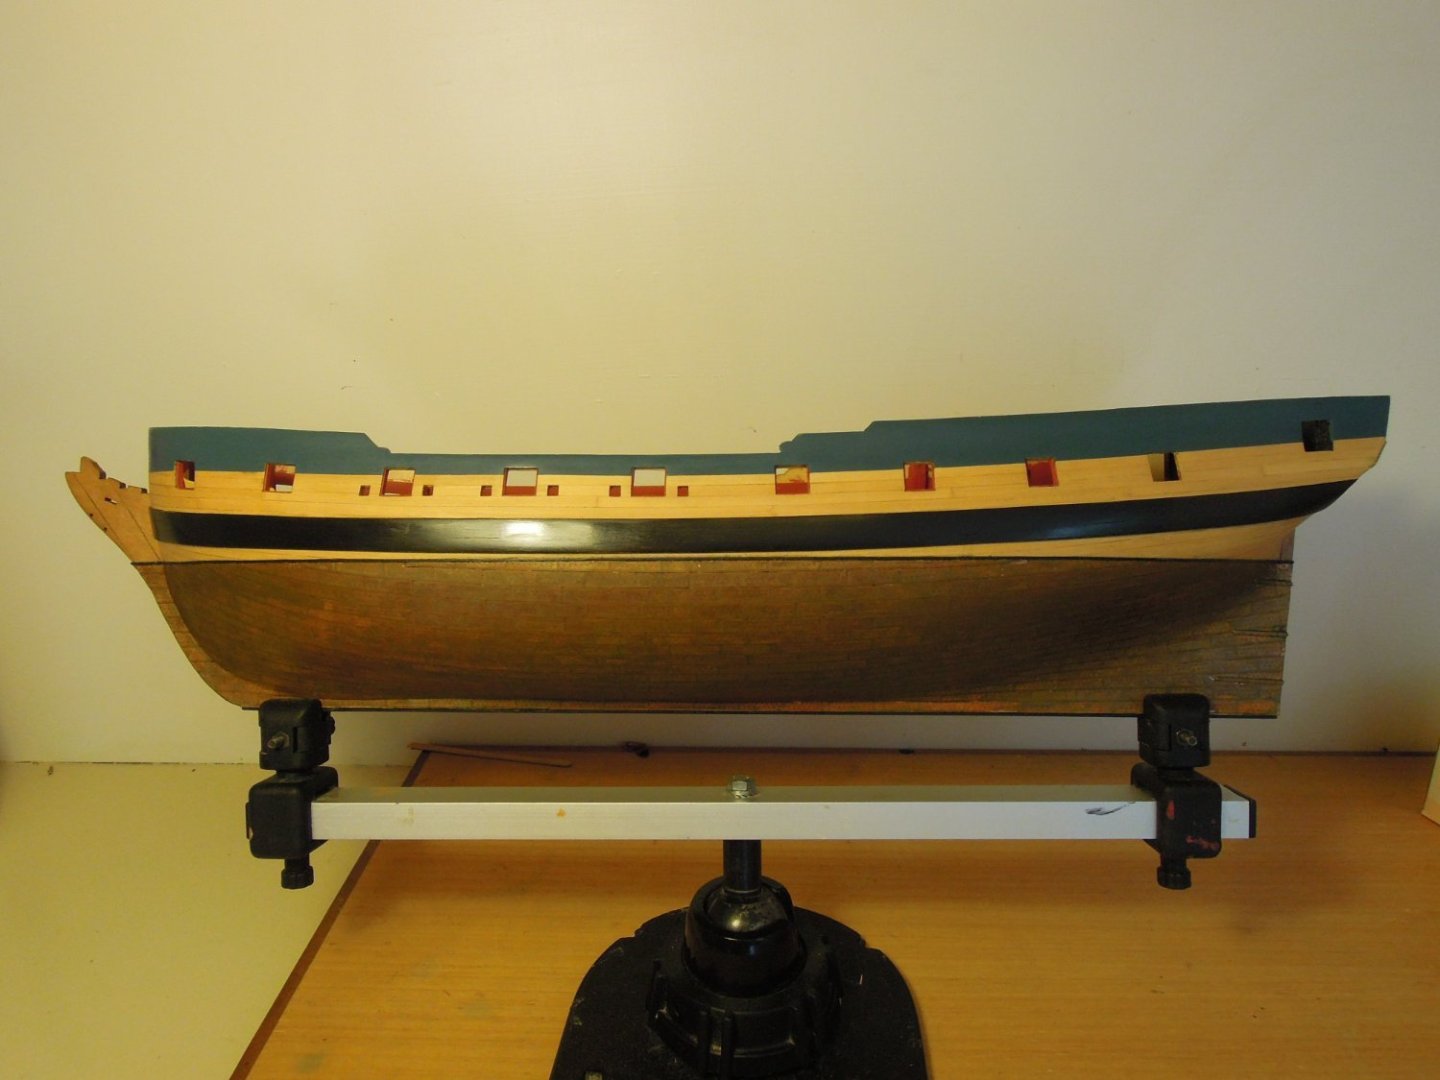
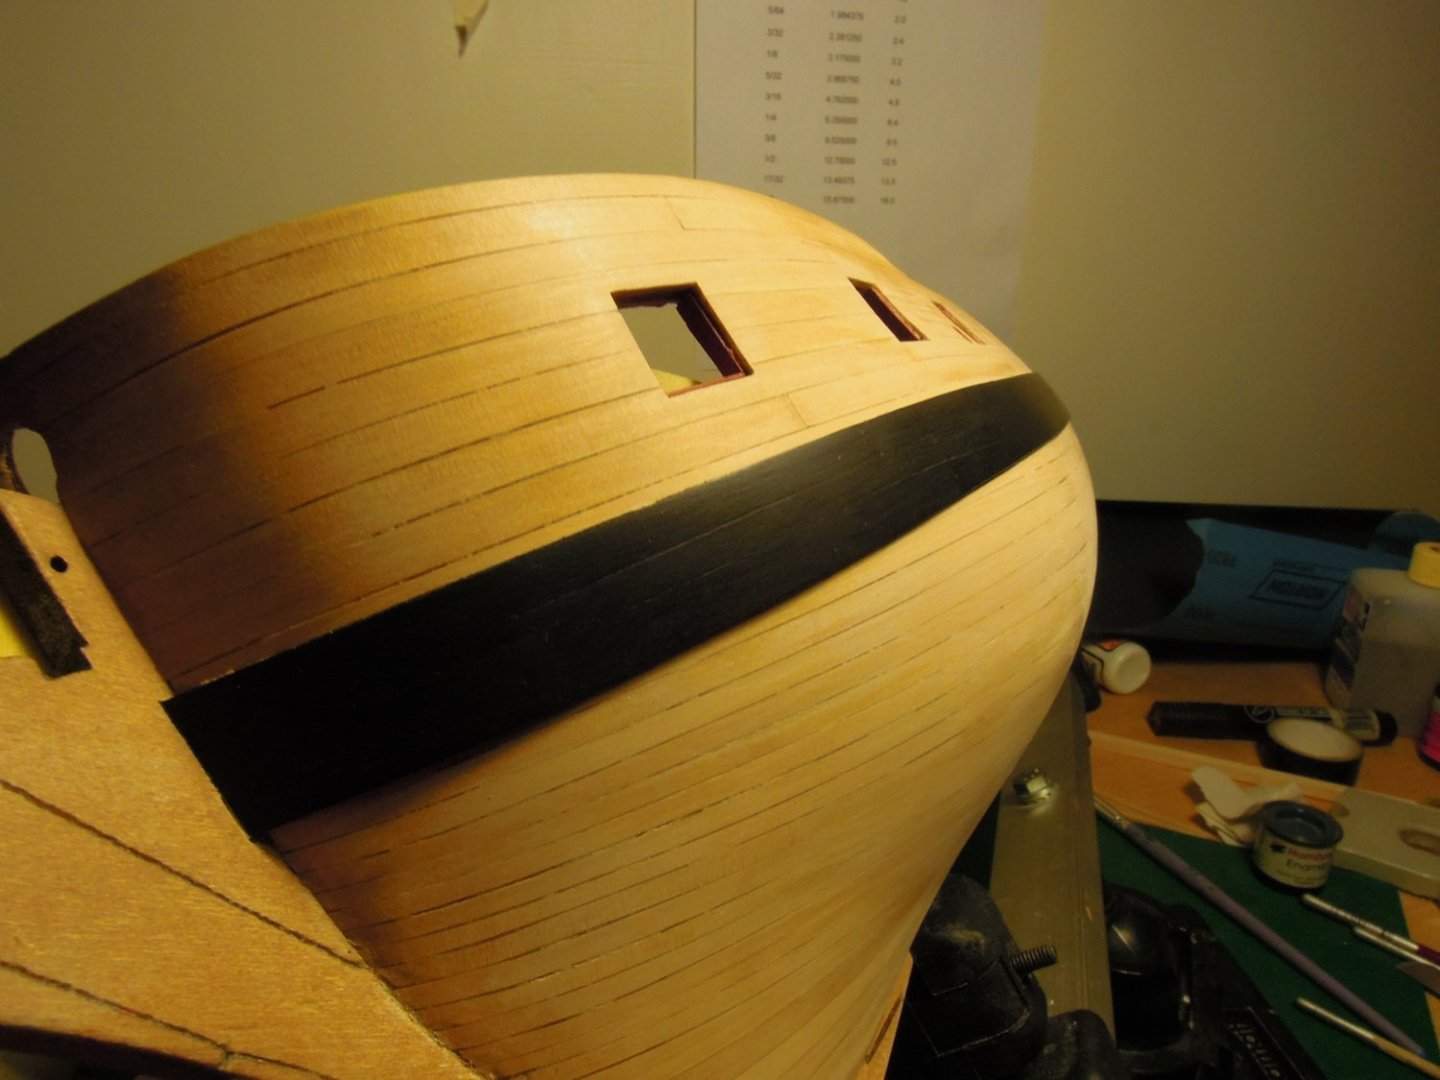
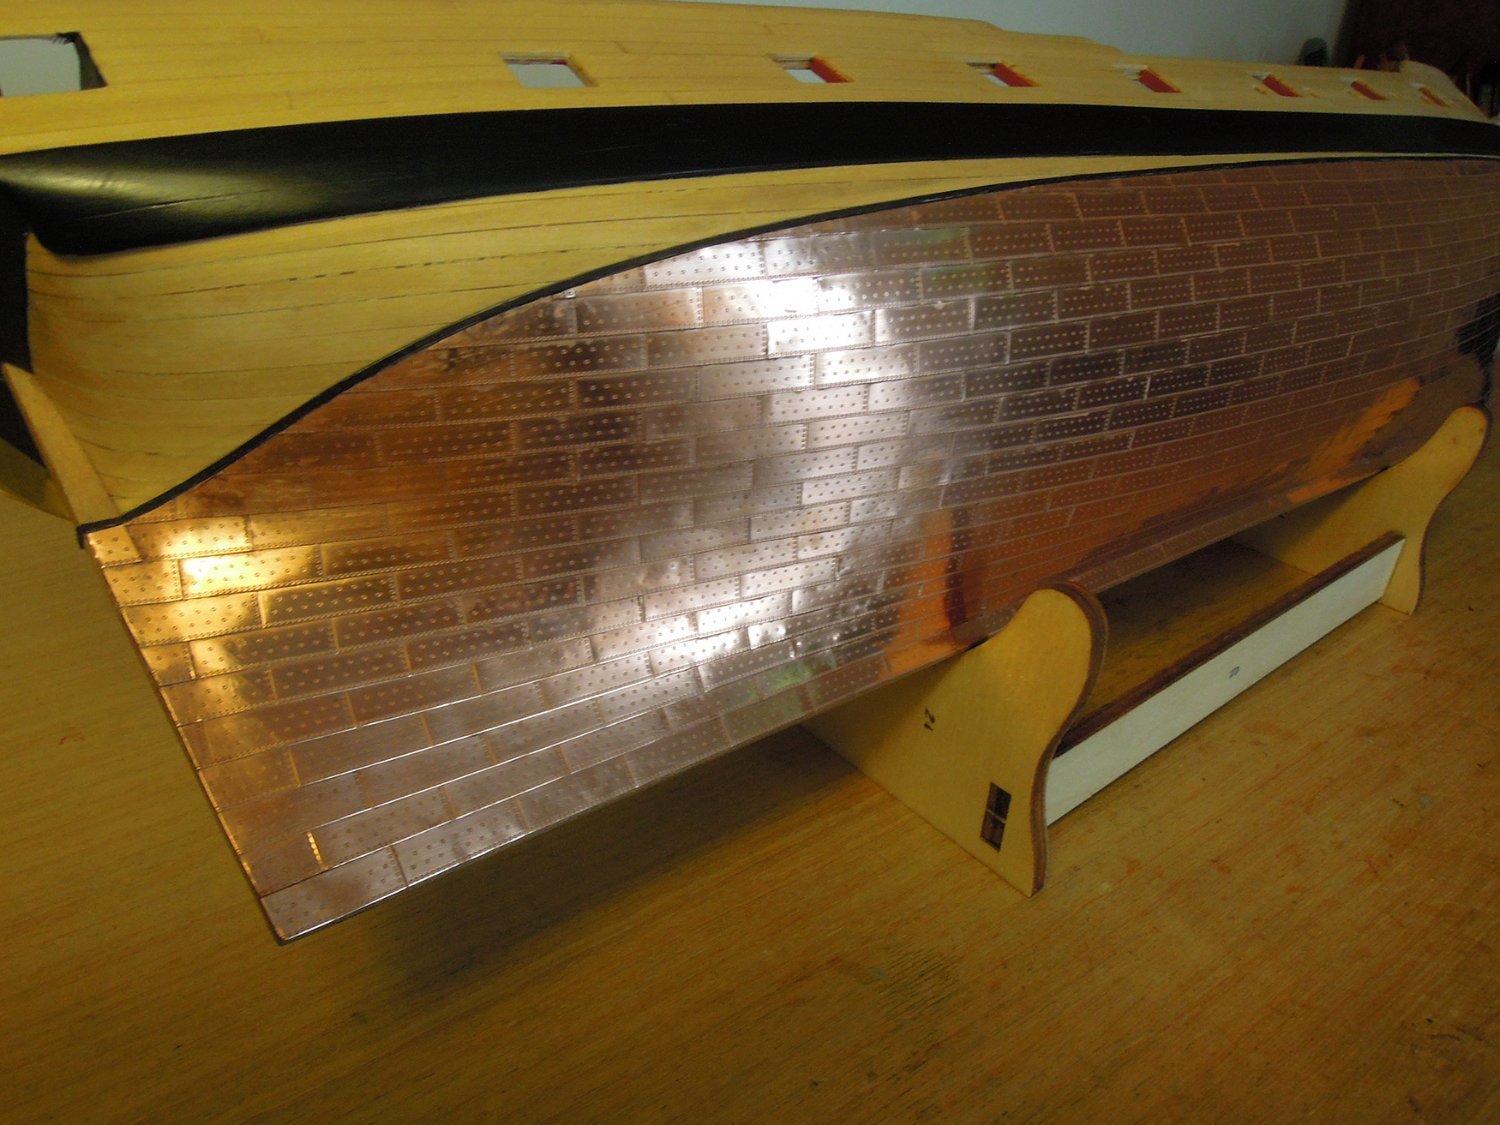
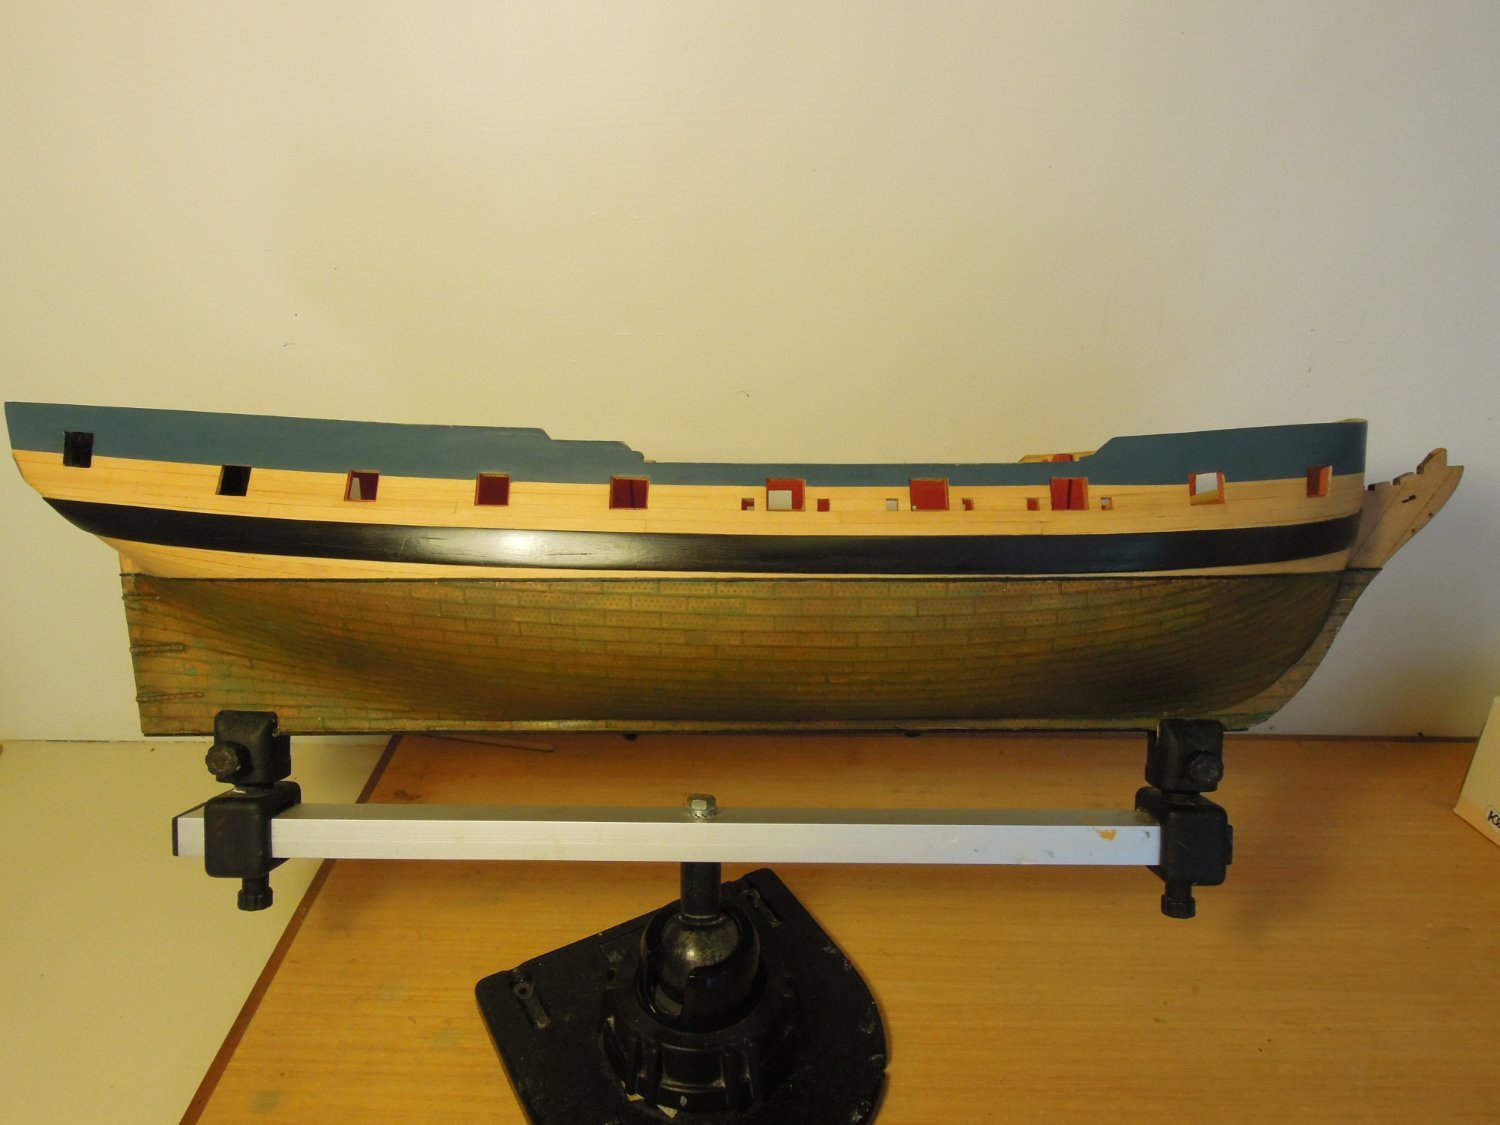
Next update to compress my old log. I was determined to try to copper the hull no matter how the boxwood planking turned out. I marked the waterline using a very expensive kit of an old cardboard tube with a pencil piercing it.

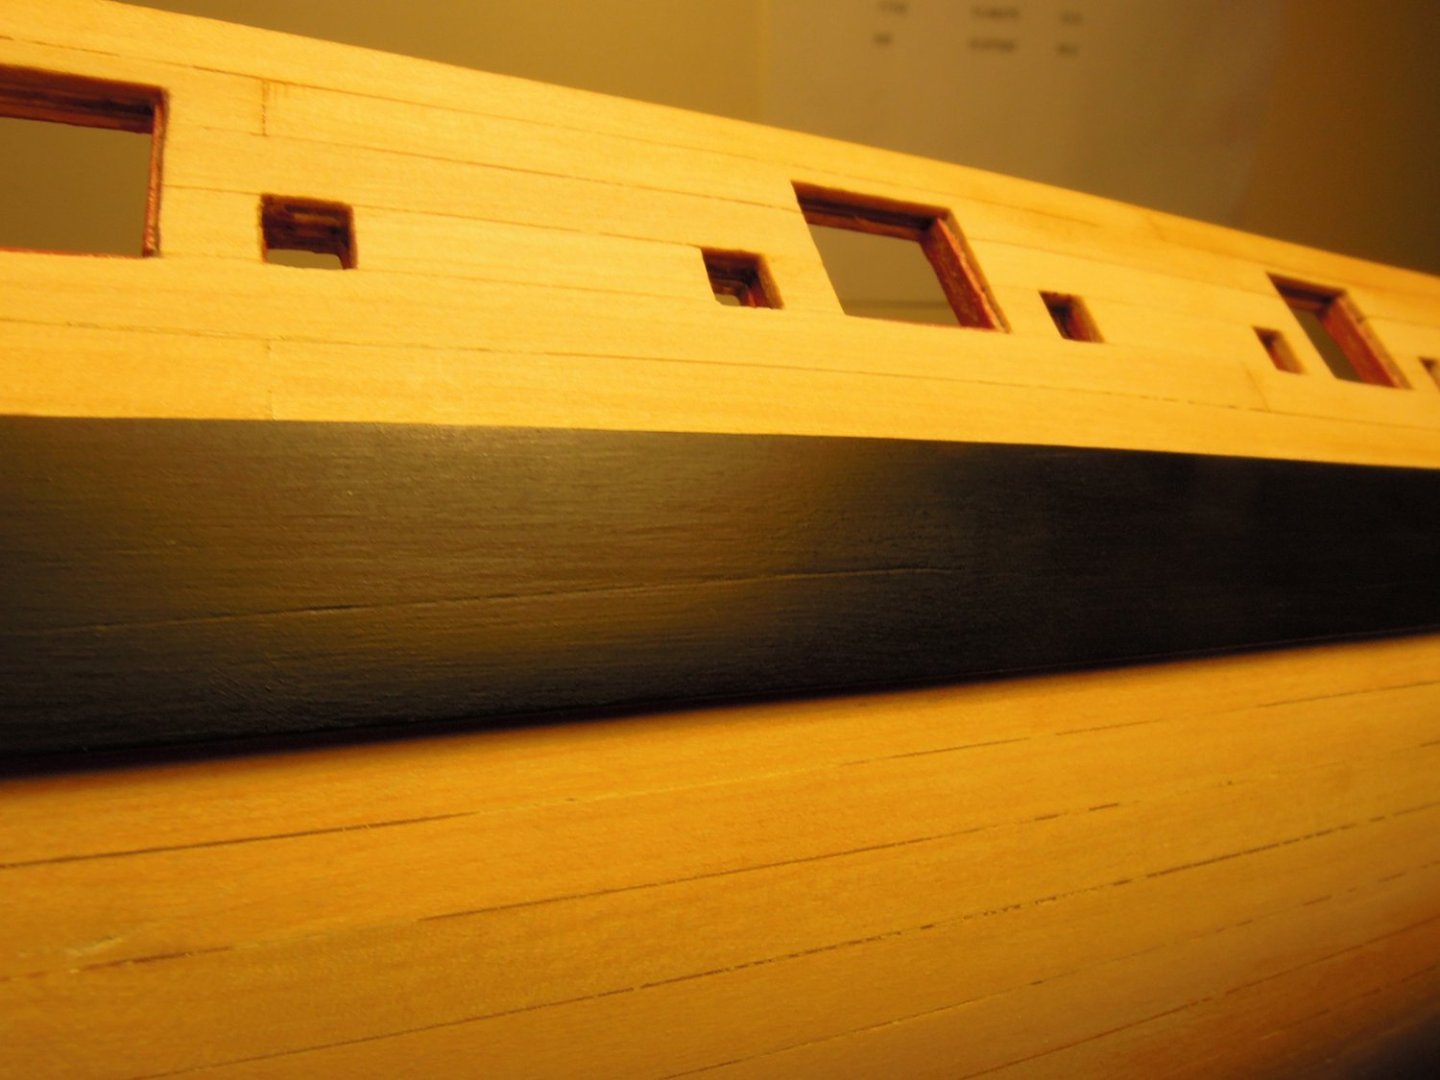
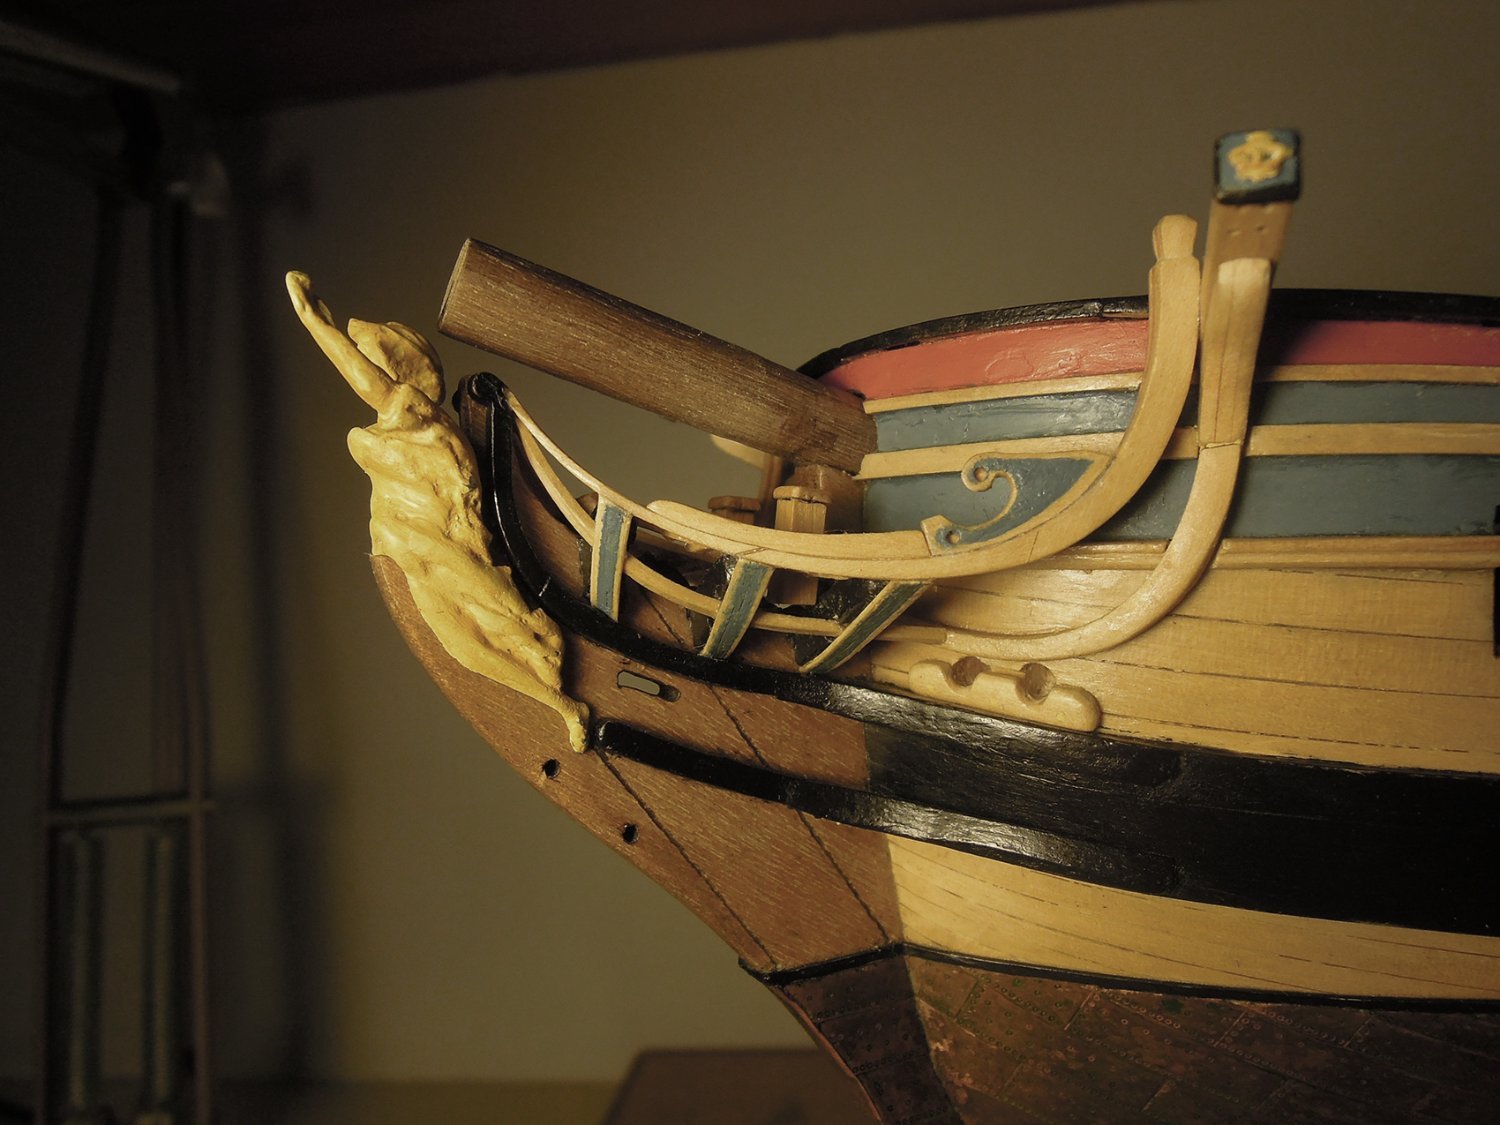
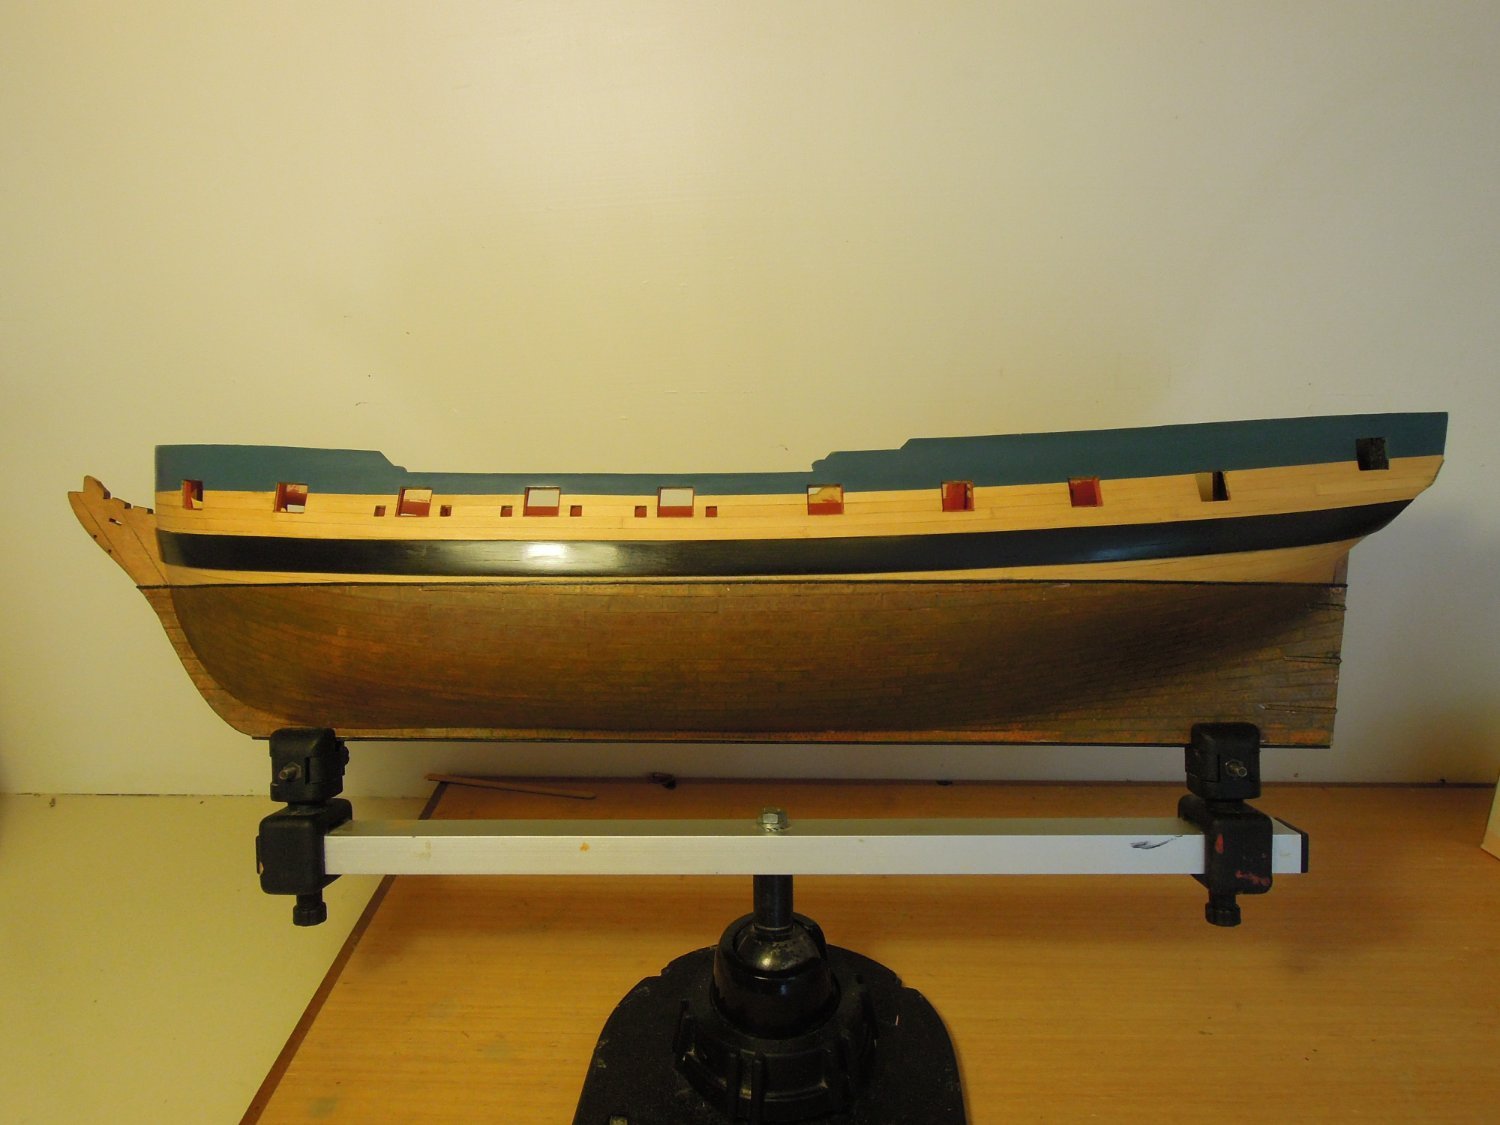
The coppering went well but the result was far too bright and shiny. The process was tedious but I stuck to the FFM concept of copper planking which more or less follows the hull planking. The bead at the waterline is a thin styrene strip painted black.


Unwilling to wait for the copper to naturally tarnish, I decided to accelerate the process. My wife, an architect, used to work on the design of high end resorts in Indonesia. They used horse urine to quicken the aging of copper roofs. I don't have a horse but I make urine - so why not try? Unpleasant to use but repeated applications over two to three days got me there. The speed of aging takes place within that time but needs careful working by brush on, wipe on and wipe off. By this point I had also painted the upper works in my interpretation of the blue. For me Humbrol 157 enamel with a touch of added grey. After the aging of the copper the entire hull is sealed with Testors Dullcote. All of this is done by hand with brushes.

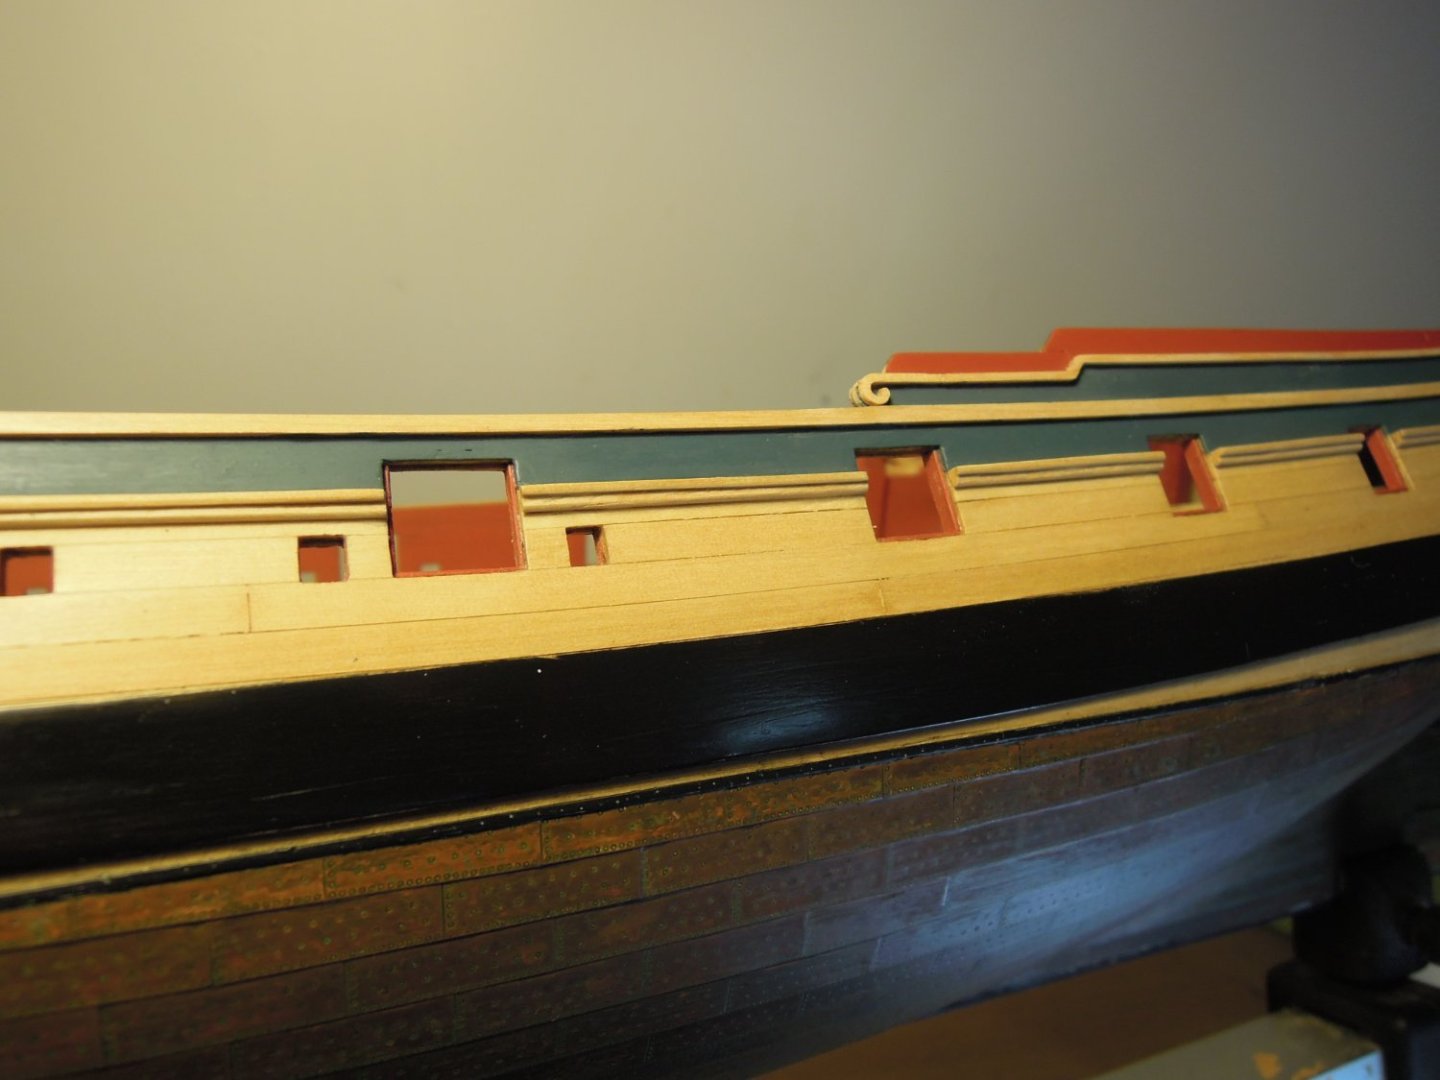
Next I tested the quarter badges for the look and started the process of adding the hull rails.
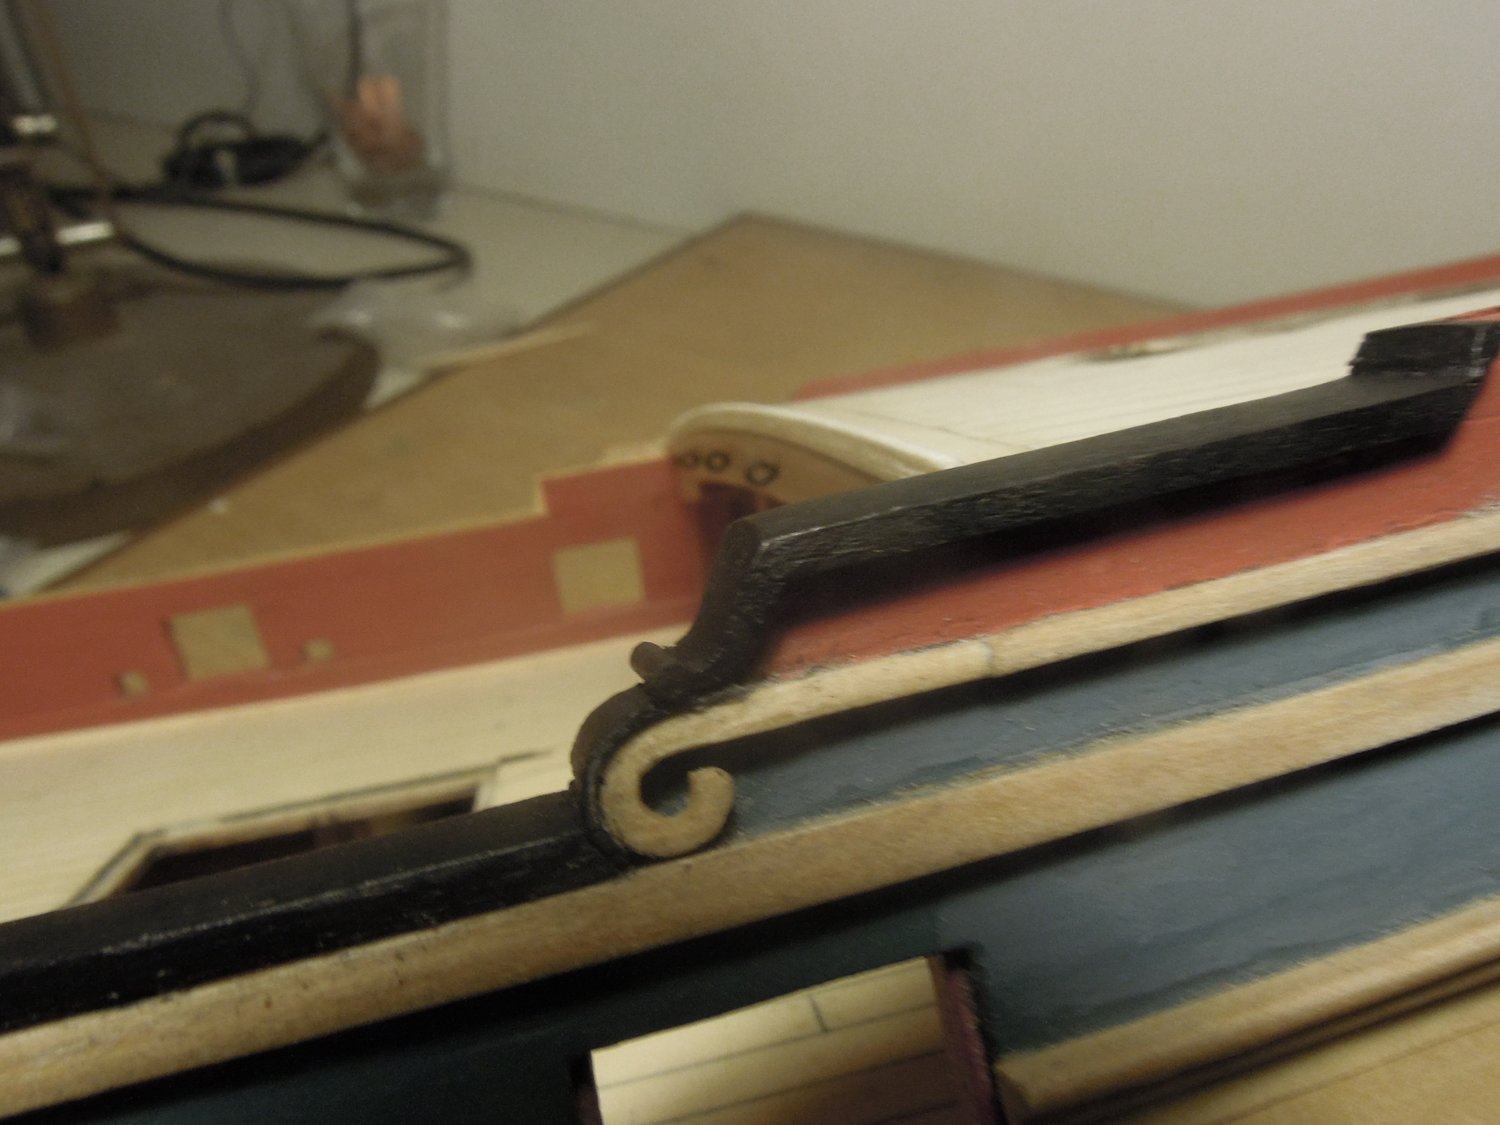
Improvements to the rails included making new coils for the end pieces. I also painted the upper most works in red.
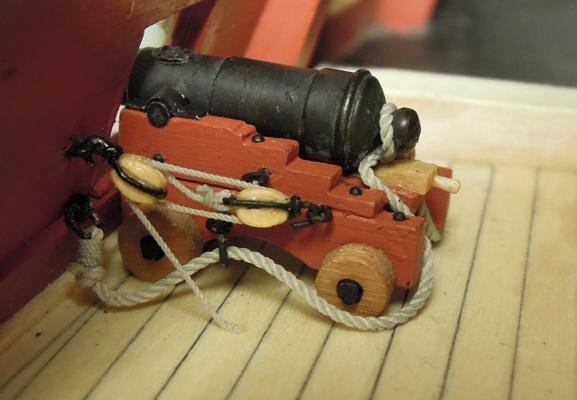
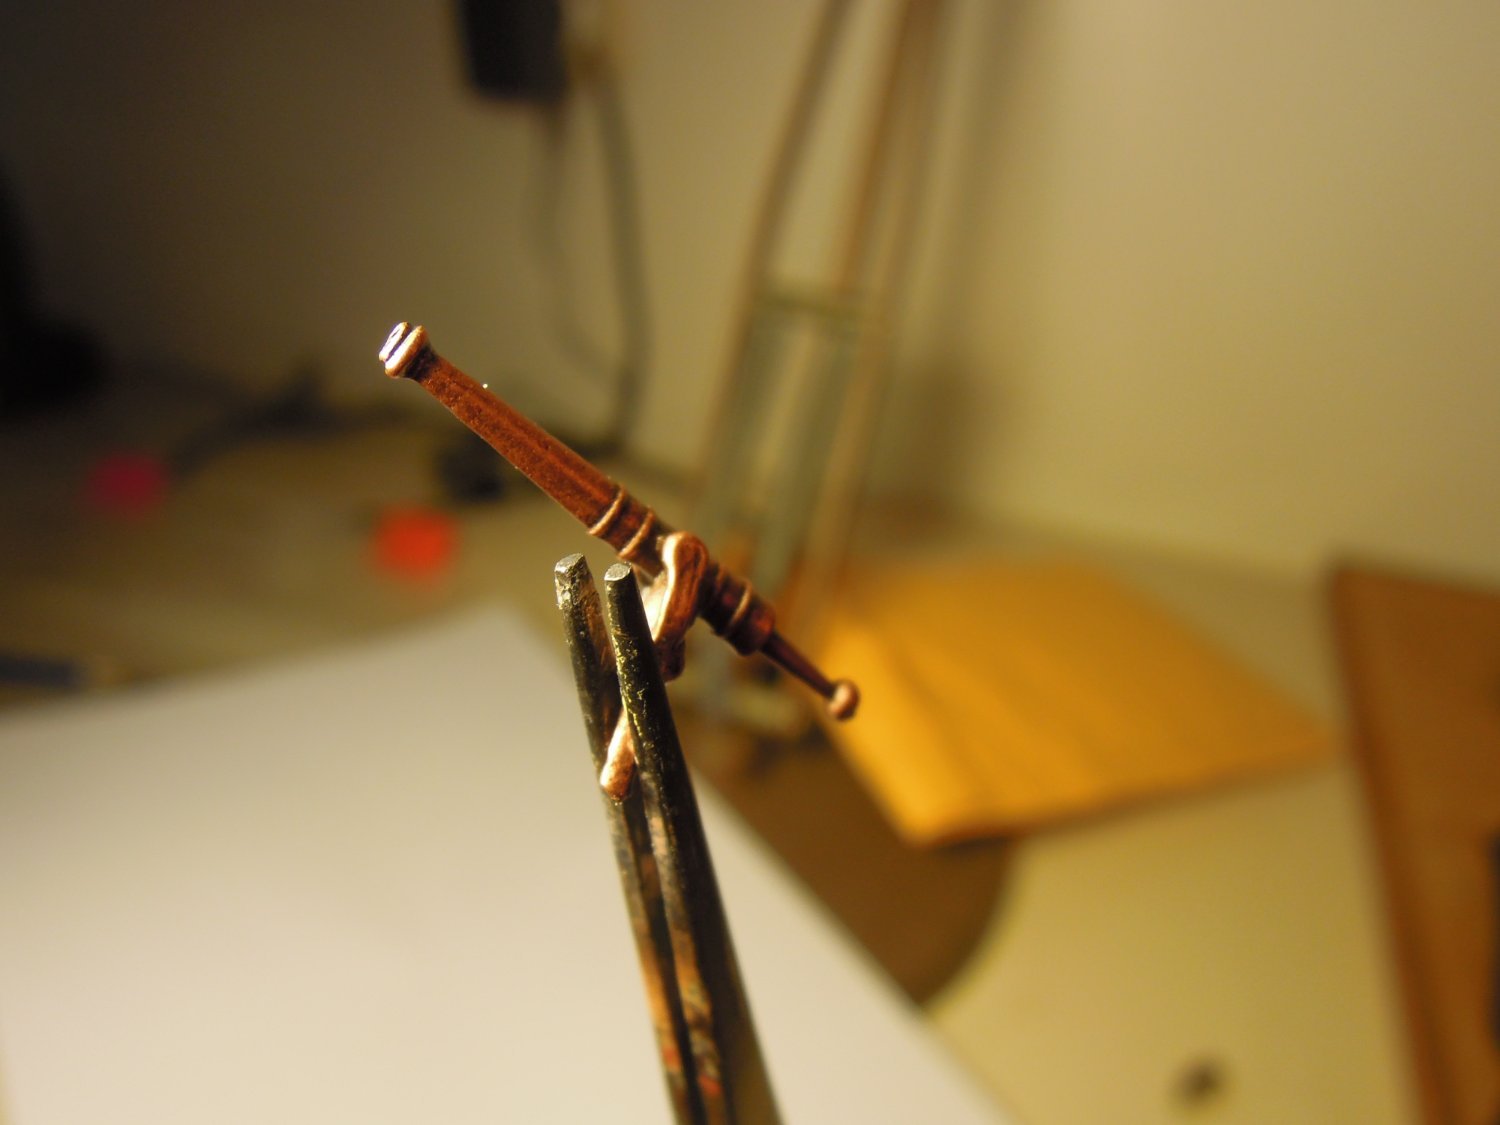
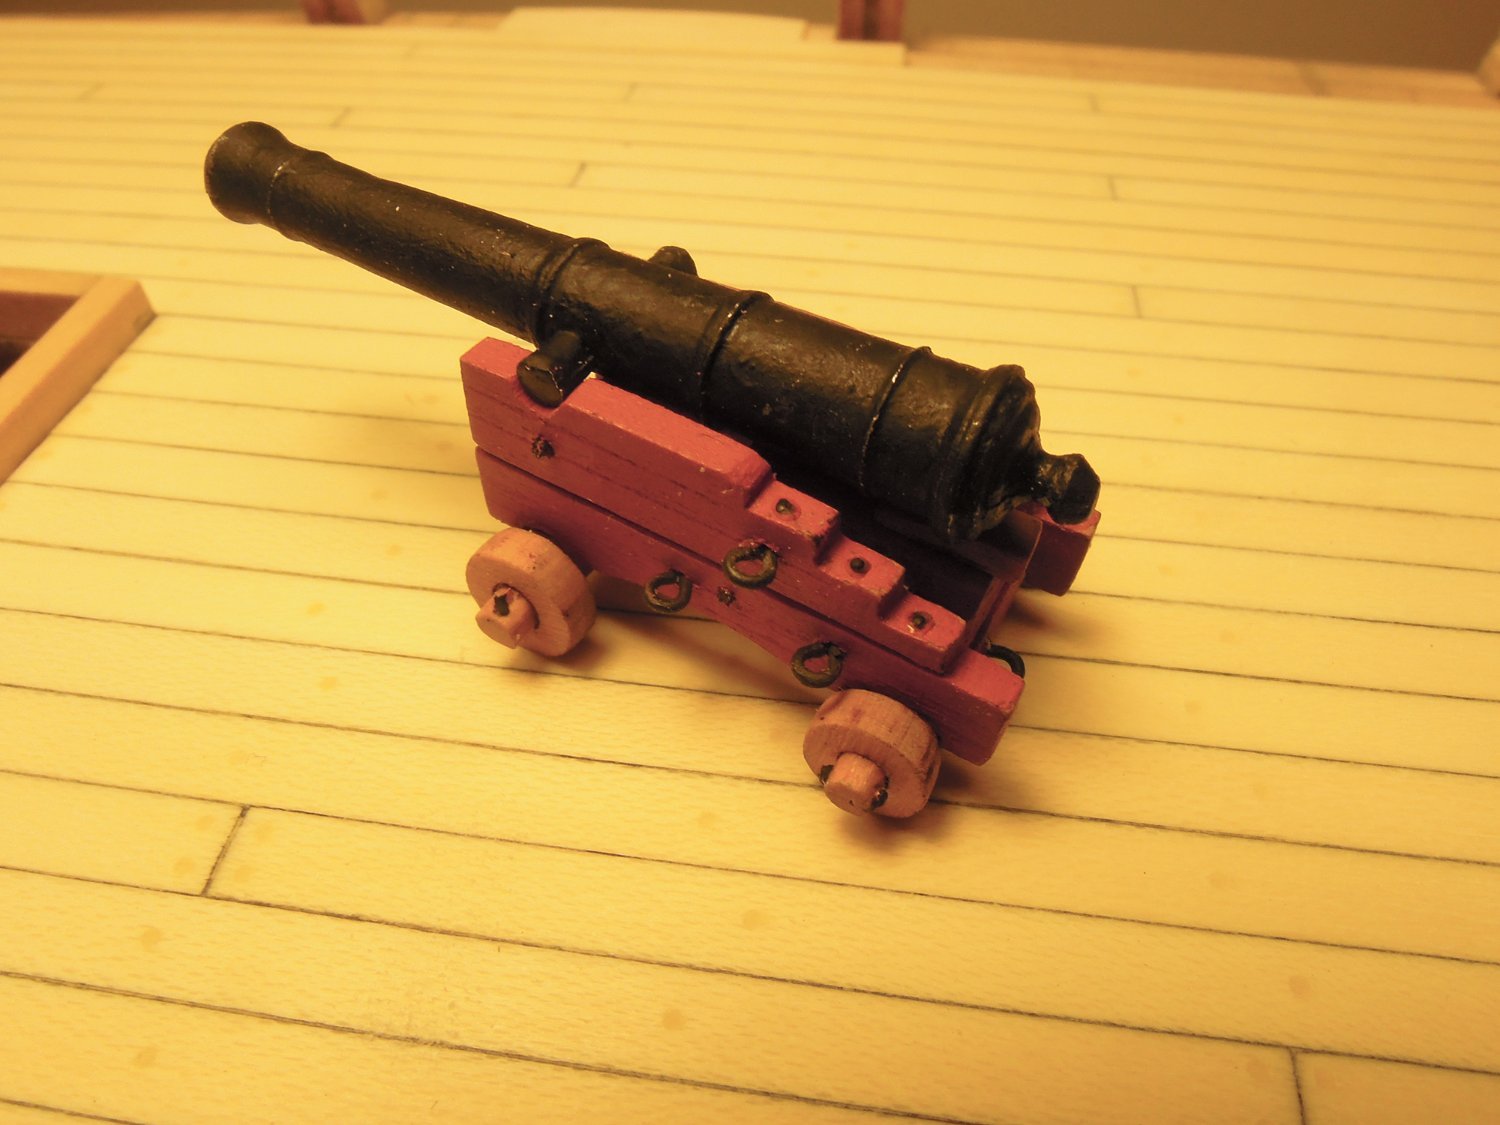
Next up (actually I played with this earlier in the build) was the vexed issue of the cannons. The kit supplied ones are pretty awful (an understatement) and not to scale. I mucked around with alternatives and settled after a while on RB Models barrels set on Syren Models (I think - memory a bit lost here) carriages. The RB Models cannon is pretty much the exact right size and it fits perfectly with the carriages. It was quite an expensive exercise trialing and getting the right bits in place but the cannon is a (the) central part of a warship and getting these wrong would let everything else down.
Test One - carriage good - barrel too big.

First test versus kit supplied cannon. Ugh - And my test barrel and carriage are still too big.
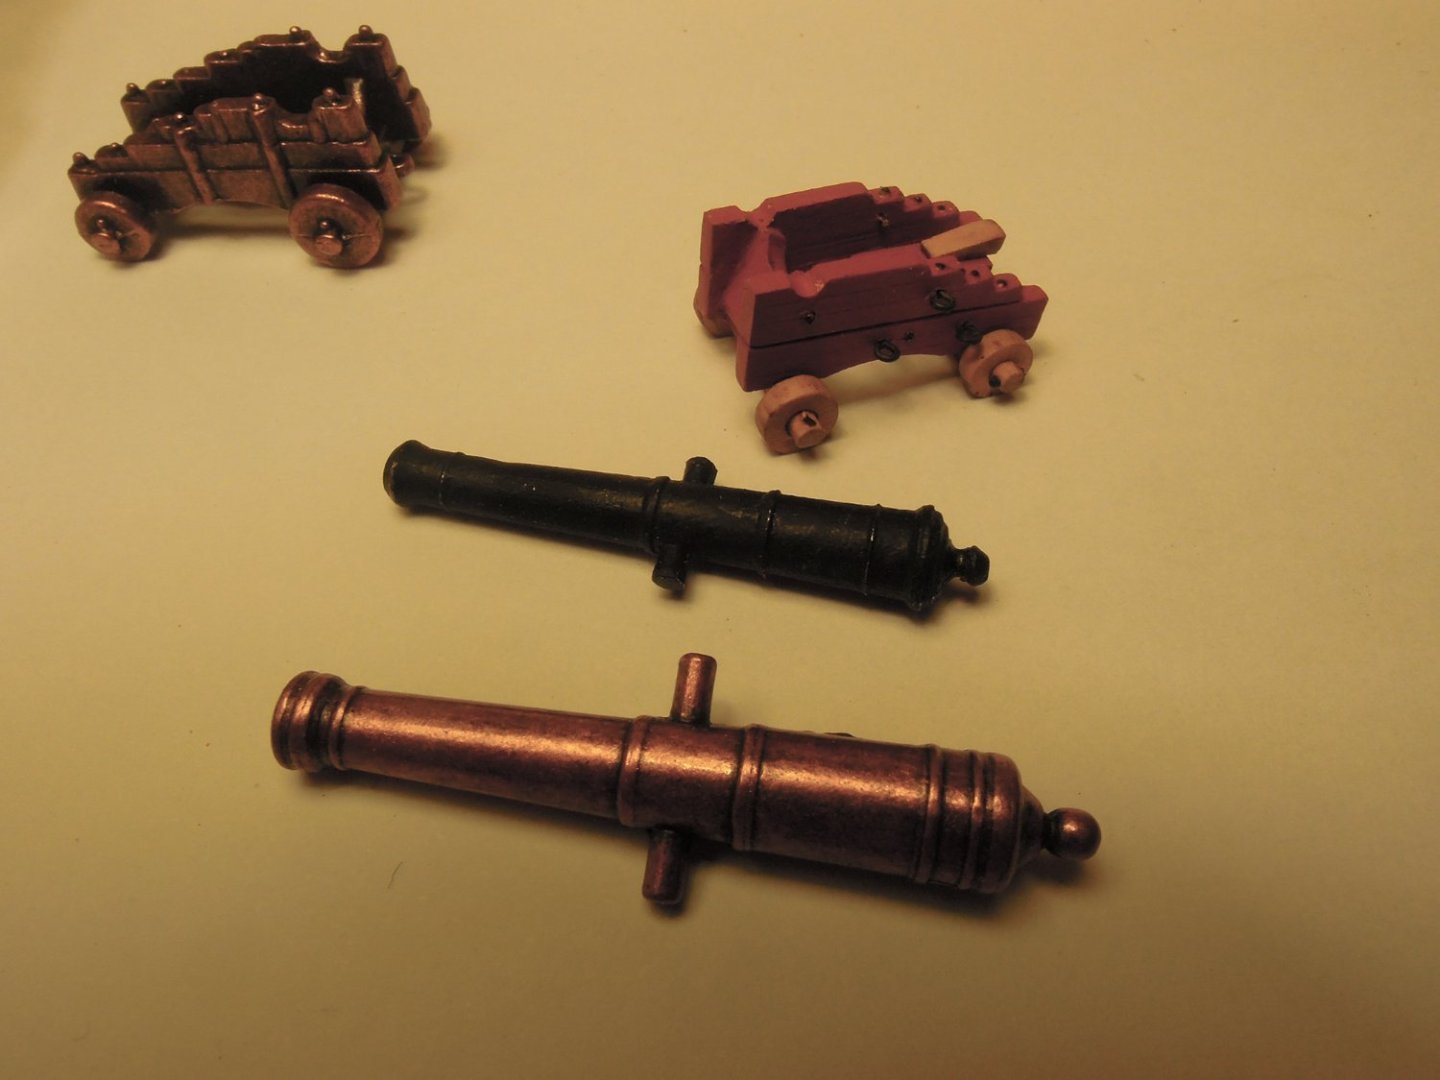
the next test put a new barrel (from where I can't remember) in the foreground up against the RB Models barrel in the background. RB wins.
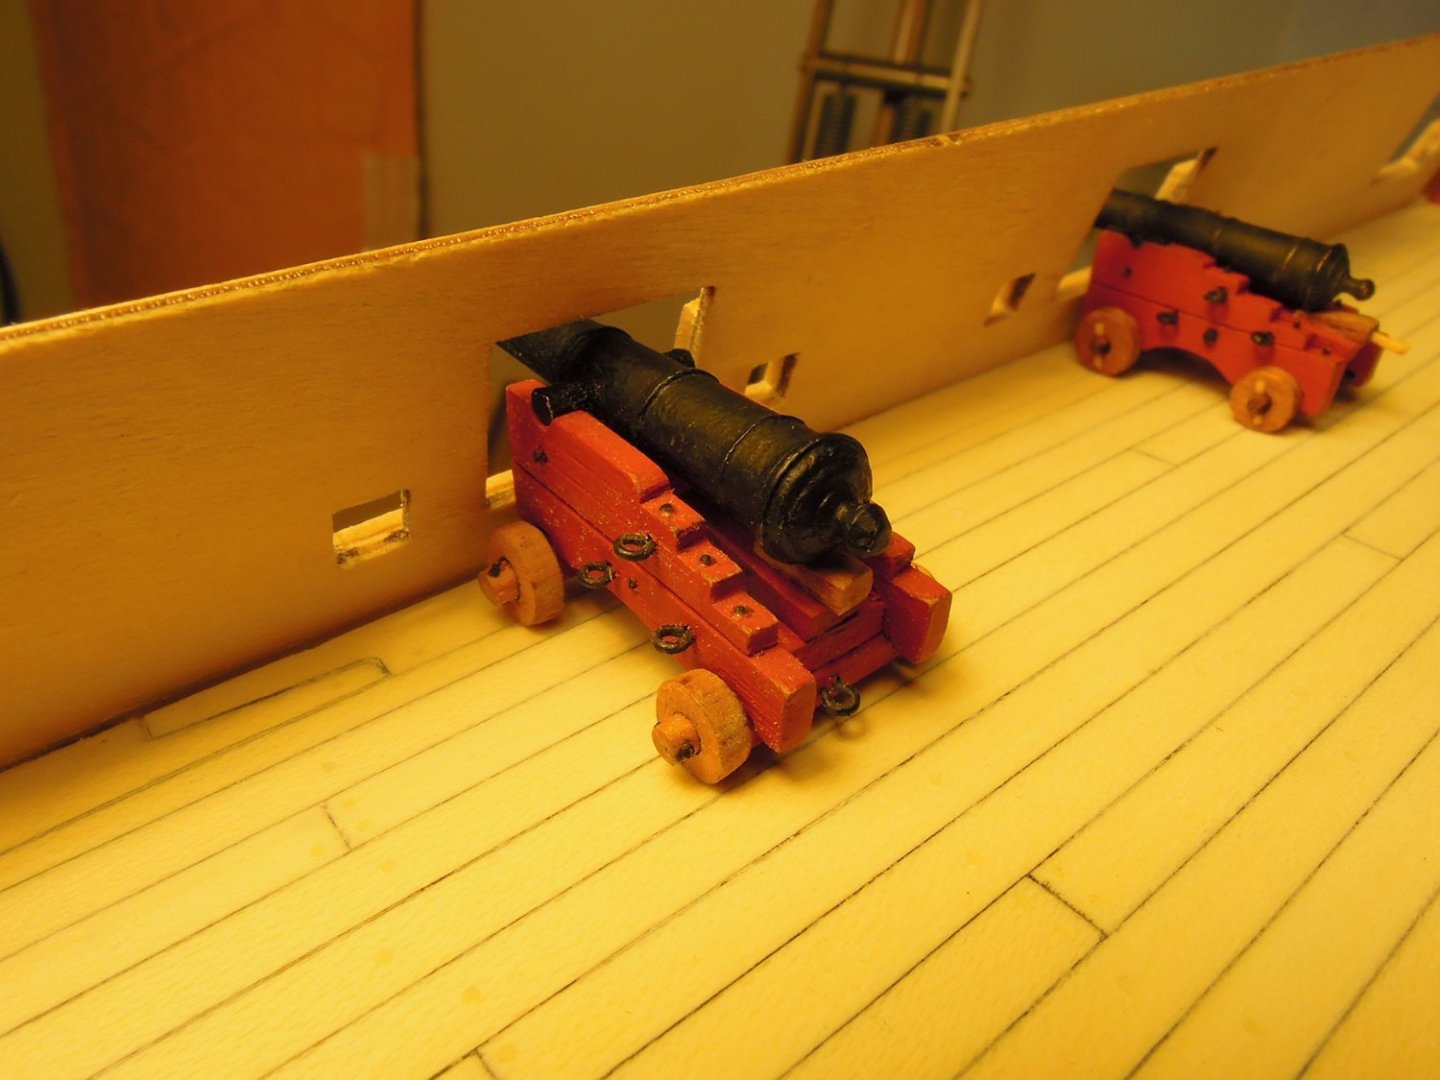
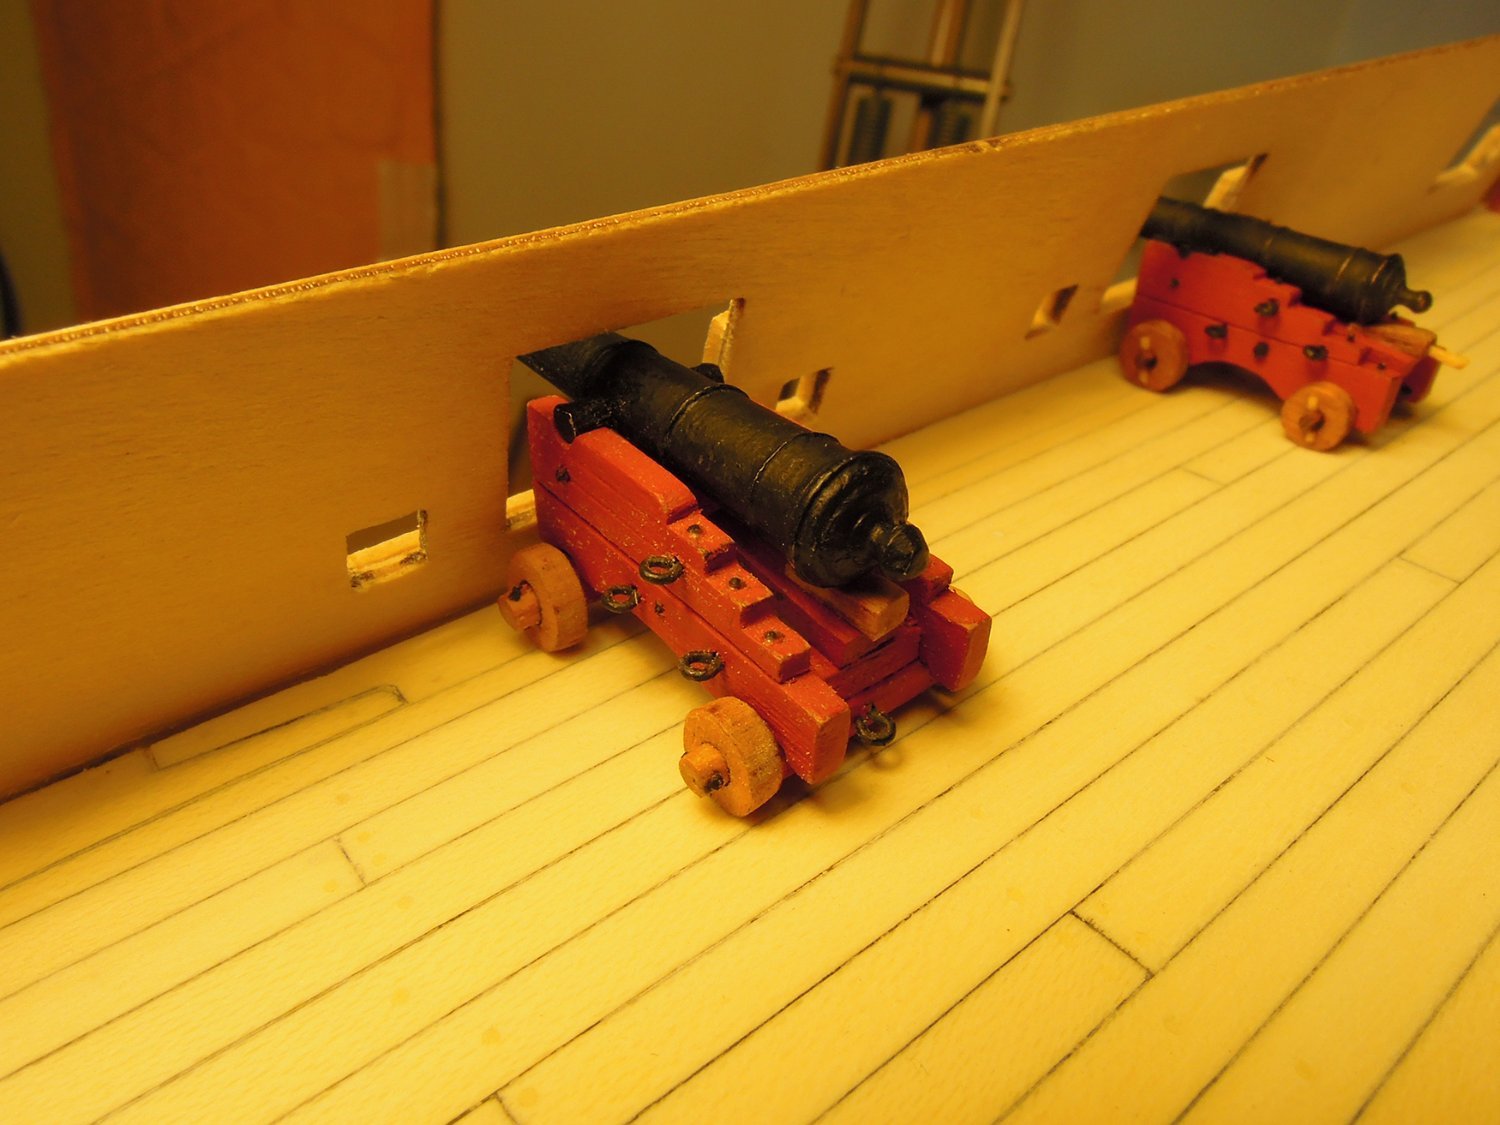
Having settled on the cannon I now need to get them under the forecastle and quarter deck - where they'll never be seen again. The rig is single 2.5 mm block to double 2.5 mm block with 0.25 mm tackle and 0.6 mm breeching rope. I know the single to double block arrangement is wrong for this sized cannon but it is easier to rig and I don't have enough single blocks at 2.5 mm to do the job...
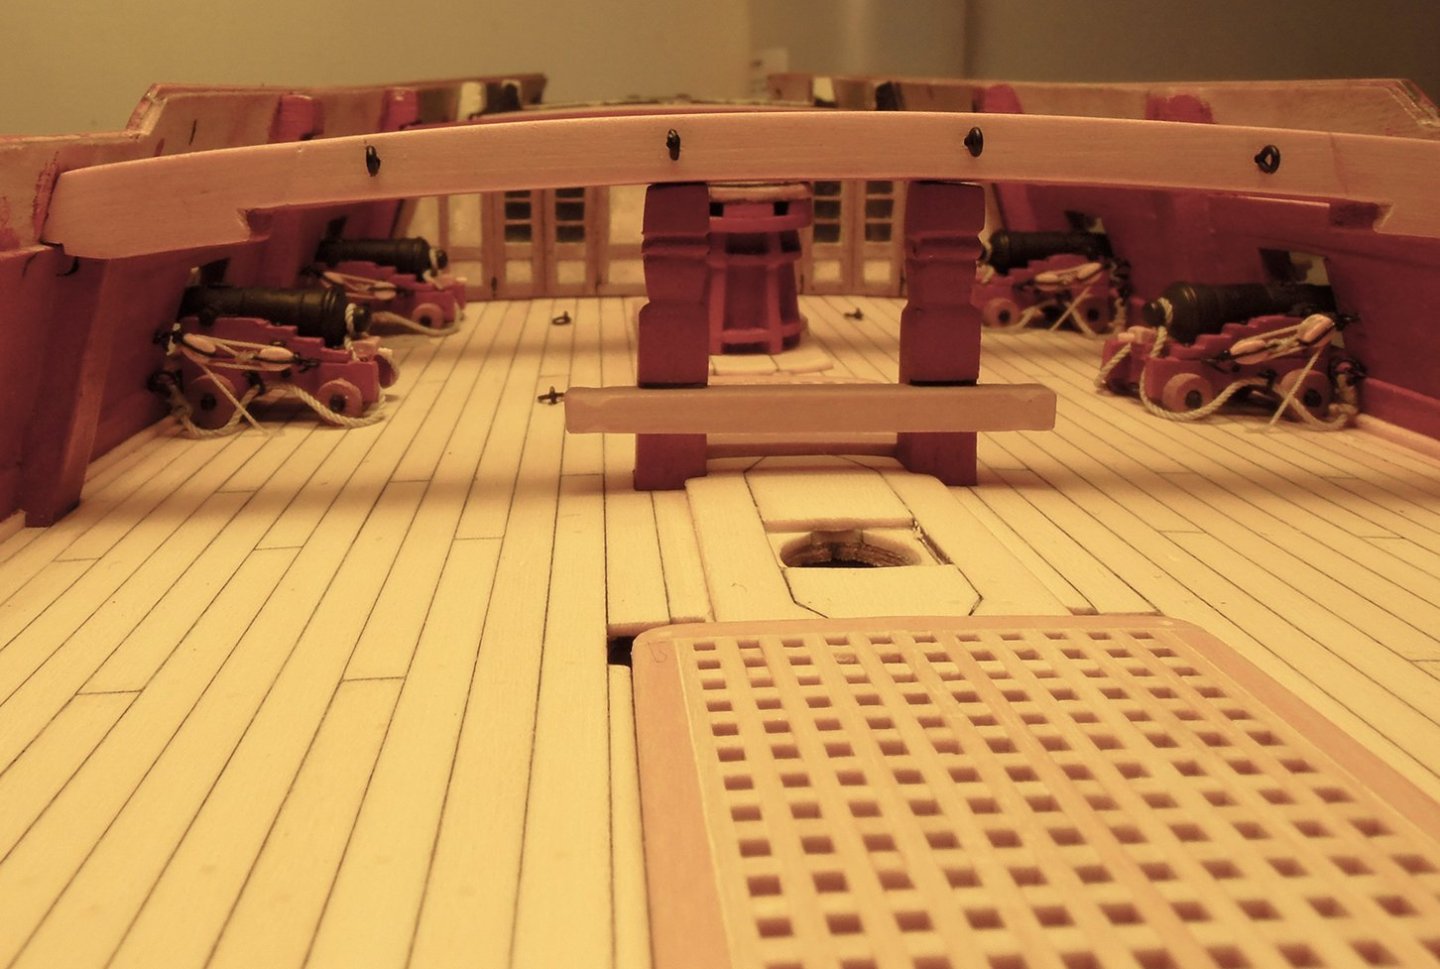
Lower capstan, beams, bitts, rear bulkhead and cannons (rope coils to come) installed before tackling the quarter deck installation. I'll leave it there for now.

- CiscoH, Thukydides, DaveBaxt and 9 others
-
12
-
Hi
After mothballing my HMS Fly for eight years and delving in making Wingnut Wings WWI plastic kits, I am returning to Fly with the intention to render it as a hull only model but keep the option for future rigging by making the mast stubs removable. Here, in this reloaded log, I will compress my previous log but keep the information that might be useful to other Pegasus/Fly builders. After I finish the reload I will delete the old log. Many years ago I bought all four volumes of the the FFM Swan Class Sloops from Seawatch Books which I have been studying in the last few days as I did when I was working on Fly. Stupidly during the first phase of building I kept no notes of what I was using - rope sizes, paint colours, block sizes; etc. - so the old log is good for a memory jolt. I will keep a notebook from now on! As a rule I try to get the details historically correct - the FFM helps as do other logs here (especially Blue Ensign's) - but I also defer to my own aesthetic taste in instances where this may be slightly incorrect, e.g. my quarter badges which attracted some comment back then. My method of weathering the copper clad hull also attracted a lot of comments! But I stand by it.
So to kick off this reload:
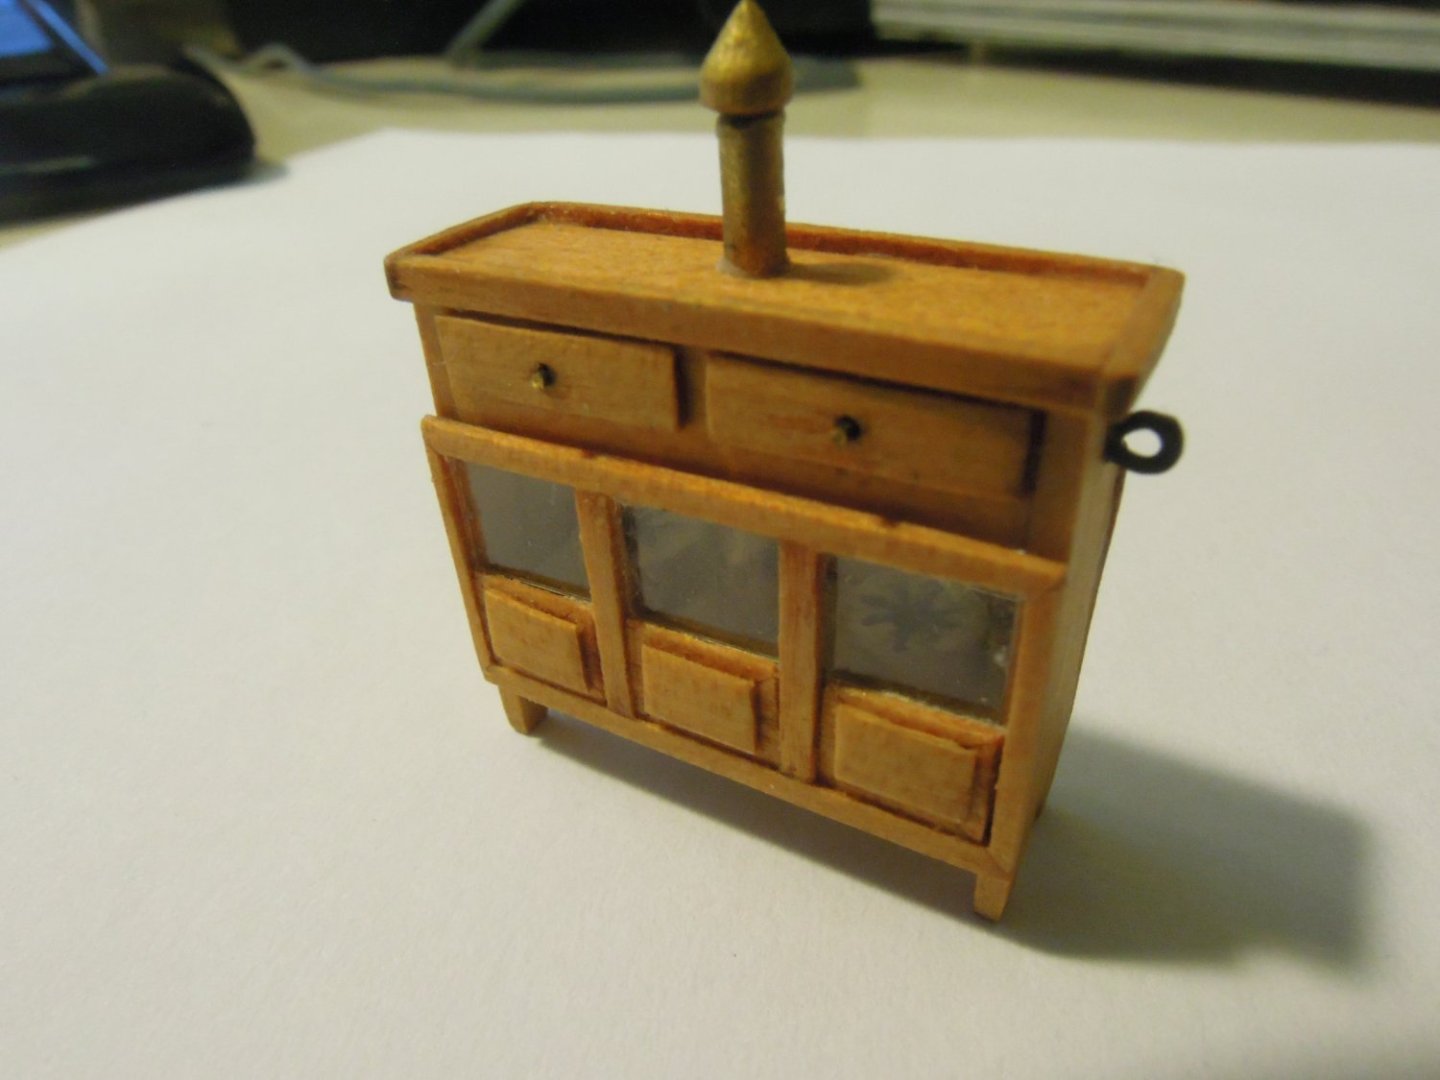
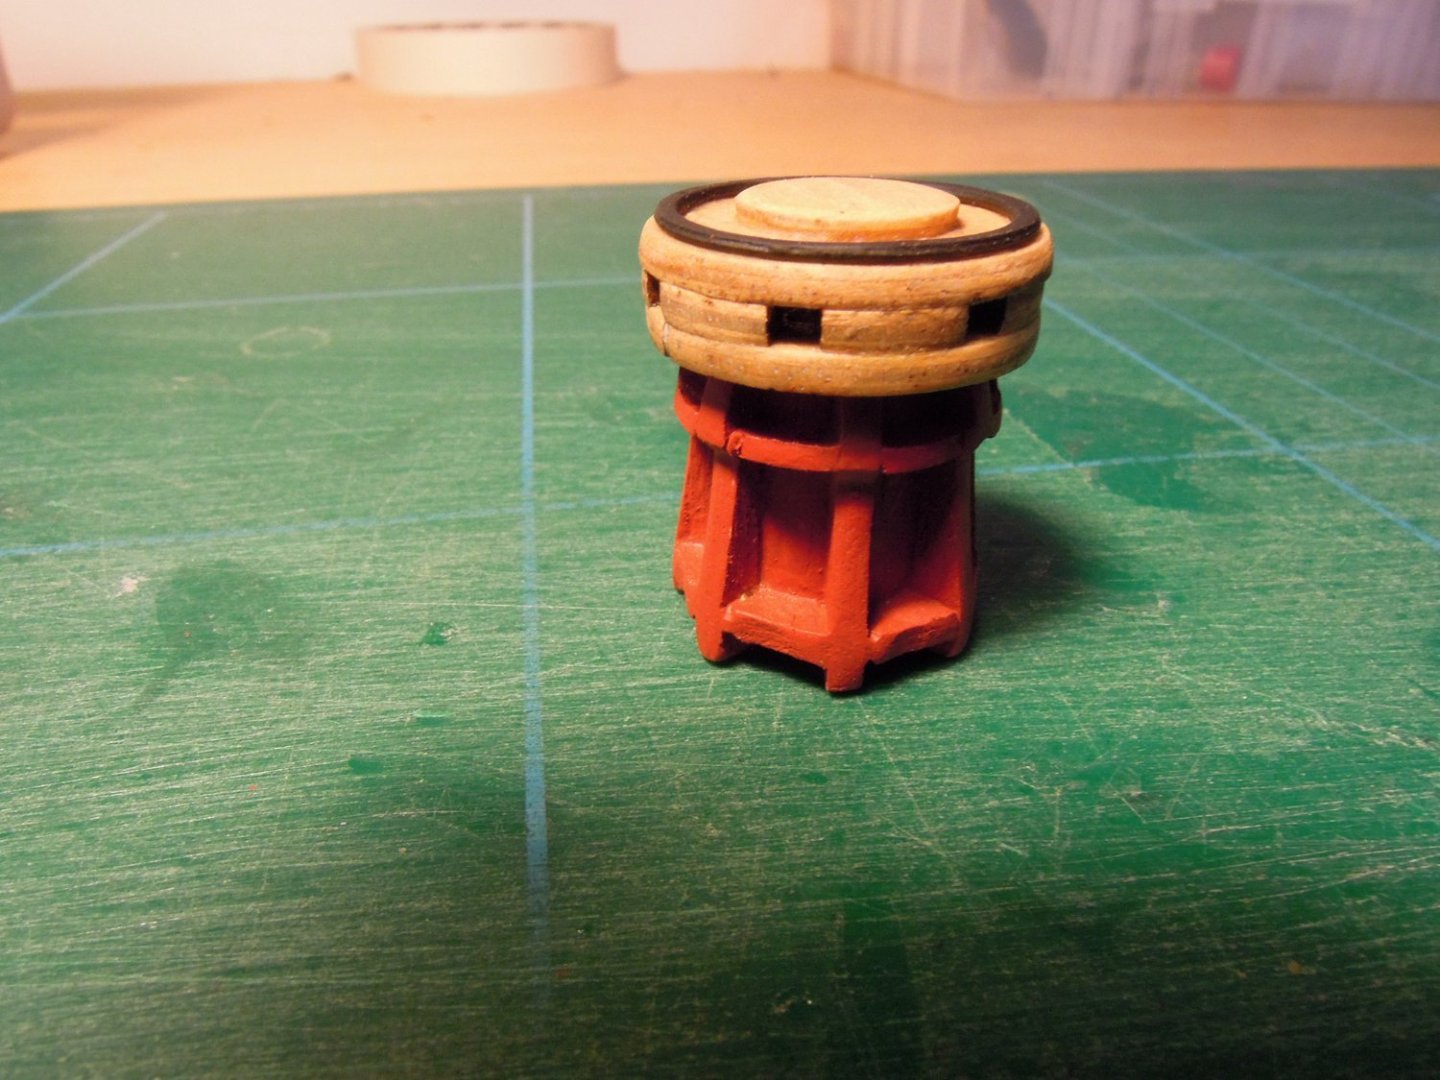
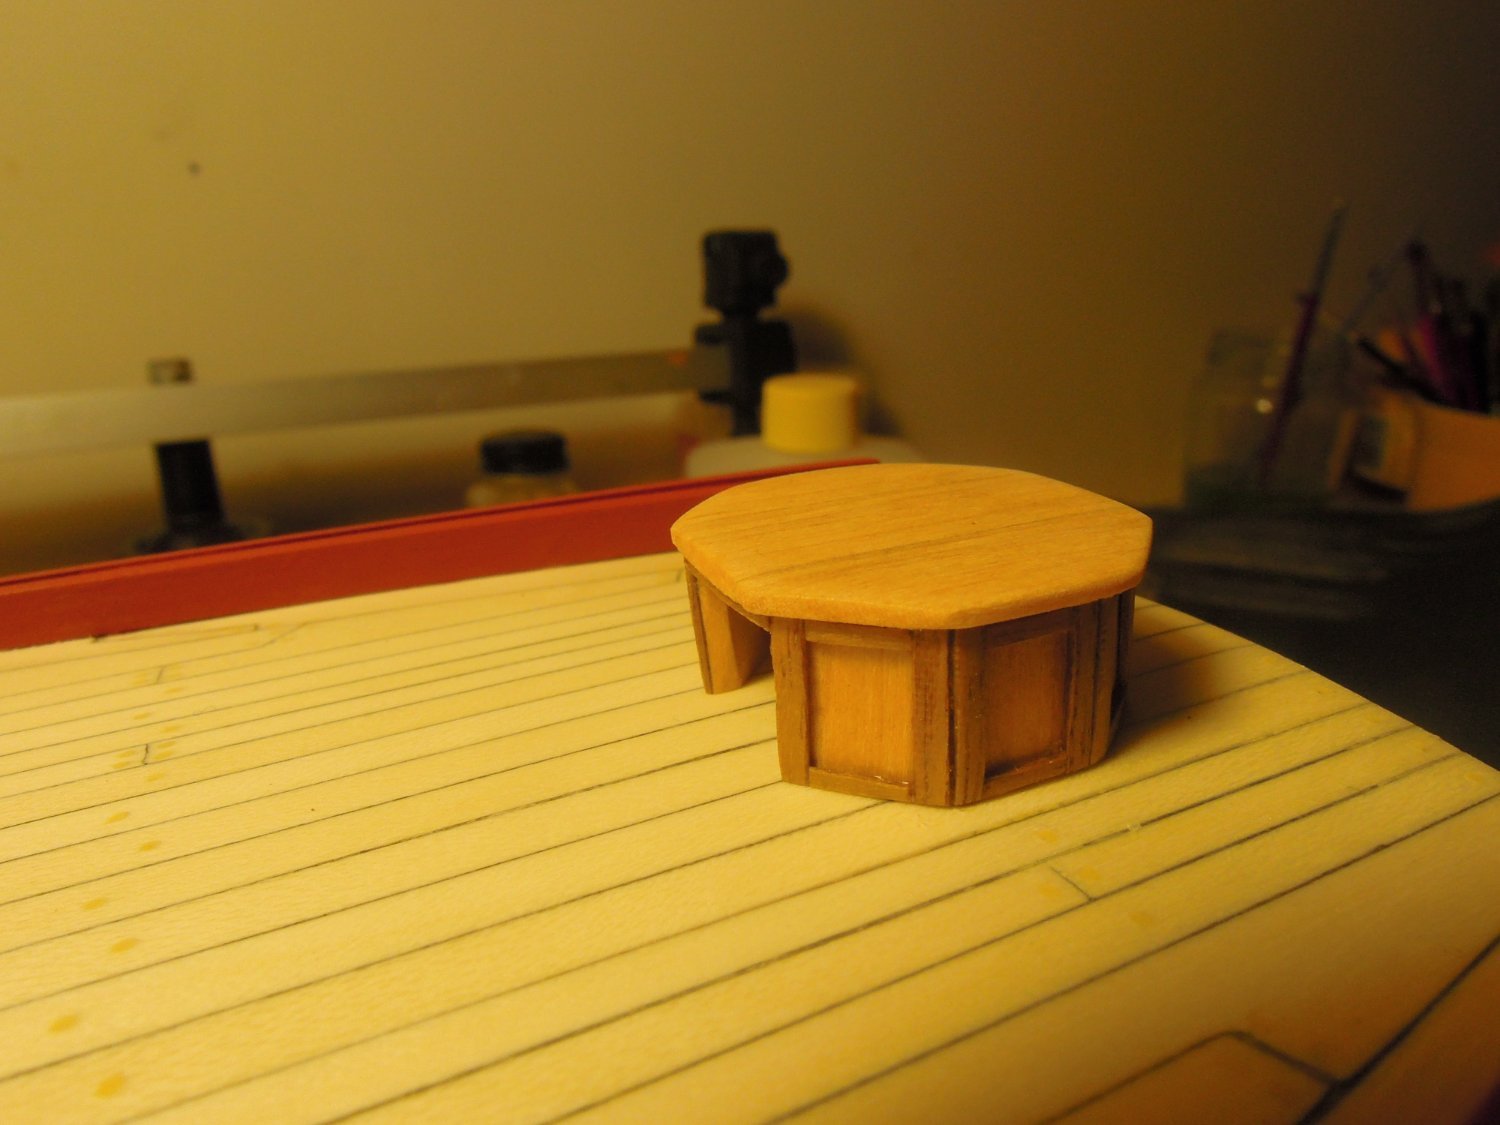
I started by scratch building the binnacle - this was to get my head around the model's scale and to navigate my way forward with the build:
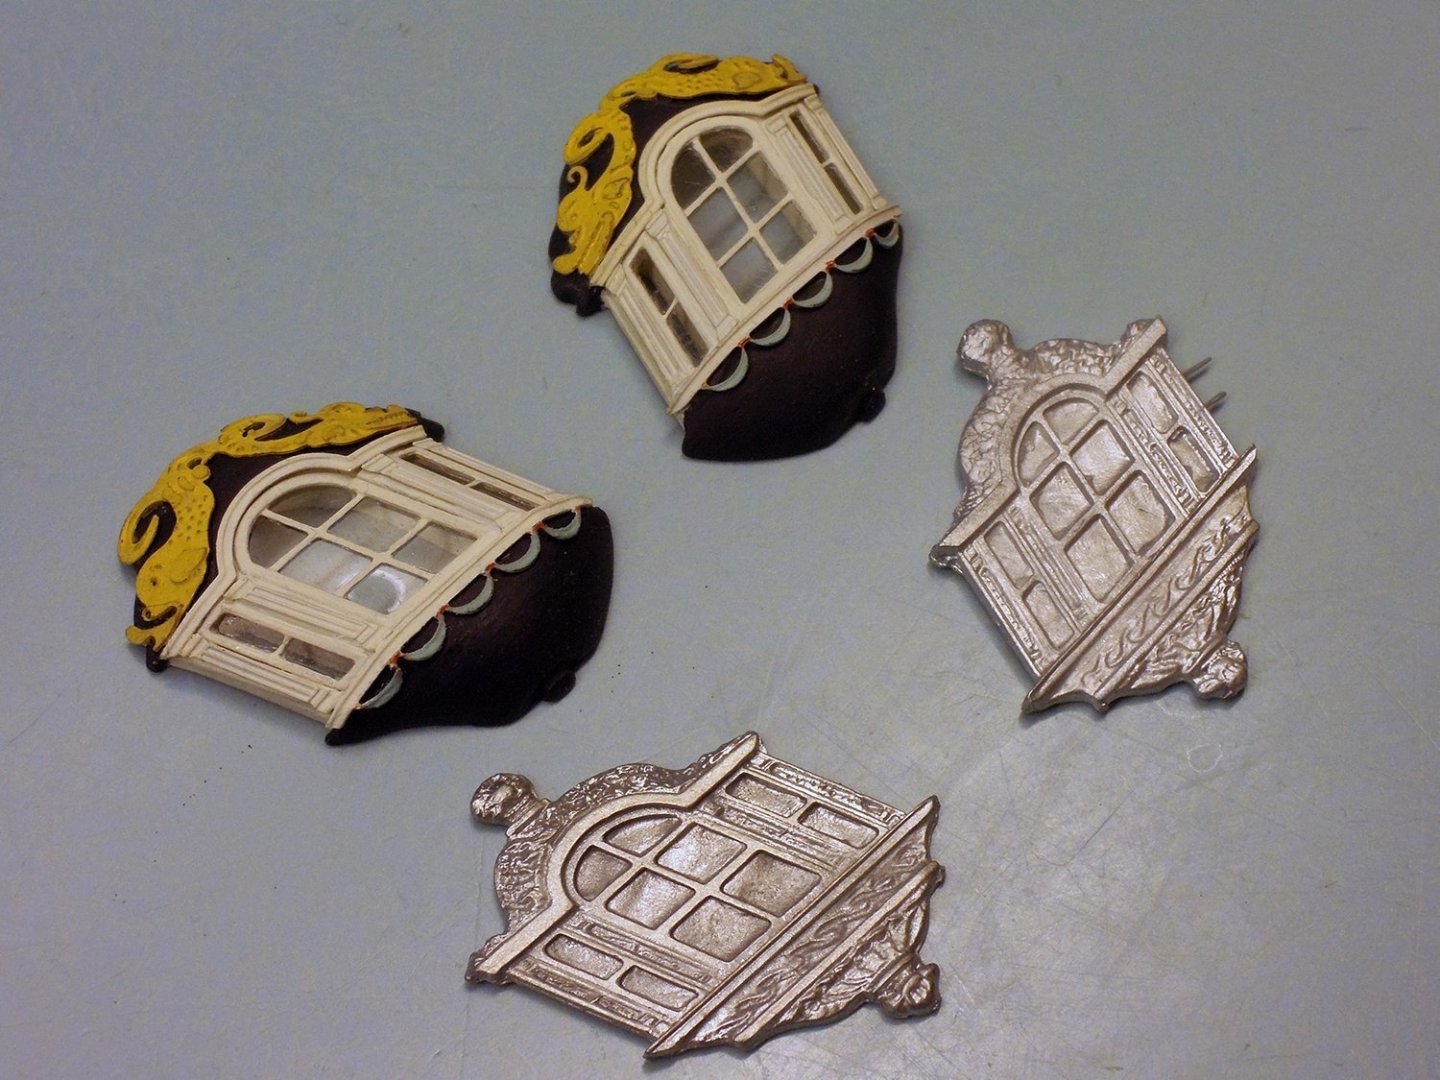
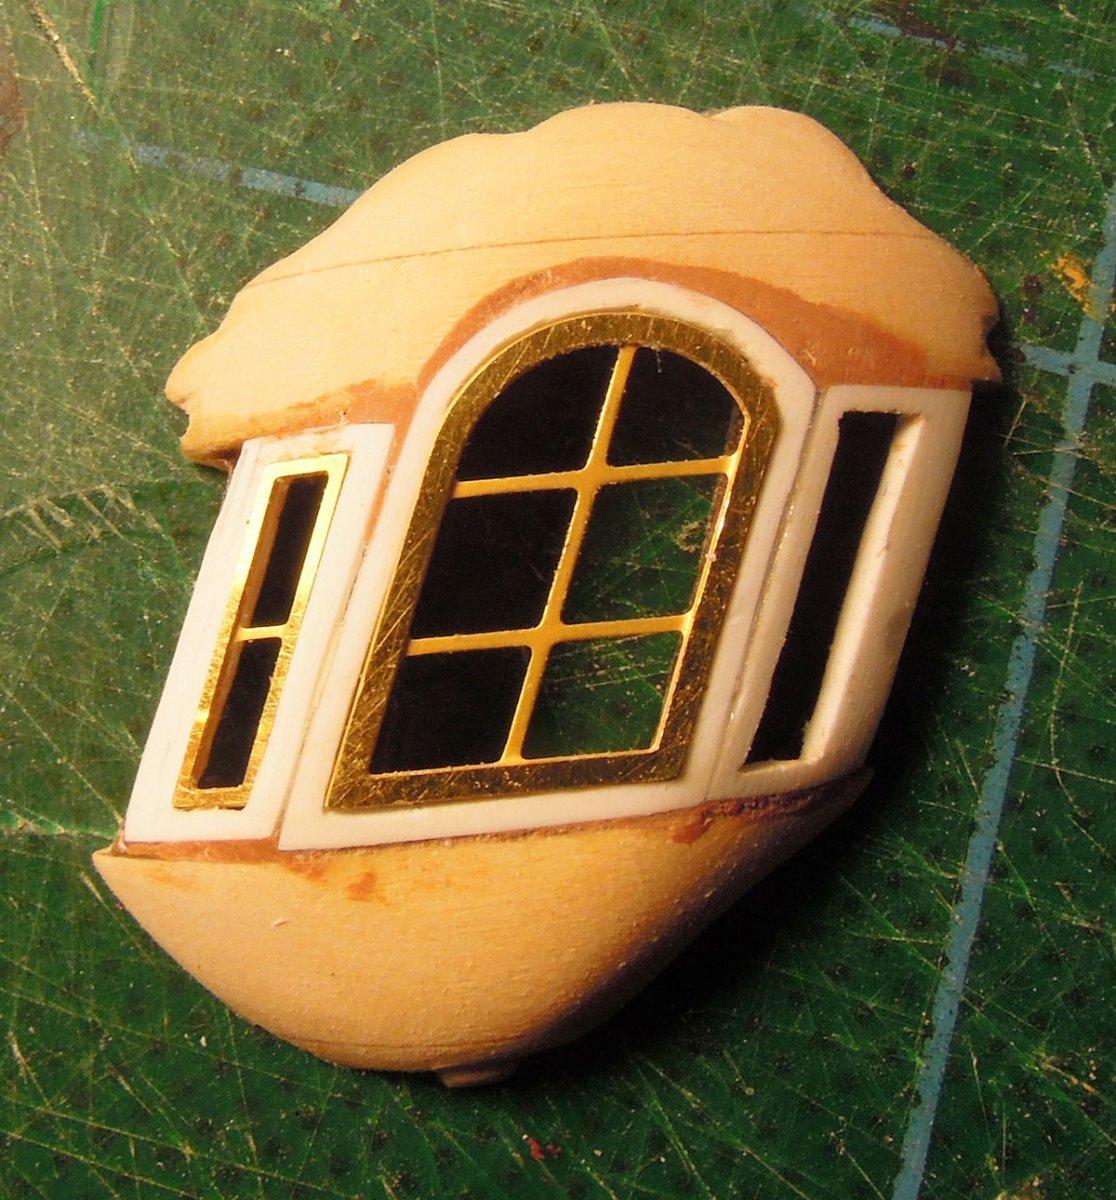
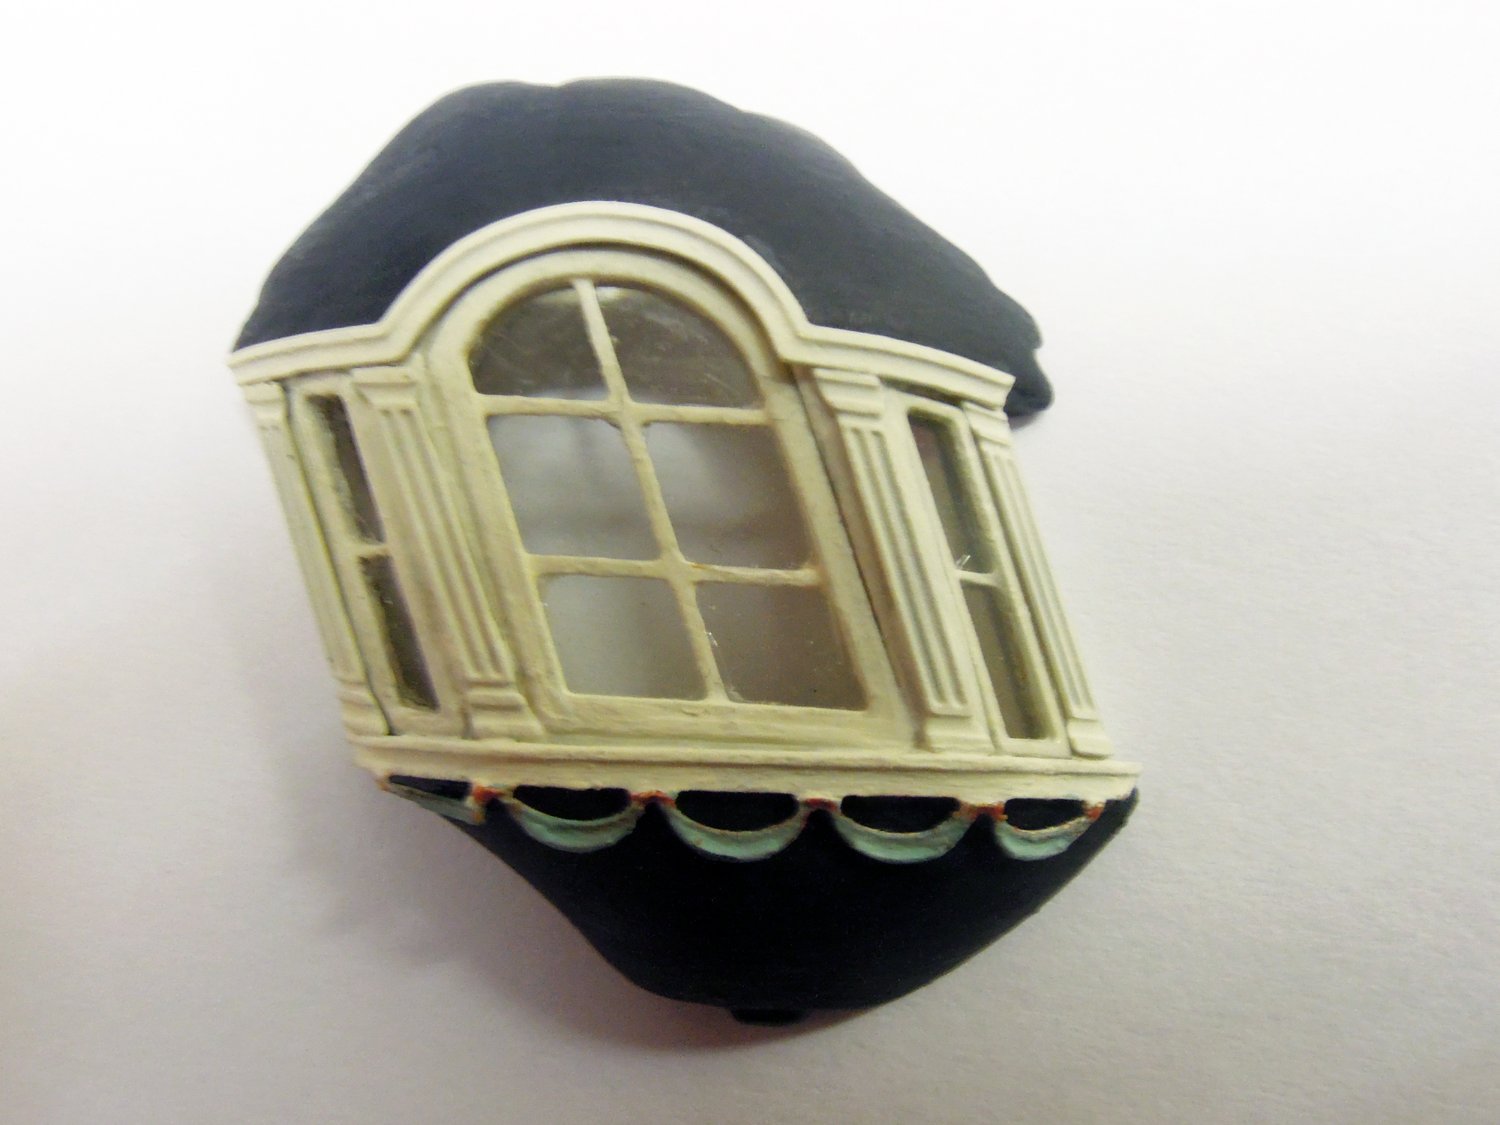
Next I reworked the quarter badges - I think 'Realworkingsailor' sent me the profiles. I got some comments about how this was historically wrong for Fly but I still much prefer them to the flat white metal kit supplied badges. I also reference VII of the FFM, page 293 - 297 which describes a similar badge. I'm using styrene to build the window frames but kit PE for the panes. The "dolphins" are also kit PE but difficult to fit to the window head. At this point I'm still avoiding the hull...
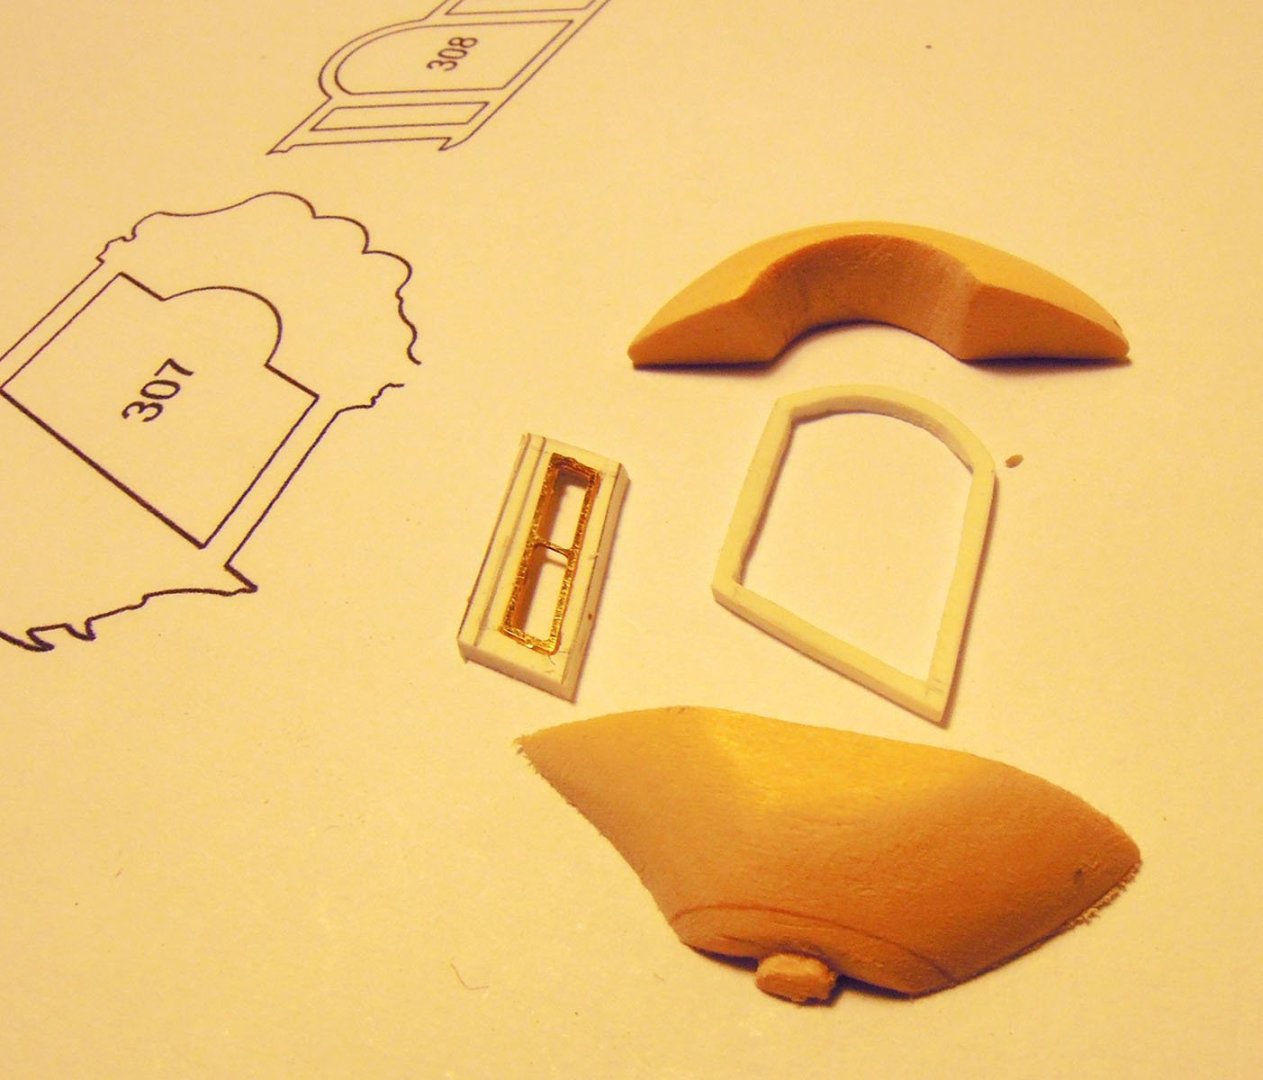


Scratched quarter badges versus kit supplied:
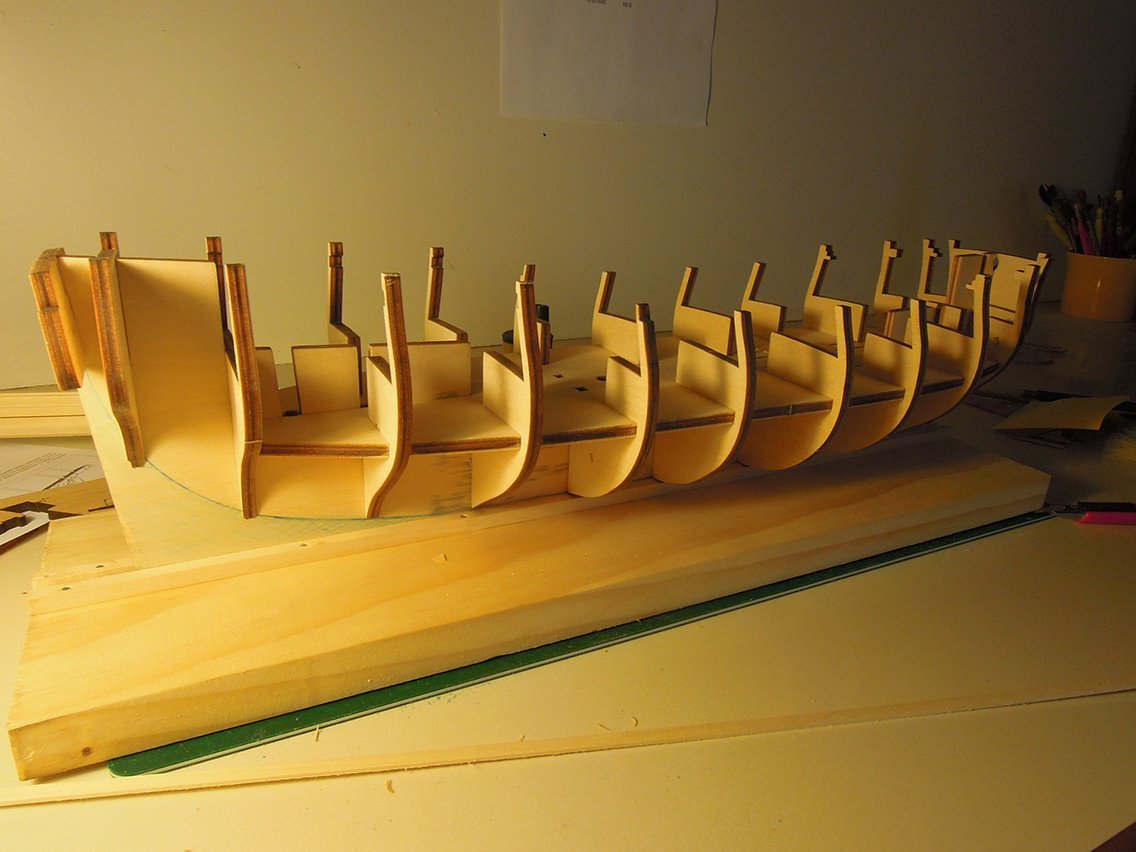
Next I got into the hard yards of the hull. I actually really enjoy this part of the build as mere frames become a three dimensional thing. Through practice and many failures I have lost the fear of planking but I know it is a steep learning curve for first time builders as it was for me.
Framing complete
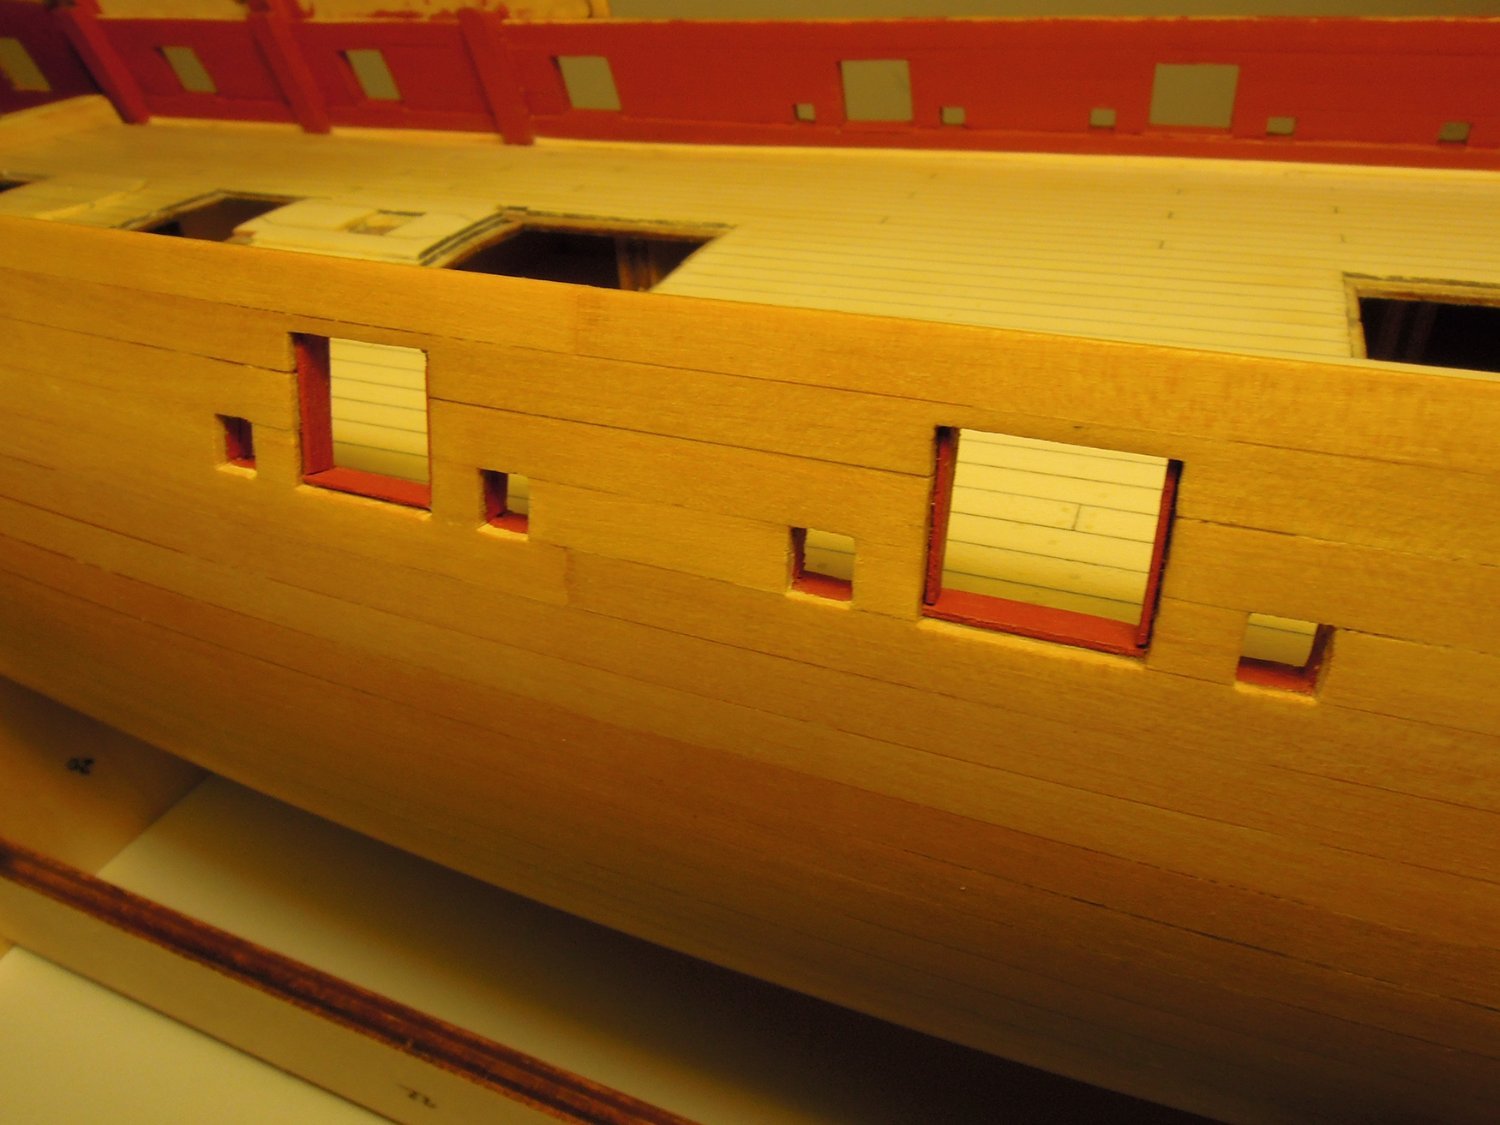
The lower deck is planked where it might be seen through the hatches.

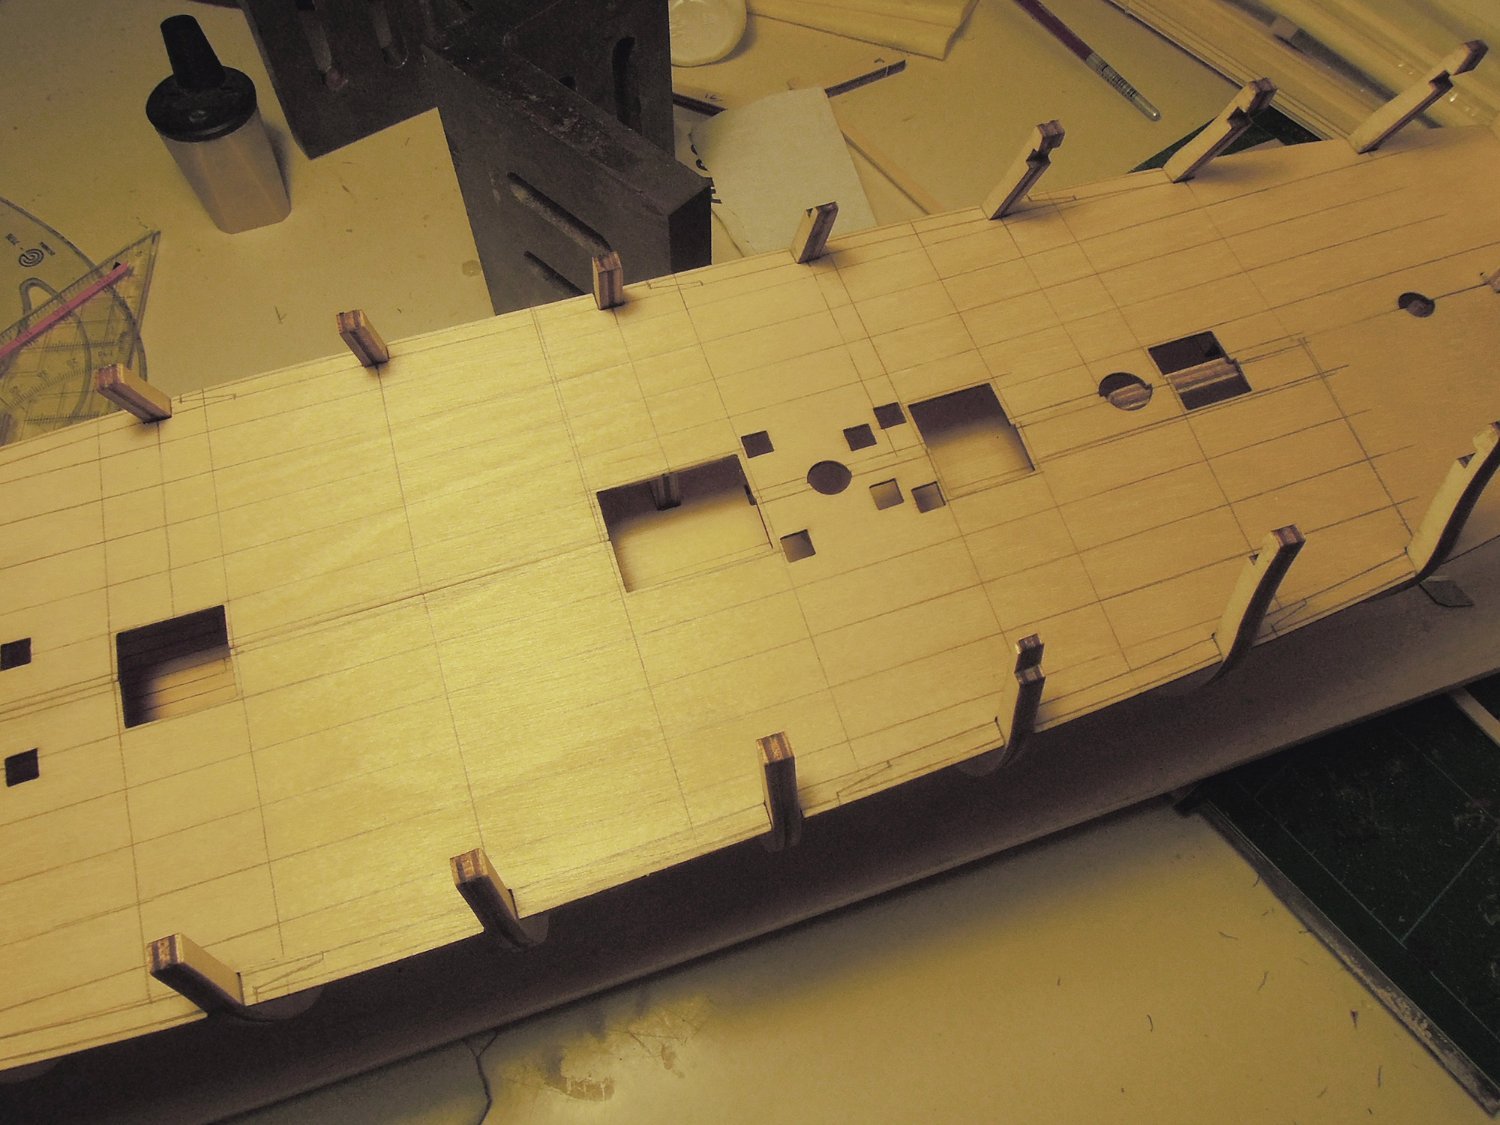
The 'false' main deck is checked for fit and marked out for future planking. In my model version this deck comes in two halves which needs work between fit with the frames and uplift in the middle.

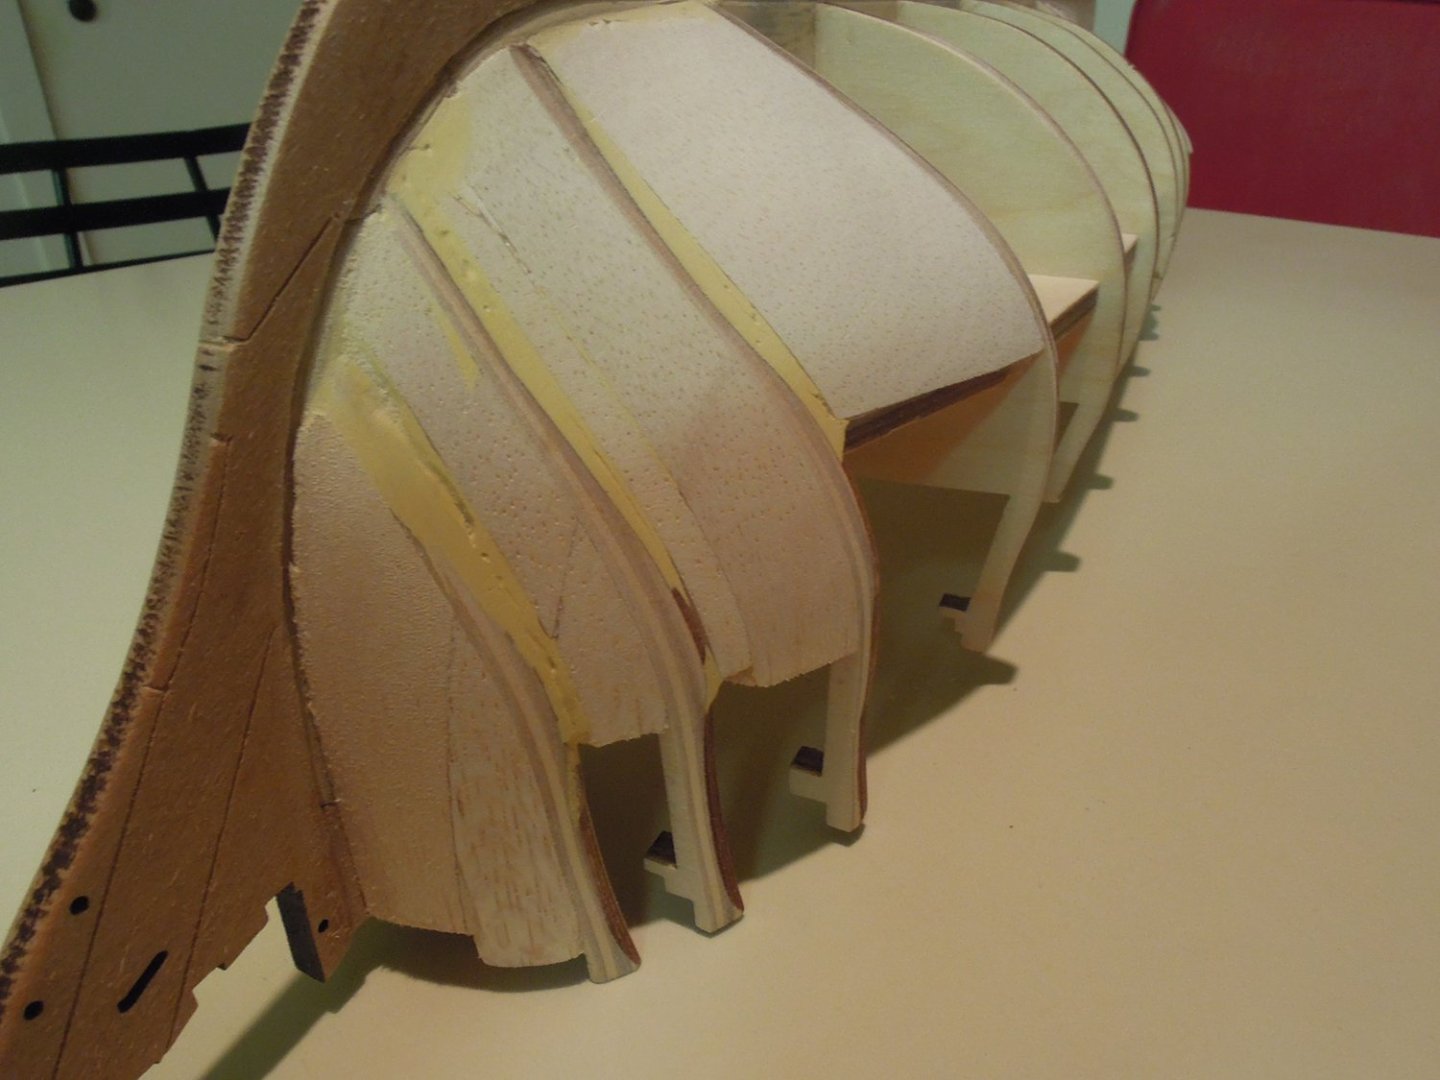
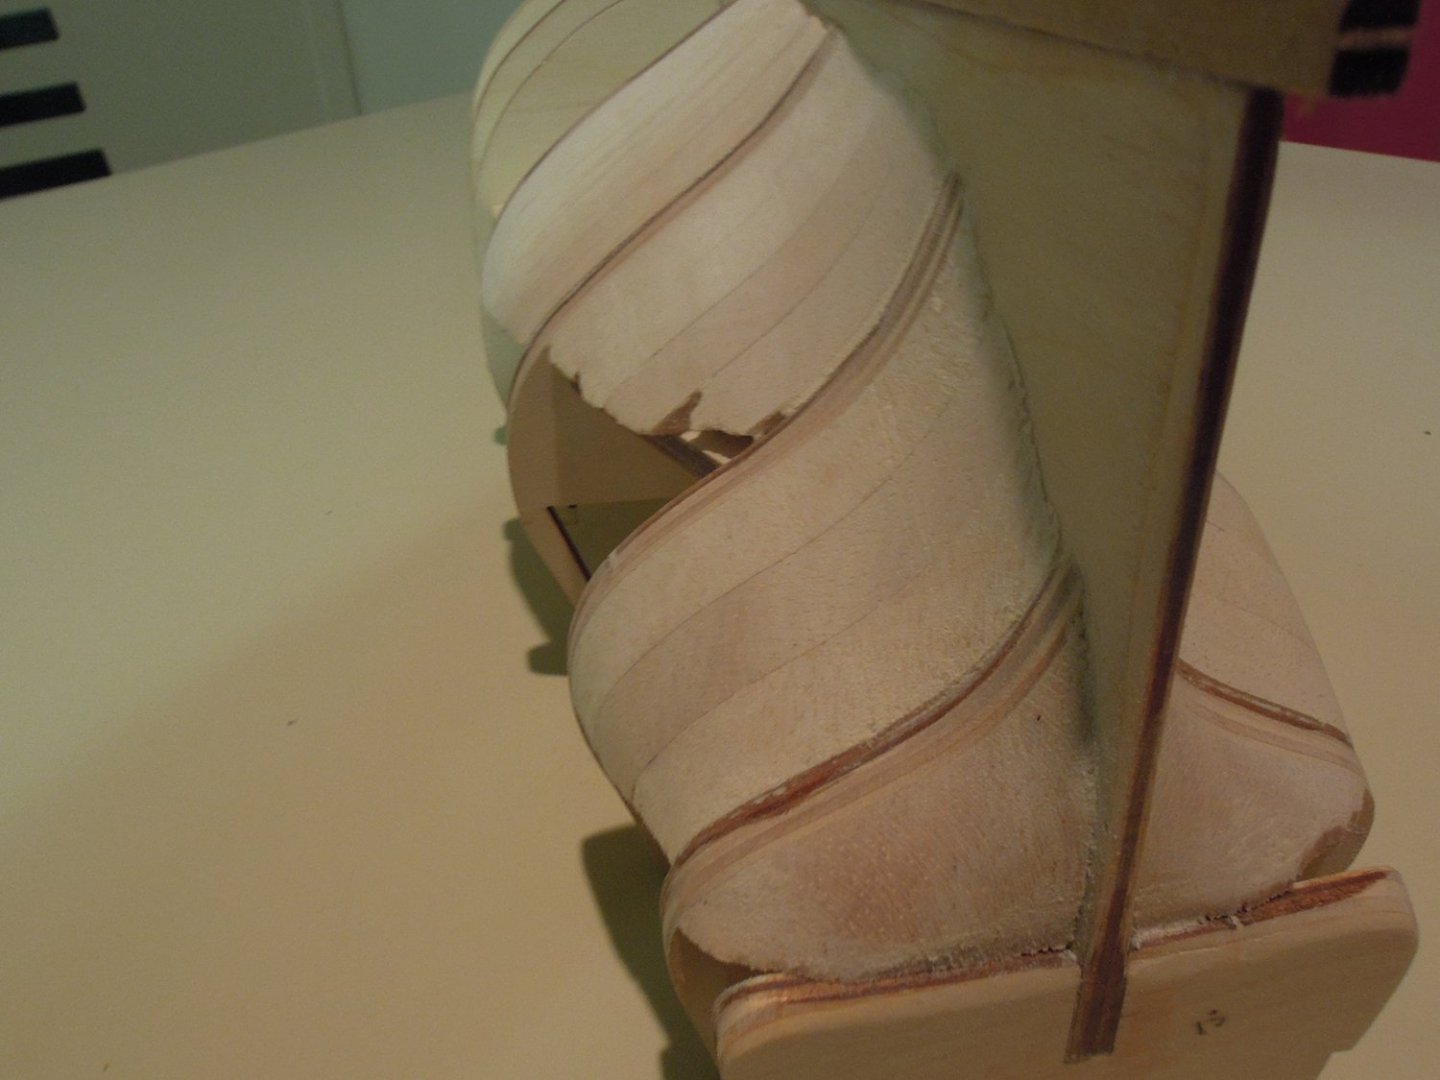
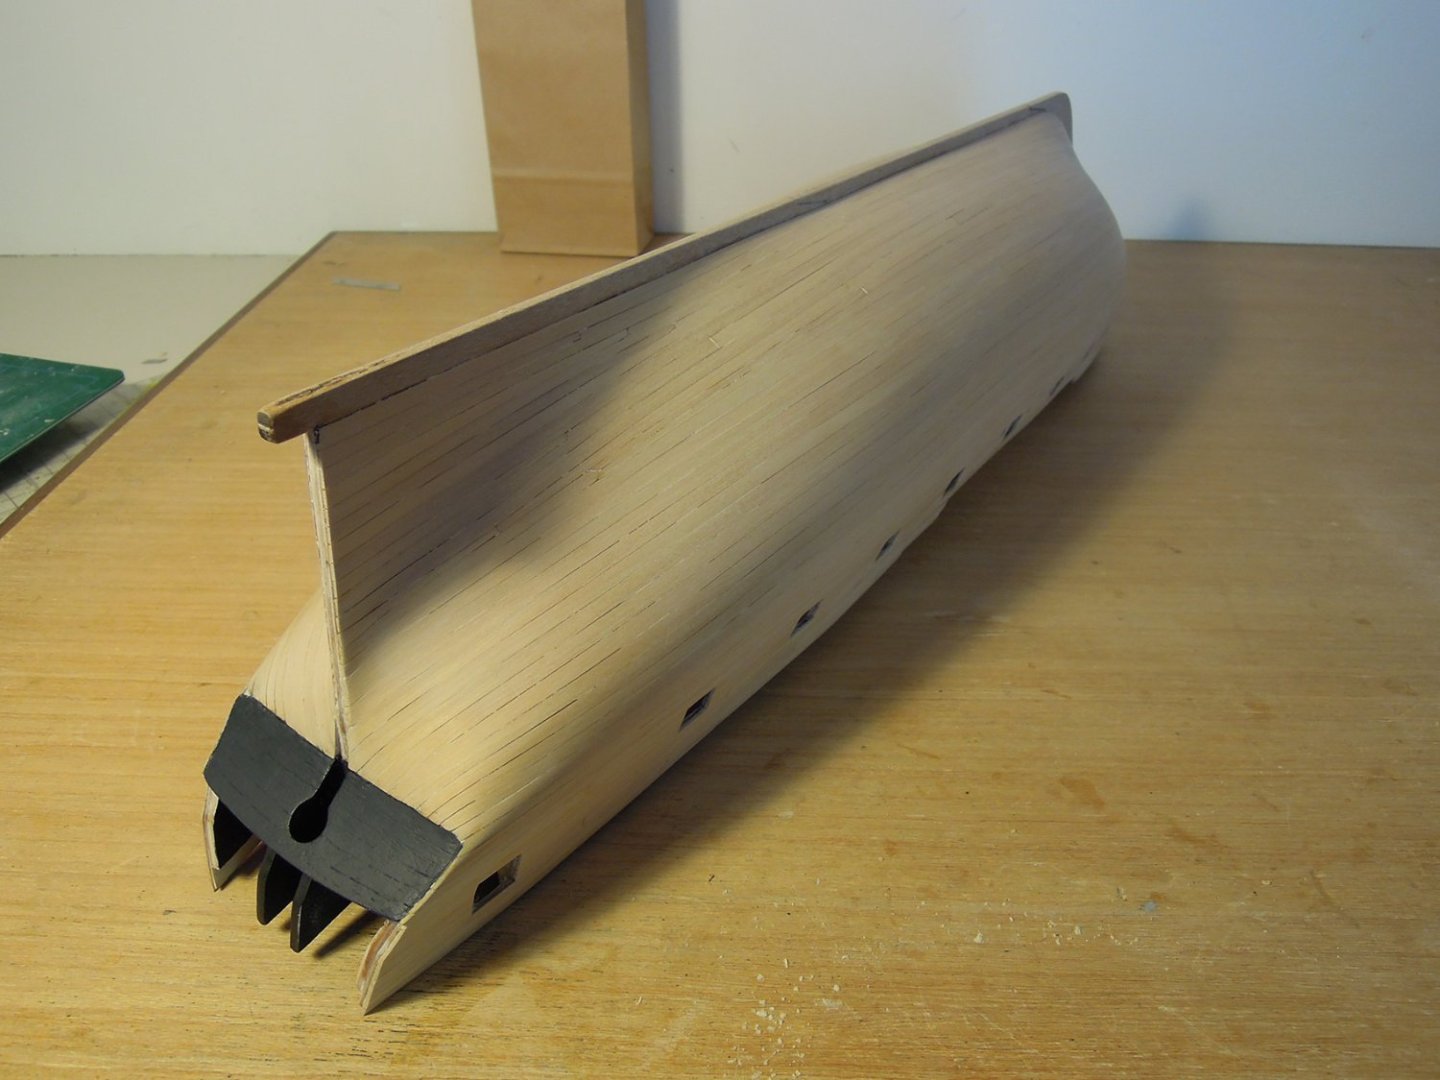
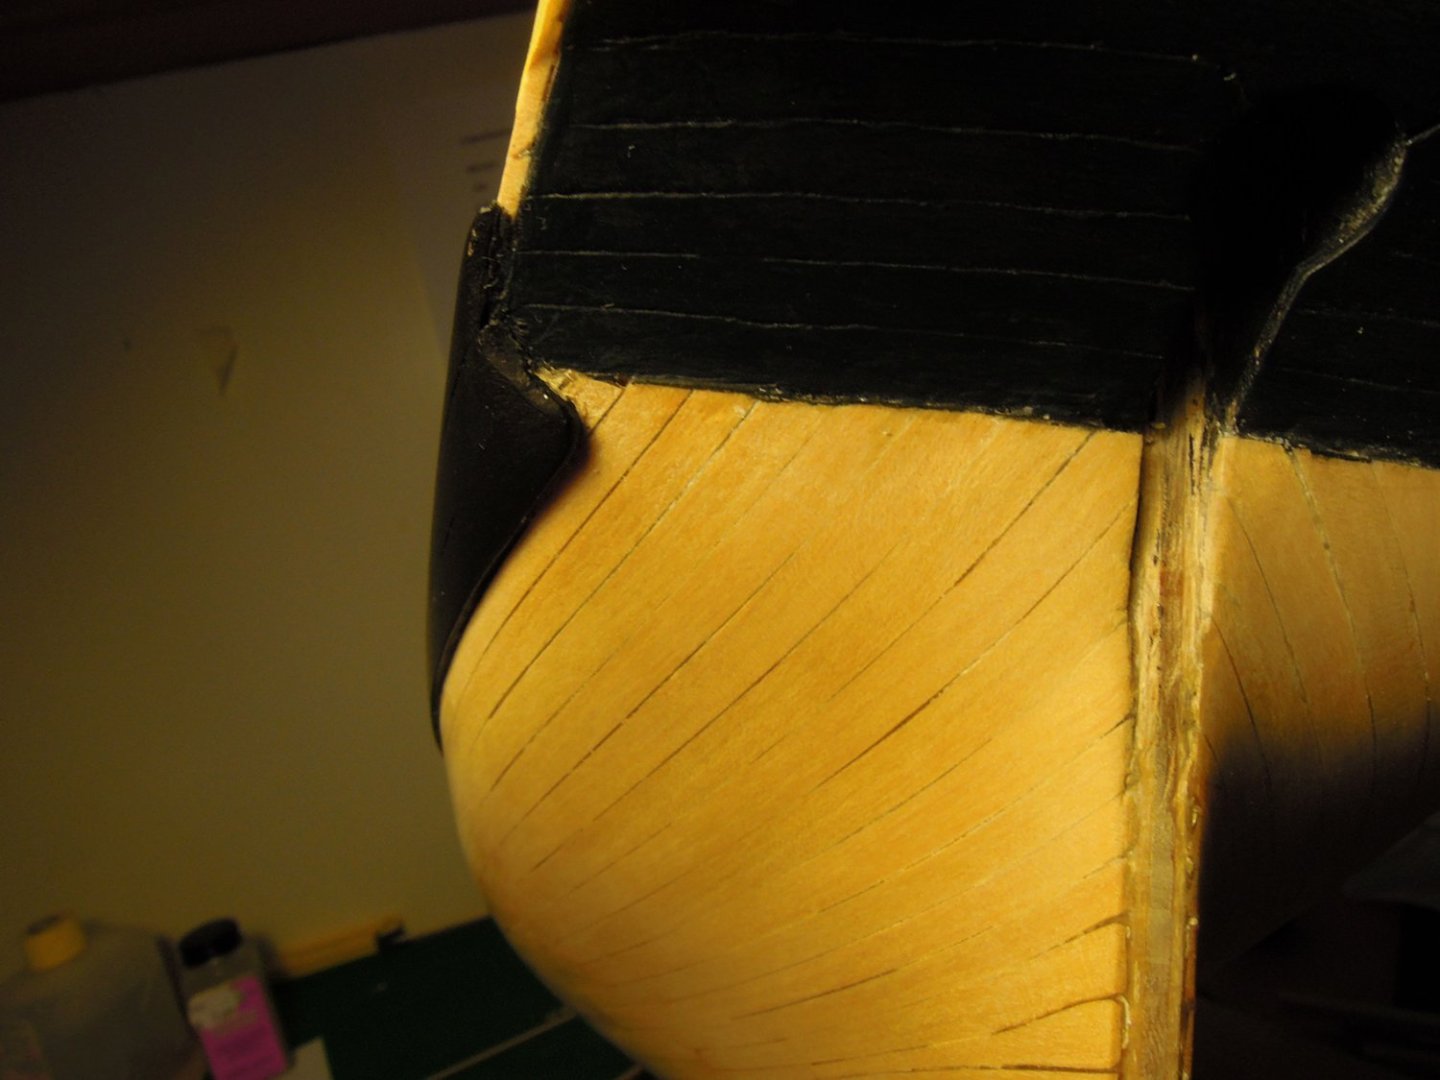
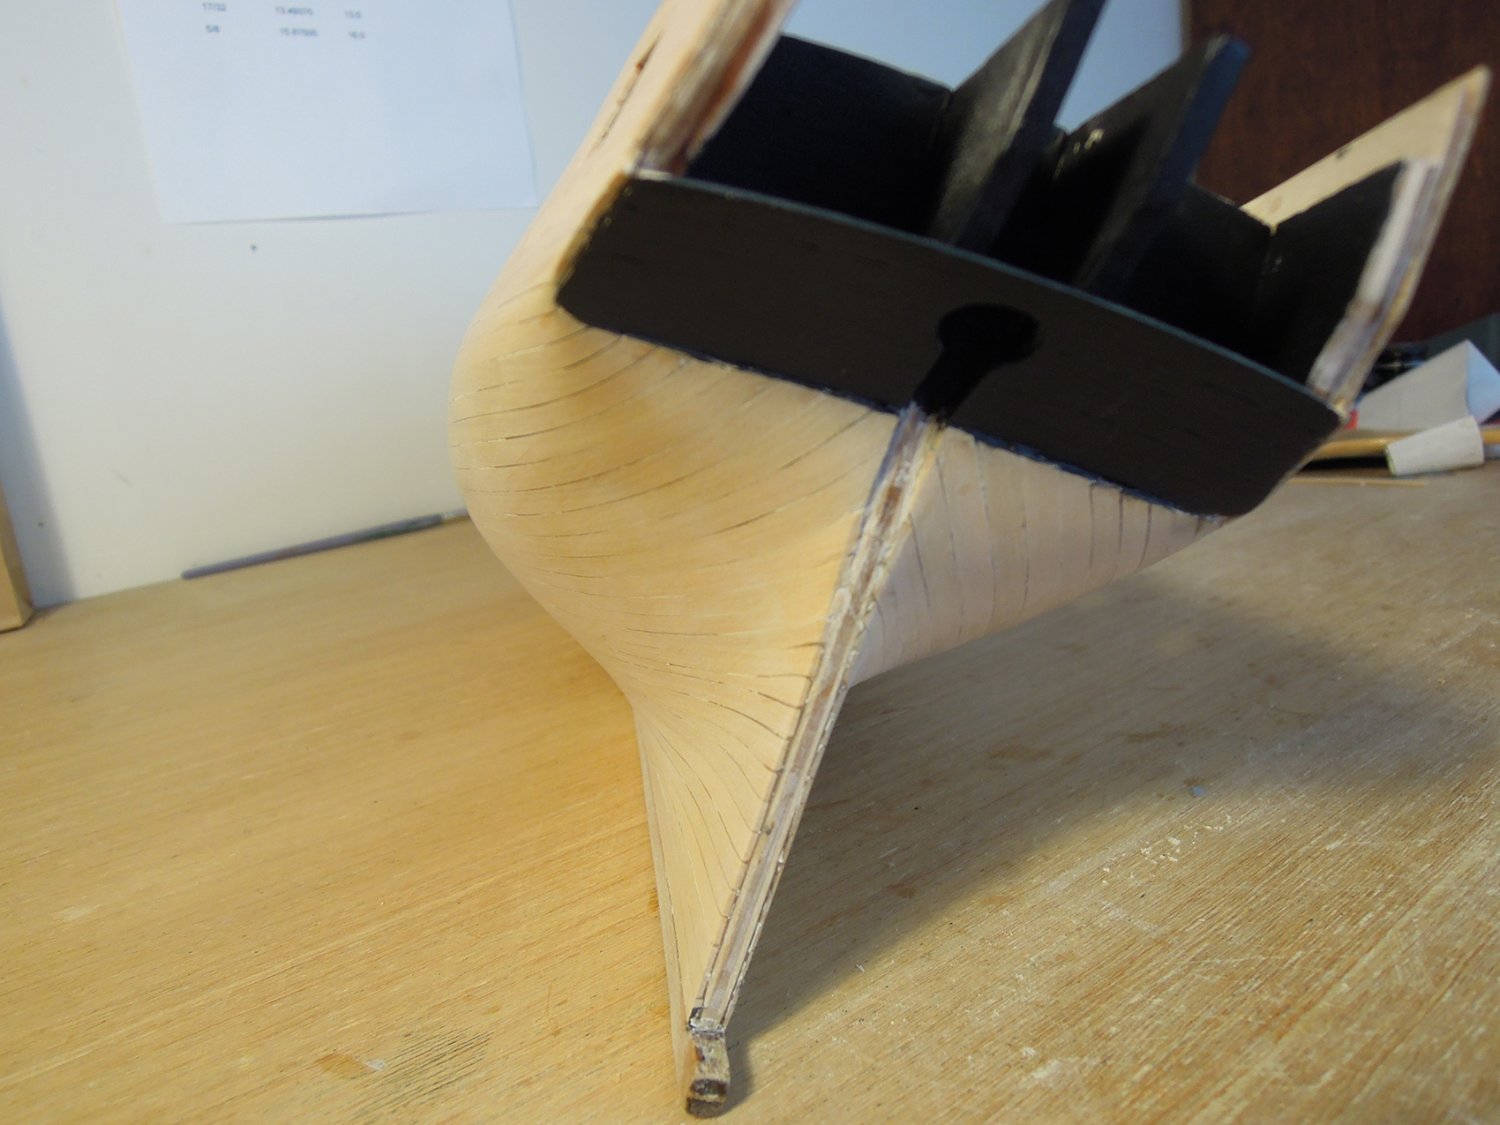
Next I fair the frames and balsawood block and fill to the bow and stern which really helps both with the fairing and with planking. It gives you shape and adhesion where you most need it.
I added a bulkhead at the end of the main deck. This is not glued at this point. Made from cardboard with a light, dirty wash and walnut frames. I try in vain to see it now but it is there...
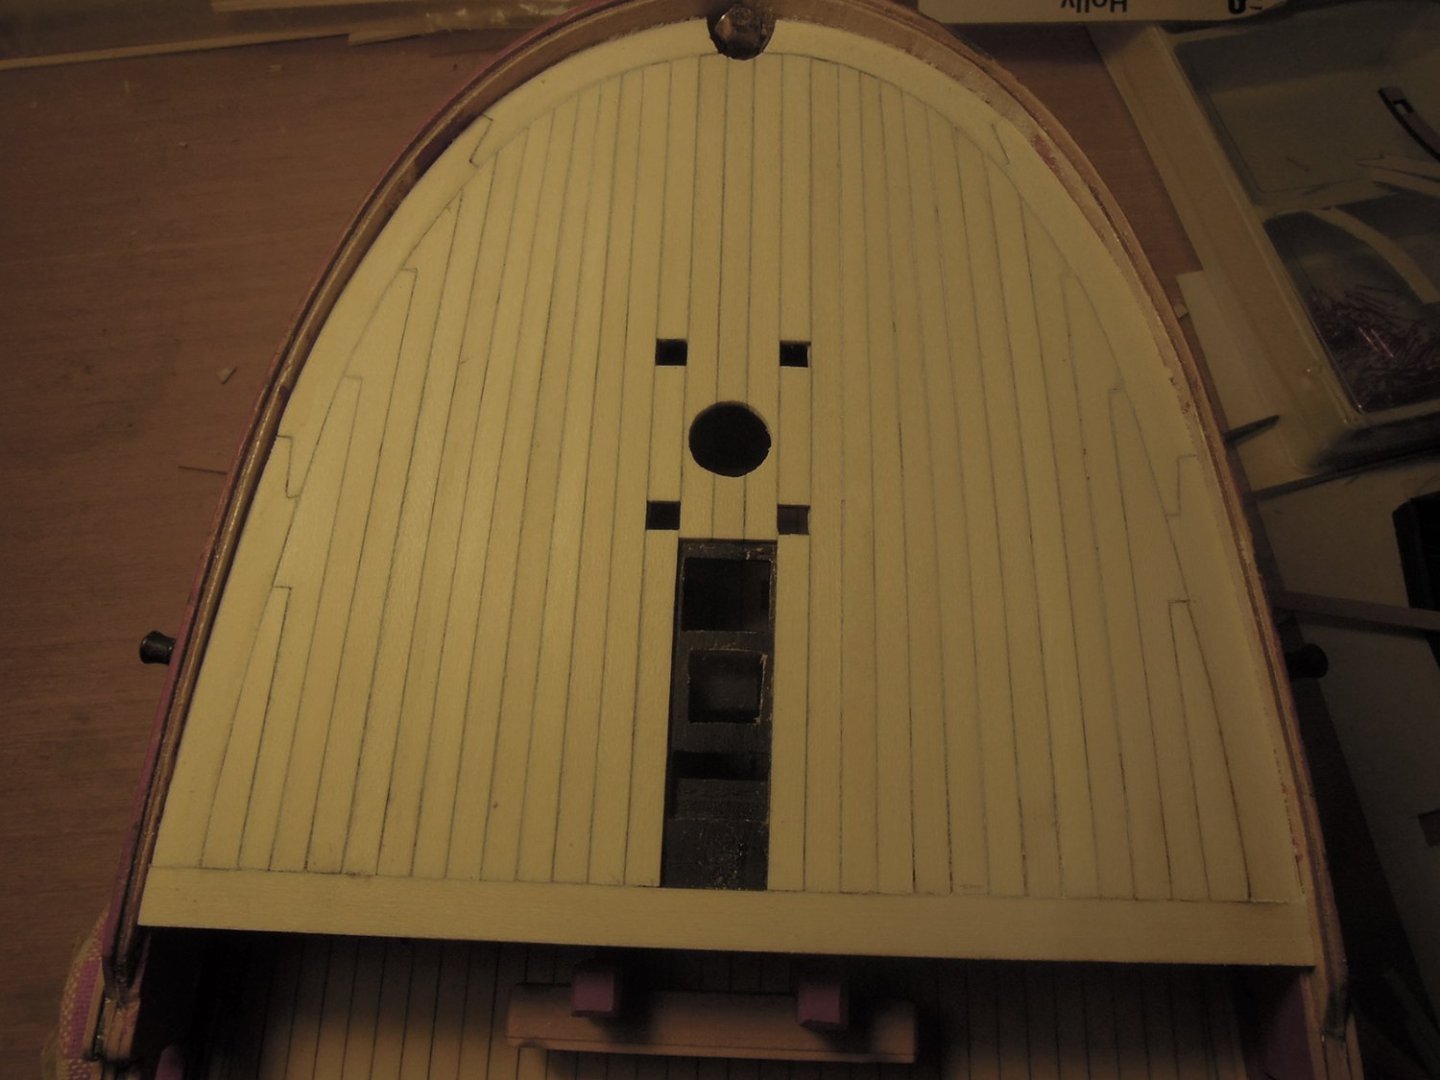
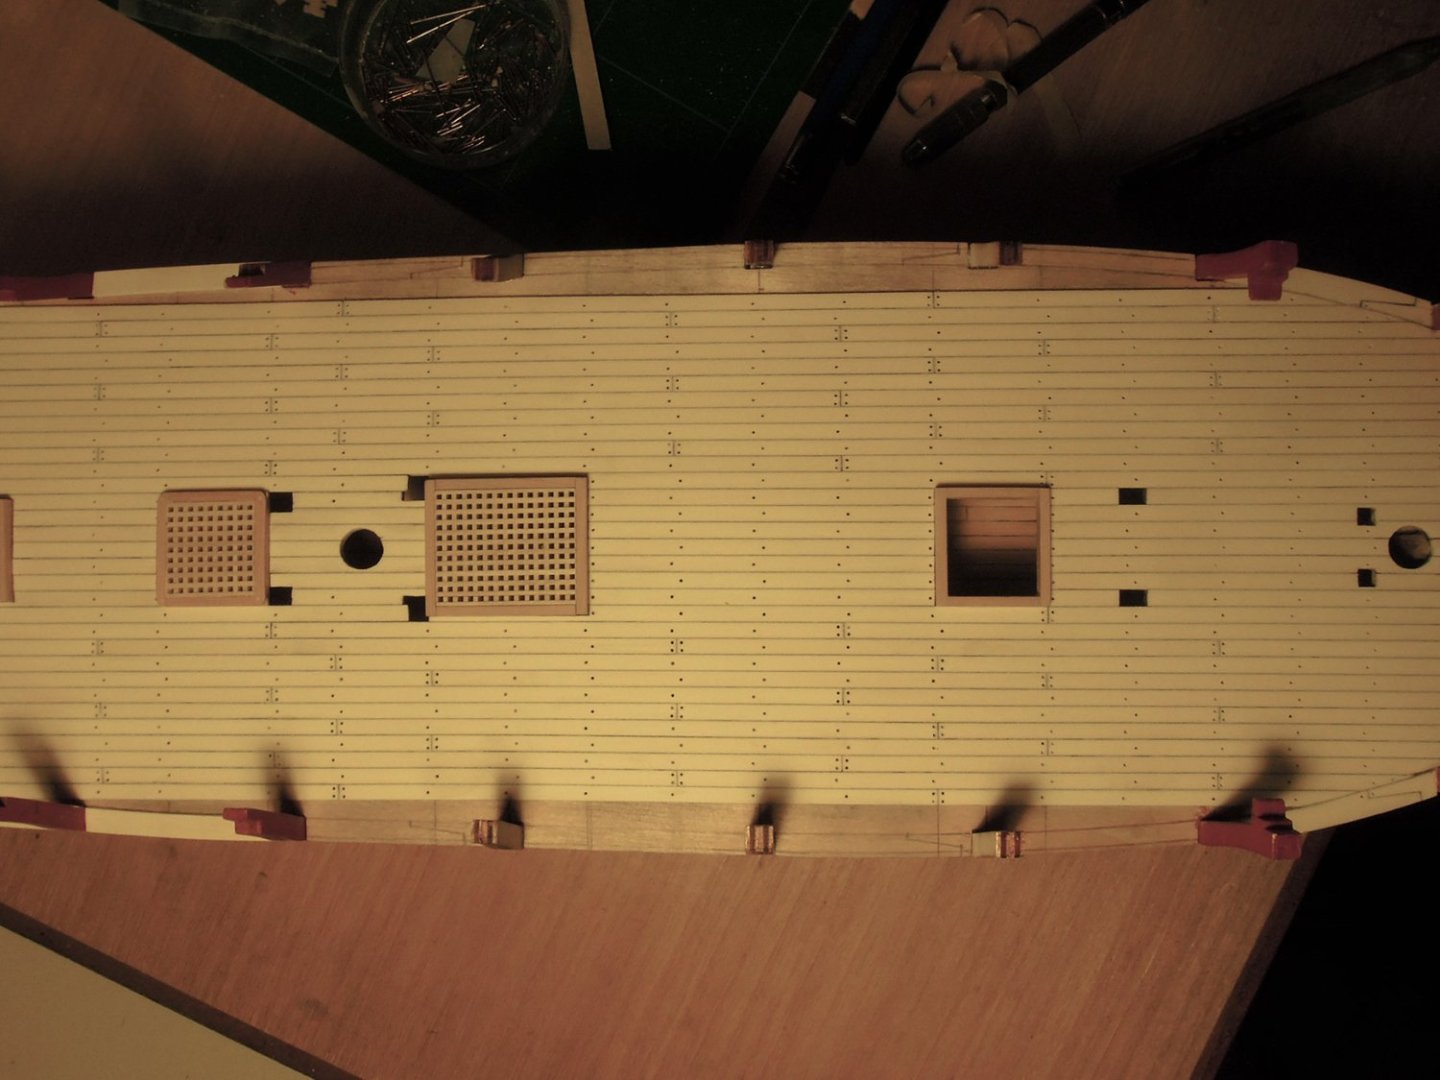
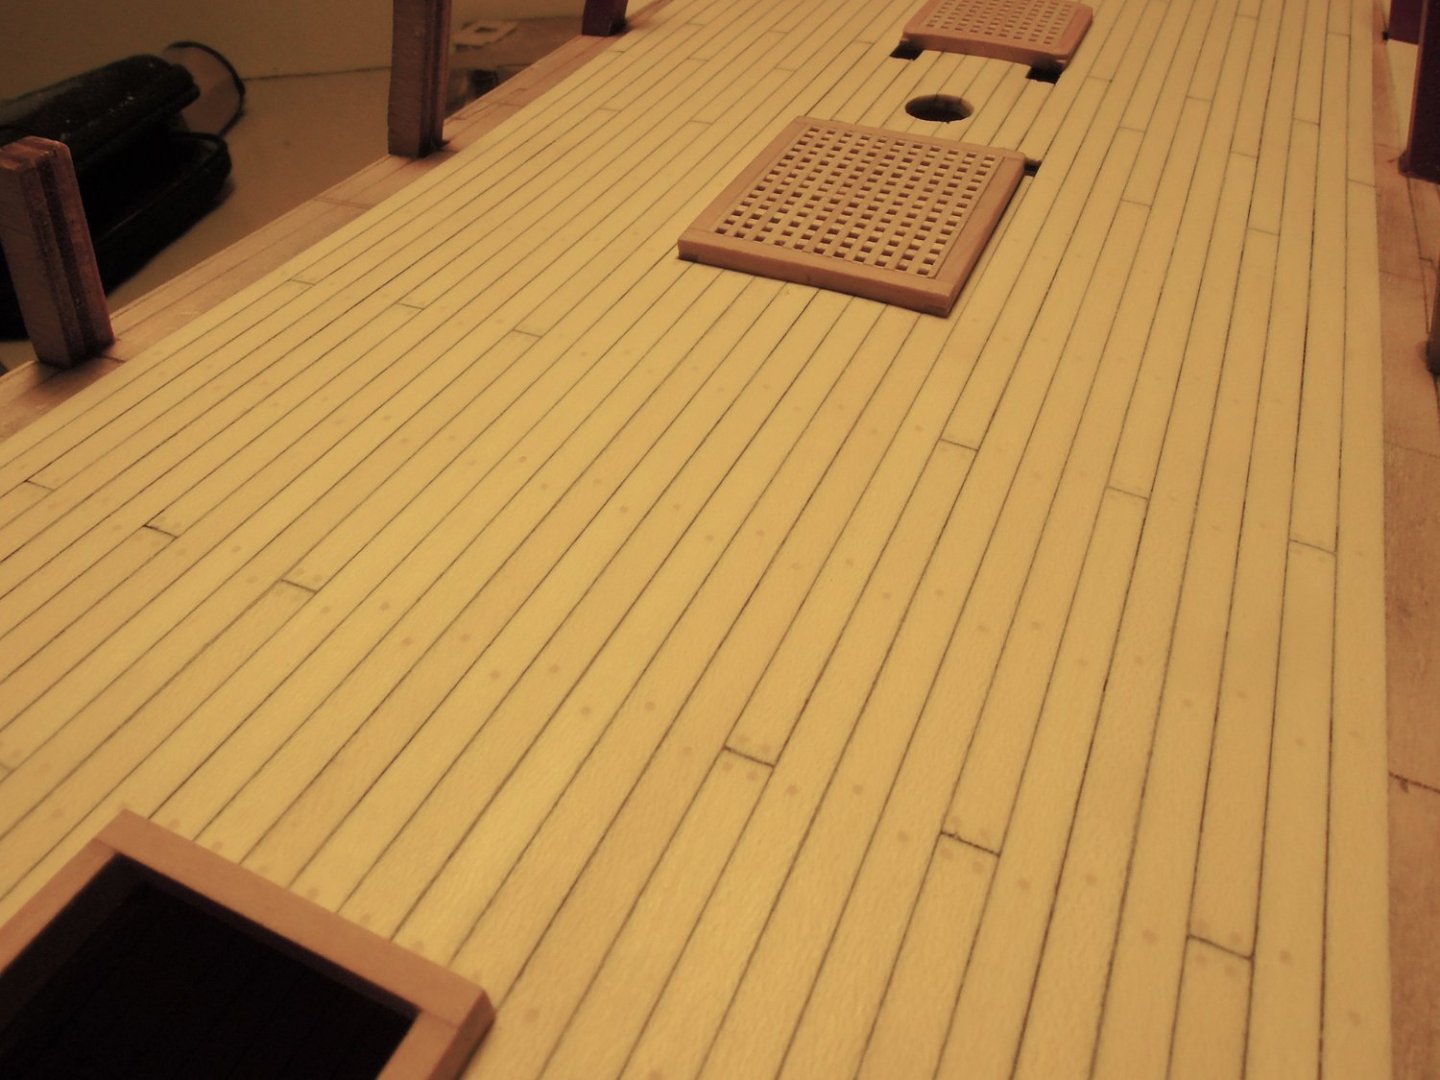
Next up the deck is installed smoothed off, main mast partners installed and deck planking begins. I bought after-market holly for the decks. This was after experimenting but holly is very white and almost free of grain. I like it but it might not be for everyone. On many models I see poor decking is a let down for an otherwise really good model and I think it is worth experimenting and planning before you commit. I mapped the main deck on tracing paper and transferred that to the actual deck. I also have trouble with treenails on a model deck. Black nails can start to look like pimples especially if the deck set out is not well planned. So I opted for a pale wood paste for the deck nails. Several people pulled me up for this but I like that you can see them when you want and they disappear at other angles. Caulking was done with a pencil on one edge only. With a tightly fitted deck that works fine to my eye.


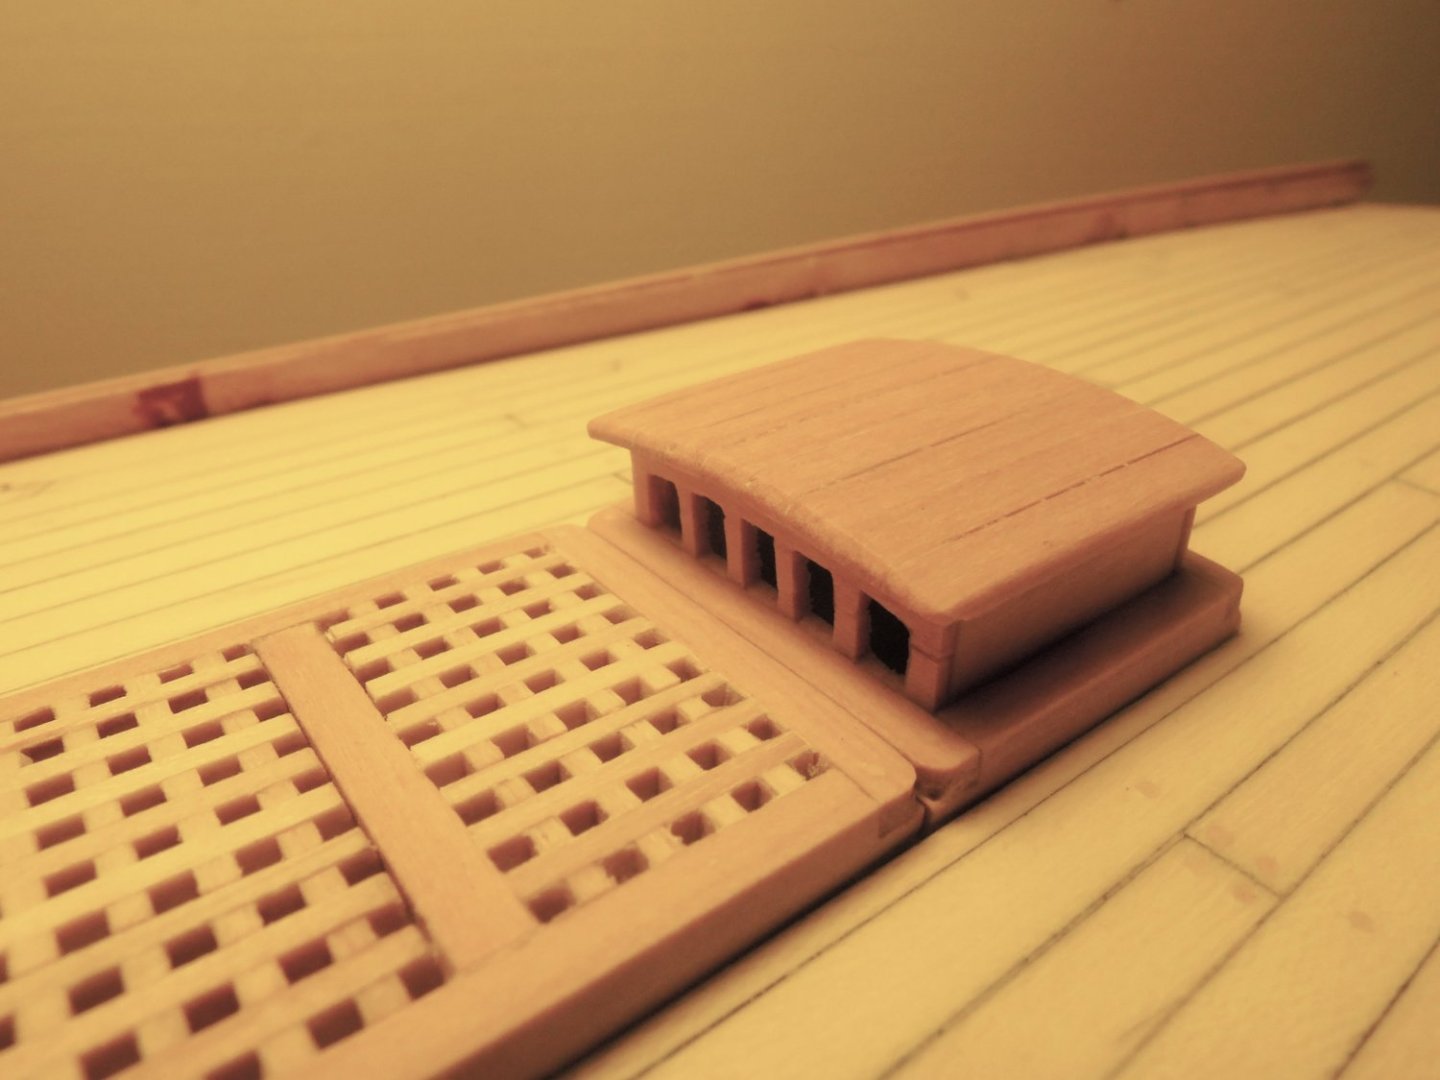
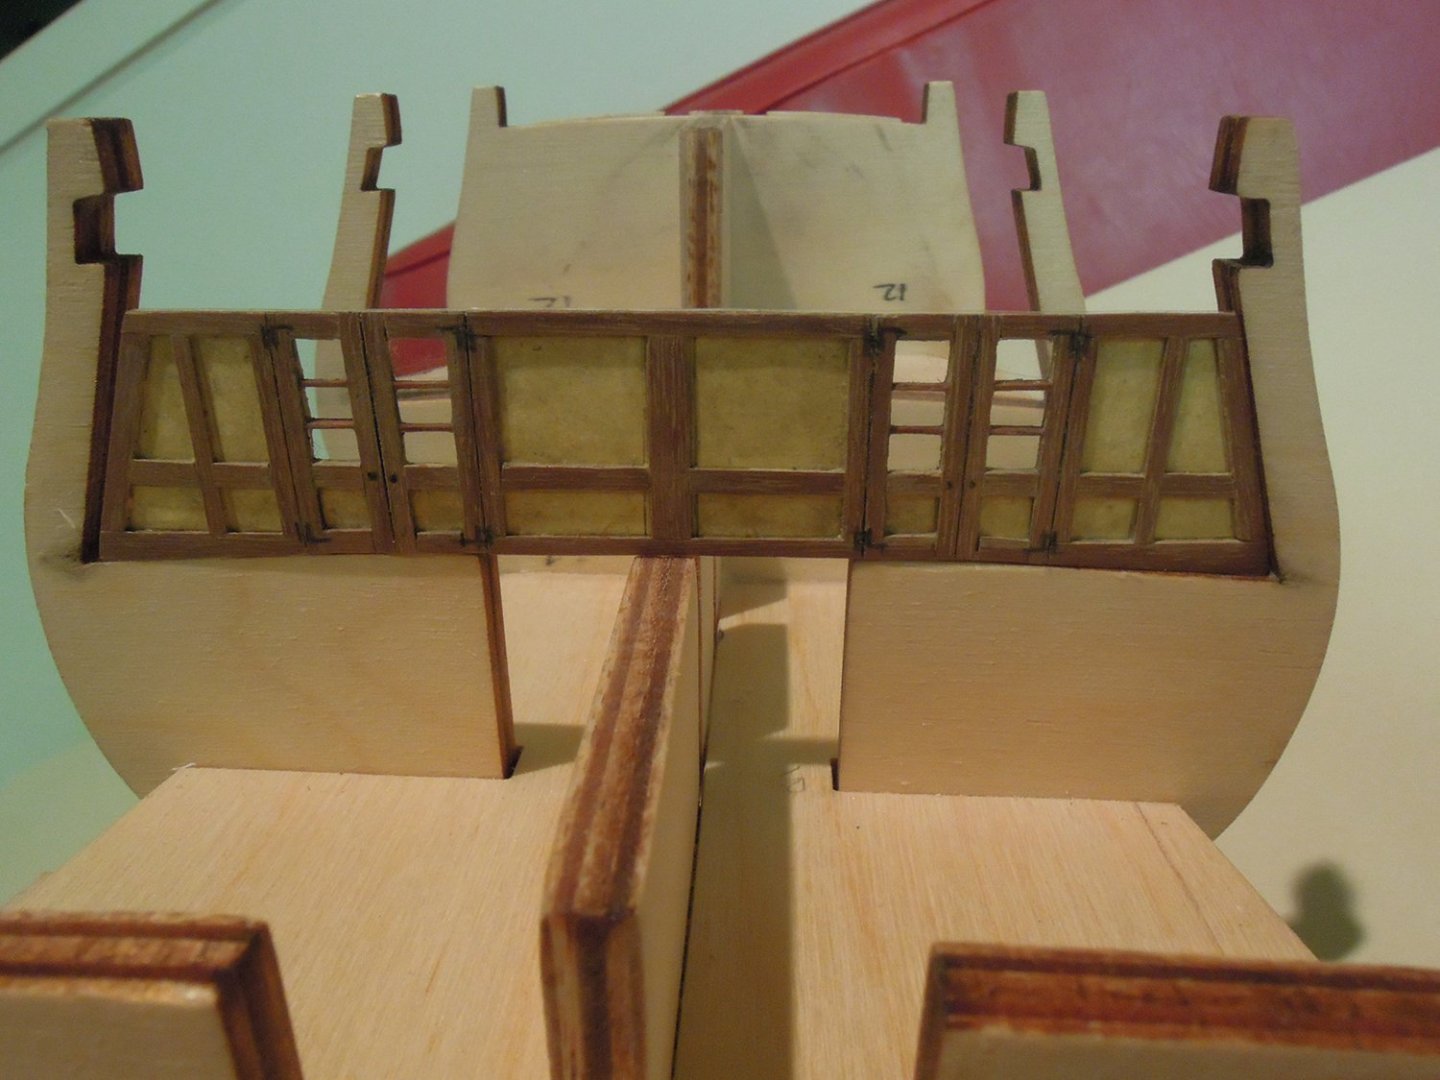
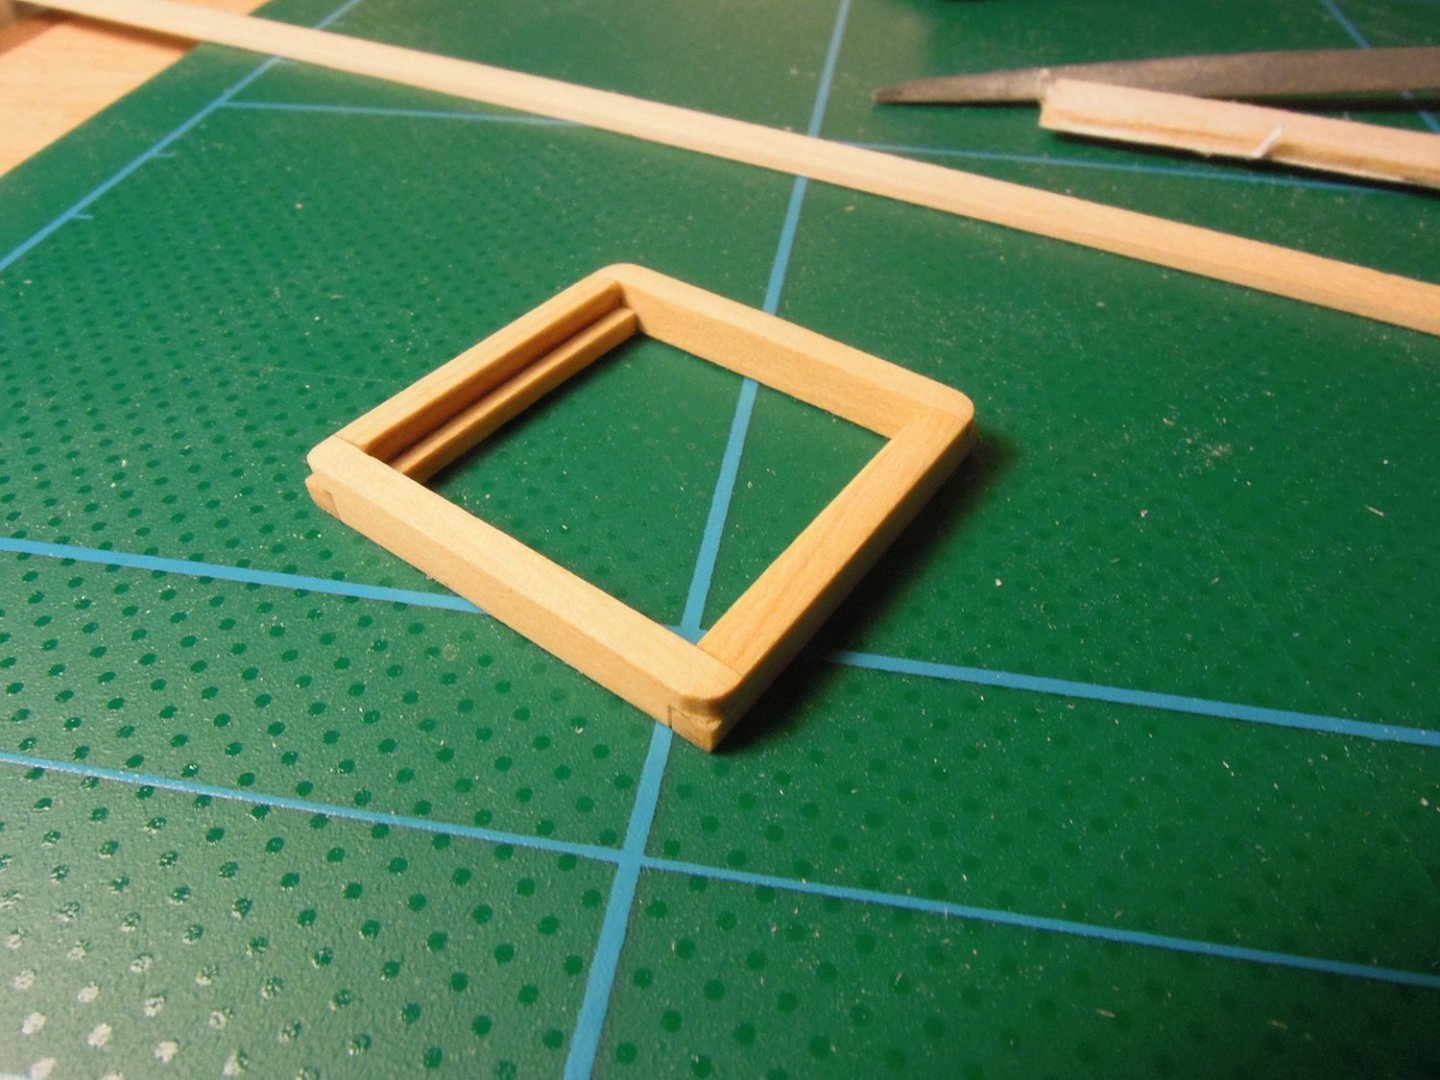
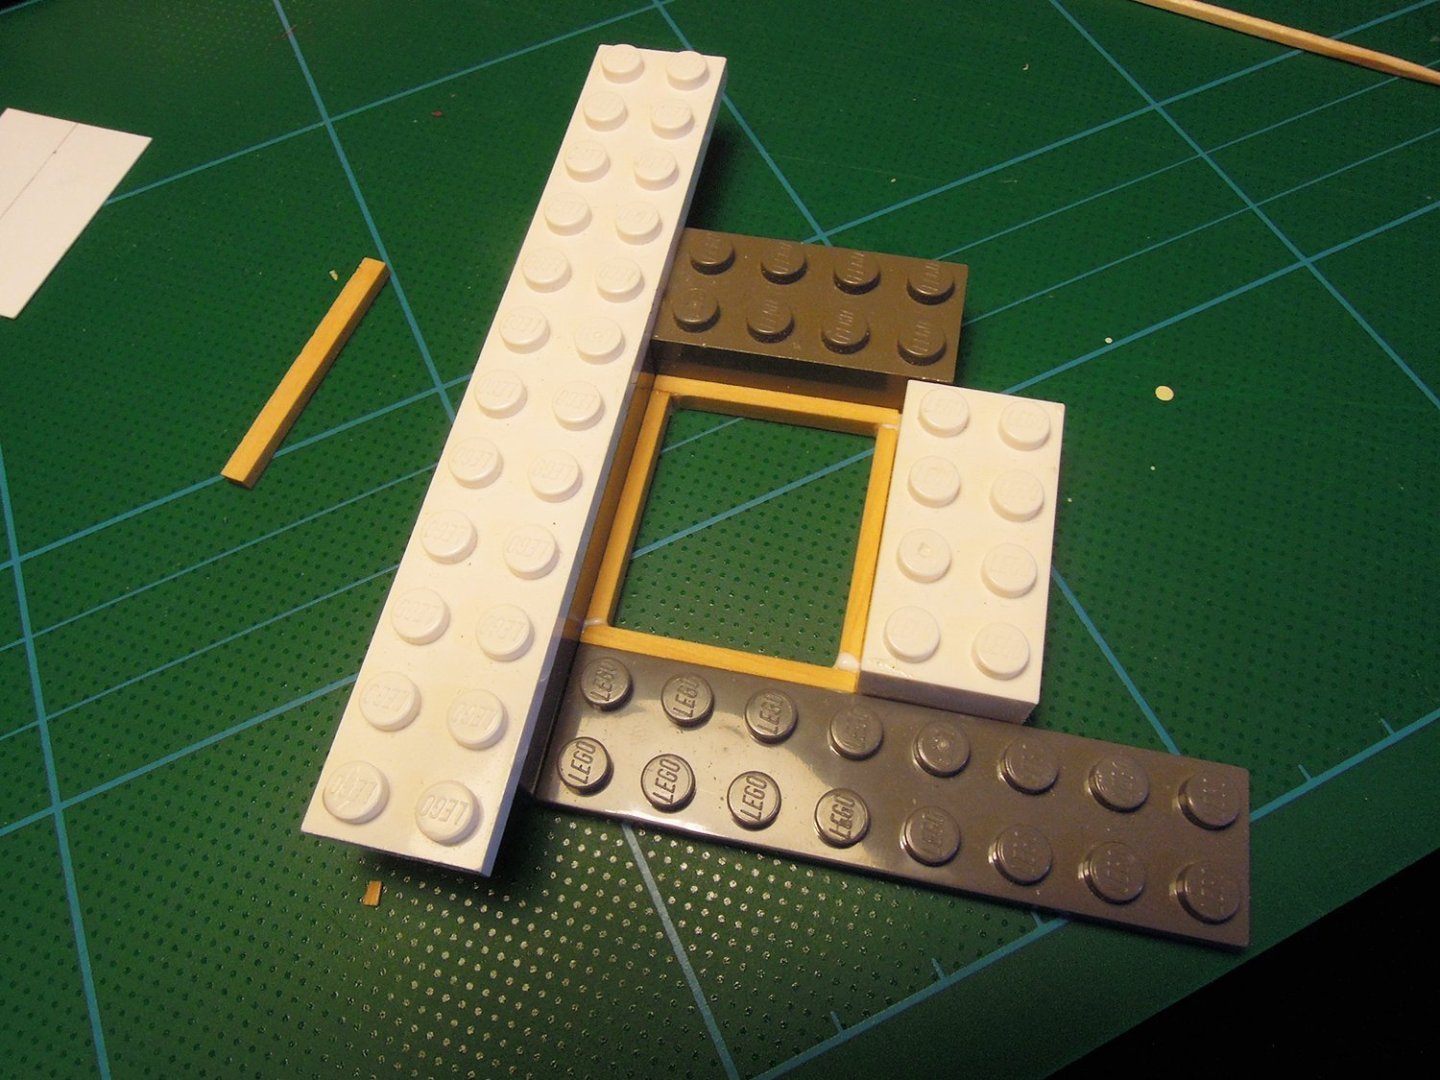
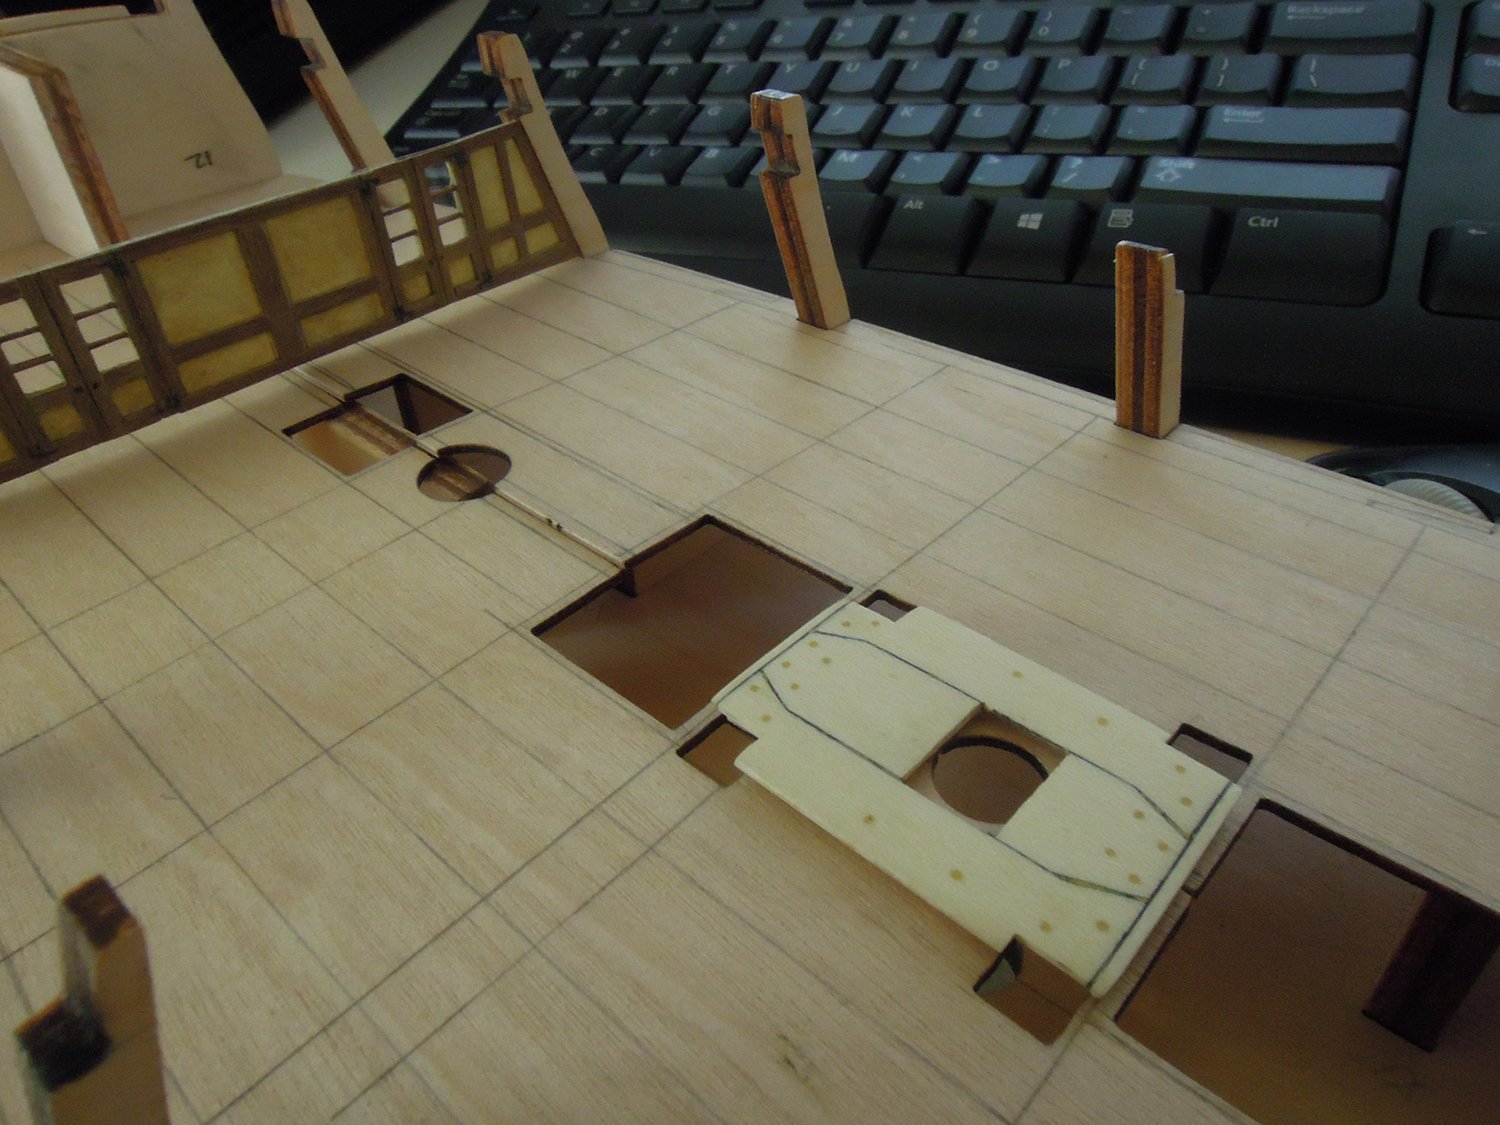
The hatches are from boxwood with box corner joints. They sit within the decking rather than on top. this requires a bit of cross coordination but works for me. The top edge of the hatch is slightly rounded. Lego is a great squaring device for making hatches.
Next I test the hatch fit and smooth off the main run of planks. I still haven't grappled with the edge planking but it still fits my mapping. I'm not saying I got this right but certainly the planning made me feel better about the outcome.

Then I drill for the treenails...this to me looks far too pimply so I fill with pale paste.
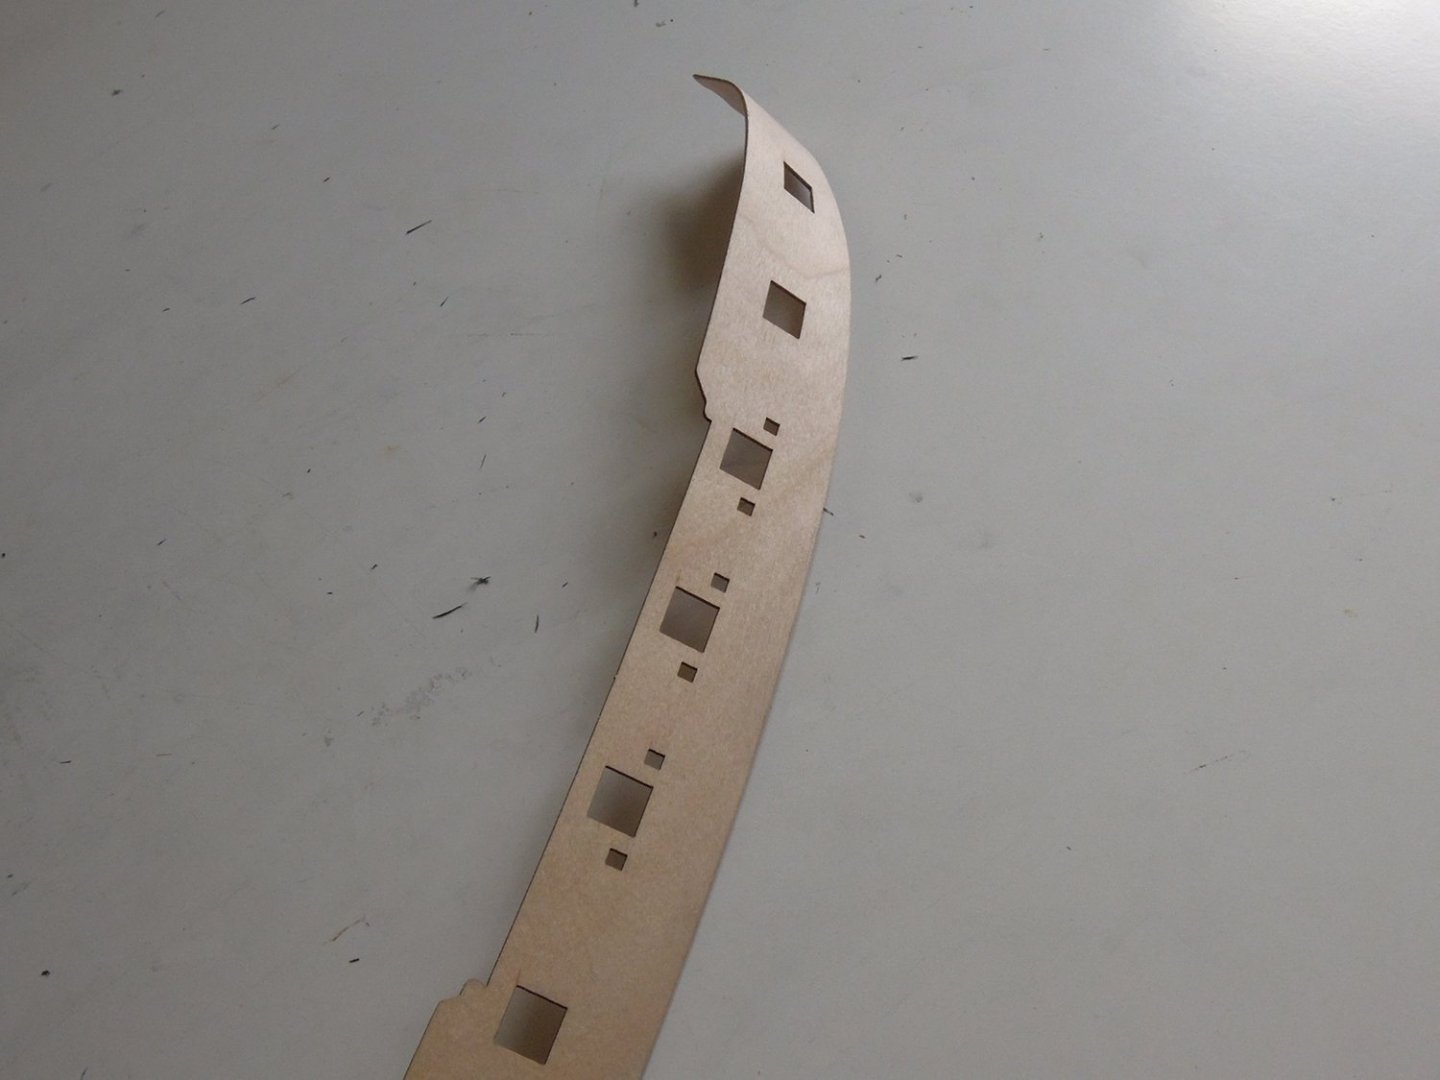
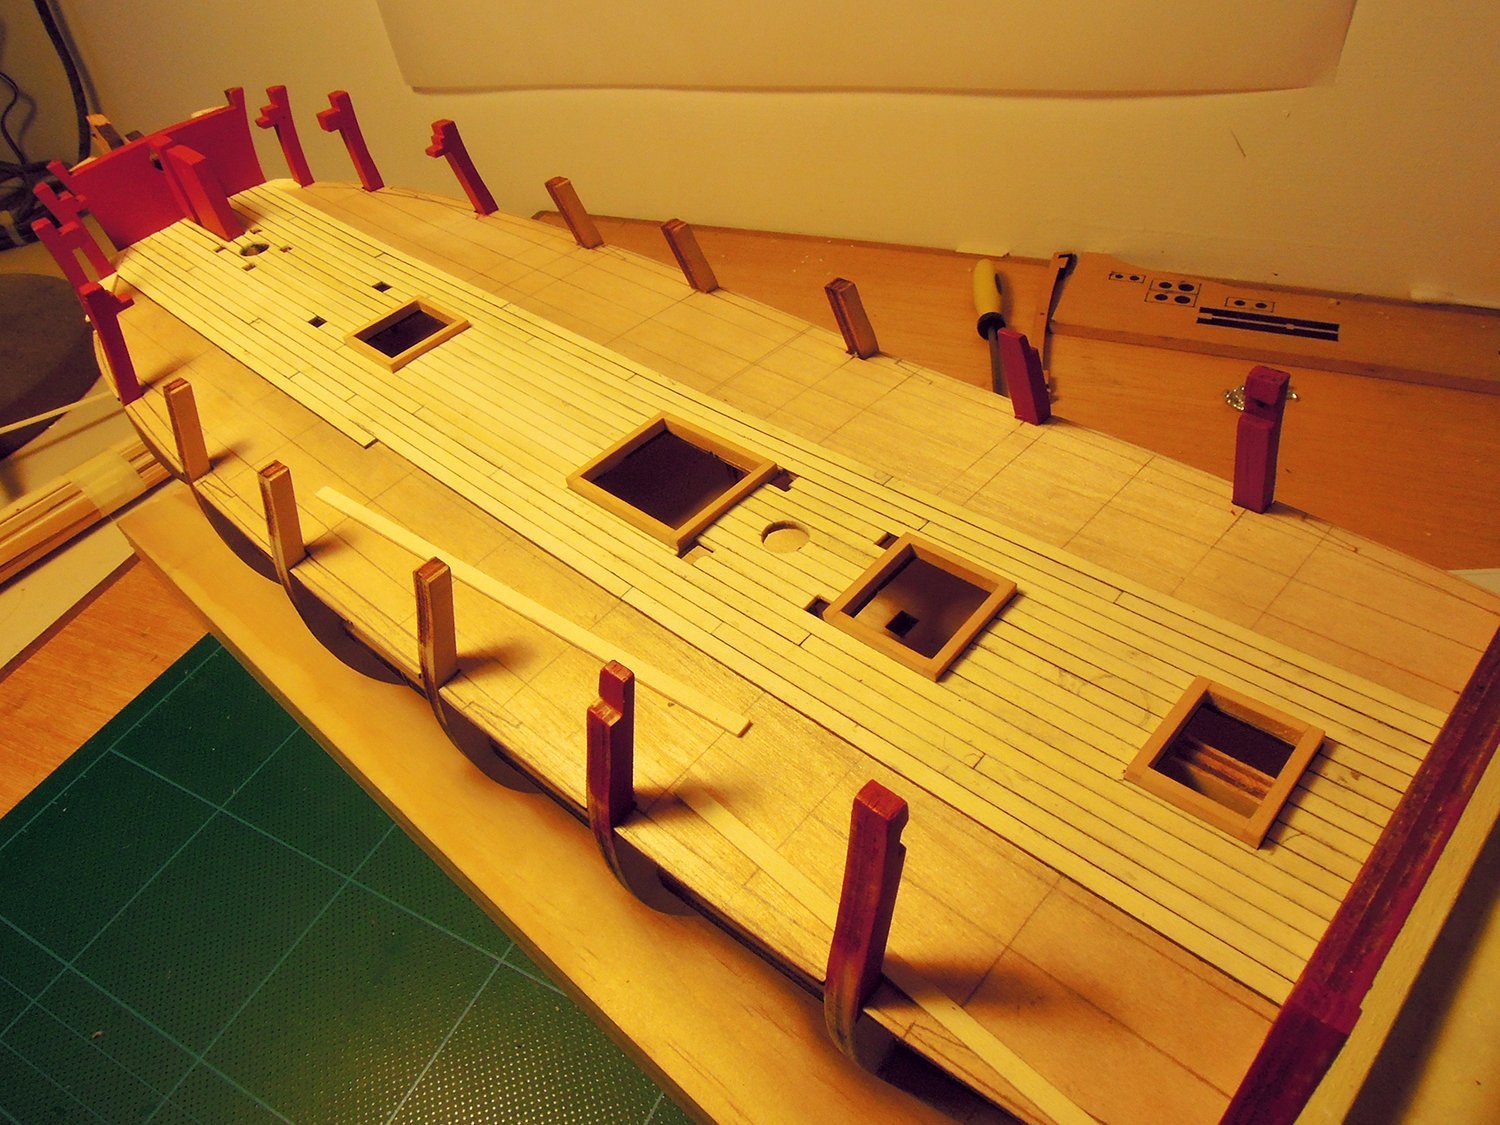
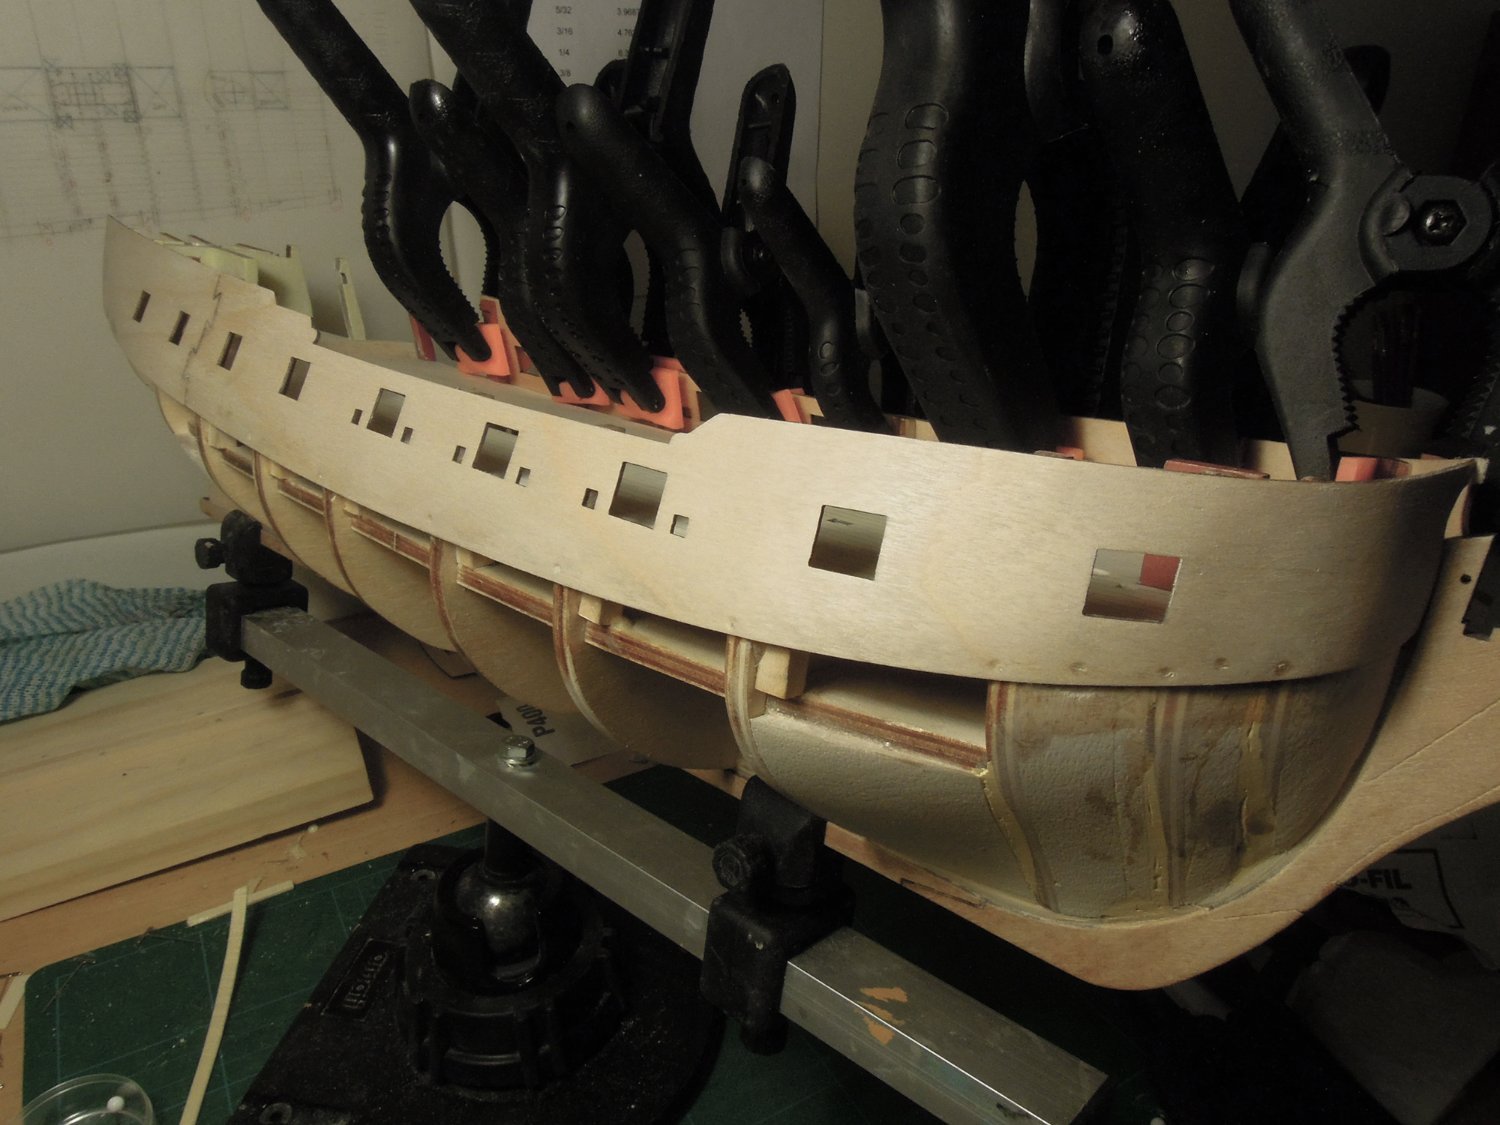
At this point it is time to do the first planking. Gulp. This kit, as many others do now (or then, I can't remember...), provides a plywood pattern for the gun ports and upper works. As challenging as this is to fit - it just takes time and patience - it is a brilliant guide to all the planking that is to come. However poor fitting of the patterns has undone some modelling. I think Chuck expresses this perfectly - "Just take your time." It is an adage for all model making...Notice that the forecastle and quarter deck templates are dry fitted to guide the plywood pattern. Finally getting the patterns to join at the bow is when you know it fits. And take some extreme measures such as clamping and nailing. Get these parts right and you are underway.
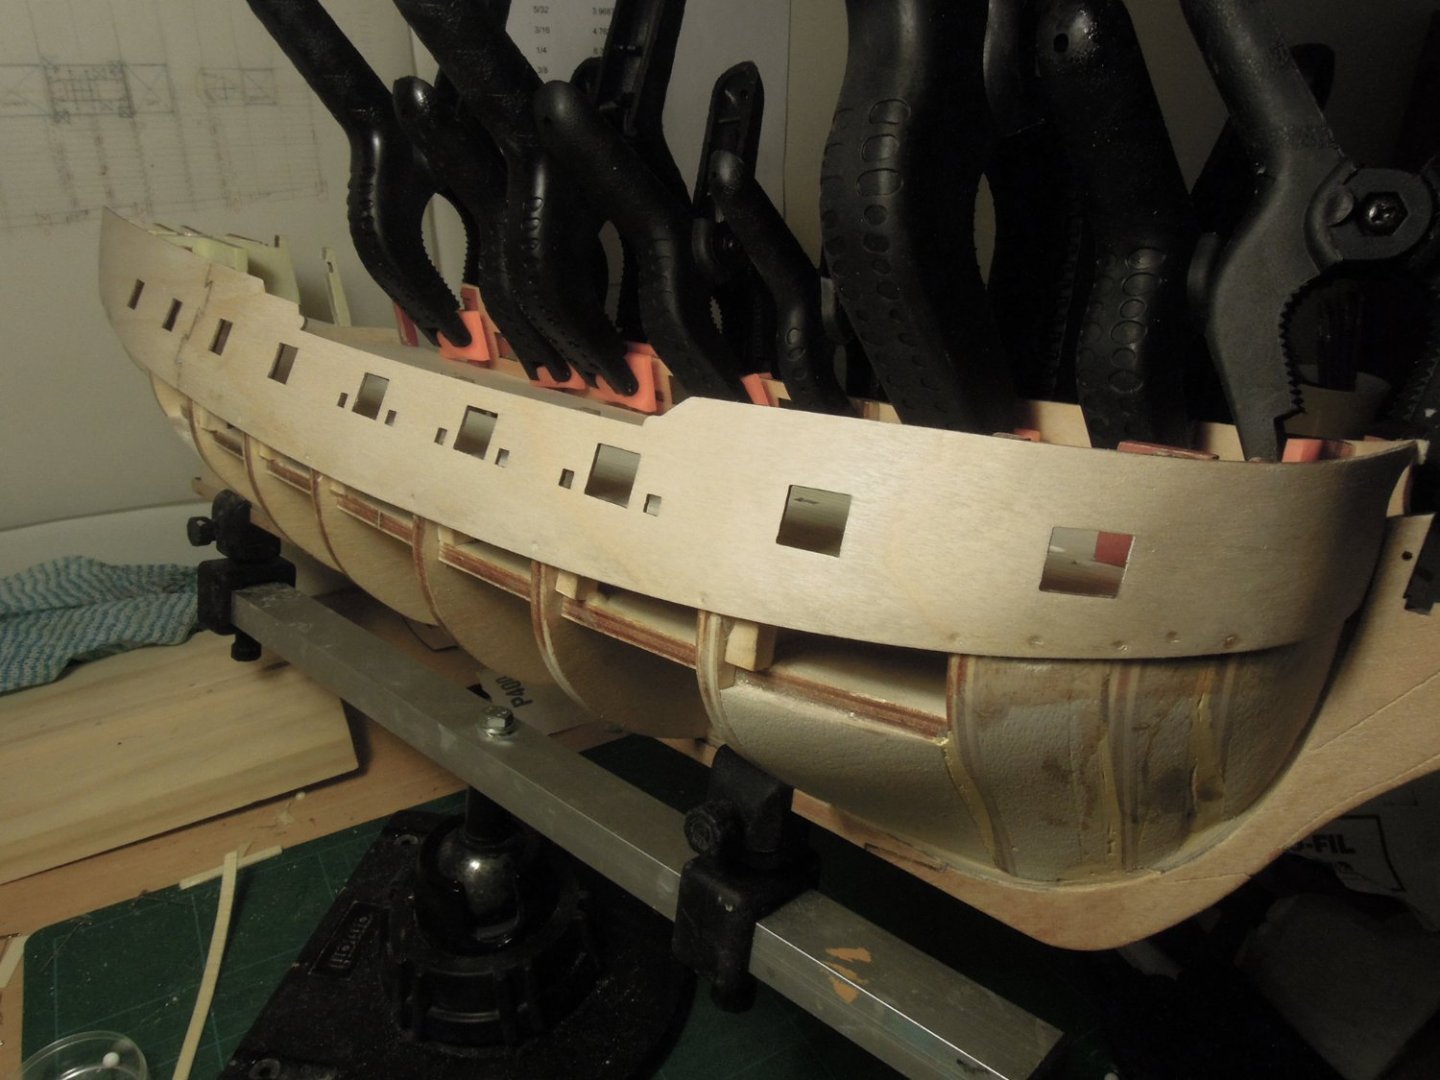

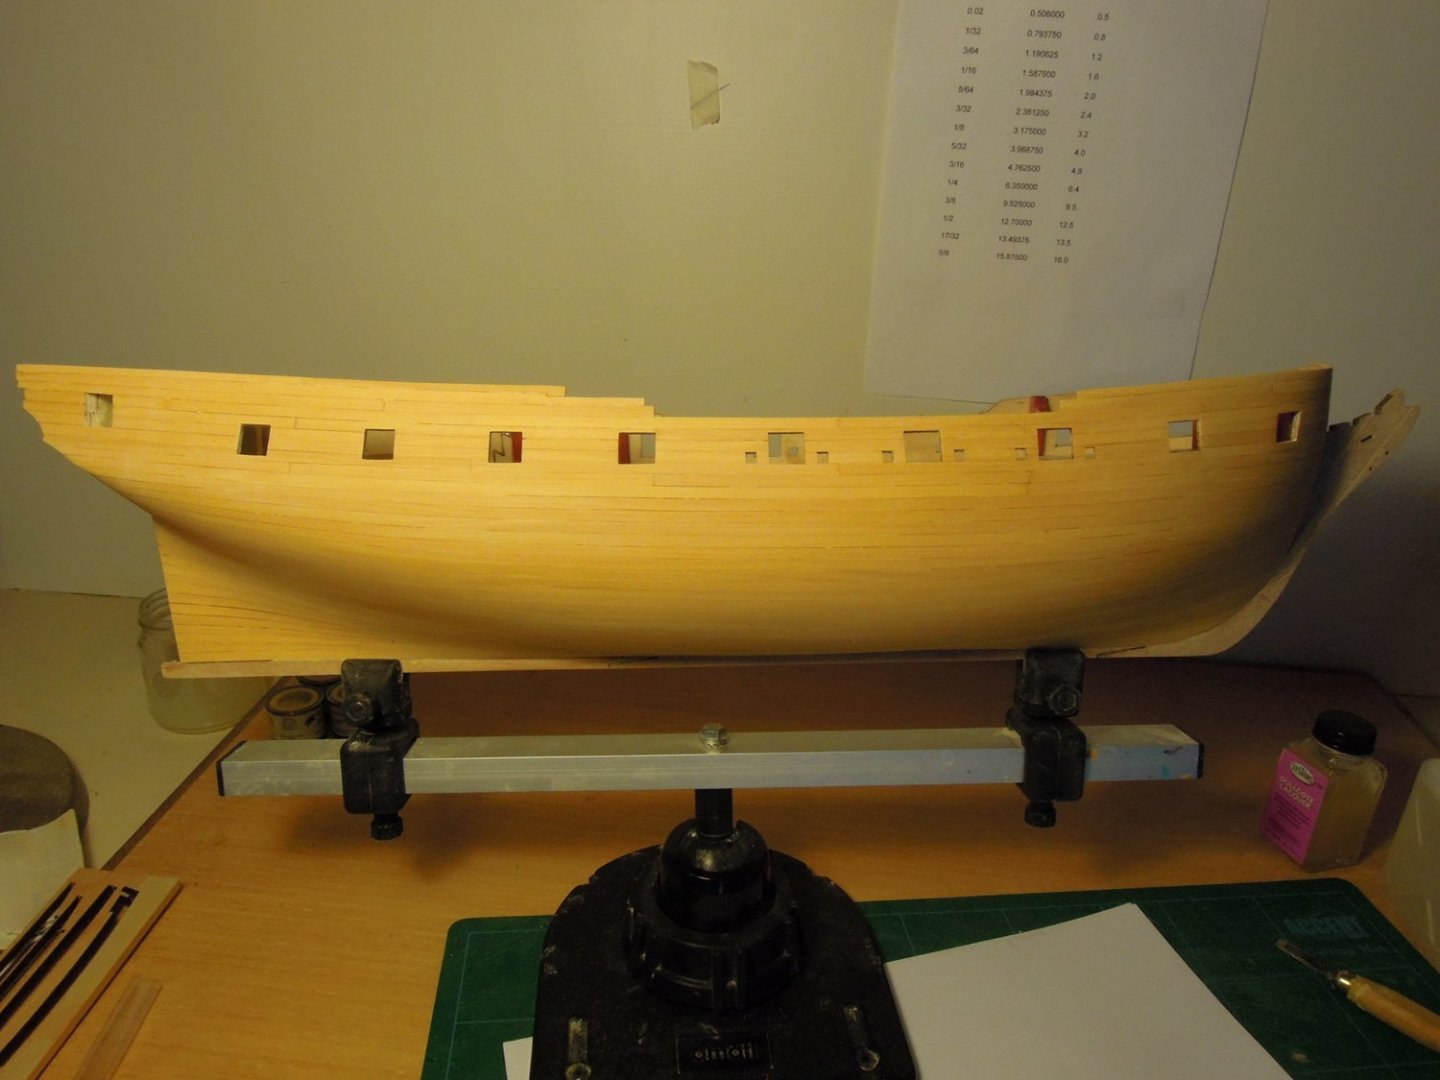
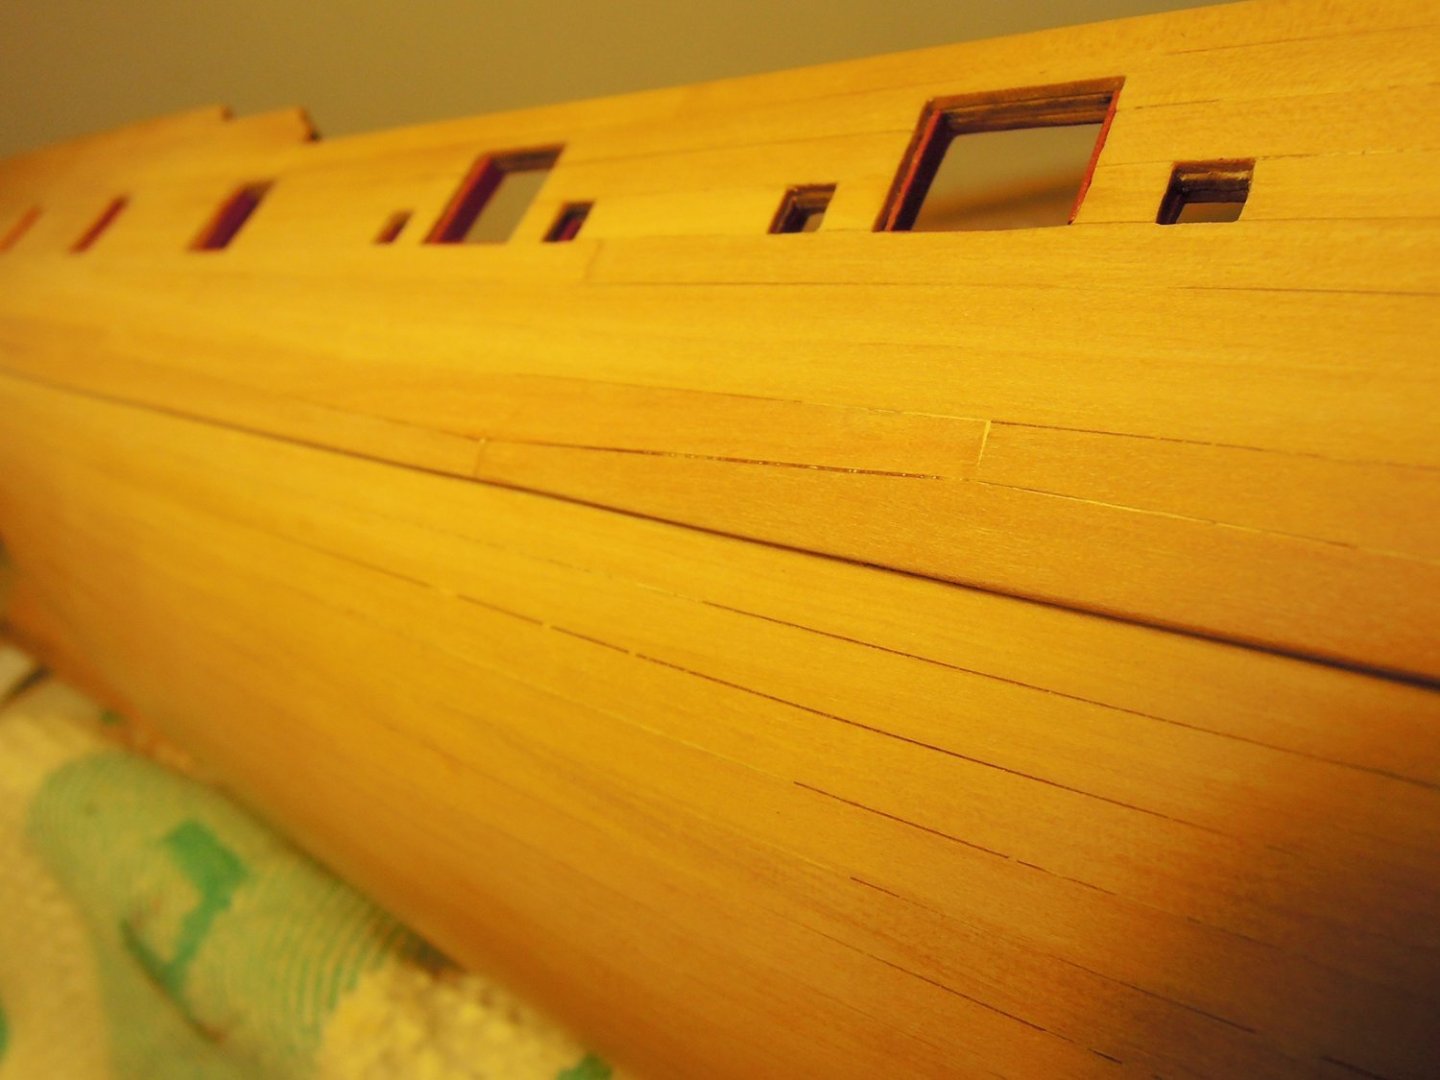
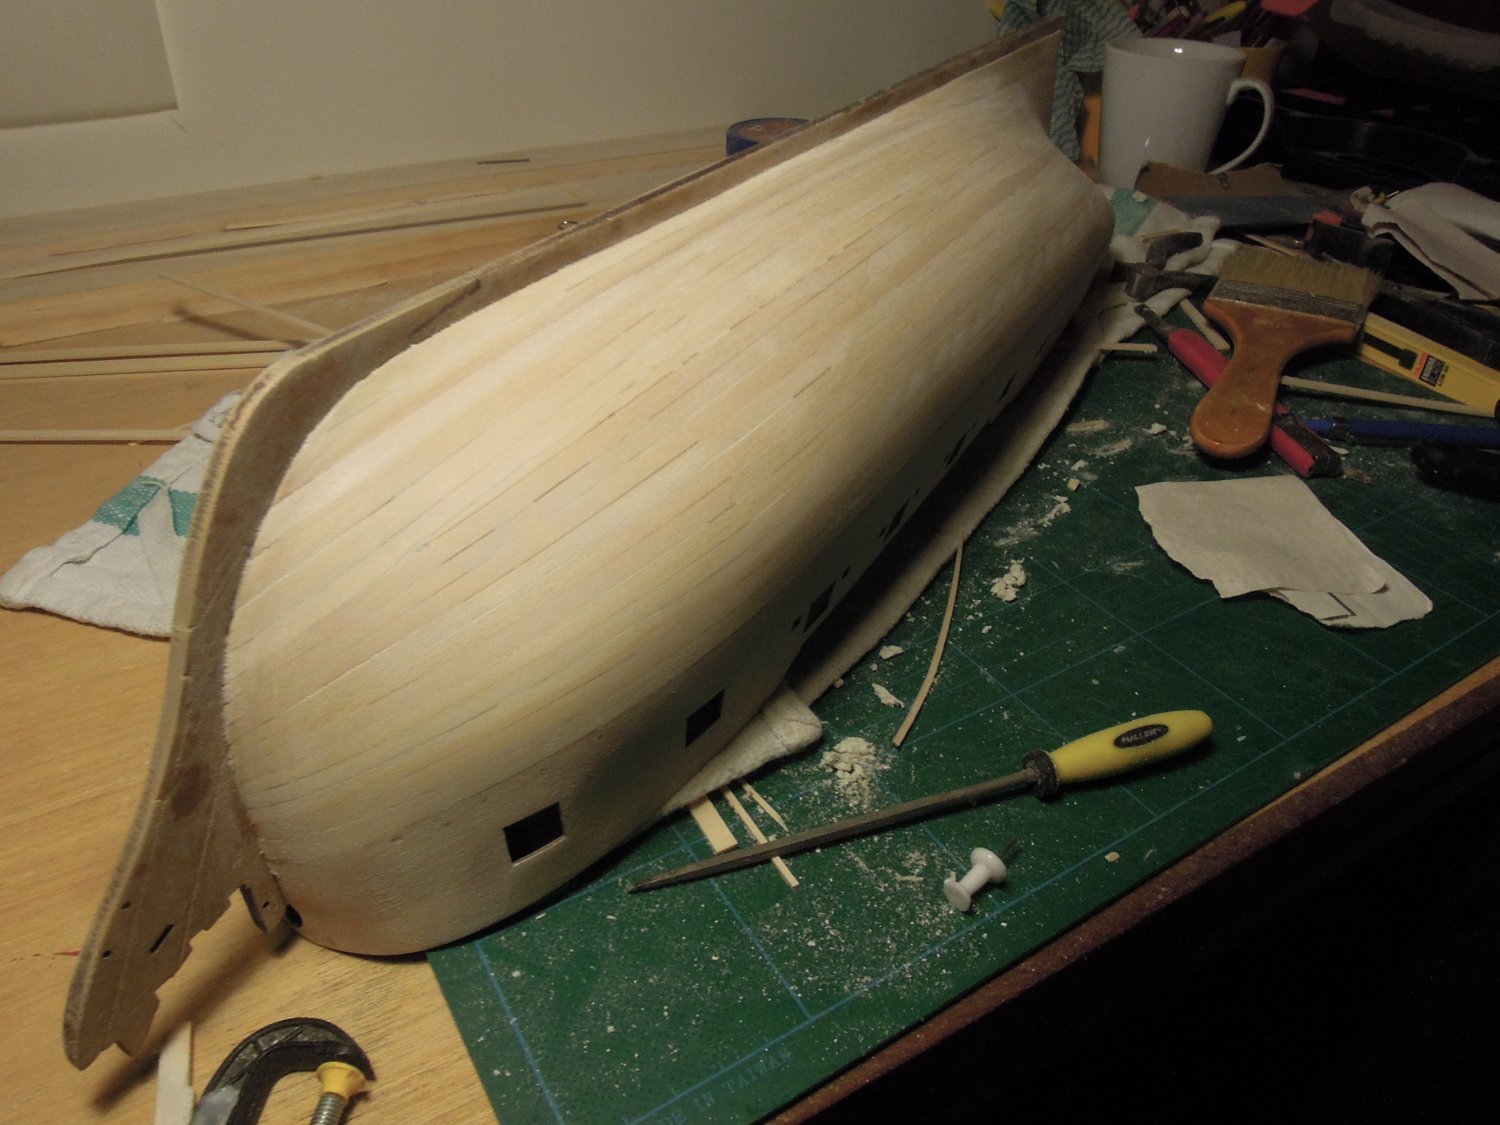
Next it is finally time for the first planking layer. Although this is only my fourth plank on frame model, I now treat the first layer as if was the only one. That is I try to make is a good as I can as that teaches me for the second layer. I don't approach it as being sacrificial and try to make the plank runs flow from stem to stern as they must on the second layer.

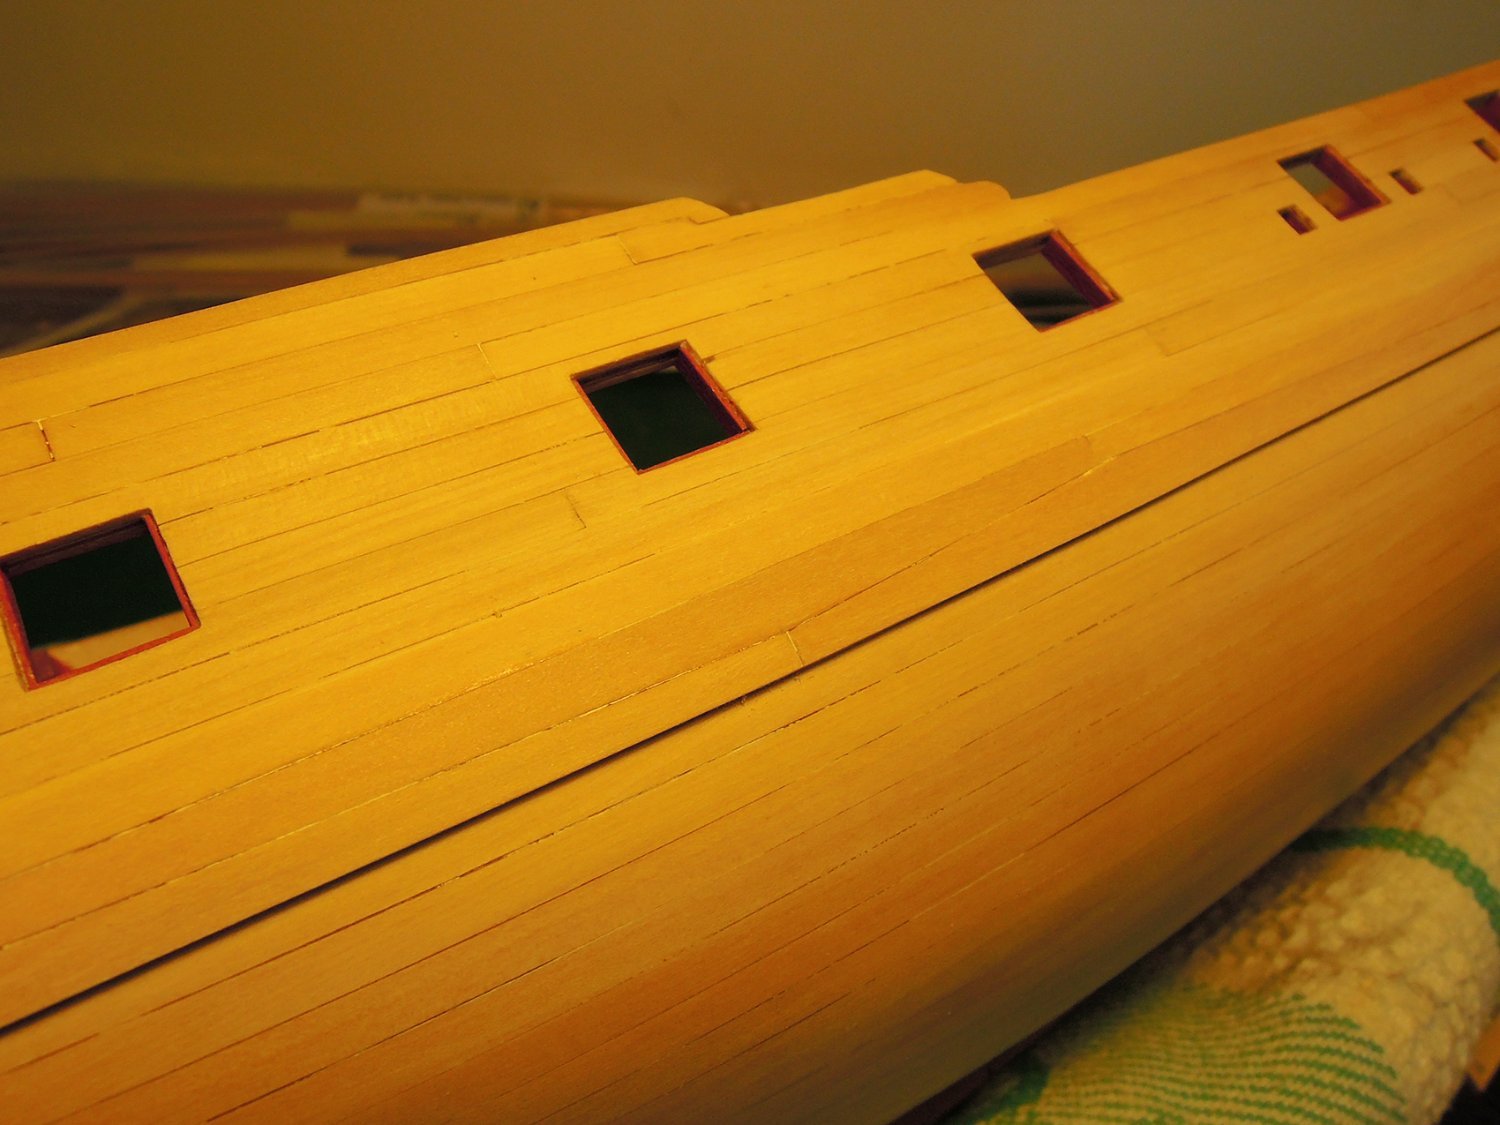
Next is the outer layer of planking. The kit provides walnut but I find this too dark and too variable in colour. I replaced it with boxwood which is a colour I prefer and a beautiful timber to work with. The second layer was eased by the effort on the first - I just followed those planks with full adhesion along the length of the hull.

Next up for me was painting and fiddling those details.


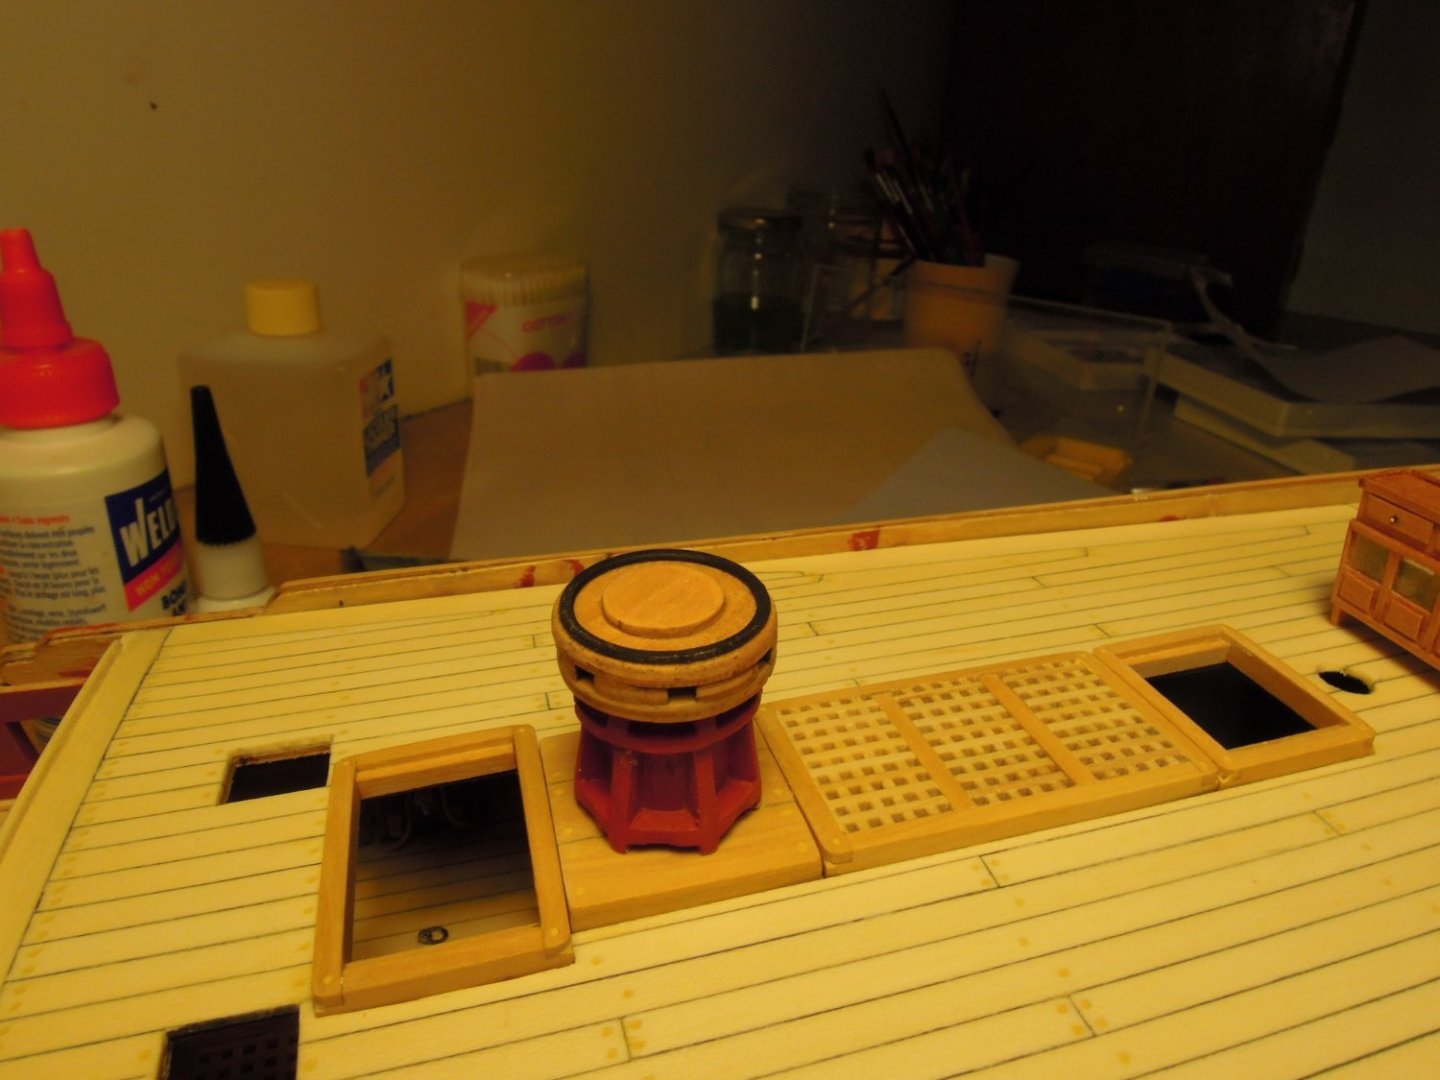
Then fiddling with other details such as making a stove.

And the capstan upper and lower details.
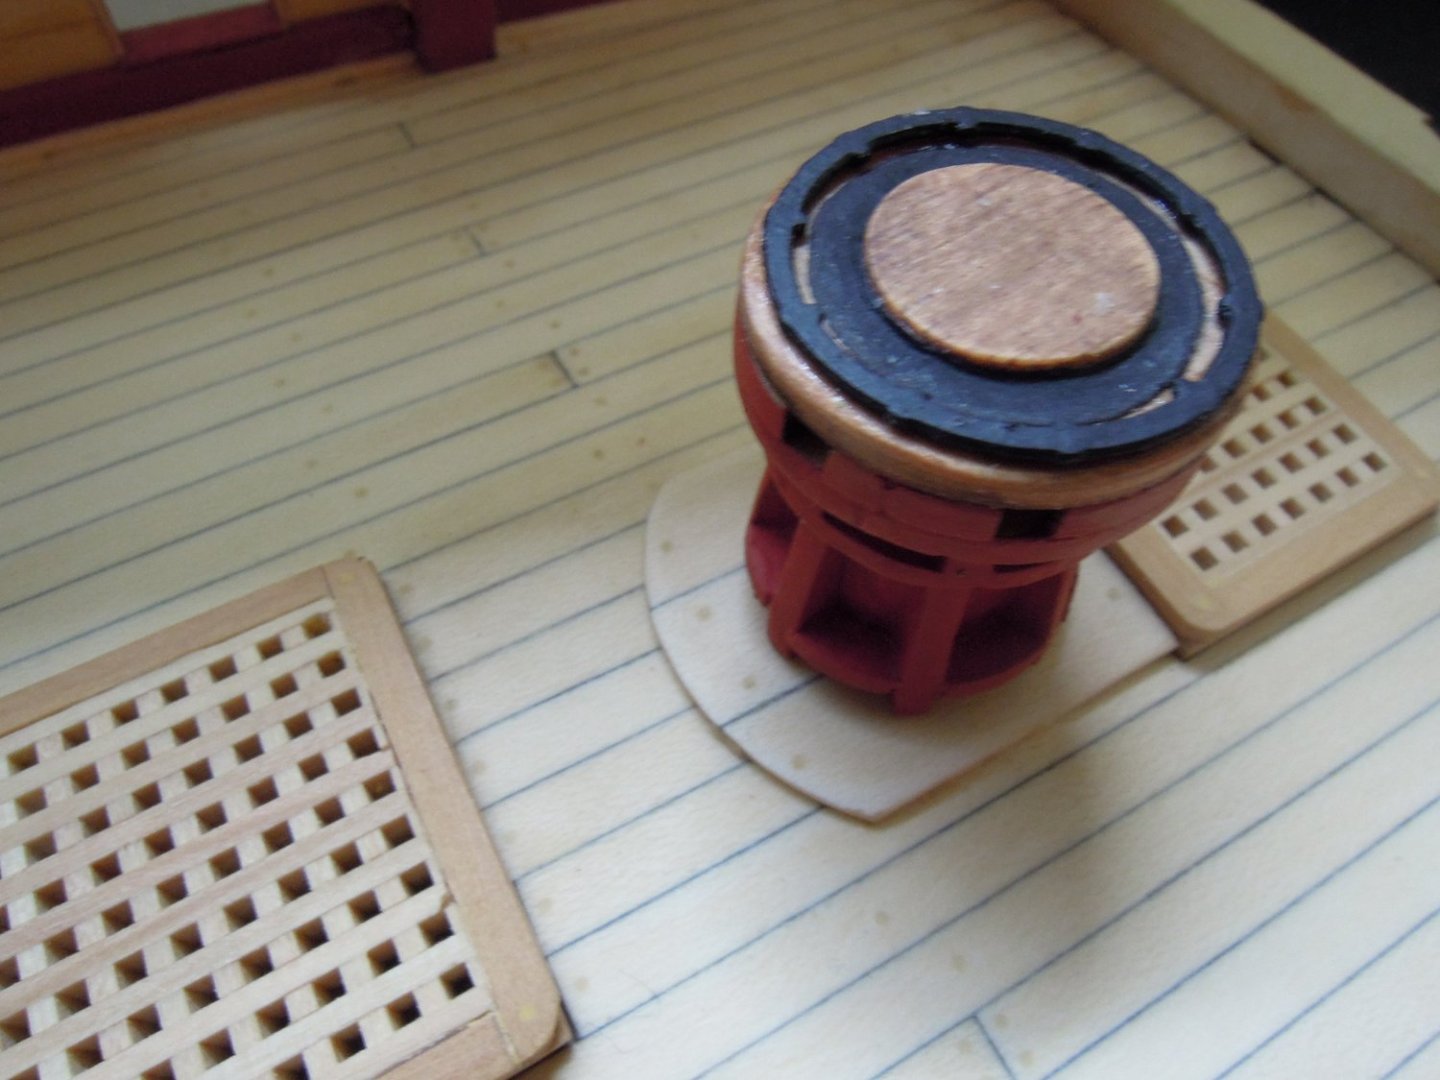
Another thought on the photo above. I work hard to fit the gratings into the hatches so that all the edges are symmetrical across and along. the two aft hatches here have a thin edge aft and forward and a fatter edge starboard and port but they equal. It seems minor but is easy to do and the alternative just looks...bad.
Next up were the wales. These are critical to the hull shaping and look and were the most scary part of the hull build. Wales that waver off line look really bad, even on a good hull. I challenged myself to make them in the correct figure pattern - I don't know what to otherwise call this - but it helped with the part. I sure know that the stem to stern look and flow of the wales is critical to the model and defines everything above and below on the hull.

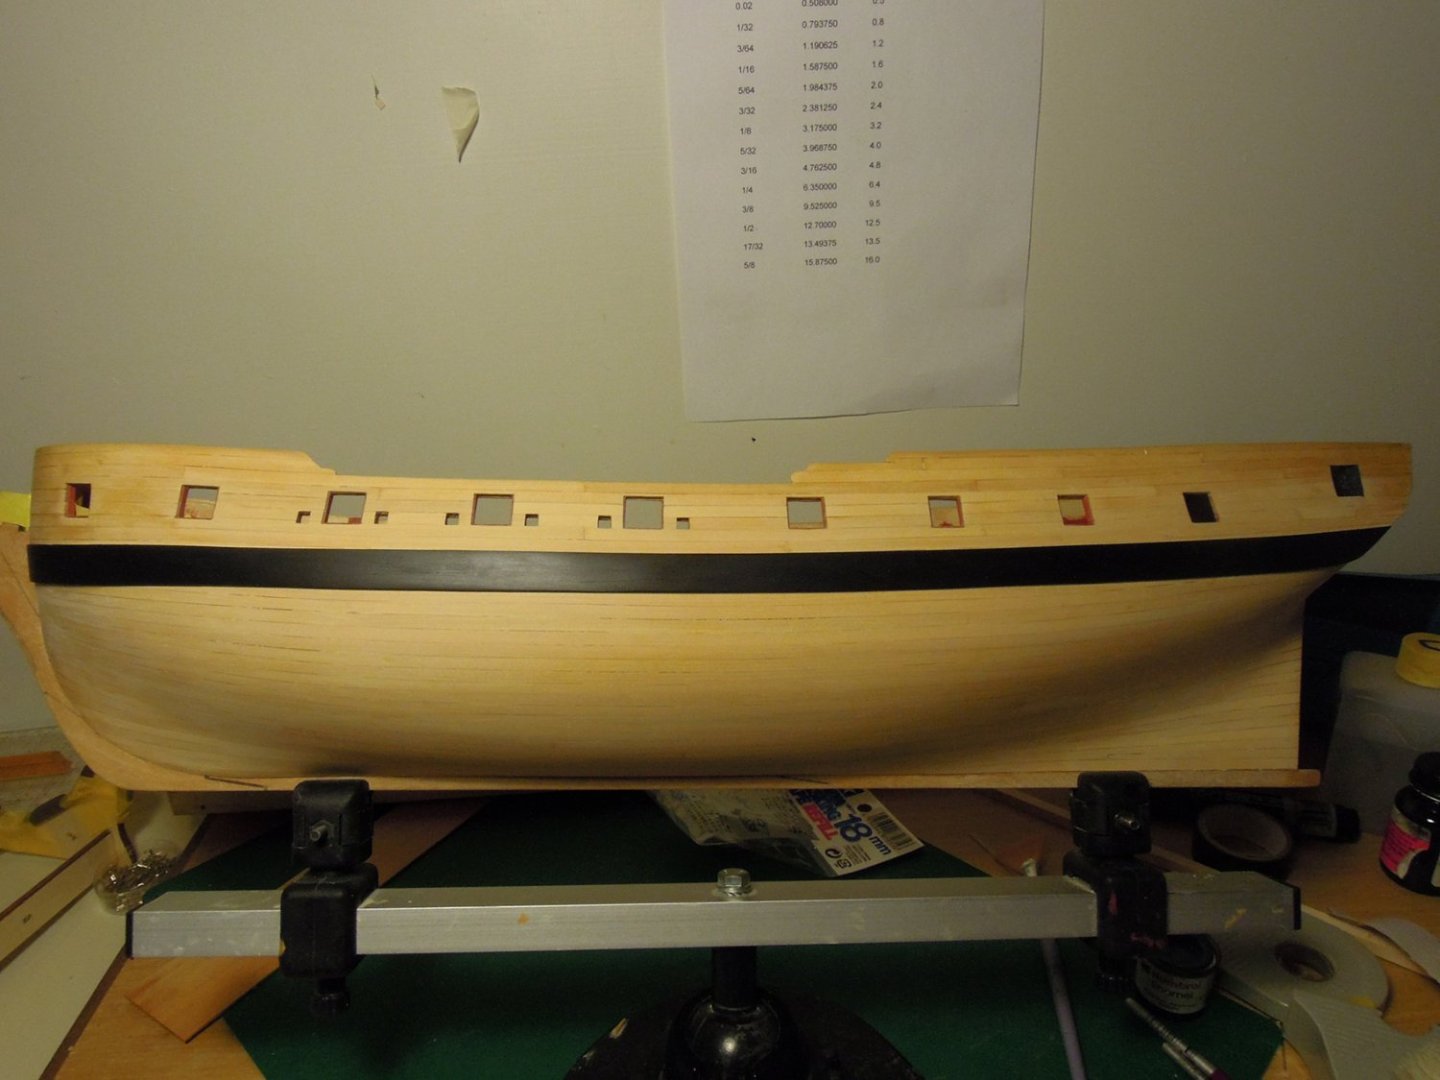
Unfortunately my efforts to paint and polish the wale almost completely eliminated any visual proof of the planking technique. And it does have a wobble here and there.
Will continue tomorrow. time for bed now.
Cheers,
A
- Doc Watson, goatfarmer11, Mark P and 11 others
-
14
-
Hi B.E.
I've just been catching up on your prolific outputs since I last wandered around MSW eight years ago. Extraordinary and all to the very highest quality. The Indefatigable looks like a fantastic kit and - no surprise - you are already proceeding at pace but with your usual accuracy. I will follow along as I will also troll through your other logs as they are always very informative. You are indefatigable! The UK must have more hours in a day than we have downunder - I'll have to check that as I'm surely wrong...
Cheers,
A
- CiscoH, Ryland Craze, Blue Ensign and 2 others
-
5
-
Hello my old friends on this forum
I have a number of books in my library that I no longer look at and might never look at again. This message is to sense whether there is any interest in them. Please PM if so. I'm not looking to make money I'd just like them to be owned by someone who will get more value out of them than I am currently. So happy to sell at a reasonable price - I have no idea if they are rare or expensive in other contexts. Shipping costs would suggest that someone in NZ or Australia would be a wiser buyer but happy to ship anywhere at cost - NZ shipping tends to be reasonable especially compared to the US rates! Happy to send pictures of any item.
Conway Ship Types:
The Bomb Vessel - Ware - hardback with dust jacket - jacket is a little tatty at top of spine - otherwise immaculate
The Heavy Frigate Volume 1, 1778 - 1800 - Gardiner - hardback with dust jacket - immaculate
Conway Anatomy of the Ship:
All hardback in immaculate condition with dust jackets (unless otherwise noted). All have fold out plans on obverse face of dust jacket. All have slightly faded colours on the dust jacket on the spine.
Endeavour - Revised Edition - Marquardt
Pandora - Revised Edition - McKay, Coleman - dust jacket has a split on lower left hand front cover
Granado - Goodwin
Bounty - Revised Edition - McKay
Beagle - Revised Edition - Marquardt
Bellona - Revised Edition - Lavery
I also have the Seawatch Series Vol I - IV of The Fully Framed Swan Class Sloop in immaculate condition which I want to sell but that might not be appropriate here...?
On another note I've decided to "complete" my HMS Fly model as a hull only model with mast stubs etc. Once finished there is a lot of materials and spares which I'll offer back to other forum members as a bulk lot - but that is in the future...
Cheers,
Alistair
-
Hi Doug
I have been absent from the forum for a long time. I'm just dropping in to rekindle my fire for HMS Fly. Work/life got in the way...
Love what you are doing - it looks great and you have got over that hurdle that curdled me - all of the full cannon rigs. Your head works - which did my head in - are also superb. Great stuff and I'll follow along again but probably not keep up with my Fly for a wee while yet. Started building WW1 planes instead...
Cheers,
Alistair
- Dfell, Martin W, sapperred1 and 1 other
-
4
-
Hello old friends!
It is good to check back into your wonderful logs. My Fly is marooned but very safe and will float again.
Wonderful work Martin - it is looking the part. You are well past where I got to when I put it on hold.
It is great to reconnect to your log, B.E's finished work - what can be said but "amazing" - and I'll hunt out Landlubbers next.
My Fly hull with deck fittings complete is in the corner of my eye on a spare shelf every time I work with plastic kits. No guilt - plastic is really unforgiving compared to wood.
Sorry just a brief visit back - I'm rather addicted to WW1 plane models at the mo and the turn around time is very fast. But as a longer journey - HMS Fly will, by my hands, be finished one day. I'll start checking into your logs again in the meantime to re-light my juices.
best regards,
Alistair- Martin W and Beef Wellington
-
2
-
Hi Maurice
I have been so long and so far away from this forum and I decided to come back for a look.
First - congratulations on your wonderful rendition of this elegant sloop. You are the master of this kit and your work always inspired me to keep going when I was going (and not going very well). Your end result is as remarkable as your journey - surely one of the most informative logs - it is the "how to" for all who tackle this beautiful ship in kit form. The brilliant outcome speaks for itself. I doff my cap to your skills and patience. One day I'd like to bother you for a visit to admire the outcome in reality - I'd need an invite of course!!!
Mine lays over on it's side - I ran out of puff but the wind will lift it off again one day...I can't resist modelling though - WW1 planes at the moment. And then I'll return here to finish my HMS Fly.
Brilliant man. Keep building!!!
Best regards,
Alistair
- mtaylor, Martin W and Ryland Craze
-
3
-
-
I'll add to that chorus - it is a really great kit and you'll learn a lot for any future build. Ask away but my memory will fail me in some instances. Although it will it will have some detractors - Bob Hunt's AVS practicum is really good in my opinion - I followed it for my model and it taught me heaps.
- DaddyWhale, Elijah, captgino and 2 others
-
5
-
Hi Zoran
I'm very interested in your kits. I followed your building here.
I'm wondering about your kit for the Brazzera with its amazing hull shape. What are your shipping costs to New Zealand?
I'm away for a few weeks - summer holiday - so forgive me if I'm slow to reply.
Thank you and kind regards,
Alistair
- Canute, MarisStella.hr and mtaylor
-
3
-
Superb. The standard for the AVS has been reset. Congratulations it has been a great pleasure following along.
Cheers
Alistair
- GLakie, Omega1234, Dimitris71 and 4 others
-
7
-


Armed Virginia Sloop by CiscoH - Model Shipways - 1:48
in - Kit build logs for subjects built from 1751 - 1800
Posted
Hi Cisco
Nice work all round on your AVS. It brings back memories as I built the same kit years ago. Some differences though...
I used Bob Hunt's practicum which was really good especially for the rigging which I'd never done before. I have no idea if you can still get that.
I didn't care much about the second planking as I was always going to paint the hull.
I replaced all the kit rope with Morope and all the blocks with Warner Woods West. Both were vastly superior to the kit offerings back then which were complete rubbish. Both Morope and Warner don't exist anymore but you have got Syren Models now which are even better.
I also replaced the deck planking which has now weathered off to a really nice tone but I can't remember what timber I used - holly? The upper deck is a New Zealand timber - matai - which I cut from a veneer sample that I had at the time.
I kit bashed a few other bits too - particularly the deck fittings.
There are photos of my build here on MSW but no log as such.
AVS builds into a spectacular model with its long bowsprit and raked mast. Uncased, it still gathers dust in our dining room but I give it a clean every now and then.
I will follow your progress but my hazy memory probably won't be of much use to you.
Cheers,
A