-
Posts
3,271 -
Joined
-
Last visited
Content Type
Profiles
Forums
Gallery
Events
Everything posted by realworkingsailor
-
It's been a while, but between being busy with other things, what I've been working on has been a little tedious. The irony is, this is but a taste of what is to come... Work is continuing on the A Frame bracing. Gleaning what I could from photos, I feel I've come pretty close to the prototype. The two triangular braces are built with styrene angle stock. The cross bracing between the legs was angle that I made up with some thicker material for added rigidity. After that I've been working on the small braces that run across the webb of the main girders. Ohhh... lot's of fun this. Like I said, only a taste of things to come. The unloading boom will be the ultimate challenge. I've got enough resource photos to use for the basic construction, at issue is the order to procede. More on this as I get further down the line... Andy
- 382 replies
-
- stadacona
- sylvan scale models
-
(and 1 more)
Tagged with:
-
Another suggestion from the model railroad world: http://grandtline.com/products/mrr/mrr%20car%20and%20loco%20detail%20parts/ho%20details/ho_misc_car_details.html Scroll down to the turnbuckles. I've used them before, the HO scale ones are about 6mm long and about 1.5mm in diameter. Andy
- 326 replies
-
- vinal haven
- steam ship
-
(and 1 more)
Tagged with:
-
Nicely done. If you want to get the pendants to hang realistically, you can try this: Soak with acrylic matte medium, OR a dilute mix of white glue and water. Suspend a weight from the pendants until dry. Andy
- 800 replies
-
- snake
- caldercraft
-
(and 1 more)
Tagged with:
-
That's exactly it. Although maybe not as labour intensive as prepping a car for paint The thing about styrene is not to be afraid of it. A few basic tools and a little knowledge of geometry are all you need. And don't be afraid to sketch out everything before hand. When I'm done I'll show you all some of my construction drawings. Andy
- 382 replies
-
- stadacona
- sylvan scale models
-
(and 1 more)
Tagged with:
-
Thanks JP. Yes I have painted resin many times before (and almost on this scale too ). The trick is always in the prep work and priming. Get that right and you're ok. Andy
- 382 replies
-
- stadacona
- sylvan scale models
-
(and 1 more)
Tagged with:
-
That will be the challenge. The key will be getting close enough to the booth so the airflow (from the exhaust fan) will catch as much of the overspray as possible. I'll cross that hurdle when I get to it. Besides, as of right now, we're still renovating and not set up yet for painting. A bit of work to convert a spare washroom to a paint room.... Andy
- 382 replies
-
- stadacona
- sylvan scale models
-
(and 1 more)
Tagged with:
-
Actually, the hull will have to get painted as a unit. It's easier that way, rather than painting, sanding, filing, fitting, sanding, filling and painting over again. She'd finish up much better getting the grunt work out of the way beforehand. Andy
- 382 replies
-
- stadacona
- sylvan scale models
-
(and 1 more)
Tagged with:
-
I've lucked out in respect to the stone trade. I'd had enough of self unloaders and went to the flat backs late in '08. I was only at Bruce Mines once, and while yes, it is nice up there, it is one of the many places I'd care not to have to go back to. CSL hasn't been a major player in the construction stone trade anyway. Most of that is split load, small consignment cargos. Andy
- 382 replies
-
- stadacona
- sylvan scale models
-
(and 1 more)
Tagged with:
-
Hi Jan, She's going to be a rather well travelled boat. As is the case with many models, there will many parts of assembly that will have to happen after painting. I'm not too worried about things getting damaged in transit, the resin is pretty tough and the model has a great stable flat "bottom". Andy
- 382 replies
-
- stadacona
- sylvan scale models
-
(and 1 more)
Tagged with:
-
In the "good old days" PPE was an afterthought. The whole principle of "git 'er done" was overriding. Nowadays, including PPE, there are other active dust suppression systems such as water spray, covered belts, and vacuum systems that can, and are installed. As for the hydraulic pumps... Yeah I guess they are pretty big. I have to justify the scale I'm used to working at, over what you guys are normally used to seeing Although I've never seen a hose burst on an unloading boom hydraulic system, I have seen a hydraulic belt drive go.....a geyser fluid 20 feet into the air.... Luckily it was a glycol system, rather than an oil system... Just messy, no oil pollution thankfully.... Andy
- 382 replies
-
- stadacona
- sylvan scale models
-
(and 1 more)
Tagged with:
-
I go by the DADGAD philosophy.... Deserves A Diagram, Gets A Diagram (or as my grade 10 math class interpreted it "Draw A D*mn Graph, Armpit Dweller" ) It still means that to achieve the diagram in real life, I'm let with plent of cut up pieces of plastic. As for unloading booms, originally they where controlled with cables, luffing and spewing winches were situated on the boom, and up until the late 1970s this was the standard. After about 1980 they switched to hydraulics, which made things a lot easier. I'll demonstrate the fun with cables in a future post. And I'll see if I can locate a few photos of "when things go.... Um.....wrong" Andy
- 382 replies
-
- stadacona
- sylvan scale models
-
(and 1 more)
Tagged with:
-
You've been quietly busy. Nice job on the rig so far. Andy
- 1,279 replies
-
- agamemnon
- caldercraft
-
(and 1 more)
Tagged with:
-
Rigging is coming along really well. I'm in agreement with everyone else, she's looking amazing. Andy
-
All that math... Makes my brain hurt... Besides, it's much more fun taking large pieces of styrene and systematically reducing them into smaller bits of styrene.... Scribe and snap, scribe and snap...
- 382 replies
-
- stadacona
- sylvan scale models
-
(and 1 more)
Tagged with:
-
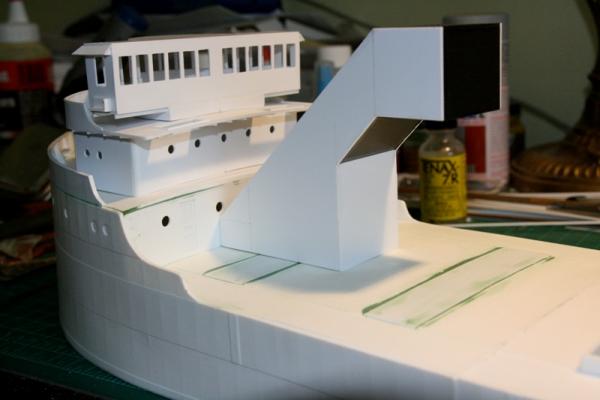
Carrying on with construction of the unloading gear. The next major structure is the "A" frame. This consists of 2 massive girders that join at the top to support the swivel for the boom headblock. Although this looks like a simple structure, it is remarkably comlex, given the angles involved. A lot of trial and error. There is still a lot more structure to be added to the two side girders as well as the framing in between them. Eventually they will be supported about 1/3rd of the way down from the top by a vertical girder(s) attaching to the loop belt casing. One of the key things to be aware of is that the alignment of the various components; the swivel for the headblock, the gooseneck hopper just under the loop belt, and the boom pivot all have to be in line. There is still many adjustments to be made. And Popeye... you would have to be stark raving made to want to attempt to model the innards of a self unloading system. if you think an admiralty style model is complex.... you have no idea the work that would be involved I'm being sent out again to take a ship down the river. I leave tonight and won't be back again until Saturday sometime. The shipyard will undergo another short hiatus in the interim. Andy
- 382 replies
-
- stadacona
- sylvan scale models
-
(and 1 more)
Tagged with:
-
Consider yourself lucky, it's not for nothing they are sometimes snidely referred to as "self destroyers" with respect to the crews.... Andy
- 382 replies
-
- stadacona
- sylvan scale models
-
(and 1 more)
Tagged with:
-
Remember the transfer belts I mentioned?
- 382 replies
-
- stadacona
- sylvan scale models
-
(and 1 more)
Tagged with:
-
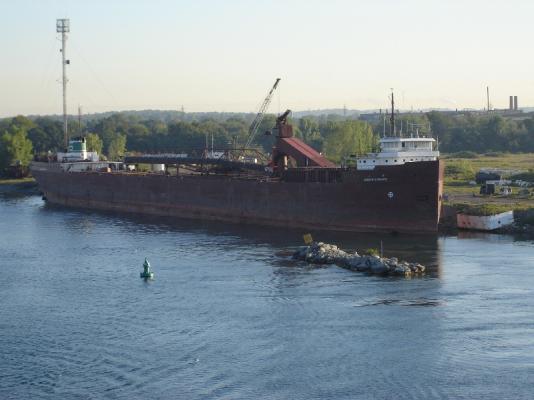
I've been considering giving the stern a bit of a re-think. I'm not entirely happy with the upper level, so I've tkaen a pause on that for some deep thought. In the mean time, I've started work on the cargo handling system. Self unloading vessels originated on the Great Lakes in the 1920s and 30s. A system of hoppers, gates and belts is used to bring cargo from the bottom of the holds up to a boom, and then off the ship, either into a shore based hopper, or onto an open pad. Below deck, instead of the cargo holds being flat bottomed, they are slopped into a series of hopper gates. These gates are located above 1 or more longitundinal belts. Crew, known as tunnelmen, open and close the gates to all the cargo to fall ont the tunnel belts. These belts take the cargo forward or aft, depending on which end of the ship has the boom. In a multiple belt system, the tunnel belts unload into short transverse belts known as transfer belts. These belts take the feed and consolidated it onto another belt that brings the cargo up from below. There are three types of elevating belts. The simplest type is an Incline Belt. This is a very straight forward open belt that brings cargo up on a shallow angle. This system is generally quieter, but it take up a lot of space to get enough height to depost the cargo onto the boom. Another system is known as the Bucket Conveyor. This is a special thick belt equipped with rubber buckets that can bring the cargo up almost vertically from below. These are very noisy systems and they are limited in the ammount and types of cargo they can move. The most efficient and modern system is known as a Loop Belt. This is actually two belts that compress together over the cargo and forms a gigantic "C". These belts can move very fast, and can move a large variety of bulk cargos, there is very little they can't lift. A basic section of a modern self unloading vessel: Which brings me back to the Stadacona. I am fairly certain she had a loop belt system. You can see on the Photo of the Joseph H Franz, the ammound of space needed for an incline belt system. So whether or not she had a bucket belt or a loop is a matter for the rivet counters, the point on this excercise was for get the outer casing made up. The first step was roughing out the dimensions on a piece of paper. The two sides were then created and then the middle parts (my supplier is currently out of white styrene sheet, so I had to resort to black sheet instead.... not as convenient to write on... but it is UV resistant... ) Anyway, there are a lot more details to work out as well as construction of the massive "A" frame structure that supports the boom. Another challenge lies ahead. Andy
- 382 replies
-
- stadacona
- sylvan scale models
-
(and 1 more)
Tagged with:
-
Very nice! If I wasn't knee deep in plastic at the moment, you know what I'd be up to Andy
- 2,191 replies
-
- confederacy
- Model Shipways
-
(and 1 more)
Tagged with:
-
Ha! I worked on the Parisien in 2003, the summer she laid up before her conversion to the Assiniboine. Small world! Andy
- 382 replies
-
- stadacona
- sylvan scale models
-
(and 1 more)
Tagged with:
-
The kit actually comes with that moulded in already. Although the rivet detail is a bit faint, the panting between the frames is done to good effect. Andy
- 382 replies
-
- stadacona
- sylvan scale models
-
(and 1 more)
Tagged with:
-
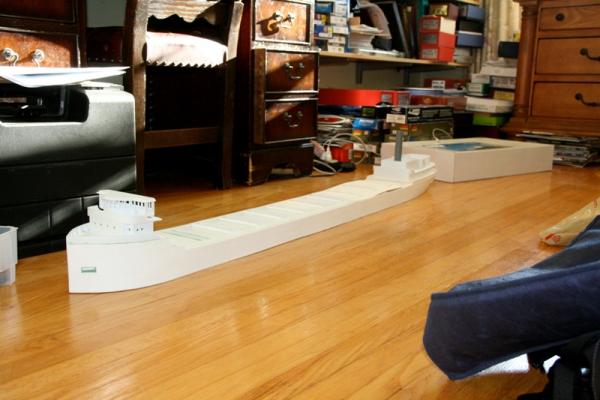
More on stern anchors later... A small update this morning. Just the preliminary work on the poop deck structure. The forward part would have been part of the engine casing, while the after part was more accomadations. And just for my own reference, and everyone else's amusement, another view of the whole ship mocked up as she stands now in construction. It happens to be a nice sunny (and cold) day, so I'm affraid all the white in the photos gets washed out. Andy
- 382 replies
-
- stadacona
- sylvan scale models
-
(and 1 more)
Tagged with:
-
It's not so much that the stern swings... (The whole ship swings anyways when going astern, due to transverse thrust). In the canals and dredged channels of the Seaway, ships are travelling at a minimum safe UKC (underkeel clearance). Often less then 2 feet, after squat is factored in. Let's face it, in a canal a ship can only swing so far... But a ship with only 2 feet of bottom clearance, and an anchor that could be well over than in thickness... Well....imagine a really large tuna can meeting a gigantic can opener. Andy
- 382 replies
-
- stadacona
- sylvan scale models
-
(and 1 more)
Tagged with:
-
Stern anchors are very rarely used, if ever. They are a requirement for the Seaway, so they continue to be fitted. The whole idea is that in the event a ship has to make a crash stop in a canal, it is better to drop a stern anchor, rather that drop one (or both) the forward anchor(s) and risk over-running them and puncturing the underside of the ship. Andy
- 382 replies
-
- stadacona
- sylvan scale models
-
(and 1 more)
Tagged with:
-
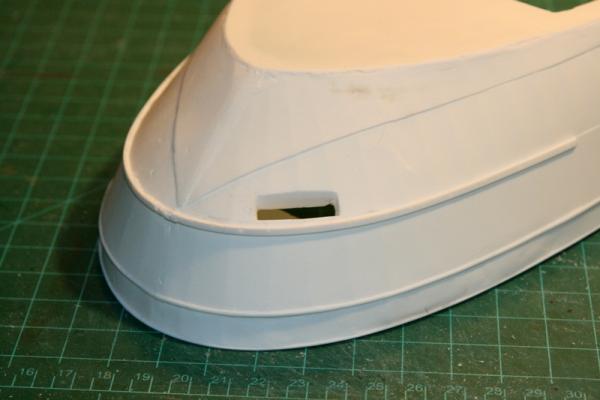
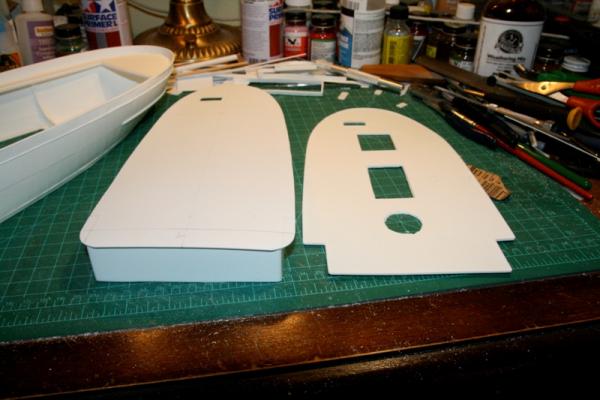
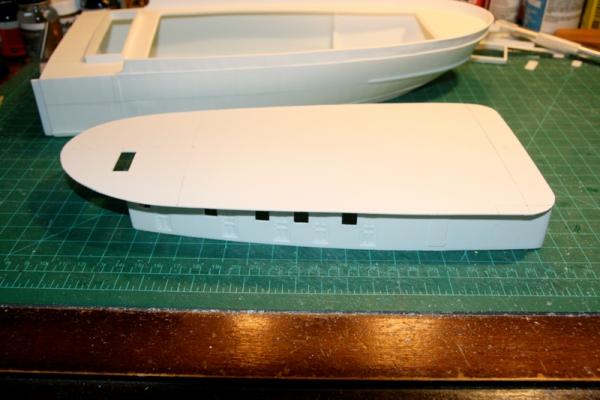
Stern work over the past couple days. Excavating the pocket for the stern anchor too a bit of doing, the resin casting is particularly thick in that area. The anchor pocket will sit just below the deck, with a hawse pipe running up to a windlass on the poop deck. This is one of these areas that will be purely speculative. I've yet to locate decent photos of her stern, however careful study of contemporary vessels can help create something at least close. I've come across some great photos of a fleet mate, the S.S. Lemoyne built by the same shipyard 3 years earlier than the S.S. Stadacona. There will most likely be some similarities between the two vessels. I've also started work on the afterhouse. I used the kit supplied casting for the lower part, mostly for the sake of simplicity. I did, however, replace the resin cast poop deck for one made from 0.030" styrene. It's a bit mroe rigid (and less warped) than the resin piece, plus I needed to make modifications to the width and the forward end. I saved the cast on details of the engineroom skylight and stores hatch for re-use later on, as well as the cast on base for the funnel. There is a second level to the afterhouse that I will have to build on top, and most of those details will be relocated there. Andy
- 382 replies
-
- stadacona
- sylvan scale models
-
(and 1 more)
Tagged with:
About us
Modelshipworld - Advancing Ship Modeling through Research
SSL Secured
Your security is important for us so this Website is SSL-Secured
NRG Mailing Address
Nautical Research Guild
237 South Lincoln Street
Westmont IL, 60559-1917
Model Ship World ® and the MSW logo are Registered Trademarks, and belong to the Nautical Research Guild (United States Patent and Trademark Office: No. 6,929,264 & No. 6,929,274, registered Dec. 20, 2022)
Helpful Links
About the NRG
If you enjoy building ship models that are historically accurate as well as beautiful, then The Nautical Research Guild (NRG) is just right for you.
The Guild is a non-profit educational organization whose mission is to “Advance Ship Modeling Through Research”. We provide support to our members in their efforts to raise the quality of their model ships.
The Nautical Research Guild has published our world-renowned quarterly magazine, The Nautical Research Journal, since 1955. The pages of the Journal are full of articles by accomplished ship modelers who show you how they create those exquisite details on their models, and by maritime historians who show you the correct details to build. The Journal is available in both print and digital editions. Go to the NRG web site (www.thenrg.org) to download a complimentary digital copy of the Journal. The NRG also publishes plan sets, books and compilations of back issues of the Journal and the former Ships in Scale and Model Ship Builder magazines.


