BANYAN
-
Posts
5,951 -
Joined
-
Last visited
Content Type
Profiles
Forums
Gallery
Events
Everything posted by BANYAN
-
 Agreewith Greg; I think that is why Marquardt shows hooks and tackle for these stays rather than fixed rigging as in other publications - so they can be removed. cheers Pat
 -
Steve, could you post a piccy of those cutters please. I have a pair of electronics flush faced cutters, but they mangle the thread at the edge of the cut - perhaps the brand (quality) may be crucial? Neat solution to the eye; I'll try that. cheers Pat
-
That is one heck of a "work of art" delivered by a very talented artisan Remco - a wonderful legacy you leave us mere mortals to follow cheers Pat
- 1,215 replies
-
- 3
-

-
- sloop
- kingfisher
- (and 1 more)
-
More than a little impressed Steve; that is a major undertaking repeating that level of detail over 12 shroud sets! I tried at scale 1:60 but just too fiddly for my 'fat' fingers and had enough issues with clove/restrictor hitch terminations. cheers Pat
-
What is the name for the netting under the bowsprit
BANYAN replied to HKC's topic in Masting, rigging and sails
Thanks Steve and JB. Steve that photo is perfect - many thanks for that - much appreciate the rapid response. I was a bit puzzled by marquardt's depiction as i could not see a 'seaman' like way to utilise a central line either end; the spreaders make much more practical sense. cheers Pat -
Nice work Dave; some great progress there. cheers Pat
-
Thanks Dave, that's the plan re Endeavour (and a couple of frosties of course ) cheers Pat
- 517 replies
-
- 2
-
-
- Endeavour
- Artesania Latina
- (and 1 more)
-
What is the name for the netting under the bowsprit
BANYAN replied to HKC's topic in Masting, rigging and sails
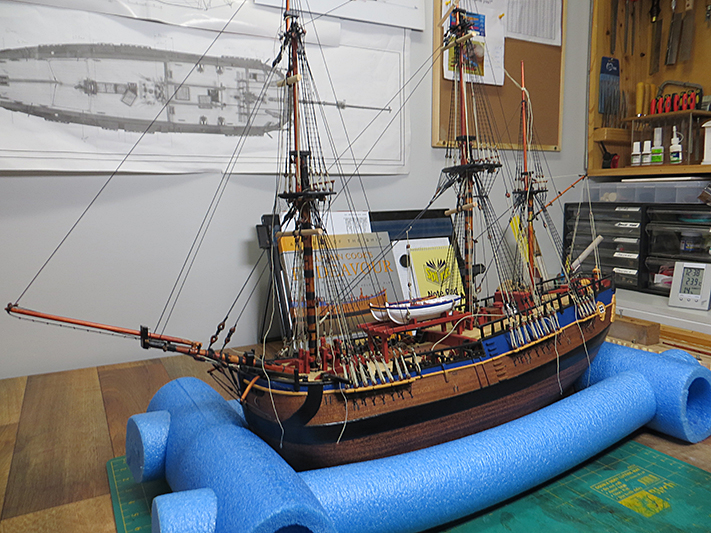
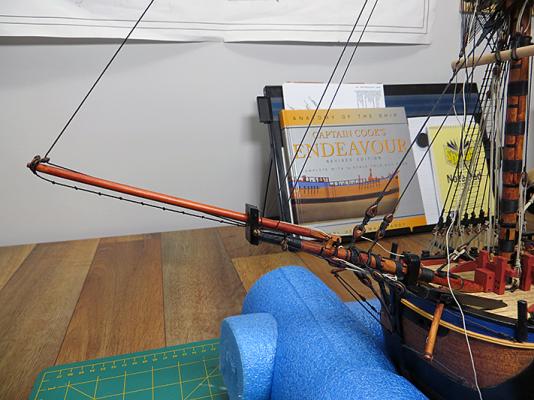
HKC - I hope you don't mind me high jacking your thread after such a long period of inactivity? In the Endeavour AOTS, this netting is referenced as being for the staysail ( to hold the 'bundle' when lowered). My question is how it was rigged circa 1770. the AOTS shows only a side view. In this view there is a 'horse' which I am presuming is one each side. I initially assumed the netting was fixed between these but there also appears to be a small eye ring centrally placed at either end fixed to the boom collar (fwd side) and boom cap (aft side) to which the net was attached. Would I be right in assuming that it was fitted between the horses (hitched) to act as spreaders and the central eye rings to give fore and aft support to the net? OR was it hung more like a hammock? Any pointers/suggestions appreciated as there is nothing in Lees, Lever, Marquardt, Harland or Falconer (that I can find) to provide this detail. cheers Pat -
Thanks all for looking in. ca shipwright - More ships??? Flat out keeping up with what I have in the shipyard Good to see you back in the dockyard Mike. Greg, Popeye - unfortunately retiring 5 years earlier than planned for health reasons - get some quality of life in while I can. My complaints however are minor compared to many! cheers Pat
- 517 replies
-
- 4
-
-
- Endeavour
- Artesania Latina
- (and 1 more)
-
Thanks Mark and back at you - I hope you and yours had a great festive season With the Death Star commissioned I am sure 2016 will be a great modelling year. cheers Pat
- 517 replies
-
- 2
-
-
- Endeavour
- Artesania Latina
- (and 1 more)
-
You too mate - 2016 will have to be better - now retired cheers Pat
- 517 replies
-
- 2
-
-
- Endeavour
- Artesania Latina
- (and 1 more)
-
So what was this about blemish lines - can't see them standing up this way Looks great Mark! cheers Pat
-
Thanks Popeye, ditto. I also hope you and your family had a great festive season and have much to look forward to in 2016. cheers Pat
- 517 replies
-
- 3
-
-
- Endeavour
- Artesania Latina
- (and 1 more)
-
Great progress Greg - looking very good indeed. At this pace you'll be finished by NYD cheers Pat
-
Coming along rapidly and looking great Danny; must be a bit of a doddle after the full shiop model? cheers Pat
-
Thanks again to all those whom have looked in and "liked' - appreciate you dropping by. Hi Per great to see you drop in; thanks for your very positive comments. The AOTS has been very helpful with this build. It's going to be a very hot summer this year; lucky for us a cooler Christmas as we have some major bushfires just down the road from us on the "Great Ocean Road" with some 120 properties/homes lost already; the cooler weather had allowed the firefighters a little respite to try and control it. Warming up again later this week - we have already had a couple of days in the 4o+ Cel. range - good excuse for a couple of 'frosties' (beers) cheers Pat
- 517 replies
-
- 6
-
-
- Endeavour
- Artesania Latina
- (and 1 more)
-
Nice work on the stern Mark; ditto John's remarks. We tend to be harder on ourselves than others and mostly the small issues you identify are only visible under harsh (bright) light and close-up photography - the real thing was probably a lot rougher to the eye than you have produced. cheers Pat
-
Thanks for looking in folks and the comments Mark and John - appreciate the interest and encouragement. cheers Pat
- 517 replies
-
- 2
-
-
- Endeavour
- Artesania Latina
- (and 1 more)
-
Well the 'knitting' is now done with all ratlines finished That is milestone completed and another started with a good start made on the jib and spritsail yards. cheers Pat


- 517 replies
-
- 15
-
-
- Endeavour
- Artesania Latina
- (and 1 more)
-
Those guns look great Greg - looka like you are just having too much fun with plastic- any chance of a return to the dark side? cheers Pat
-
Great update John; she is coming along very nicely. Our best wishes to you and your lovely wife for a happy and safe festive season and a great modelling 2016. cheers Pat
- 745 replies
-
- 3
-
-
- francis pritt
- mission ship
- (and 1 more)
-
Great to see you back Paul; look forward to the updates on this woinderful build. Ditto re the festive season. cheers Pat
-
Looks ghreat as ir is Mark. This gives you the excuse to have a really good festive season celebration - well two excuses cheers Pat
-
Okay - I'll jump inm also - Happy birthday. Love this log simply for learning the ways you approach each detail. keep them coming (after appropriate birthday celebrations of course ) cheers Pat
- 1,215 replies
-
- 5
-
-
- sloop
- kingfisher
- (and 1 more)