dvm27
-
Posts
2,468 -
Joined
-
Last visited
Content Type
Profiles
Forums
Gallery
Events
Everything posted by dvm27
-
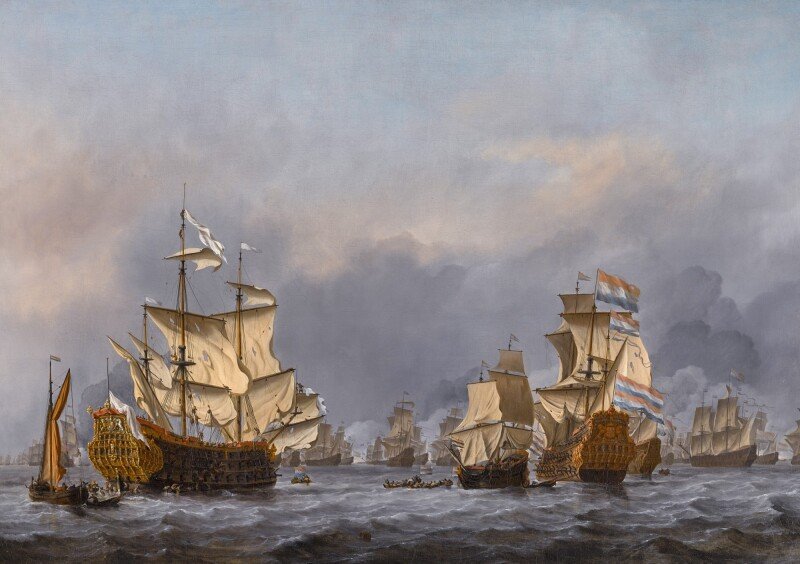
 I love whatever rendering process you are using. Looks very Van de Velde like.
 -
Vandolay sold special 3/4" cutters for their treenail makers after I inquired about them. I still have them but quite honestly think the Byrnes treenail maker is the easiest and fastest way to make them. I start with bamboo skewers sold ib grocery stores.
-
Perfectly done lighting, looks very natural. Might be cool if you were to hollow out an area below the gratings and place a light there so it would provide the illusion of a lower deck.
-
Lovely work, Ben. Would it be possible the stitch both decals together and apply them as one to cover the seam?
- 399 replies
-
- 1
-

-
- winchelsea
- Syren Ship Model Company
- (and 1 more)
-
I've had nightmares about backing up a rig like that!
-
One of my favorite You Tubers The Art of Boat Building recently did a video on making a mast. He used many of the same techniques we taught in our Admiralty Models workshop on masting and sparring for making a tapered mast. Check out his video https://www.youtube.com/watch?v=KaWIIiv9zRg&ab_channel=TheArtofBoatBuilding. His next video was on building a half hull model and his lofting and building of the model should interest many of the modelers here. Bob is a true artist and craftsman:
-
Been awhile since I made this frame but perhaps the photo will show better what I've done. I'm pretty sure I started with a wider toptimber and shaped it to fit the offset. It needs to be wide enough at the top to form the side of the port. Then shape downwards in a smooth arc to fay into the next futtock.
-
June 2022 Nautical Research Journal
dvm27 replied to Roger Pellett's topic in NAUTICAL RESEARCH GUILD - News & Information
Congrats to the publisher of this issue - it's fantastic! -
Try Model Motorcars website. They purchased Scale Hardware and have a wide variety of small bolts and rivets. https://model-motorcars.myshopify.com/collections/small-parts-hardware/bolts
-
Whaler copper weathering
dvm27 replied to Srodbro's topic in Painting, finishing and weathering products and techniques
The eye likes what the eye likes, Steve. Personally, I think R's version looks a bit jarring. For another approach watch this YouTube video by our member Ohla. I think it's beautifully done. -
Are you going to show the after-cleaning photos Kevin? Just kidding, of course. I spent the day cleaning my shop as well. No guests, but I couldn't find anything anymore.
-
Swan-Class Sloop by Stuglo - FINISHED - 1:48
dvm27 replied to stuglo's topic in - Build logs for subjects built 1751 - 1800
It's been decades since I built my fully framed Swan class model. But I recall the deck beams being let into the clamps by 1". At any rate it's only important for the top of the knee to be flush with the top of the beam so the decking will be supported. Usually the underside of the lodging knee was an inch shy of the bottom of the beam. -
Sounds interesting. Just be sure not to over-illuminate and keep the light color on the yellowish side to mimic lantern light.
- 257 replies
-
- 2
-
-
- pegasus
- Swan-class
- (and 1 more)
-
Mabuhay Kale! Spent four memorable years in Quezon City decades ago. The Model Shipwright series is a great way to learn the hobby of ship model making. After that perhaps try your hand at a Banca.
-
Just for fun I tried to turn a smaller belaying pin from the box wood and was able to turn the pin portion down to 0.010" but when I turned the handle portion at 0.015" the pin portion whipped and separated off. perhaps you could make them in two sections as Druxey does.
-
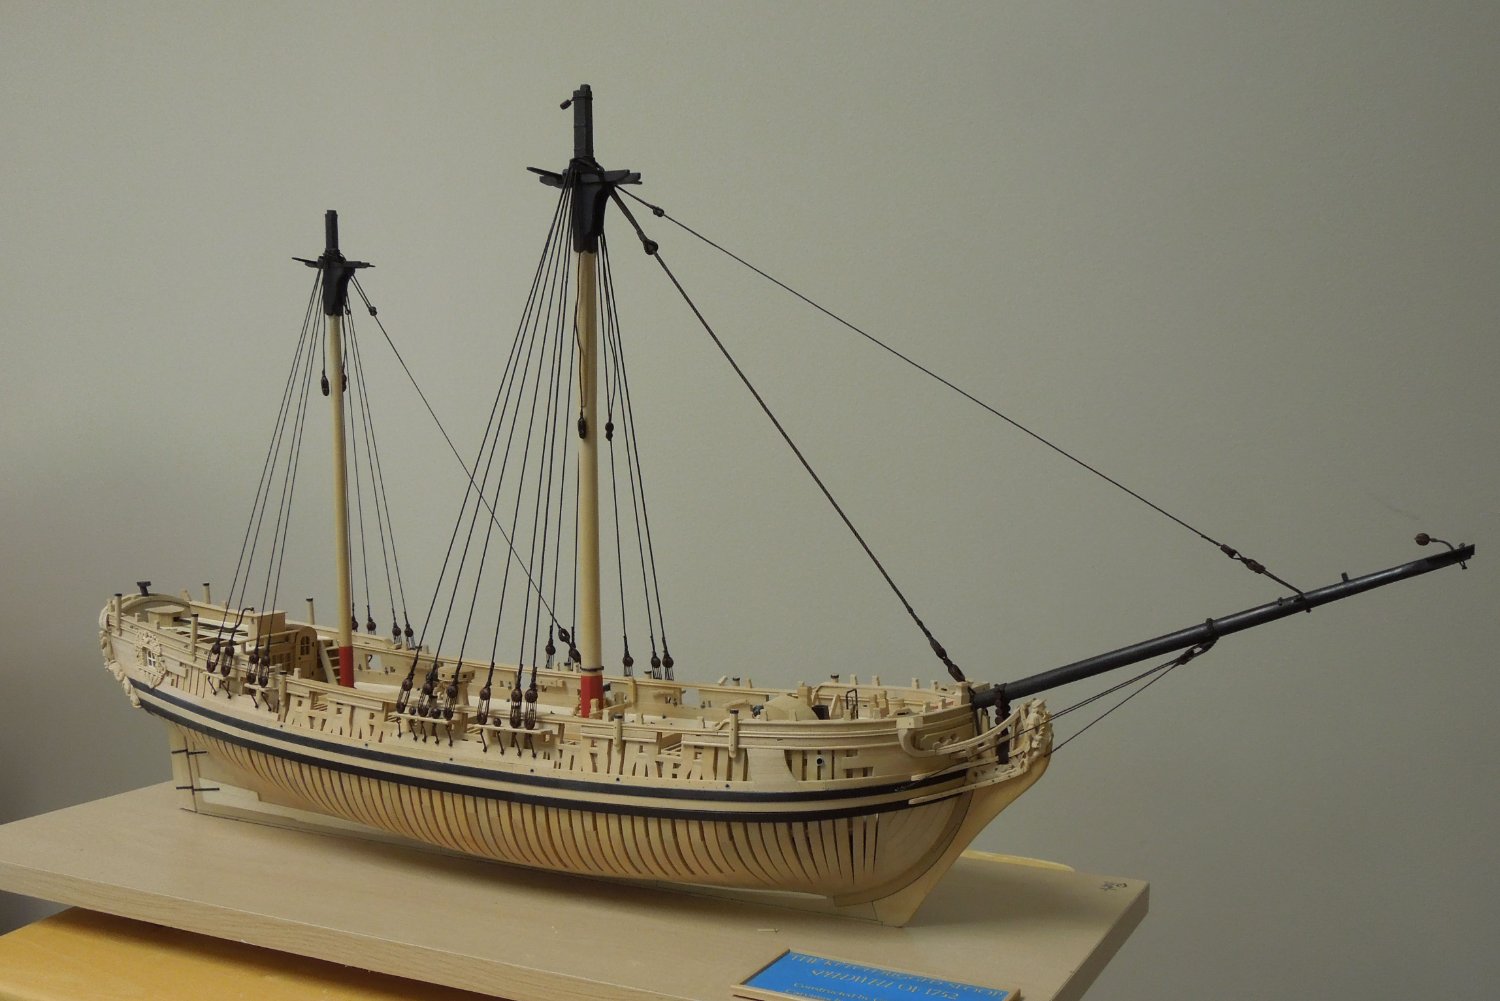
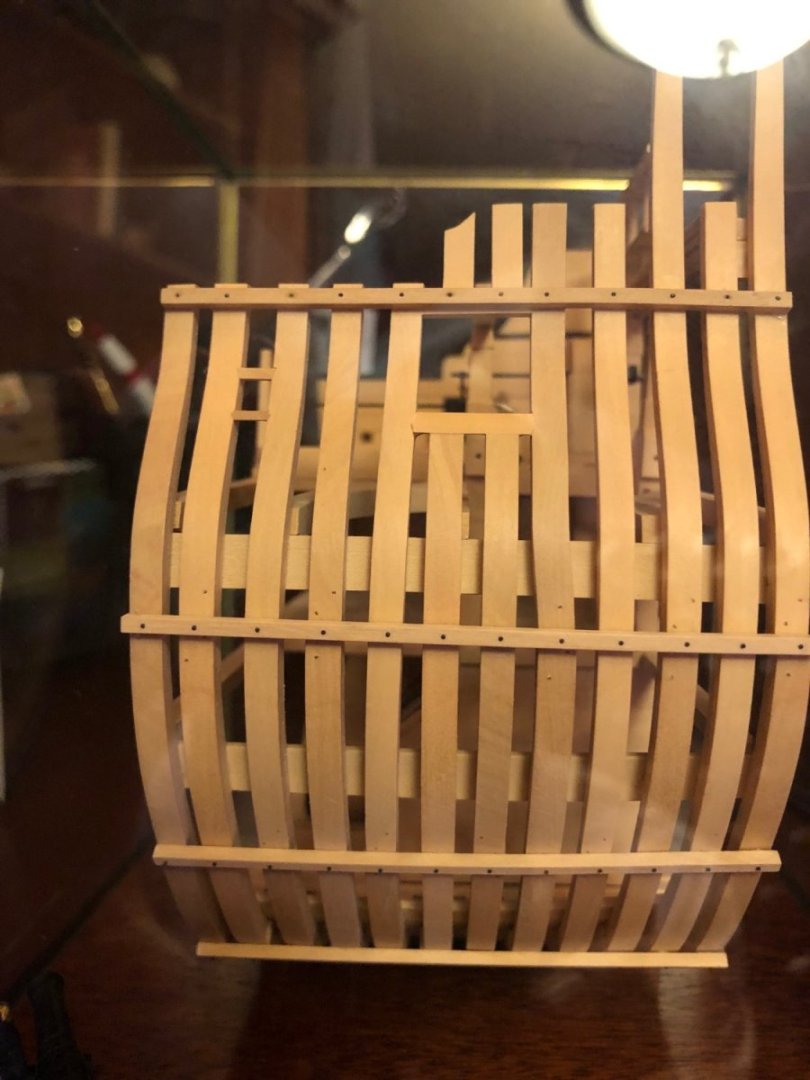
The belaying pins are now installed in their shroud deflectors. That's a term I had never read before but that's what they're called according to Markquardt. Perhaps they're called pin rails only when affixed to the inner bulwarks. The deflectors have grooves filed on the outboard edge for the shrouds and lashings inboard and are surprisingly strong once attached. At any rate, I was able to hone my lathe technique to turn out consistent pins. Next it's on to ratlines. Perhaps Archjofo would fly in from Germany to show me how he successfully duplicated actual practice when securing them to the outer shrouds. Personally. I believe he used Photoshop as this is not humanly possible to do.
- 345 replies
-
- 40
-
-

-
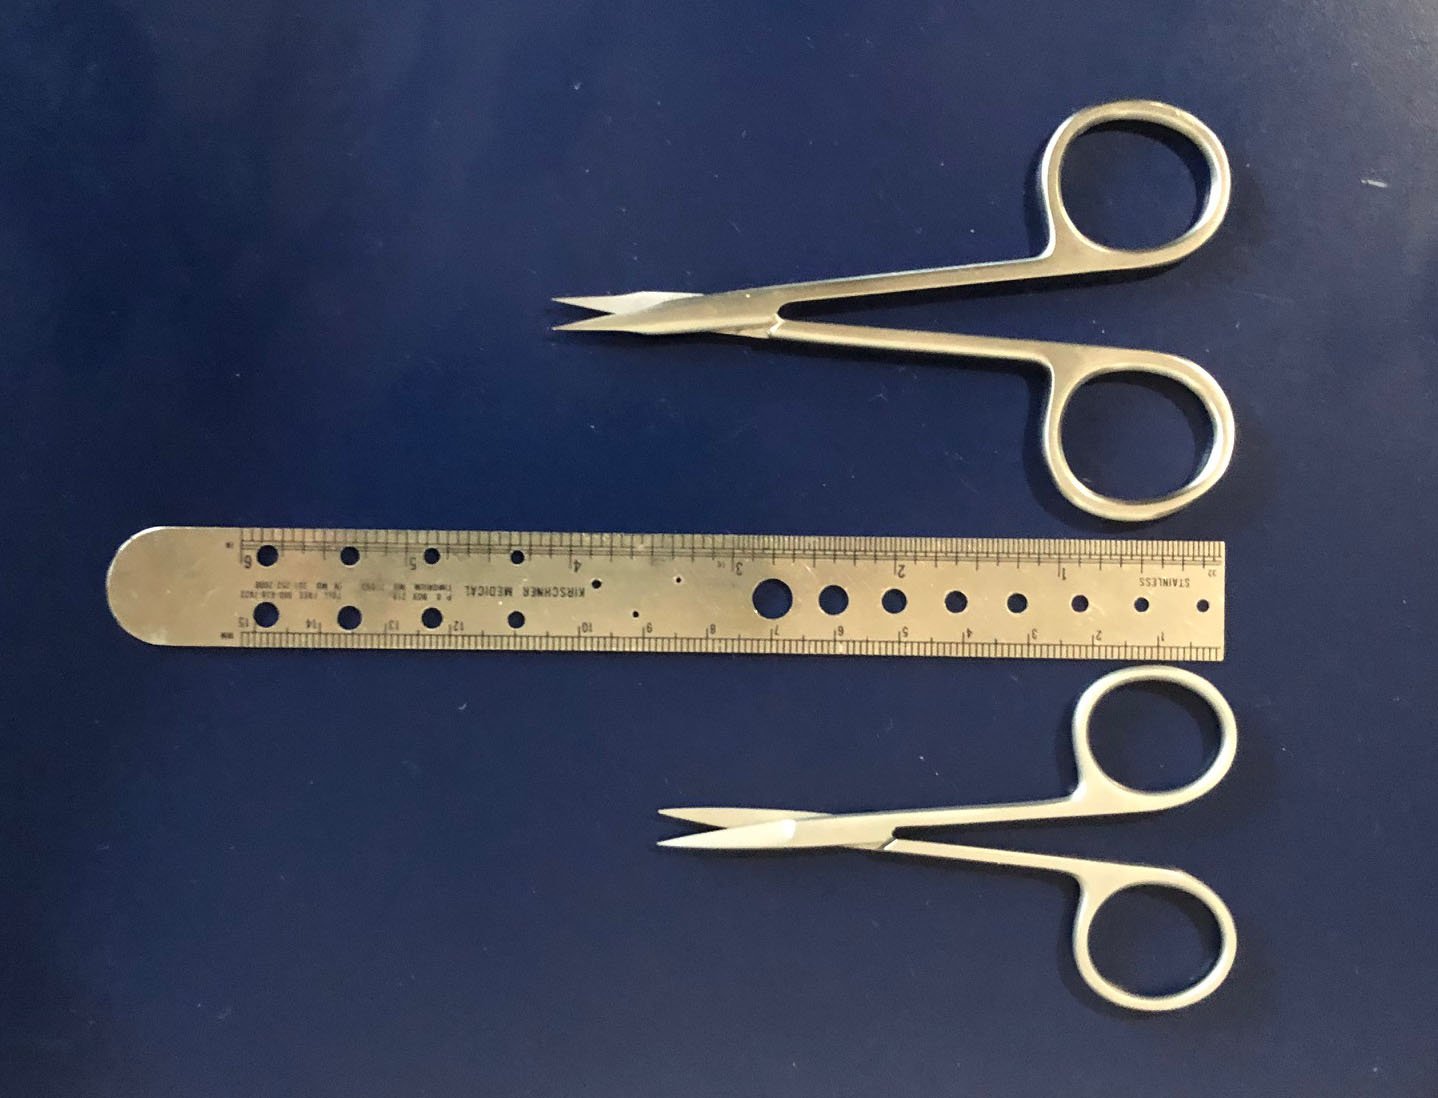
For rigging you can't beat surgical scissors like iris or Castroviejo scissors. The smaller 3 1/2" scissors are item #045067 and the larger 4 1/2" is item #056005. They are surgical stainless steel and you can cut knots flush with them. They are from Securos Surgical http://www.securos.com and are not cheap. But they will be the last scissors you ever need. They may sell to the general public. If not ask your veterinarian or ophthalmologist if they'll order for you. Beware of cheap, non-surgical imitations available from Amazon. when it comes to surgical instruments you get what you pay for.

-
Very nicely done Giampiero. I also notice the perfectly positioned scupper holes internally and externally. I'll bet drilling them caused you no anxiety at all 😉 The fore port scupper looks to be lined with lead. Very convincing effect.
-
The only thing more tedious than setting up the deadeyes and chains is ratting down but perhaps you're not rigging her.
-
Pretty simple on the Sherline lathe. I just used the zero adjustable hand wheel. It was set to zero once the leg diameter of 0.020" was verified by caliper then backed off by 0.020" for the shaped top portion of the pin.
-
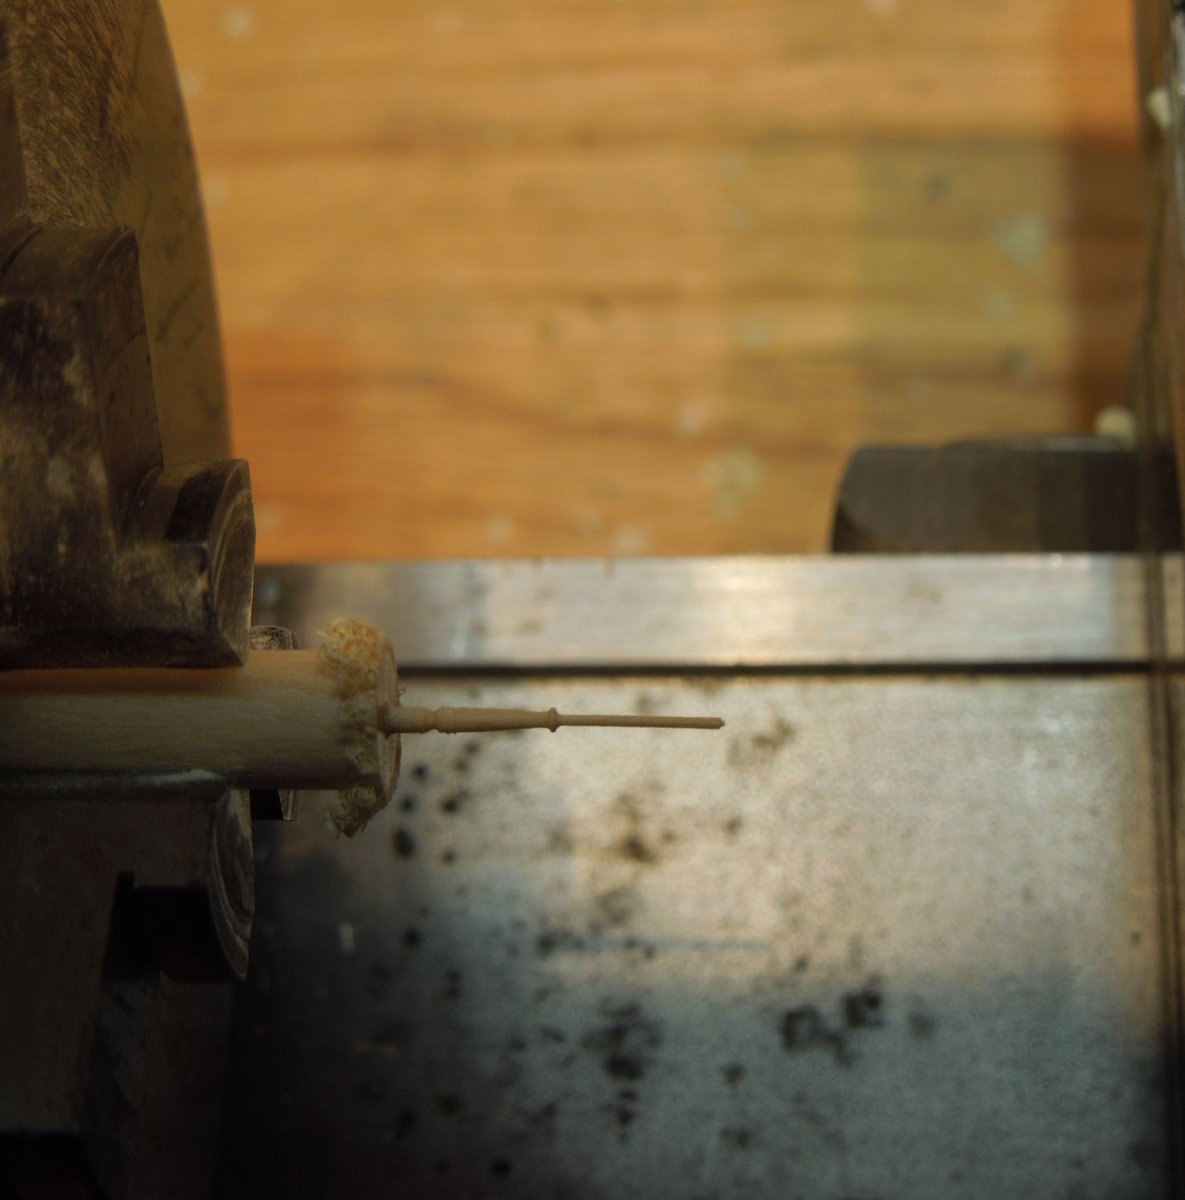
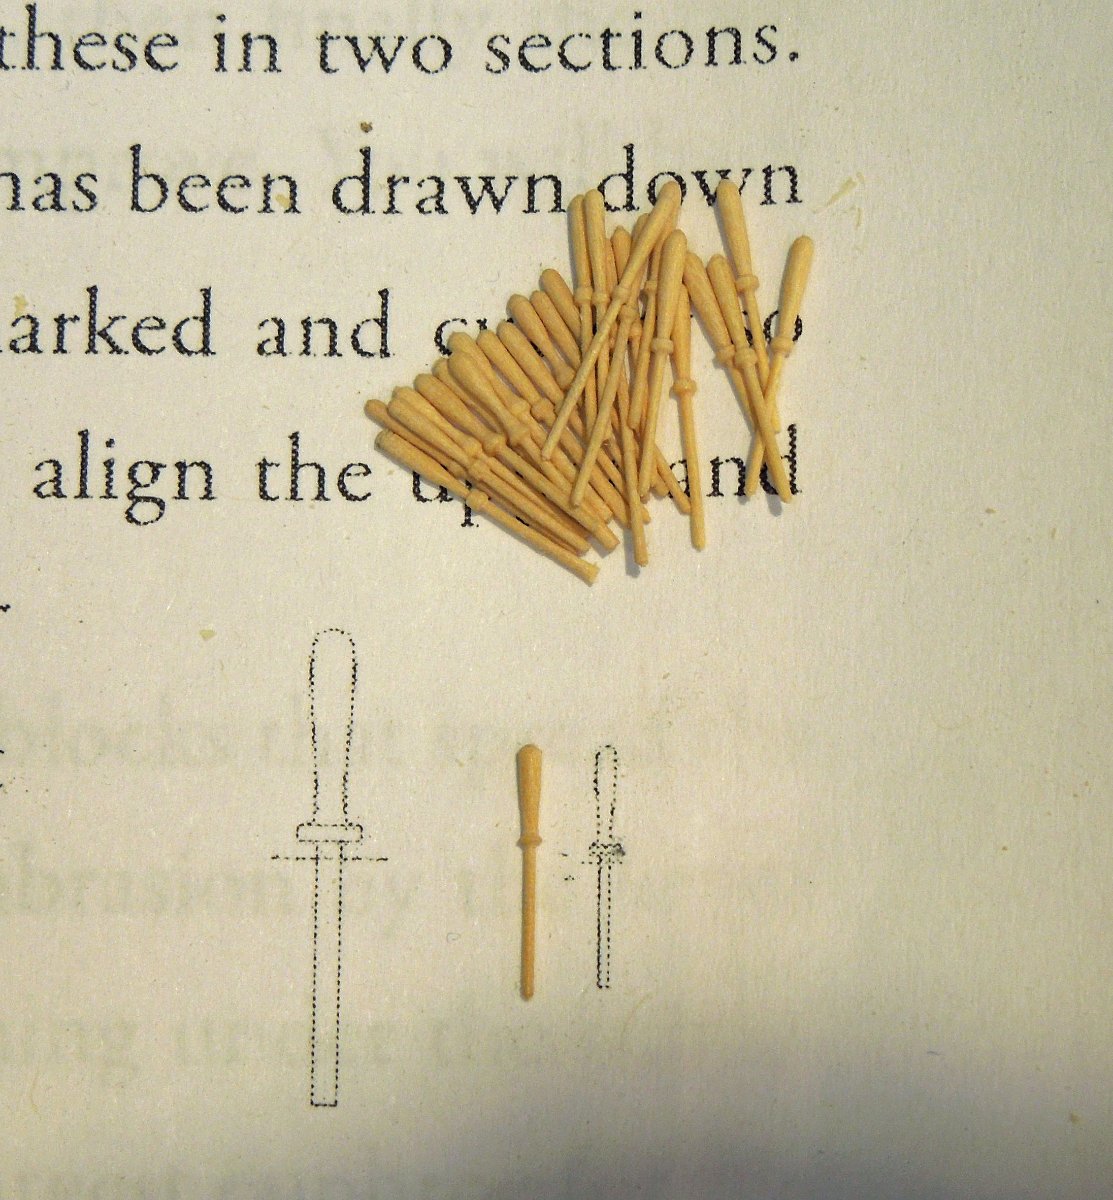
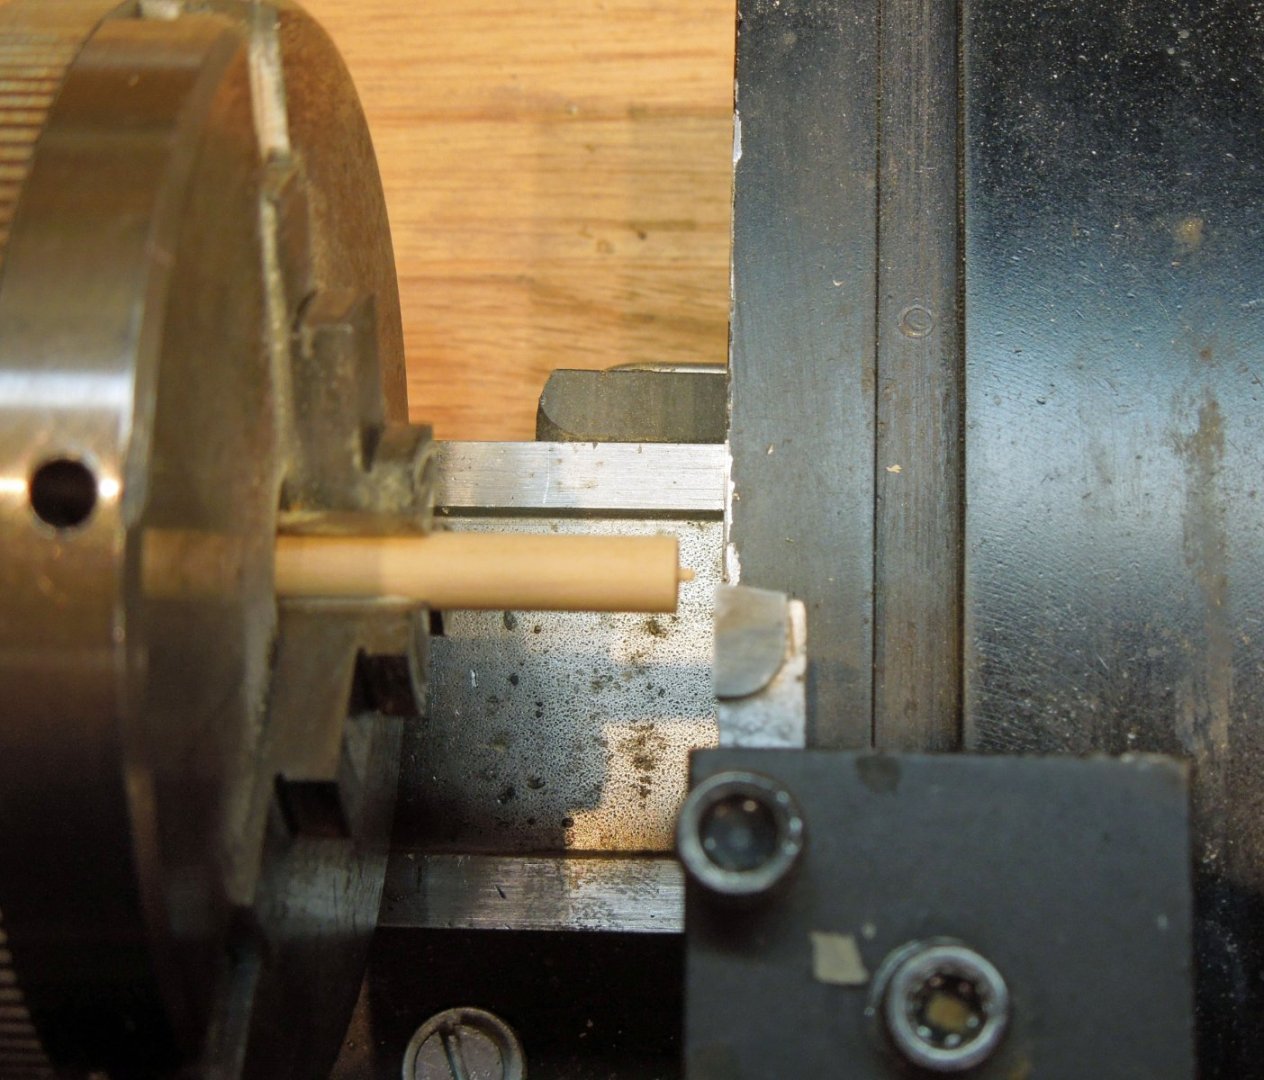
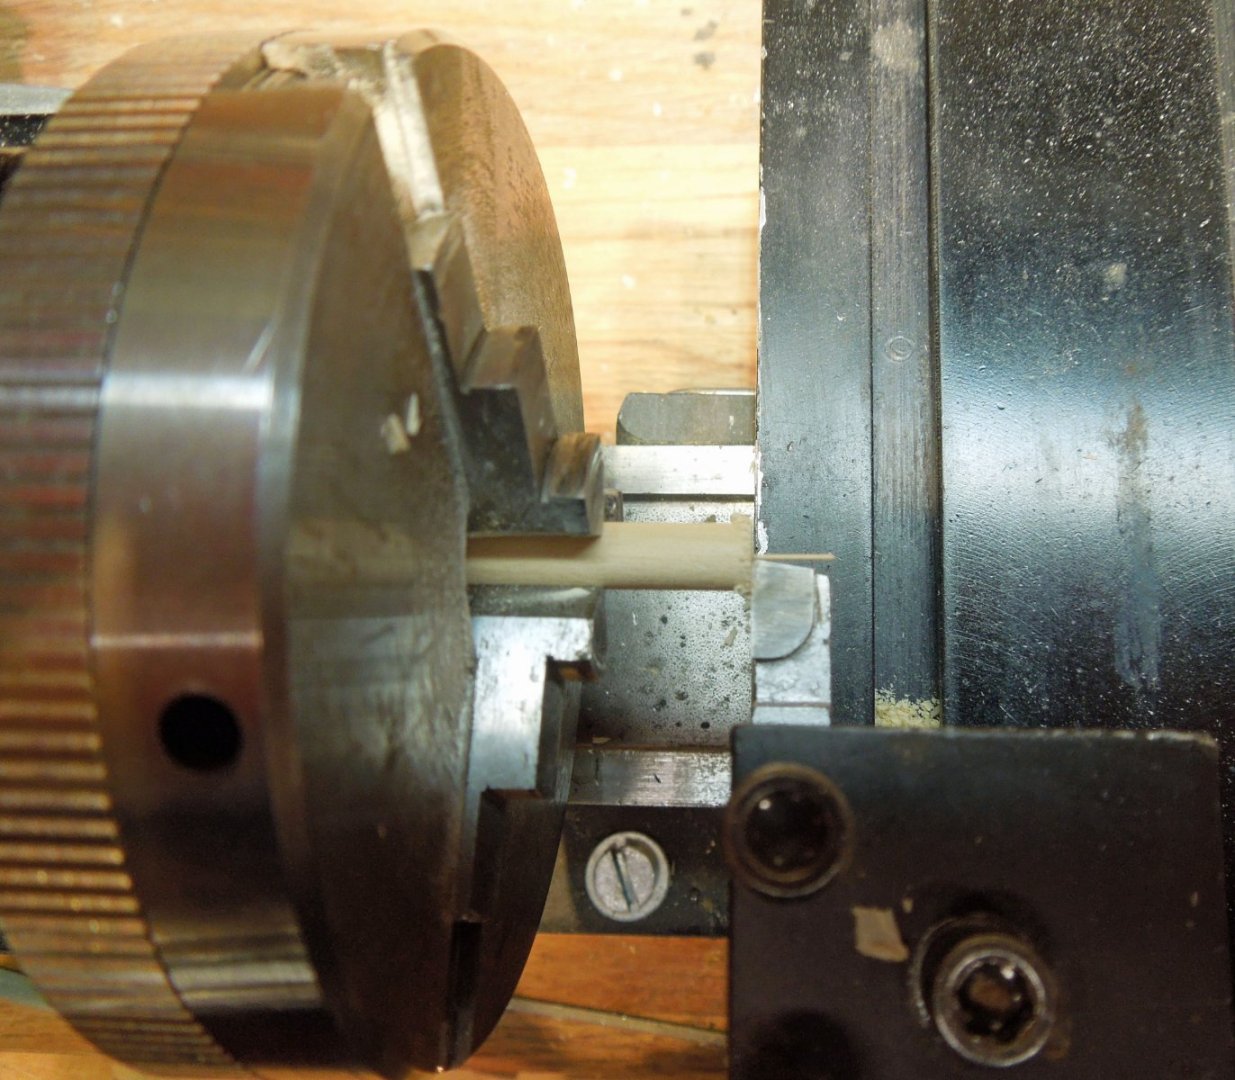
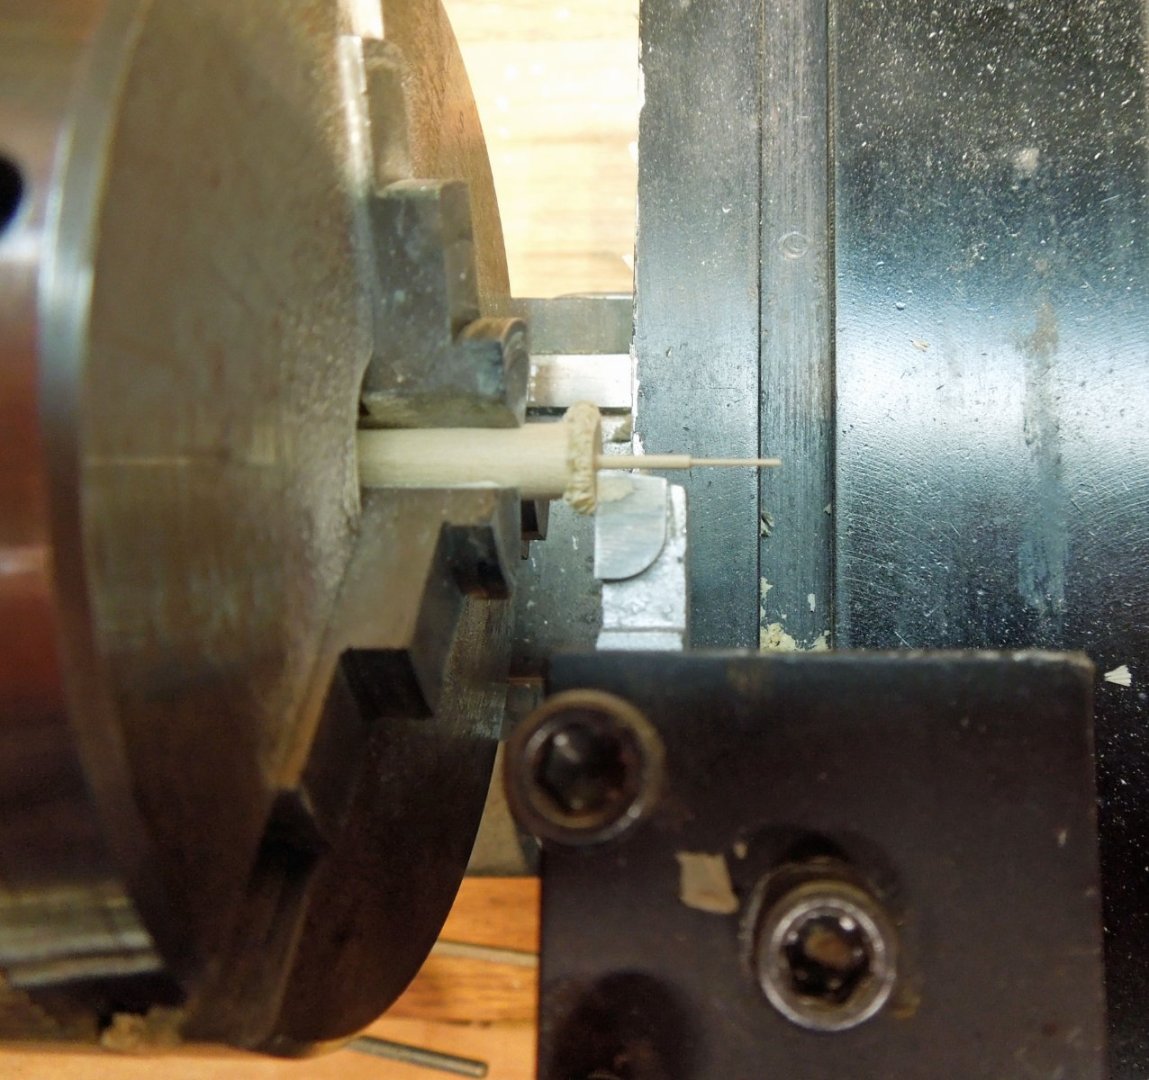
Not too much progress to note on Speedwell but the standing rigging has commenced. A photo of her in her current state is shown below. She needs twenty belaying pins. For the most part I find commercial belaying pins clunky and like to make them myself. I have seen several different techniques but they did not work particularly well in my hands so, if you have a lathe, maybe try this technique. I discovered early in my machining, self-taught trials that in order to turn a very small diameter like the 0.020" leg of the belaying pin you have to turn against a much thicker stock or deflection occurs. In the first photo the 0.020" diameter is turned from 0.25" boxwood. The speed is high and the feed is very slow and consistent to avoid warping and deflection. The cutting tool backed off 0.020" to form the diameter of the head of the pin. The next step was impossible to photograph but a very fine Swiss file was used to reduce the area just above the transition. The rest of the head was shaped with a fine Swiss file. The finished belaying pin was parted with the knife edge of the file while shaping it's curved profile. Many extras were made to insure consistency. You can see the delicate elongated shape of the pins against the illustration by David Antscherl in our Speedwell book. The key takeaway for new home machinists is that you can turn very small diameters even in wood if you turn against a thicker stock. I can't say for sure exactly how thick but I should think at least four times the desired finished diameter.


- 345 replies
-
- 48
-
-
-

-
This little gem was recently sold by Sotheby's. Unfortunately, my bid came in at just slightly under the auction realization of 5,500,000 pounds. But, there is an amazing book on the Van de Veldes for the rest of us losers.
-
The hull is shaping up nicely Kevin. On your next model (should you ever wish to plank again!) you'll learn how to install stealers and drop strakes to control the width of those planks at the bow and the stern.