HOLIDAY DONATION DRIVE - SUPPORT MSW - DO YOUR PART TO KEEP THIS GREAT FORUM GOING! (Only 20 donations so far - C'mon guys!)
×


dvm27
-
Posts
2,457 -
Joined
-
Last visited
Content Type
Profiles
Forums
Gallery
Events
Everything posted by dvm27
-
 I've been a Tally Ho fan for years as well Kevin and very much enjoy seeing the traditional boat building techniques he uses. Enjoy your visit to New York, stay safe and a Healthy New Year to you! We look forward to your 2022 progress videos.
 -
HMS VICTORY 1765 by albert - 1/48
dvm27 replied to albert's topic in - Build logs for subjects built 1751 - 1800
Fairing that all together is going to be some fun, Albert! Lovely work. -
Swan-Class Sloop by Stuglo - FINISHED - 1:48
dvm27 replied to stuglo's topic in - Build logs for subjects built 1751 - 1800
Great job on the wales! Personally I believe no one feature should jump out and announce its presence. To me, the shiny fastenings disrupt the flow of the wales. But it's your model so you should choose whatever is most aesthetically pleasing to your eye. -
I turned them from Box wood and dyed them with Fiebings brow leather dye.
-
Here's a link to a great site that sells it. They also have free tutorials on silver soldering, pickling etc. https://beaducation.com/collections/soldering-fusing-tools
-
Correct, Maury. It just hooks over the deadeye binding.
-
I hope others take note that you have tenoned your transoms and filler pieces to fit to the fashion piece and last cant frame. Incredible!
-
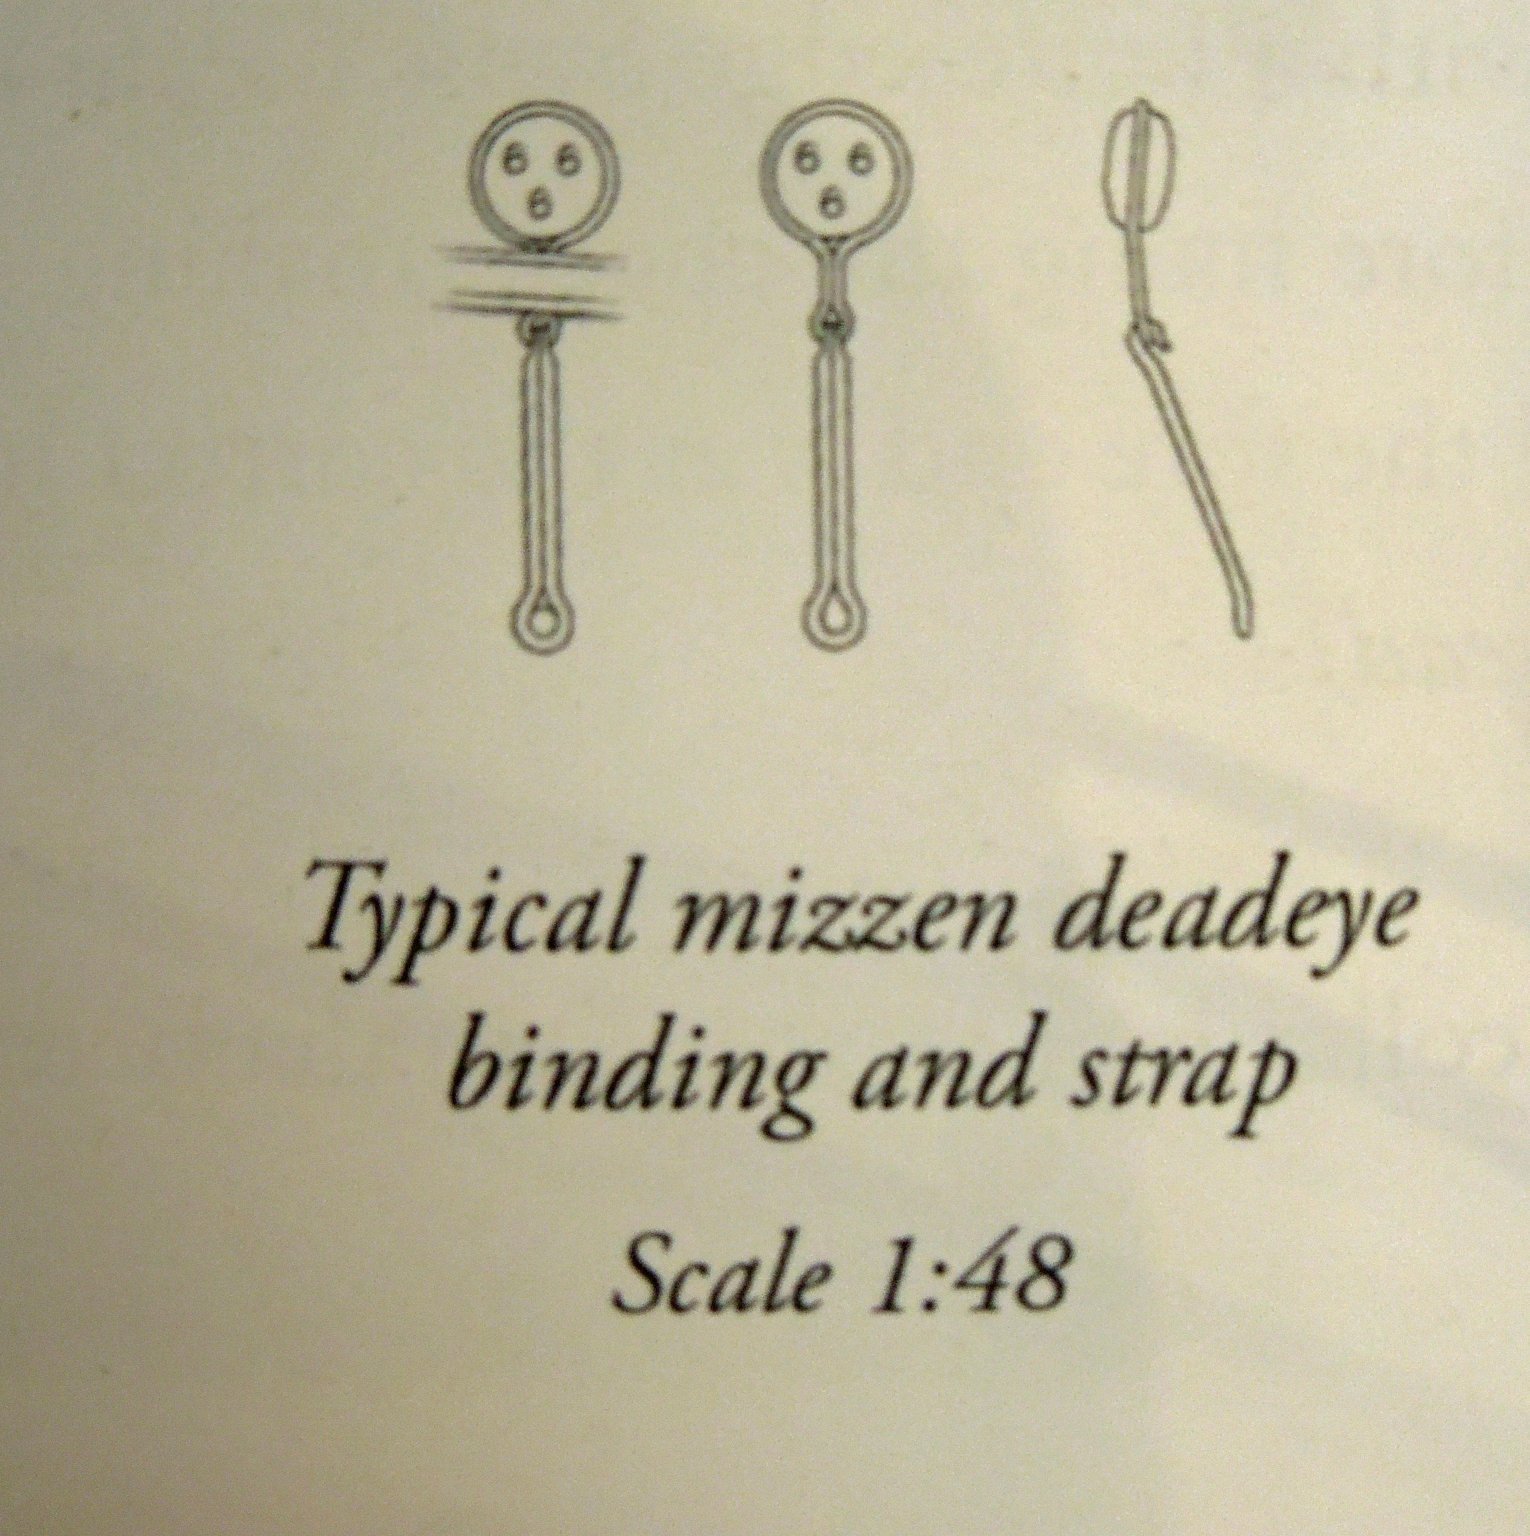
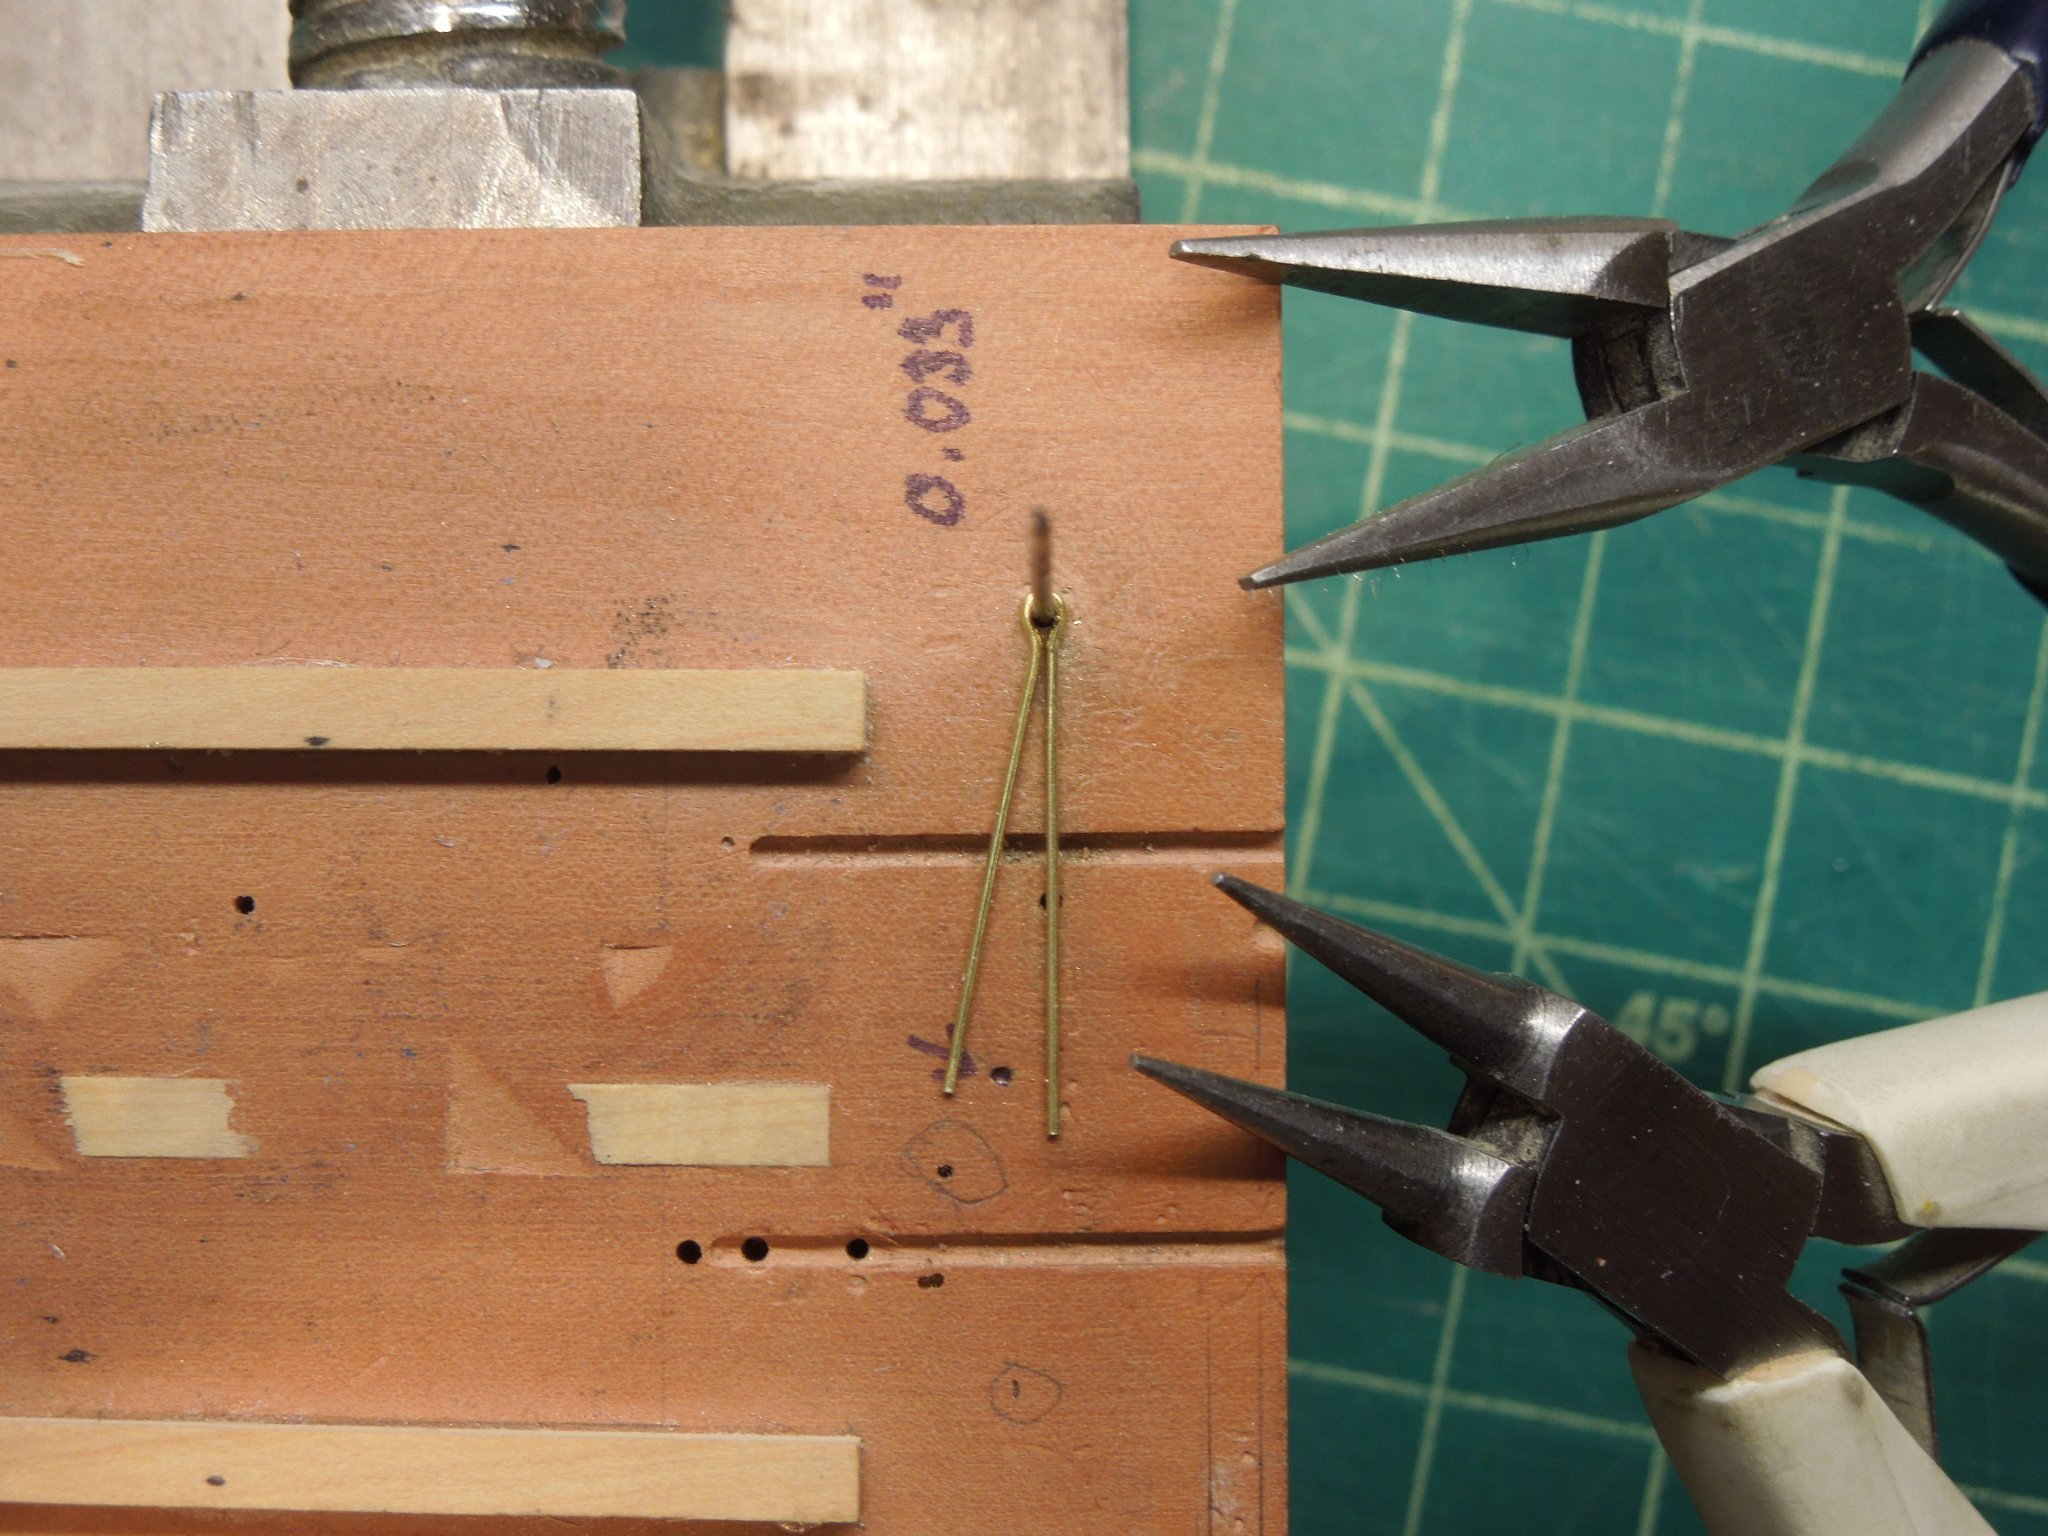
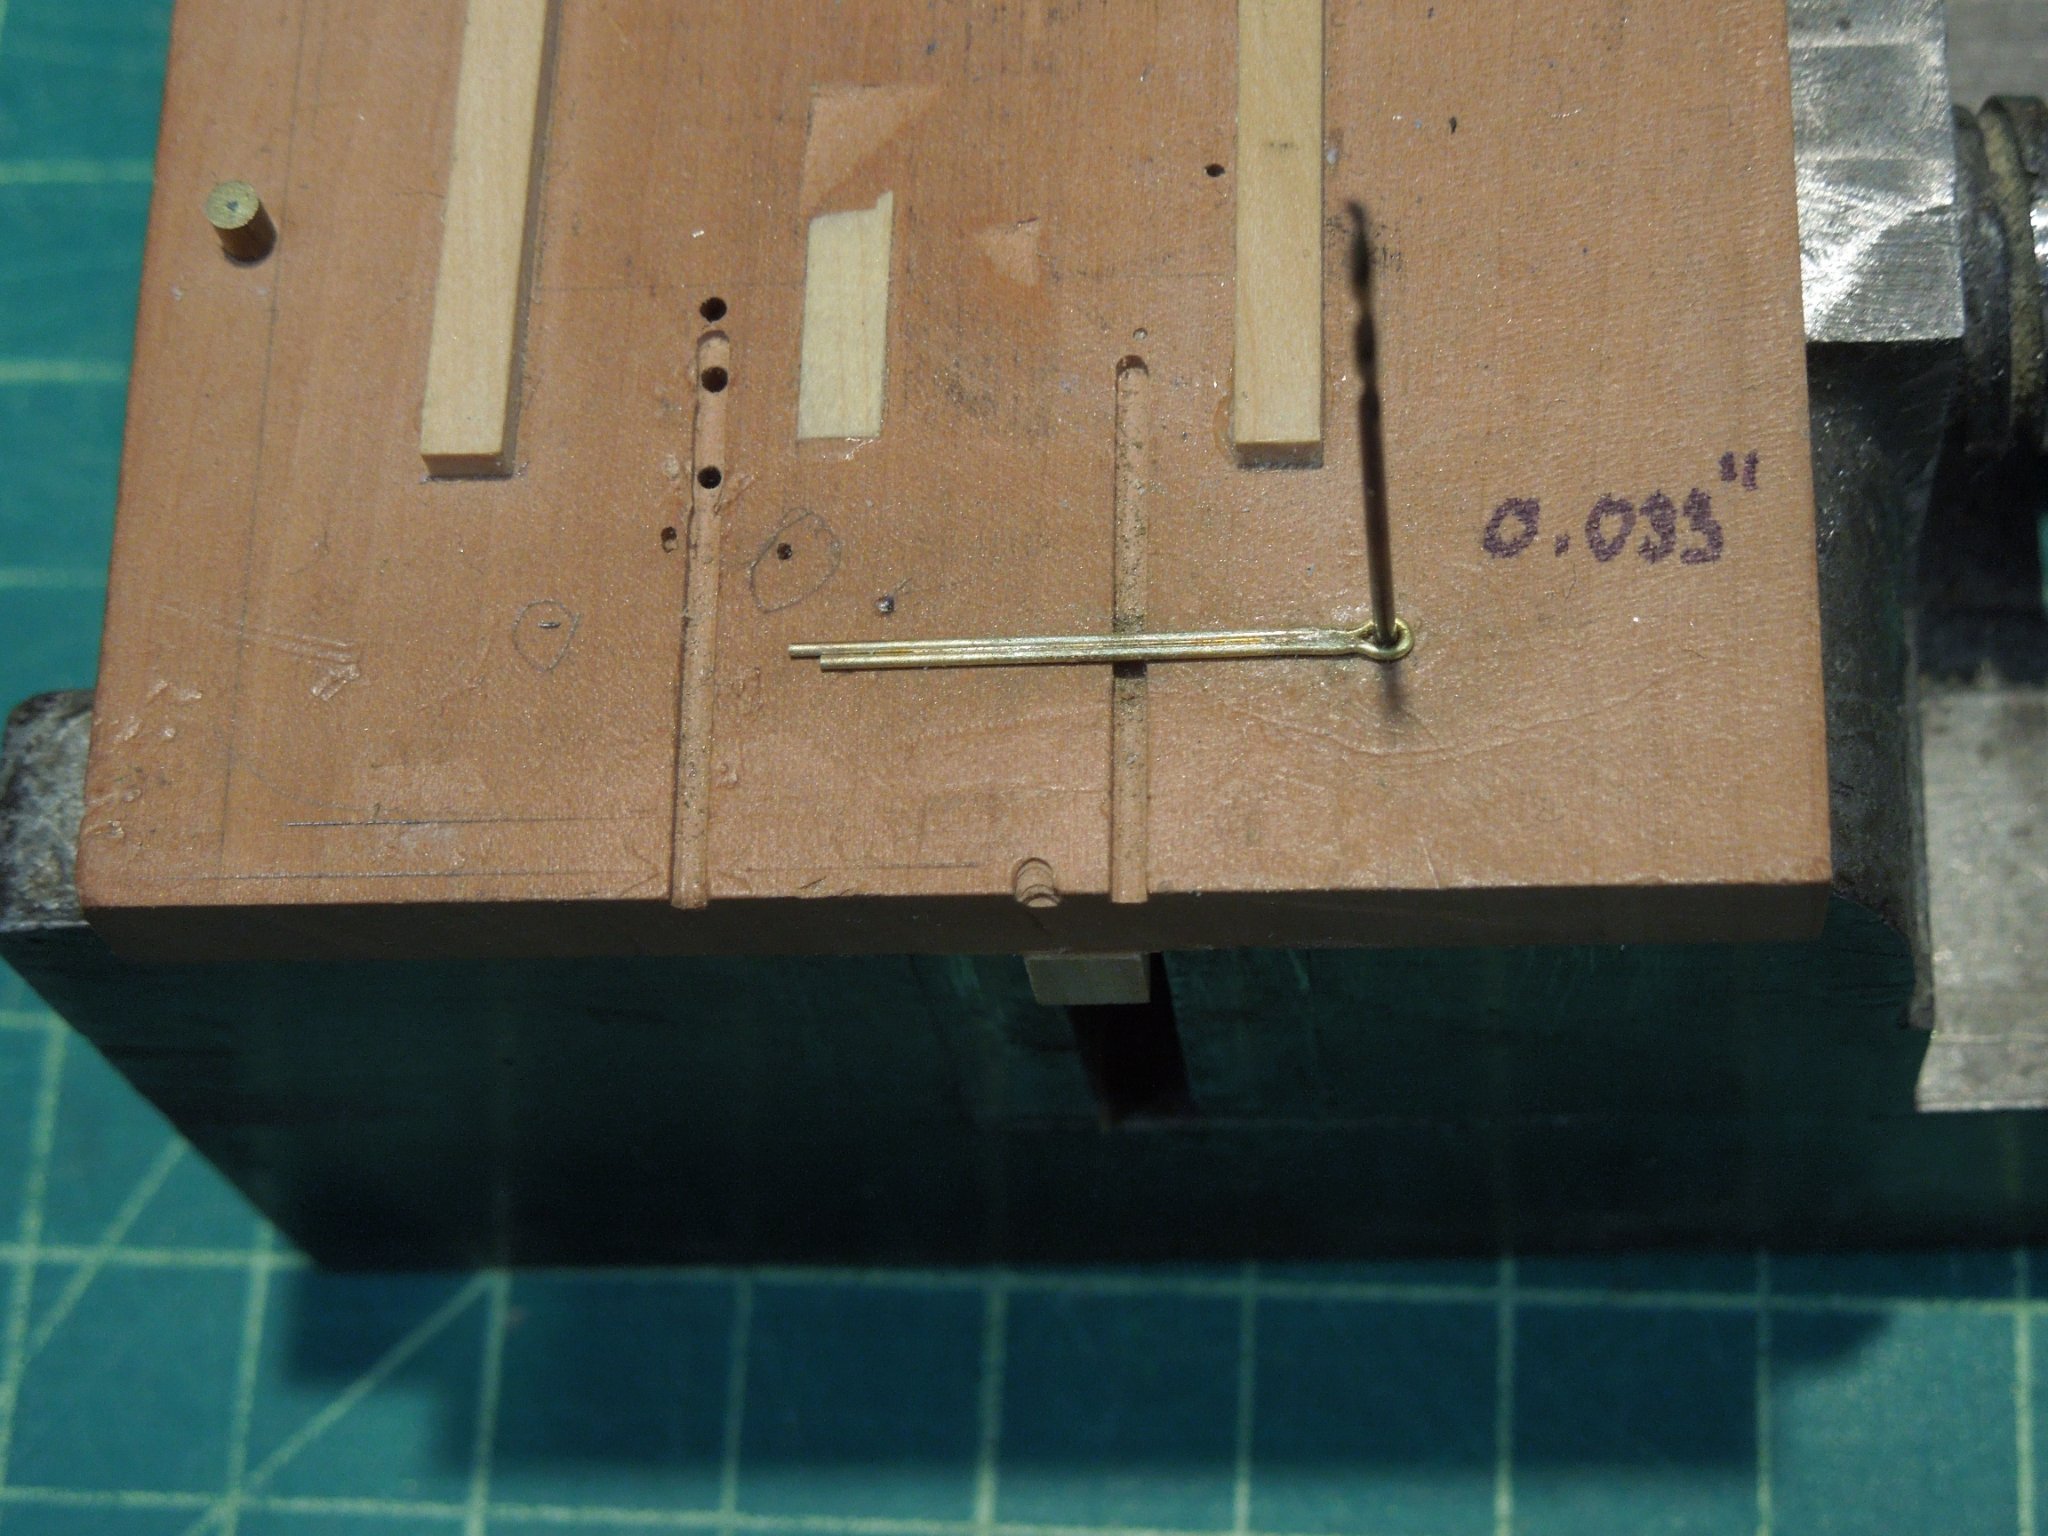
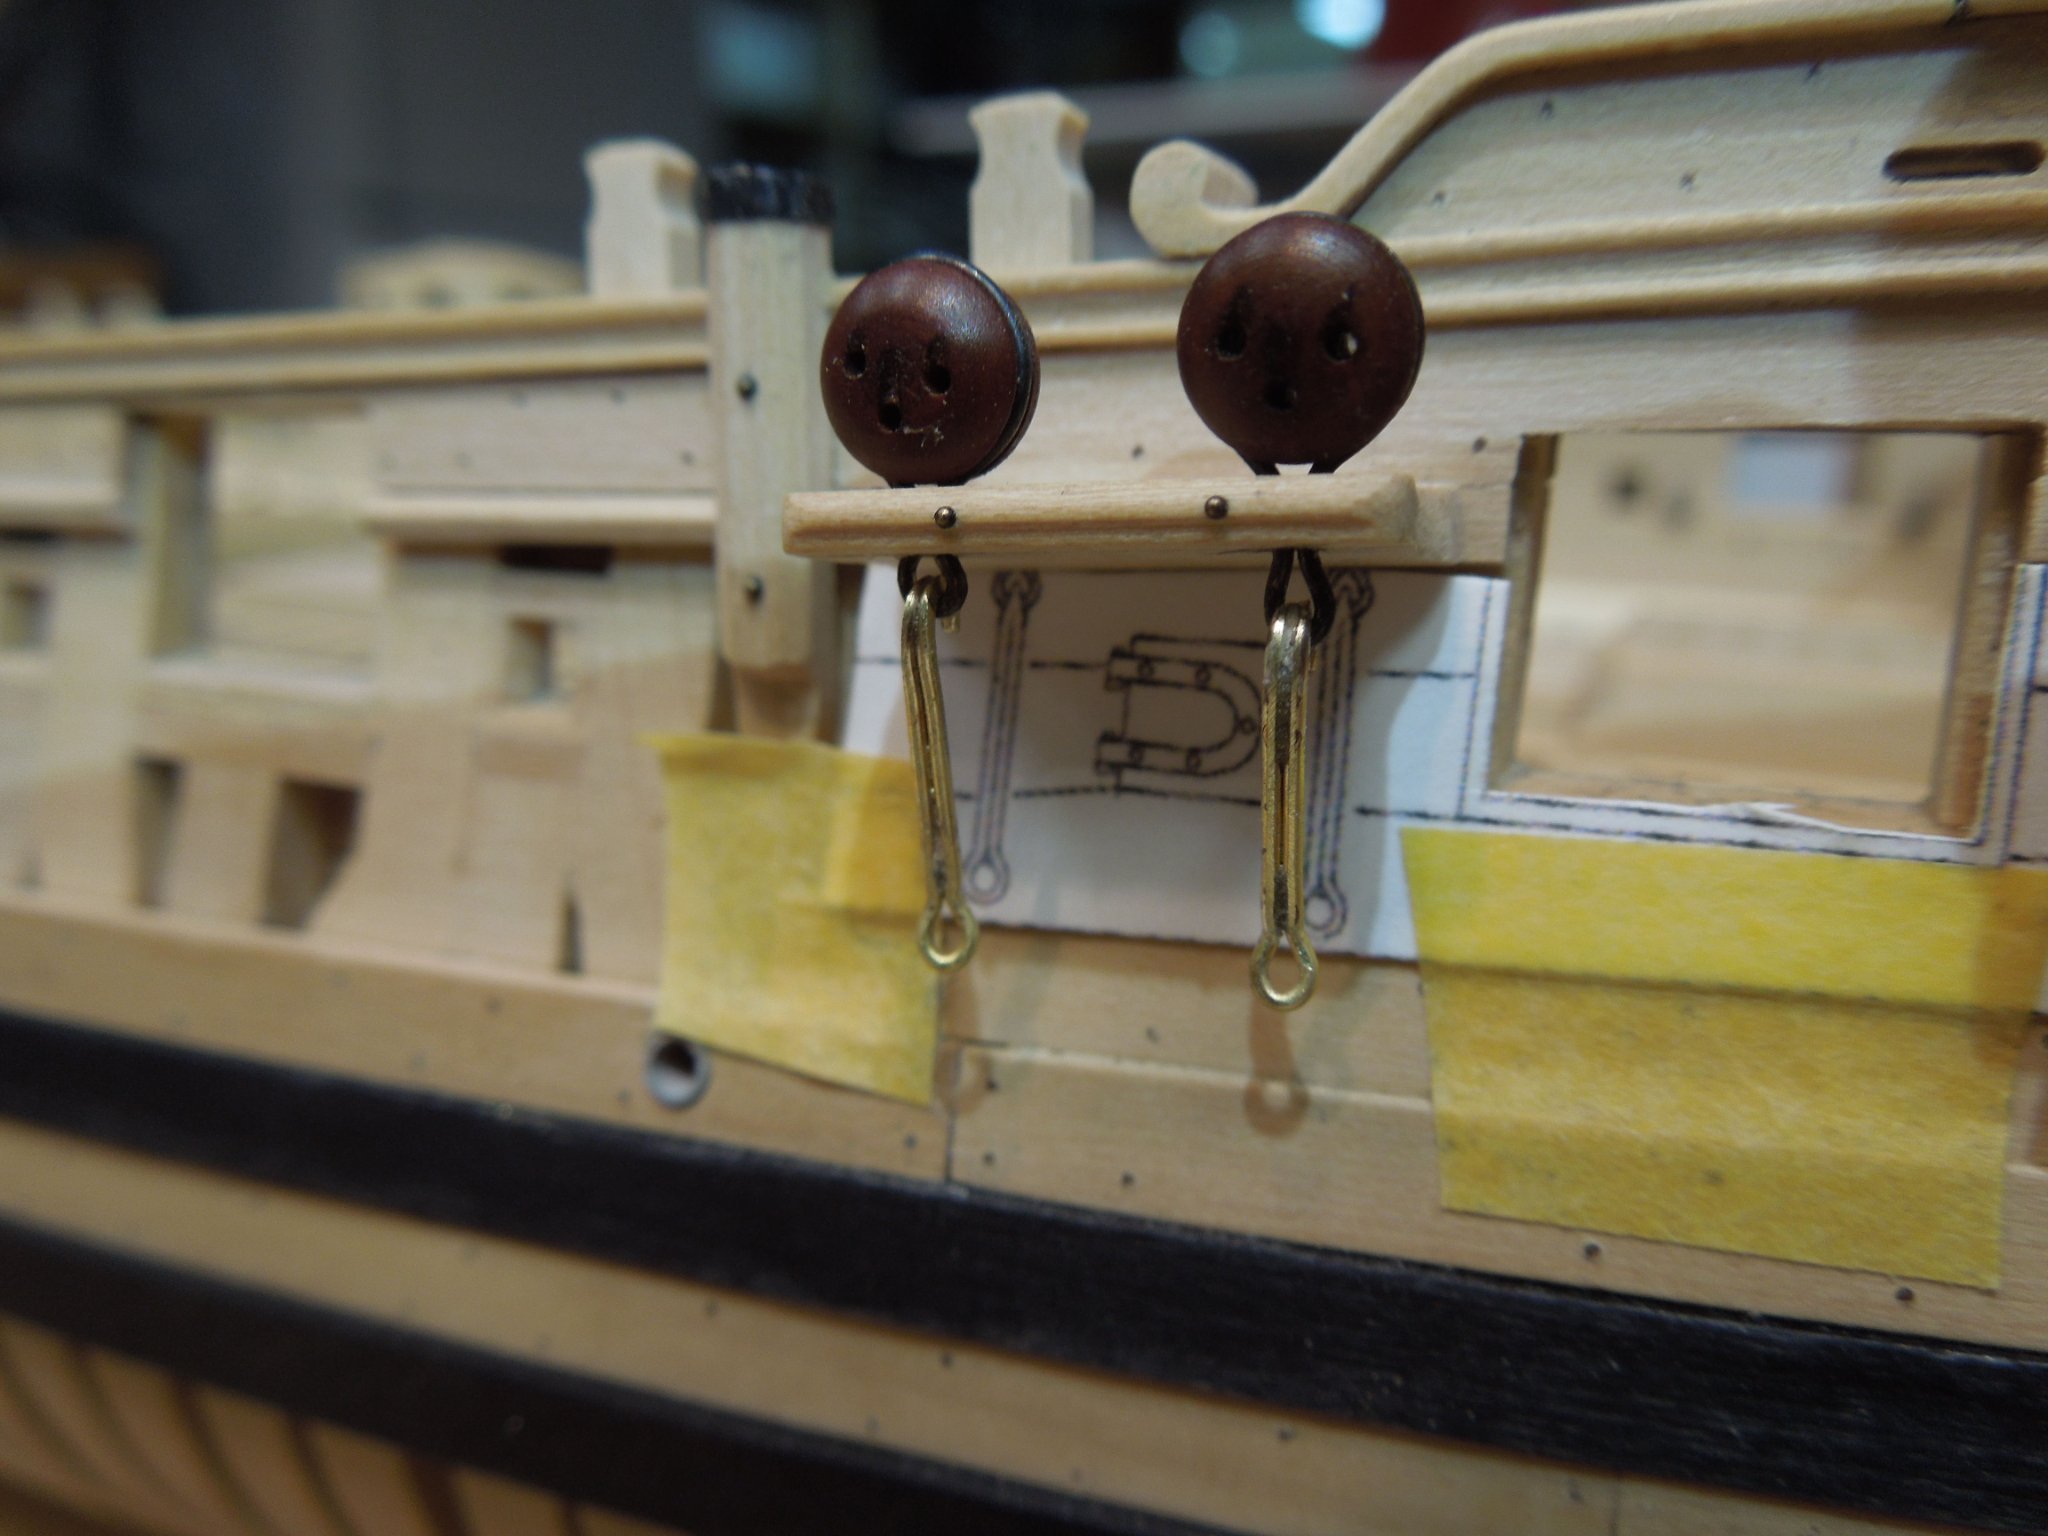
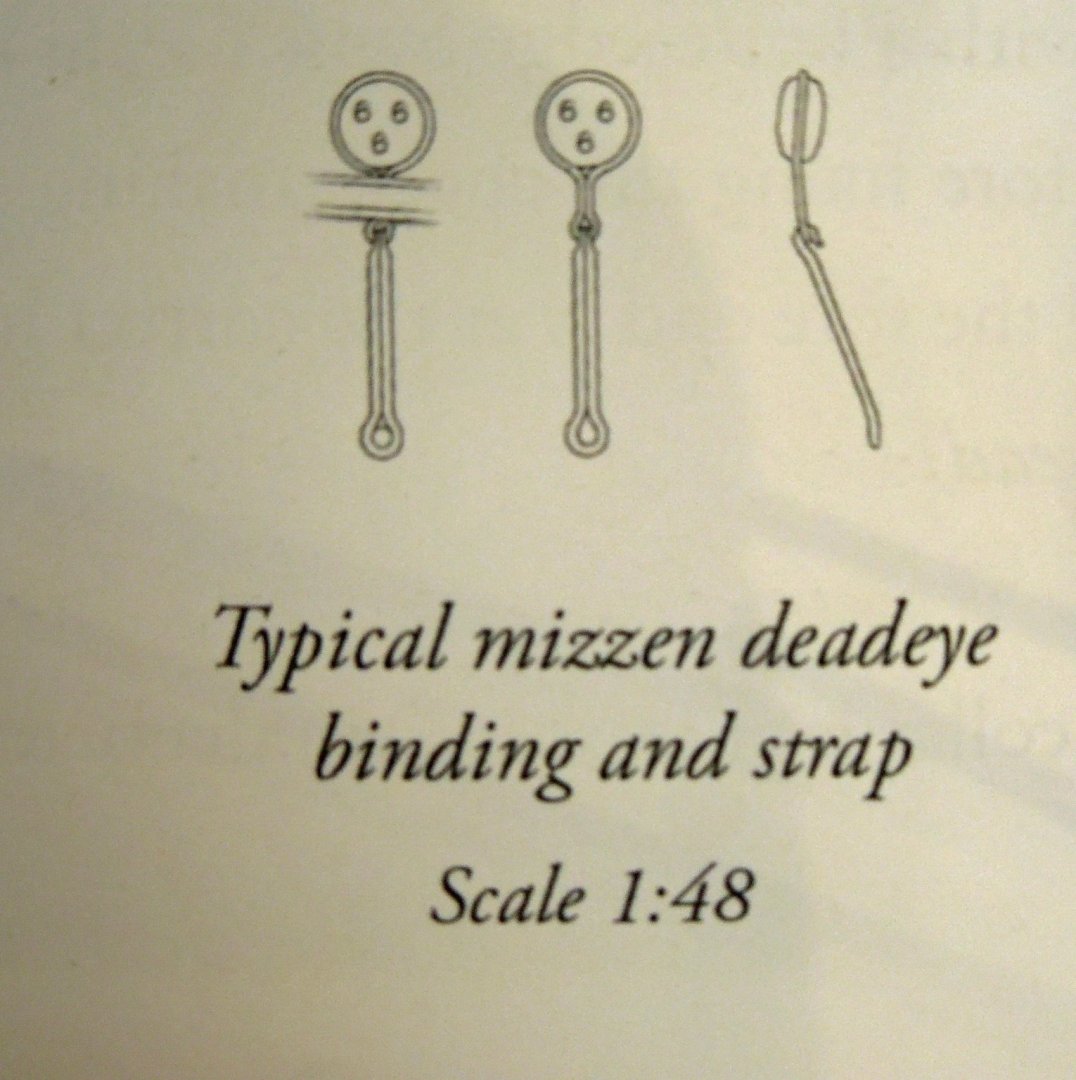
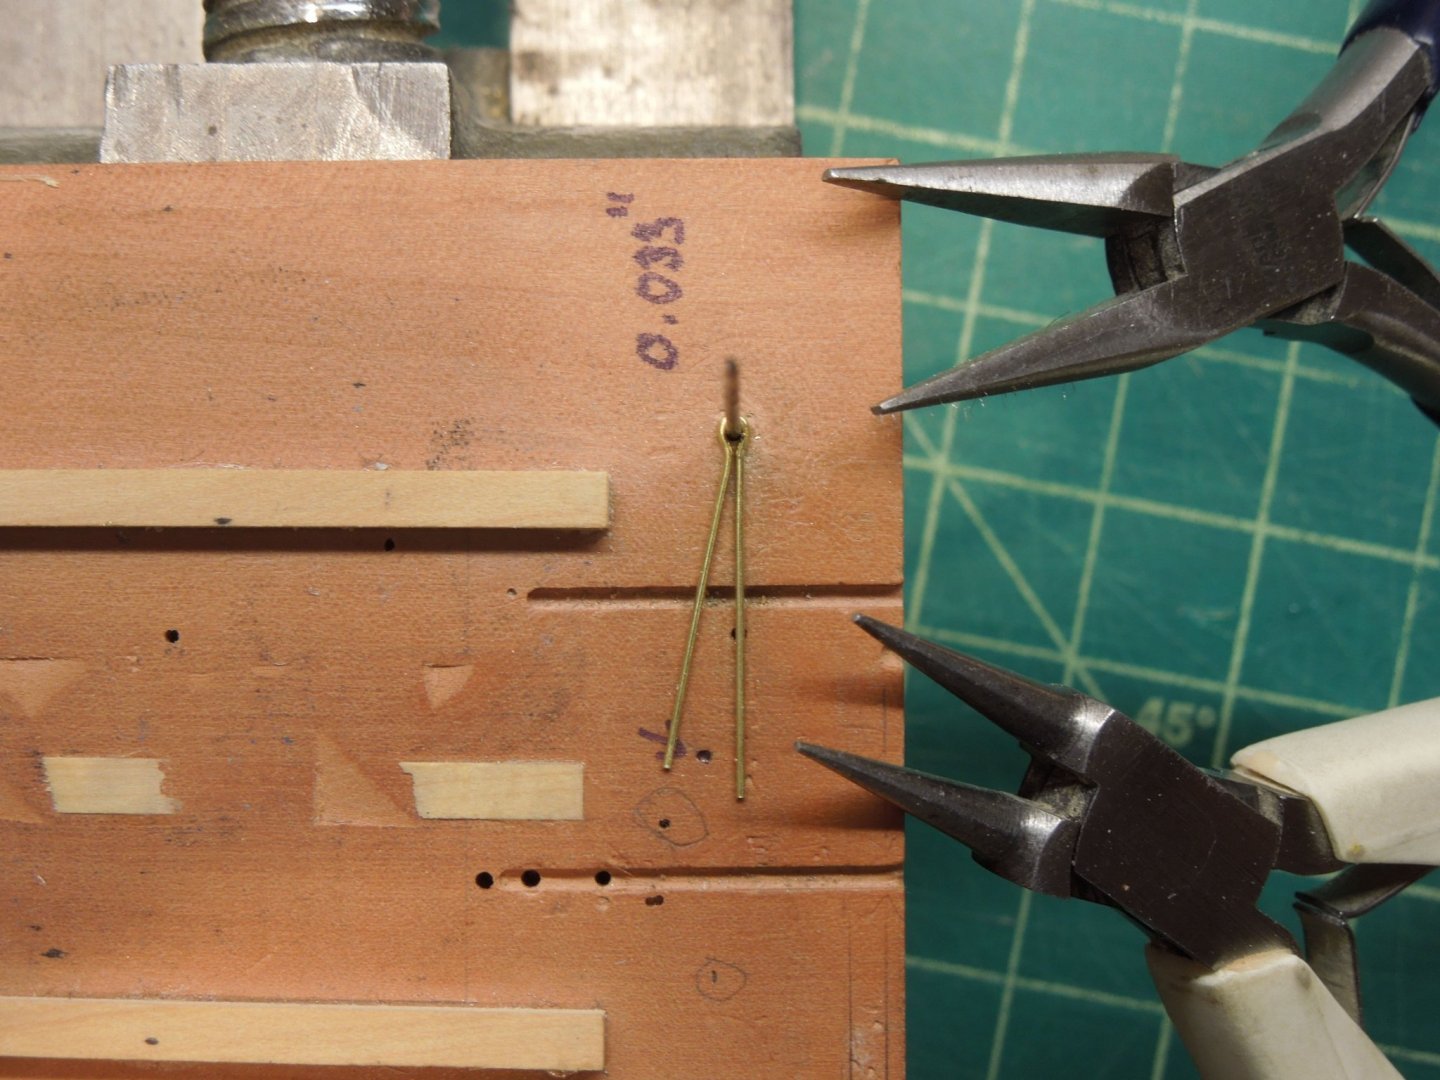
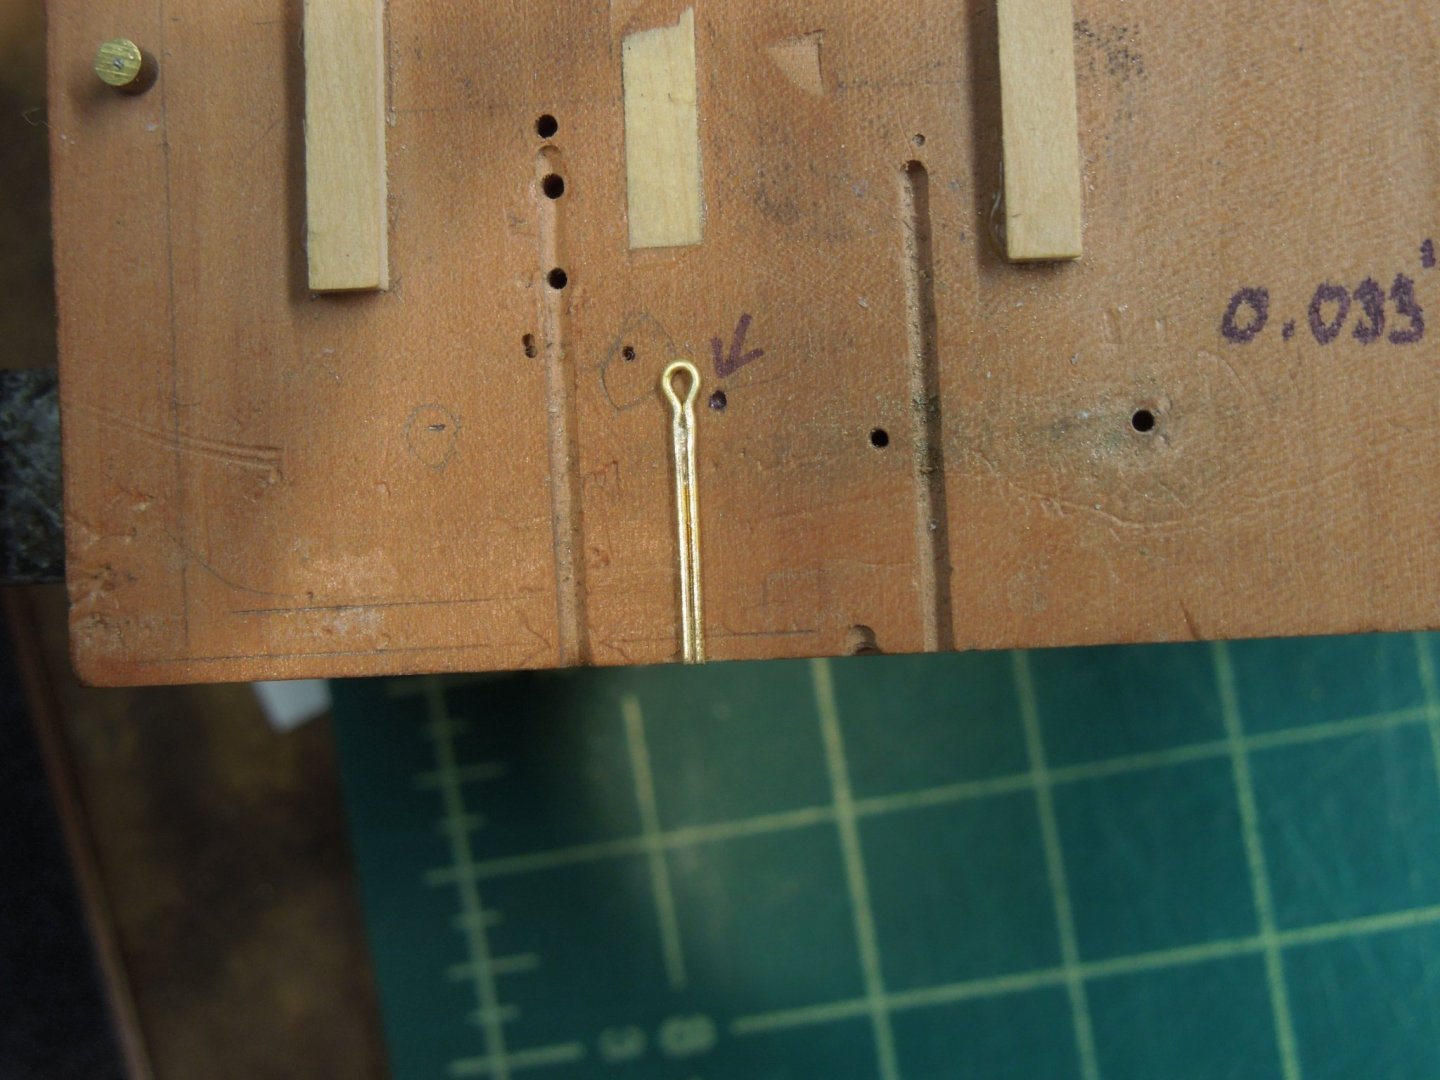
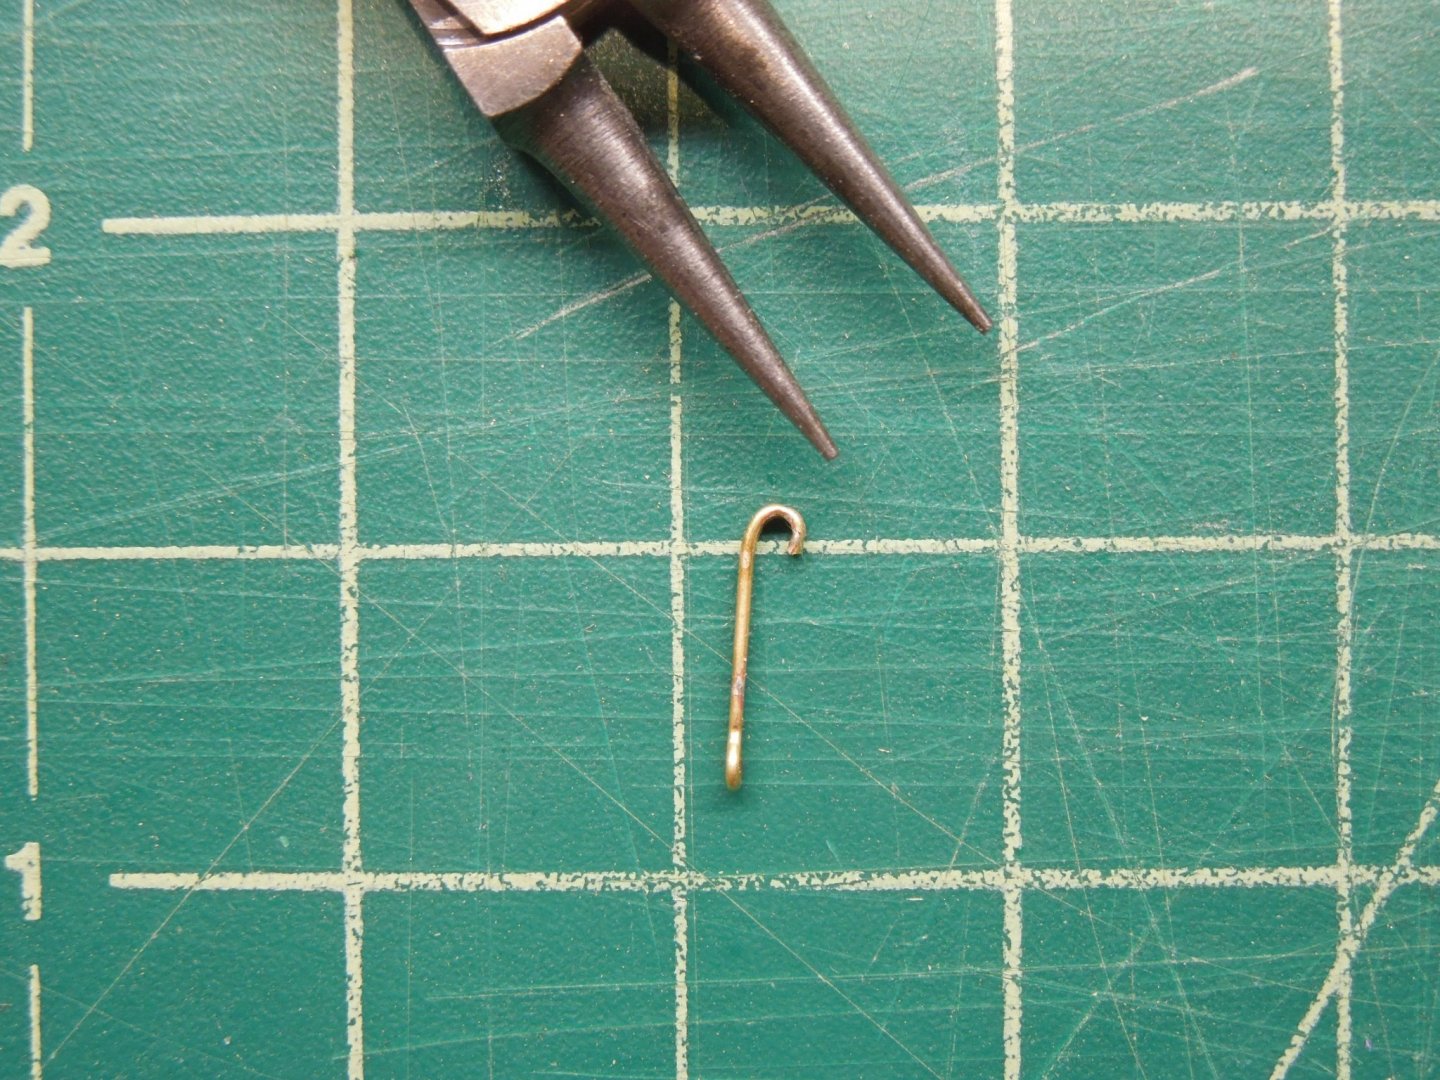
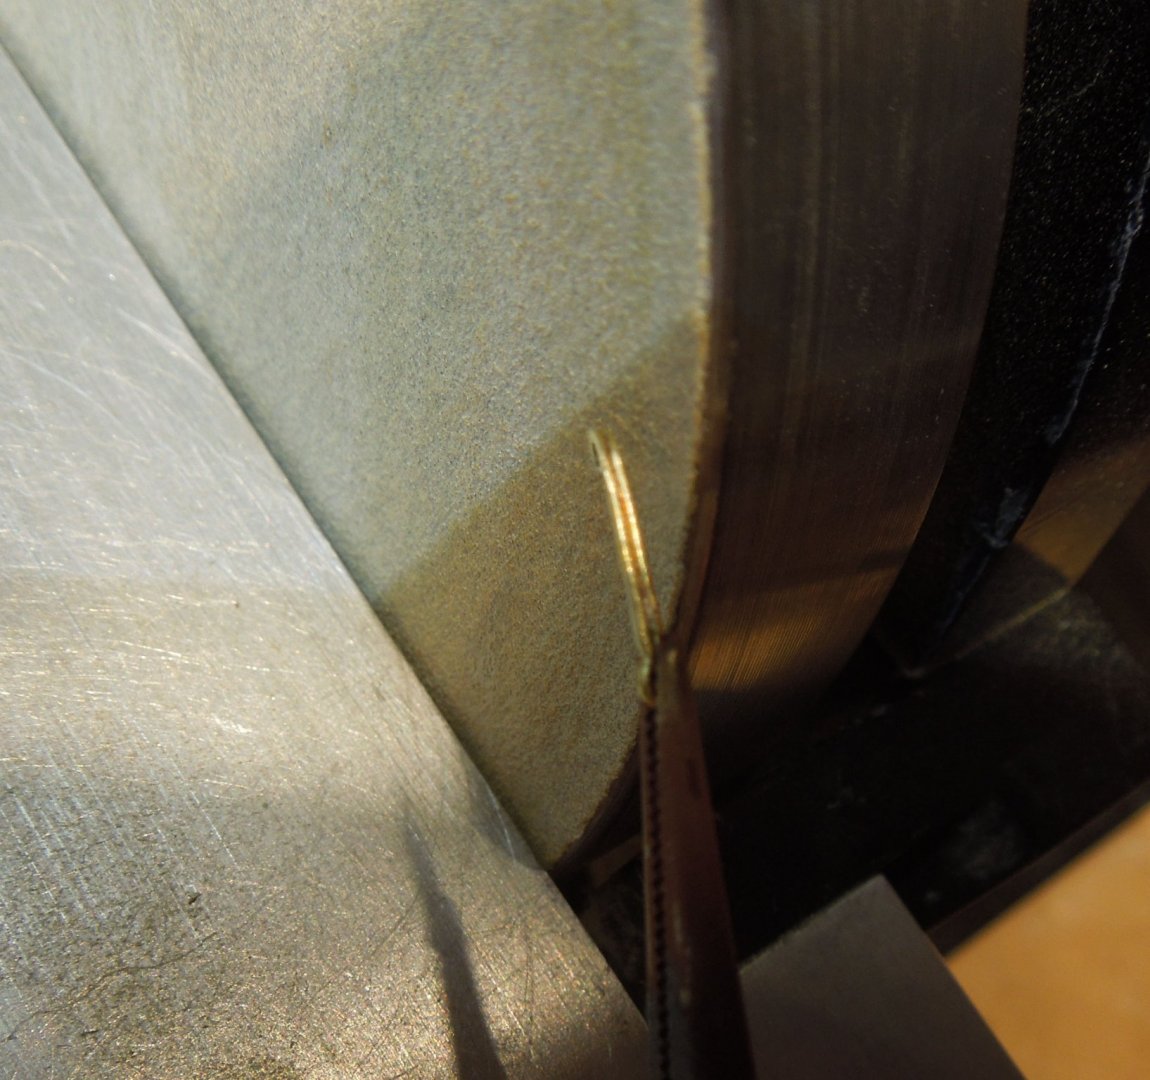
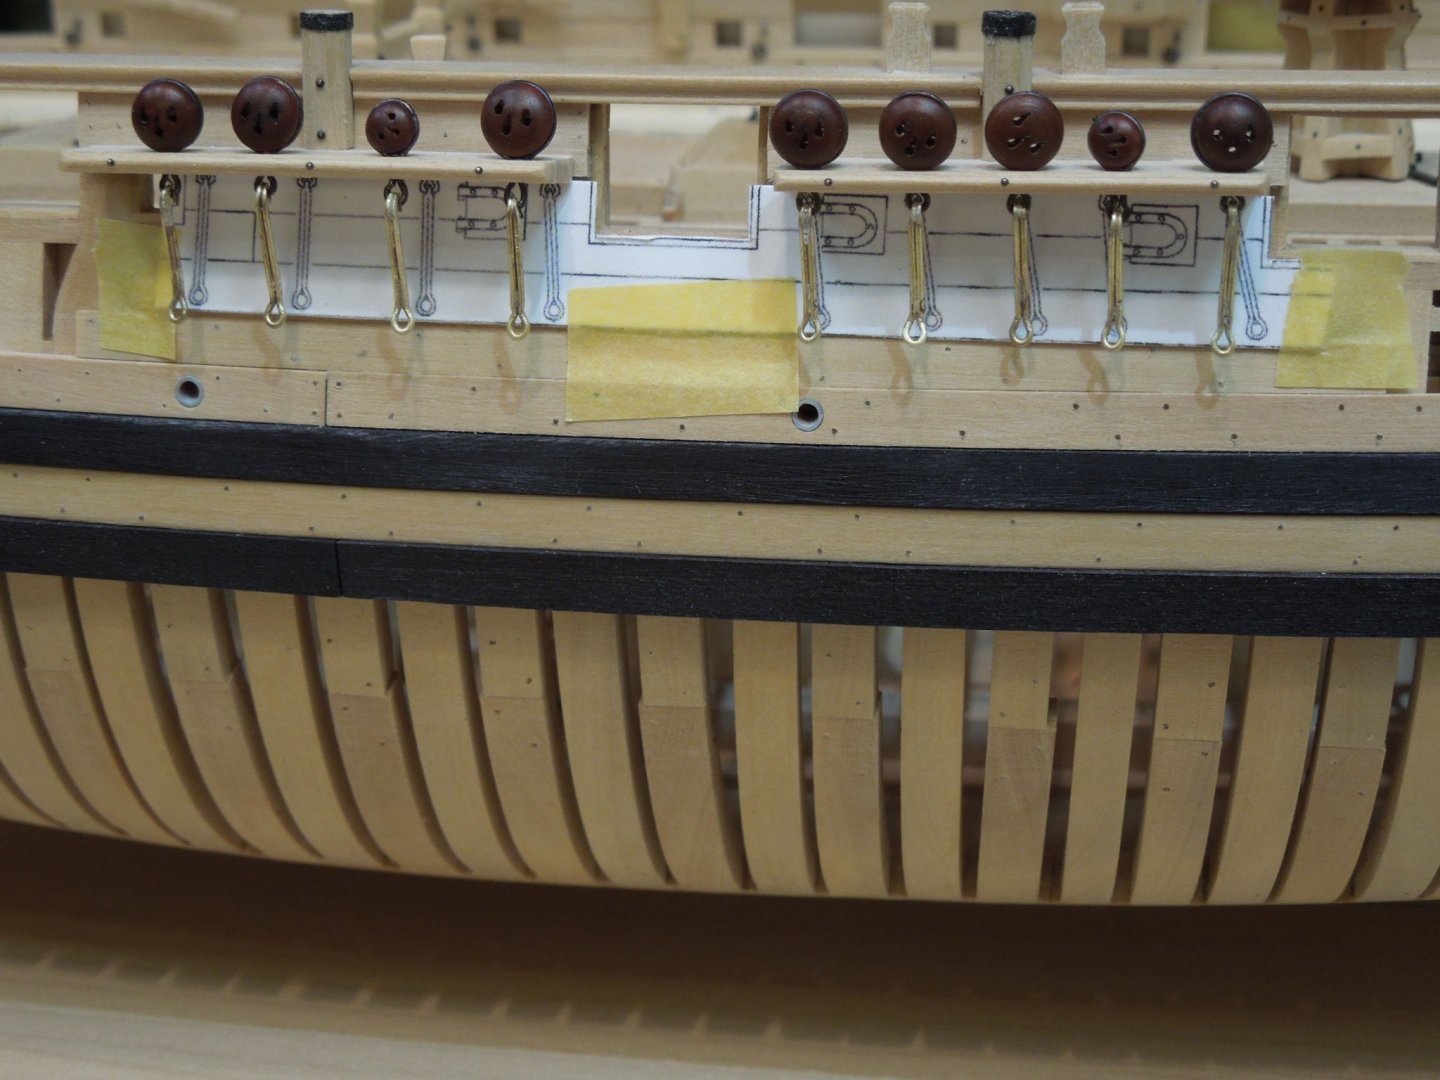
Before starting on the rigging the straps for the deadeyes need to be made. These would be ideal for photoetching (see Siggi's latest postings) but I thought I'd make my own following the illustration by David Antscherl in Volume Two of Speedwell. Keep in mind straps varied in the number of links based on the size of the vessel and era modelled. Here is the illustration of Speedwell's deadeye straps: I used 24g brass straight wire from K&S. The first step was to form the toe loop. It was bent around a 0.33" drill bit using various shaped jewelers pliers. Once the toe loop was formed the strap was transferred to a honeycombed ceramic soldering plate with steel pins to hold them in the correct position for silver soldering. I use Euro Tools paste solder http:// Quote https://www.eurotool.com/search.asp?keyword=silver+solder+paste and it is a joy to use. I used to have a 25-50% failure rate with silver solder but this self fluxing paste is magic - not one failure in the 18 straps and it flows beautifully. I used the low temperature solder for this application. The strap was next cut to length The top was bent into a hook with the round pointed jewelers plyers. It's extremely difficult to photograph the next step but the hook was tapered on each side to fit into the binding loop of the deadeye. I did this on the Byrnes disk sander and used files to finish. Finally, the toe was bent to lie at the correct angle against the hull. All straps are now being pickled before blackening and installing on the hull. I can now start on Speedwell's rigging. I've only fully rigged two models before so this should be a fun learning experience for me. David has gone into great detail in Volume Two of Speedwell detailing every rope and fitting for rigging her so I have no excuse for not doing it correctly.


-
It's a treat for me to see the ship built at this scale. The stern geometry looks great!
-
While awaiting Chucks cross-section maybe consider a x-section of Echo? The plans and build log are available for free from Admiralty Models http://www.admiraltymodels.com/Tips.html
-
Rigged Speedwell dimensions: length (tip of ensign staff to end of jib boom) - 34". Height - 25 1/2", width - 12" at the main yard. The unrigged hull is 22" in length. Chuck will have many challenges in making her into a kit but it starts with the carvings. That's what attracted me to her initially. If he can have carvings produced of similar quality to Winchelsea then I have no doubt this will be the finest ship model kit ever produced. By the way, for those first time plank on framers, the photo of Pegasus shown above to compare with Speedwell is my first failed attempt. That's several months work which is basically firewood but that I could not throw away. I believe the system Chuck is designing will prevent failures like this. Now all of you Winchelsea-ites get back to work so Chuck can proceed to the next project!
- 1,784 replies
-
- 21
-

-
- winchelsea
- Syren Ship Model Company
- (and 1 more)
-
Photos of the carving are in the original build log https://modelshipworld.com/topic/370-speedwell-by-dvm27-greg-herbert-ketch-rigged-sloop-1752/page/8/#comment-809695, message #223 I believe.
-
NAIAD 1797 by Bitao - 1:60
dvm27 replied to Bitao's topic in - Build logs for subjects built 1751 - 1800
Where you been Alex? The rest of us have been mesmerized by this log for months! -
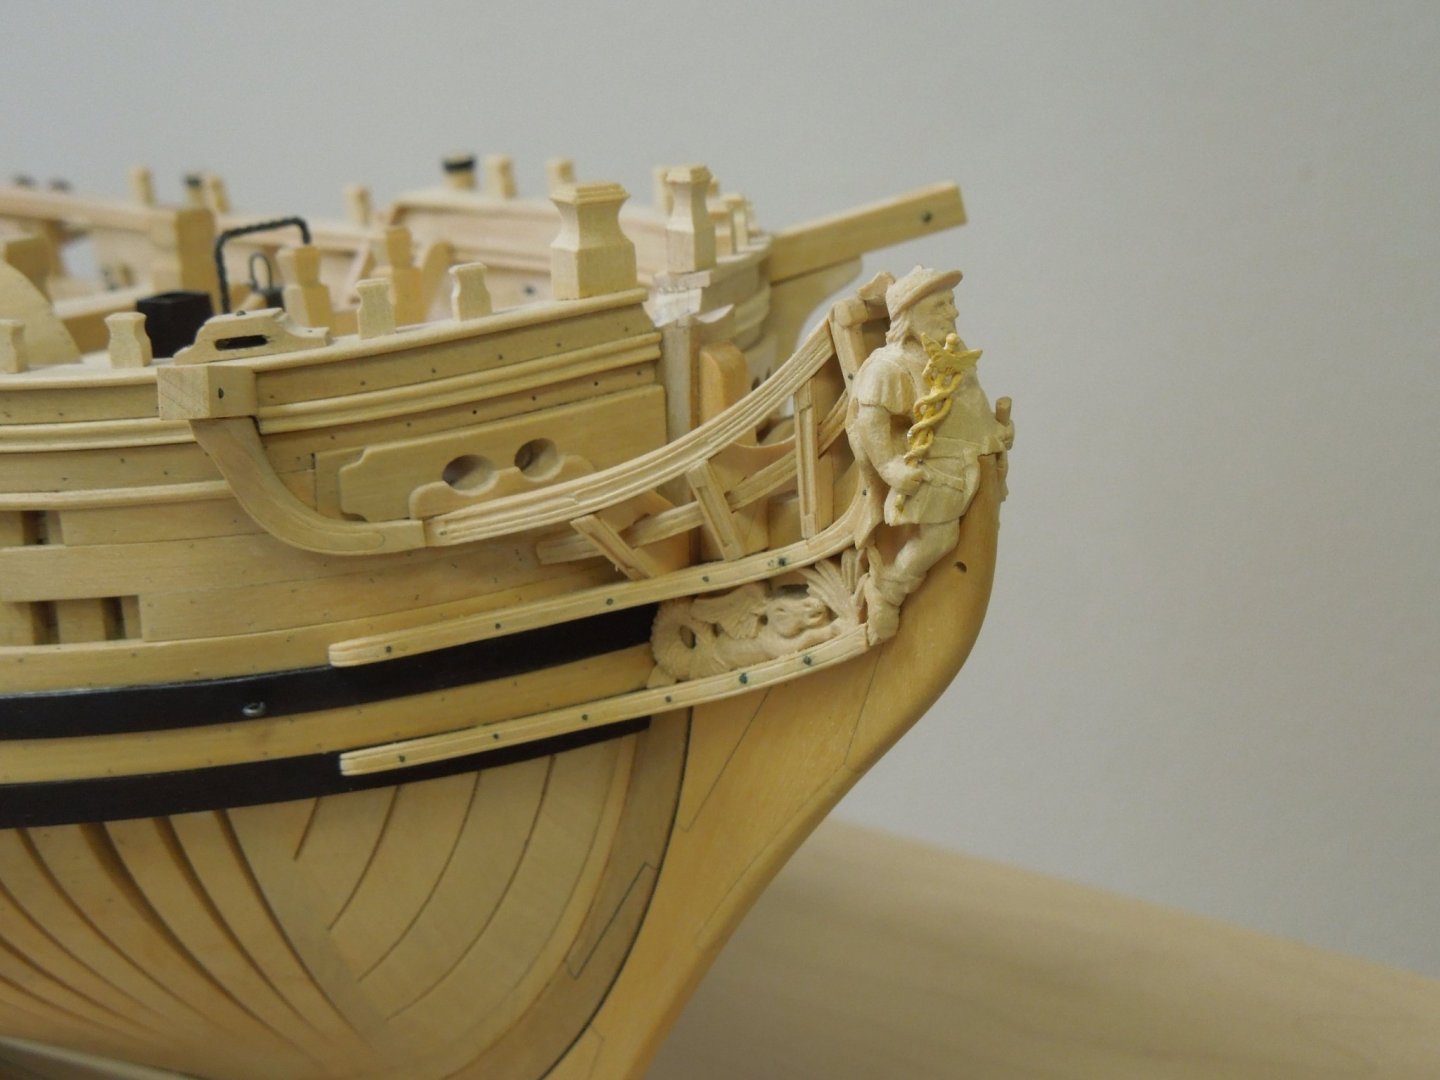
I chose to model her for a couple of reasons. First, she would fit into the last available space in my study (fully rigged). Second, she's a relatively easy rig when compared to a three masted ship. But most importantly her carvings and profile make for a beautiful model. I believe that Chuck will make this kit both accessible for first time POF modelers and a beautiful representation of the NMM model.
- 1,784 replies
-
- 13
-
-
- winchelsea
- Syren Ship Model Company
- (and 1 more)
-
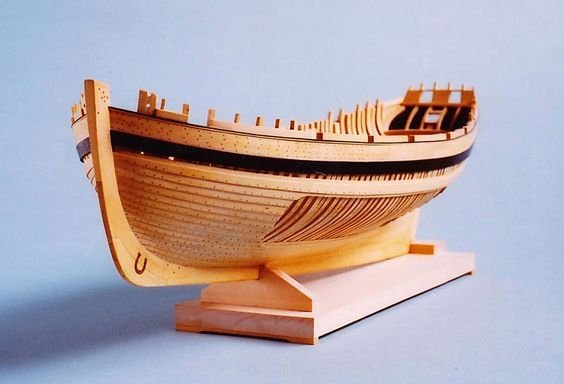
After some consideration David and I have decided that the topic of next year's workshop will be on clinker style planking. To me there is nothing lovelier than a clinker planked hull but they are a bit more difficult to successfully execute than the traditional carvel planking. For this workshop the participants will be provided with a laser cut hull section (to be assembled prior to the workshop). The principles of clinker planking will be taught and the participants will be doing their own planking over the course of the 1 1/2 day workshop. The workshop will take place in Baltimore, MD, probably towards the end of May'2022. We will also be taking a trip to Prebble Hall the day before (or after) in order to view the magnificent Rogers collection. Now that Grant Walker is back a guided tour is always awesome. As with everything else in the past two years all depends on the Covid rates at that time but life goes on and we are making plans. If you are interested in attending this workshop please send a PM or e-mail to me at dvm27@comcast.net so that I can add you to our e-mail group list. Also, please indicate whether a mid-week workshop might work for you. Hotels, workshop space and restaurants are generally easier mid-week than weekends and a trip to the Naval Academy could be incorporated on the second afternoon. Alert, clinker hull by Roger Cole
-
- 10
-
-

-
- plank on frame
- workshop
- (and 1 more)
-
That's a hole-in-one Mark! You're lucky as well that French warships seem to only have one pair of hawse holes. I always have trouble getting the second pair exactly right.
-
I’ve always used water stones but really like the diamond ones better as they sharpen much faster. The trade off is price though. But, as Druxey wrote, the Veritas guide is a must regardless of the stones you use.
-
On a professional woodworkers site his process is to halve the distance to the pencil cut line with each pass. This works well for me. It does take some practice to keep your chisel vertical but you'll definitely get better at it over time. I just purchased some diamond sharpening stones and leather strop and they are working better for me than my old water stones.
-
Safe edges are files which cut on only two surfaces (or sometimes three) and are perfectly flat on the other sides. They are great for refining corners. The pillar files by Grobet on page 12 of https://www.grobetusa.com/content/NEWFile2014.pdf are good examples. Many carpenters grind the edges of their files to make their own. I don't disagree with Druxey that you don't need a mill to make perfect joints. I just bought a Kell honing guide and love it. But mills are a lot of fun!
-
The dean of POF ship modelers used only a jewelers saw so you are in good company. You should be able to make nice keel slots by scoring both sides with a chisel and working from the center out with a chisel. You need a really sharp chisel and much has been written on that subject here already. You can also purchase small square files with the cutting teeth only on the top and bottom. this helps refine the edges.
-
Which ever method you choose if using clamps please consider using small scraps of wood between the clamp edges and the plank. I can see a small divot in the plank adjacent to the clamp edge. Scraps provide even gluing pressure across the joint with no marring from the clamp edge.
- 1,784 replies
-
- 11
-
-
- winchelsea
- Syren Ship Model Company
- (and 1 more)
-
If you're building a second version make the first keel/false keel assembly slightly thicker with the tissue paper extending beyond the edges. Use a new blade to trim the excess paper to the margins. Then run through your thickness sander or over sandpaper affixed to a smooth surface for final dimensioning. You should get a perfectly clean paper edge this way.