HOLIDAY DONATION DRIVE - SUPPORT MSW - DO YOUR PART TO KEEP THIS GREAT FORUM GOING! (Only 20 donations so far - C'mon guys!)
×


dvm27
-
Posts
2,457 -
Joined
-
Last visited
Content Type
Profiles
Forums
Gallery
Events
Everything posted by dvm27
-

HMS Discovery 1789 by Don Case - 1:48
dvm27 replied to Don Case's topic in - Build logs for subjects built 1751 - 1800
Very nice woodworking, Don. I'm a bit concerned about the first two frames of the forebody in post #24. It doesn't look as if the heel of the frames is seating anywhere near the rabbet. Or is that an optical illusion. Will there be sufficient wood to fair them into the frames adjacent to them? -
Perfection, Druxey. Is there a point during the planking process where you'd feel comfortable lifting the boat off the mold?
- 433 replies
-
- 3
-

-
- open boat
- small boat
- (and 1 more)
-
The carving reminds me of the amazing boxwood carvings in the Art Gallery of Ontario. Check out this fabulous article by the museum and click on chapters to see some amazing carvings (especially the Prayer nuts in chapters 4-6)! http://boxwood.ago.ca/publication/small-wonders-late-gothic-boxwood-micro-carvings-low-countries
-
I found the cutting of these mortises to be one of the more challenging aspects of the model Richard. I also made my sills slightly oversize and pared them back to better match the mortises after cutting. Trim, fit and repeat until satisfied. What I can tell you is that when you do your final fairing with a dab of white glue in any unwanted gaps they will disappear.
-
Amazing work Jack. I'm used to seeing the scroll of the lower cheek tuck into the bottom of the foot. Is the small gap temporary or does it conform to the draft?
-
Beautiful work Greg. Make sure you photograph the installation of the whiskey plank and we'll raise a glass together.
-
Exquisite work, "No Idea"! You should change your screen name to "I Got This".
-
Ditto to what Roger said. Can't say enough about the quality of Sherline mill and lathes, both which I have used for over a decade.
-
Nice job on those stanchions, Chuck. Just curious if the contemporary model had wooden rails between them or if they were hemp? I like the later look.
- 1,784 replies
-
- 2
-
-
- winchelsea
- Syren Ship Model Company
- (and 1 more)
-
You're the art major Chuck but I think you gotta go with the red capstan to match everything else. The other just seems to fade into the background.
- 1,784 replies
-
- 4
-
-
- winchelsea
- Syren Ship Model Company
- (and 1 more)
-
Hard to comment on perfection, Chuck! Have you applied any finish to the panels? Any warpage following an application of finish?
- 1,784 replies
-
- 5
-
-
- winchelsea
- Syren Ship Model Company
- (and 1 more)
-
Wow, Jack. I can attest that those apron steps are not easy to do!
-
You must be catching up on inventory. Nice to see you making progress on your beautiful model!
- 1,784 replies
-
- 5
-
-
- winchelsea
- Syren Ship Model Company
- (and 1 more)
-
Making perfect repeatable cannons on the lathe can be a bit challenging. Some folks make a form tool for the reinforcements (rings), some use CNC and some use a lathe duplicator after turning a master in wood. Here is a series from Jo Pi on You Tube on turning a brass cannon that may be of help. He is a master machinist though and his techniques may be a bit above many of our capabilities. https://www.youtube.com/watch?v=6i4rffLUqyY&ab_channel=JoePieczynski
-
There's a delightful Admiralty style presentation folio with two card stock unfolding models that was presented to Prince William on his tenth birthday, April 13, 1731. It is still in excellent shape. It is described and shown in the Kriegstein book. It may be of some interest to bibliophiles here that an "all new" edition of the Kriegstein ship model collection will be published by Pen and Sword Books this month https://www.pen-and-sword.co.uk/Historic-Ship-Models-of-the-Seventeenth-and-Eighteenth-Centuries-Hardback/p/18975. Not quite sure how they can improve upon the two SeaWatch versions but apparently they have new material.
-
If you have a lathe it is also very easy to turn the axles from square stock then reduce the width to size. Literally takes 30 seconds per truck.
-
Swan-Class Sloop by Stuglo - FINISHED - 1:48
dvm27 replied to stuglo's topic in - Build logs for subjects built 1751 - 1800
Boring, frustrating but ultimately satisfying. I usually start with 80 grit paper. -
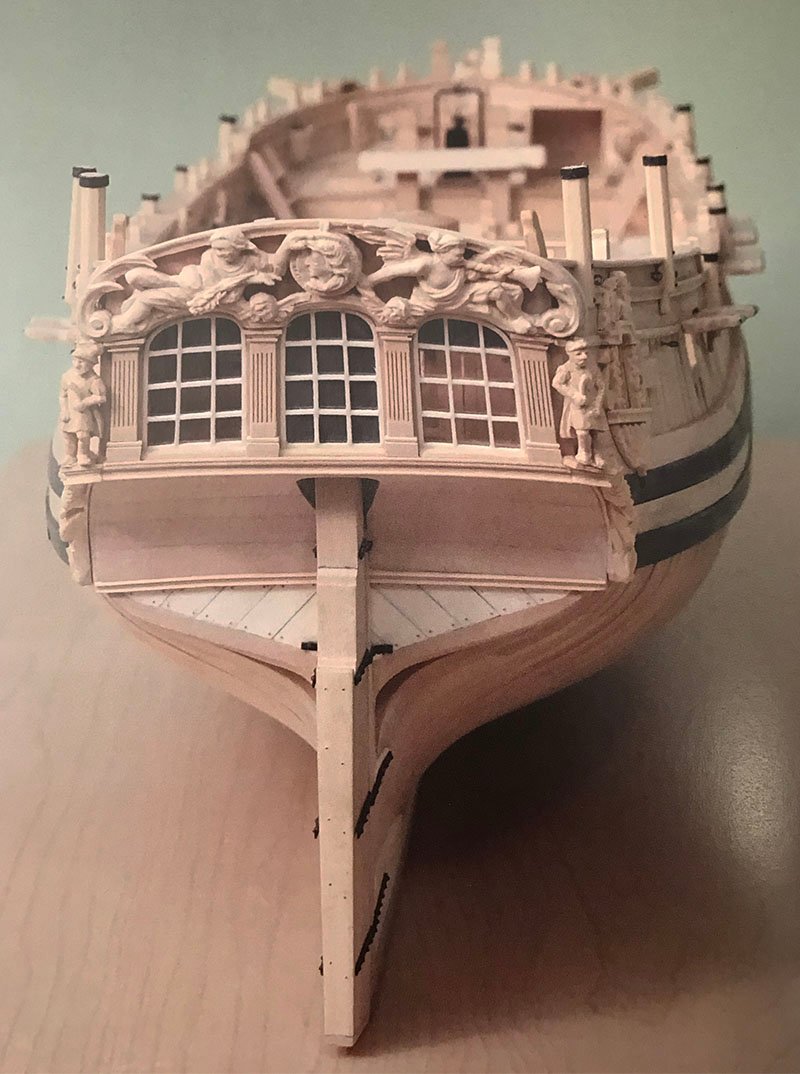
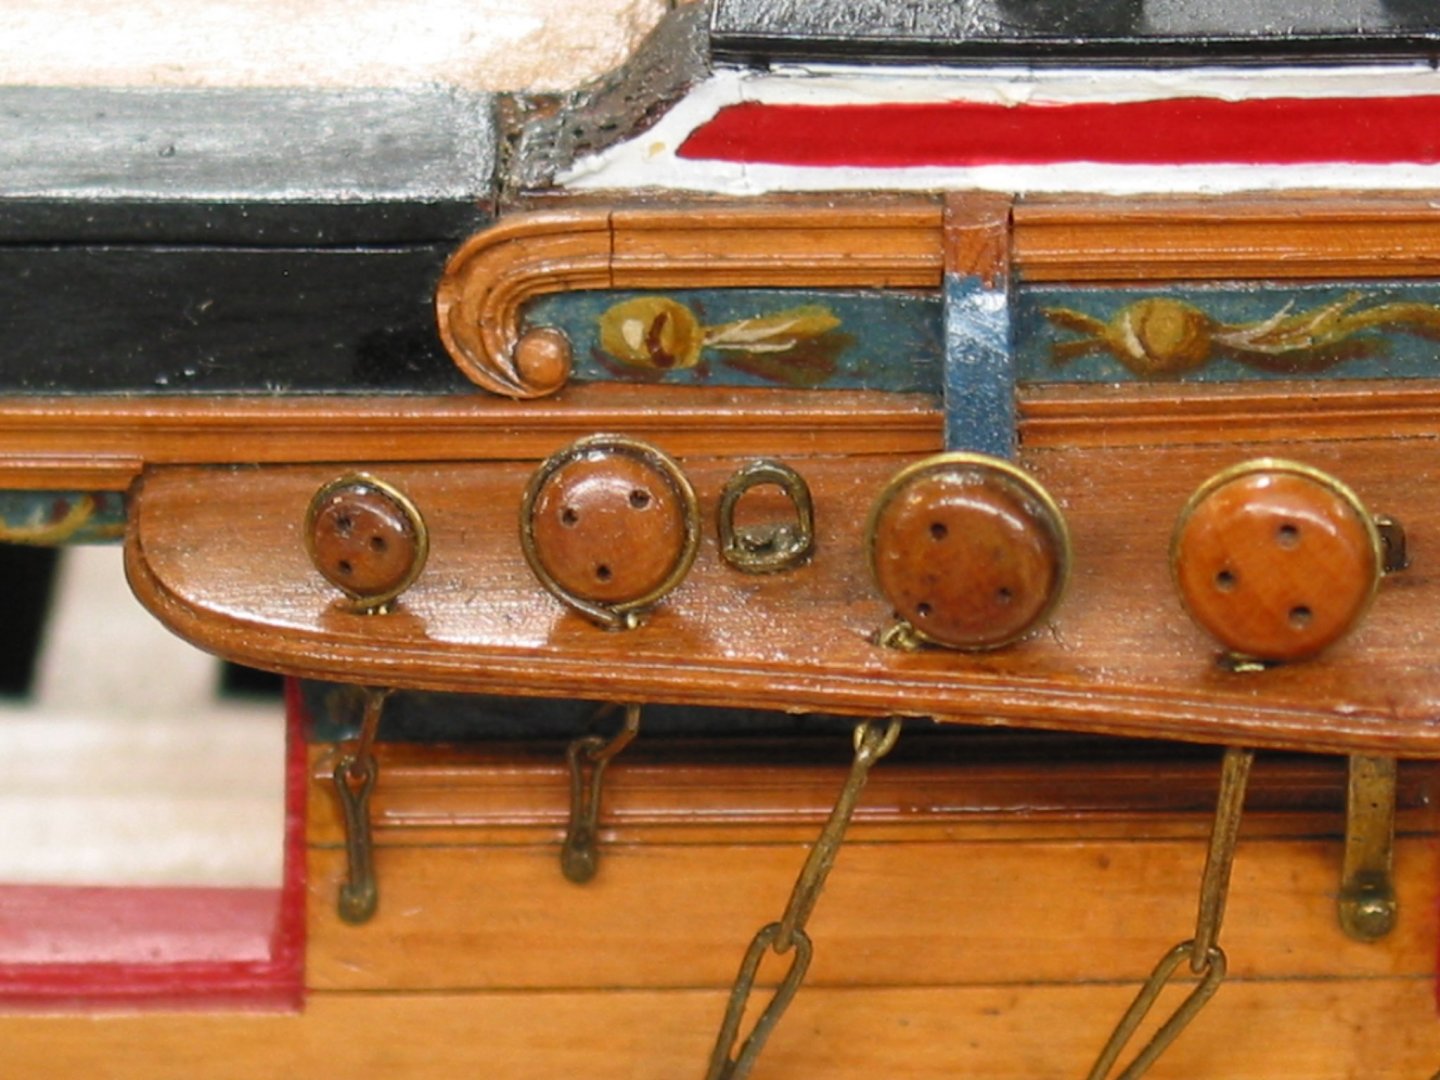
Thanks for all the kind comments. HH - the transom planking is indeed let into the aft fashion piece. The side planking is also let into the fore end of the this fashion piece. Needless to say it is a beast to make with two rebates and rolling bevels! But when done this way the end grain of the transom and side planks are both protected from seawater. Some contemporary models show it done this way and some don't but the NMM model we based this on did. BE - that is indeed a pisdale which seems a bit unusual but is a feature of the contemporary model. It has a molded feature that is a continuation of the molding of the inner planking. Wintergreen - I'm sure David would love to collaborate with every single member of this forum...when his plate is empty (estimate 2032). Trussben - haven't rigged a model in 25 years so looking forward to that. I'm studying the work of Archjofo and hope to emulate his work.
-
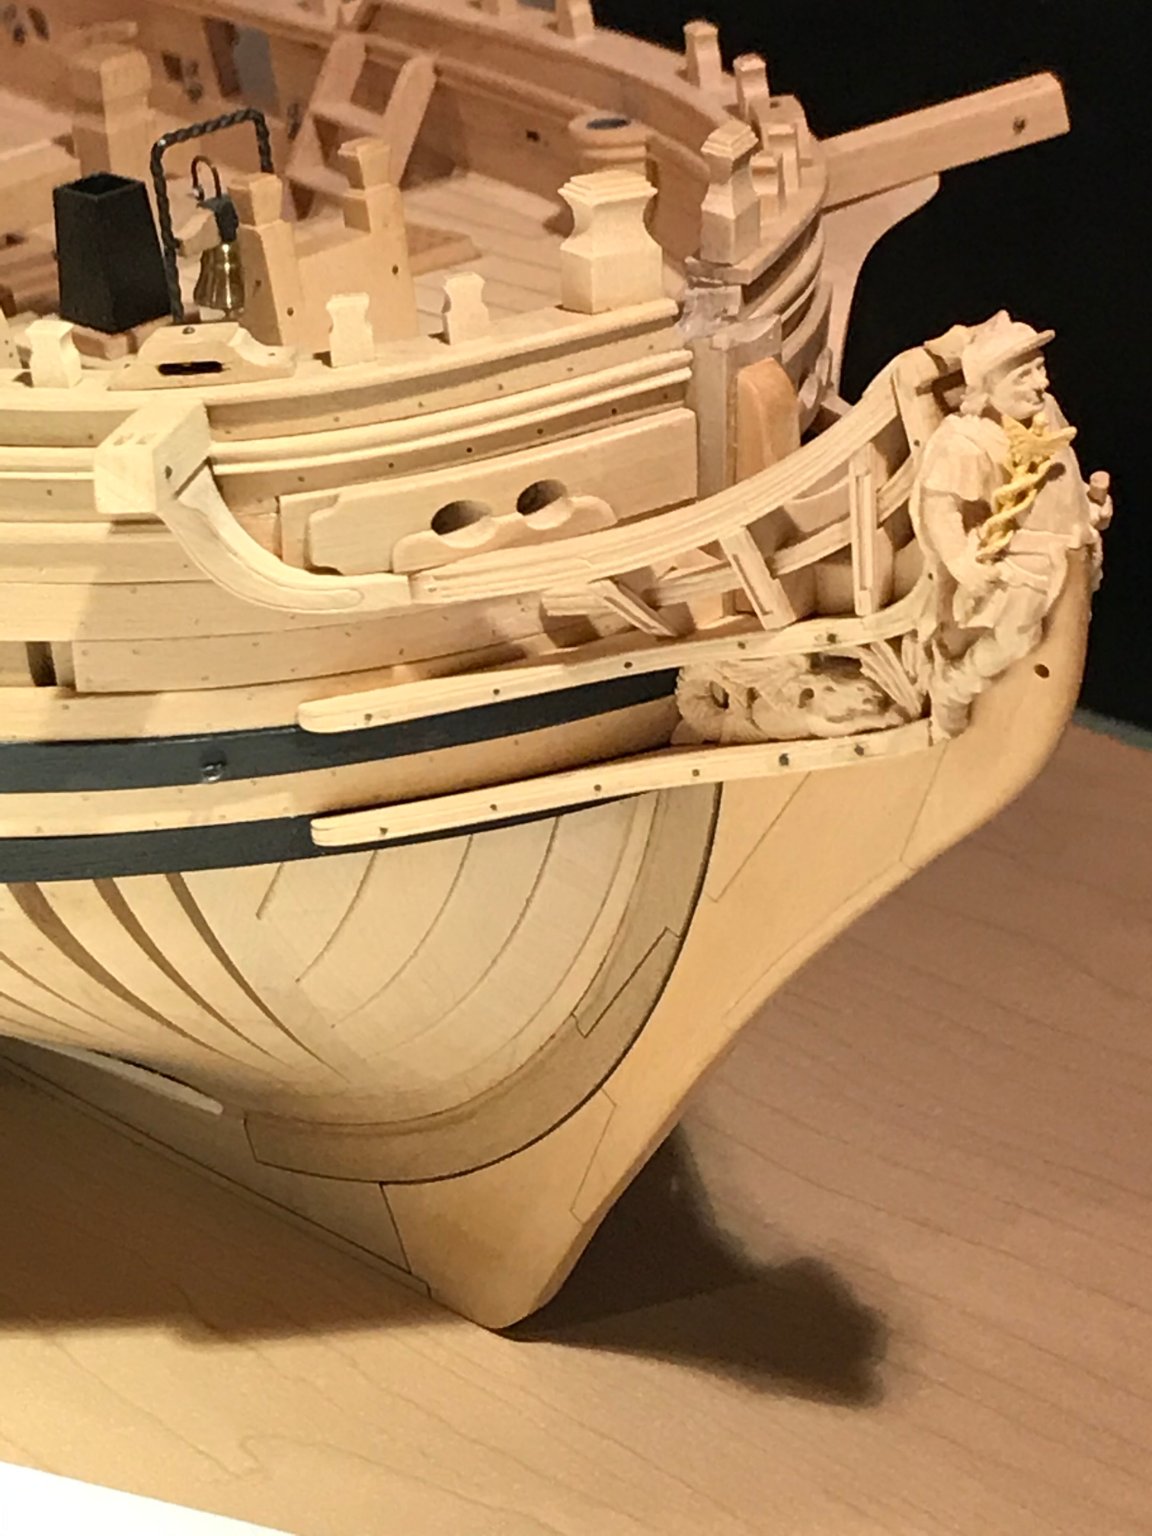
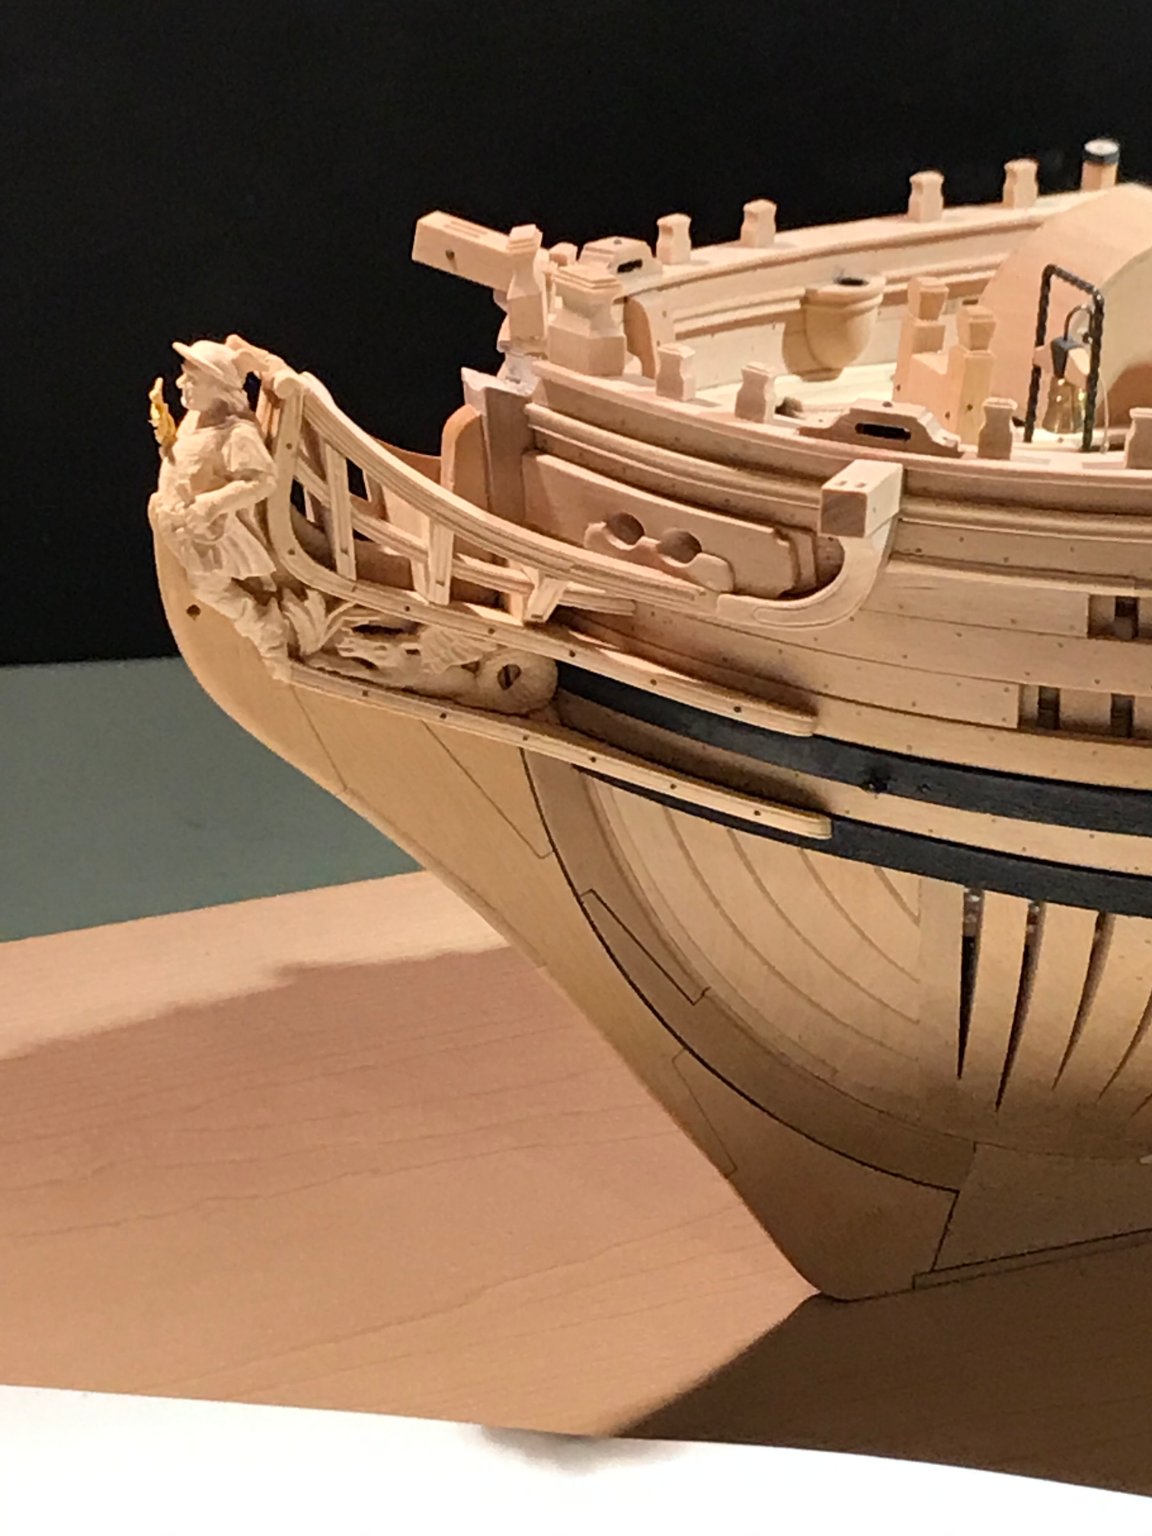
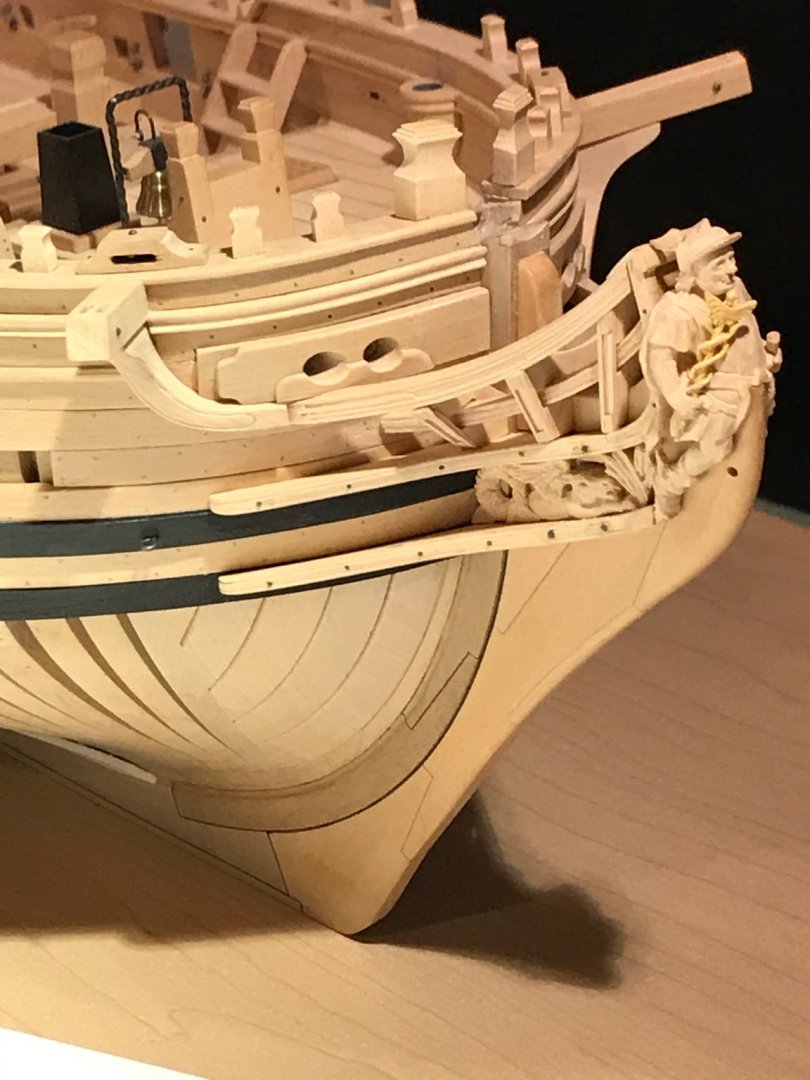
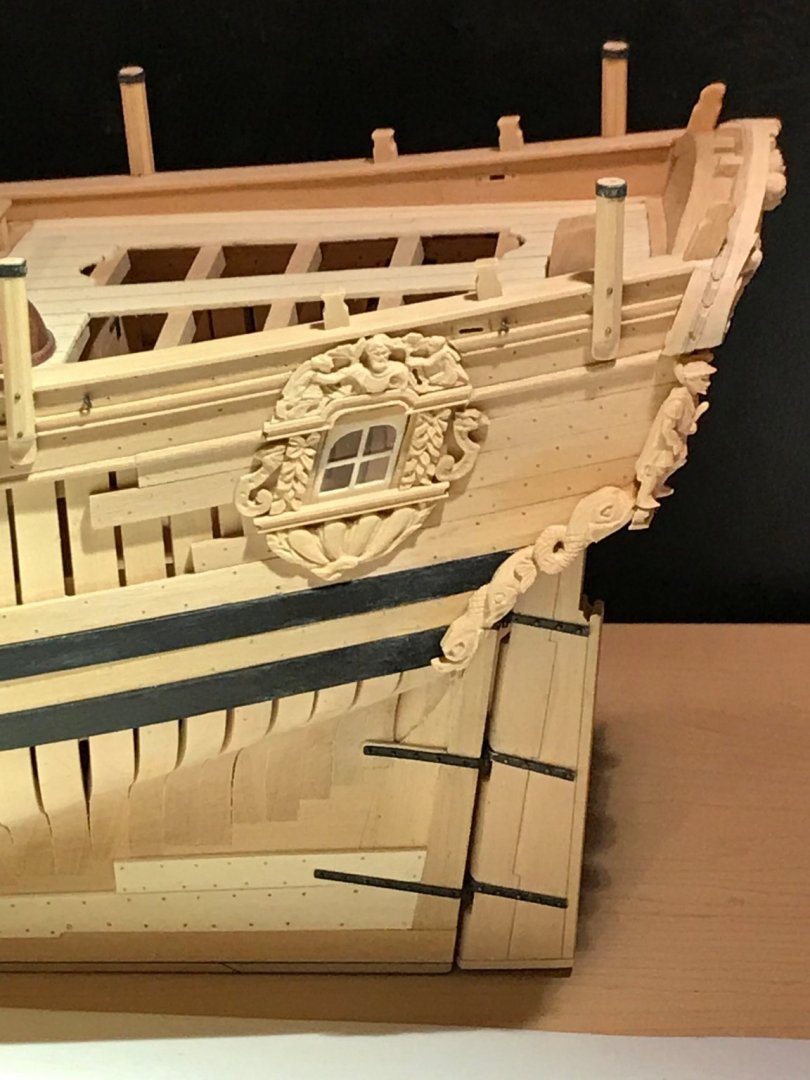
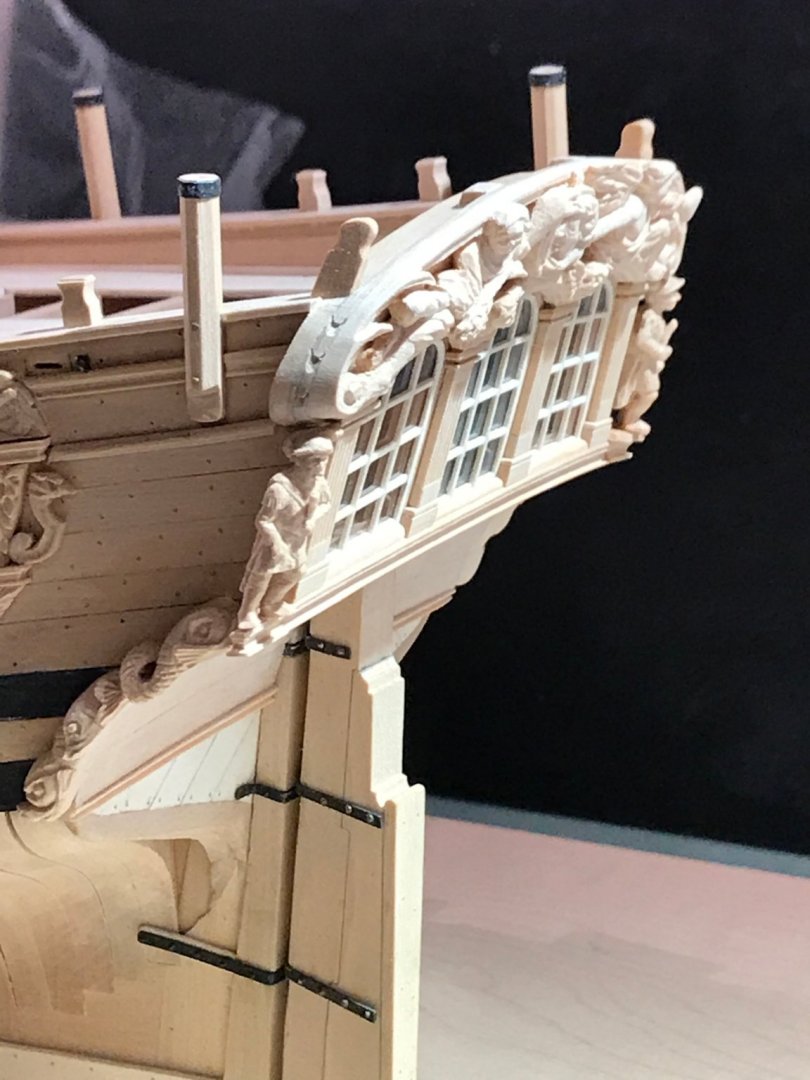
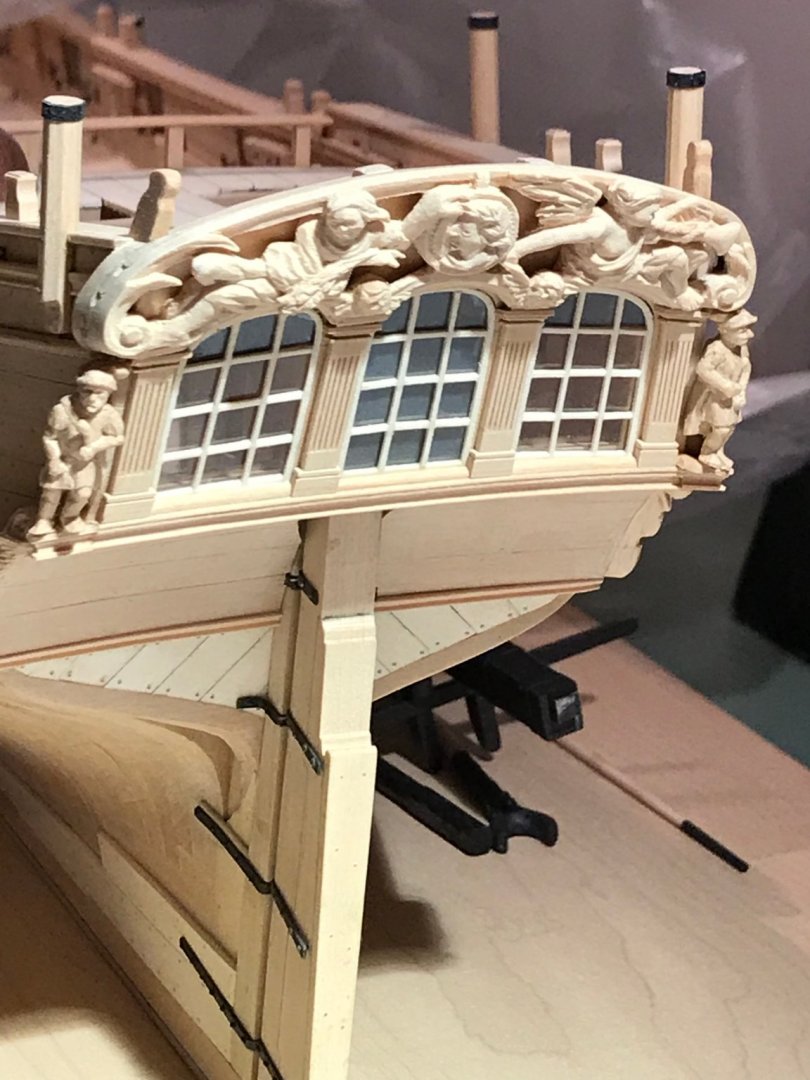
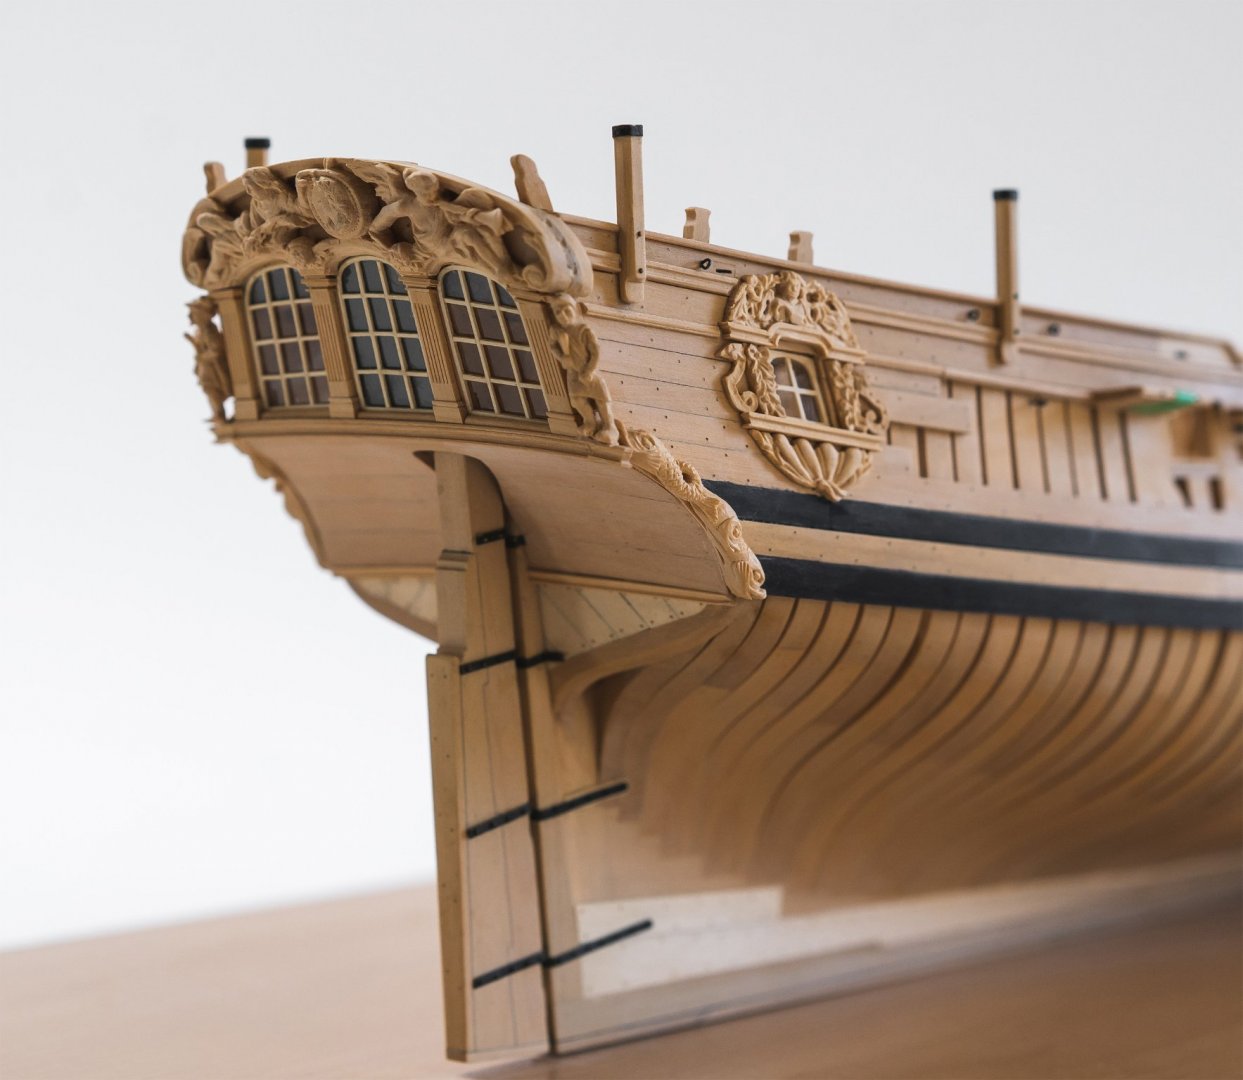
It's been almost a year since my last update. The reason is that Speedwell has been landlocked in Canada since last November. My very talented collaborator David Antscherl had made and applied all the carvings and I was going to pick her up to rig her just when Covid struck and the border was closed. I have all the blocks, ropes, masts and spars ready but no model. I'm hoping to get her this summer but who knows at this point. At any rate here are some photos of her sporting her wonderful carvings.

- 345 replies
-
- 59
-
-

-
Fascinating stuff Michael! But I will miss your beautiful Pilot Cutter which I suspect is now on hiatus.
-
Here's some inspiration Siggi. But after viewing your work I don't think you need it. Well done!
-
I see I am not the only one who makes the unforgivable mistake of using the Byrnes saw as a building surface. But it is the only perfectly flat surface in my workshop so allowances must be made. Beautiful work N.I.!
-
Your model reminds me very much of White Wings, a wooden yacht that won the prestigious best model award at the Mariners Museum'2000 competition. It even had plumbing. I can't find any photos of it on the internet but i think you would find it inspirational, as we do yours.