

guraus
-
Posts
361 -
Joined
-
Last visited
Content Type
Profiles
Forums
Gallery
Events
Posts posted by guraus
-
-
-
-
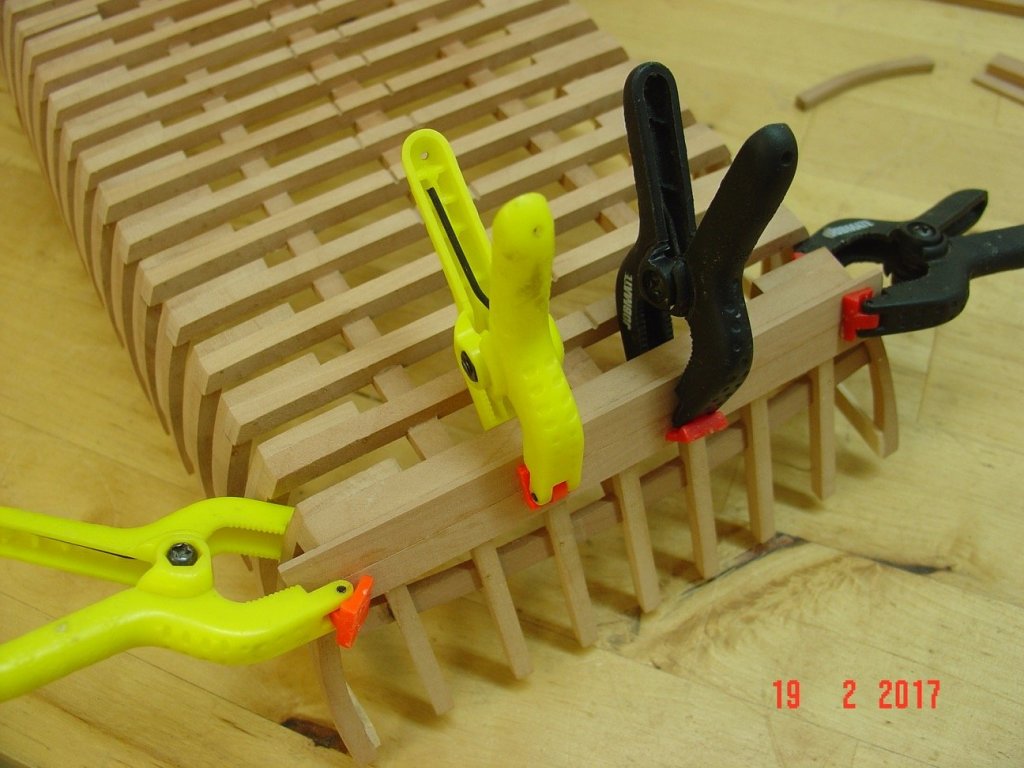
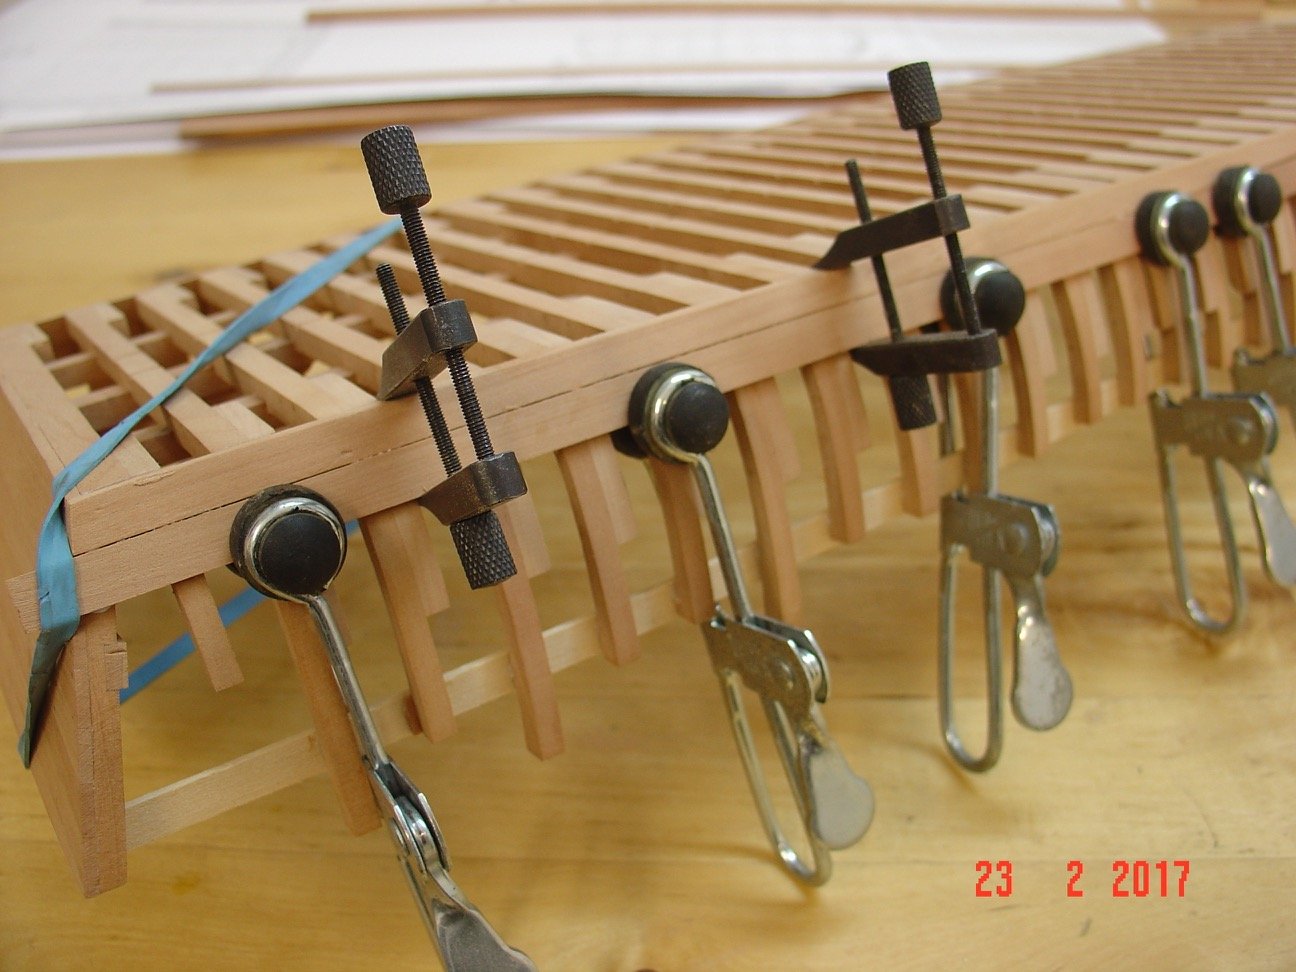
29 minutes ago, michael mott said:
Your joinery is superb, I noticed in one of the pictures some small cam-lock clamps where did you get them?
Michael
Michael,
I've got them from somebody who worked in an airplane assembly plant here in Montreal. I think they were used to clamp in place the aluminium skin on plane wings structure for drilling holes and riveting. I have 6 and use them when I need a high pressure on something quite thin as they open about 5 mm. The nice part is that they have those rubber things and do not scratch or damage the wood. Unfortunately I don't have a source where you could buy them.
Alexandru
- thibaultron, mtaylor and Eddie
-
 3
3
-
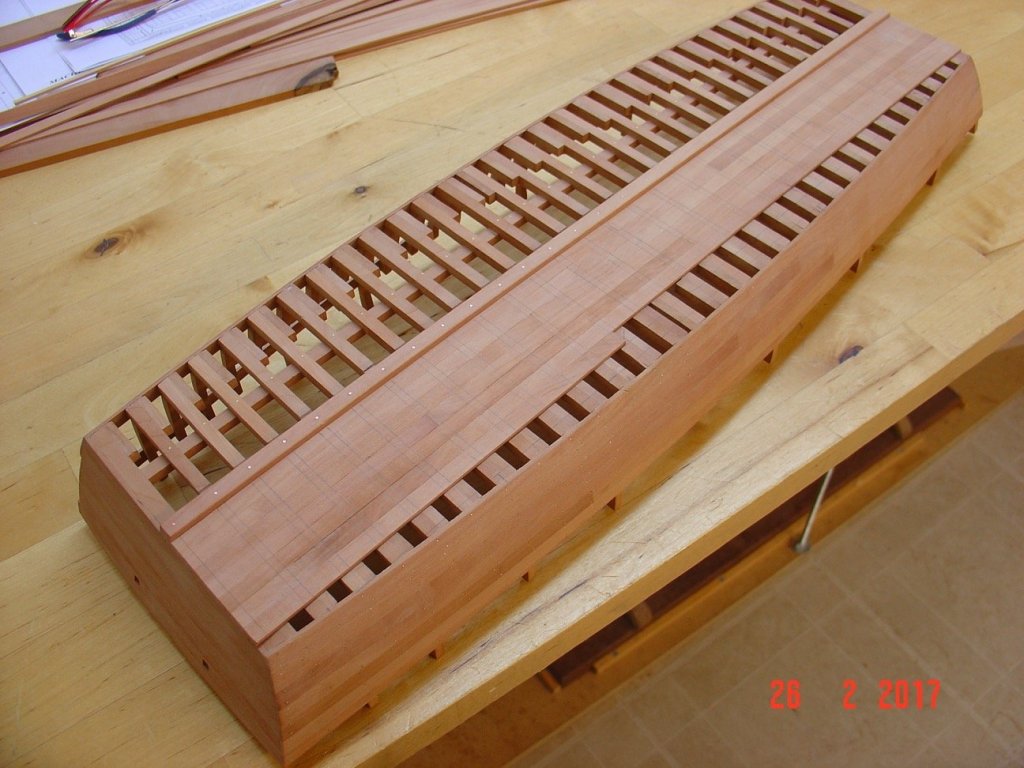
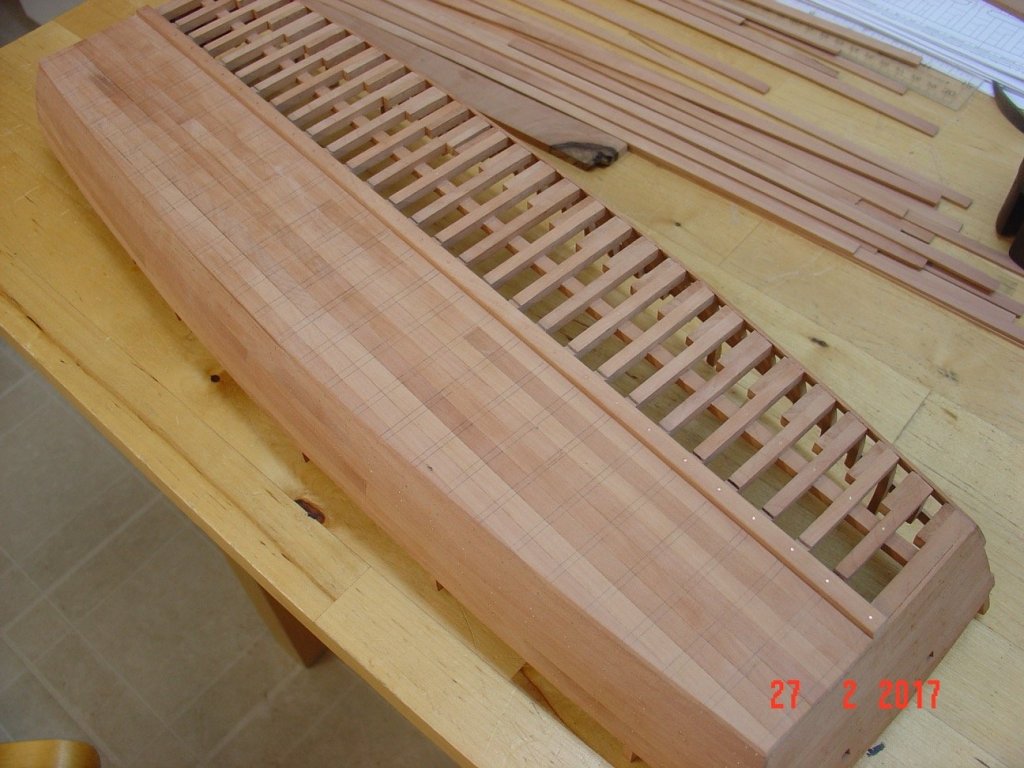
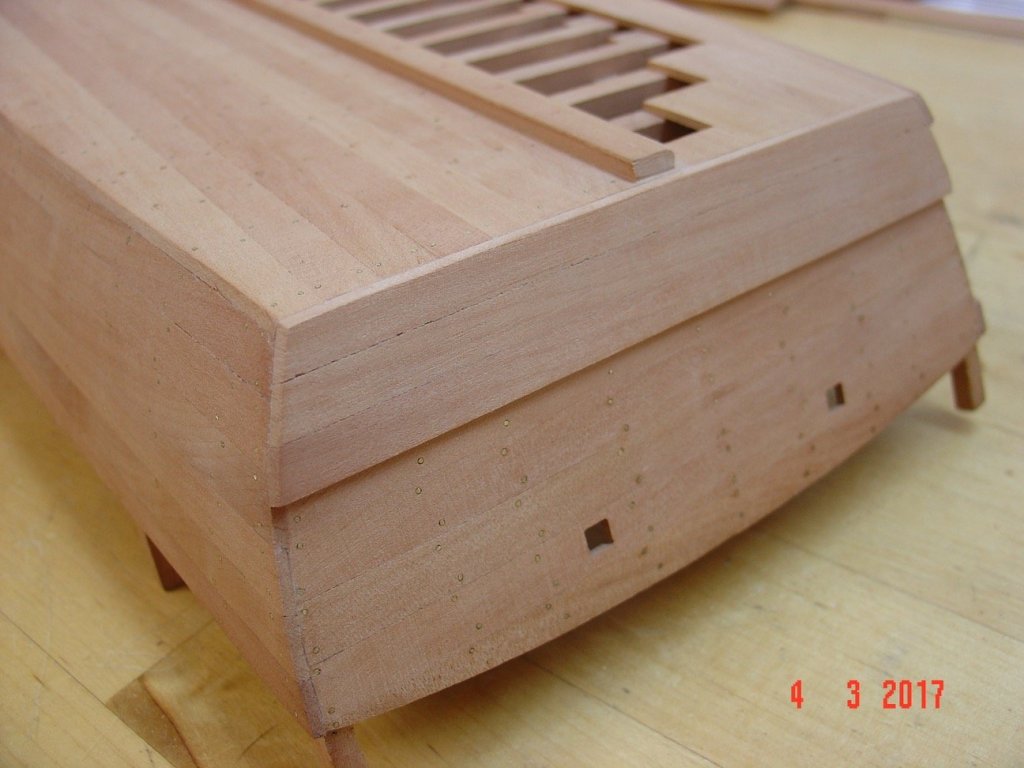
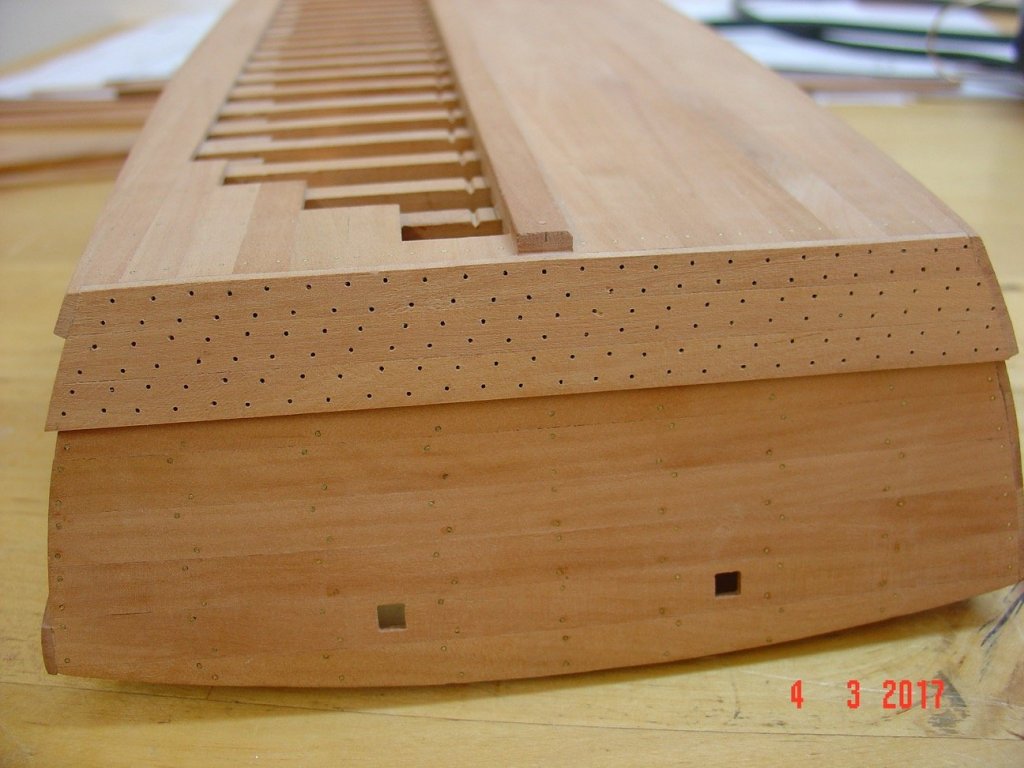
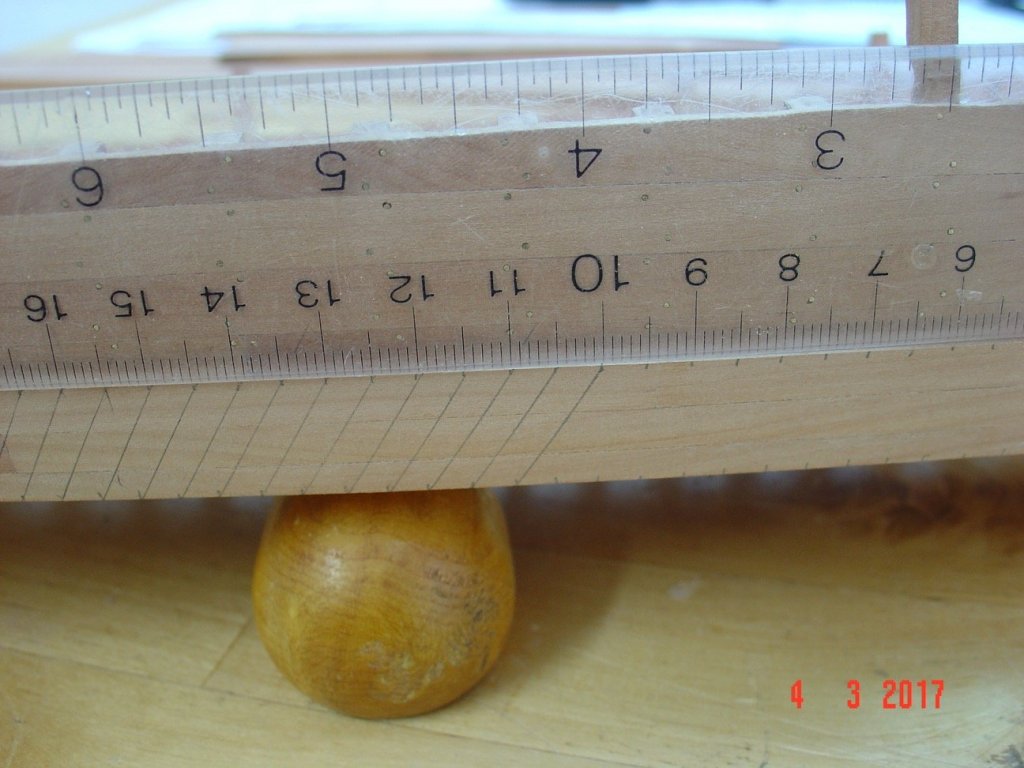
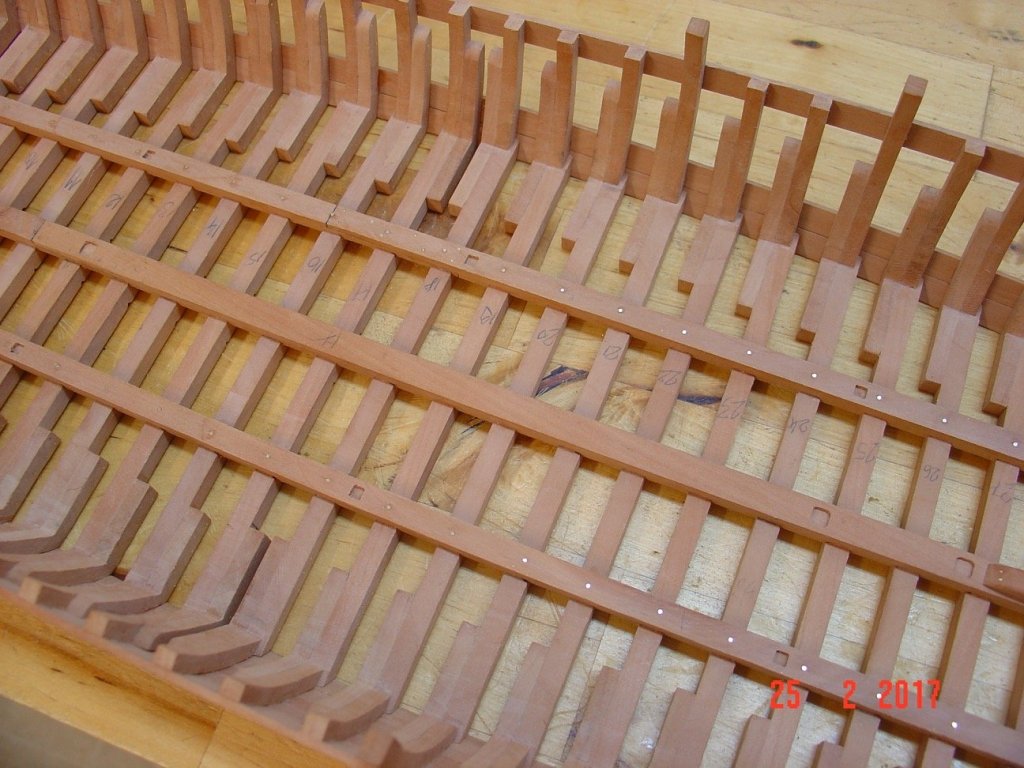
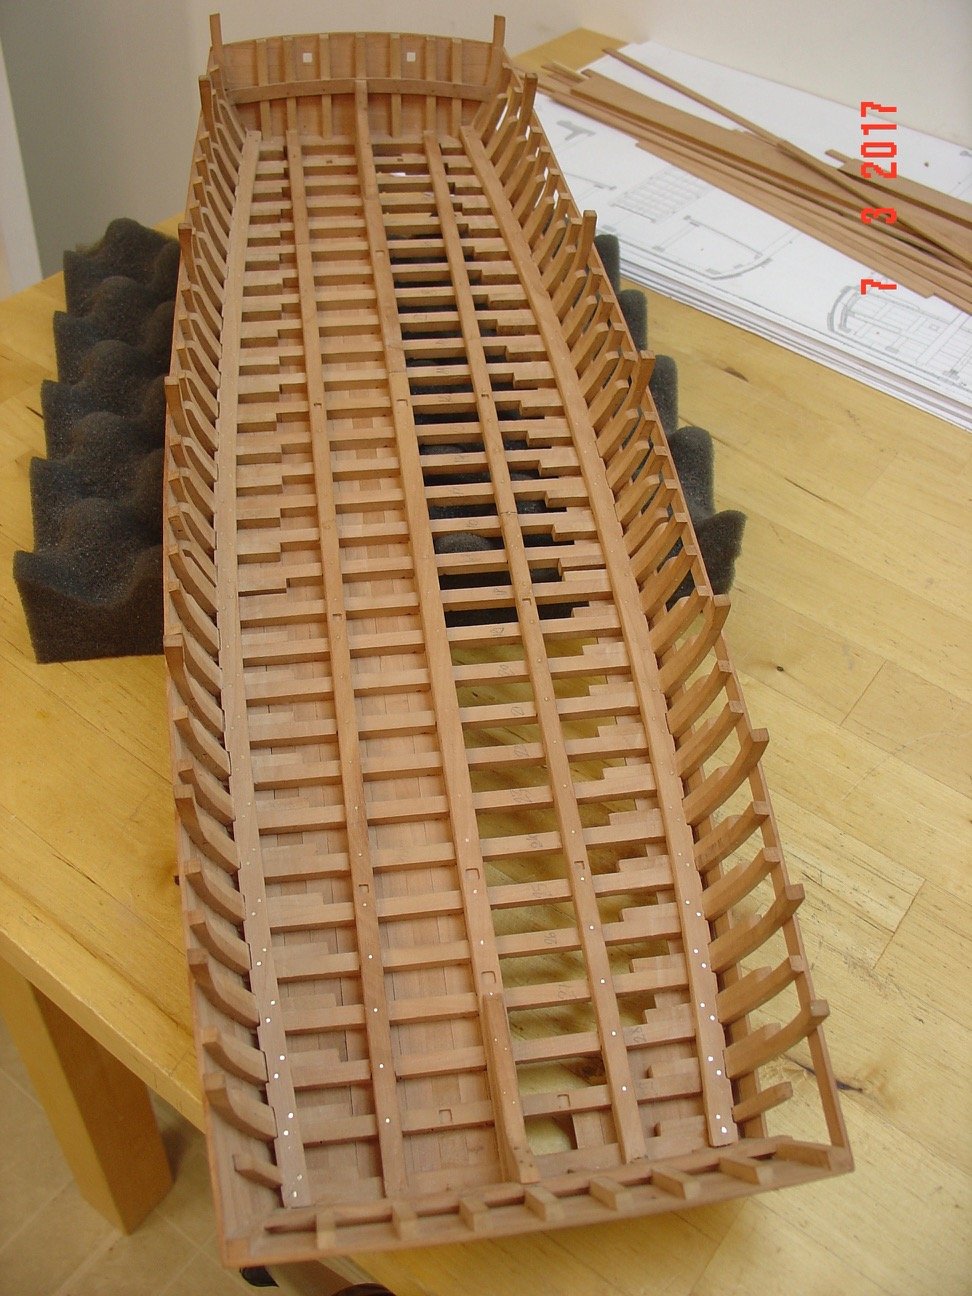
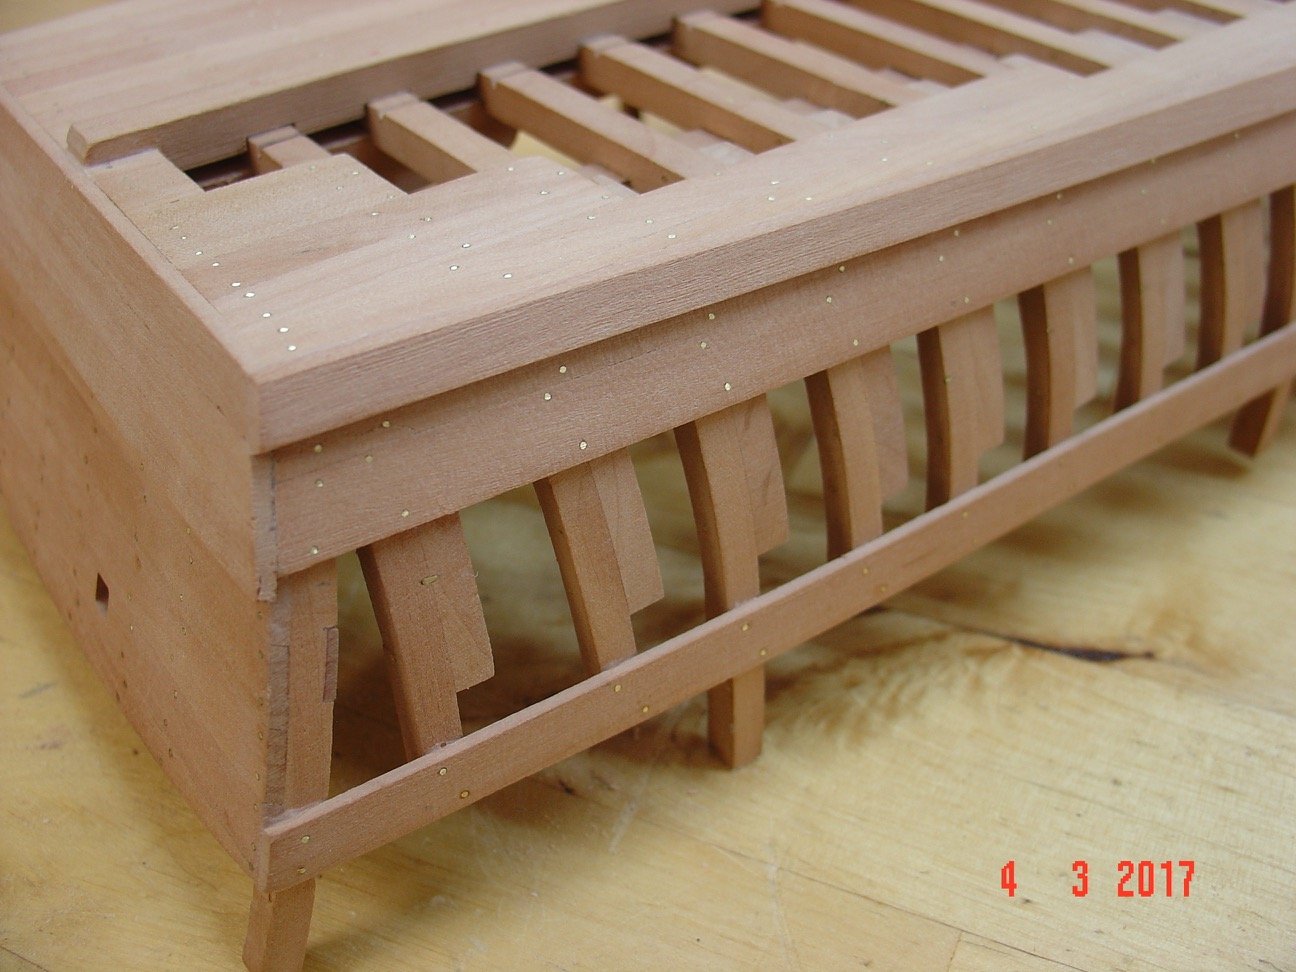
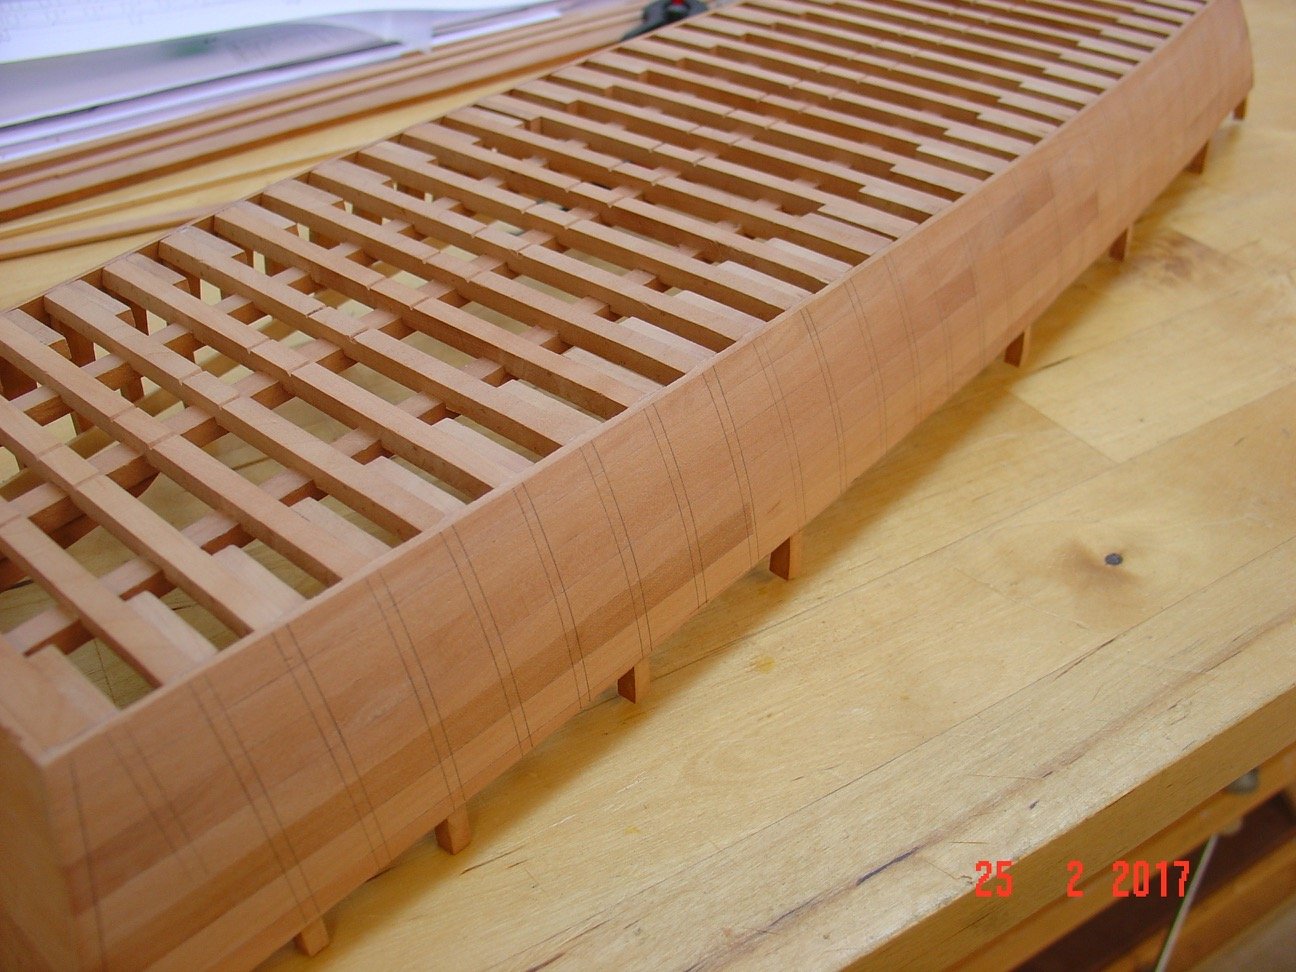
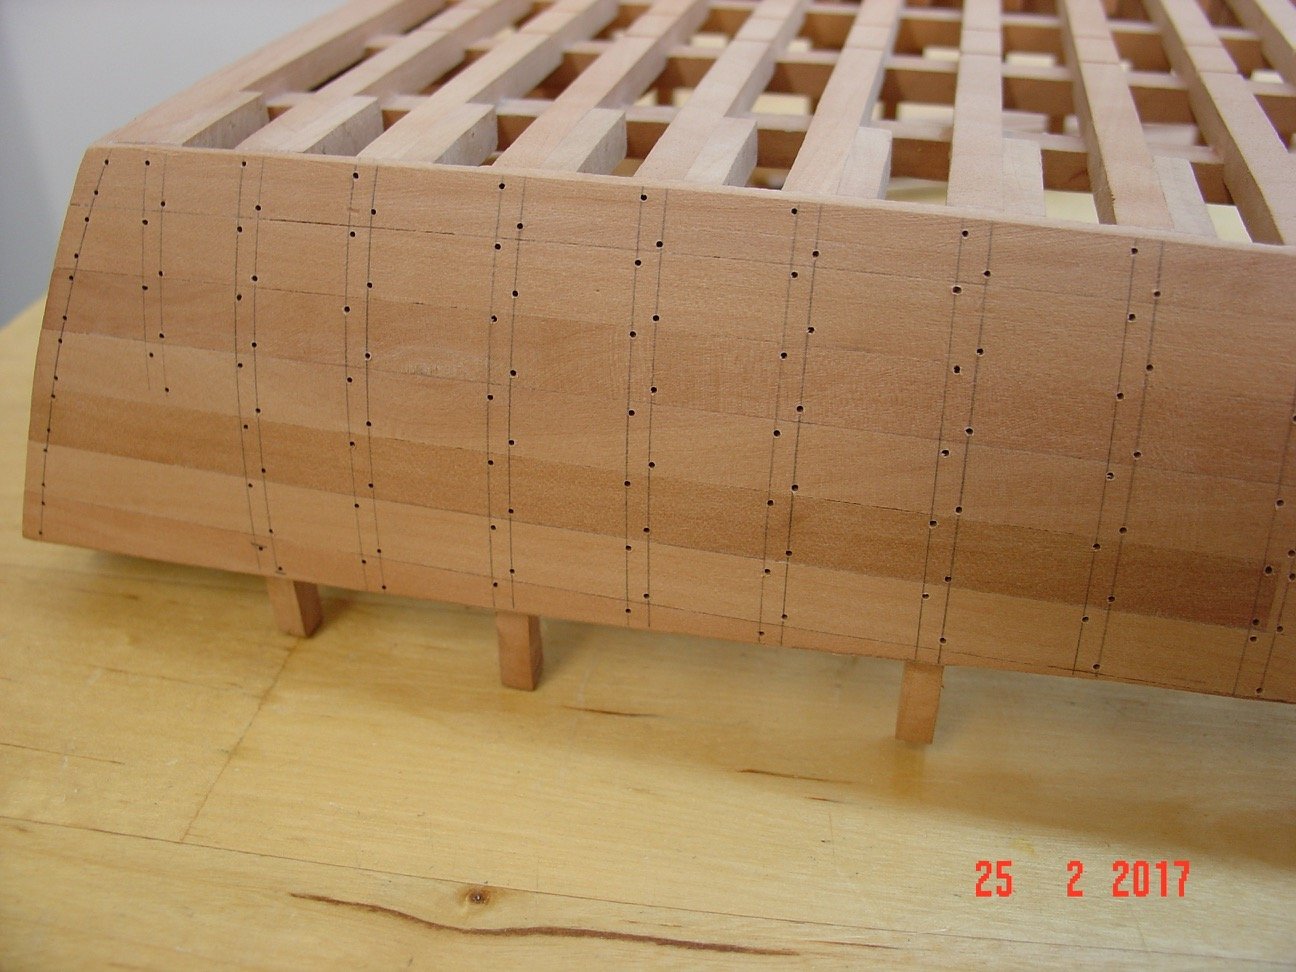
Hello,
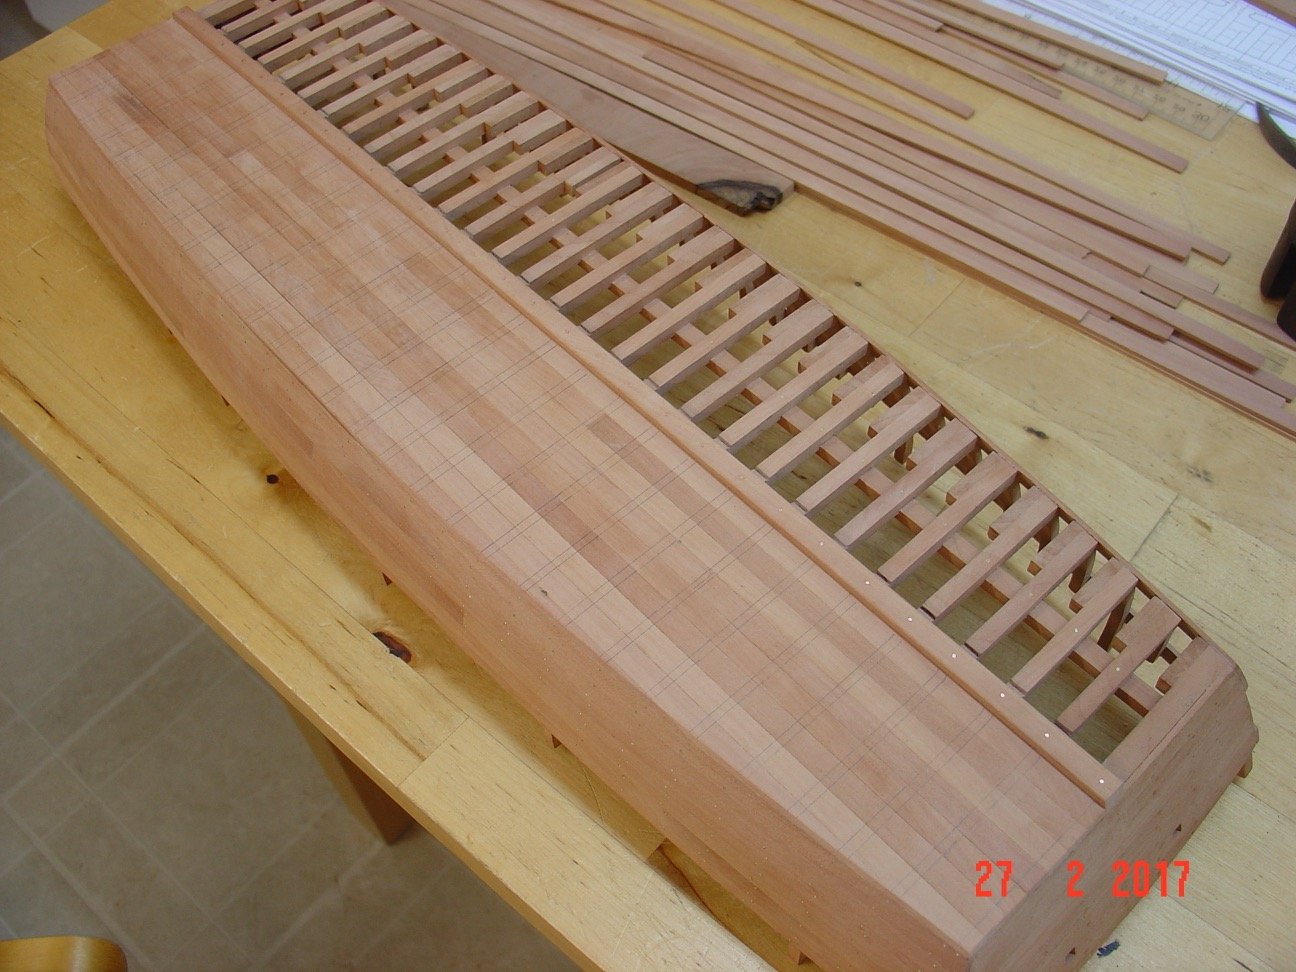
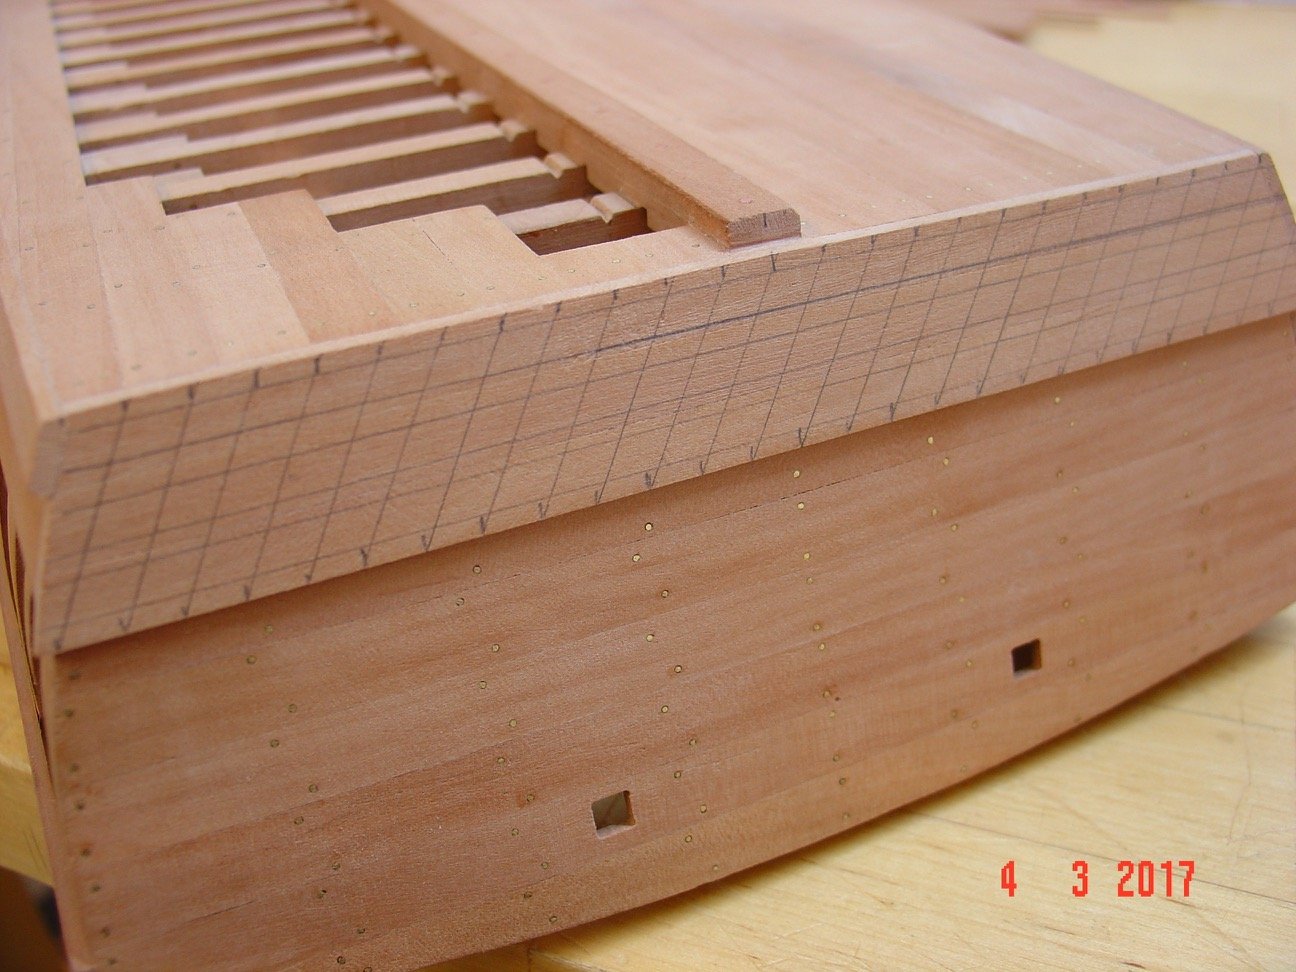
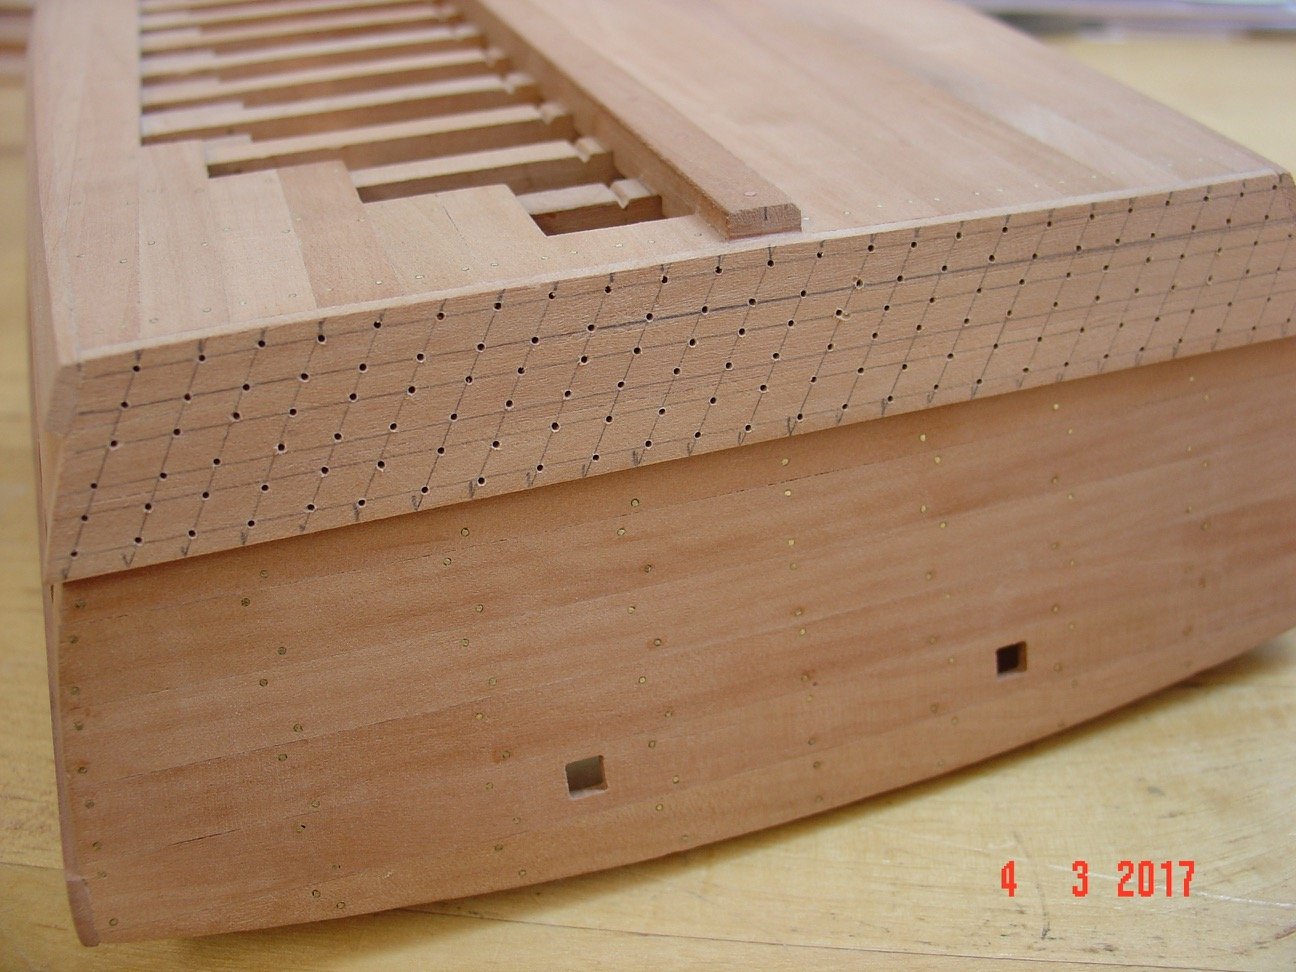
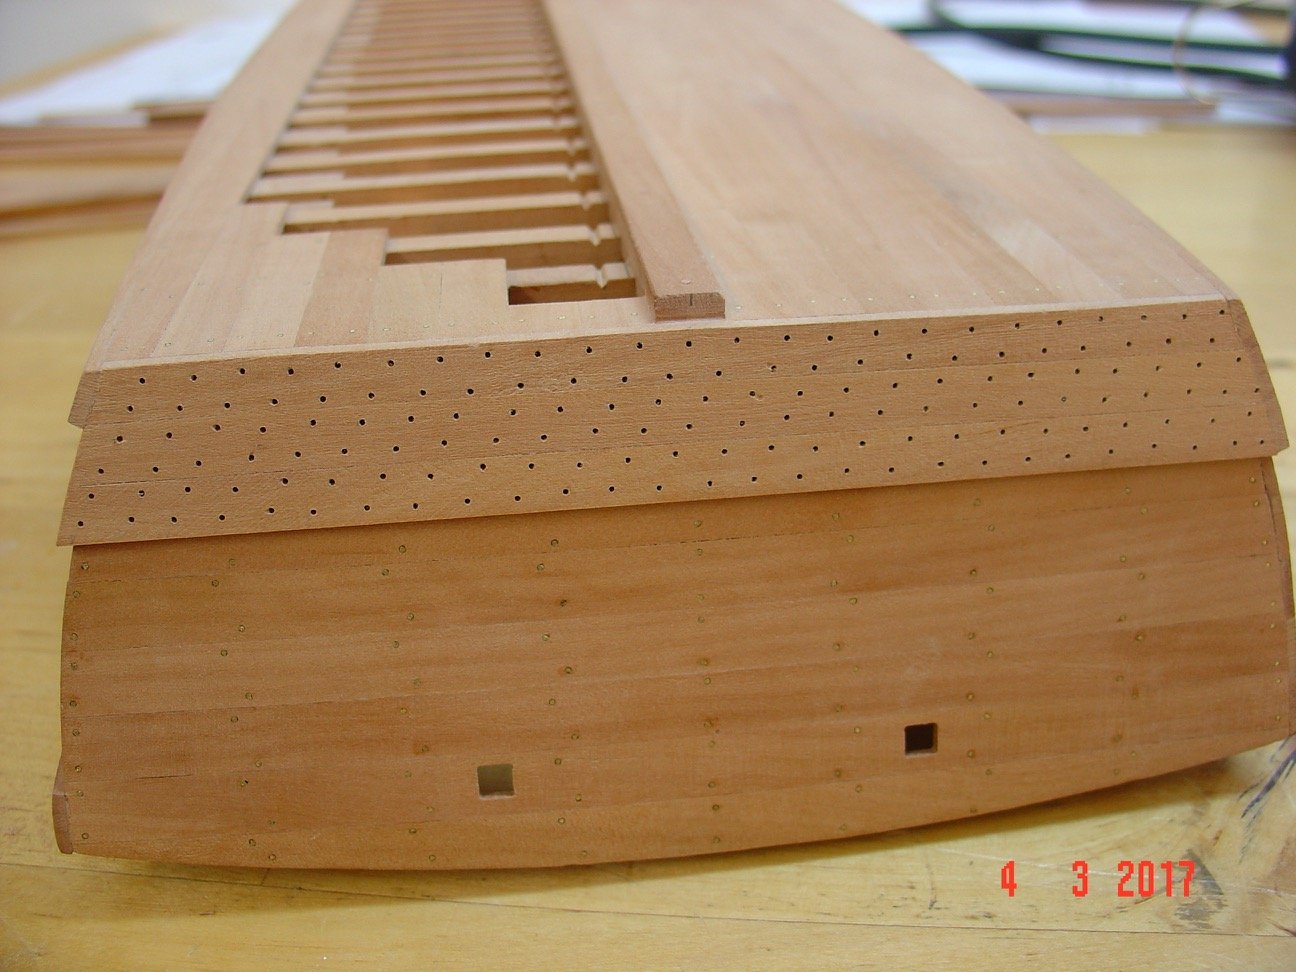
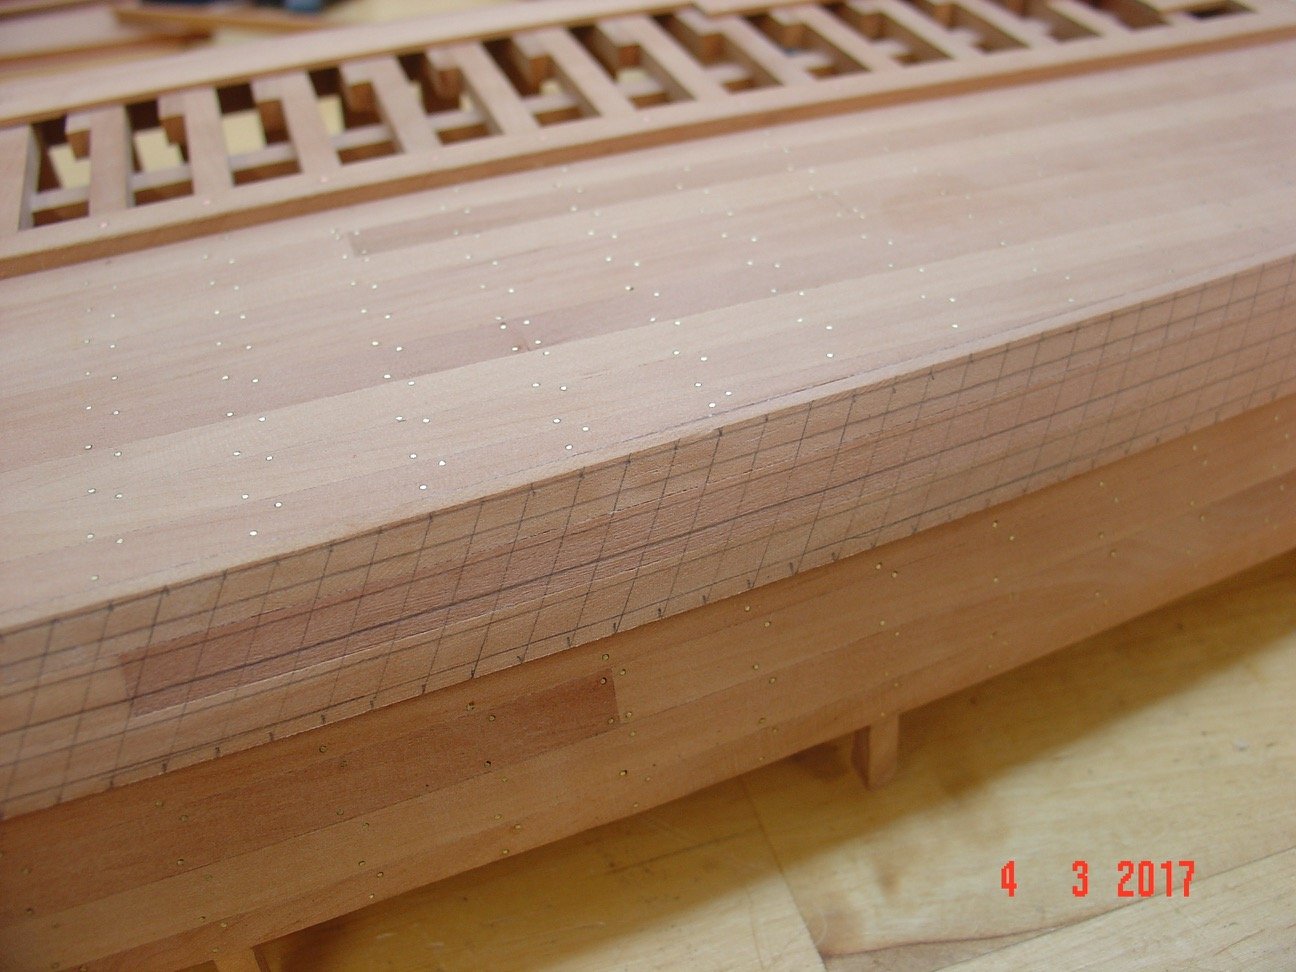
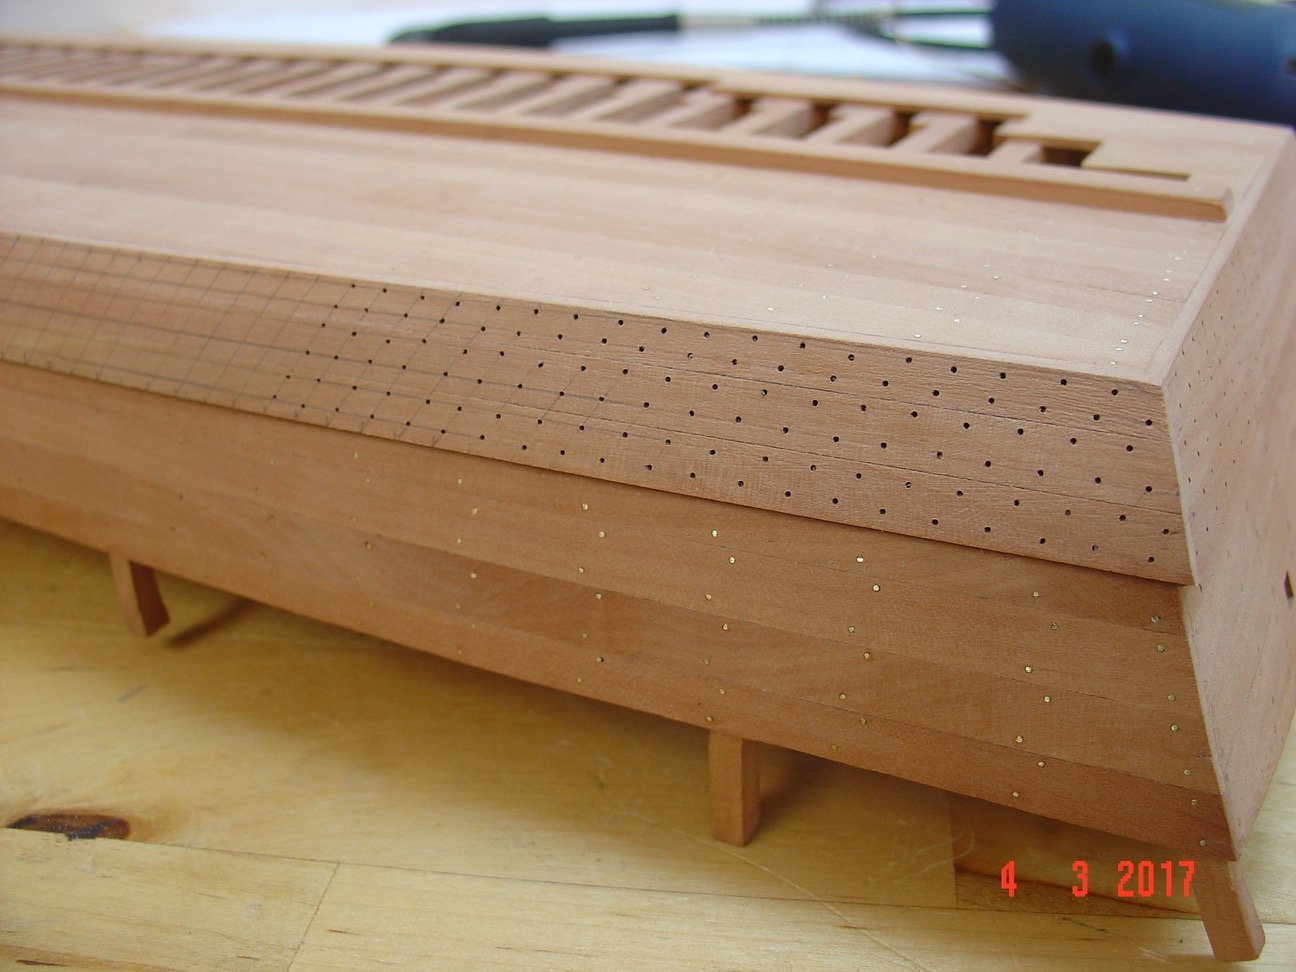
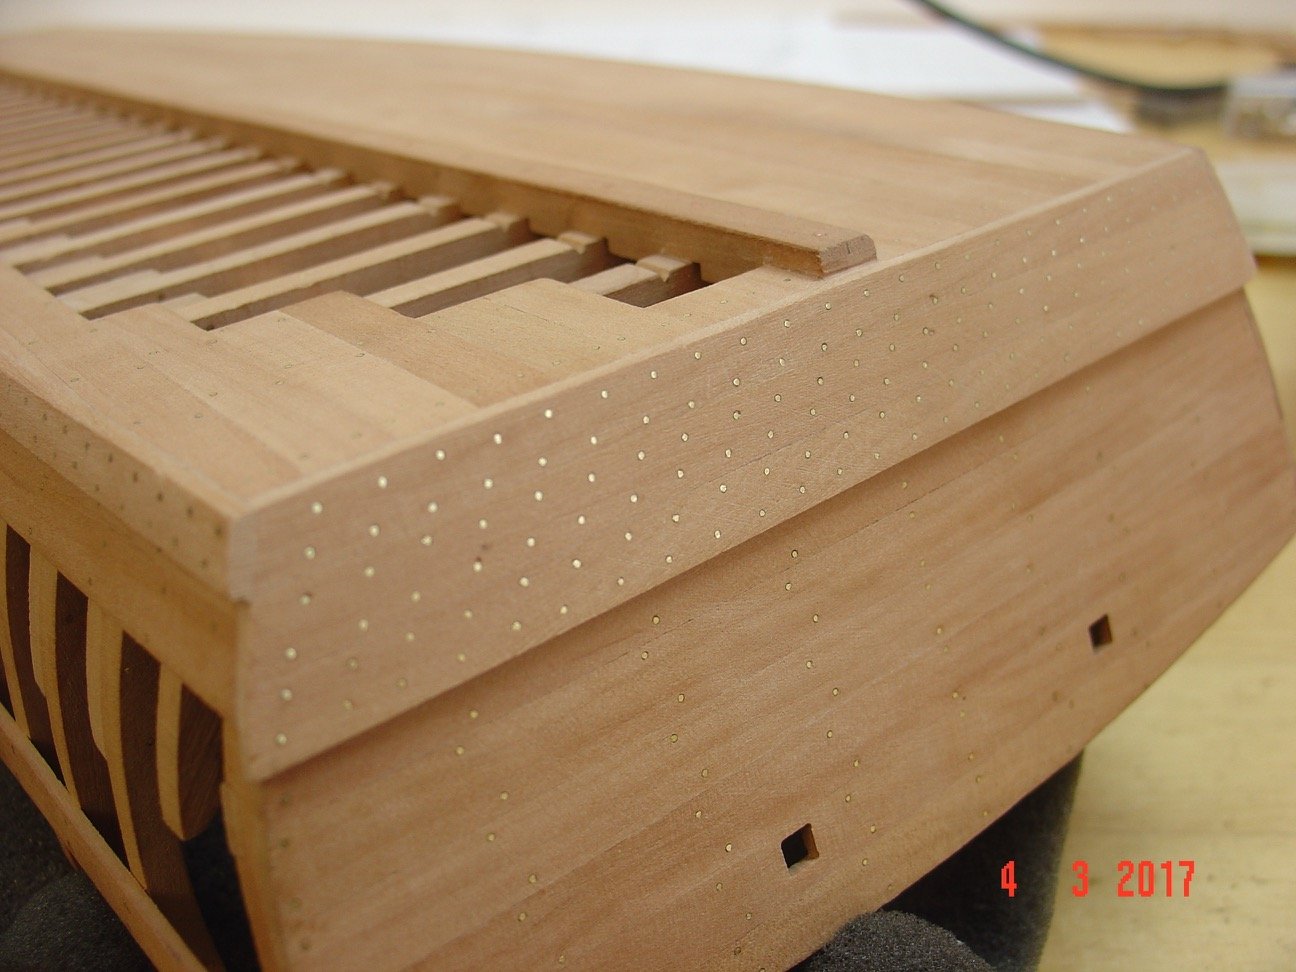
Another update on the construction progress. The hull is done now: keel installed, exterior planked and nailed. I started working inside it.
Alexandru


- giampieroricci, druxey, mtaylor and 23 others
-
26
-
-
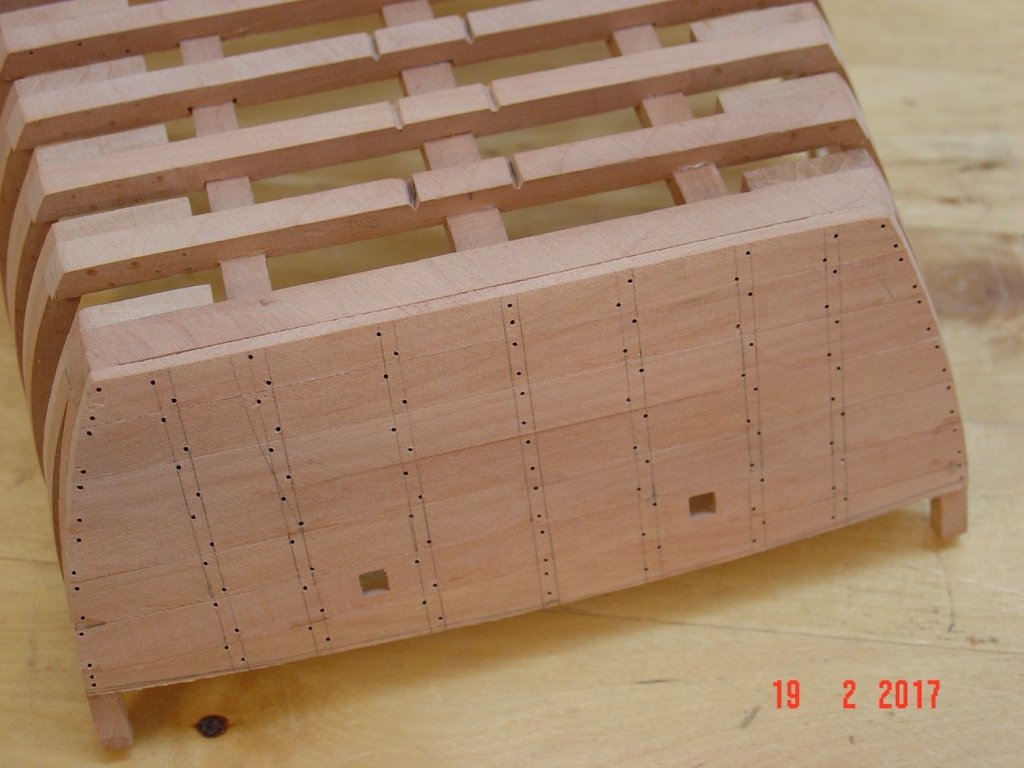
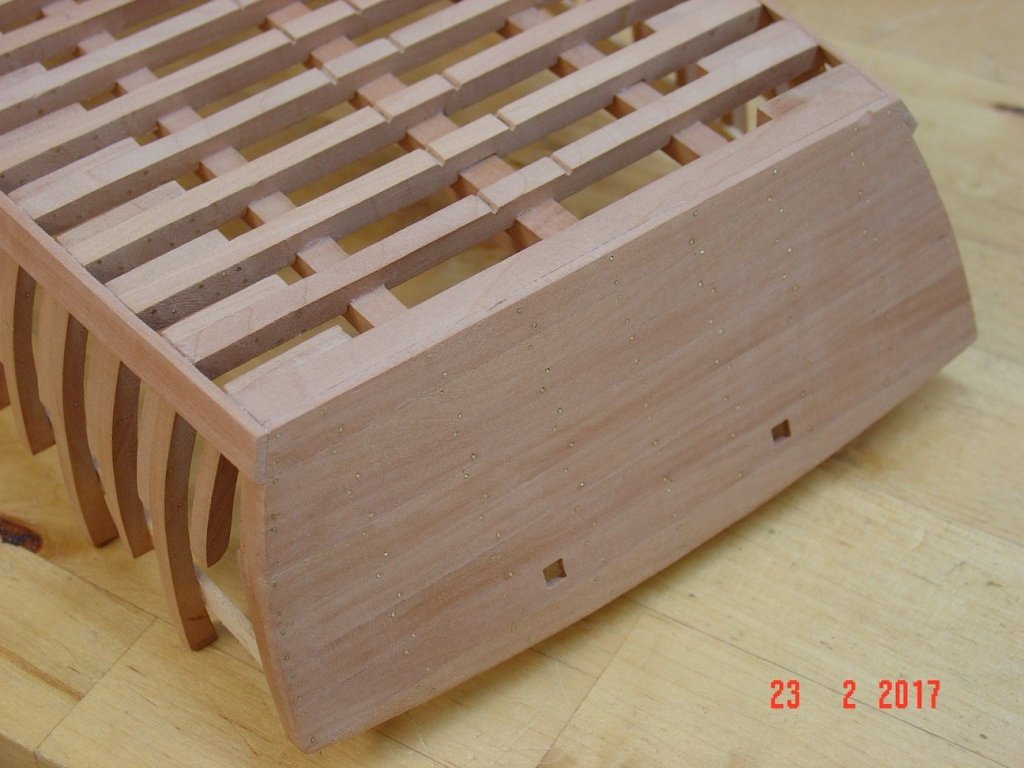
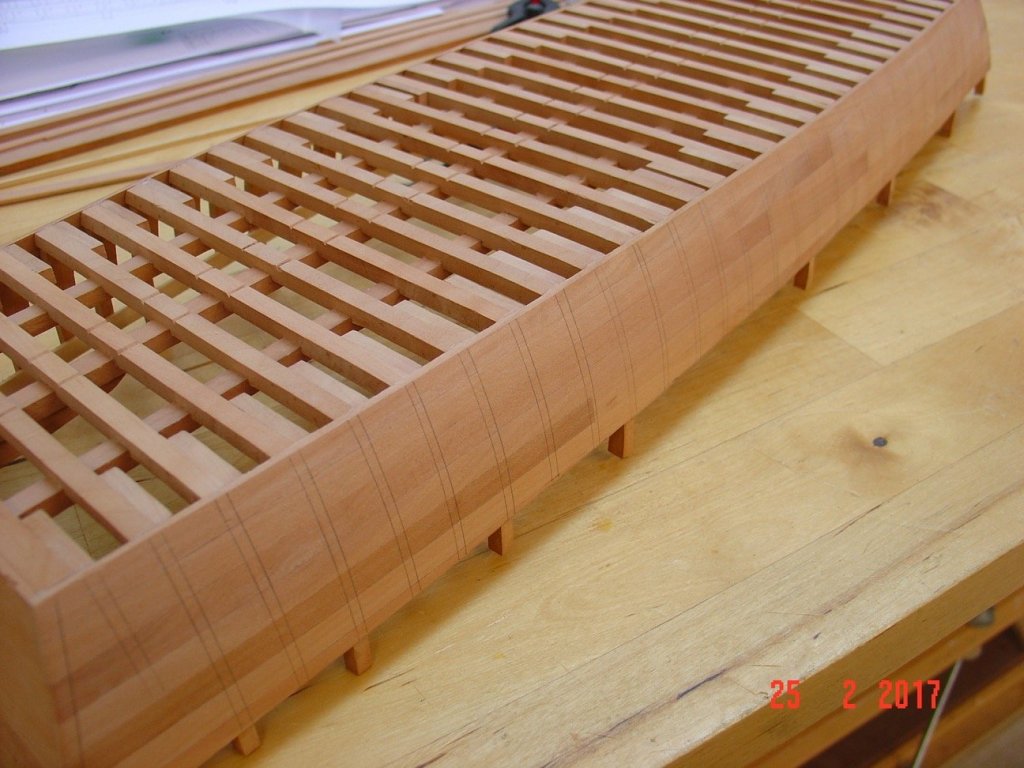
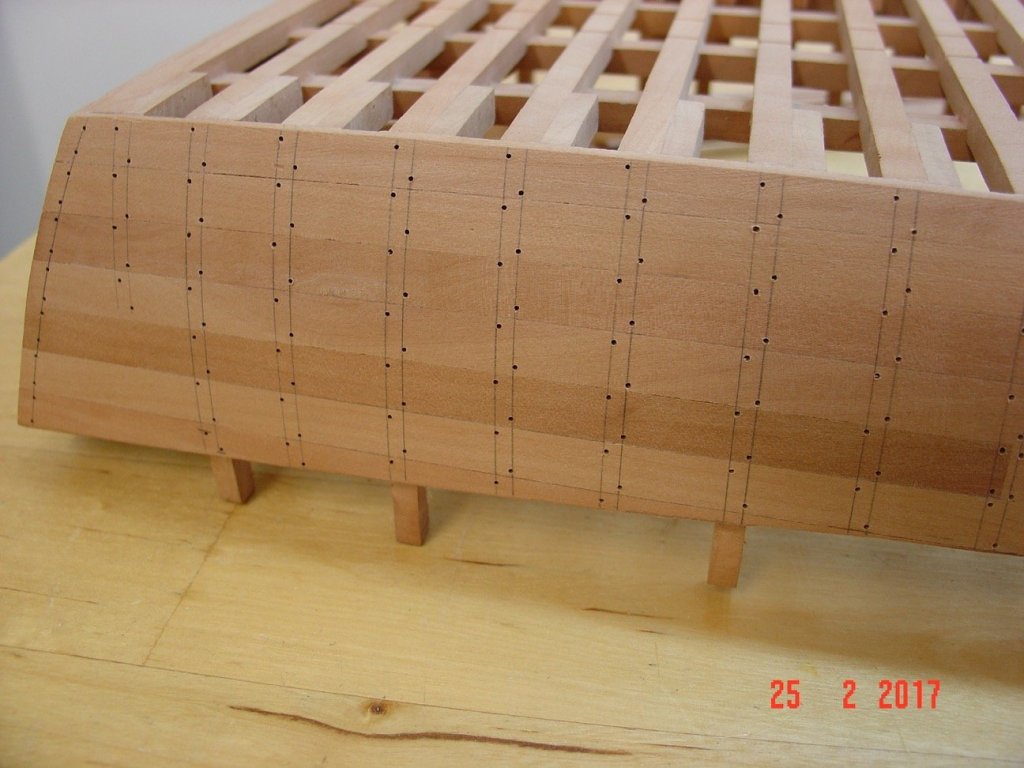
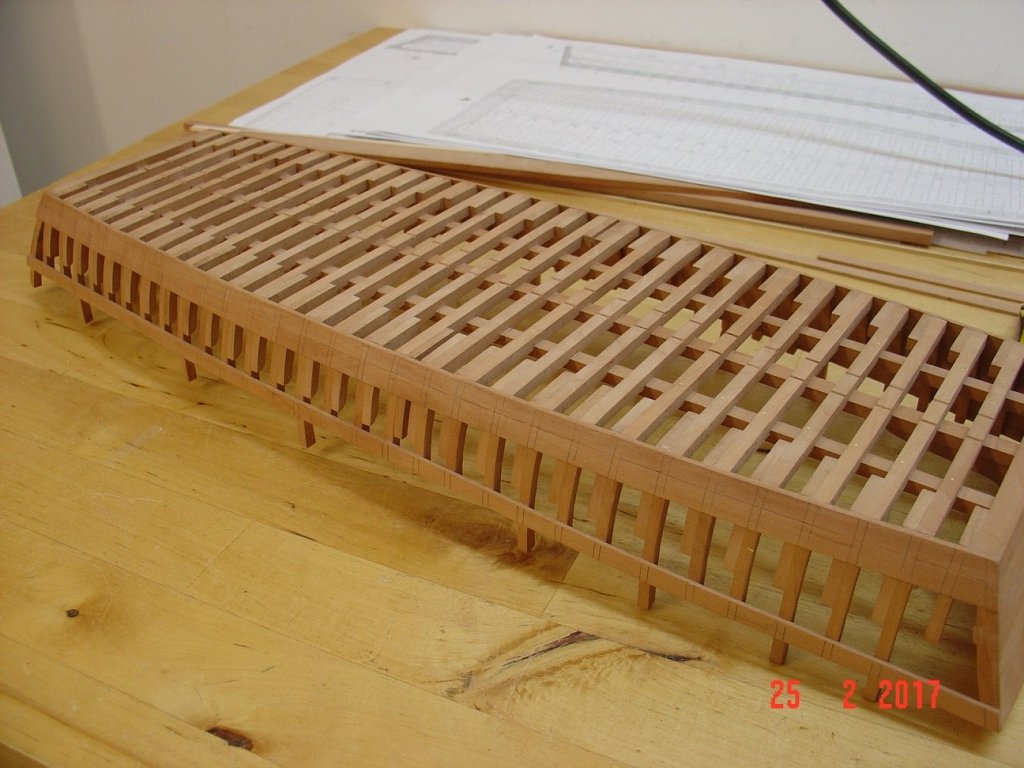
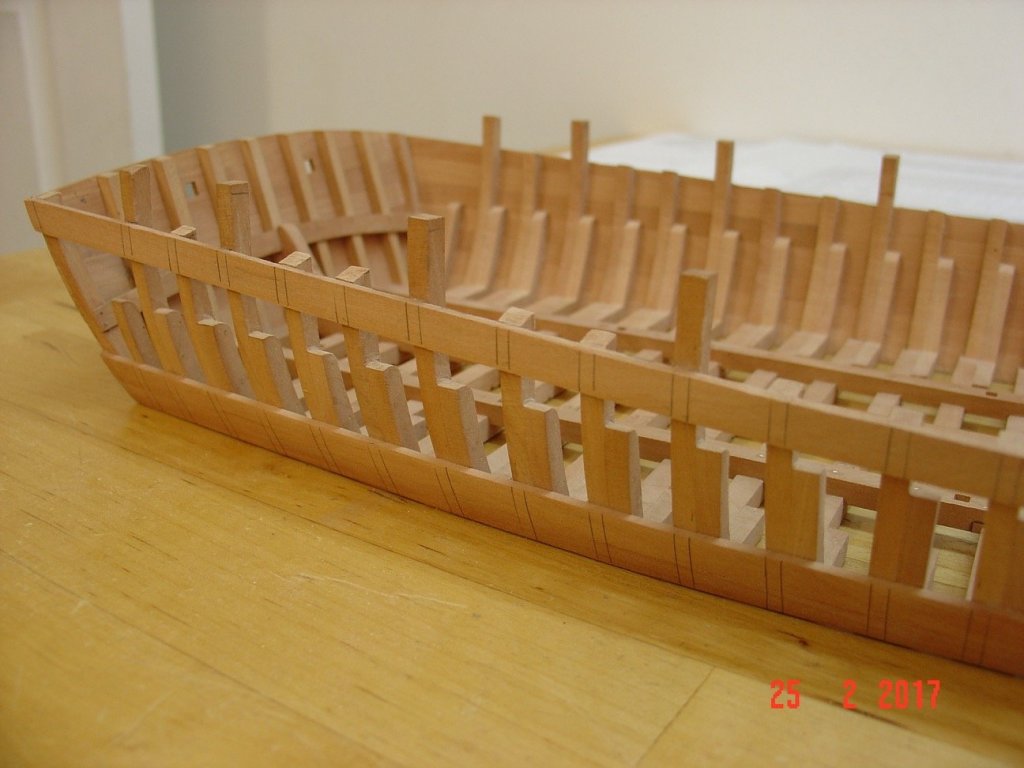
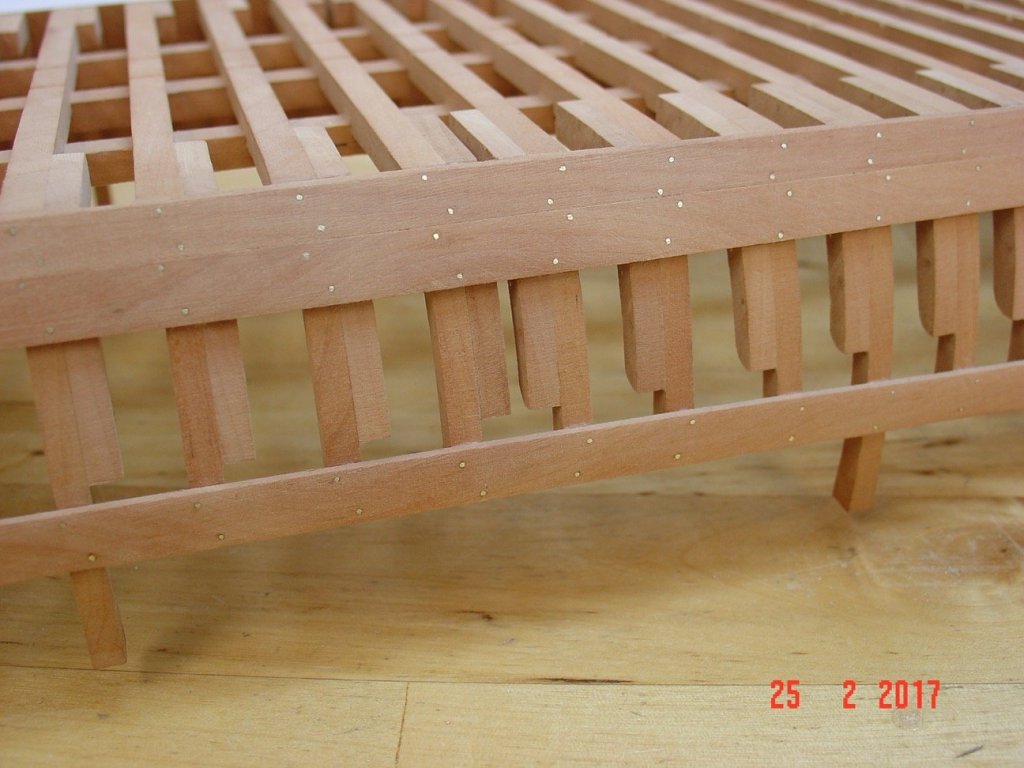
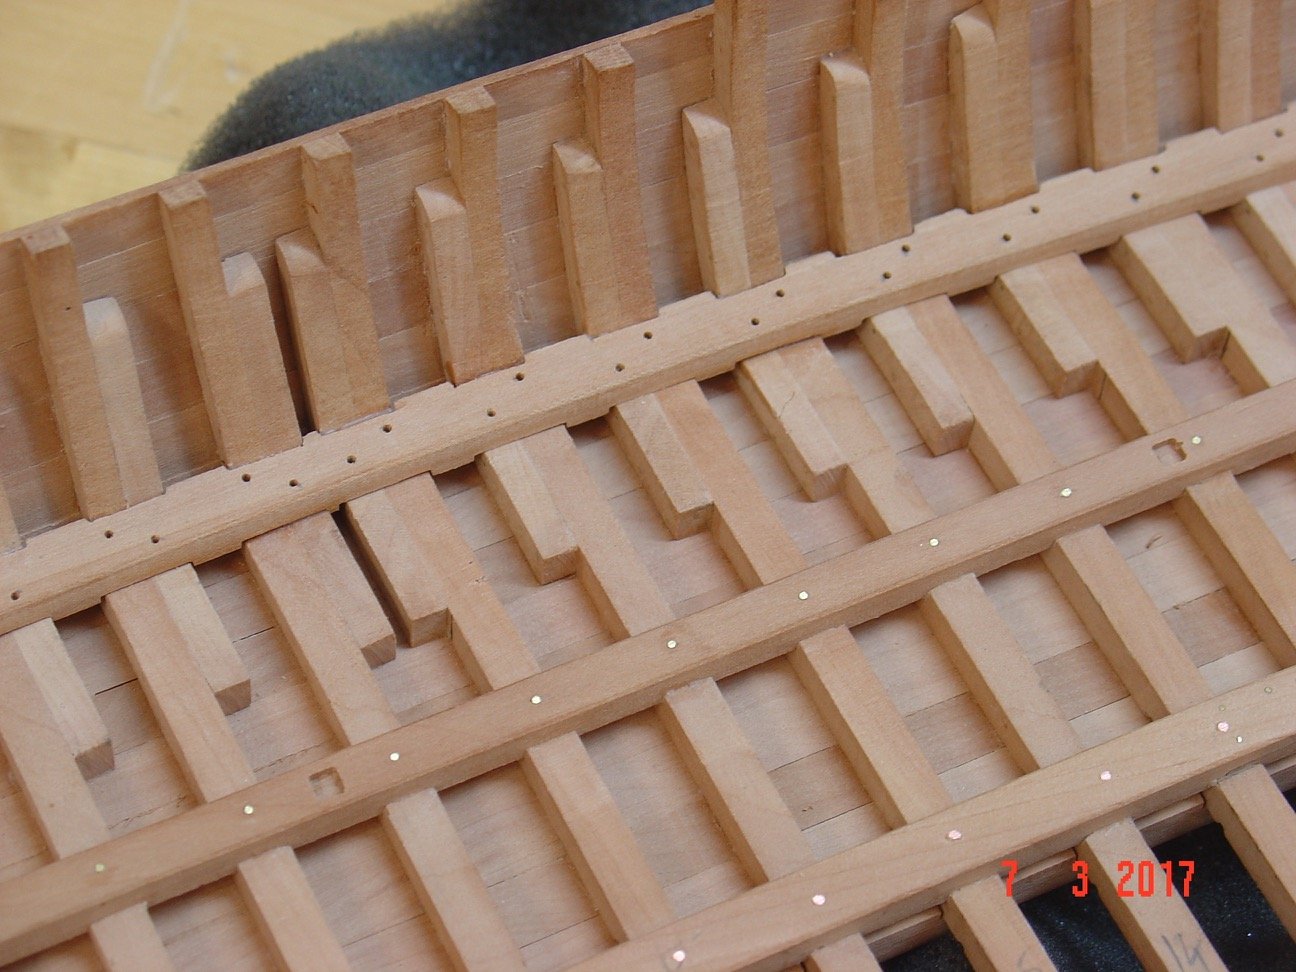
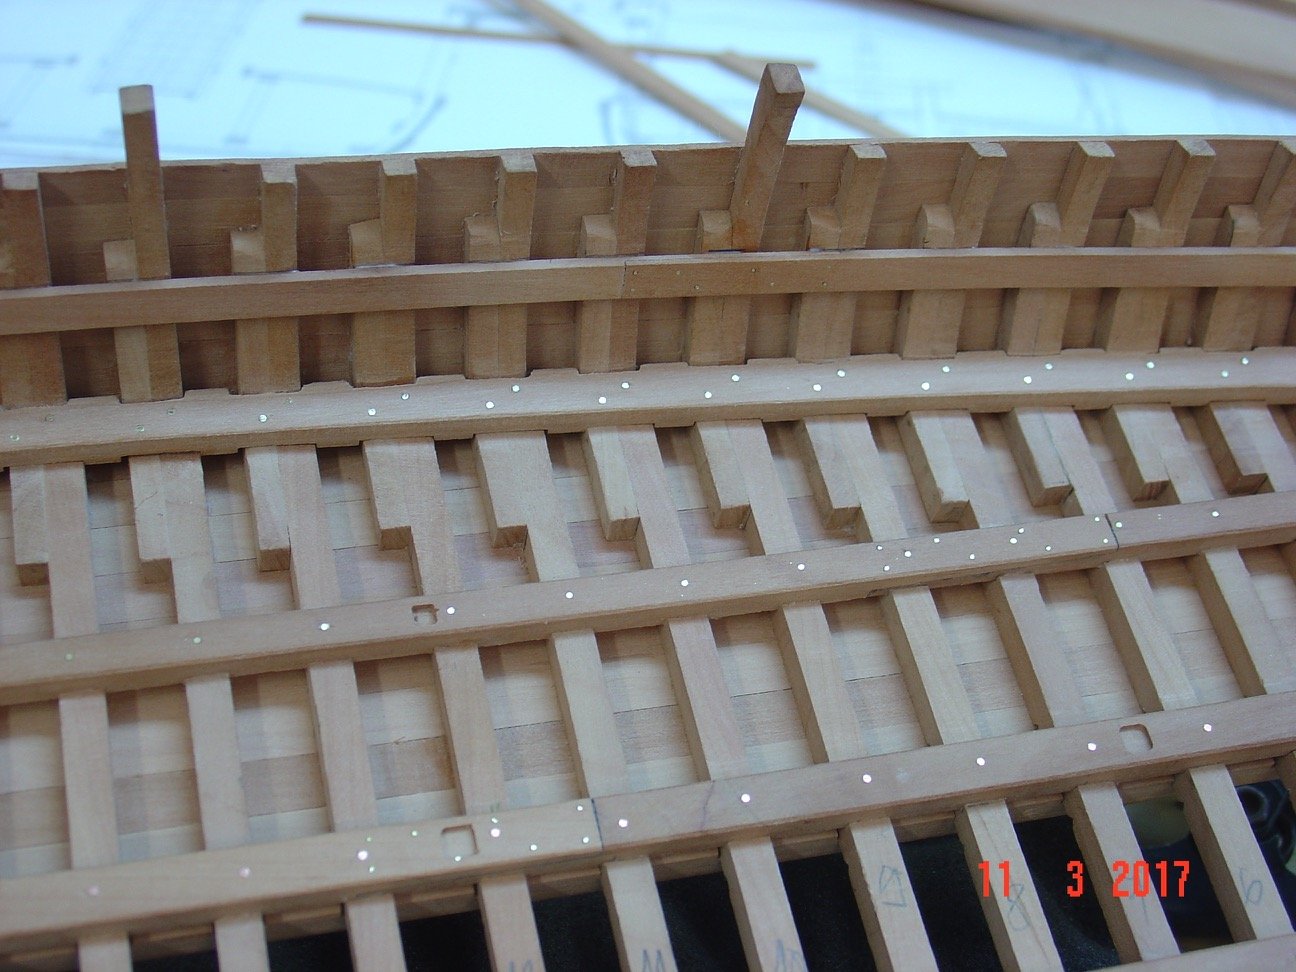
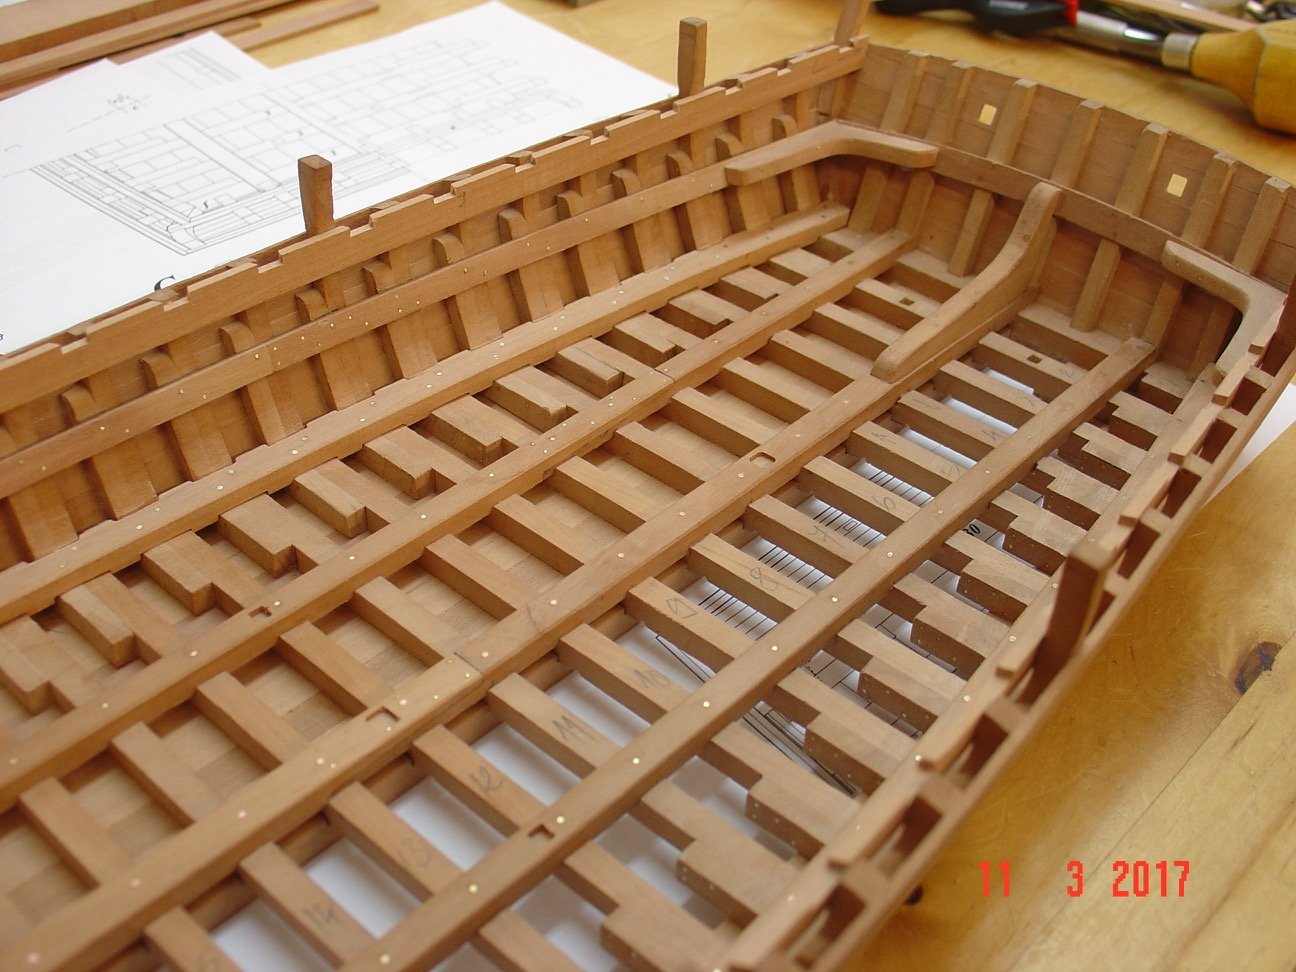
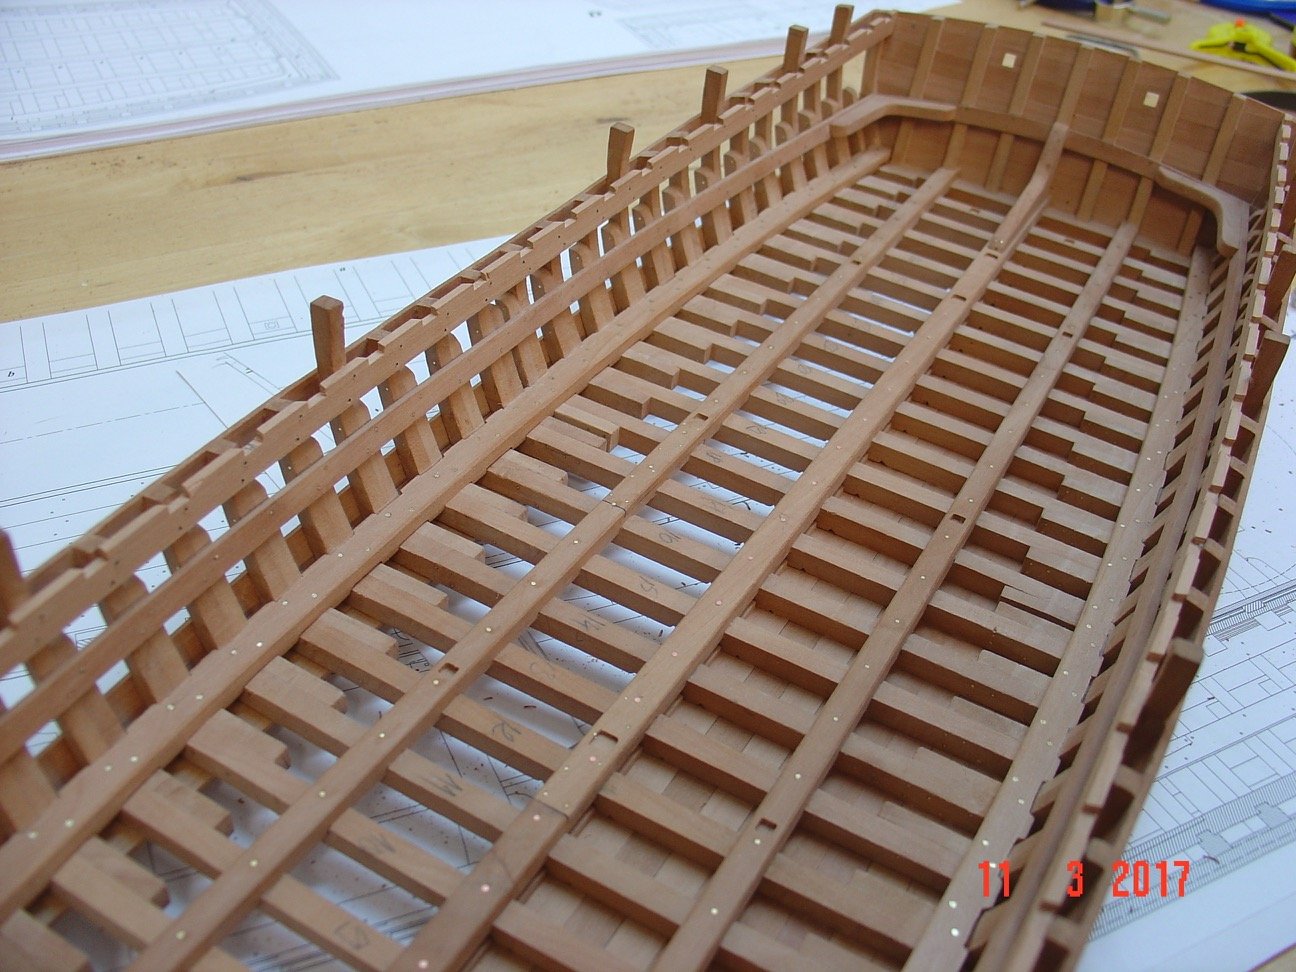
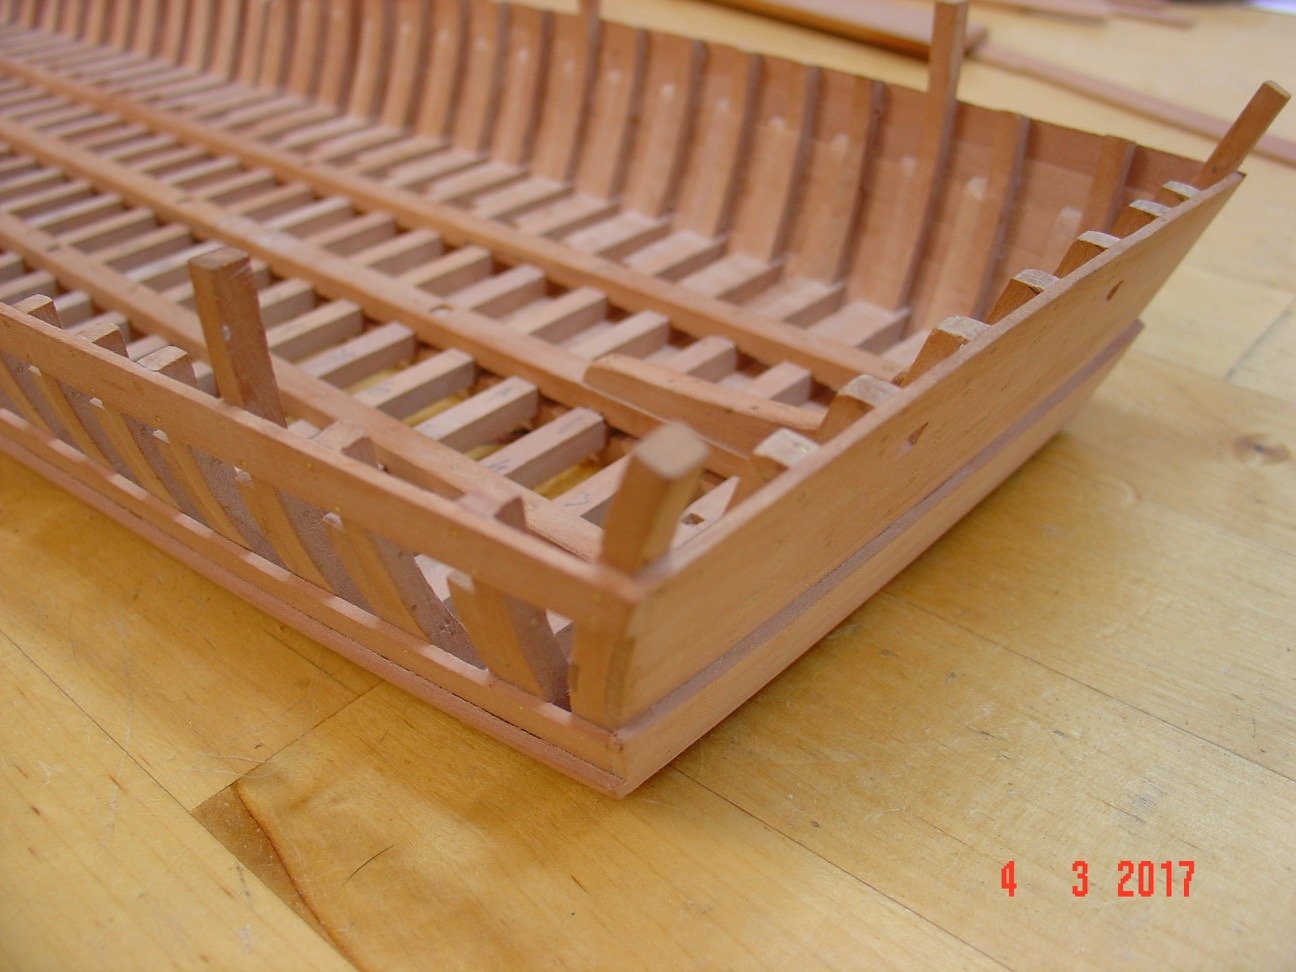
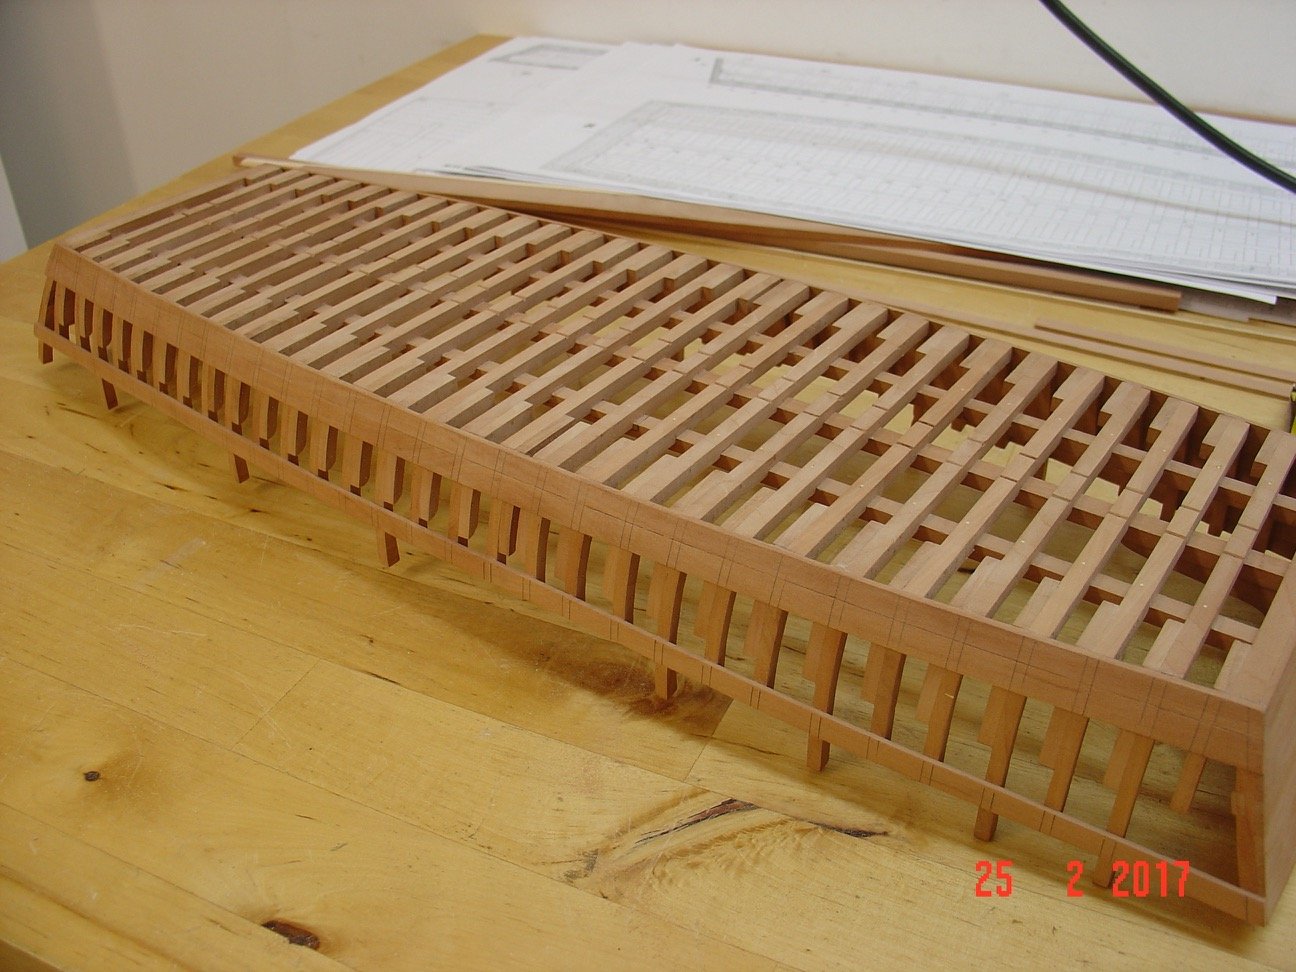
Hello,
Yes Druxey these things were human powered from the start well into the steam engine era.
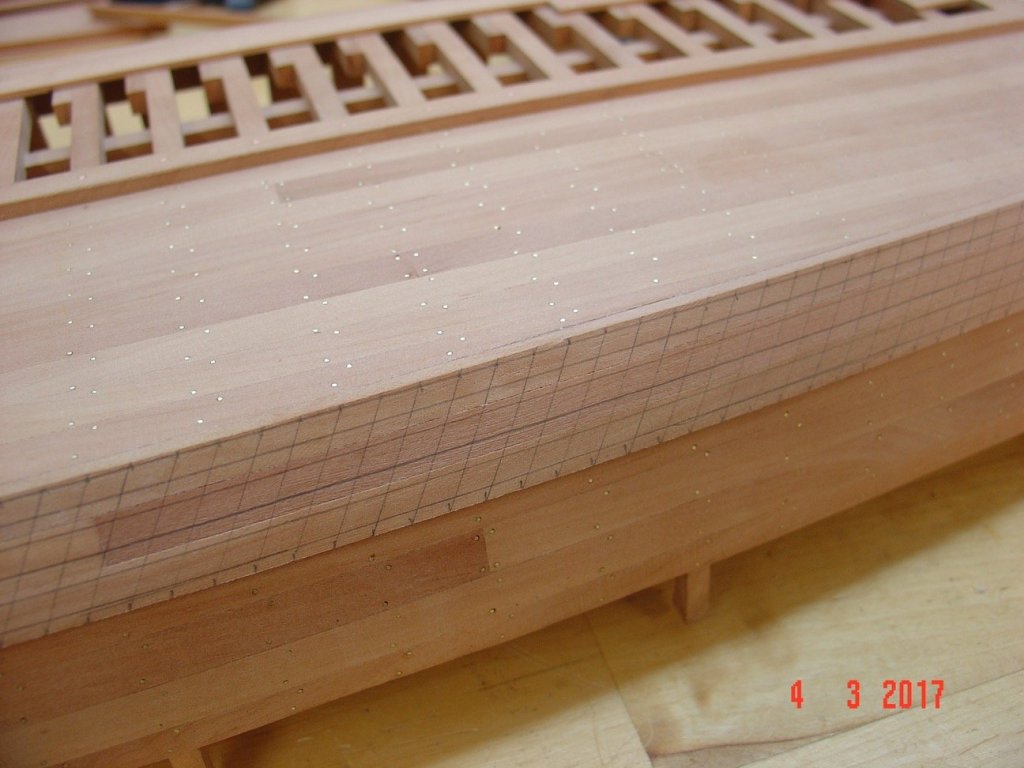
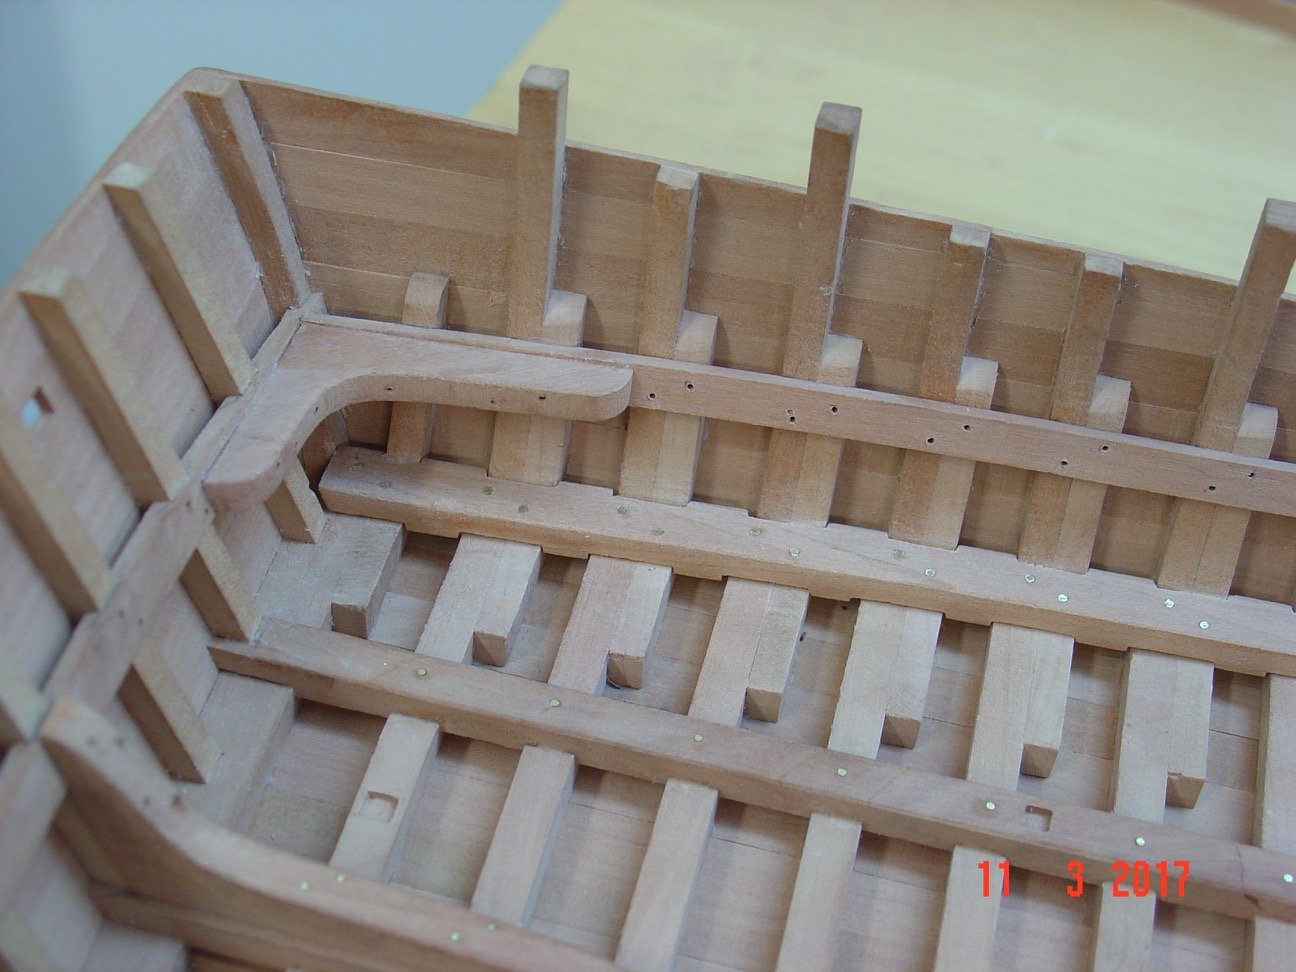
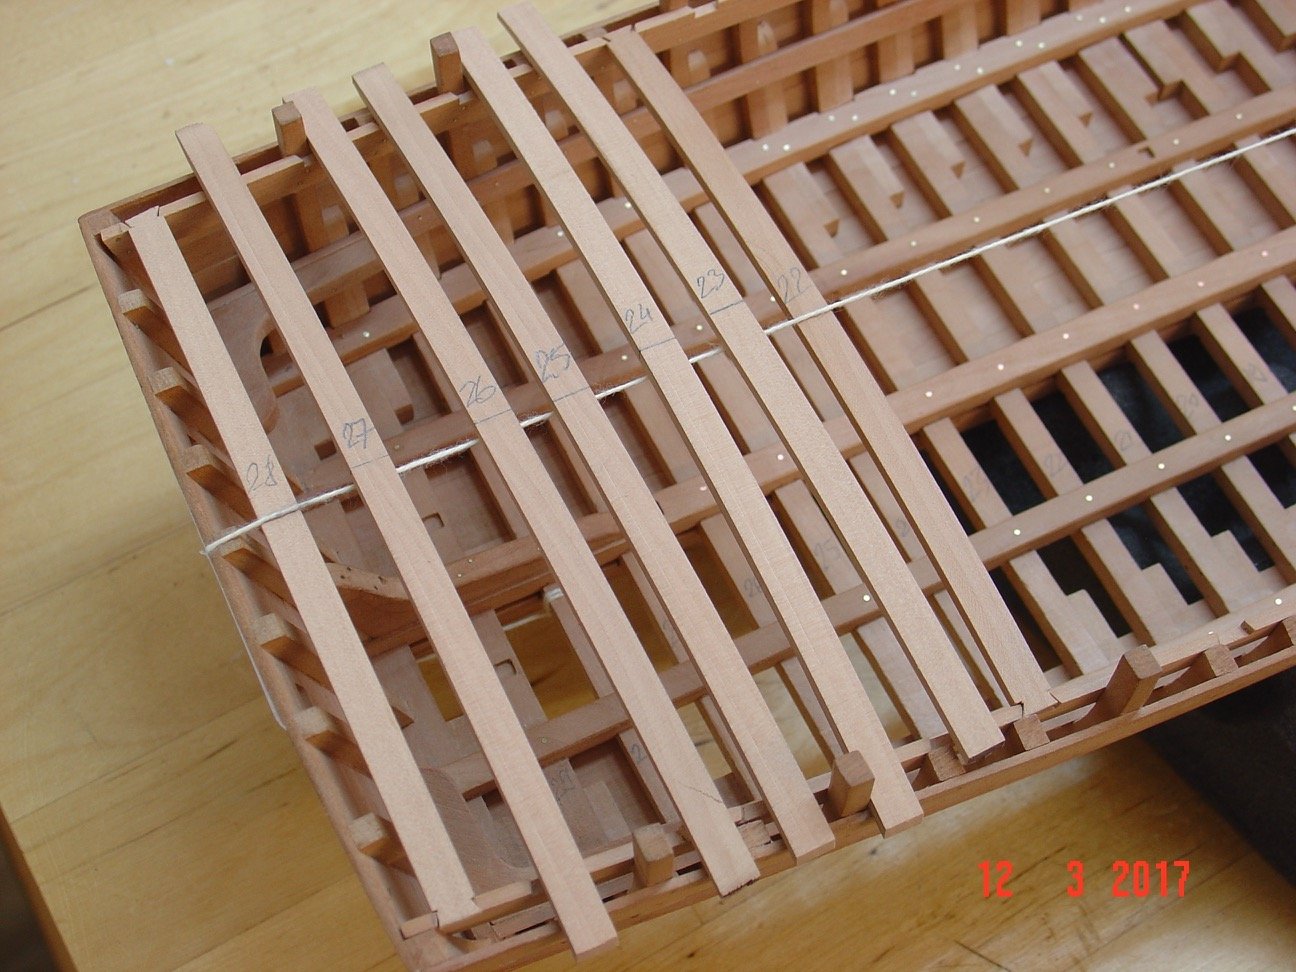
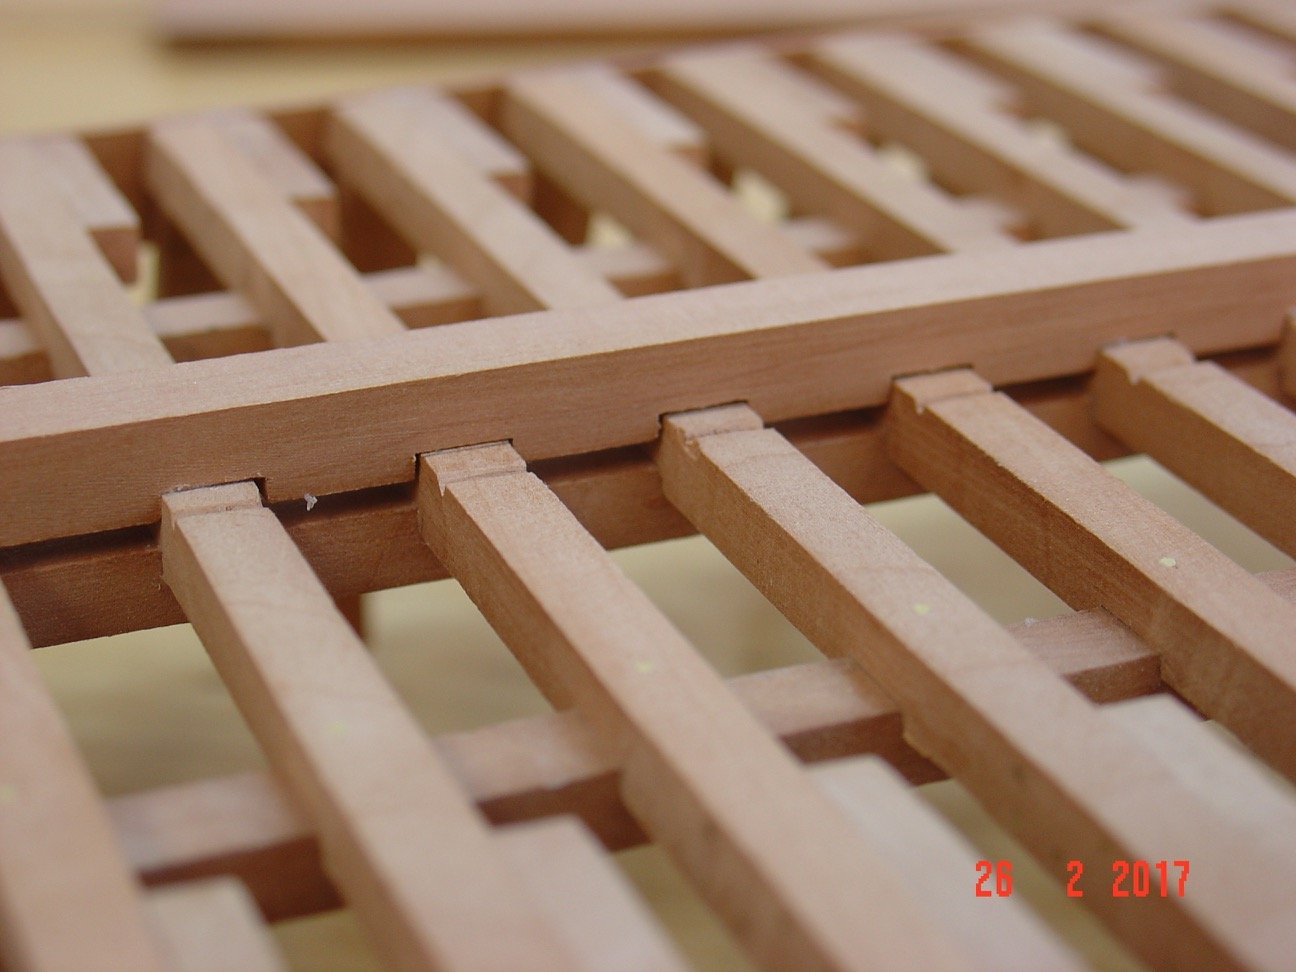
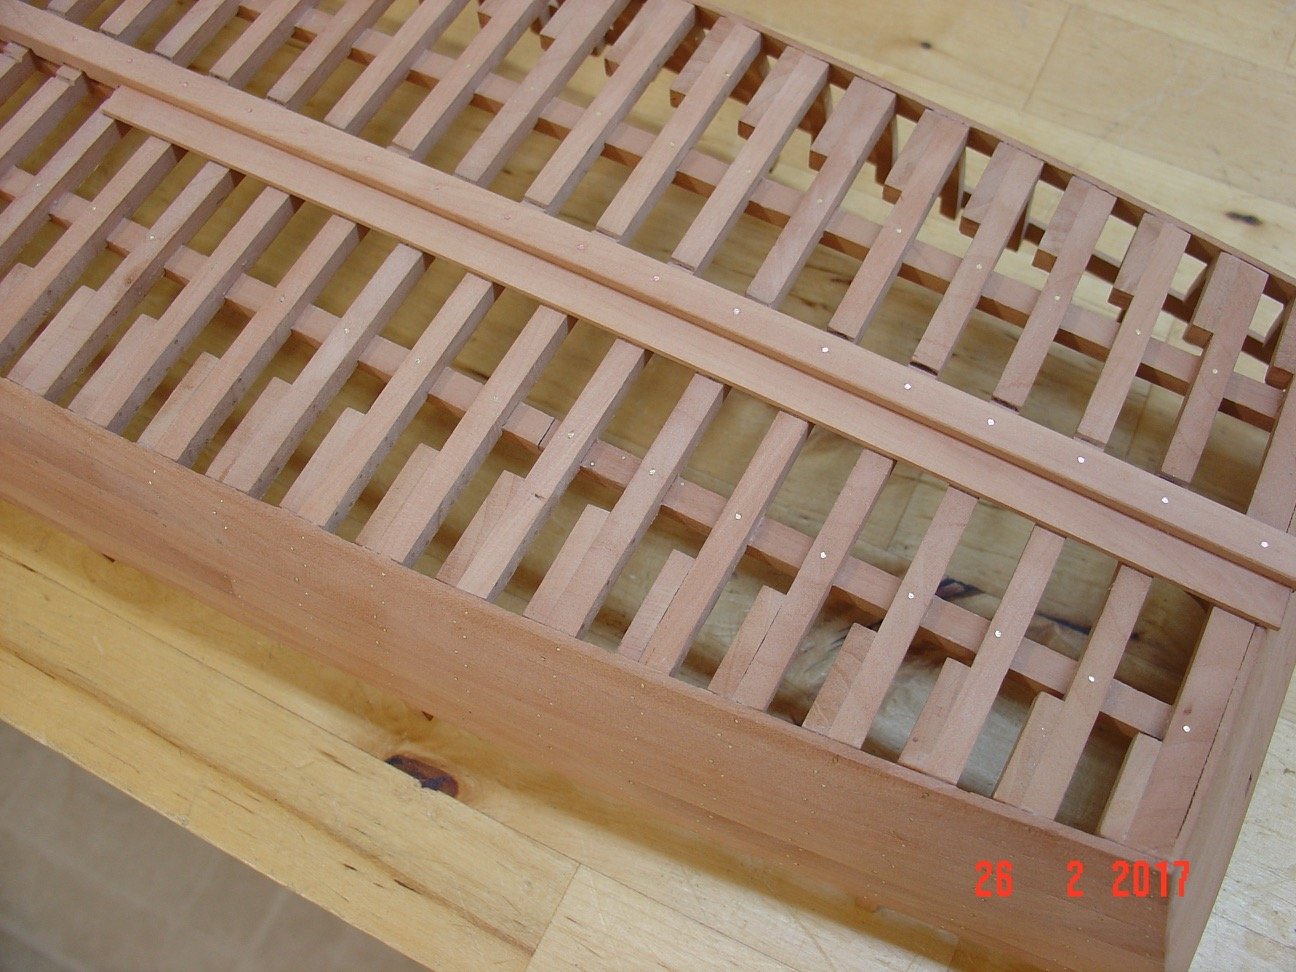
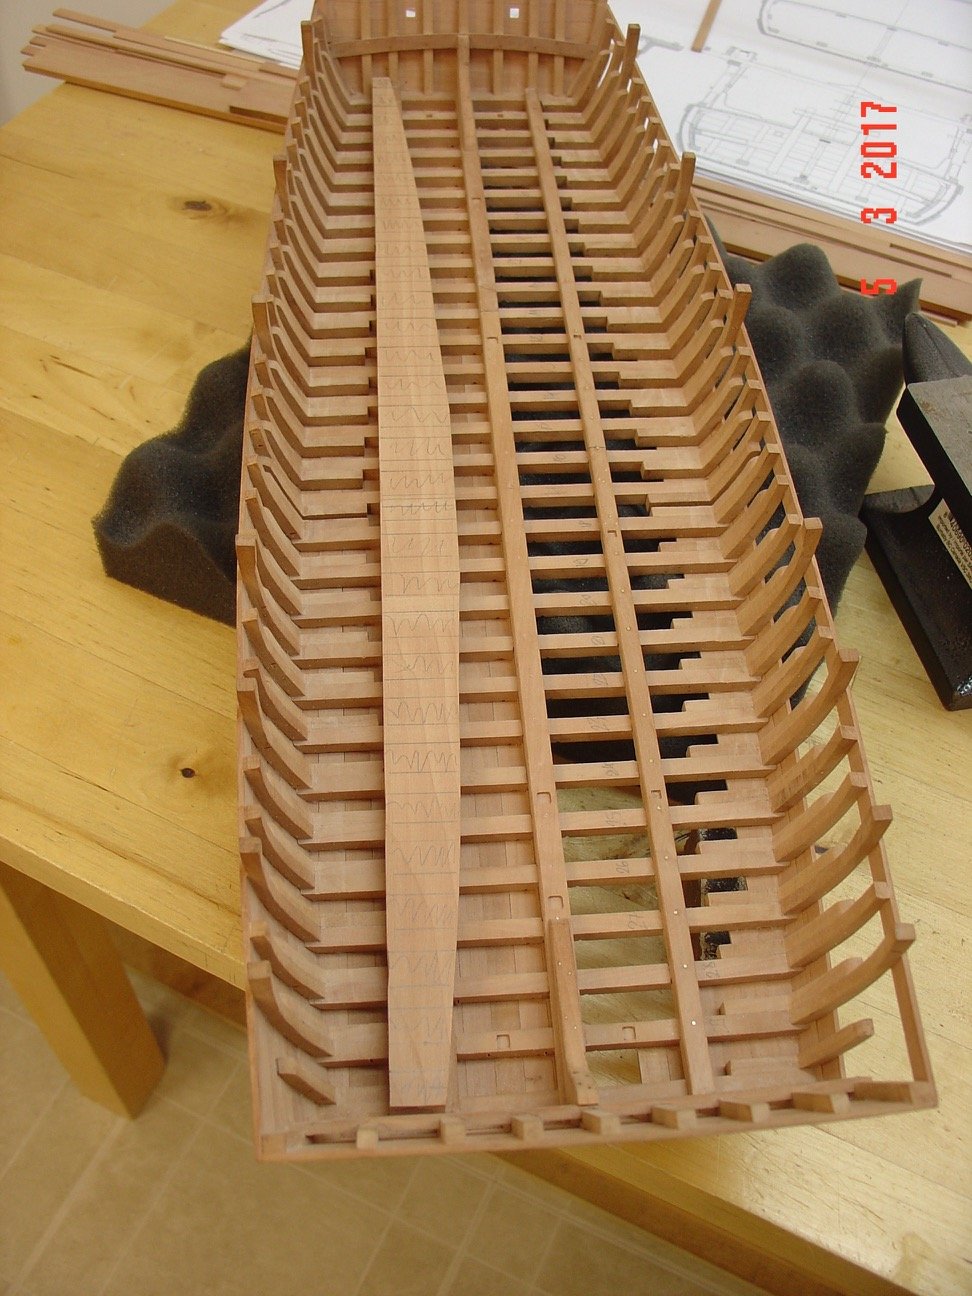
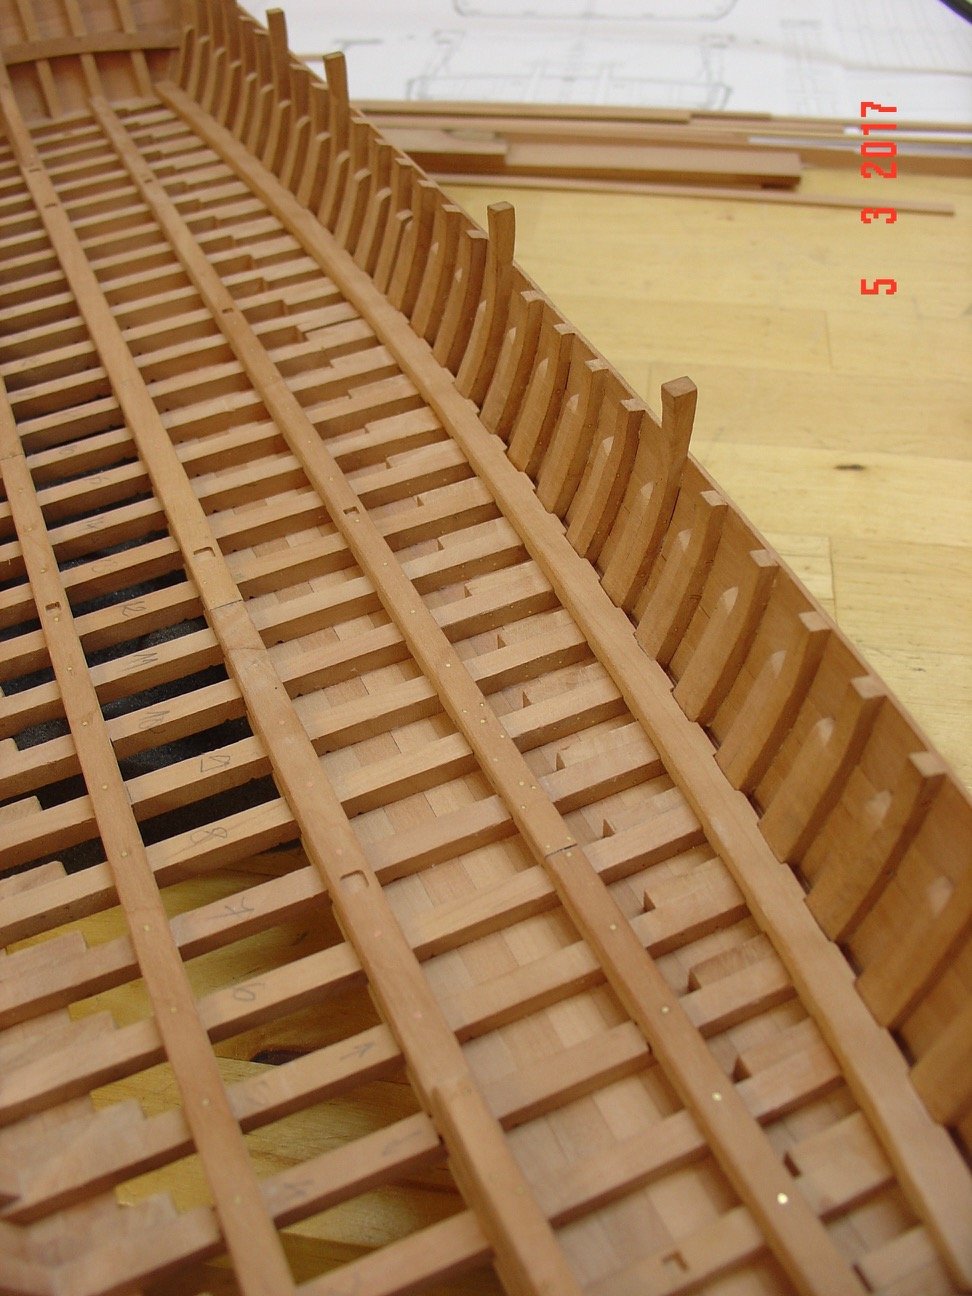
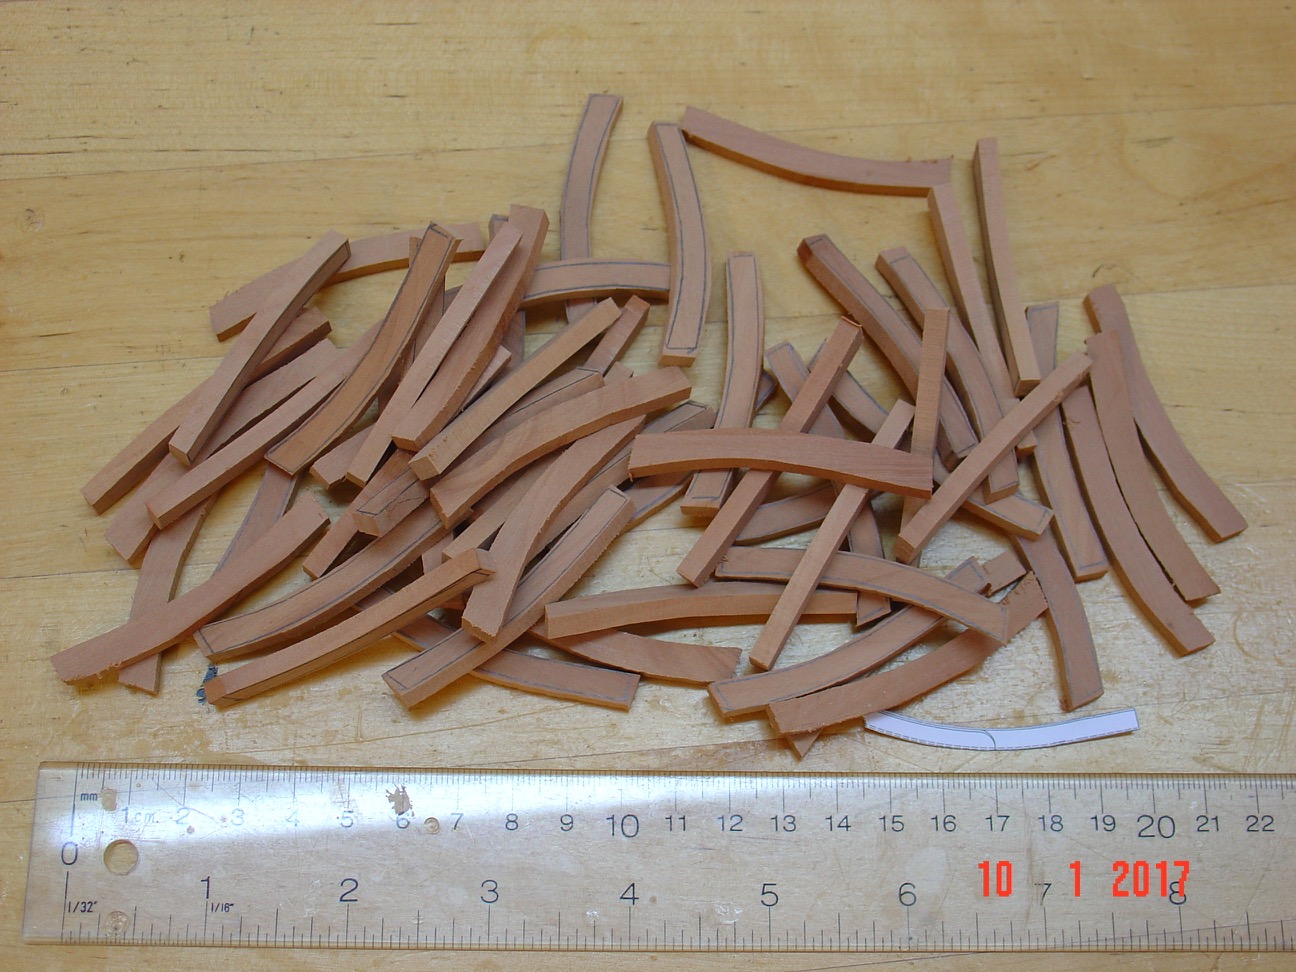
Here are some more progress pictures. I started the bow and stern planking then I went to the side planking. On one side I will let an opening in the side planking. I had to add a couple of temporary longitudinal stiffeners until the side planking was fixed as the model was starting to hog. The stiffeners are now removed so I can fair the inside before installing the deck clamps and other permanent longitudinal pieces. I will also plank the bottom on the outside but again I will let some opening on one side.
On a different note - I just noticed the forum site face lift and it took me a bit to figure it out but works better than the old one. GREAT JOB web admins!
Alexandru


- Seventynet, Mike Y, dvm27 and 17 others
-
20
-
Nils,
I think it was more than important to keep the ports clean - it was mandatory. And it started a lot earlier. The author of the monograph - Gerard Delacroix - is mentioning the port of Marseille (oldest port in France) which had a decline of activity in 3rd century because of this issue. First recorded port cleaning activities in this case are dating from 13th century and first vessel to actually have this name "machine a curer les ports" and do this job in France dates from 1632. This type of ship lasted a very long time without significant changes - human power driven - until as recent as 1870. There are a couple of actual photographs in the book.
Alexandru
- Mirabell61, thibaultron, mtaylor and 2 others
-
5
-
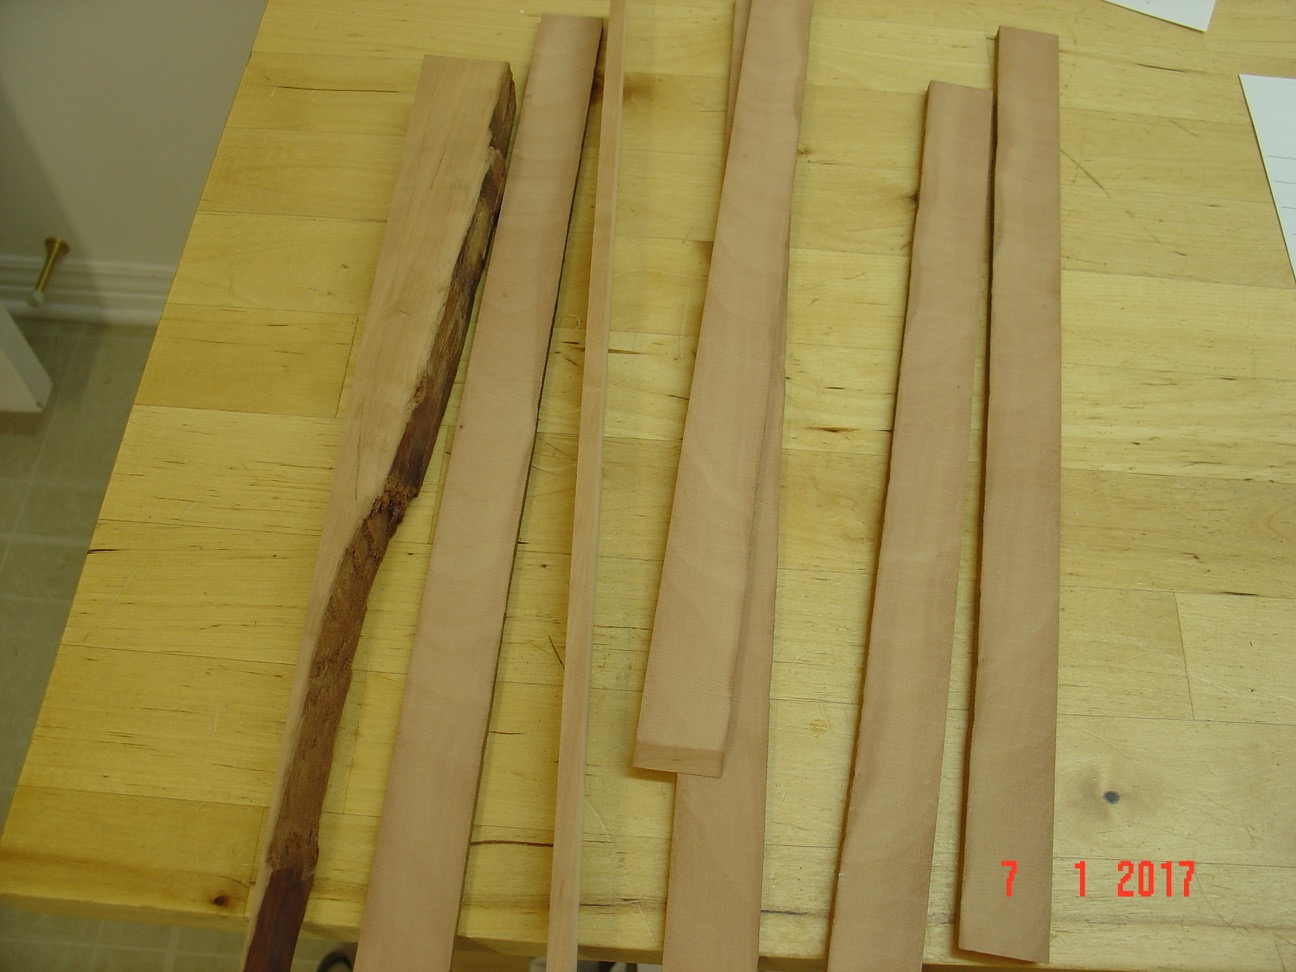
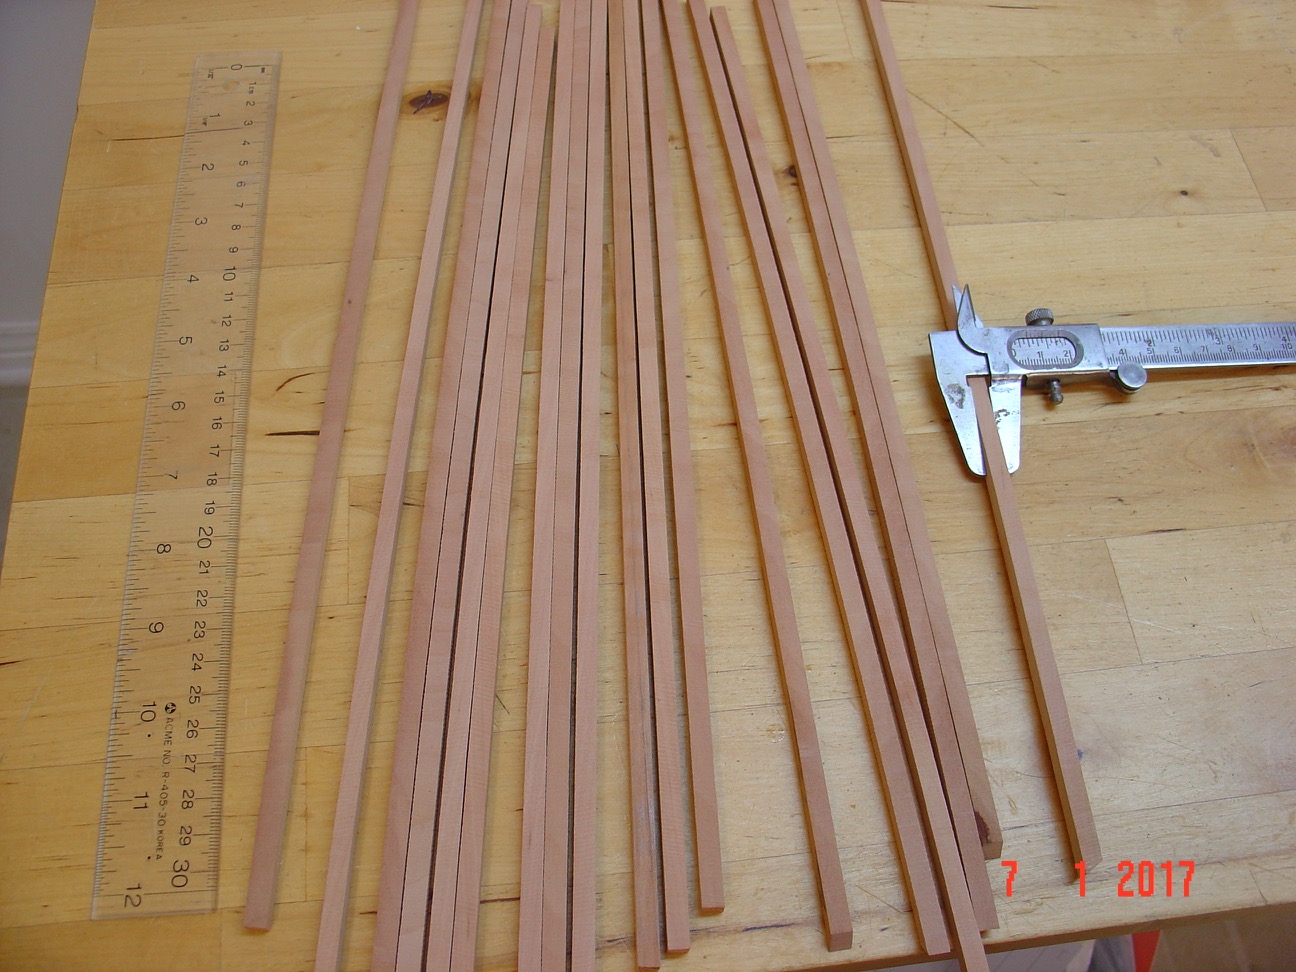
Jim,
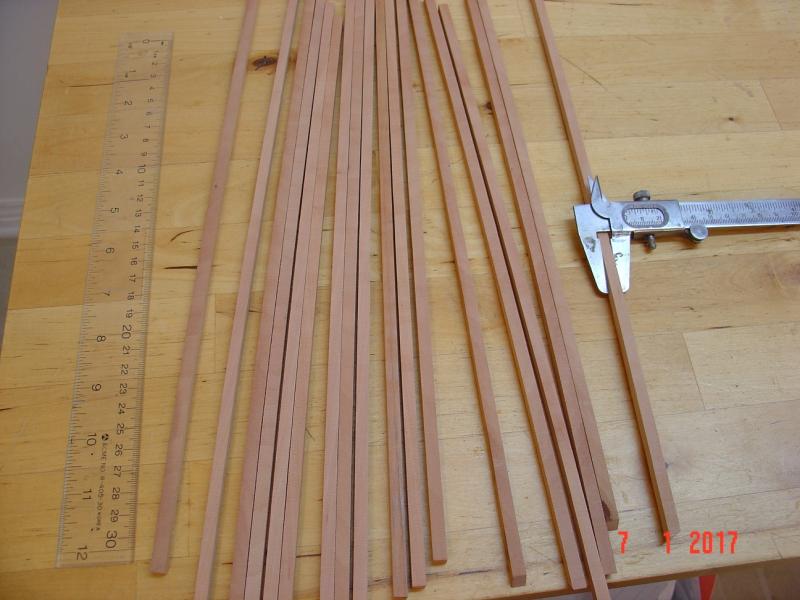
I am using pear wood.
Alexandru
- mtaylor, Eddie and thibaultron
-
3
-
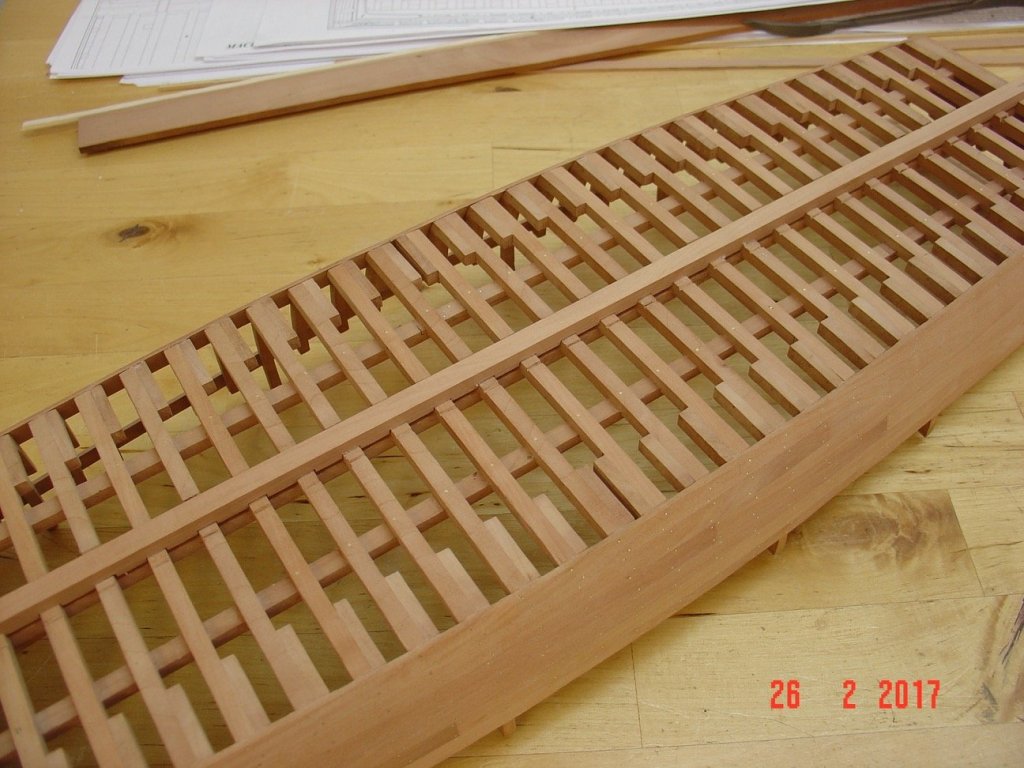
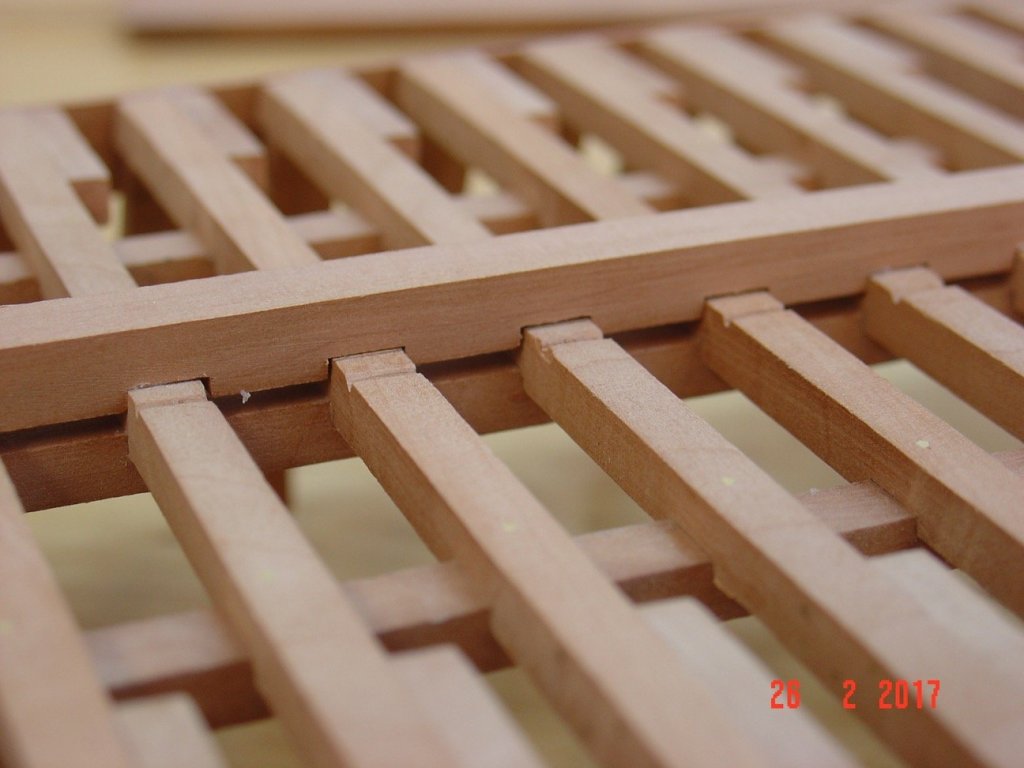
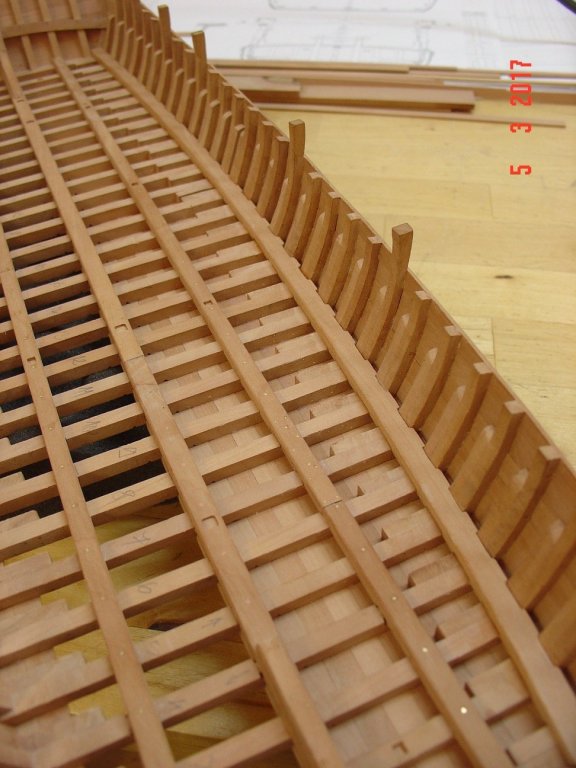
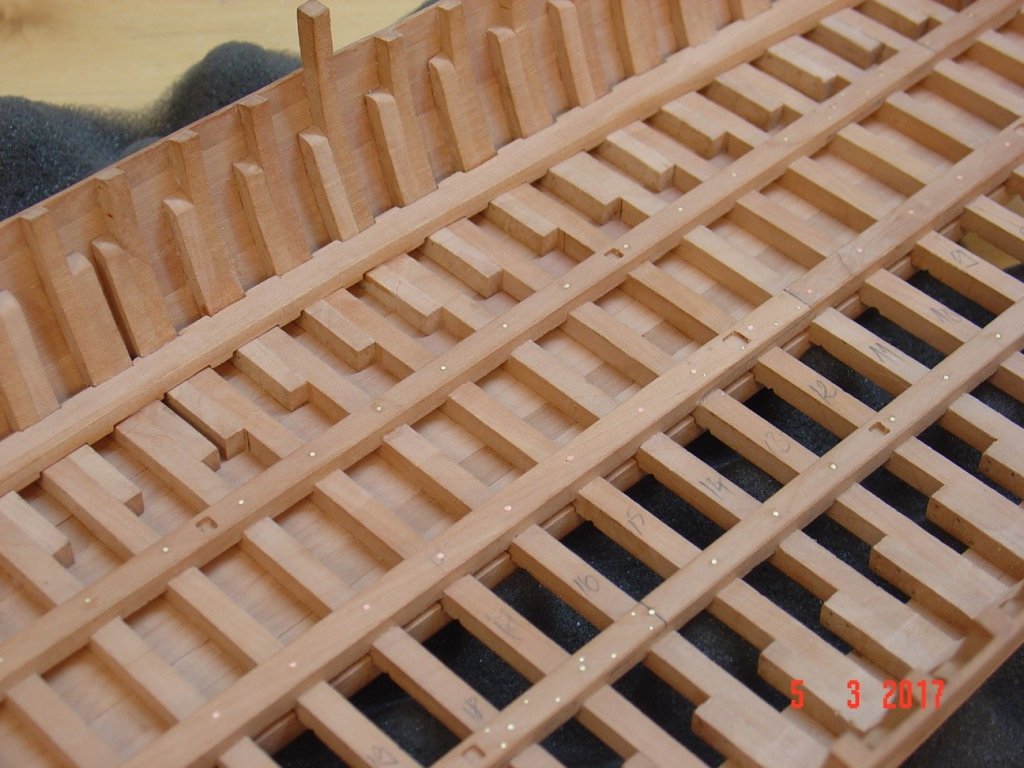
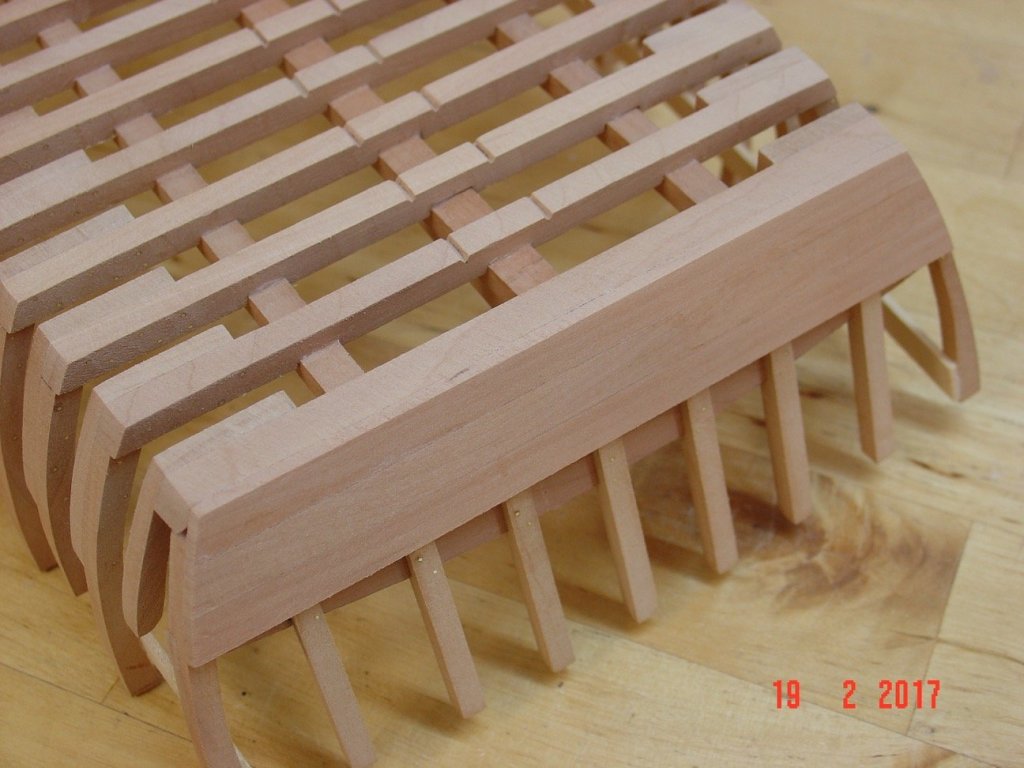
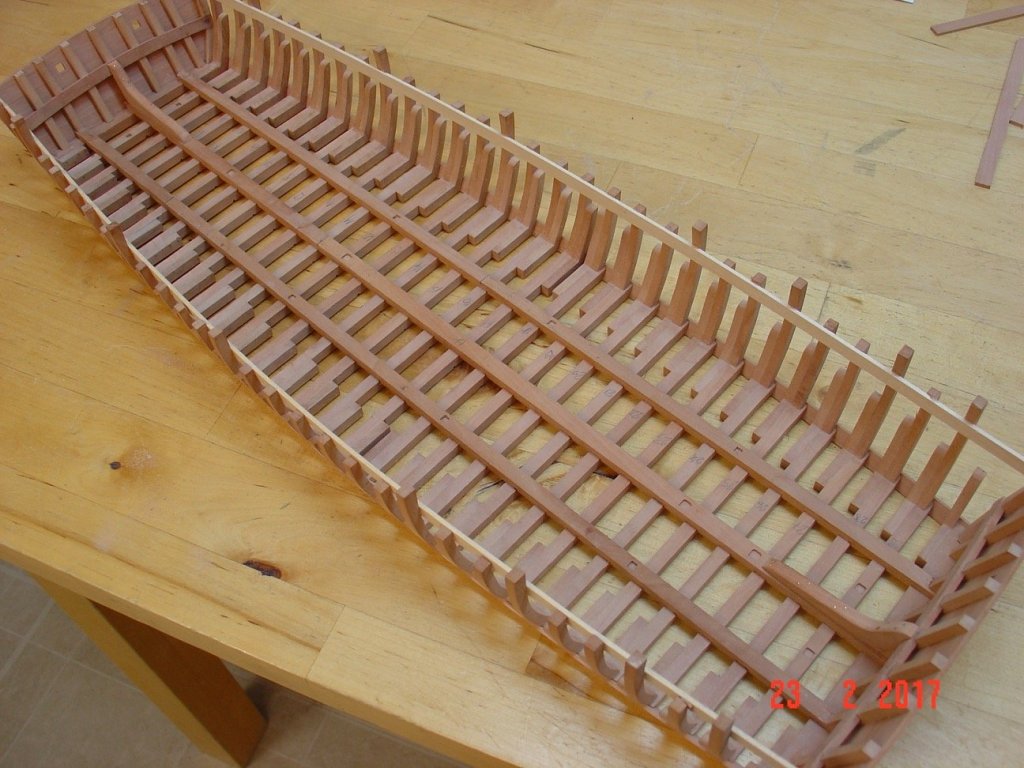
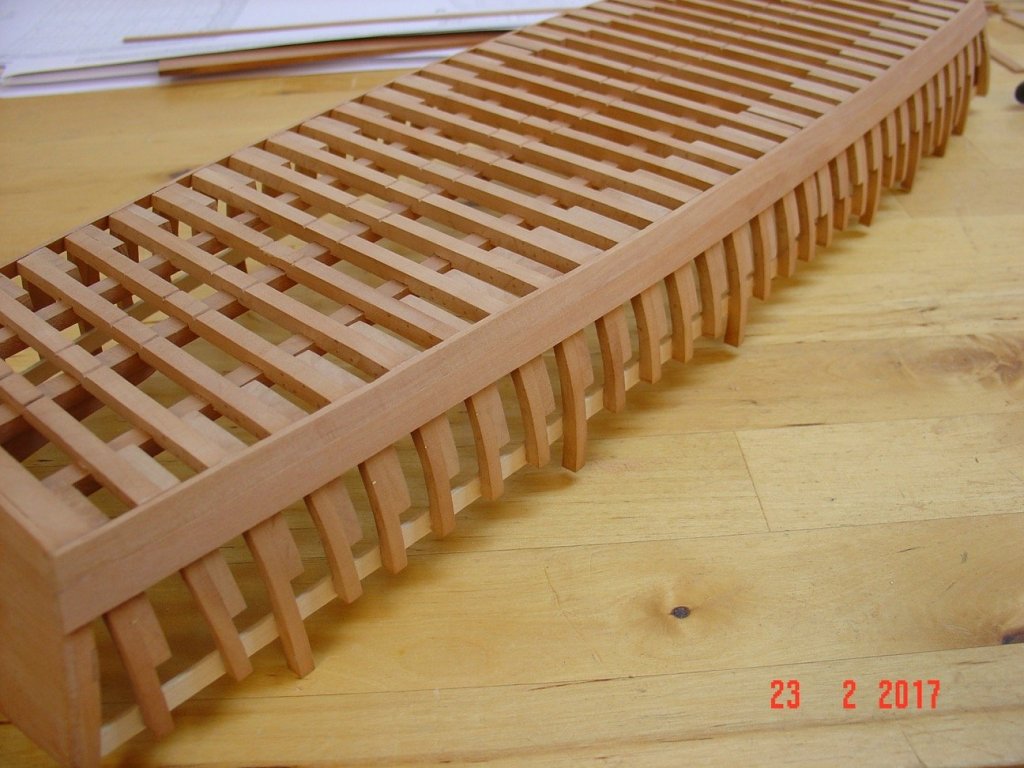
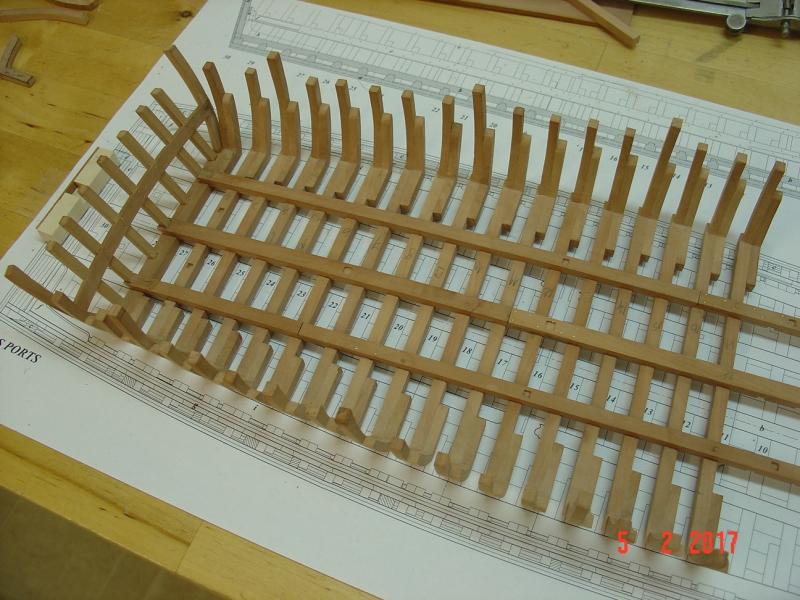
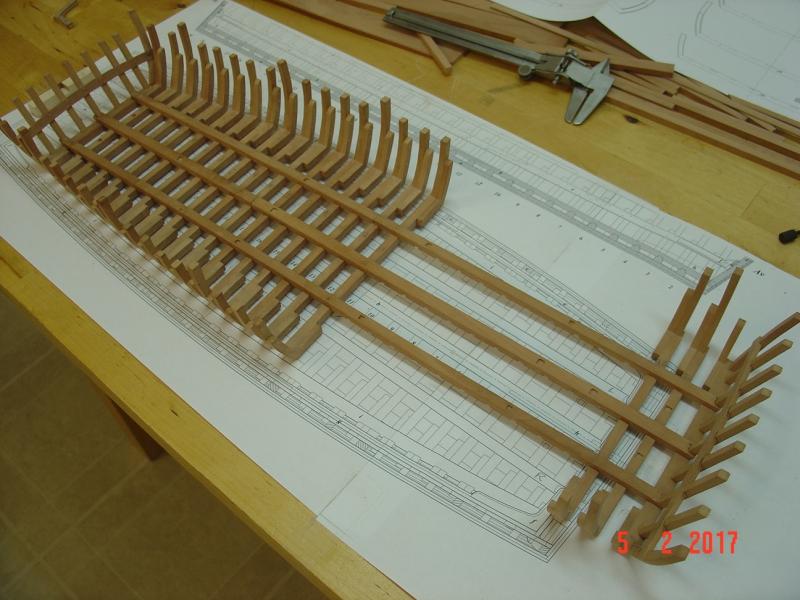
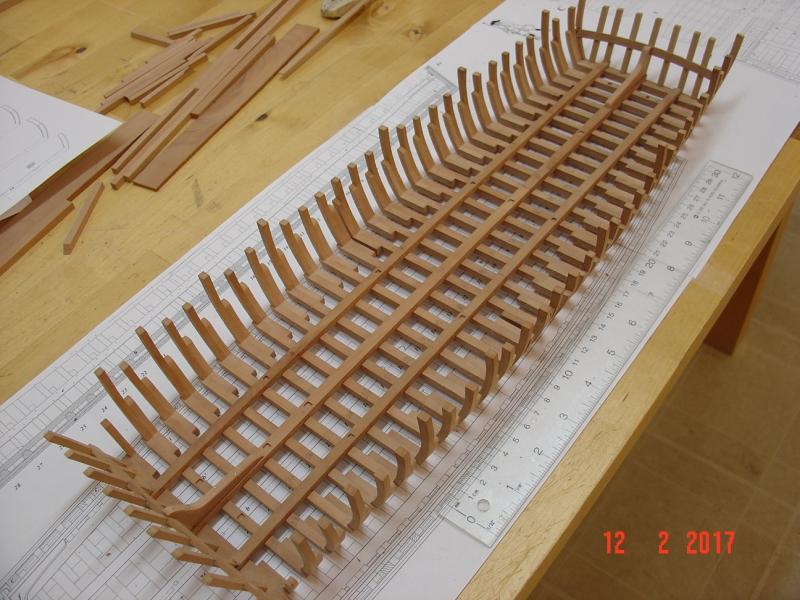
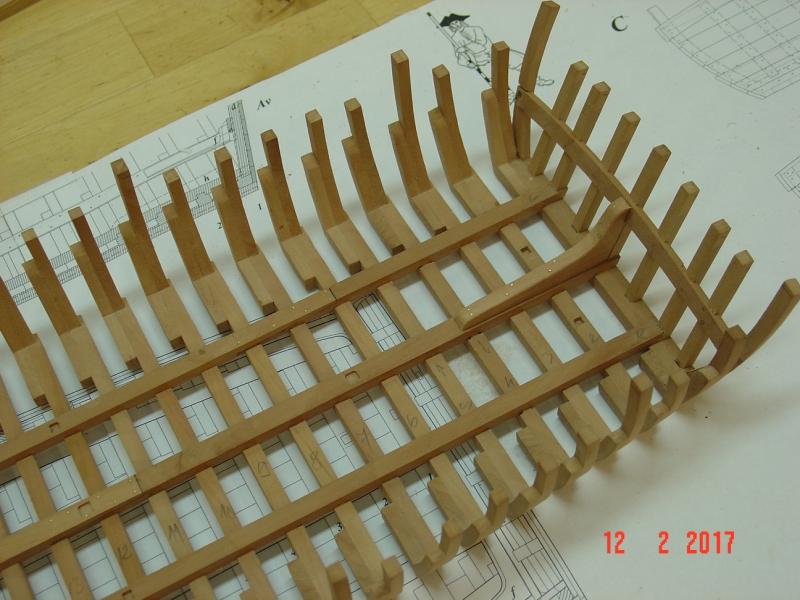
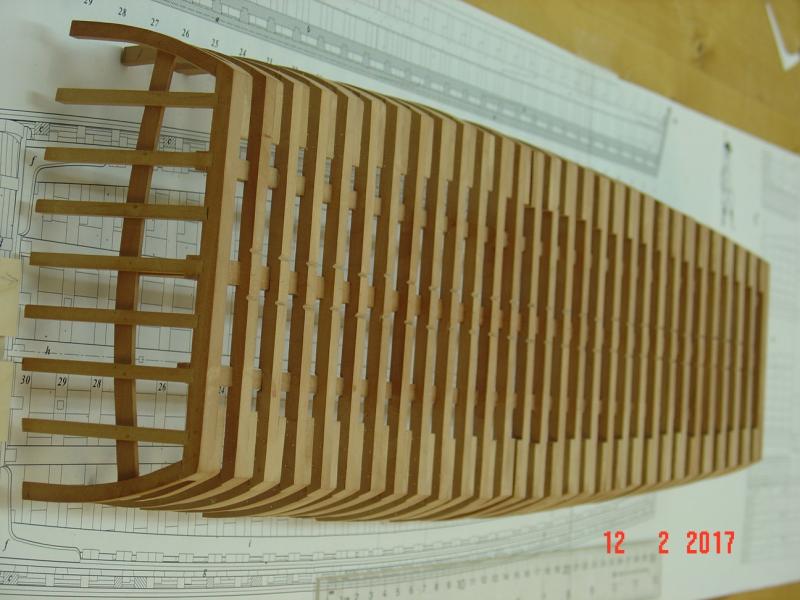
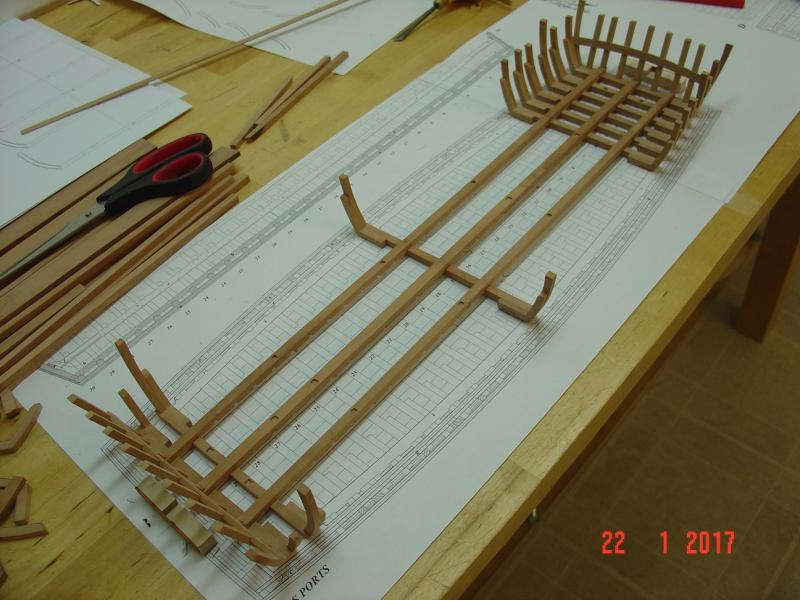
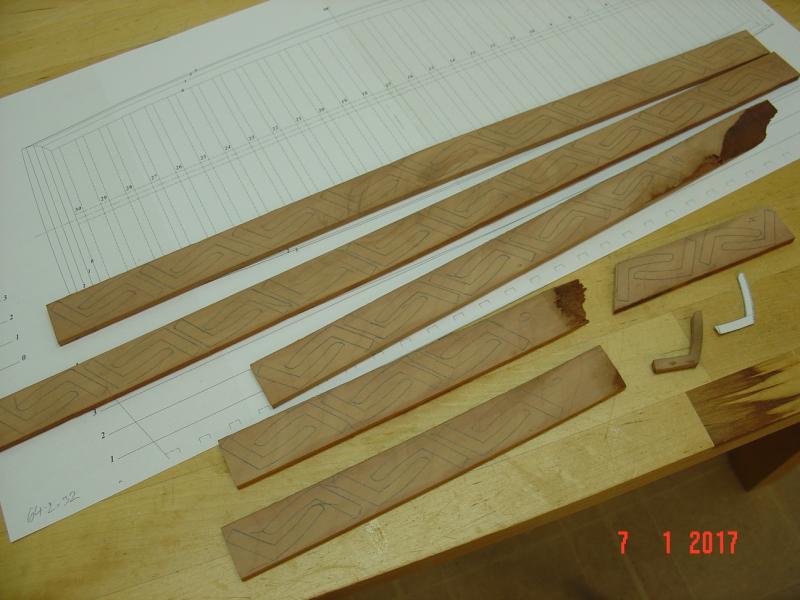
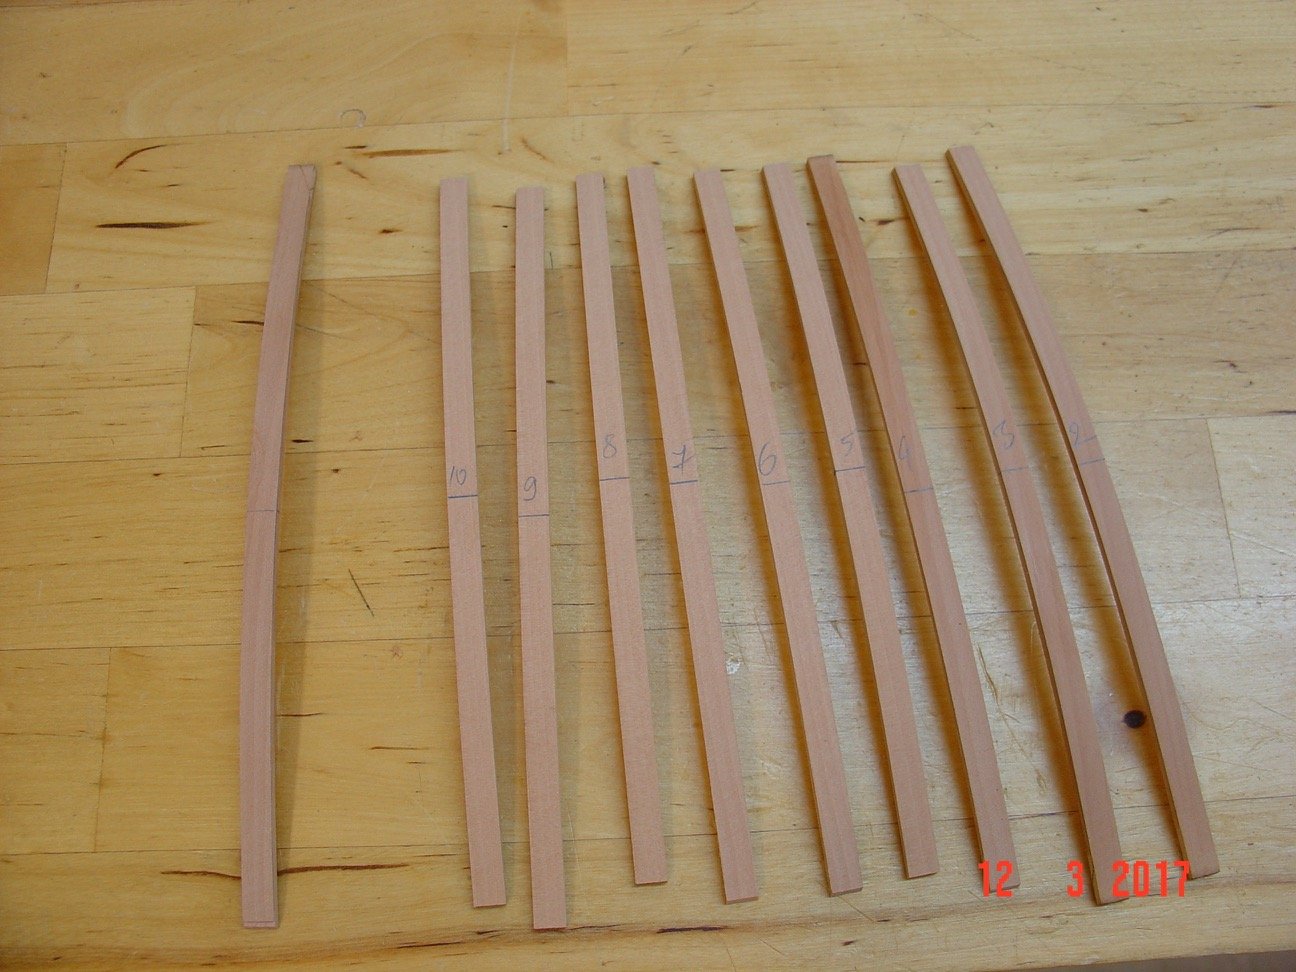
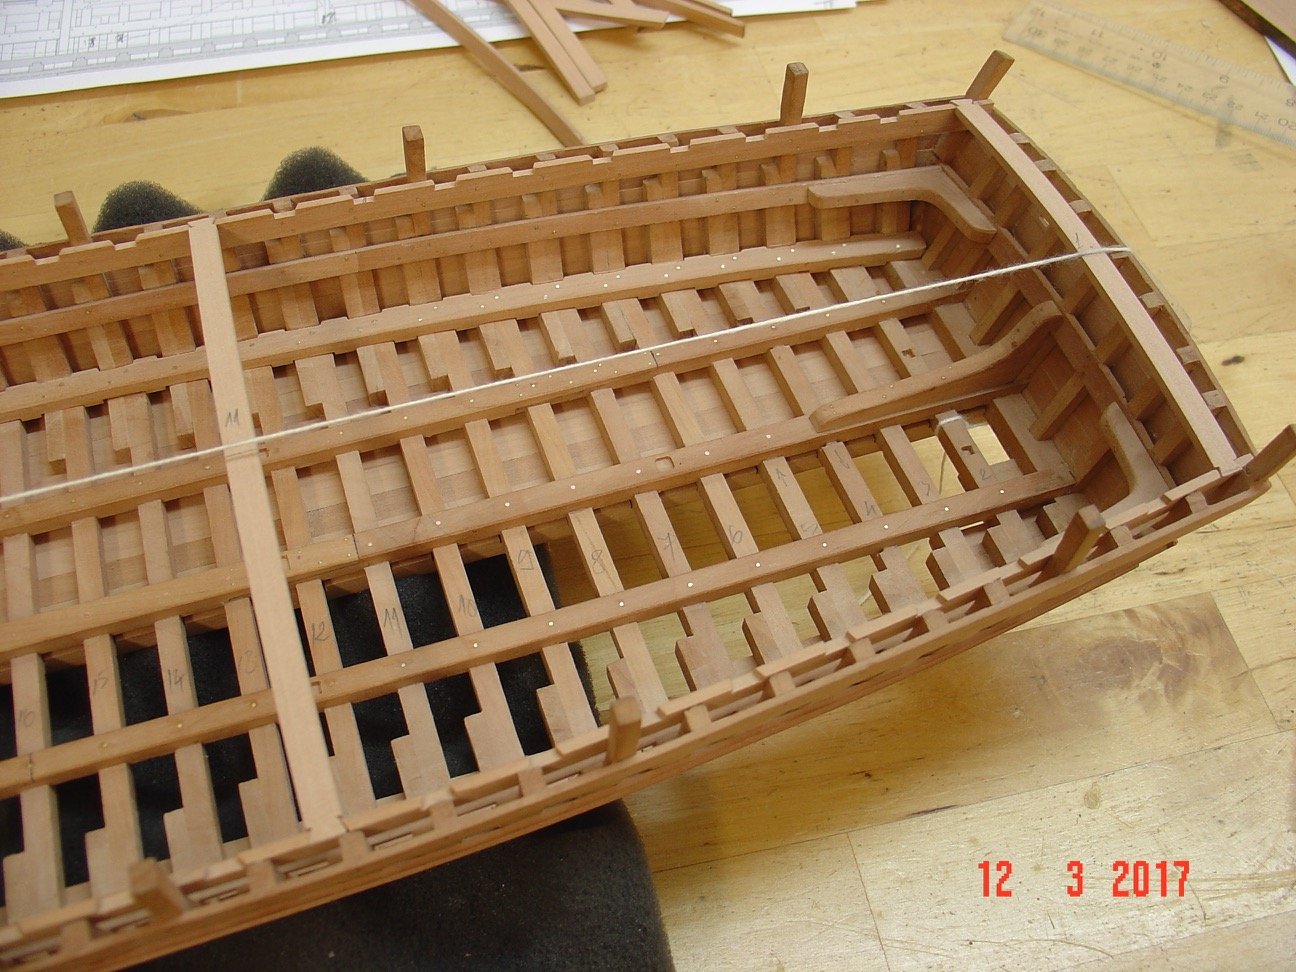
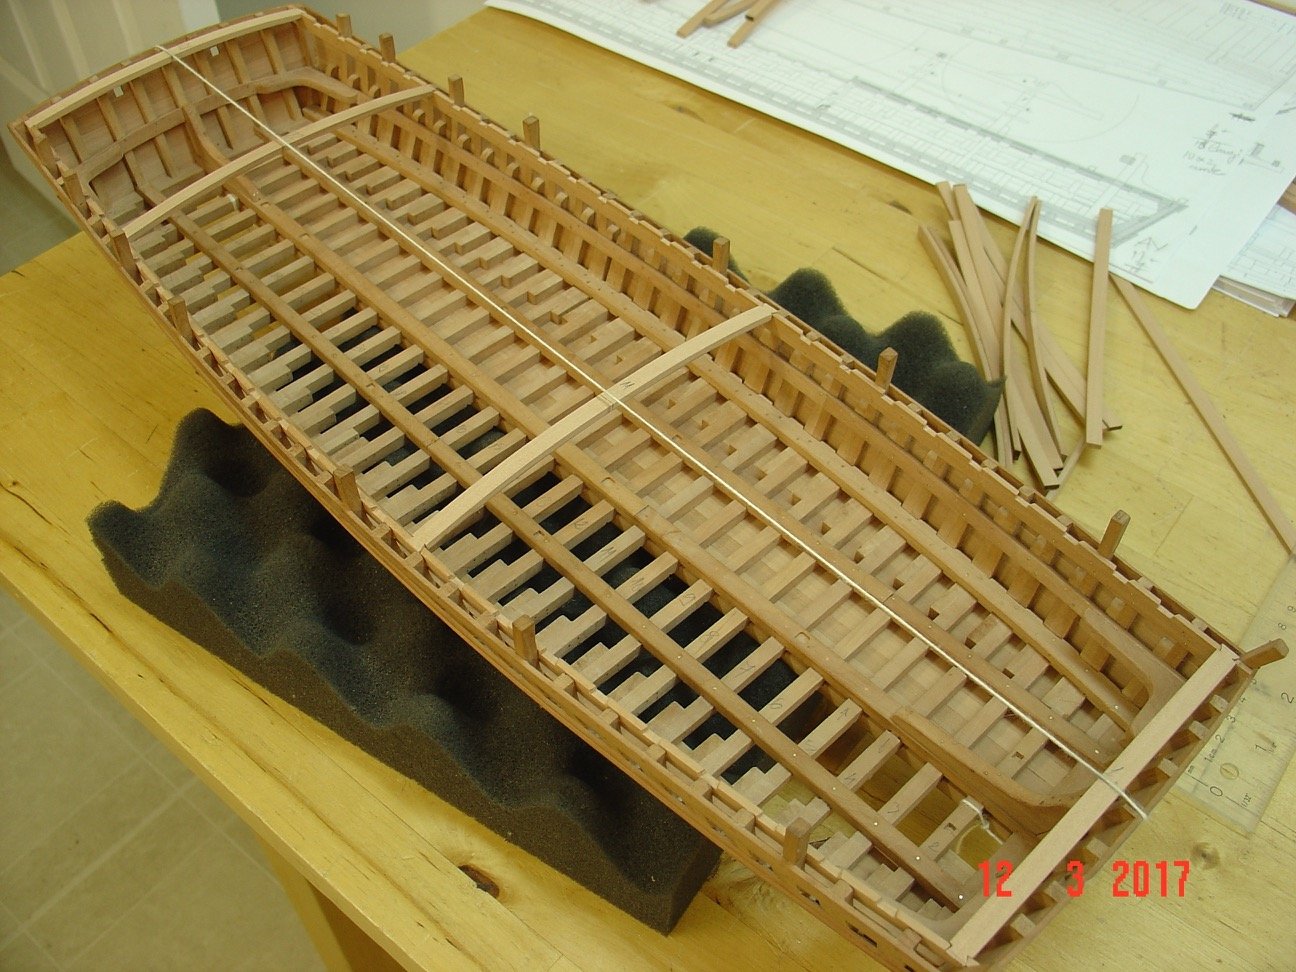
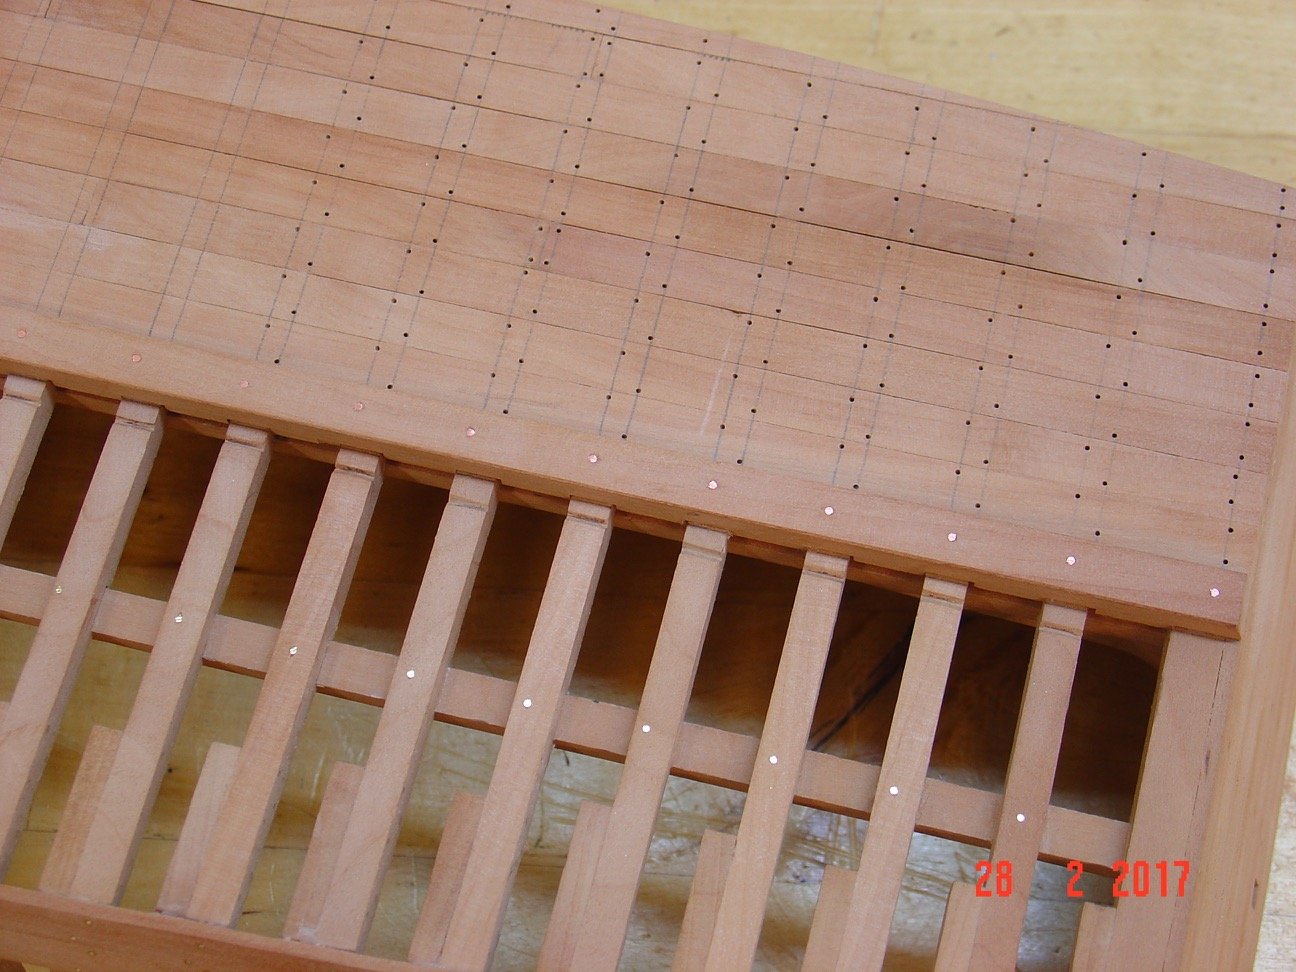
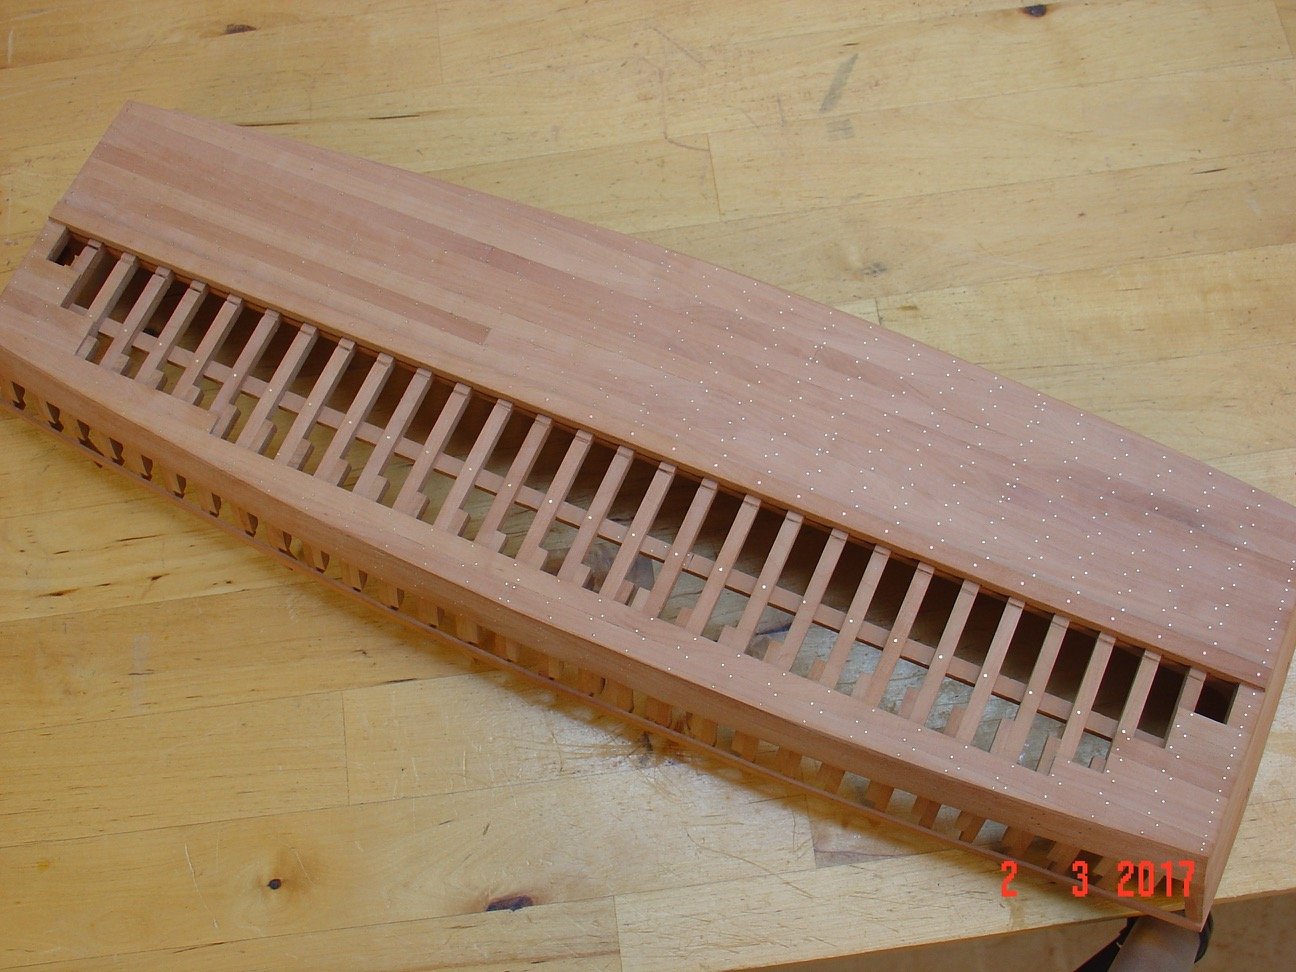
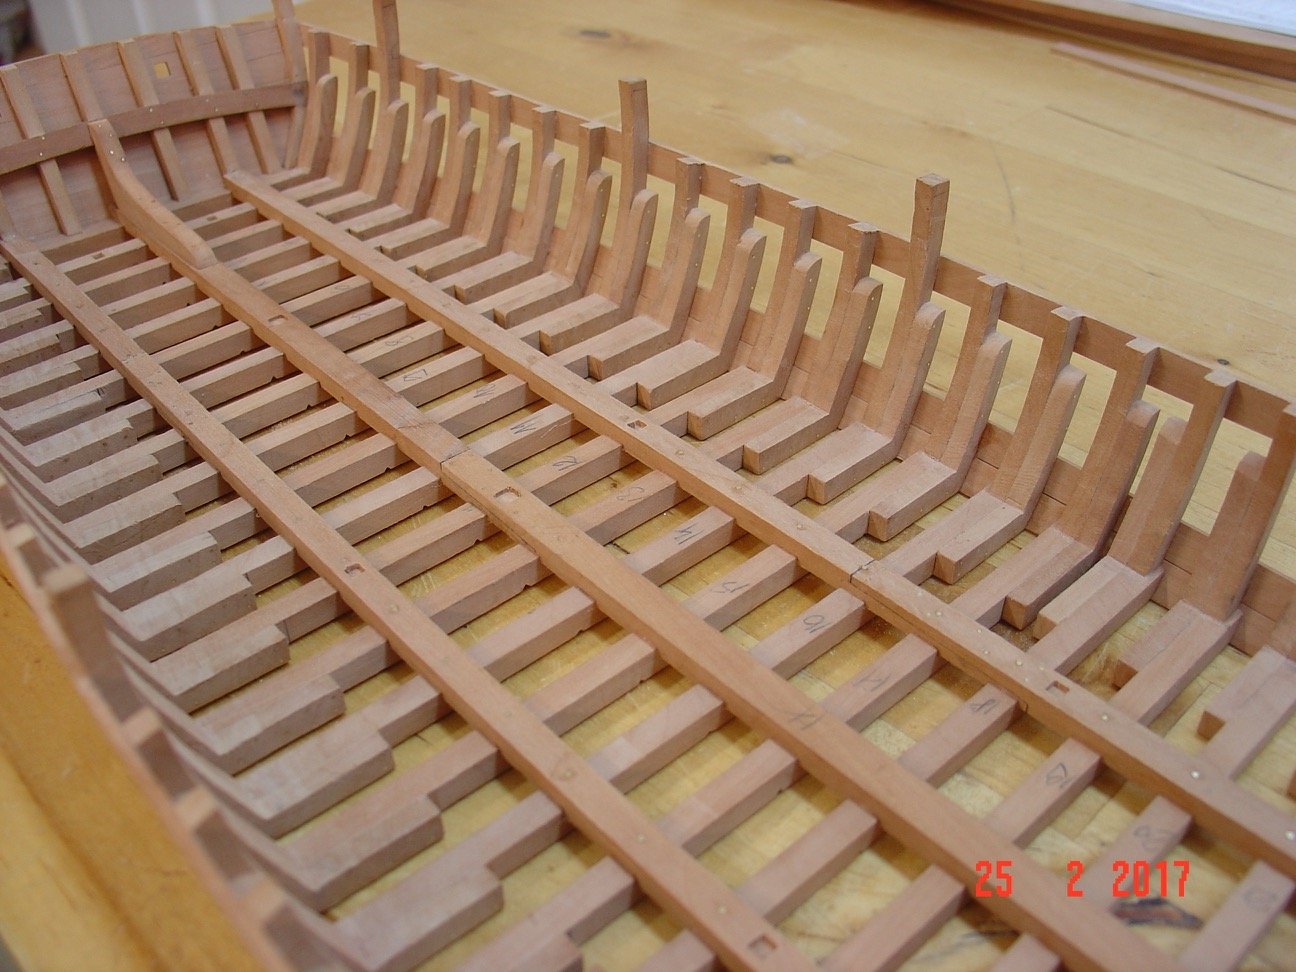
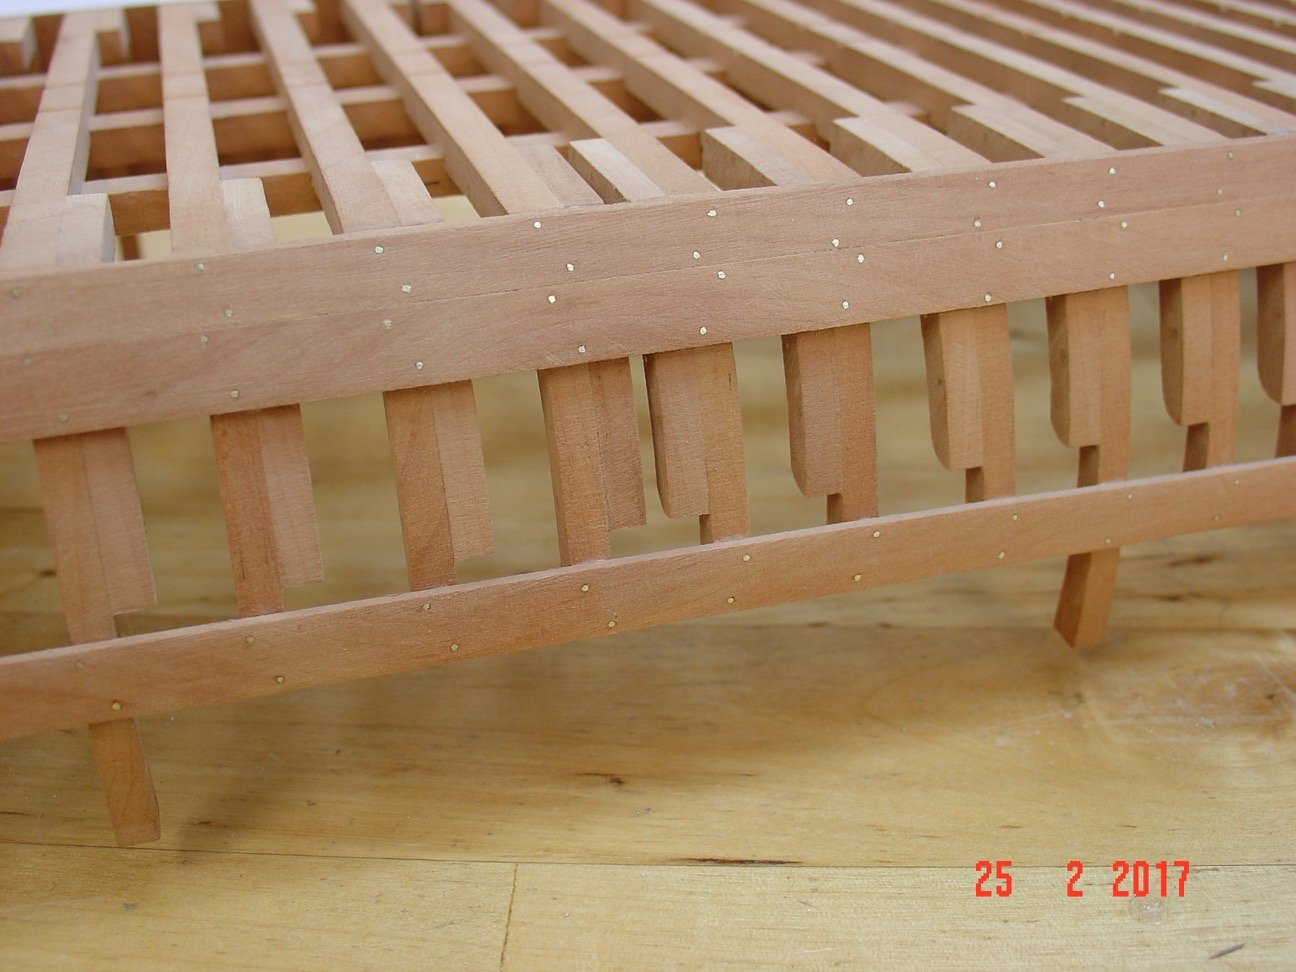
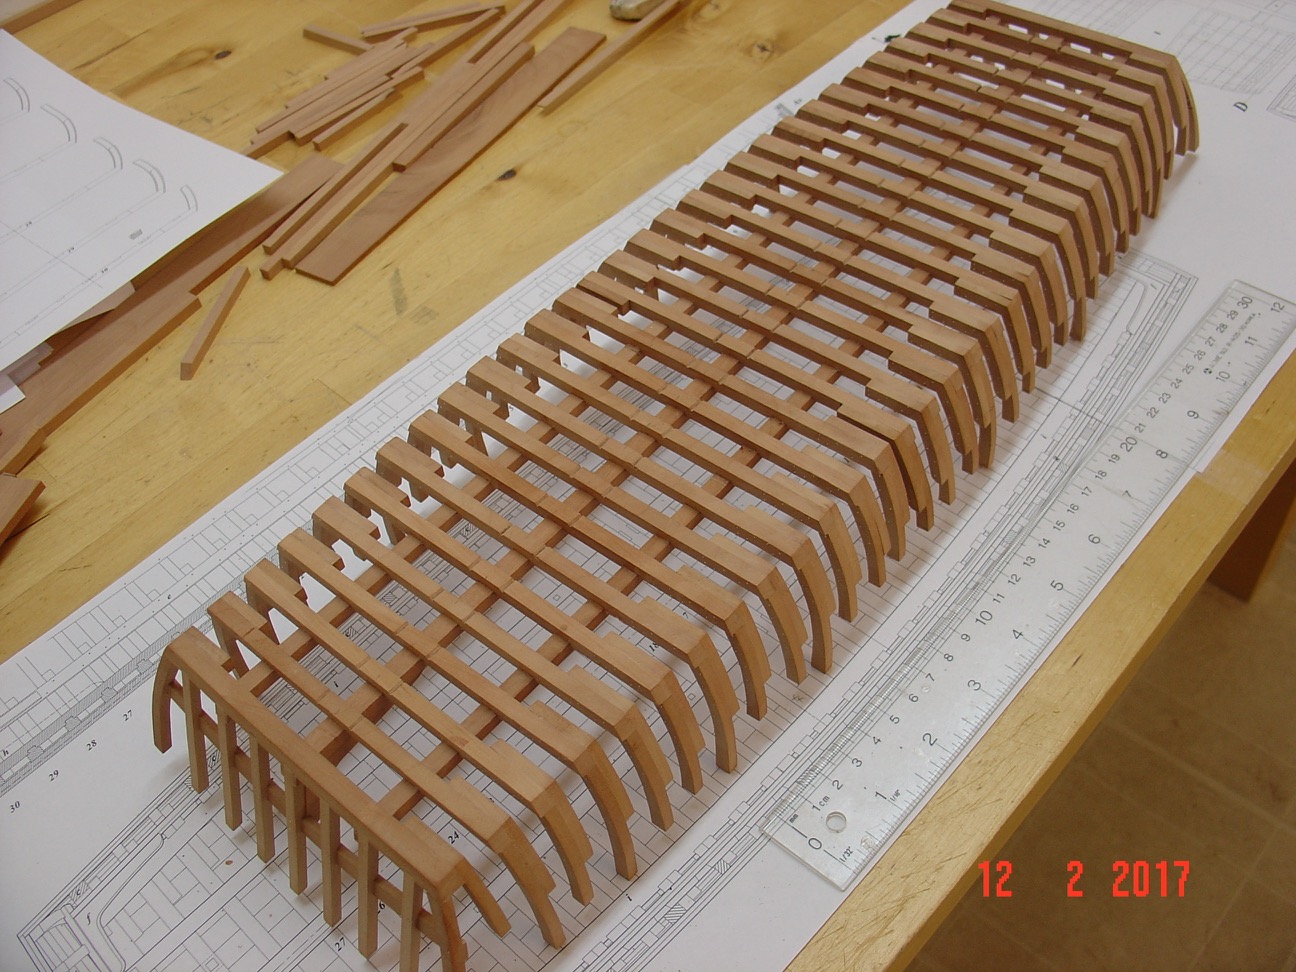
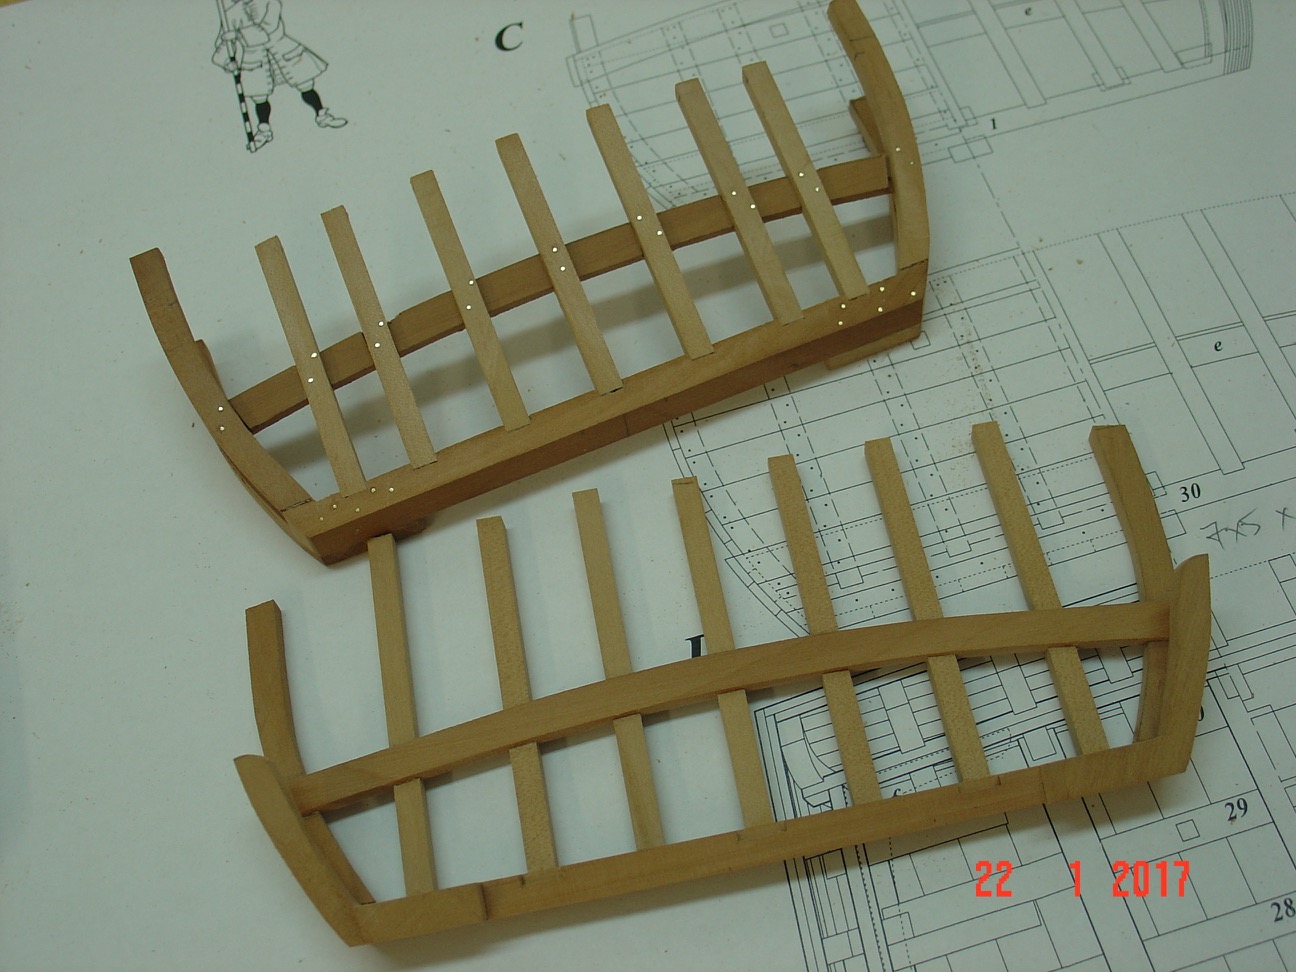
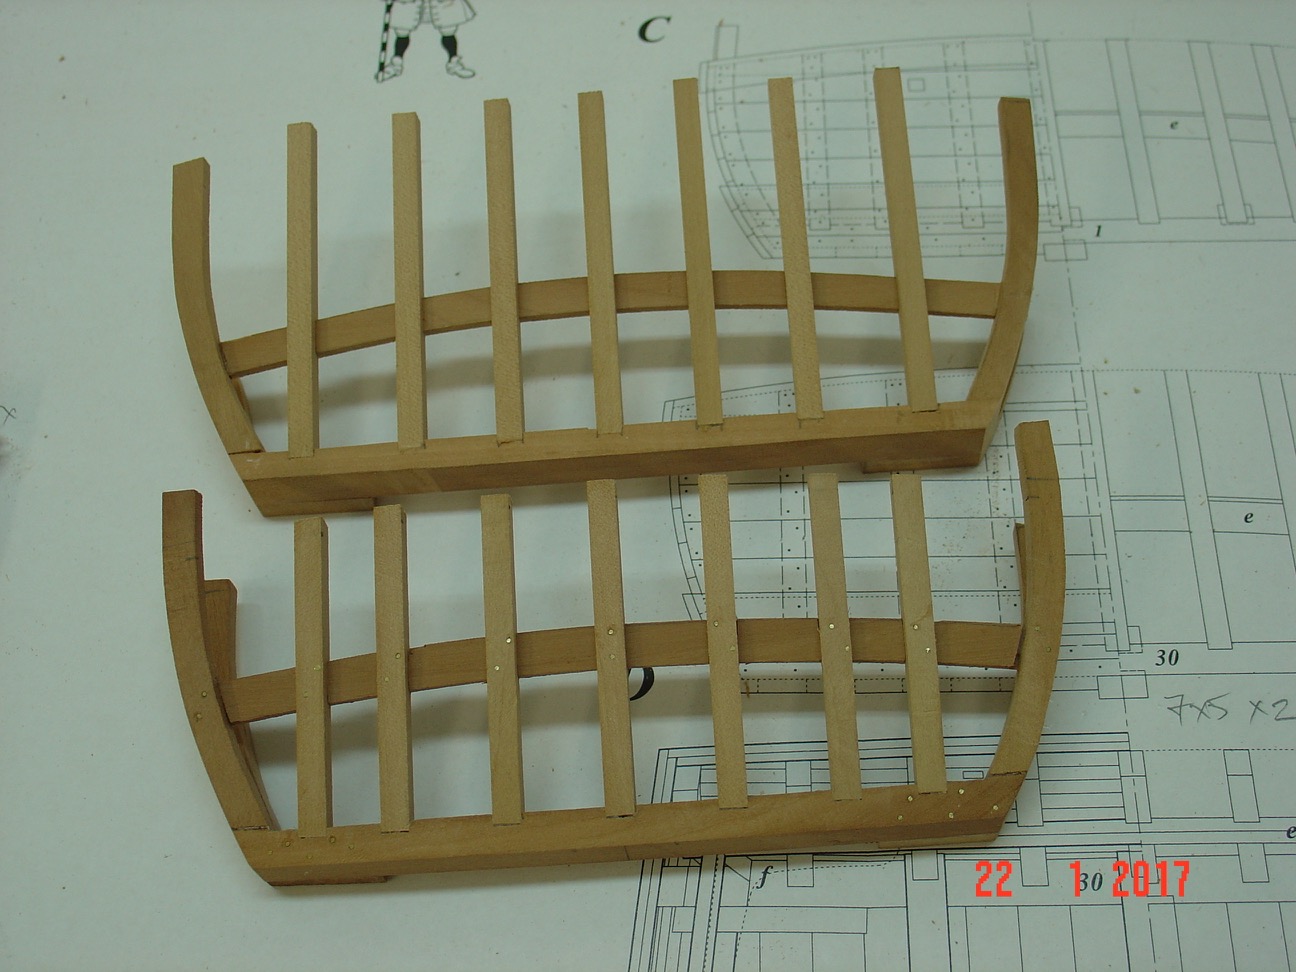
Hello,
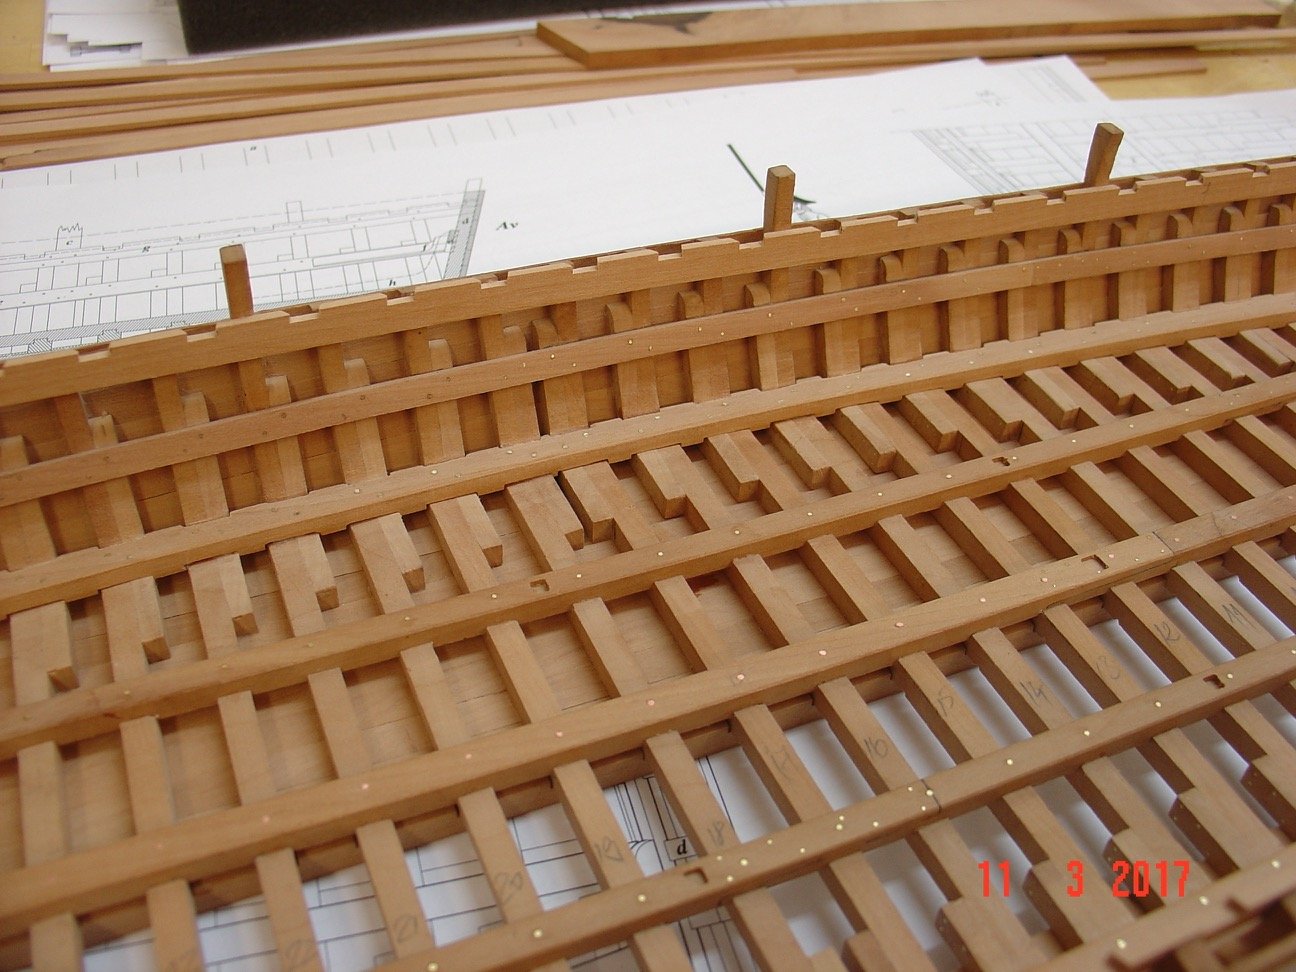
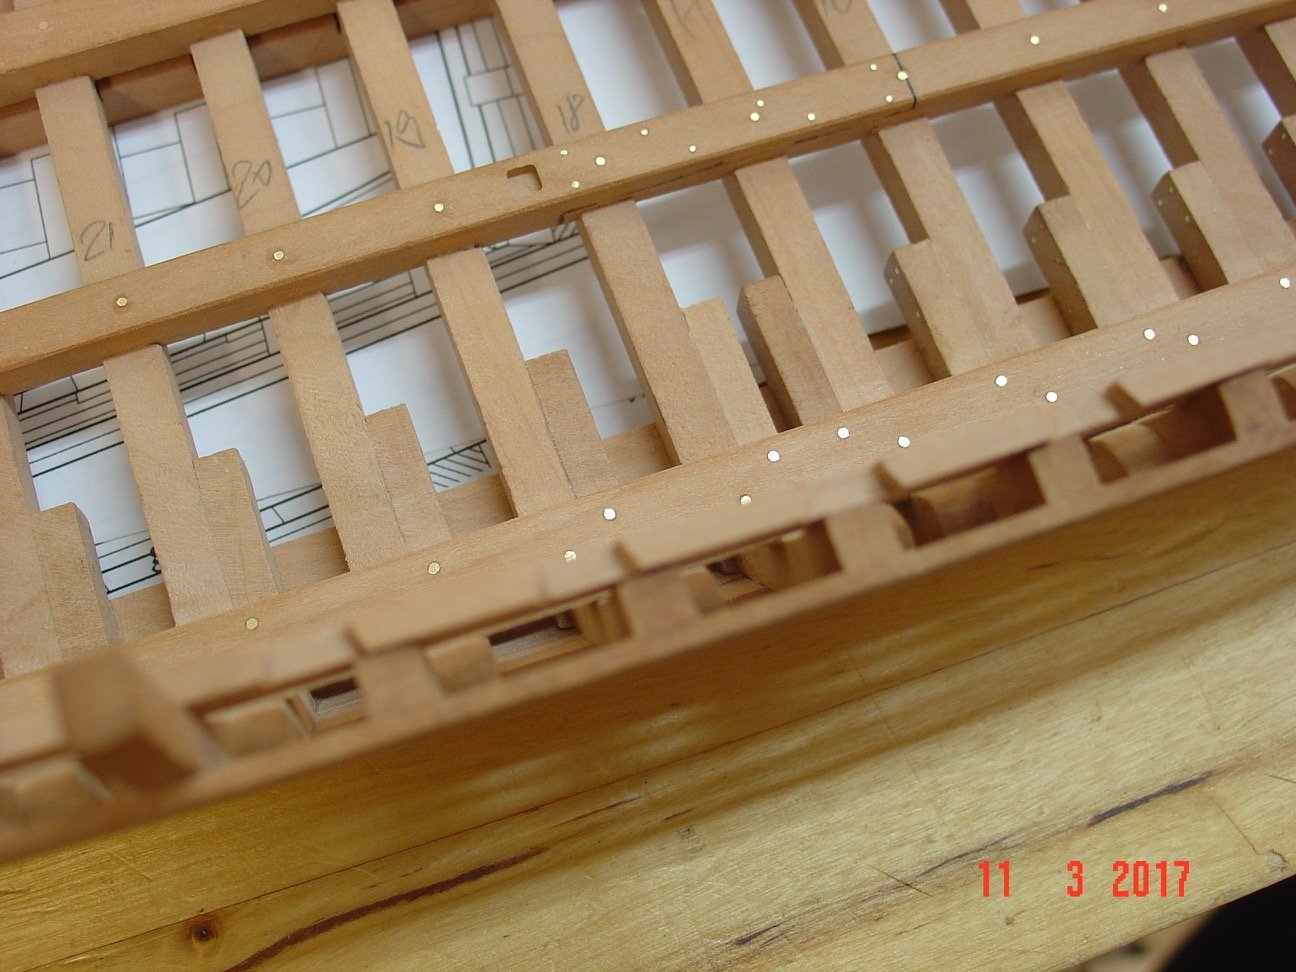
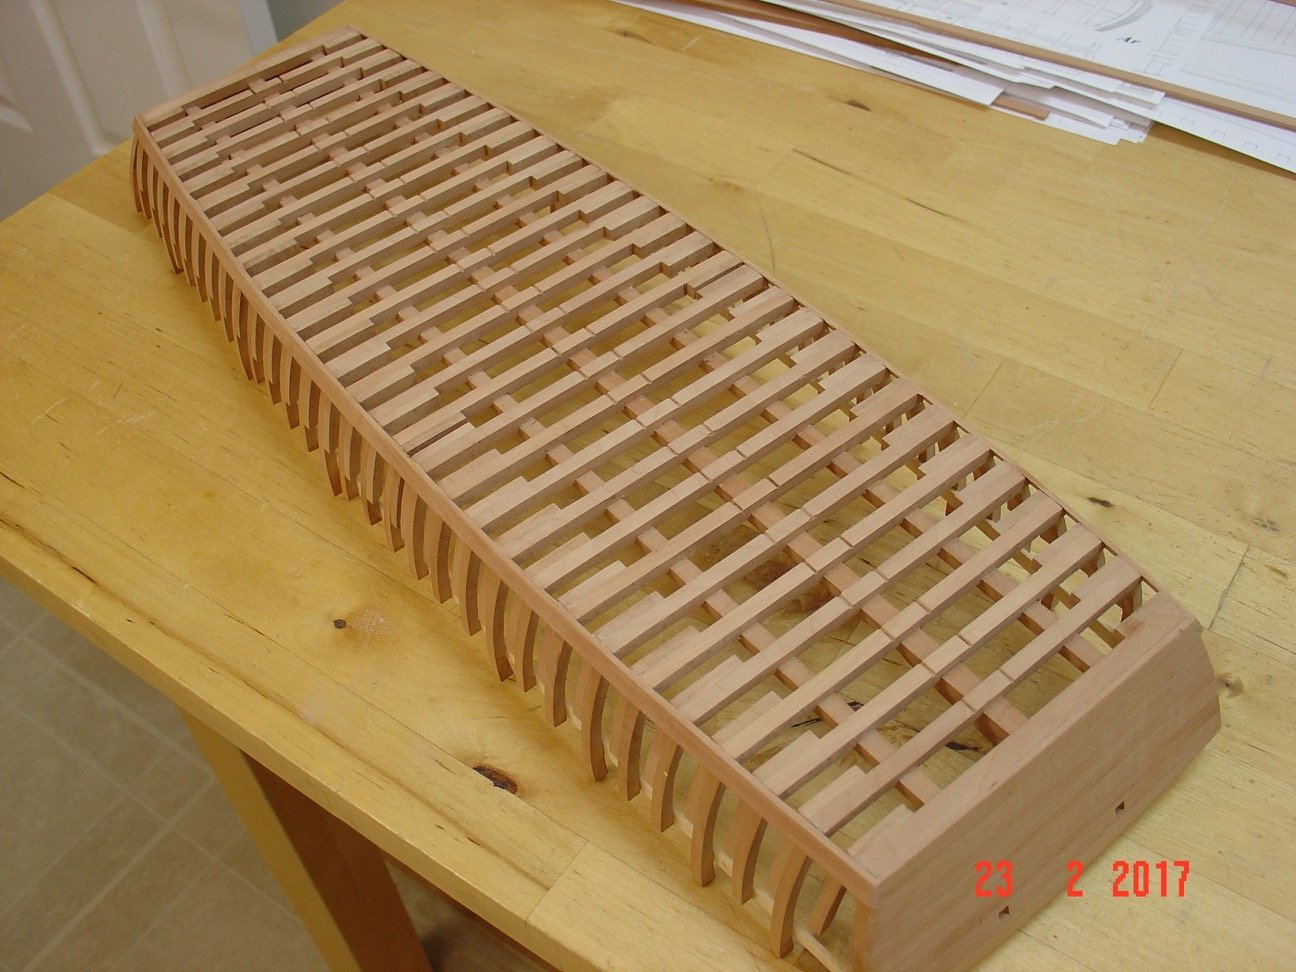
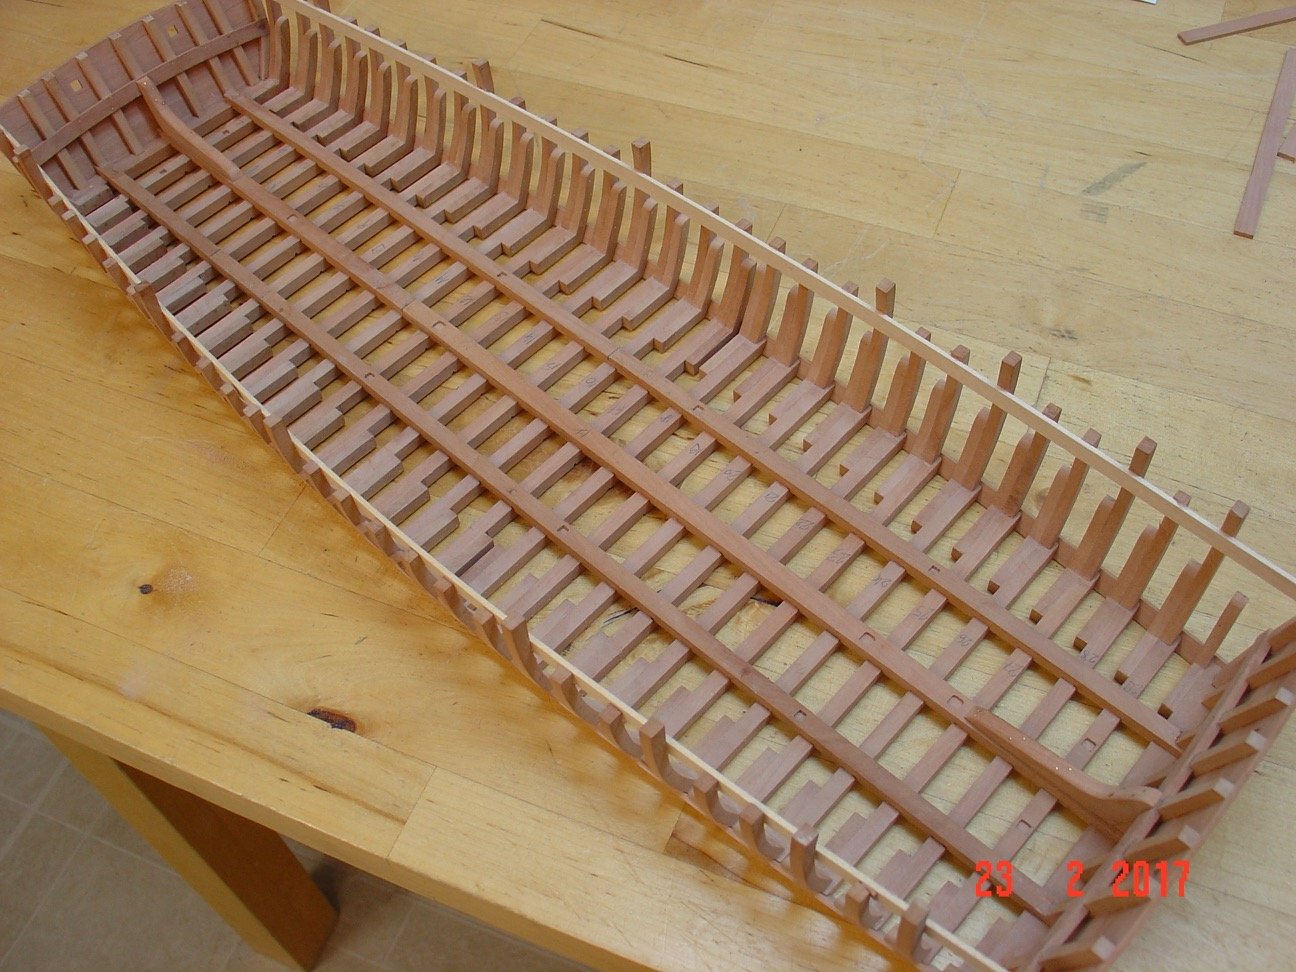
Here is another update - all the frames are done.
Regards,
Alexandru


-
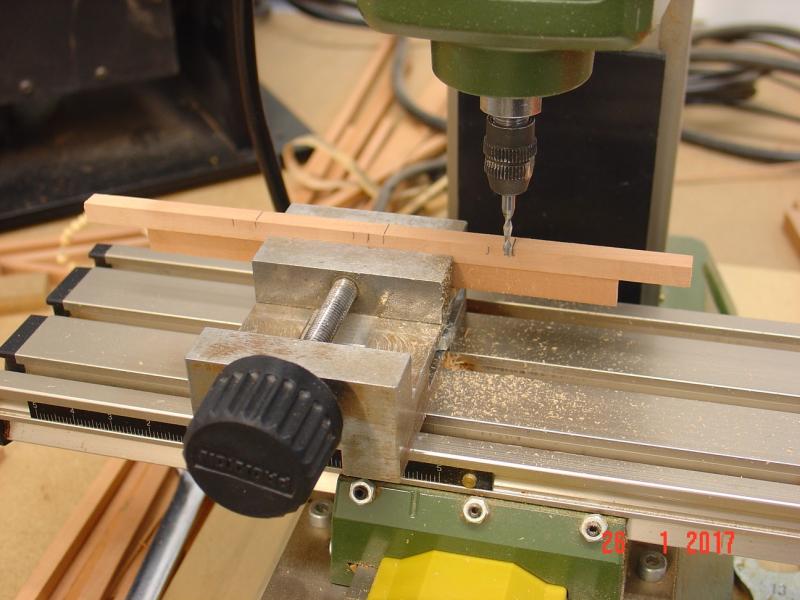
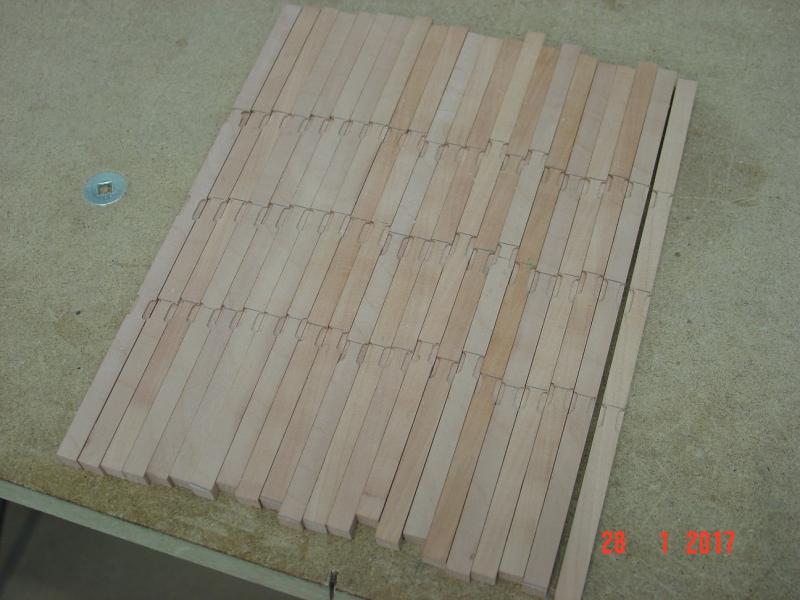
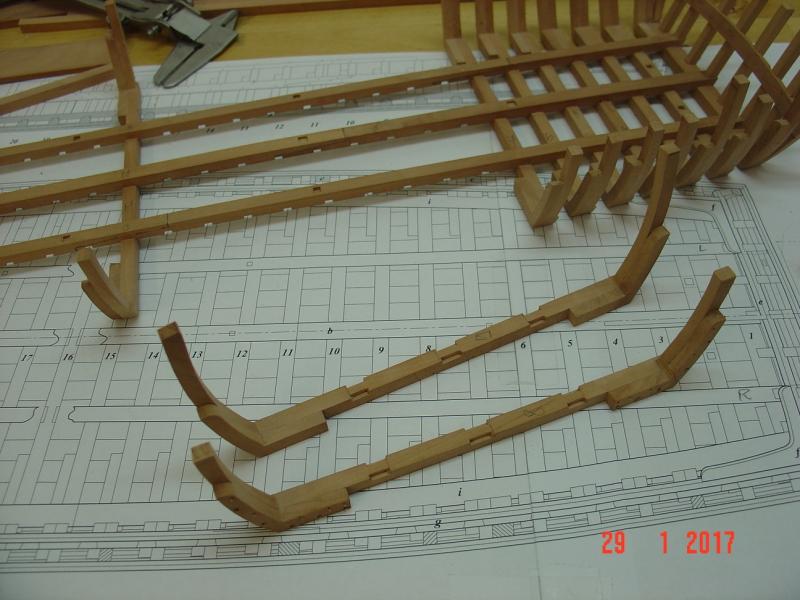
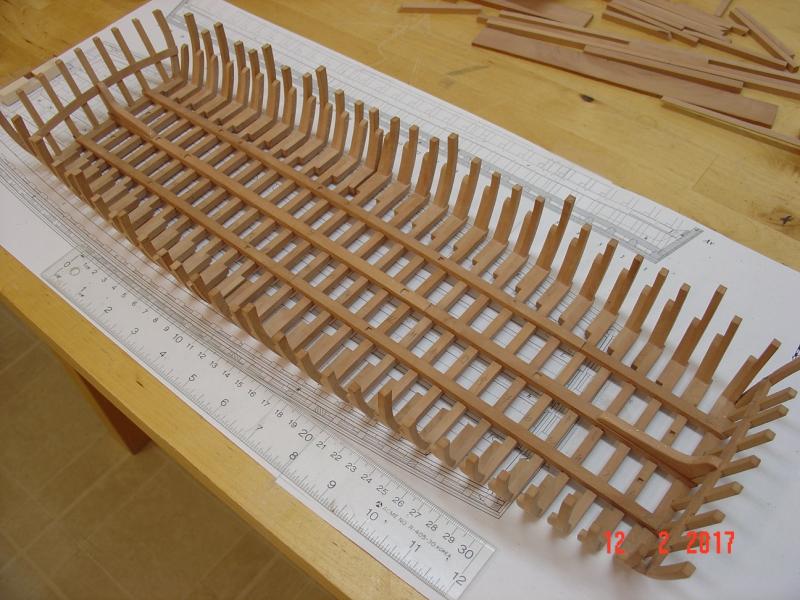
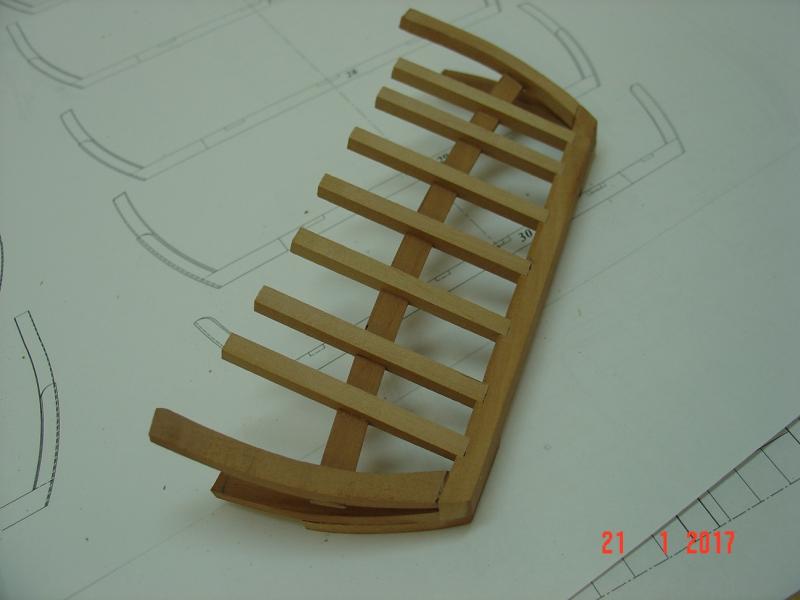
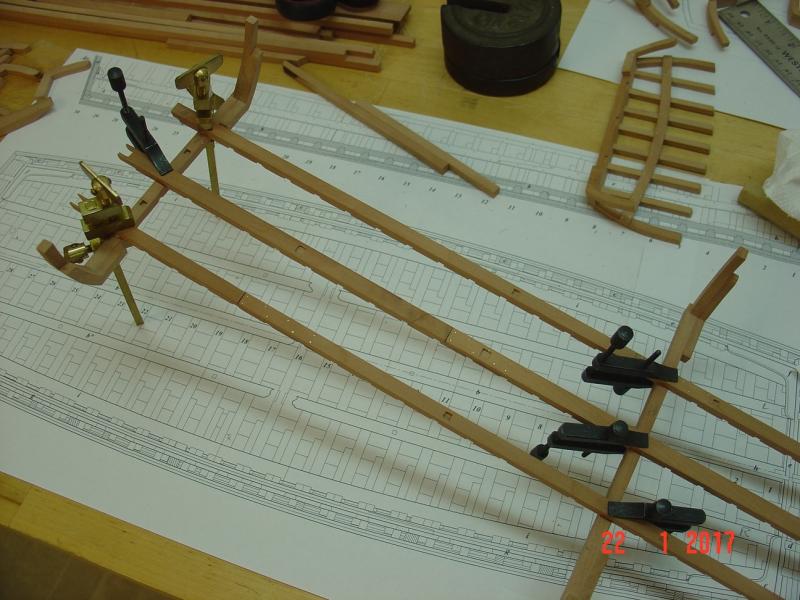
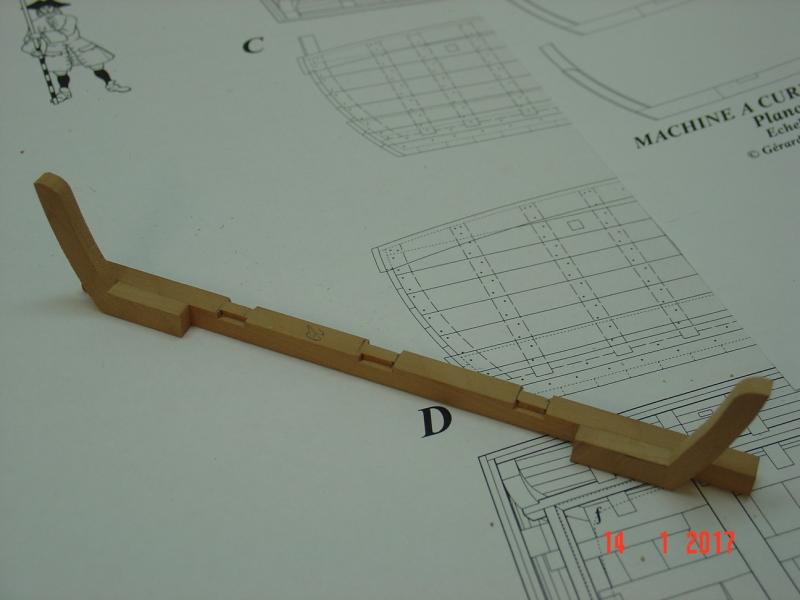
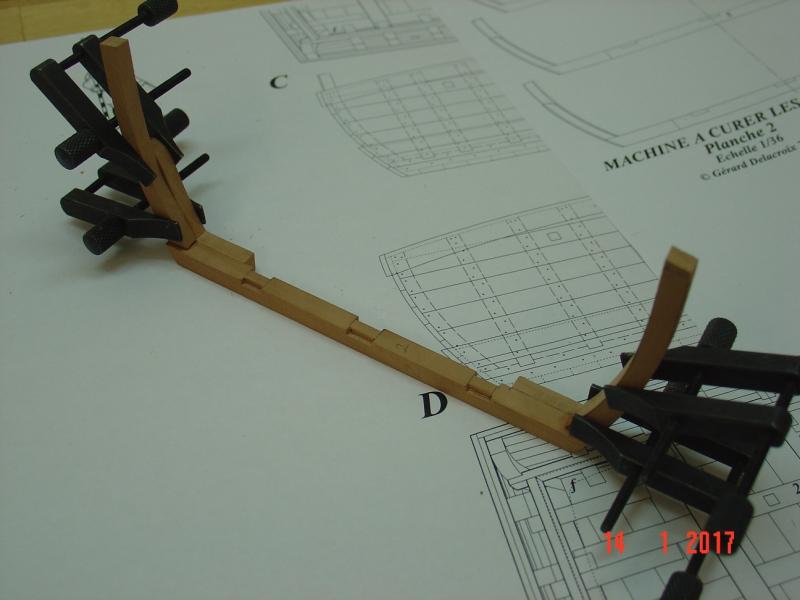
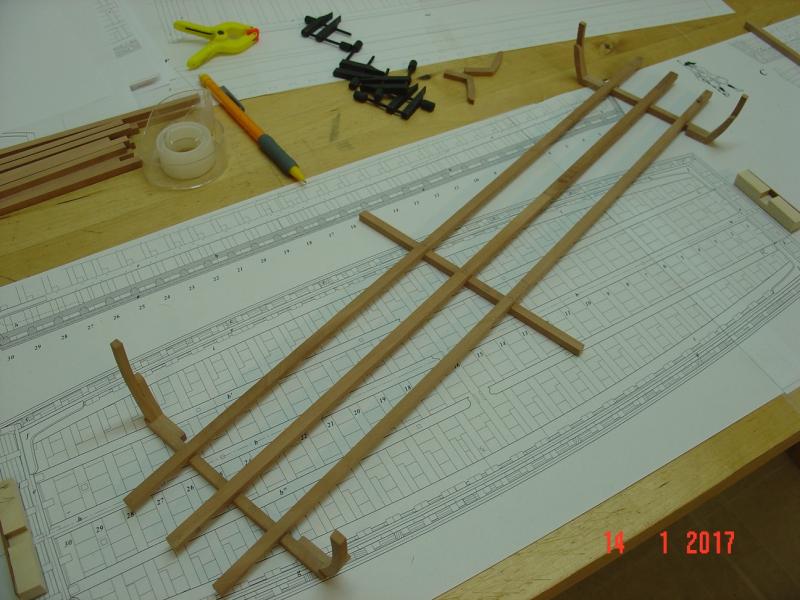
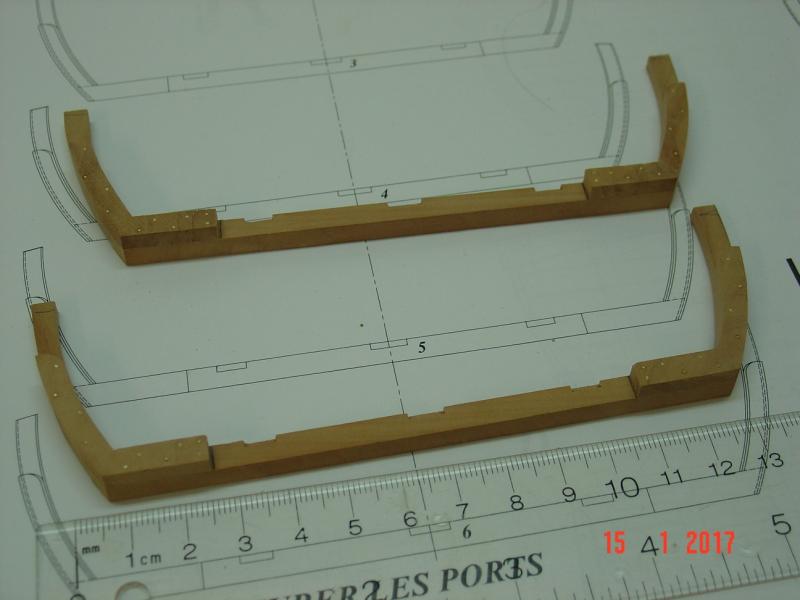
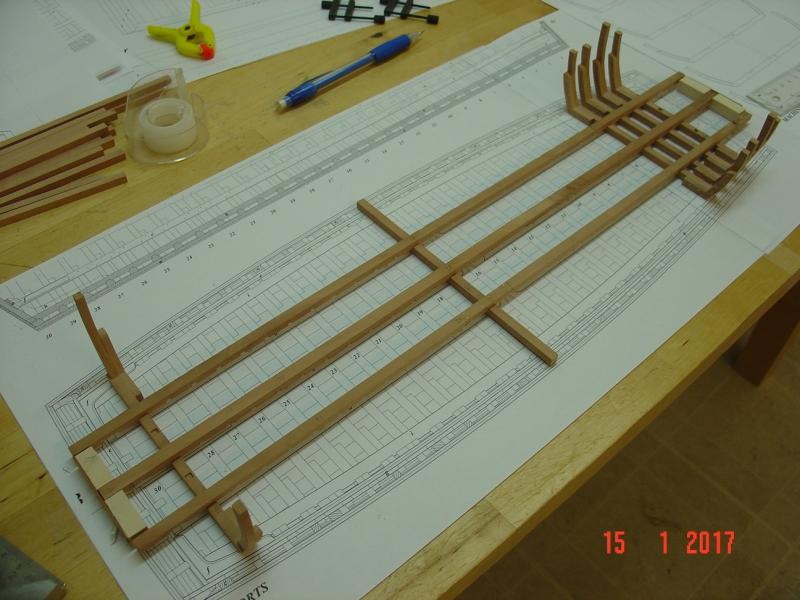
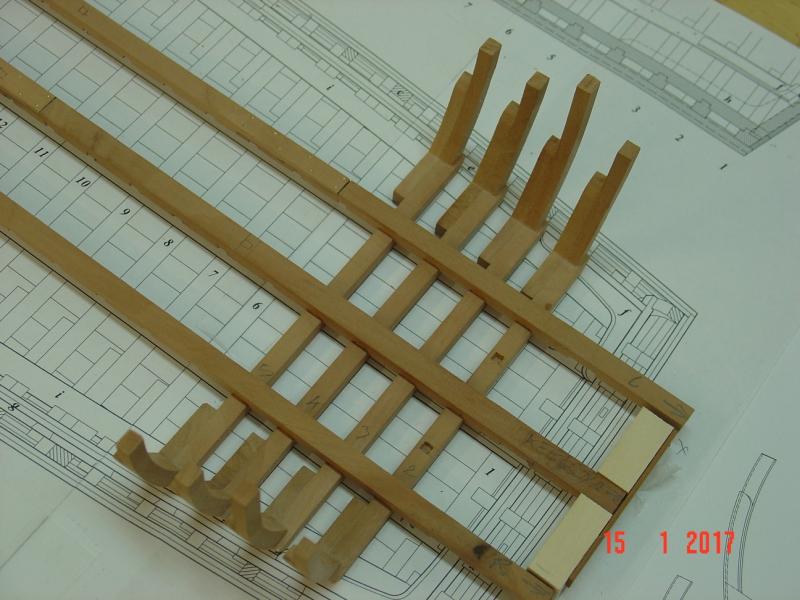
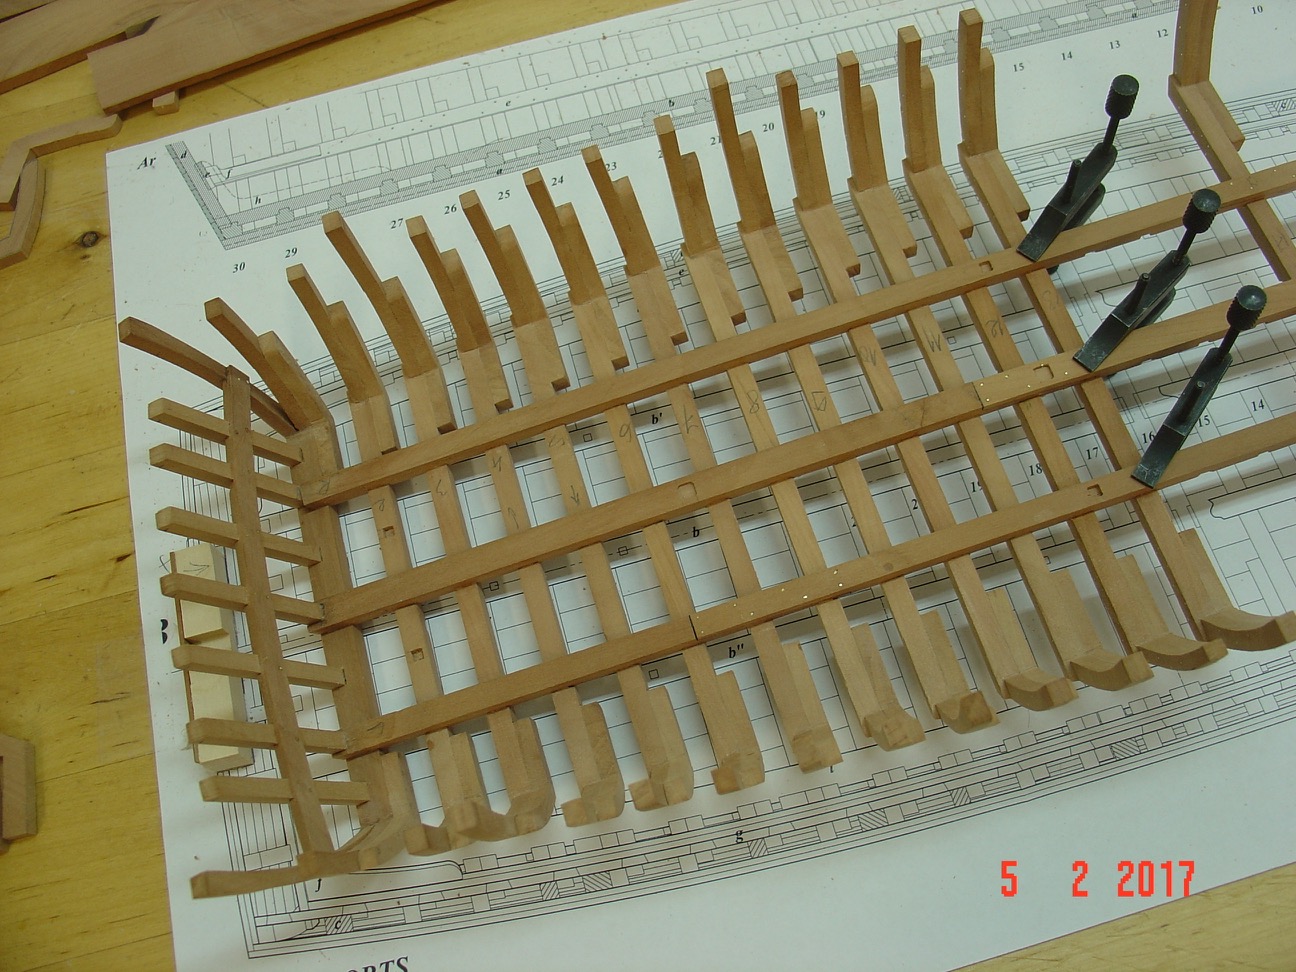
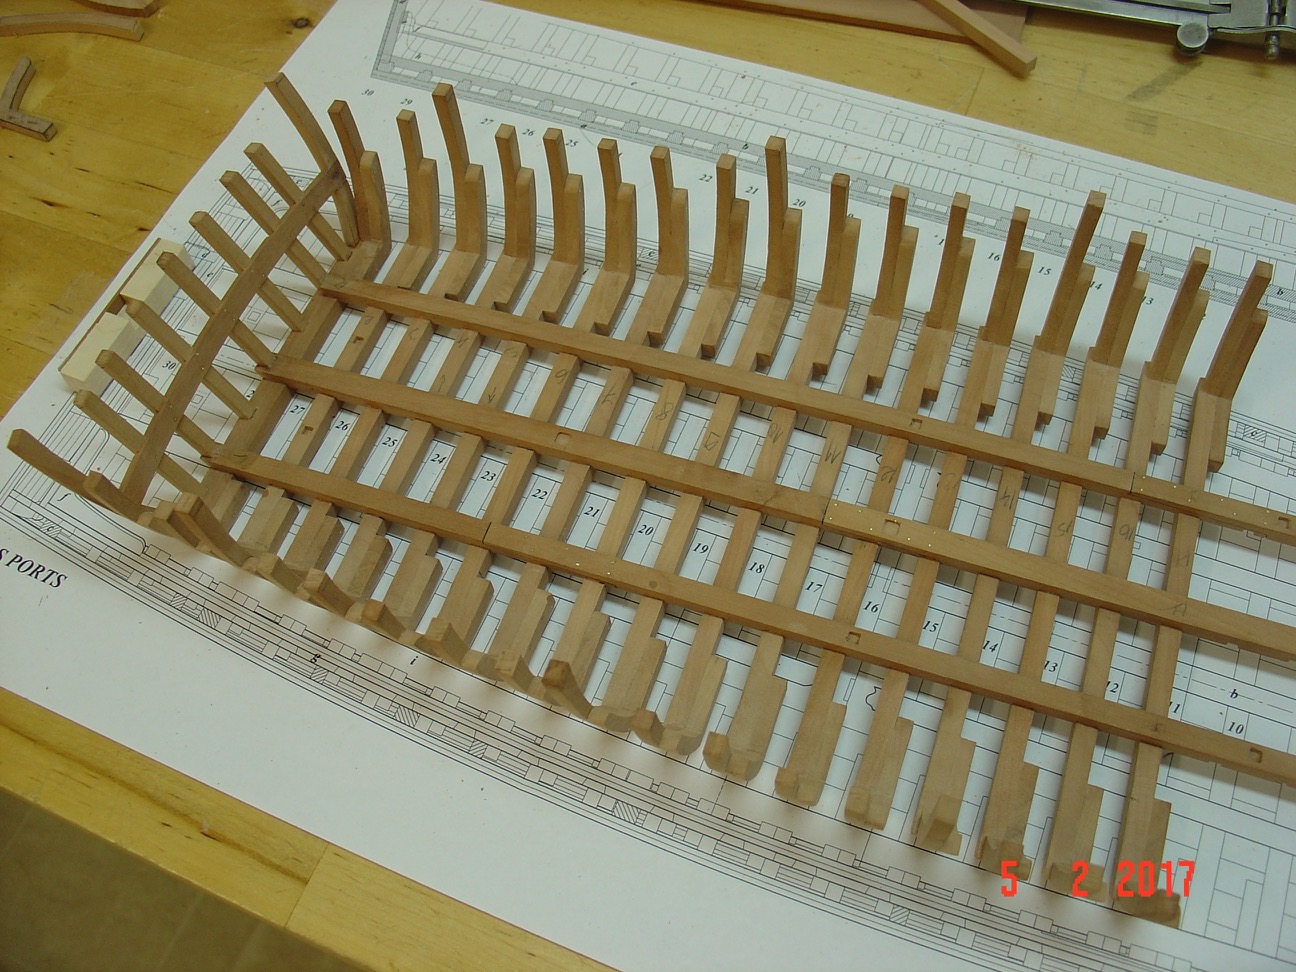
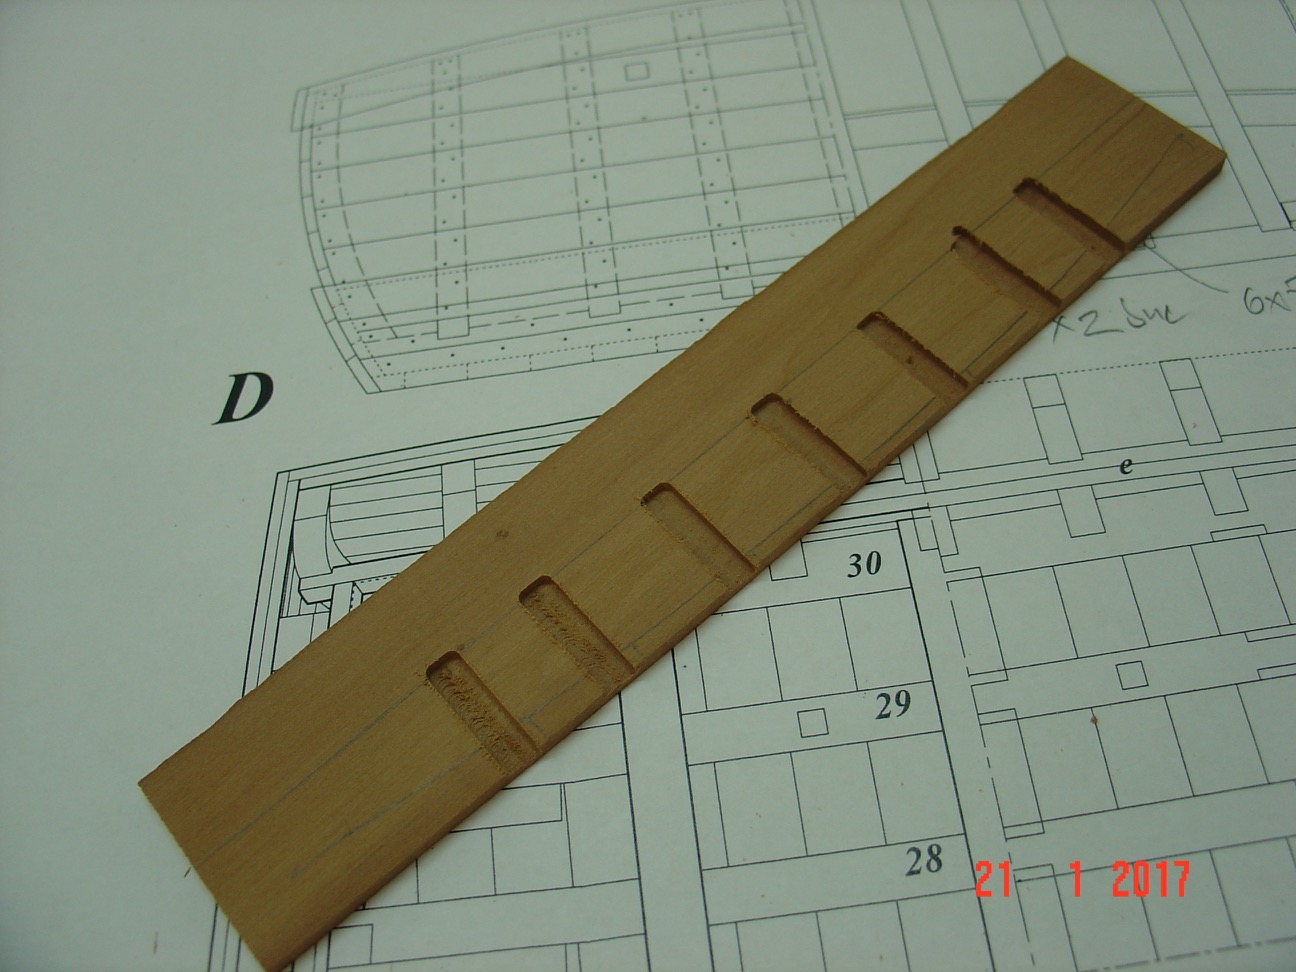
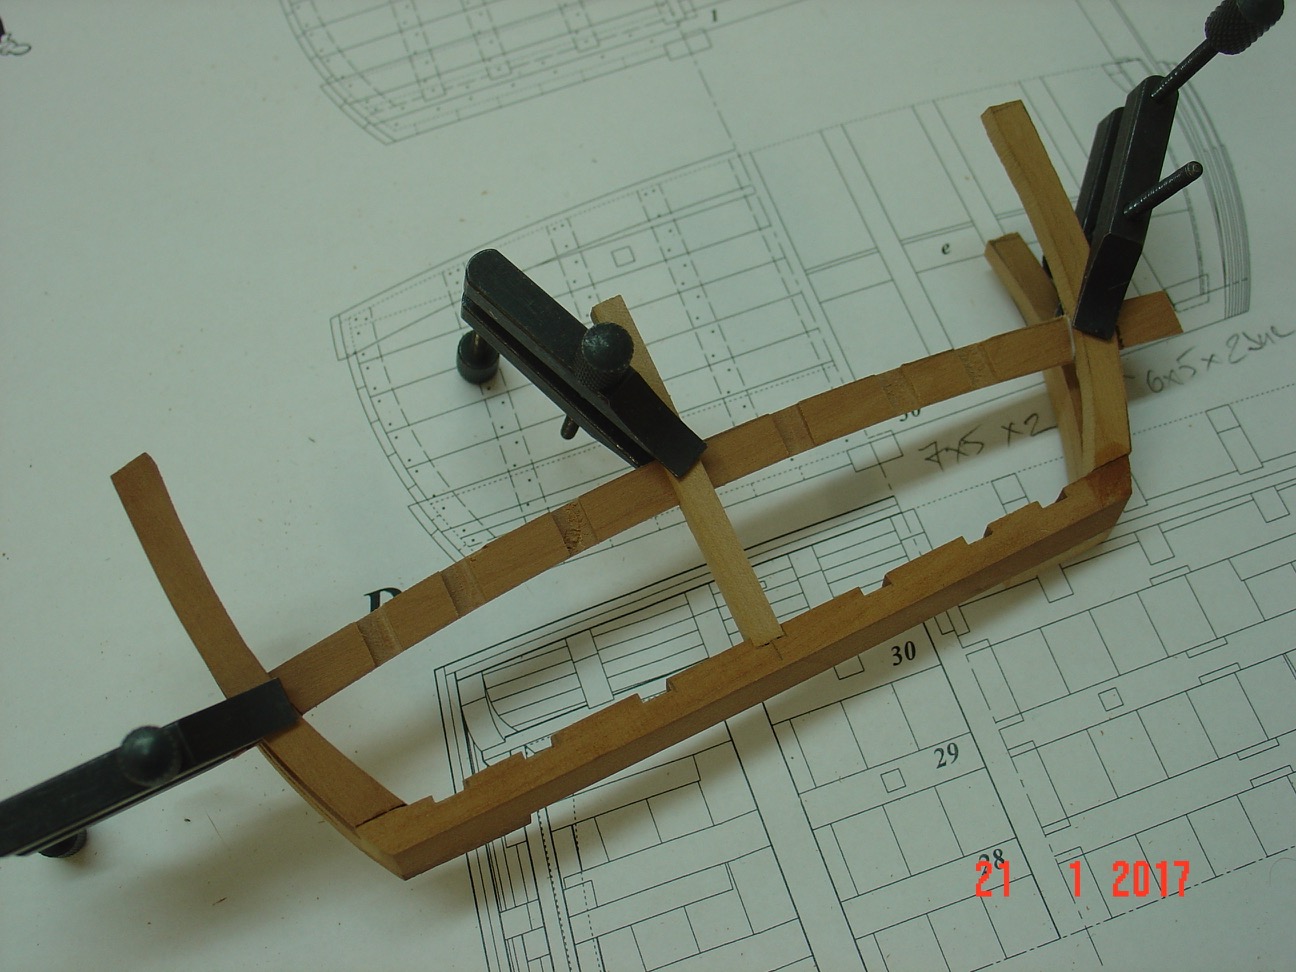
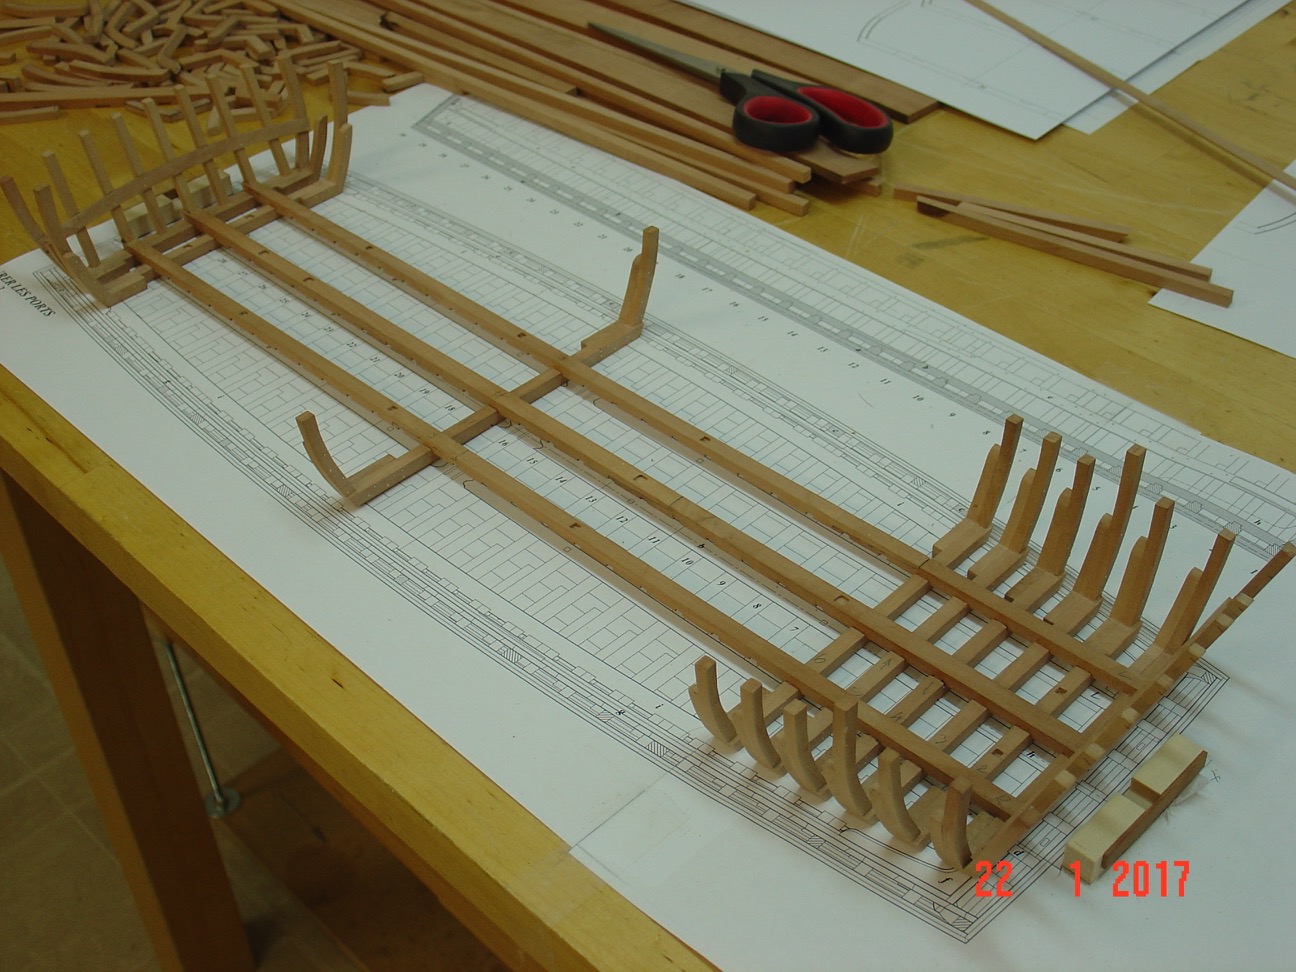
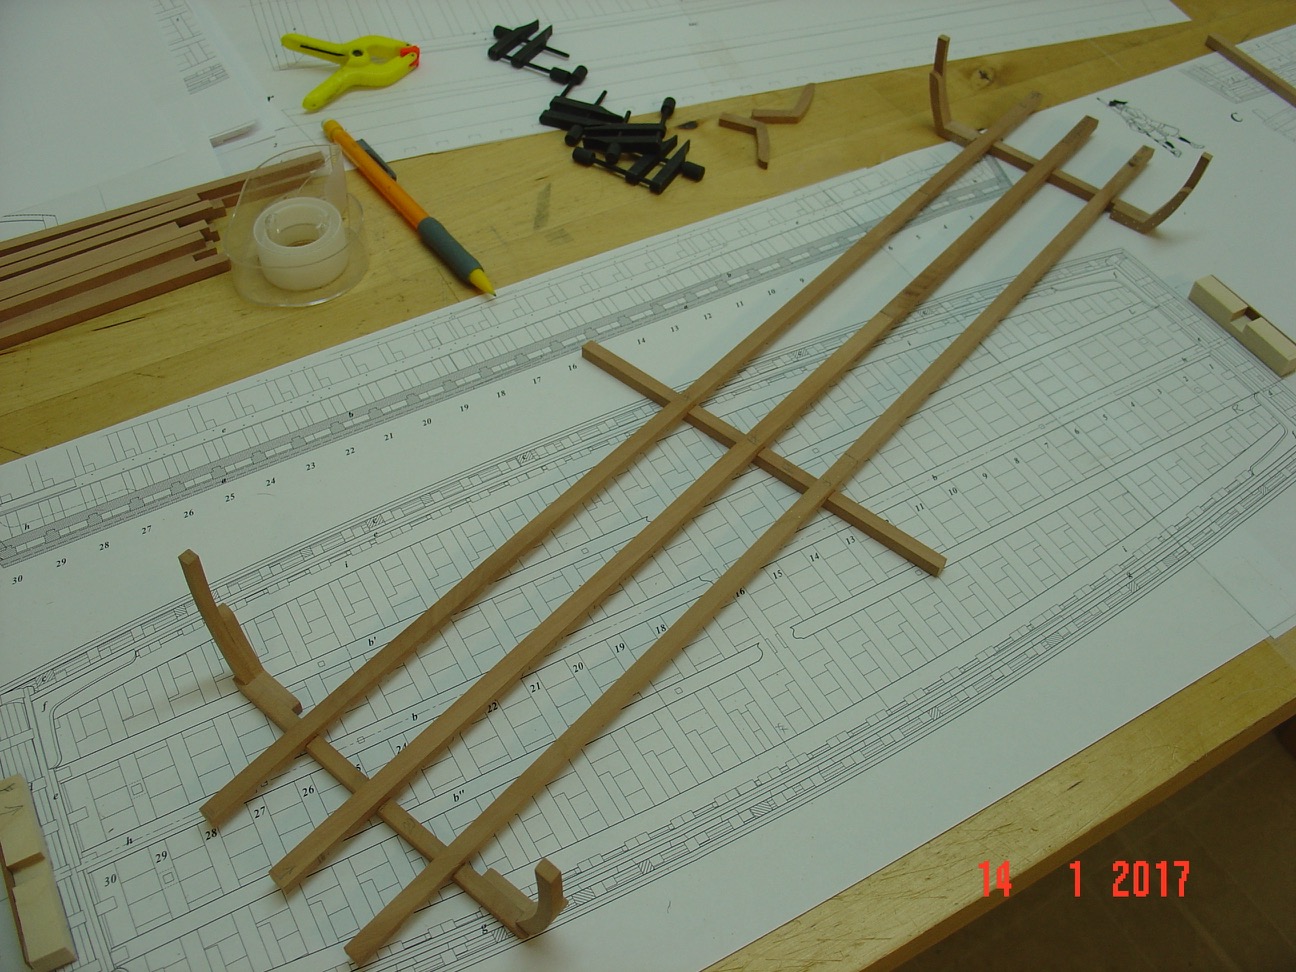
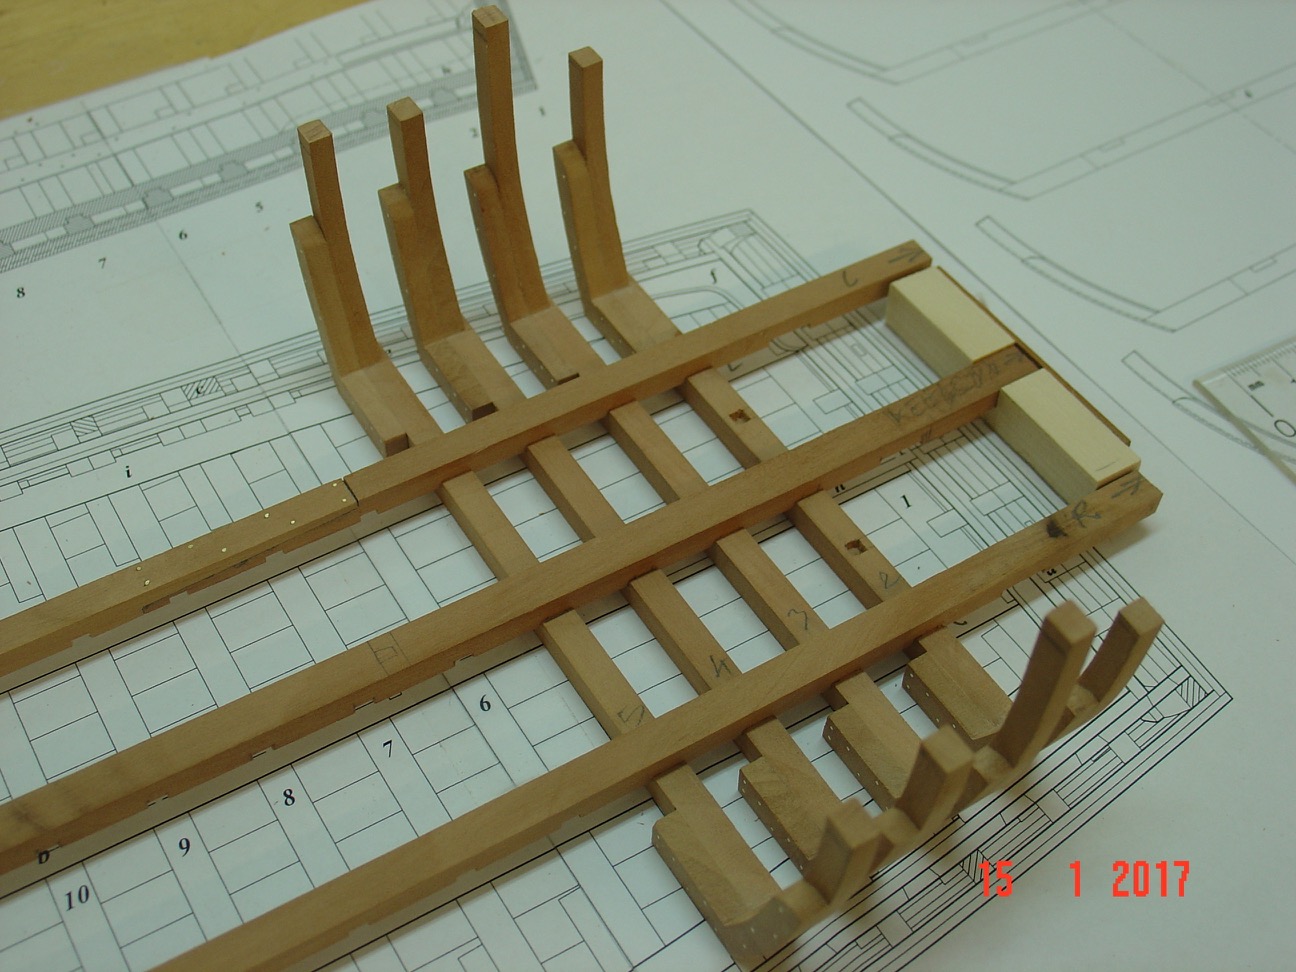
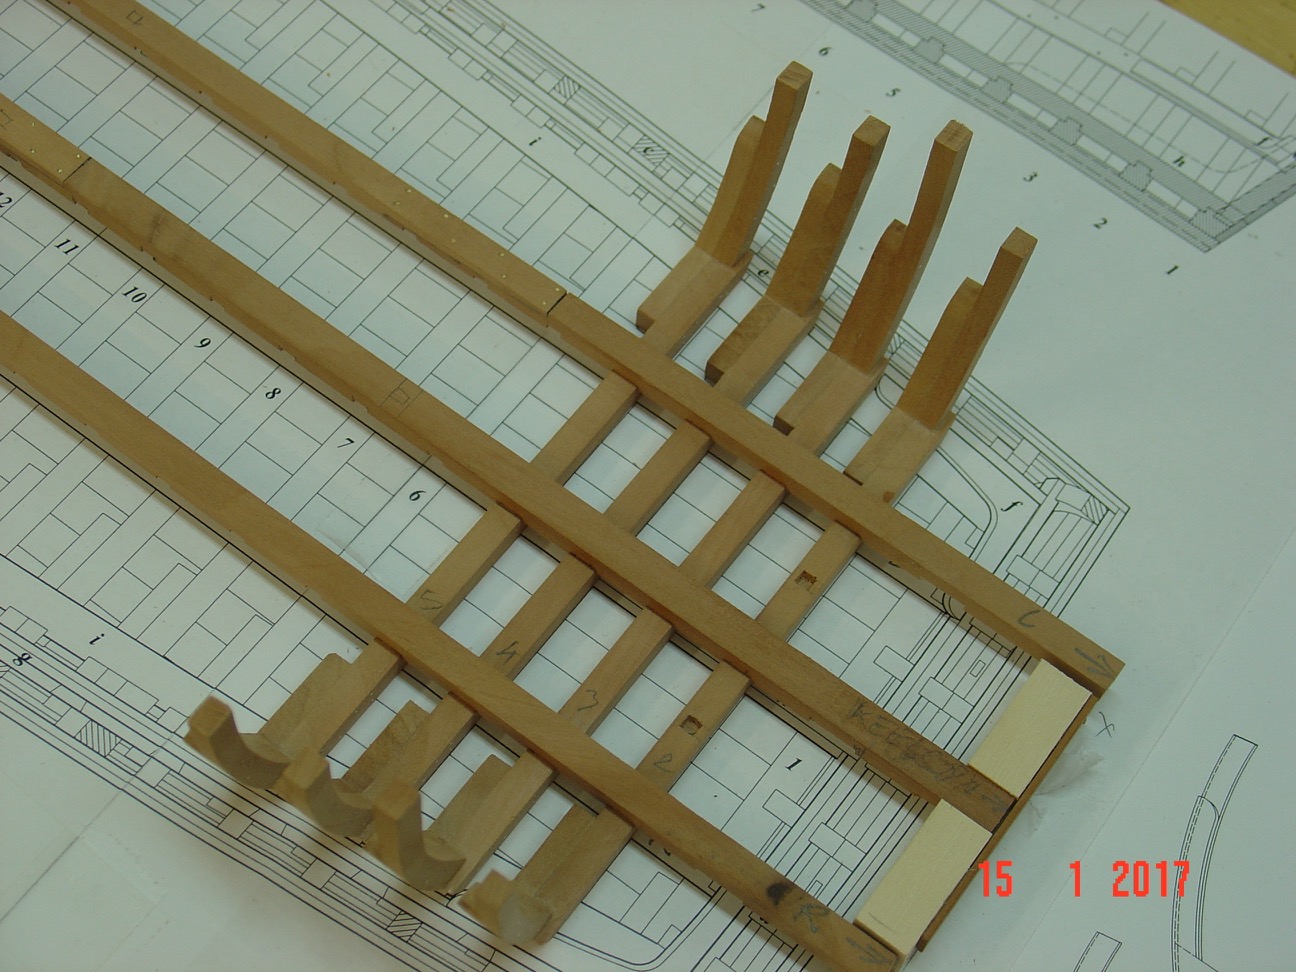
Thank you for interest.
Here is another update with the weekend progress: I made the first and the last frames corresponding to the ship bow and stern then I started the assembly of the frames on the keelson and the other two strikes parallel to the keelson. I have so far 9 out of 30 frames done.
Reagards,
Alexandru


- tadheus, ChrisLBren, popash42 and 19 others
-
22
-
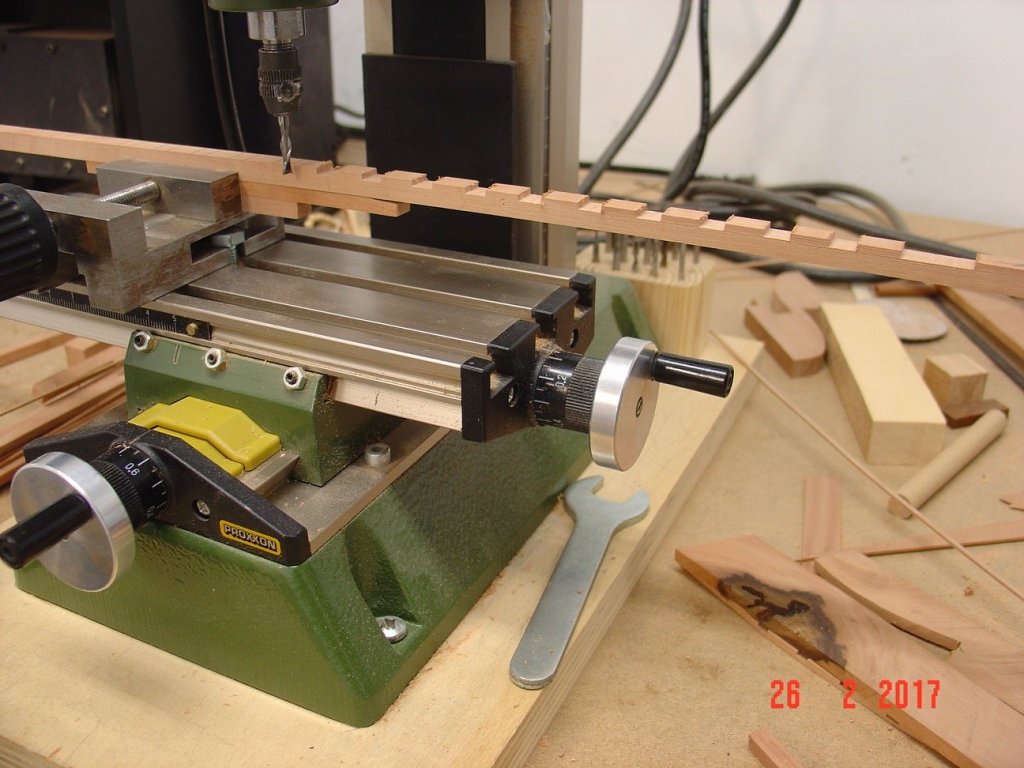
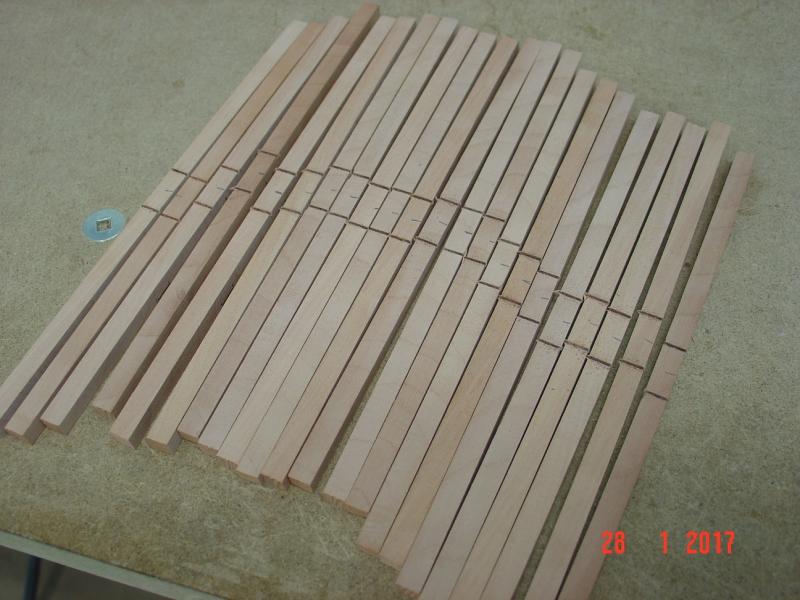
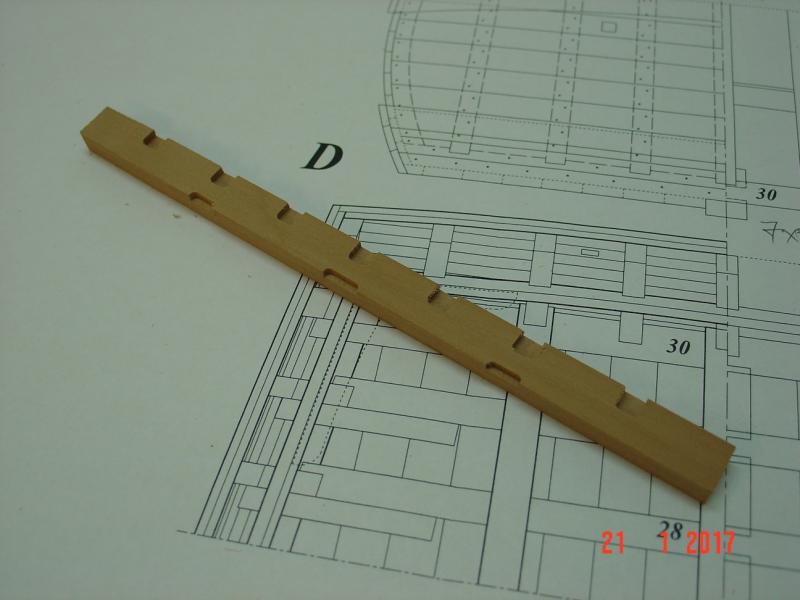
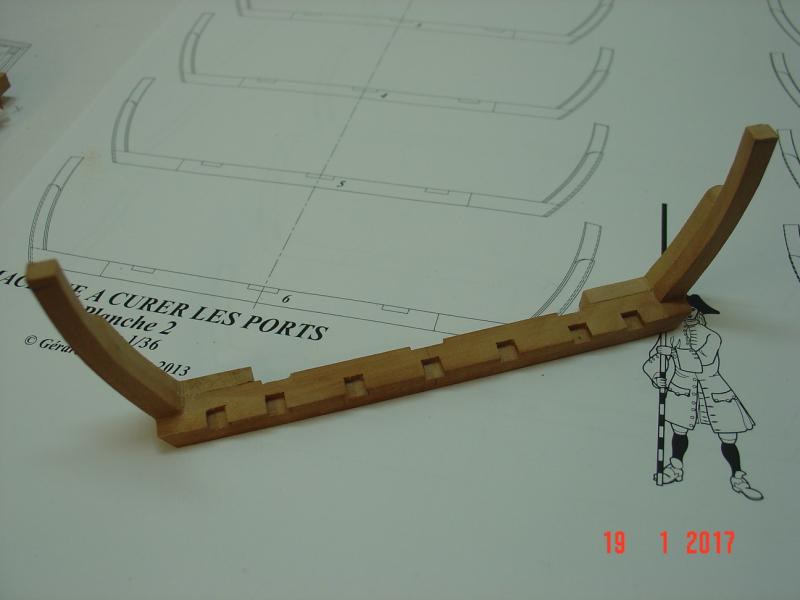
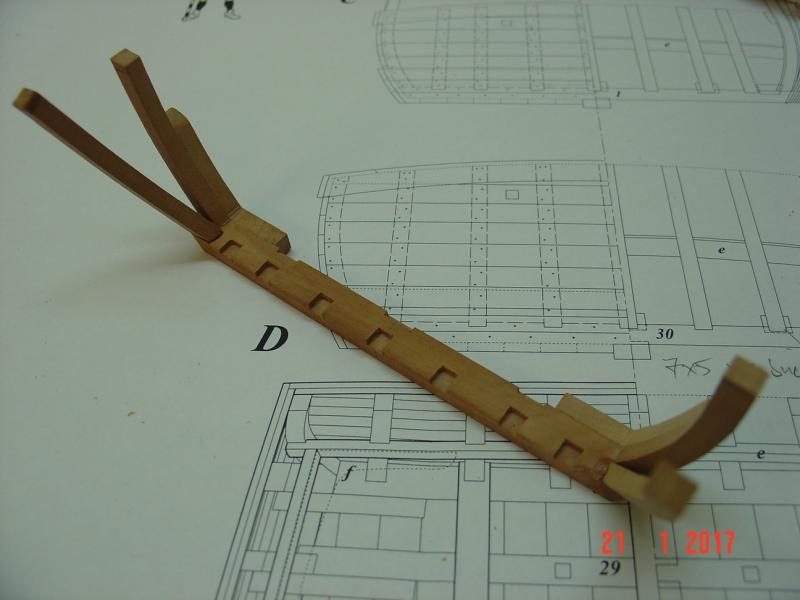
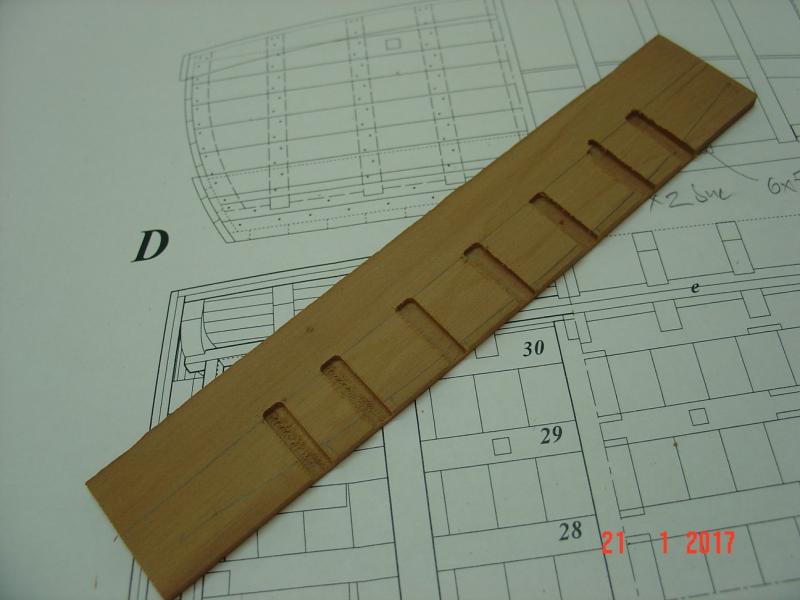
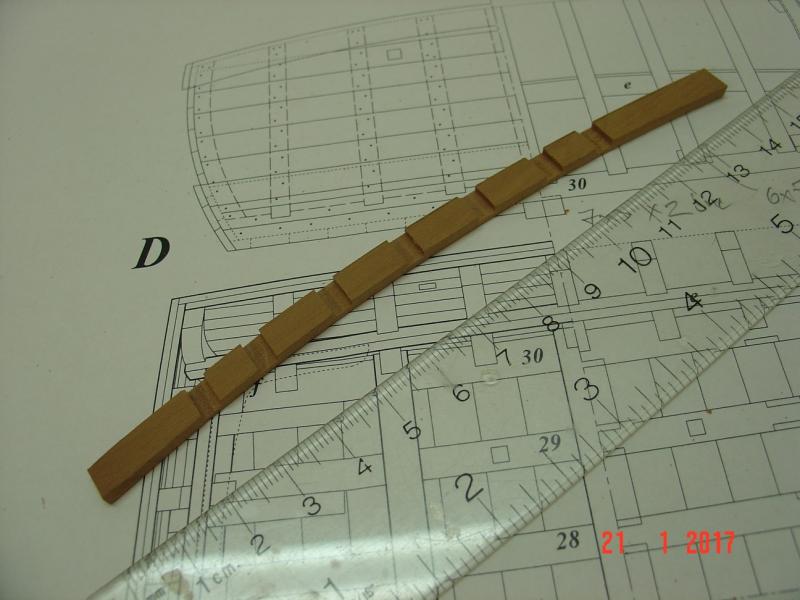
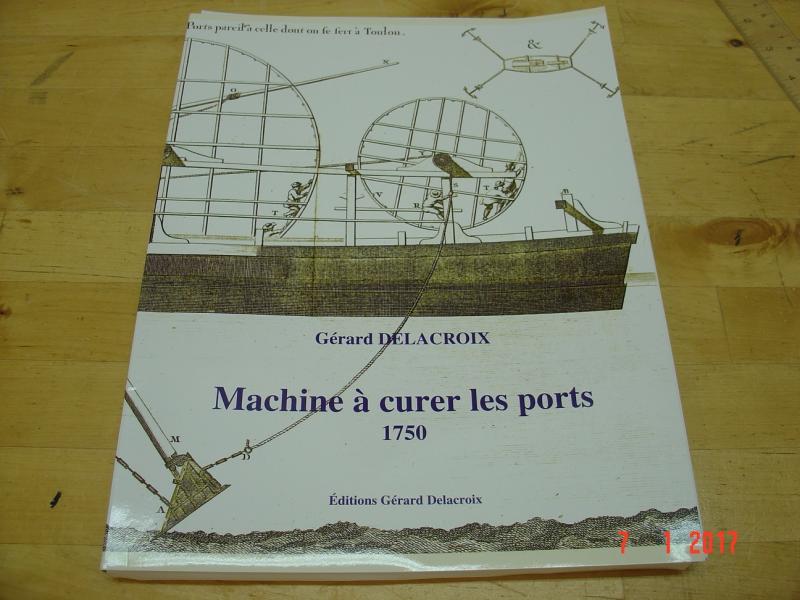
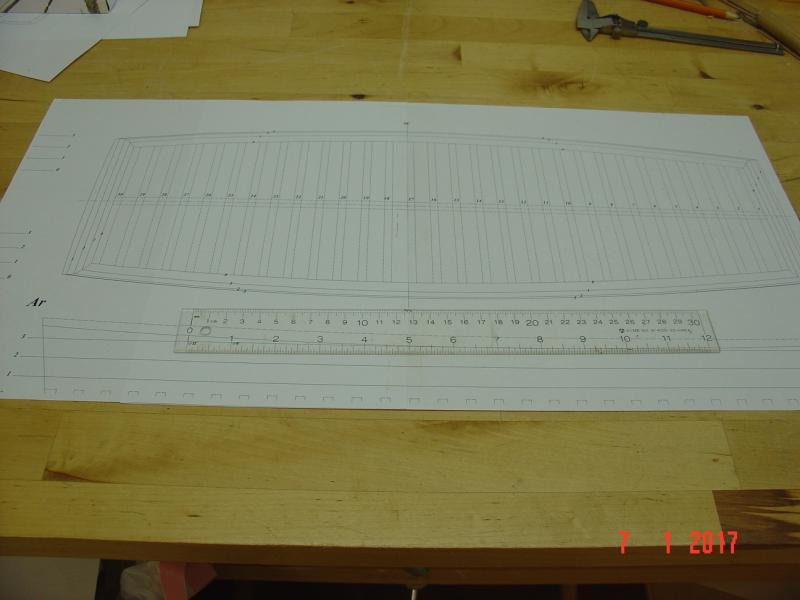
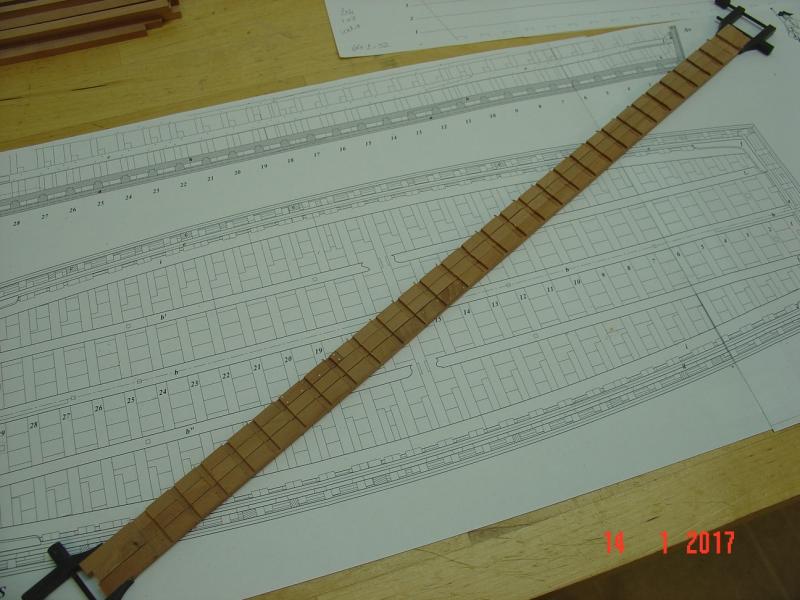
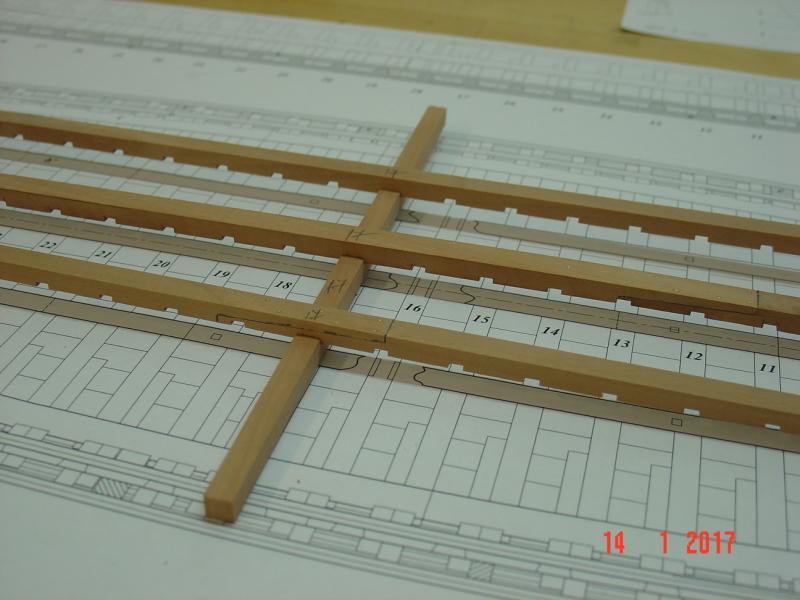
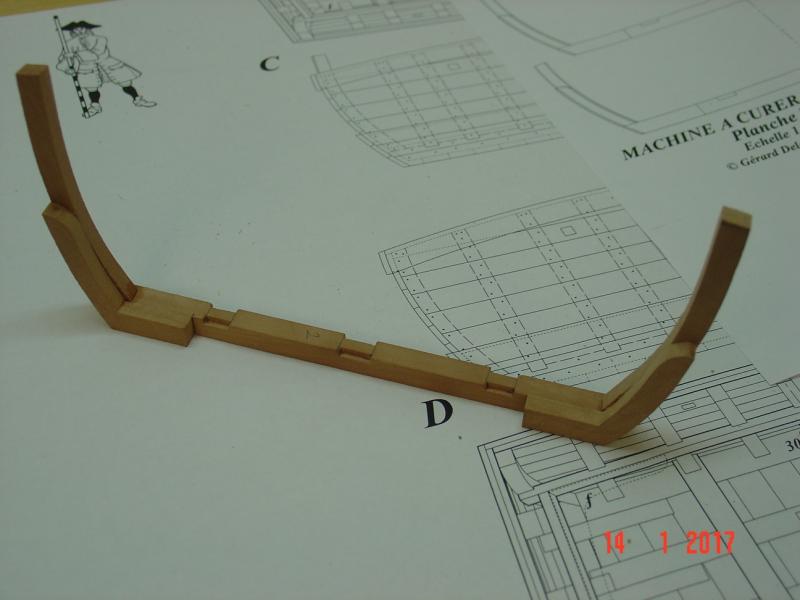
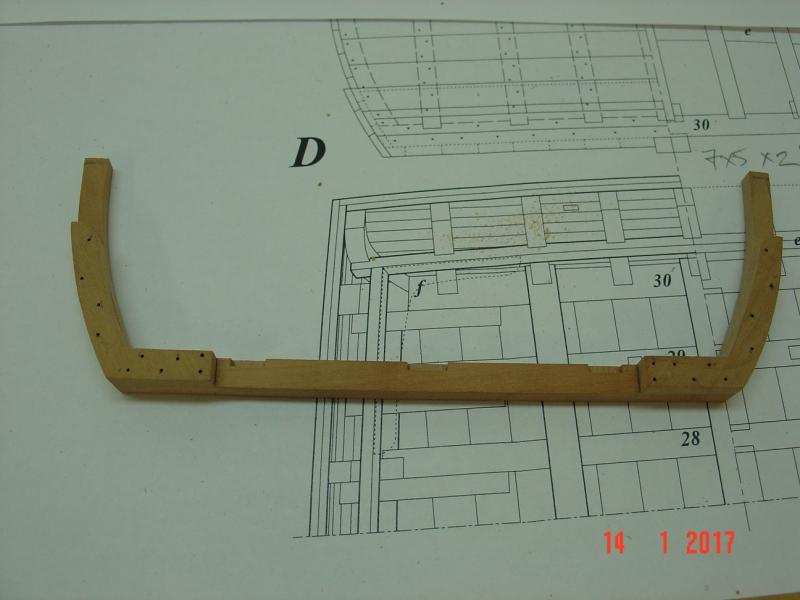
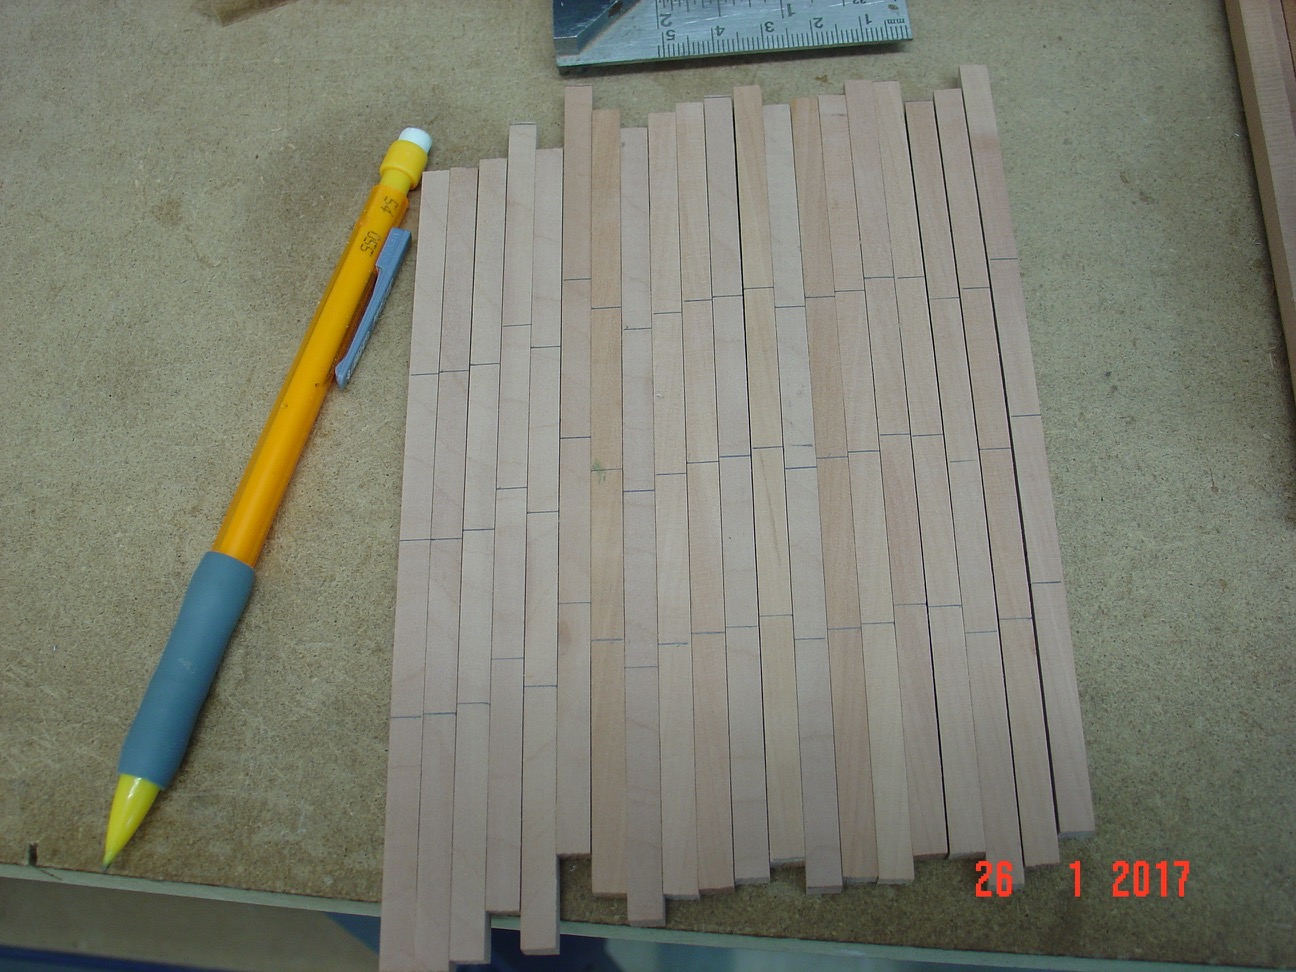
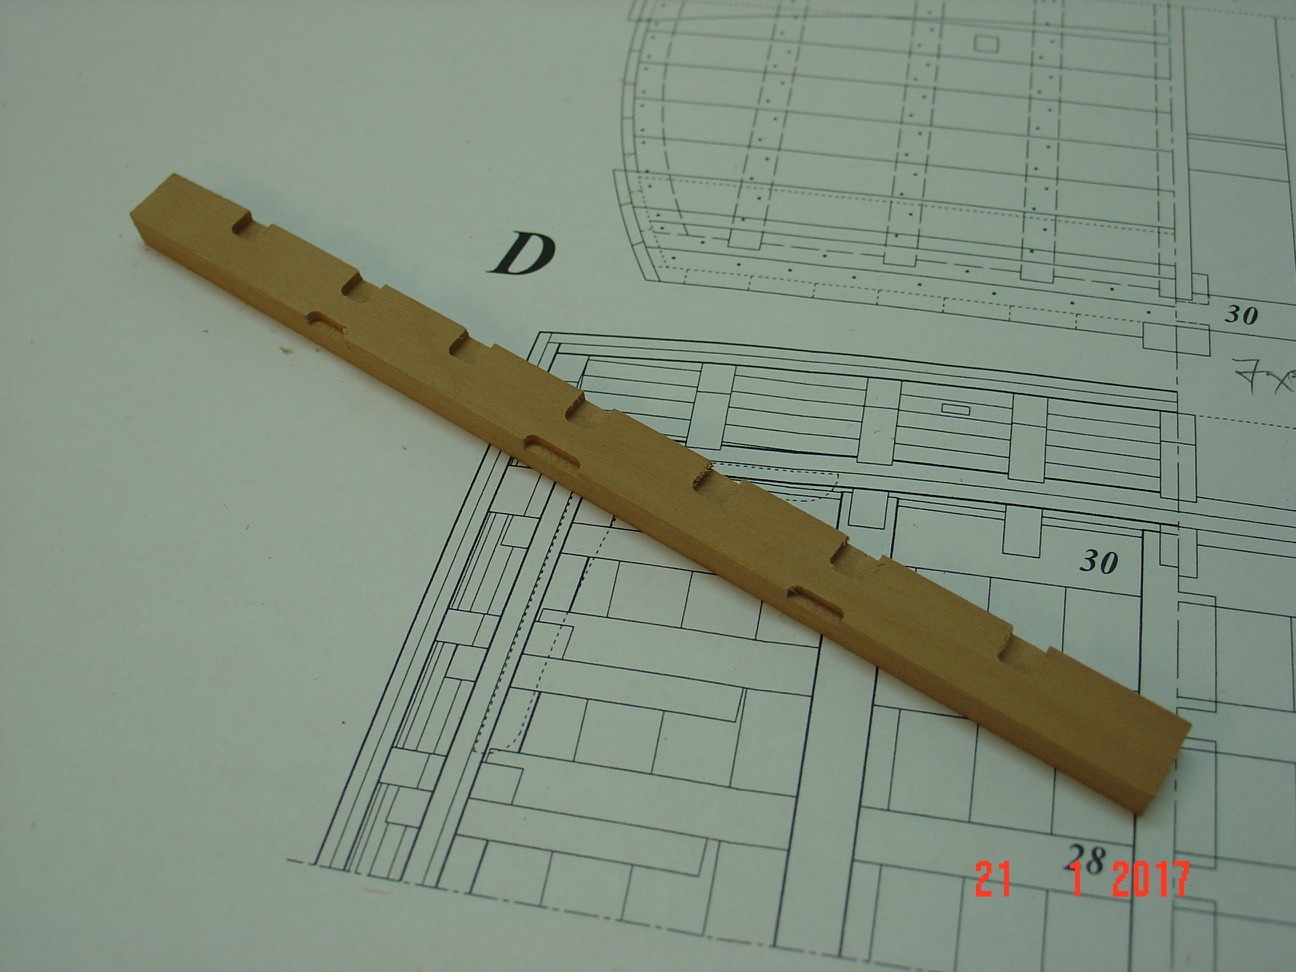
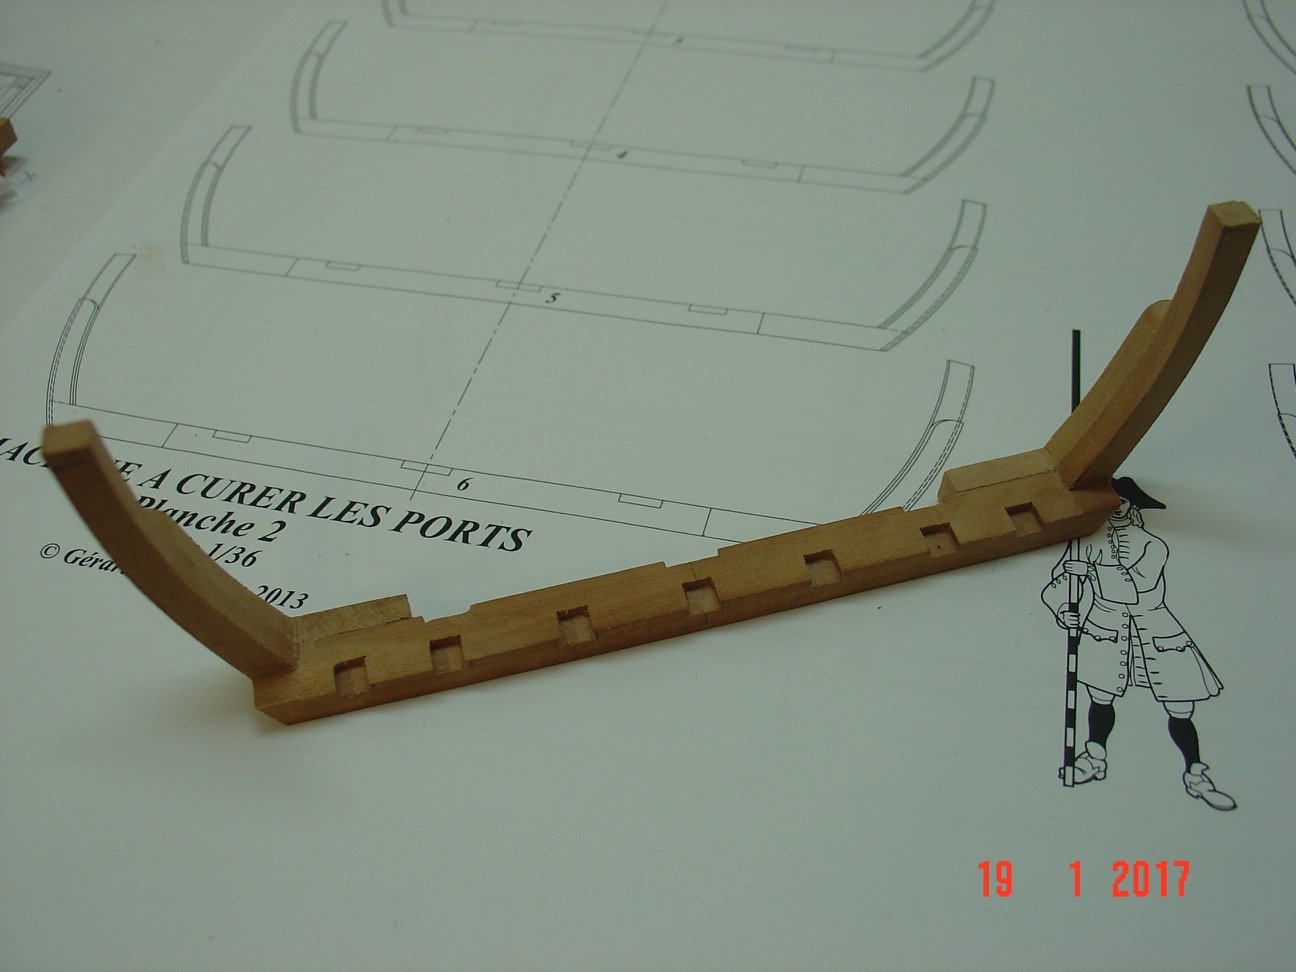
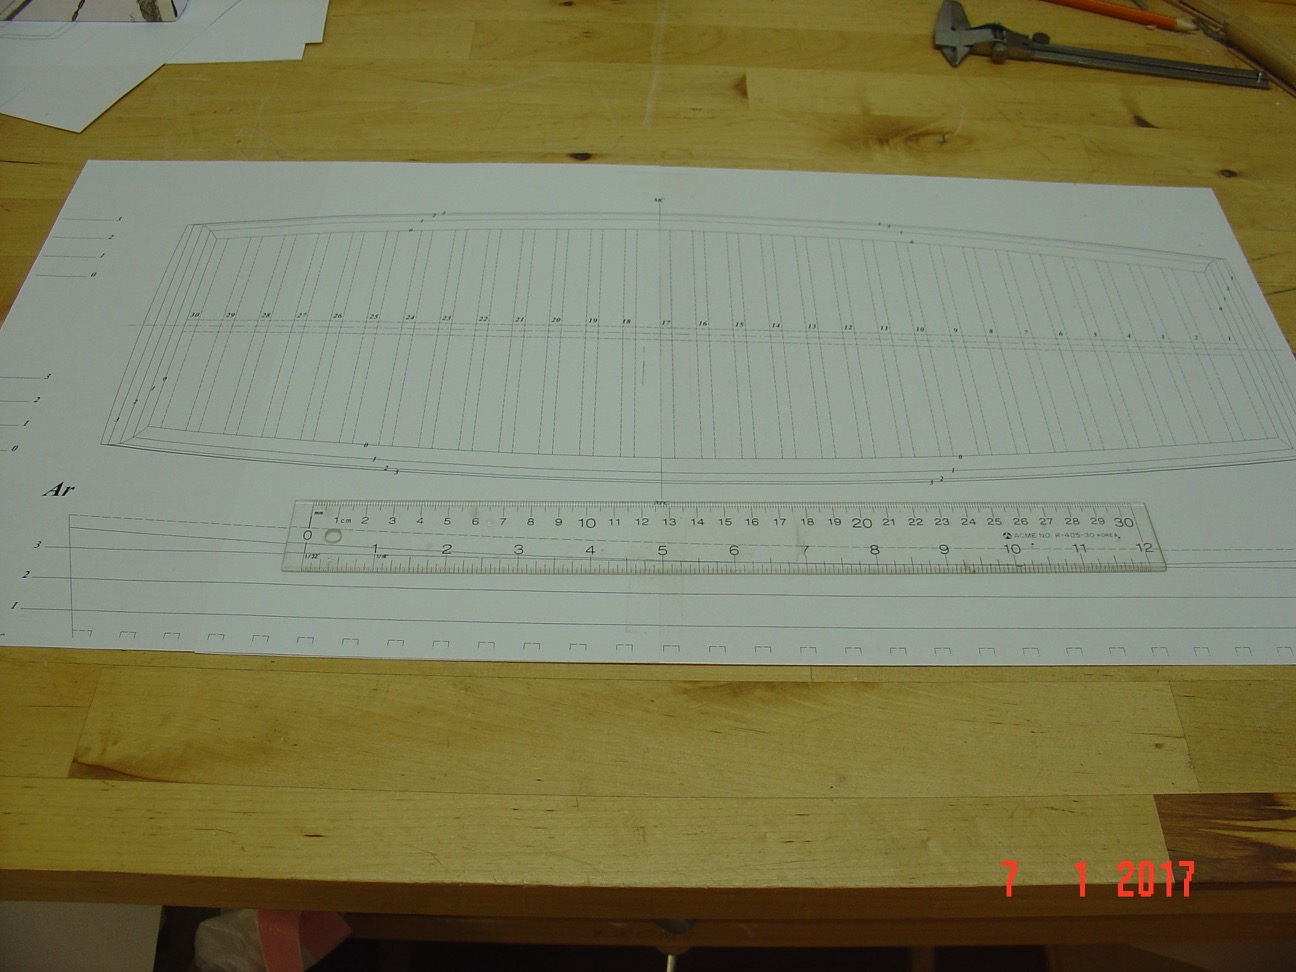
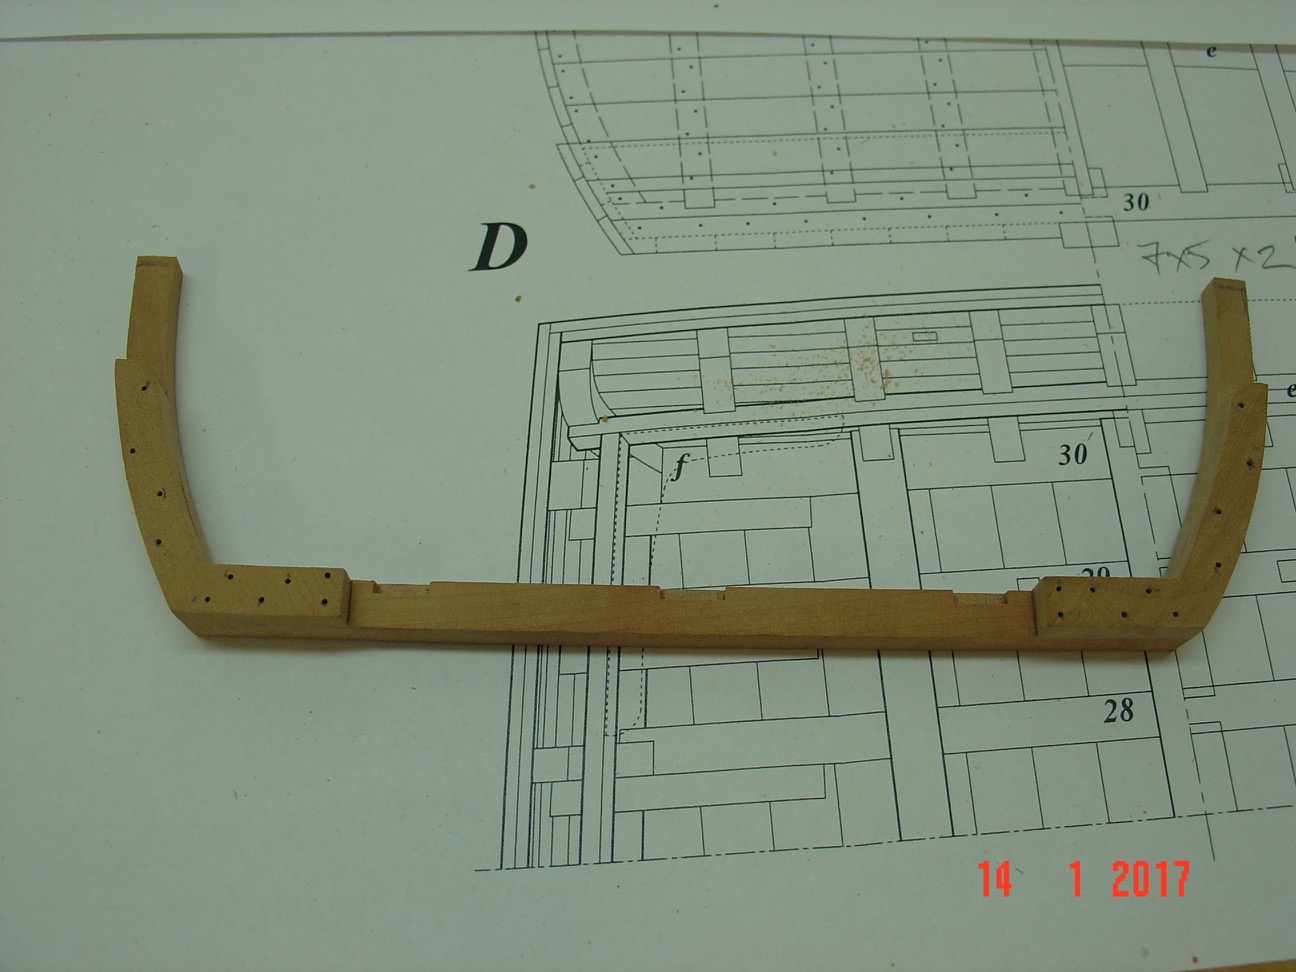
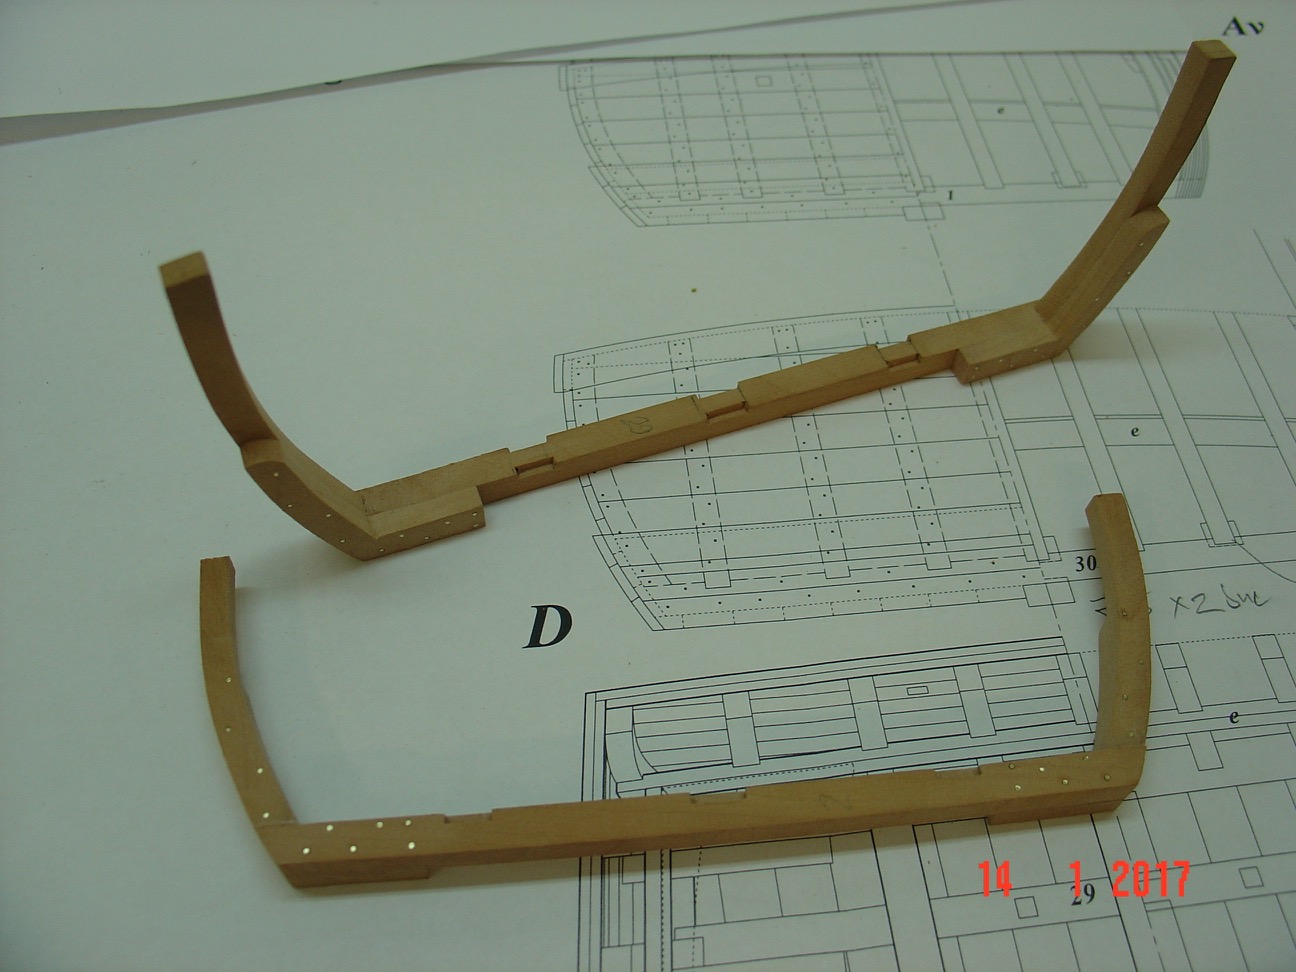
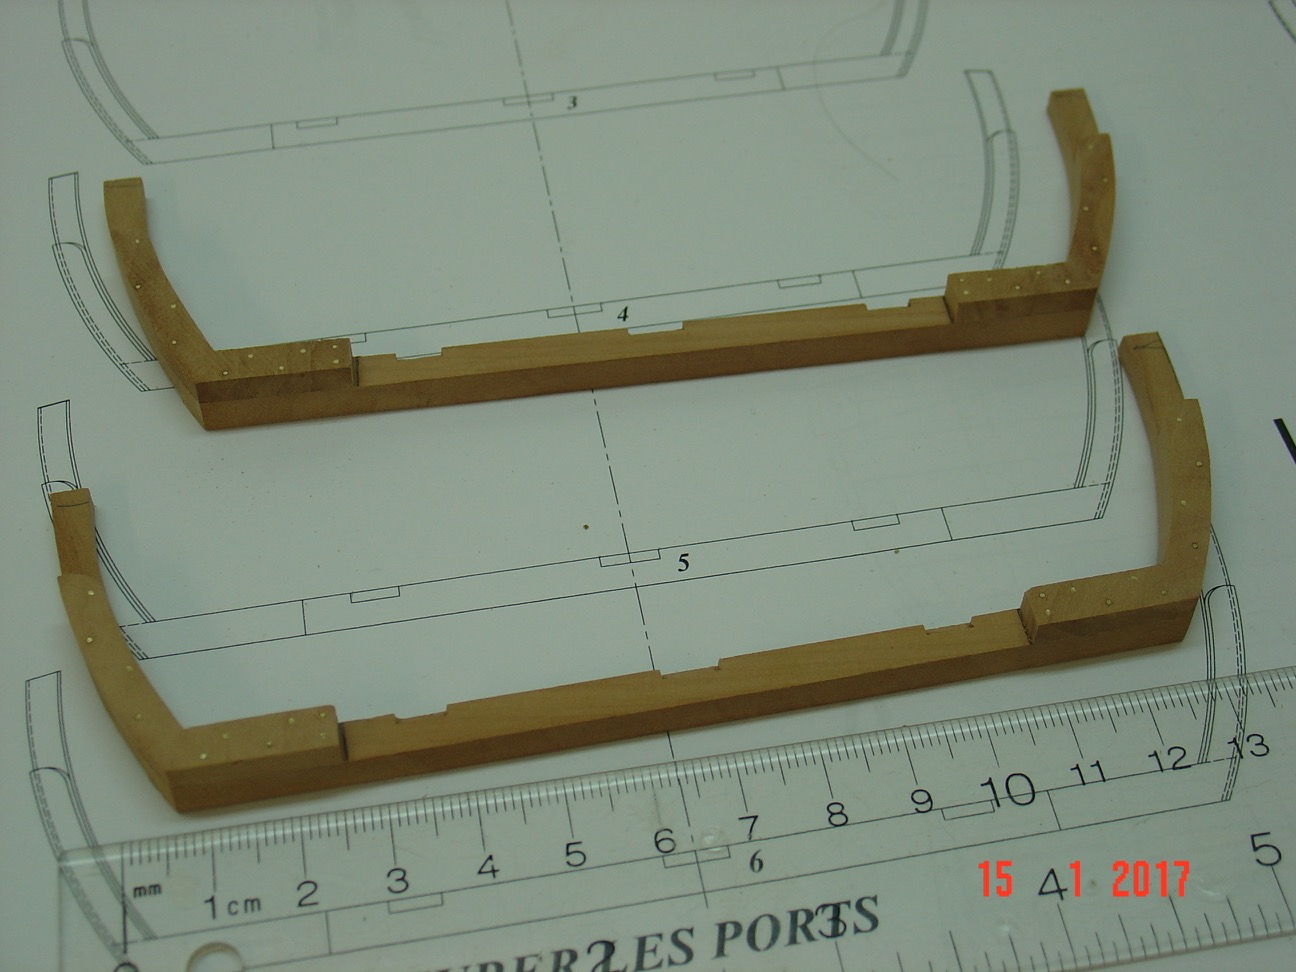
Hello,
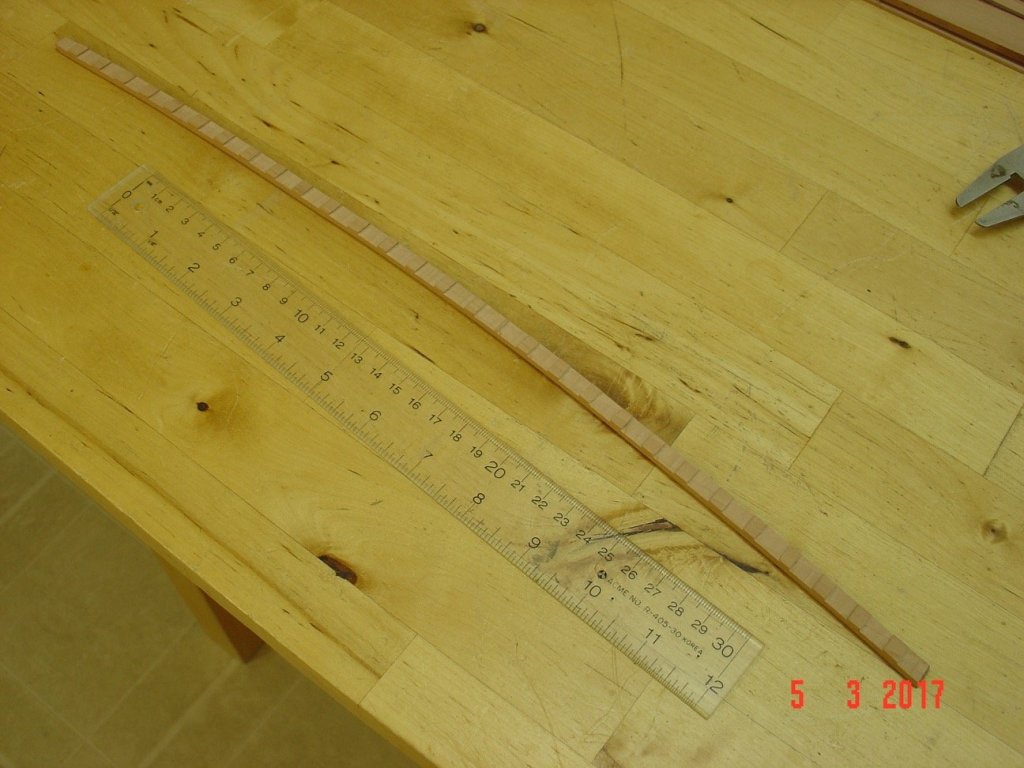
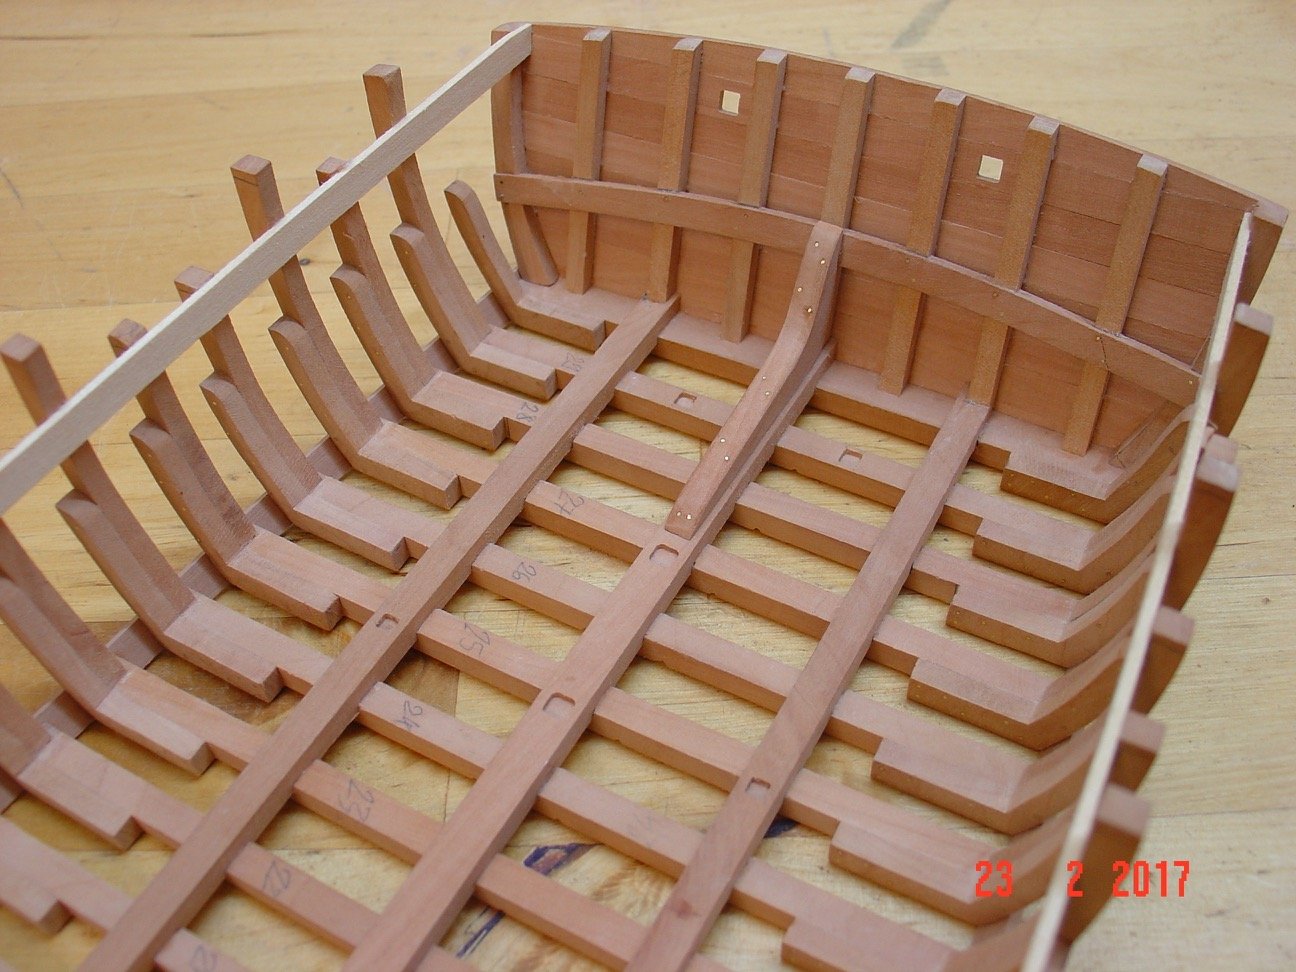
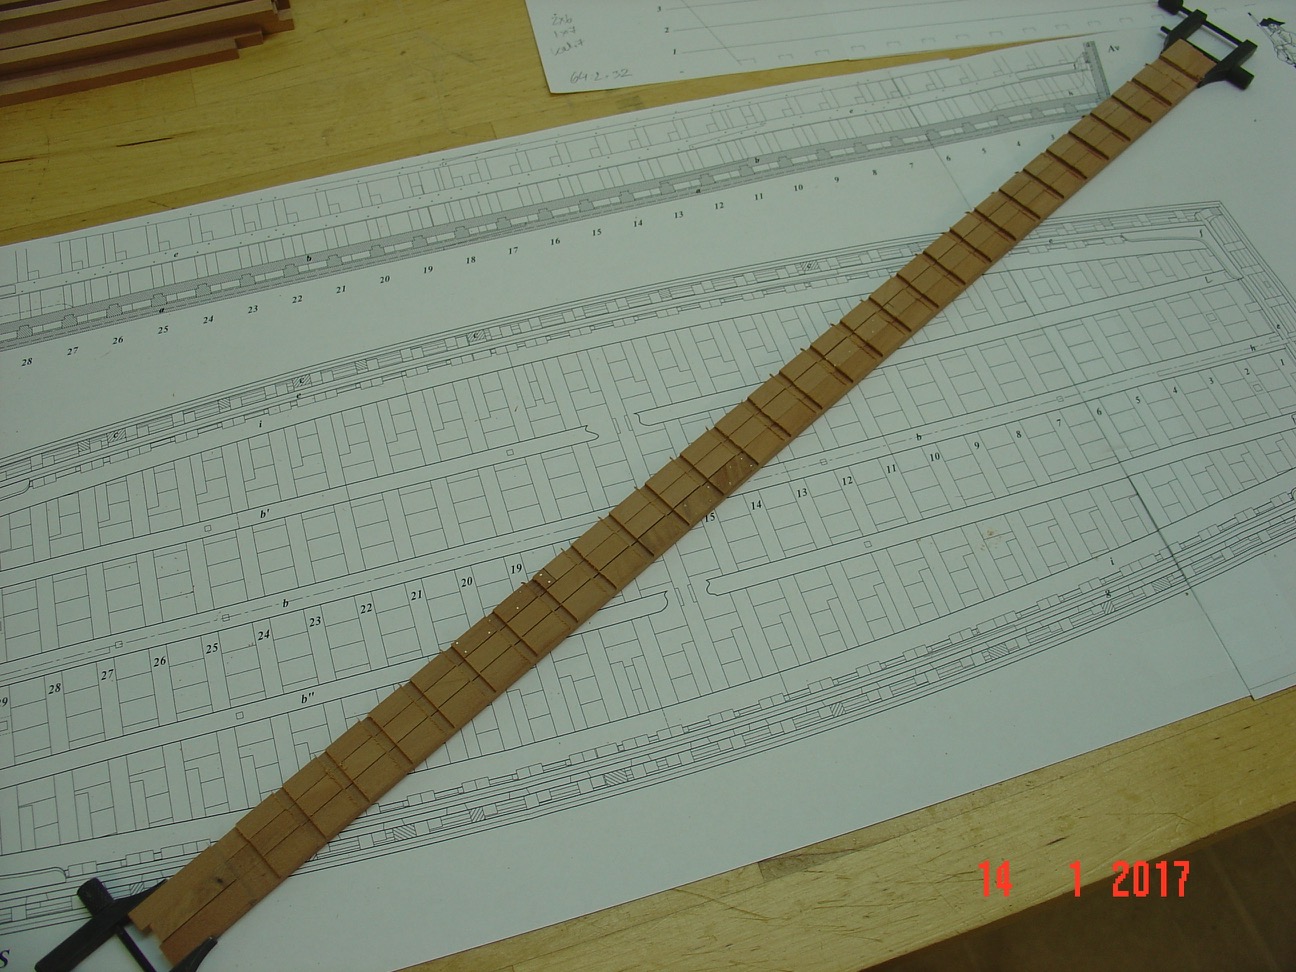
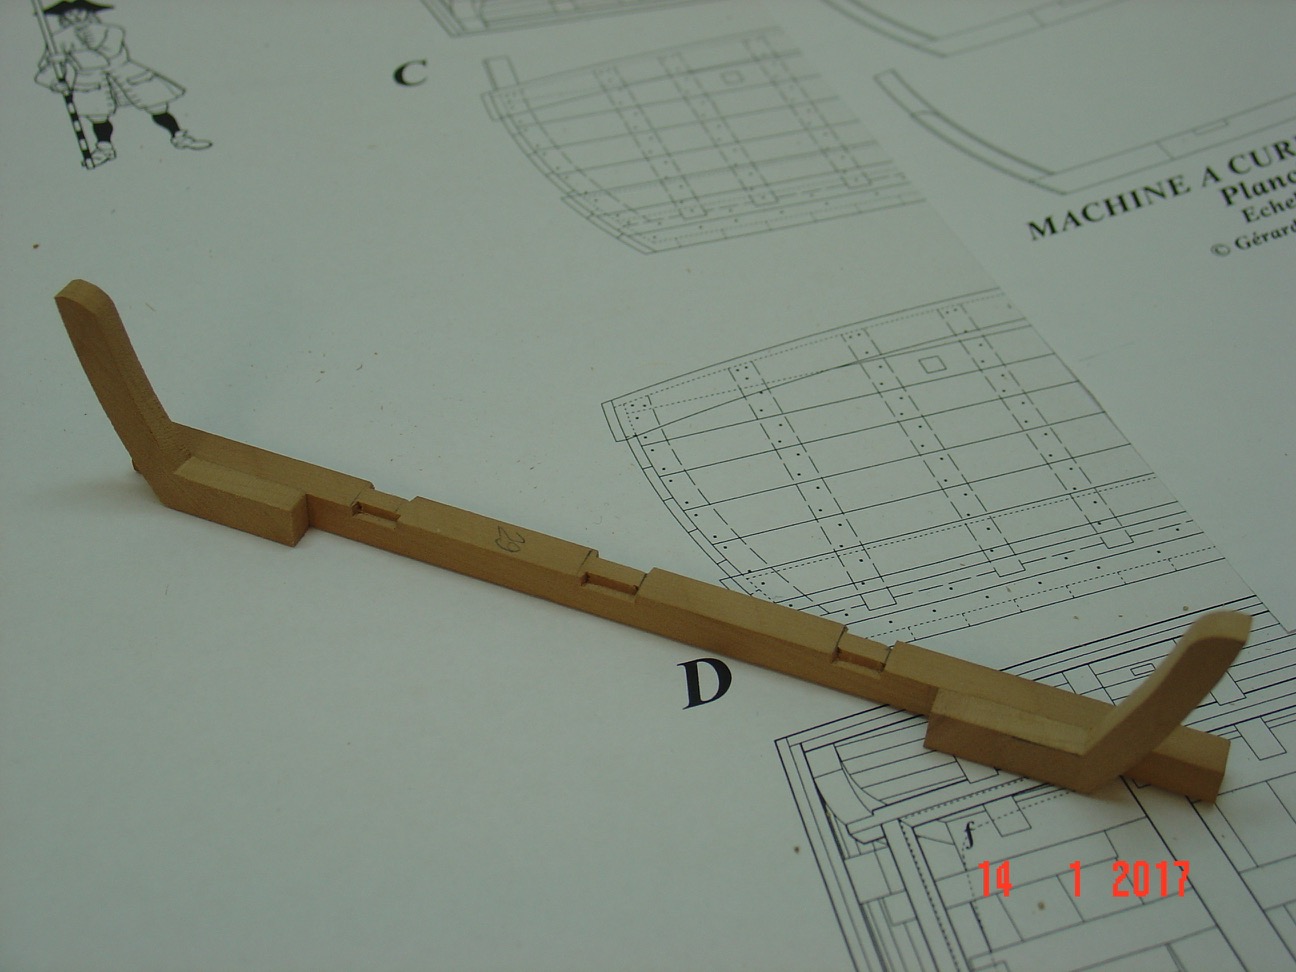
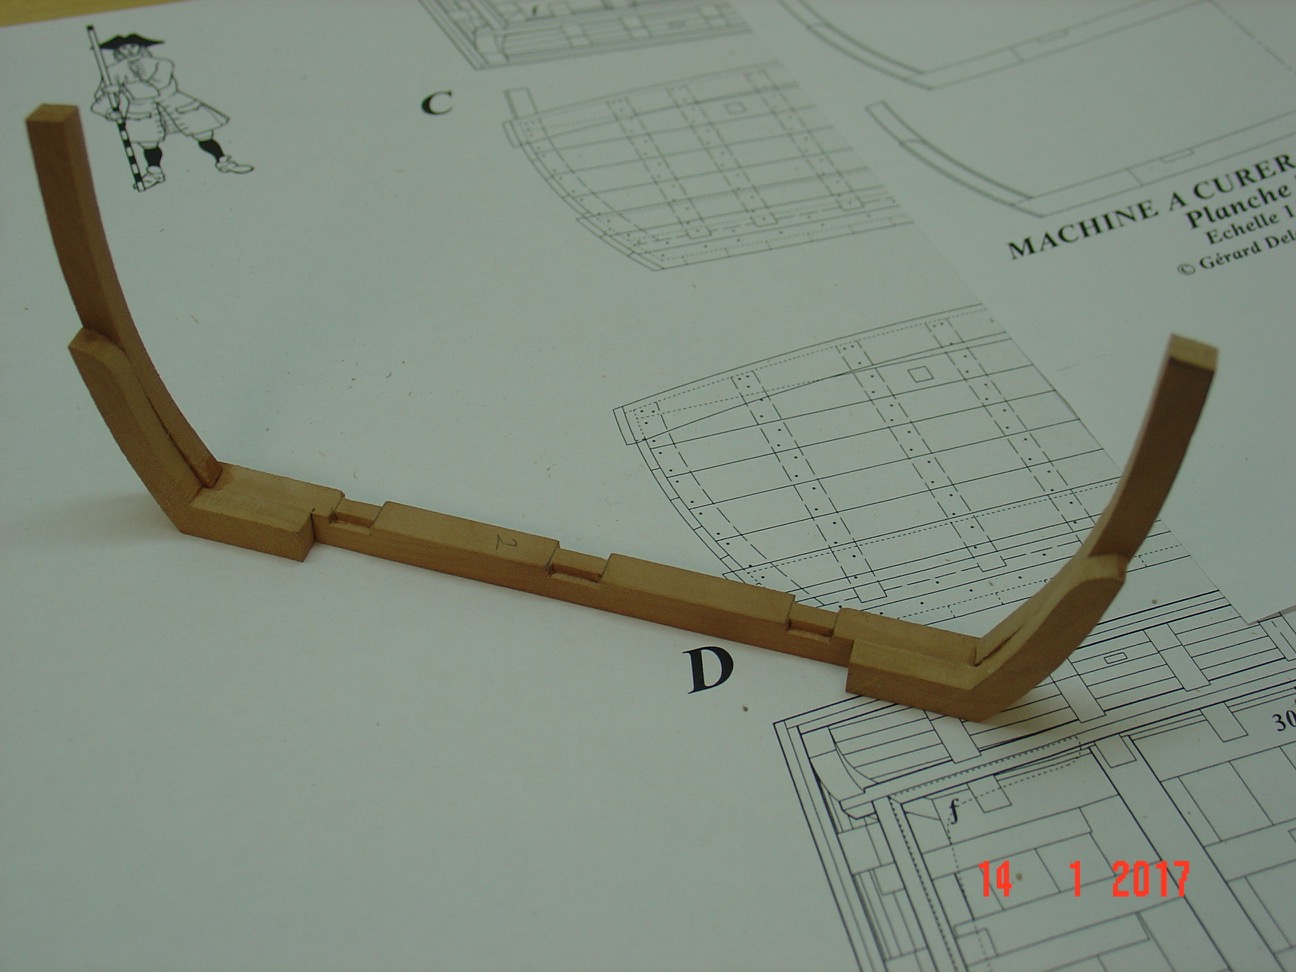
I started the year with a new project - since my Victory is "done". The project I choose is small utility vessel used in French ports to keep them clean and accessible based on a monograph by Gerard Delacroix. The model will be built as plank on frames with a side open.The plans are at 1/36 which will give a model about 50 cm long - so not too big.
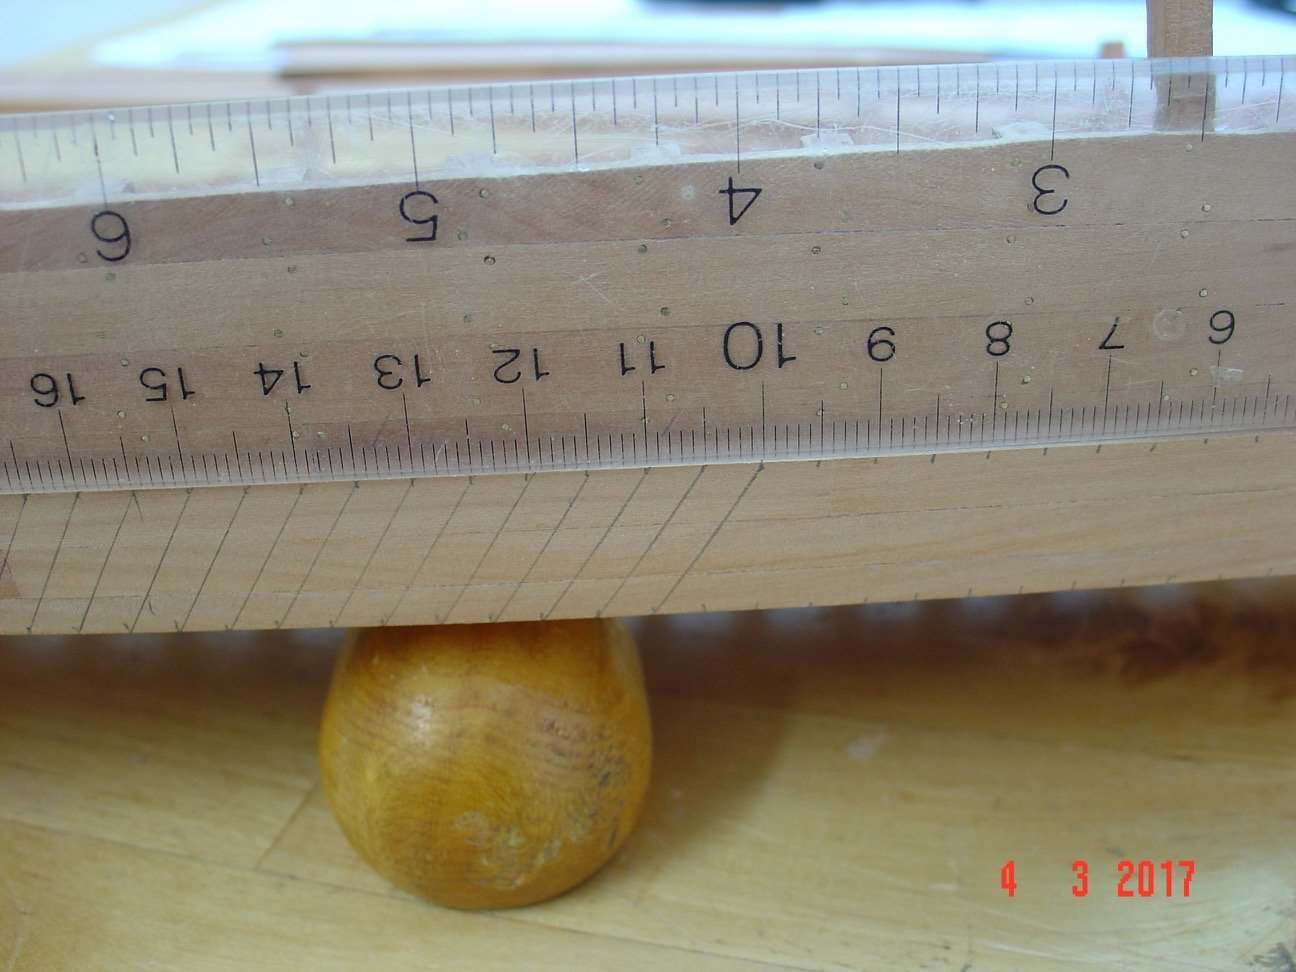
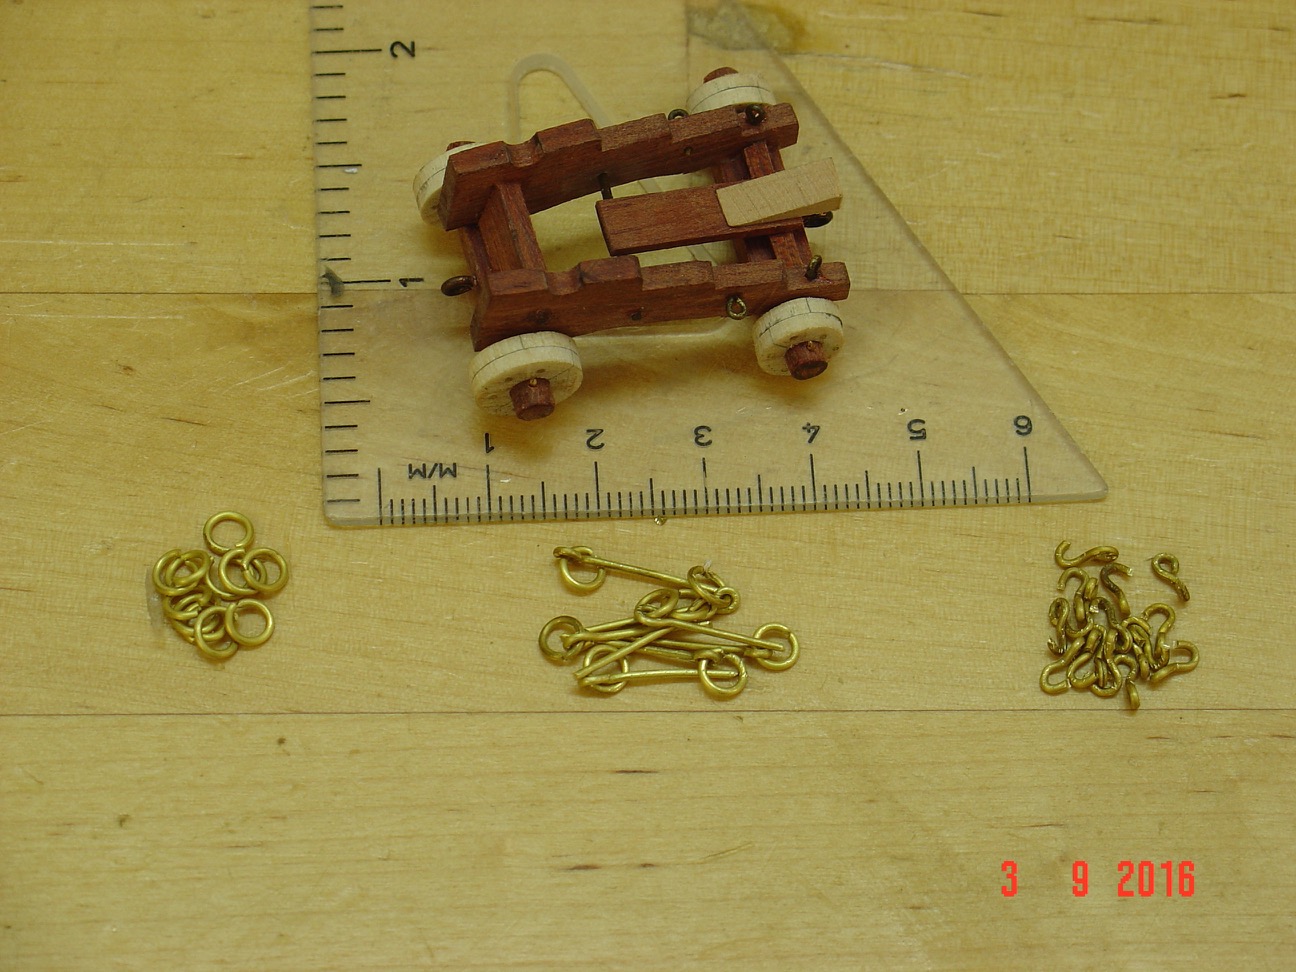
It has no rigging and the hull shape is quite simple with a perfectly flat bottom. The hull itself will be relatively easy to build - which I like as I don't feel like embarking in huge projects for a while now (Victory took me 9 years). But there are challenges to this project too: the two wheels and the metal scoops.
Here are some pictures with the progress so far.
Regards,
Alexandru


- mtaylor, Bluto 1790, hexnut and 27 others
-
30
-
-
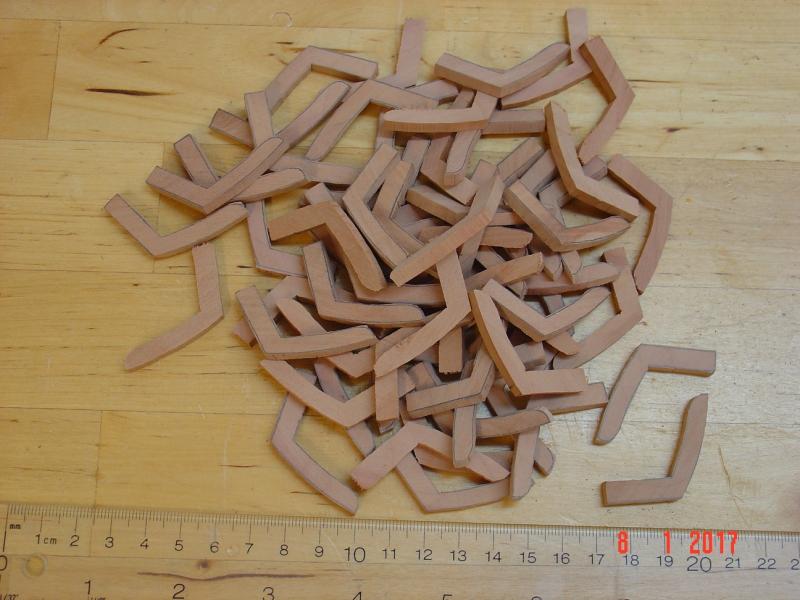
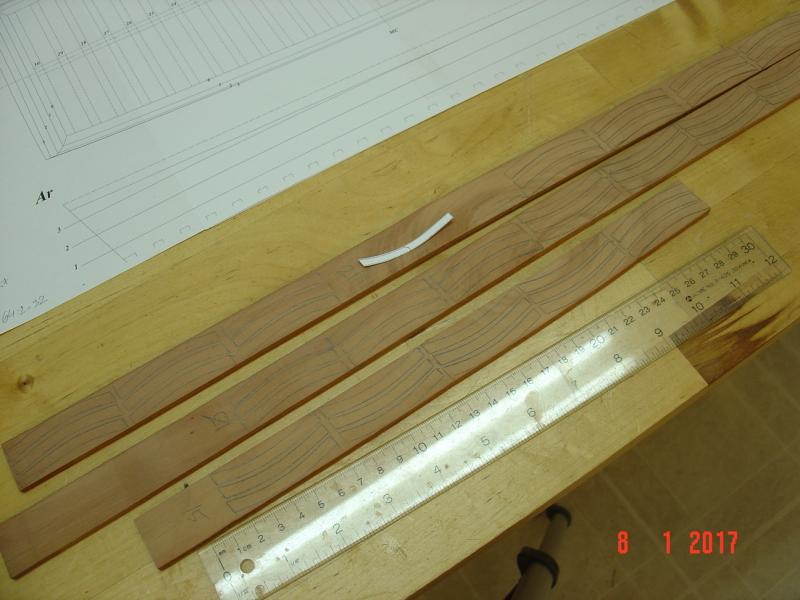
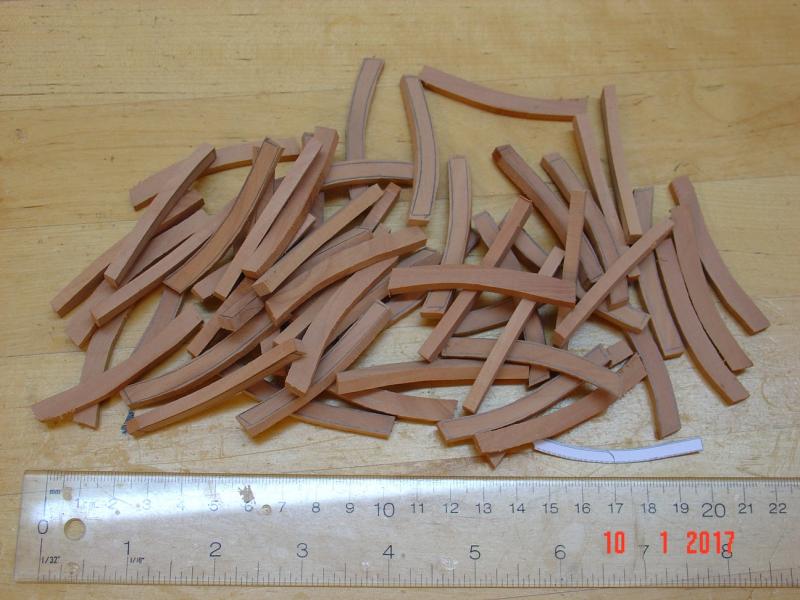
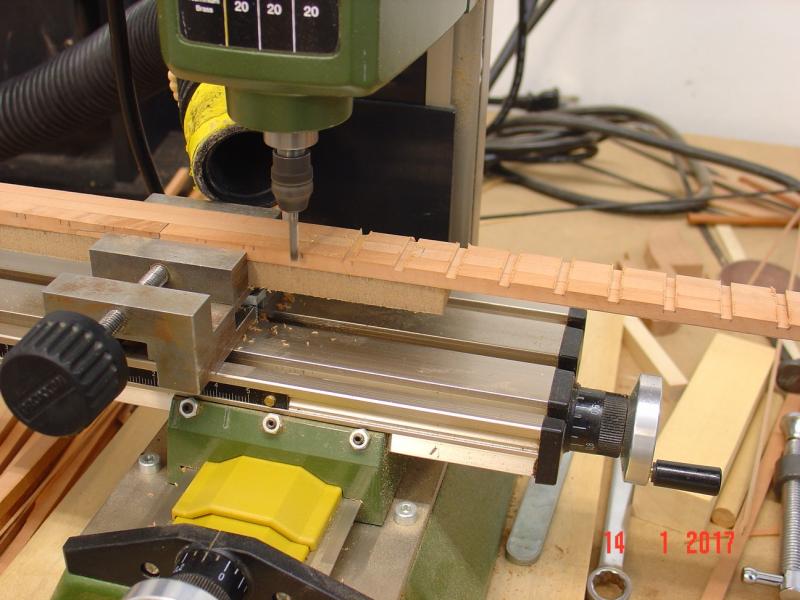
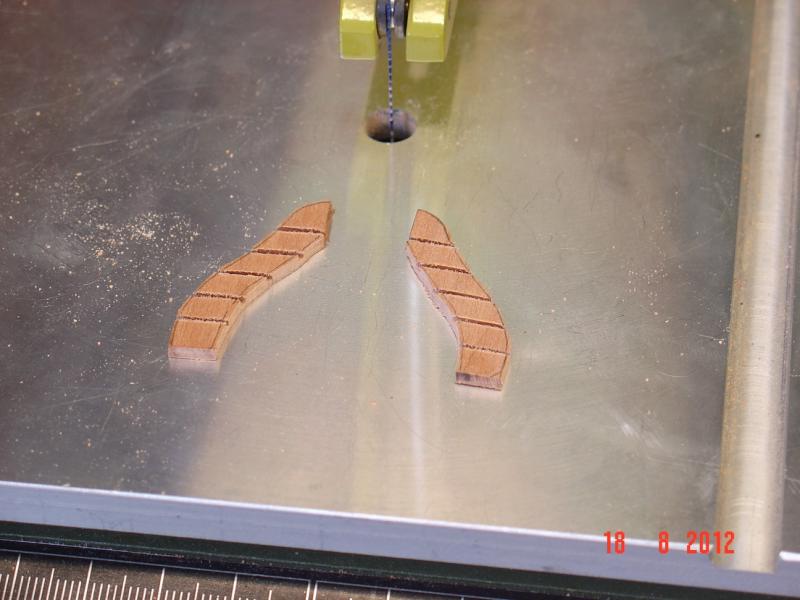
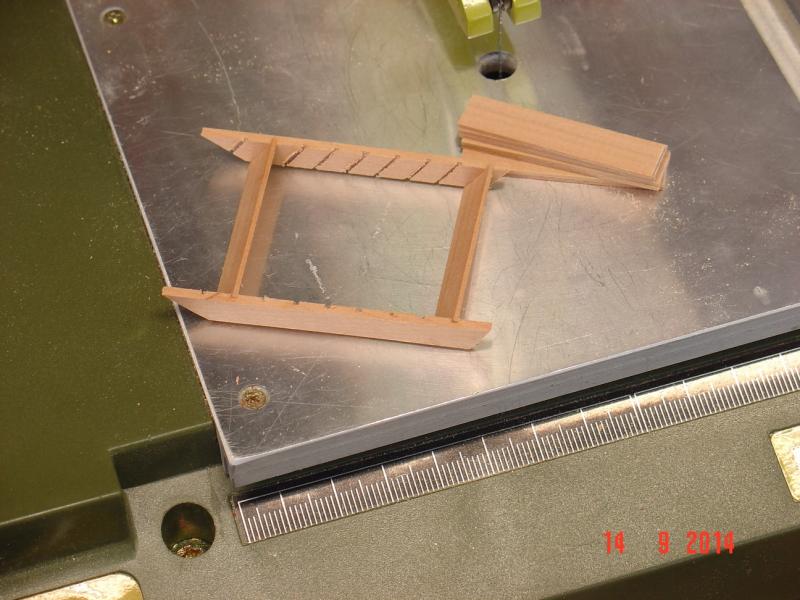
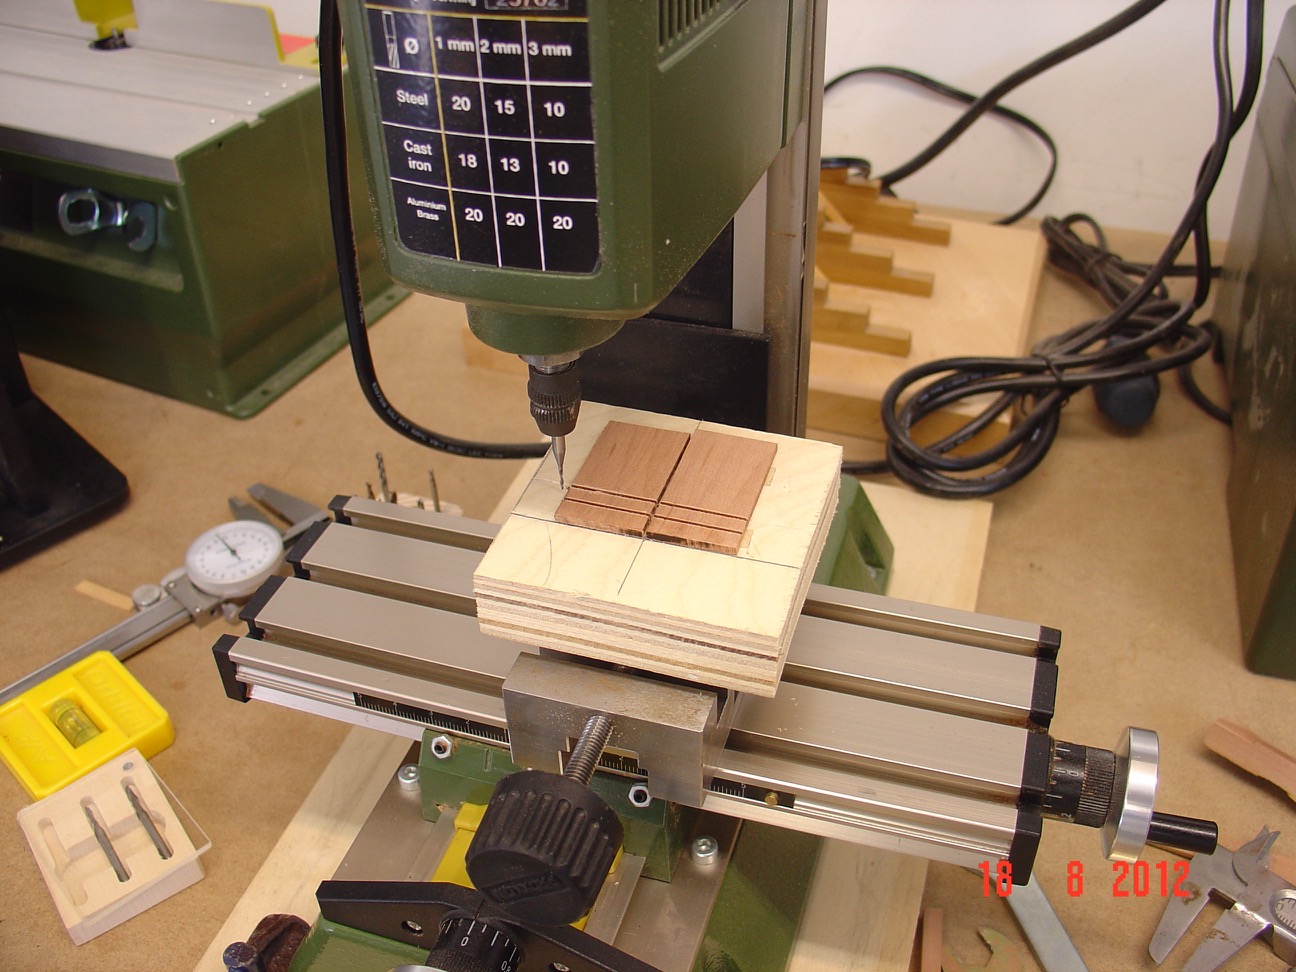
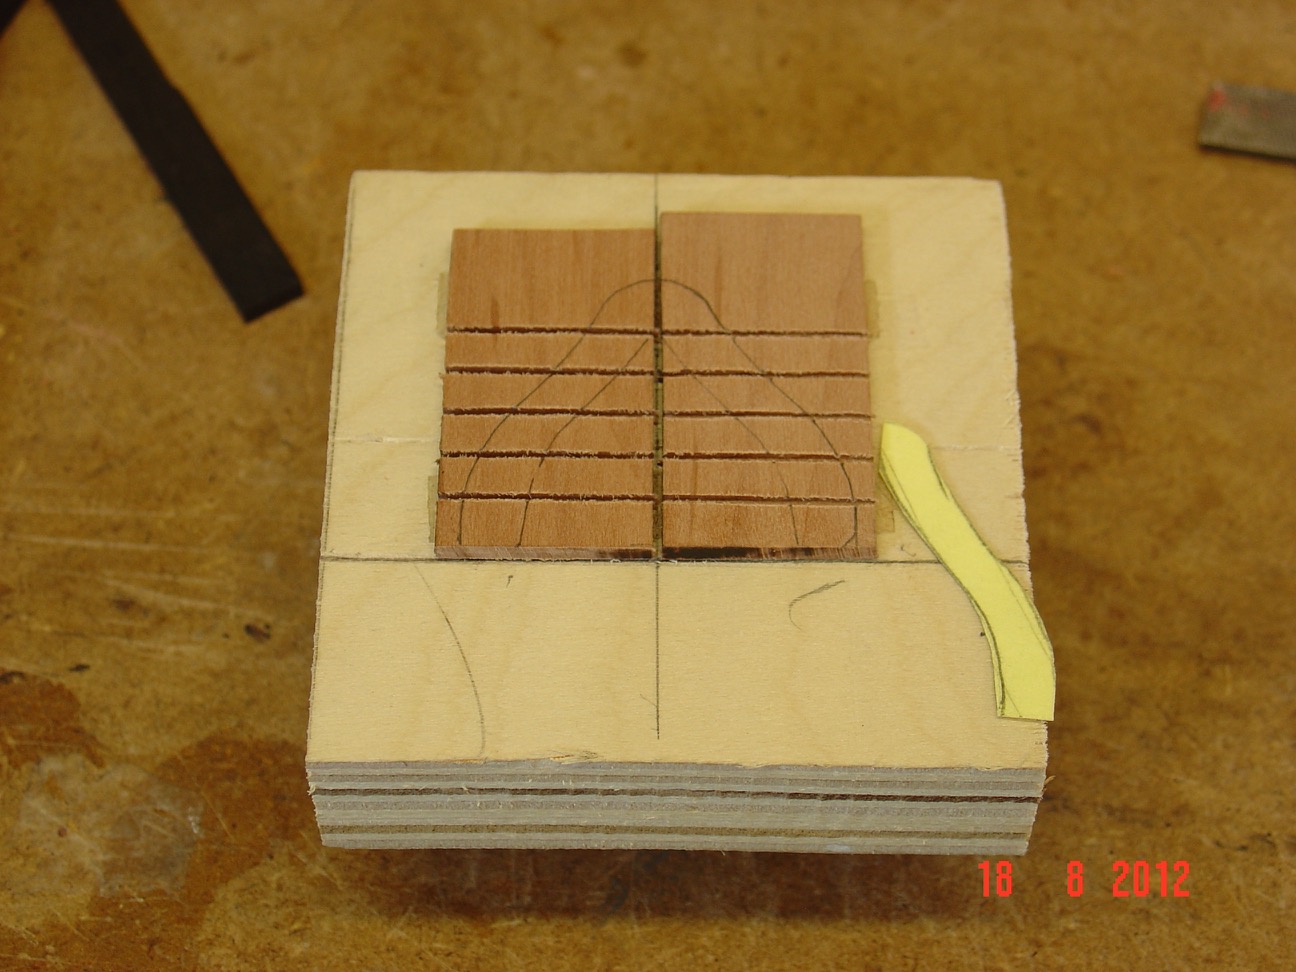
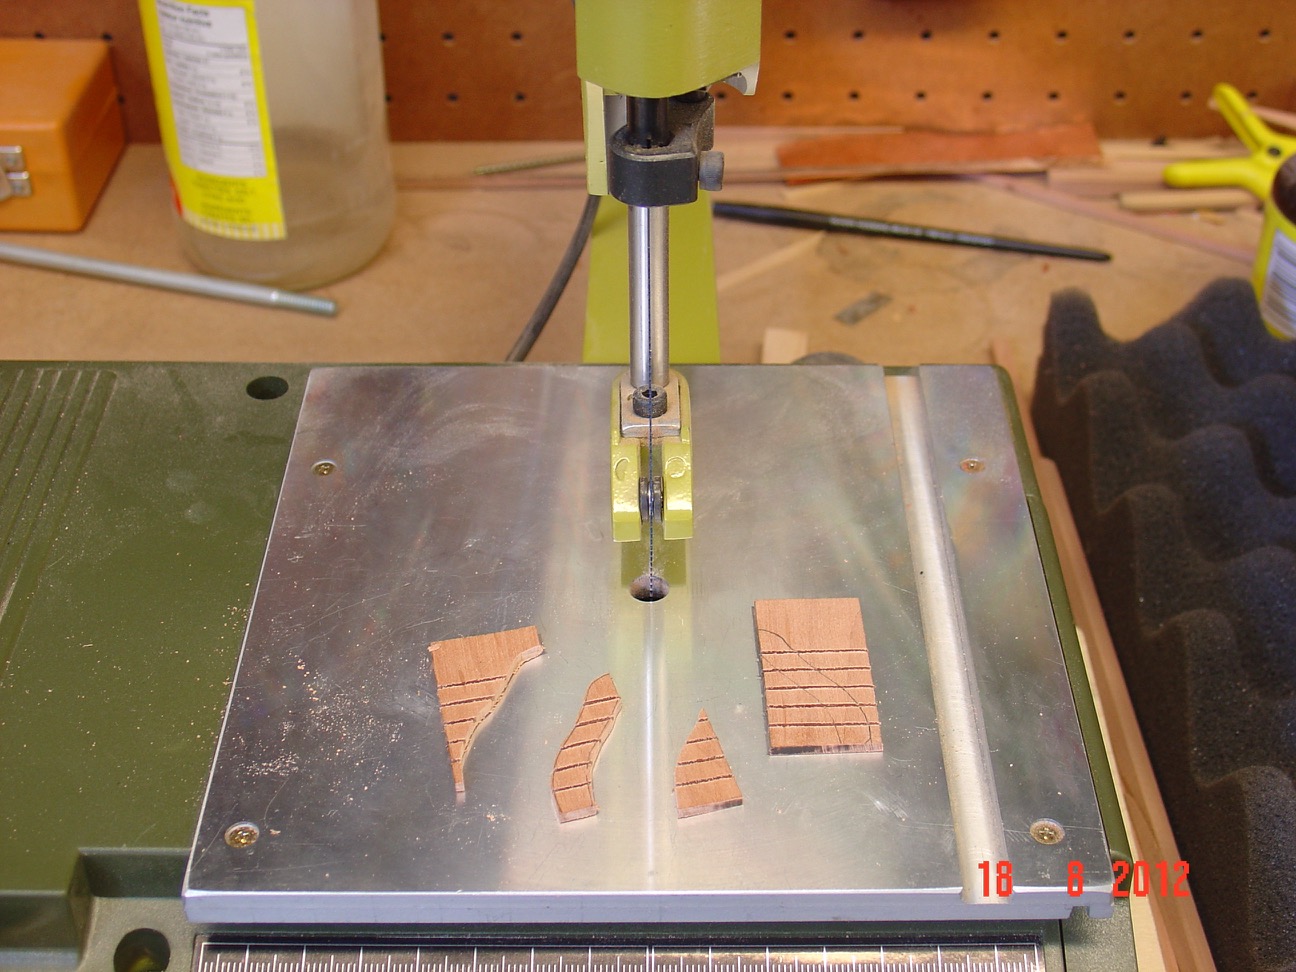
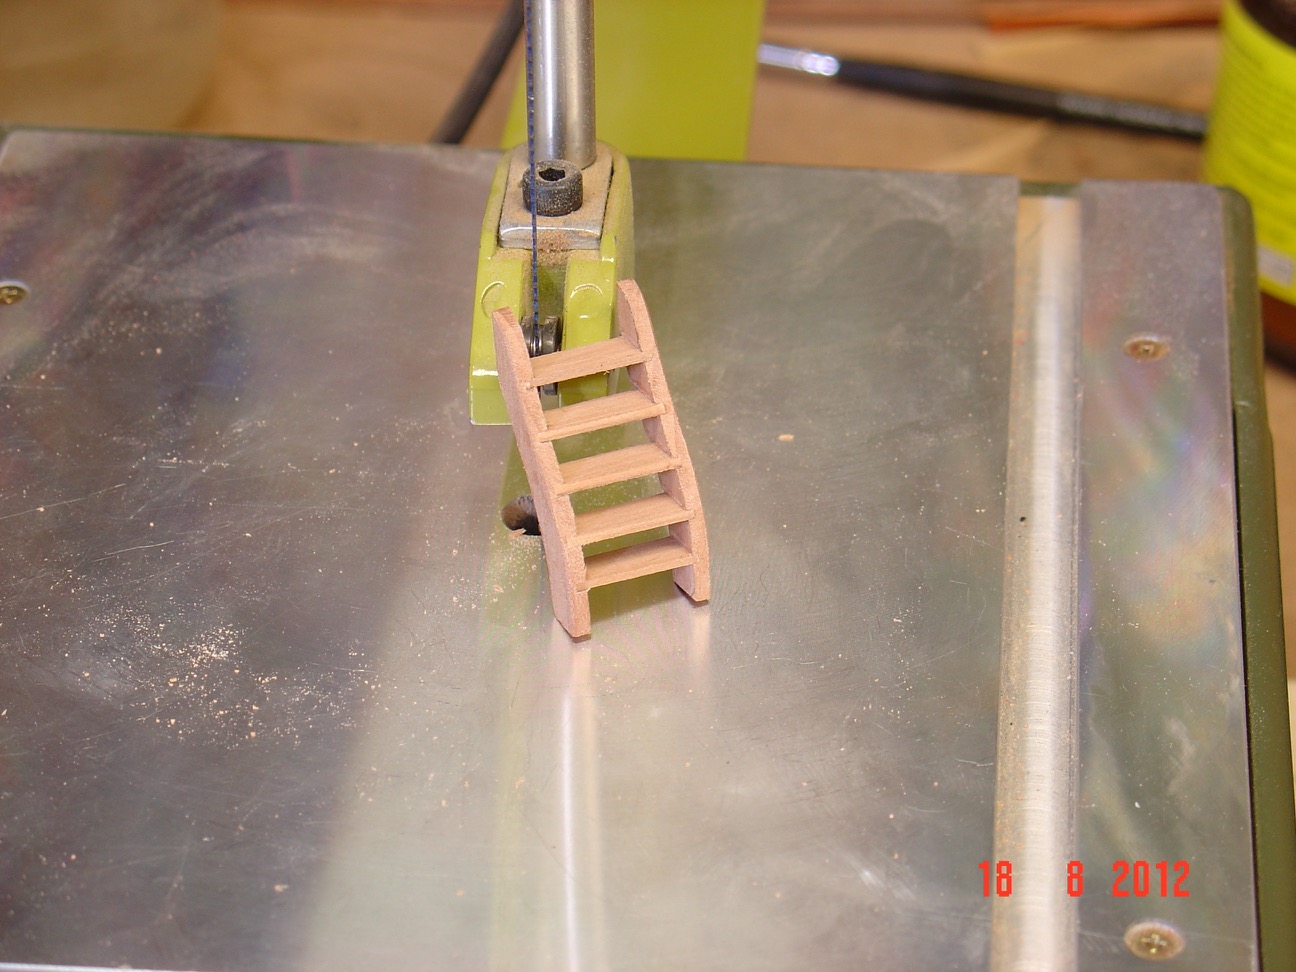
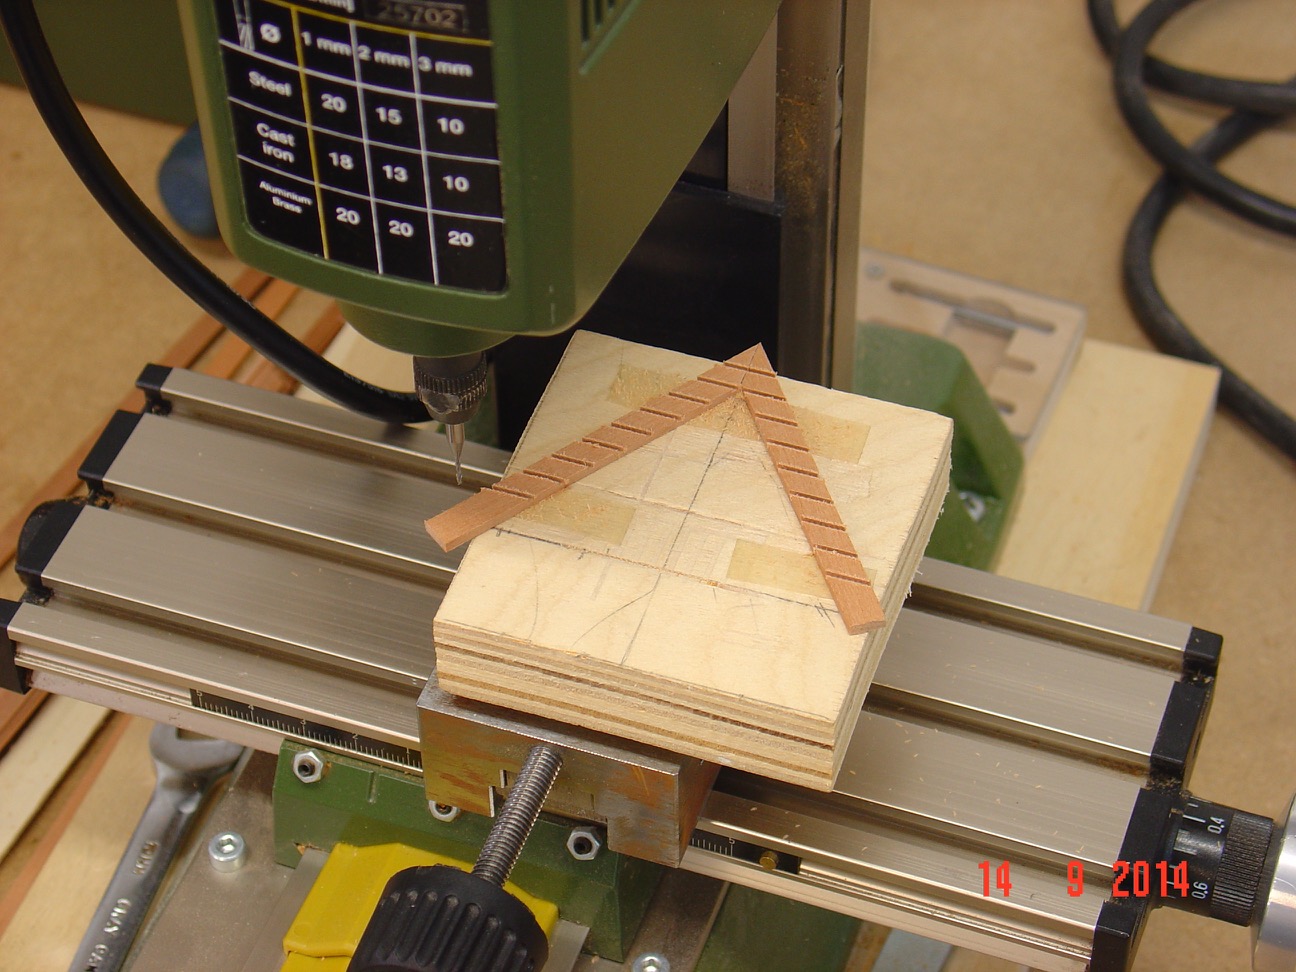
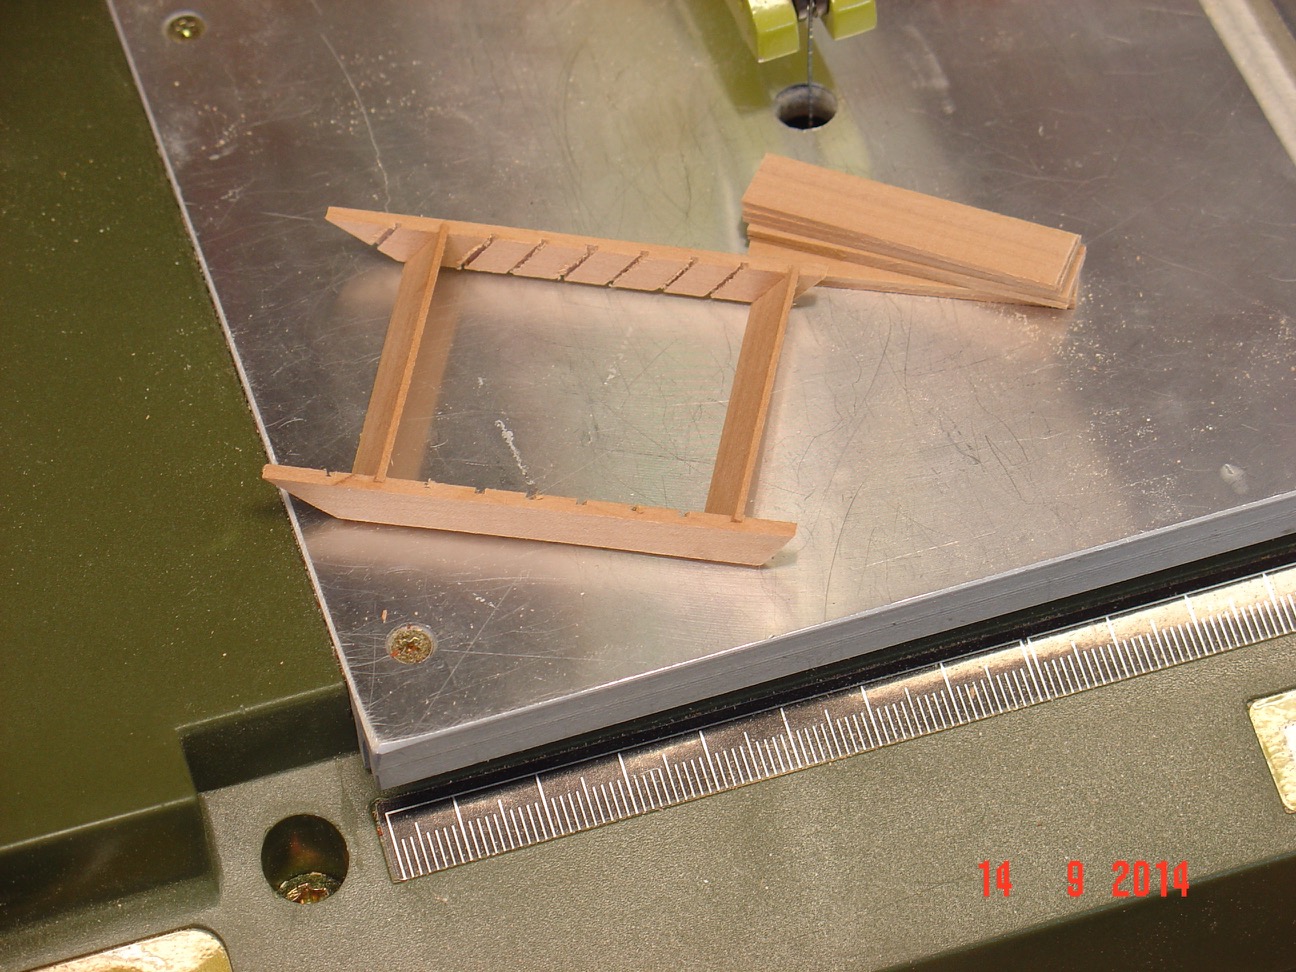
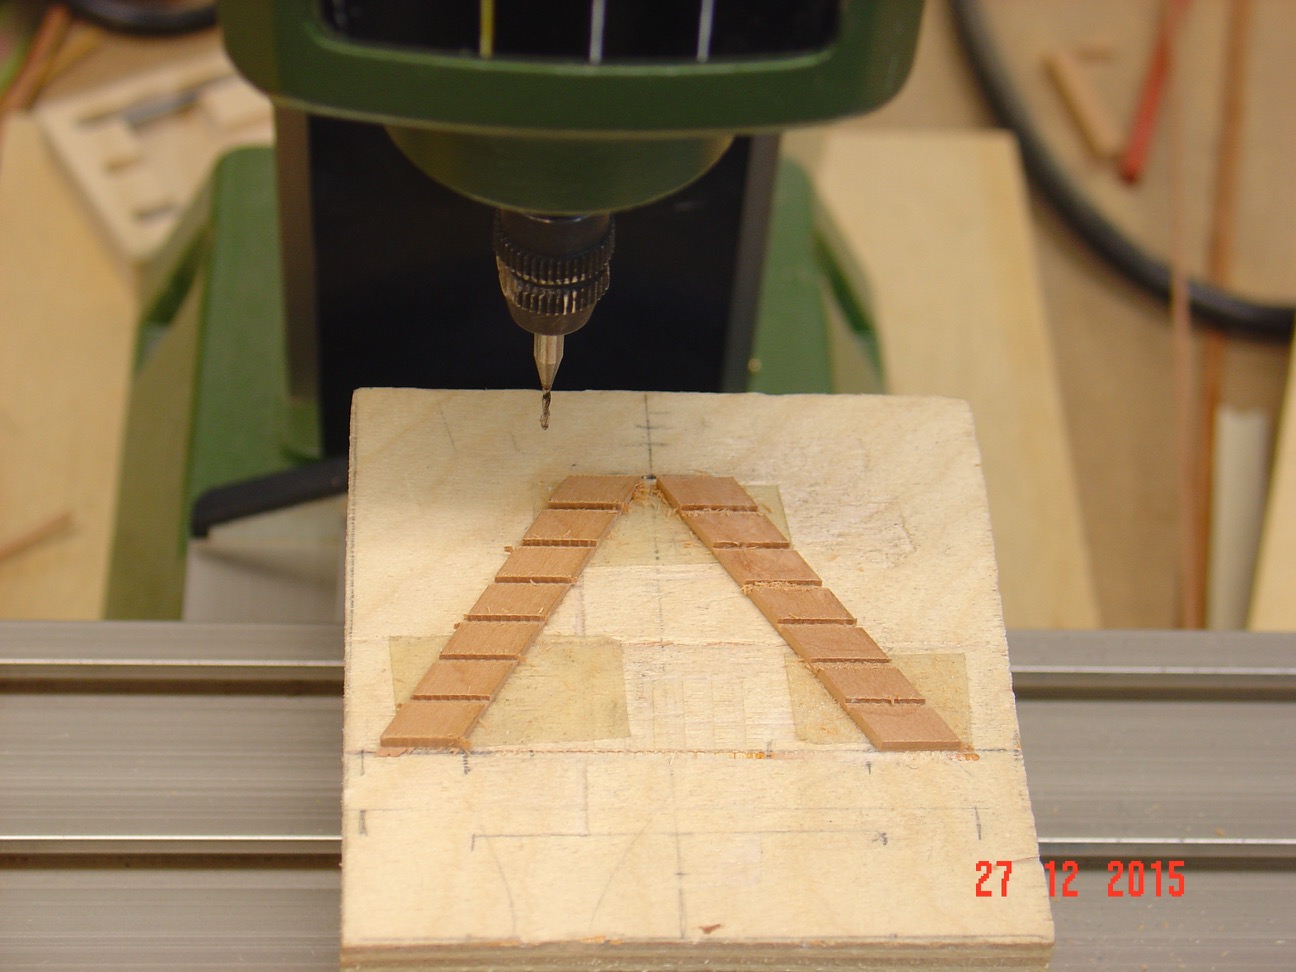
I do not have pictures for the exact stairs in this model but I am doing them all the same way. Here are the pictures for several stairs I build.
Alexandru


-
Hello,
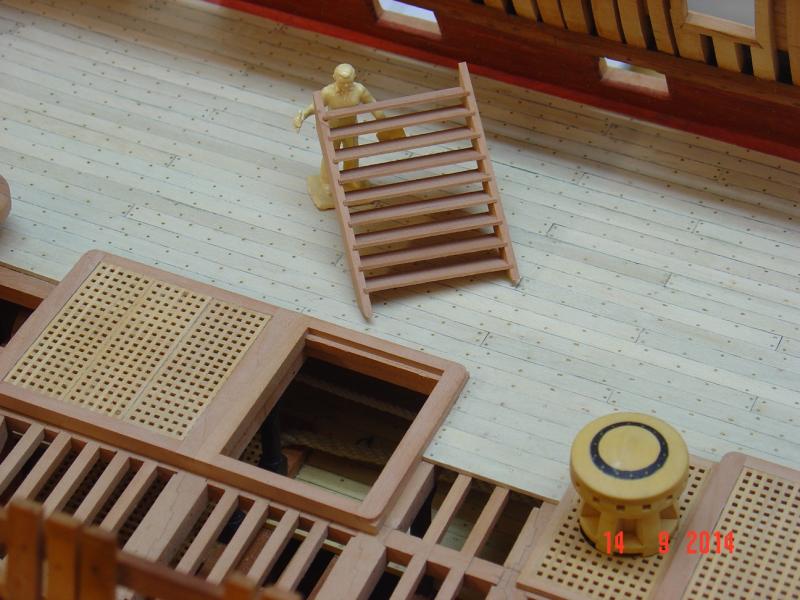
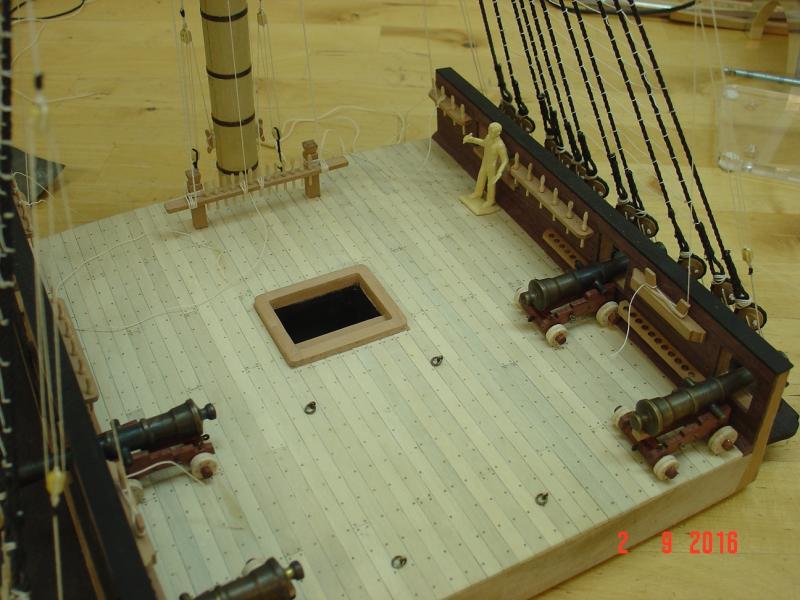
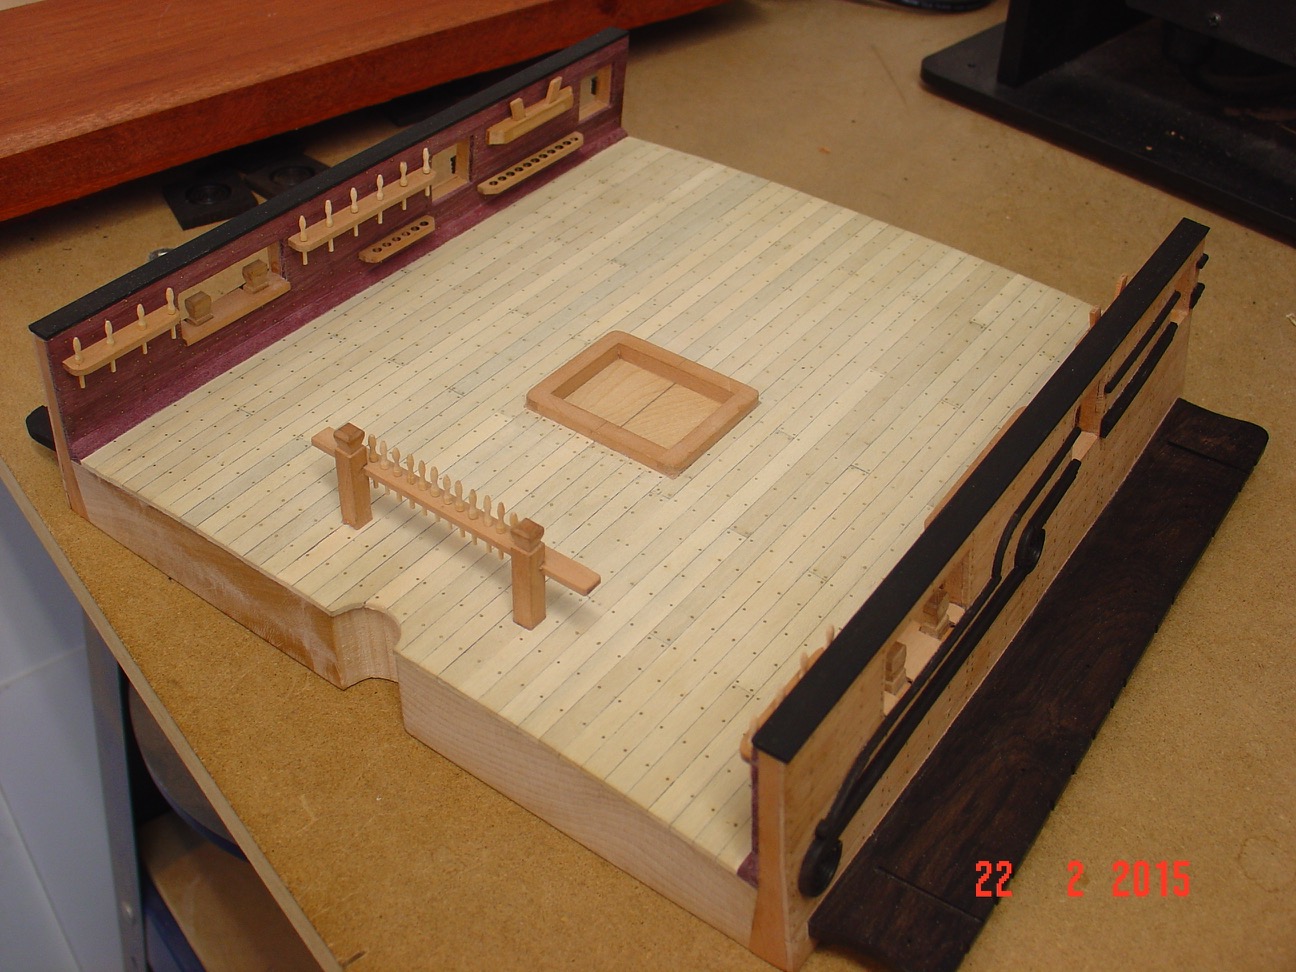
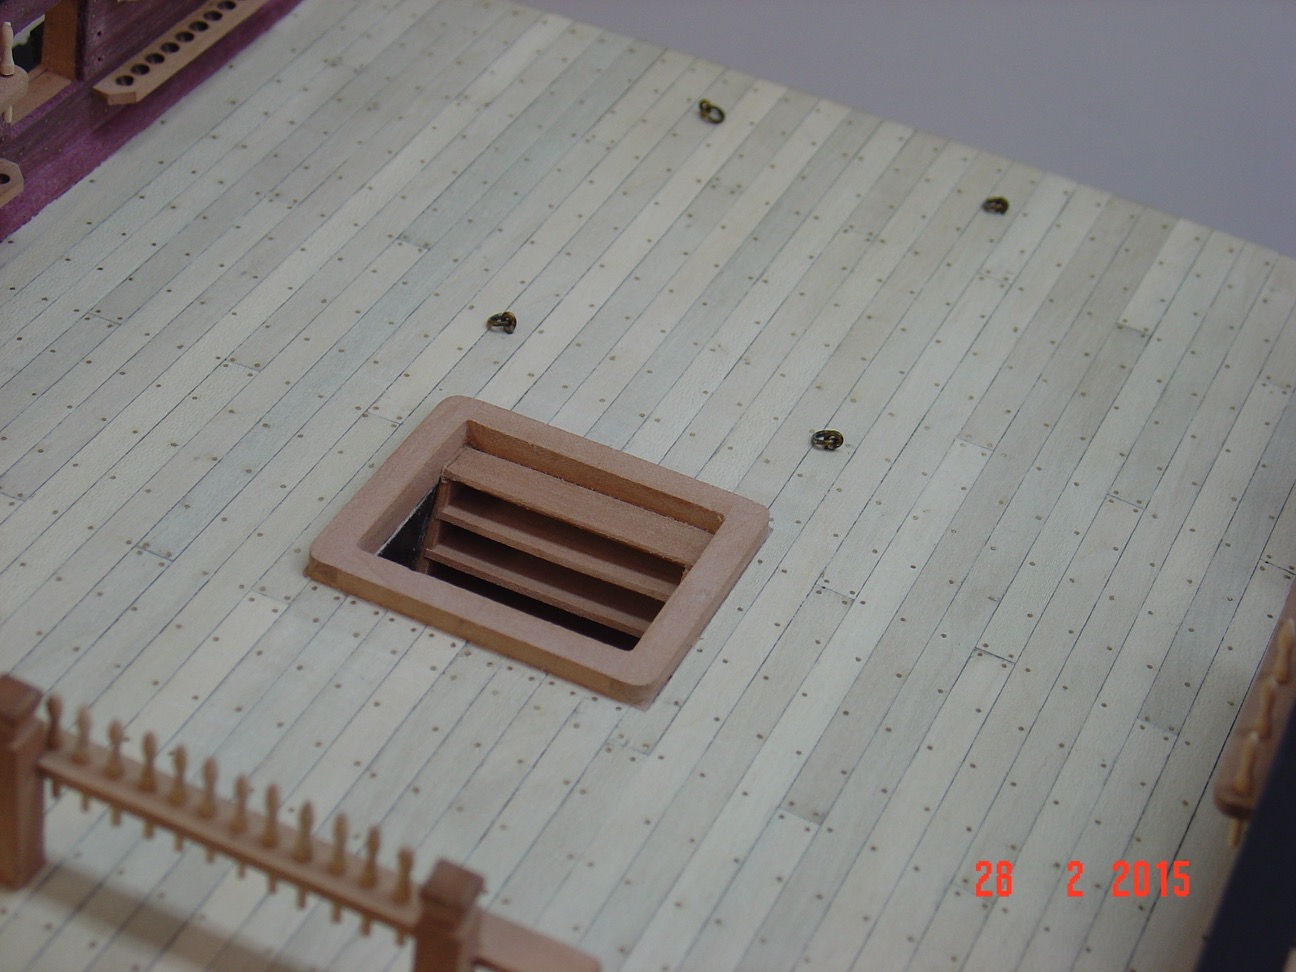
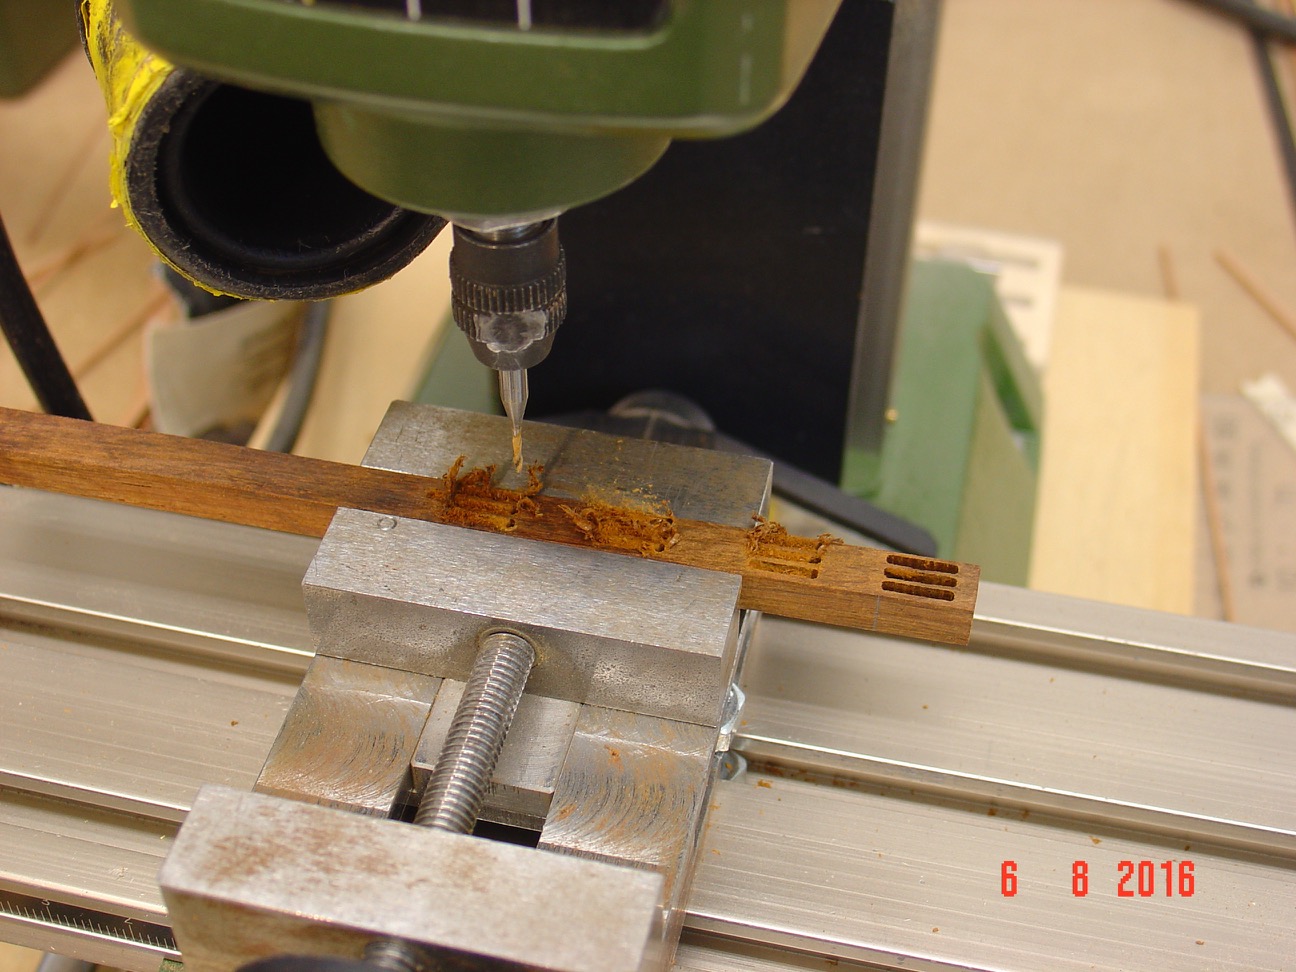
The stairway was an afterthought. Initially I planned to just paint black the corresponding opening but then - quite late in the process of building the base - I changed my mind and added it as you can see in the below pictures.
To do it, I just dril a lot of holes with a 1/4in bit inside the rectangle delimited by the hatch coamings. Then with a big file and a lot of effort while trying not to damage what was already done I made the hole sides nice and smooth. The sides were painted black and the stair was added in.
If you want to know how I actually did the stair, let me know as I have pictures on that process also and I can post them.
Regards,
Alexandru

-
-
-
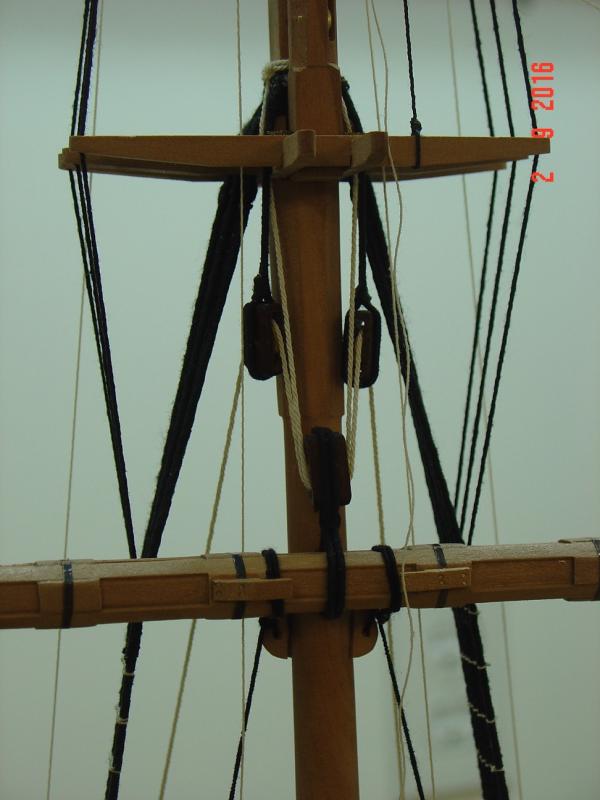
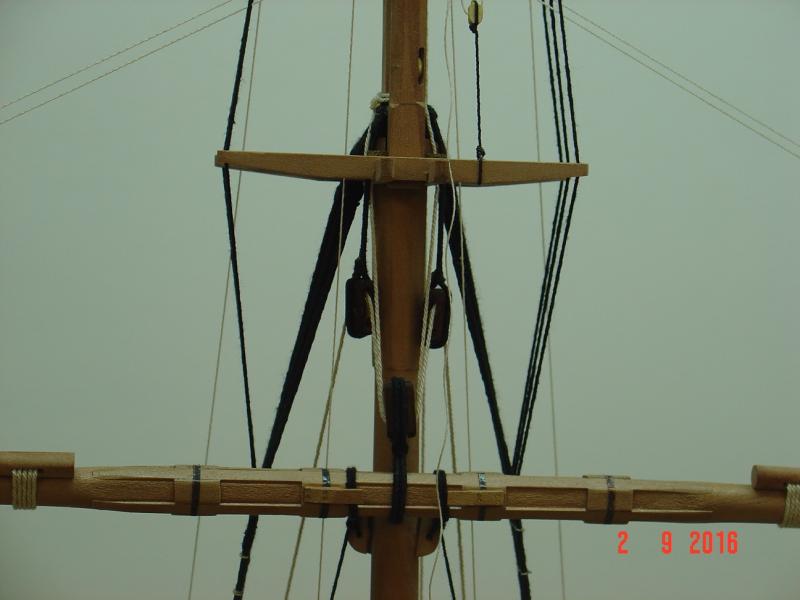
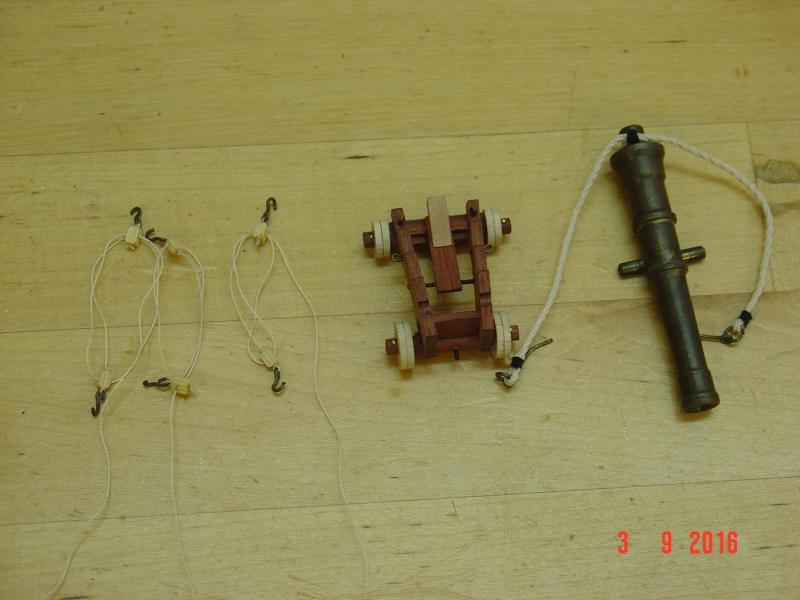
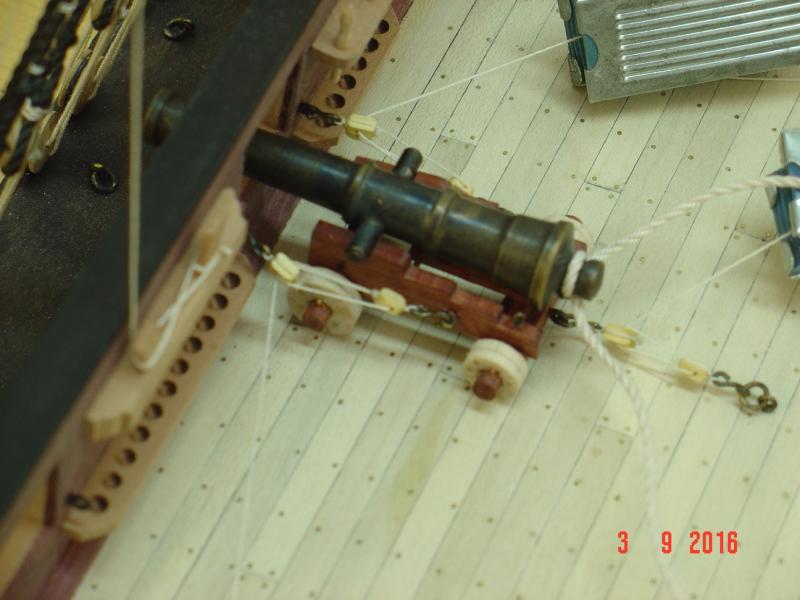
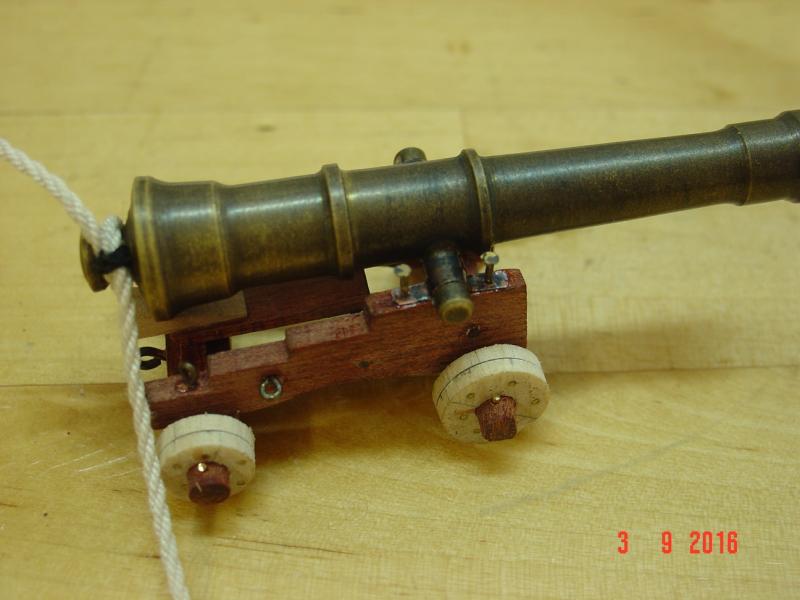
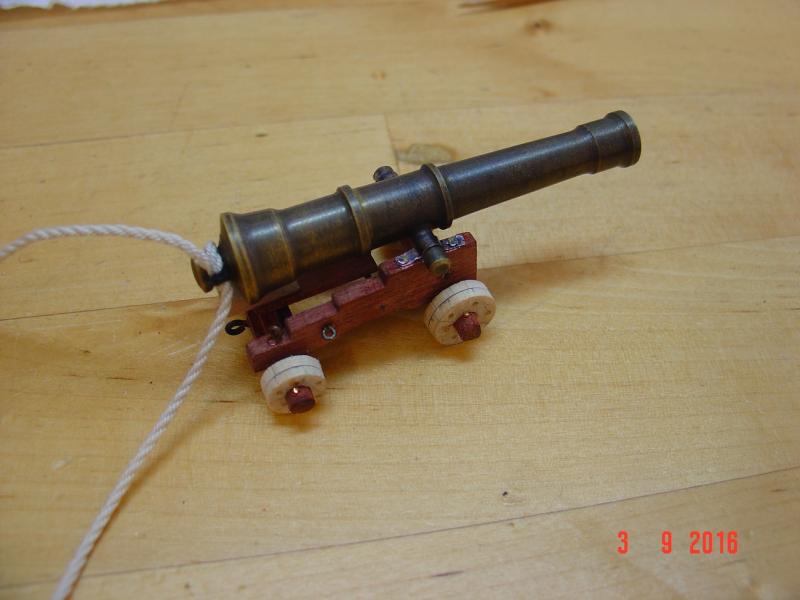
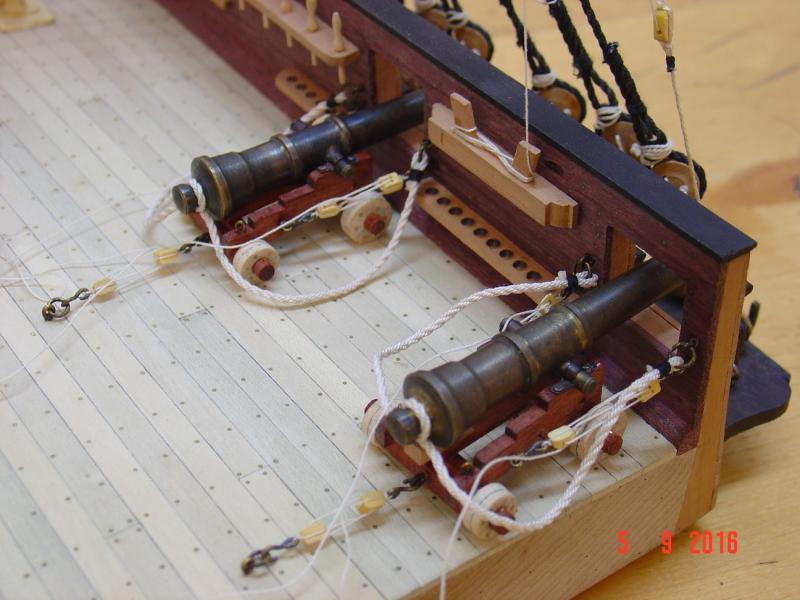
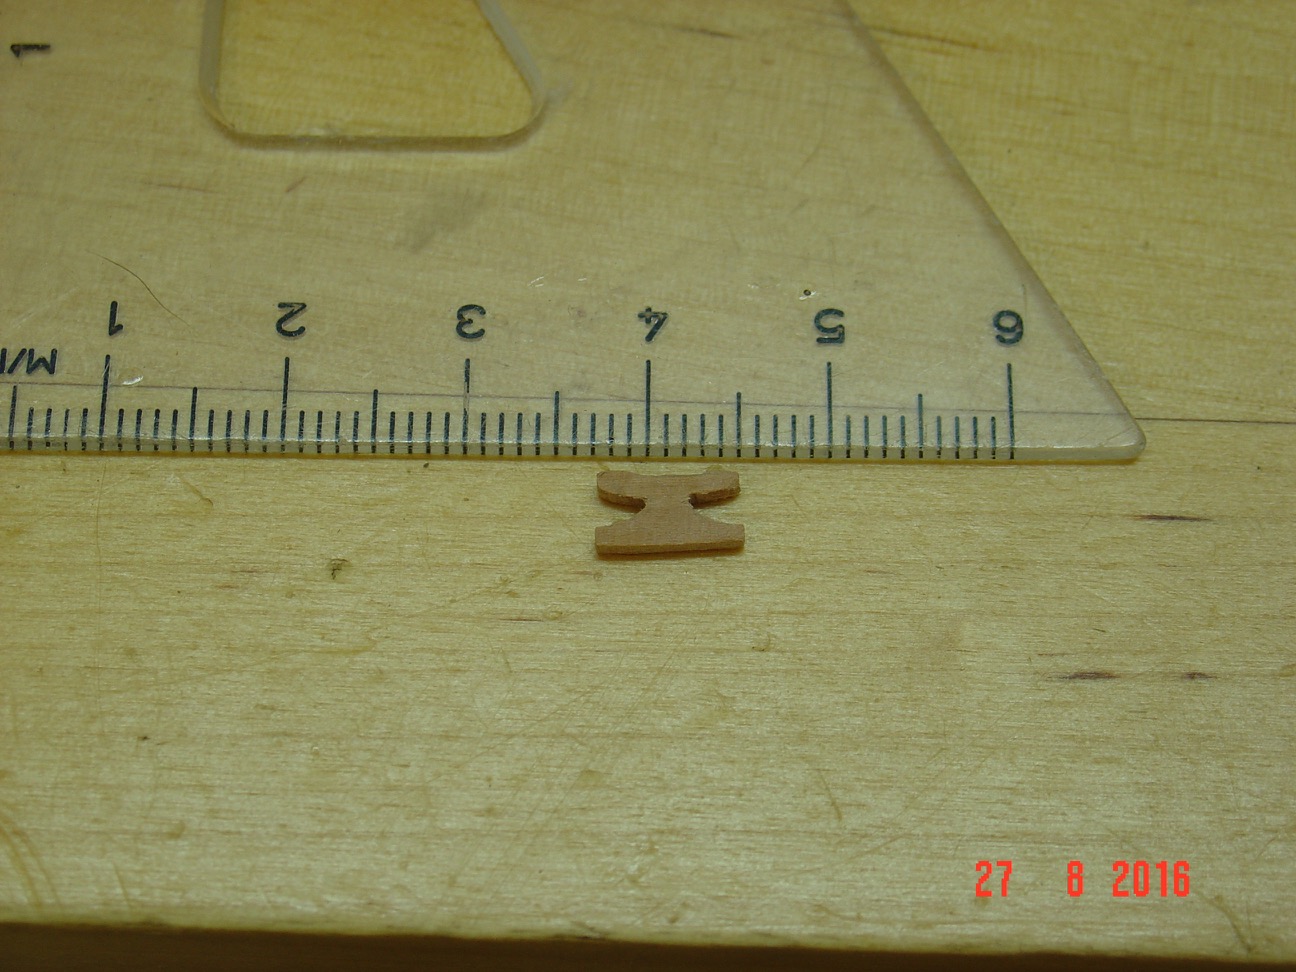
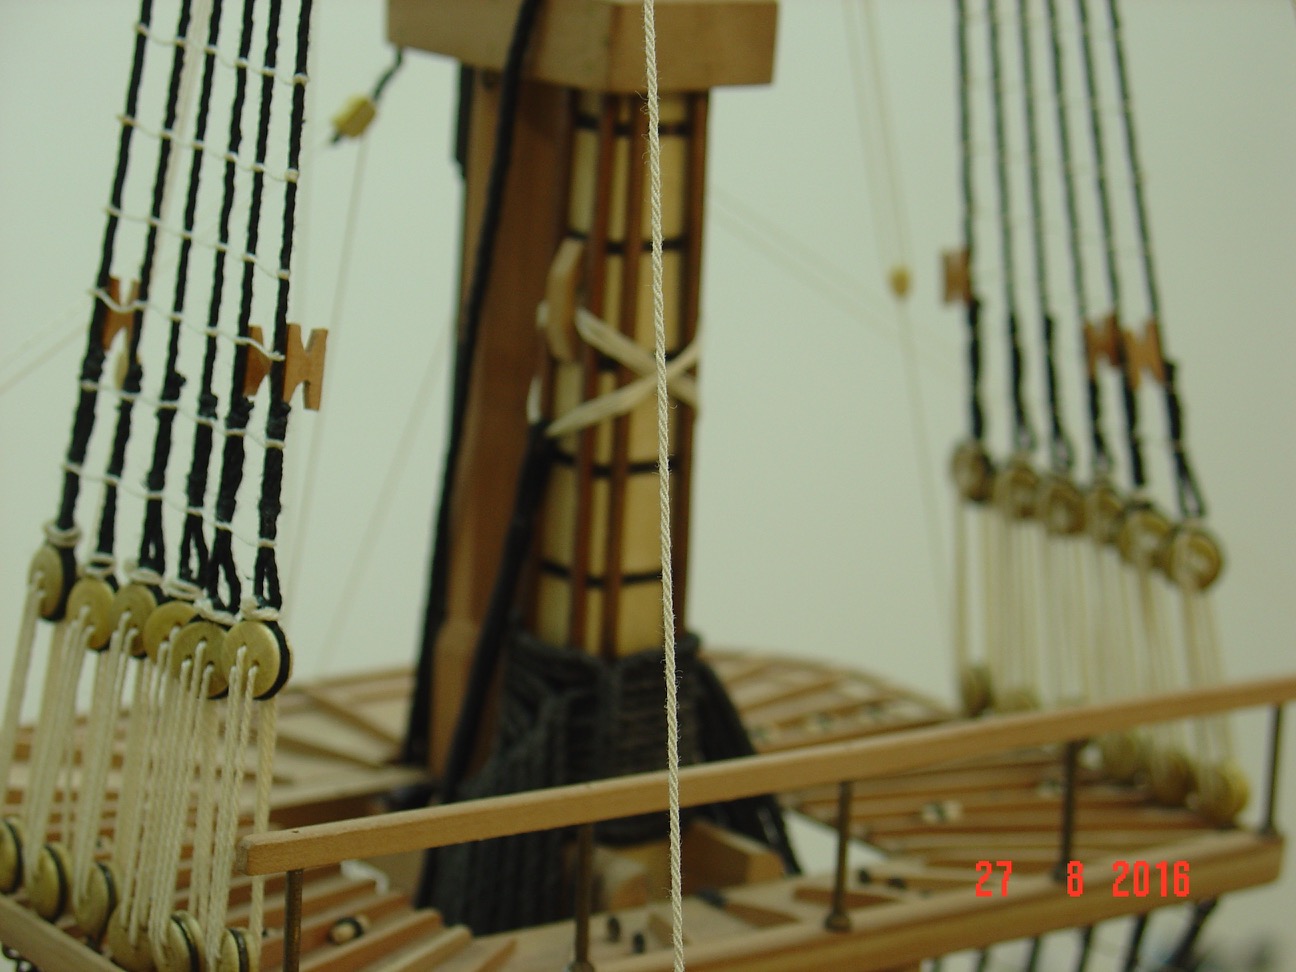
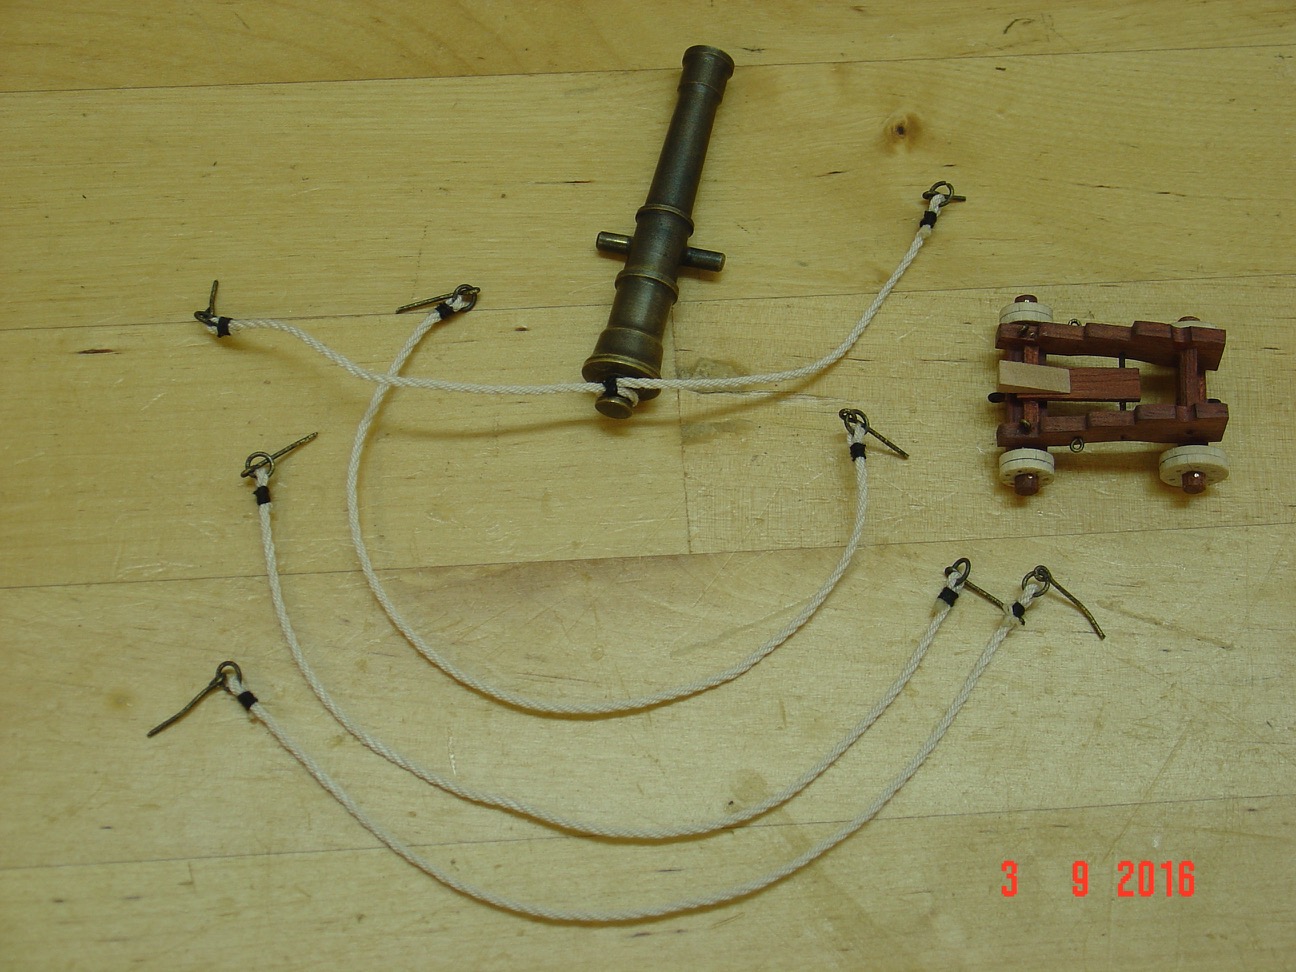
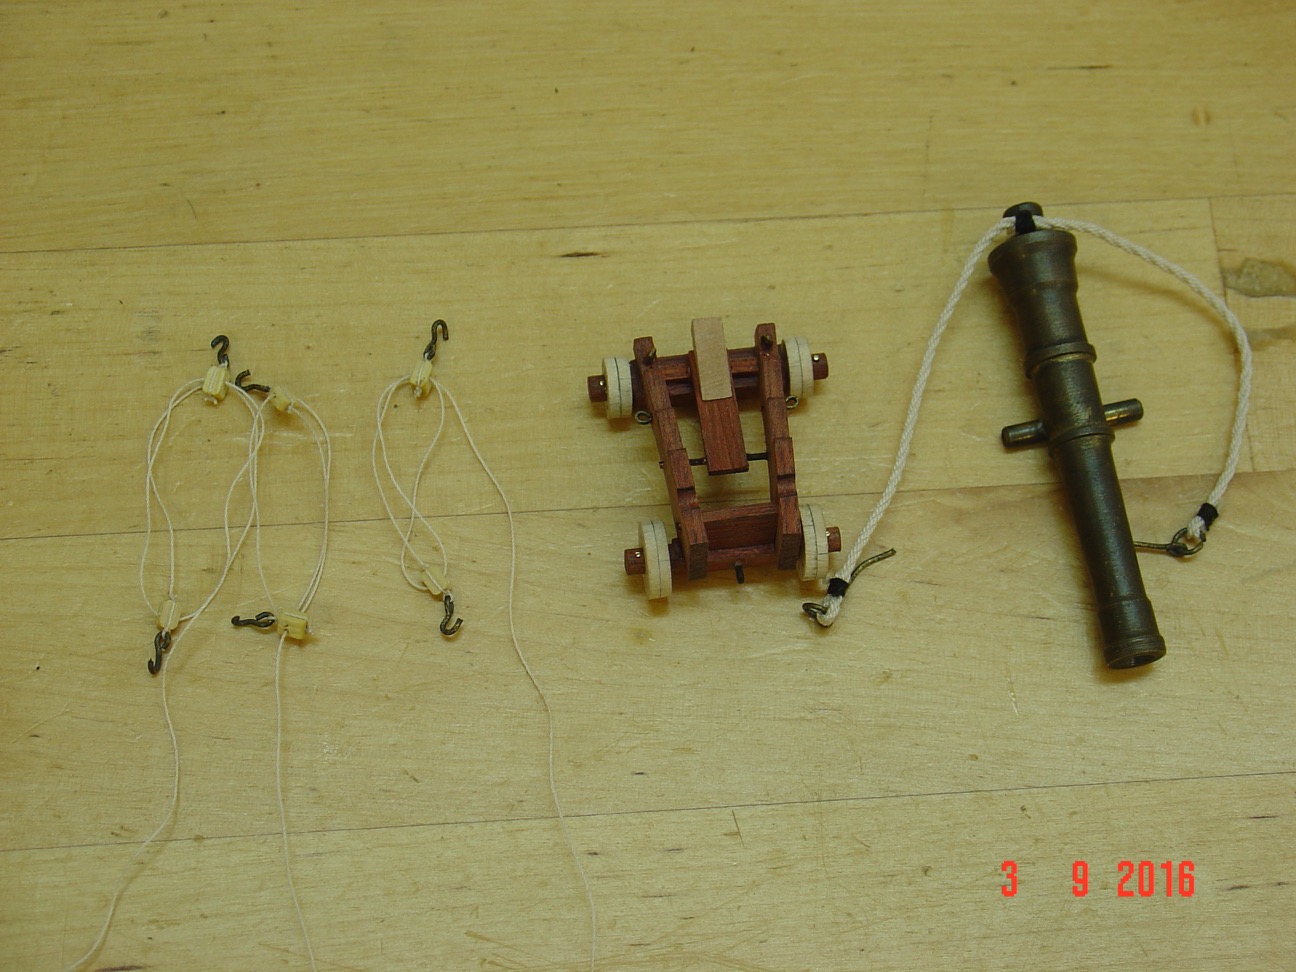
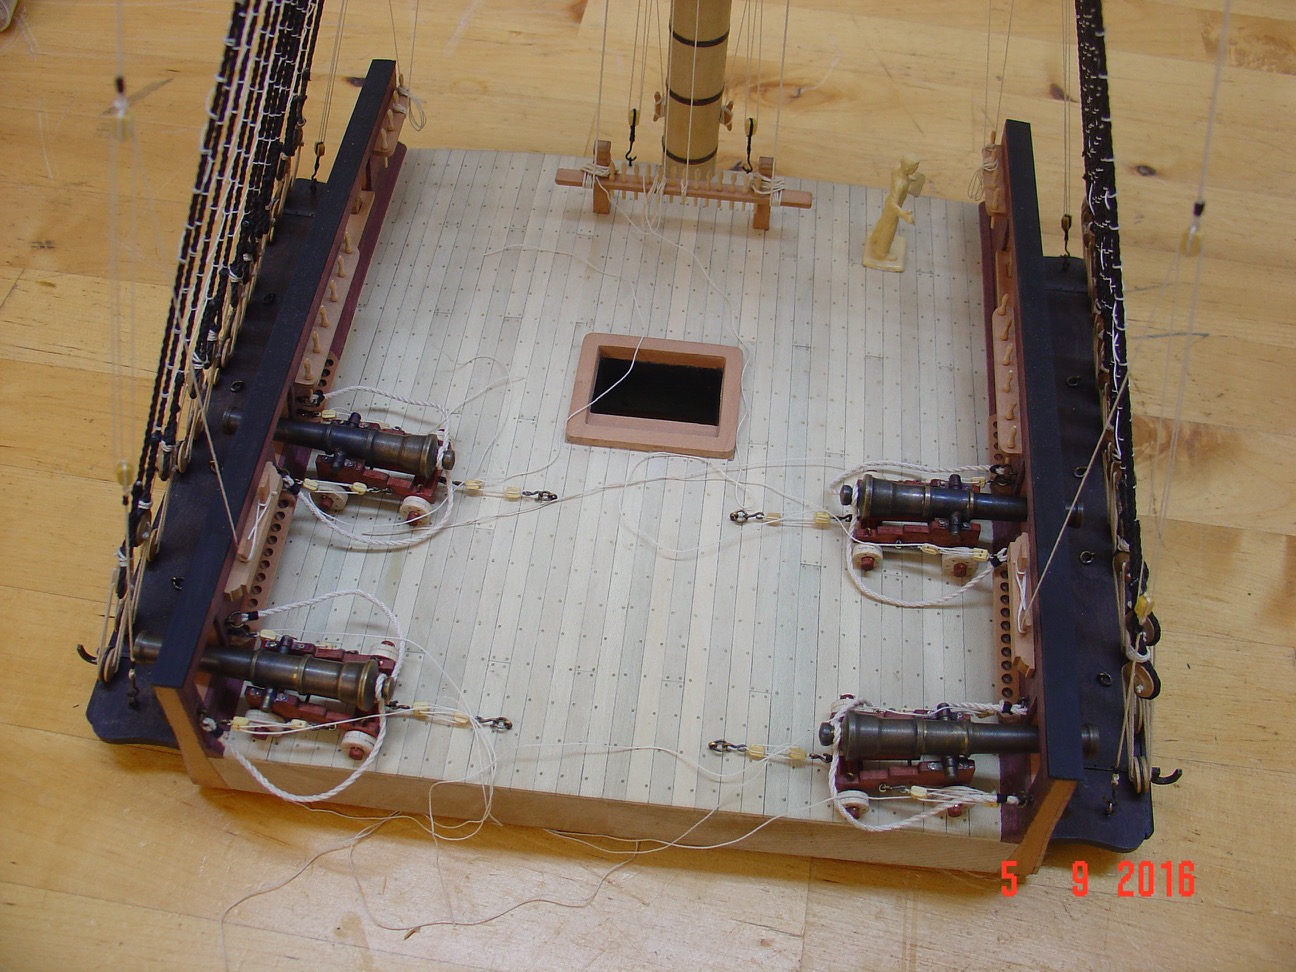
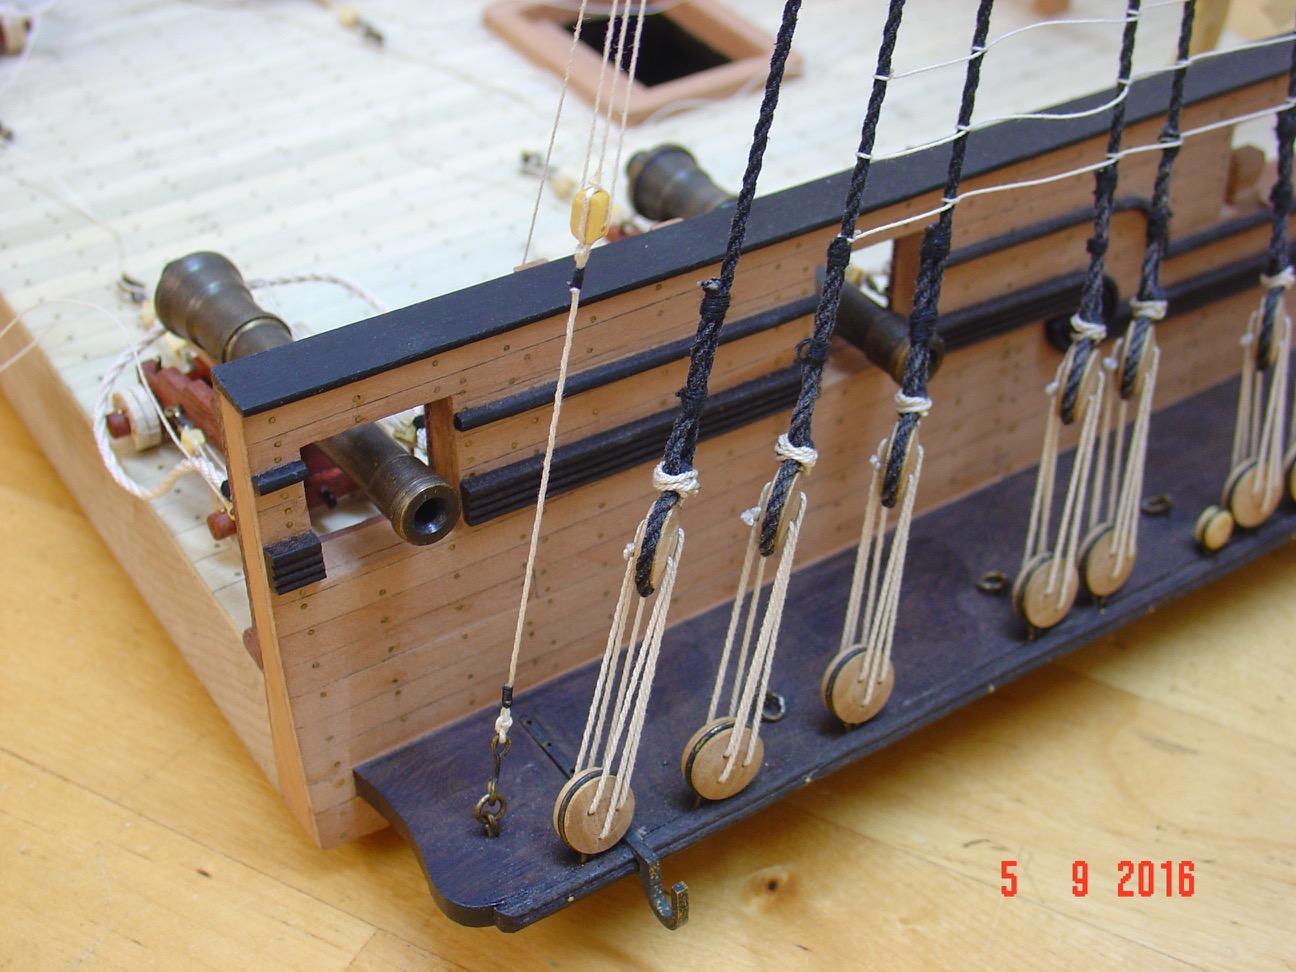
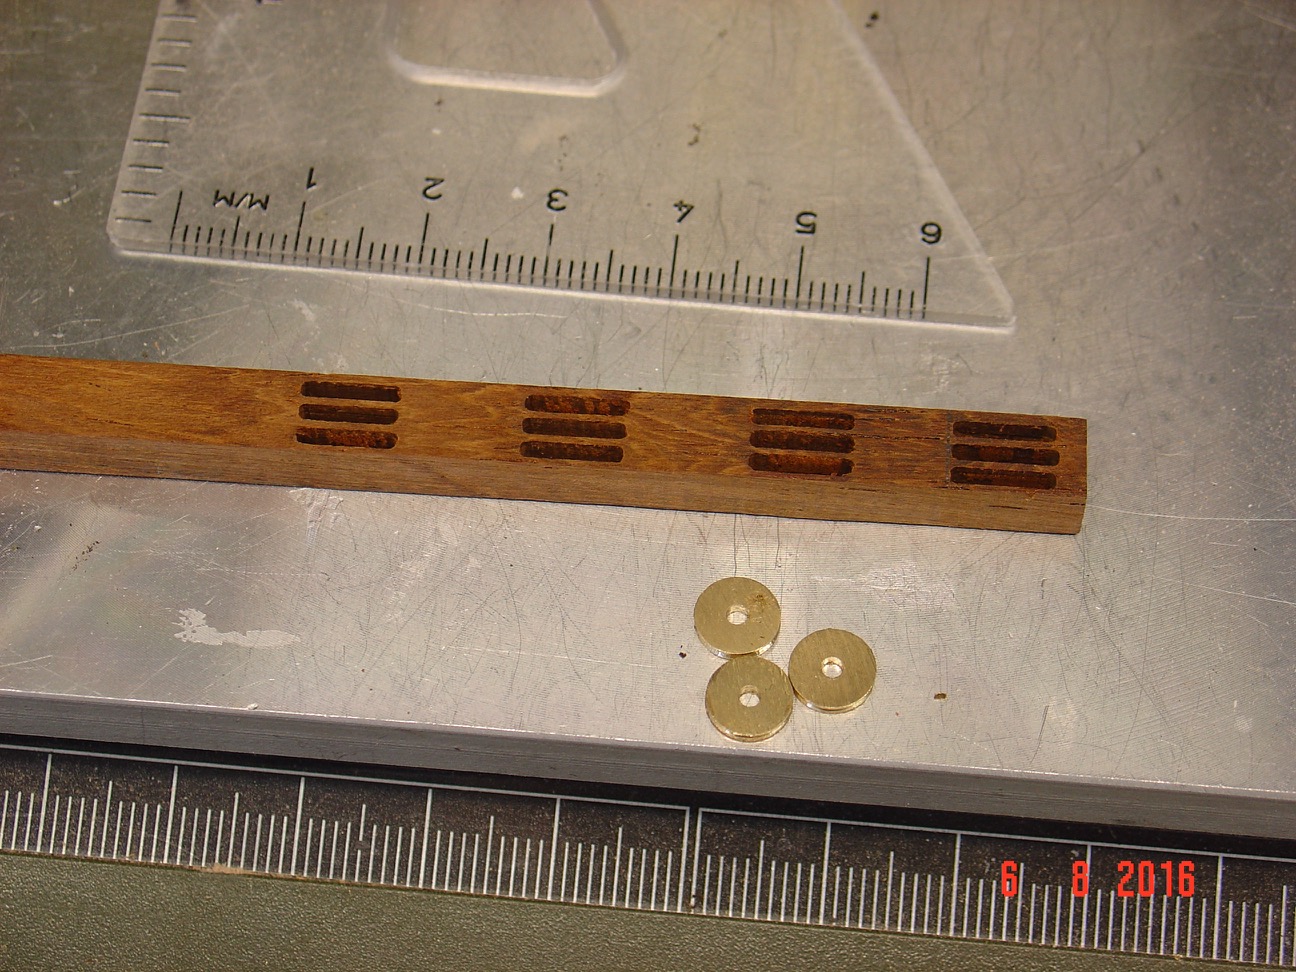
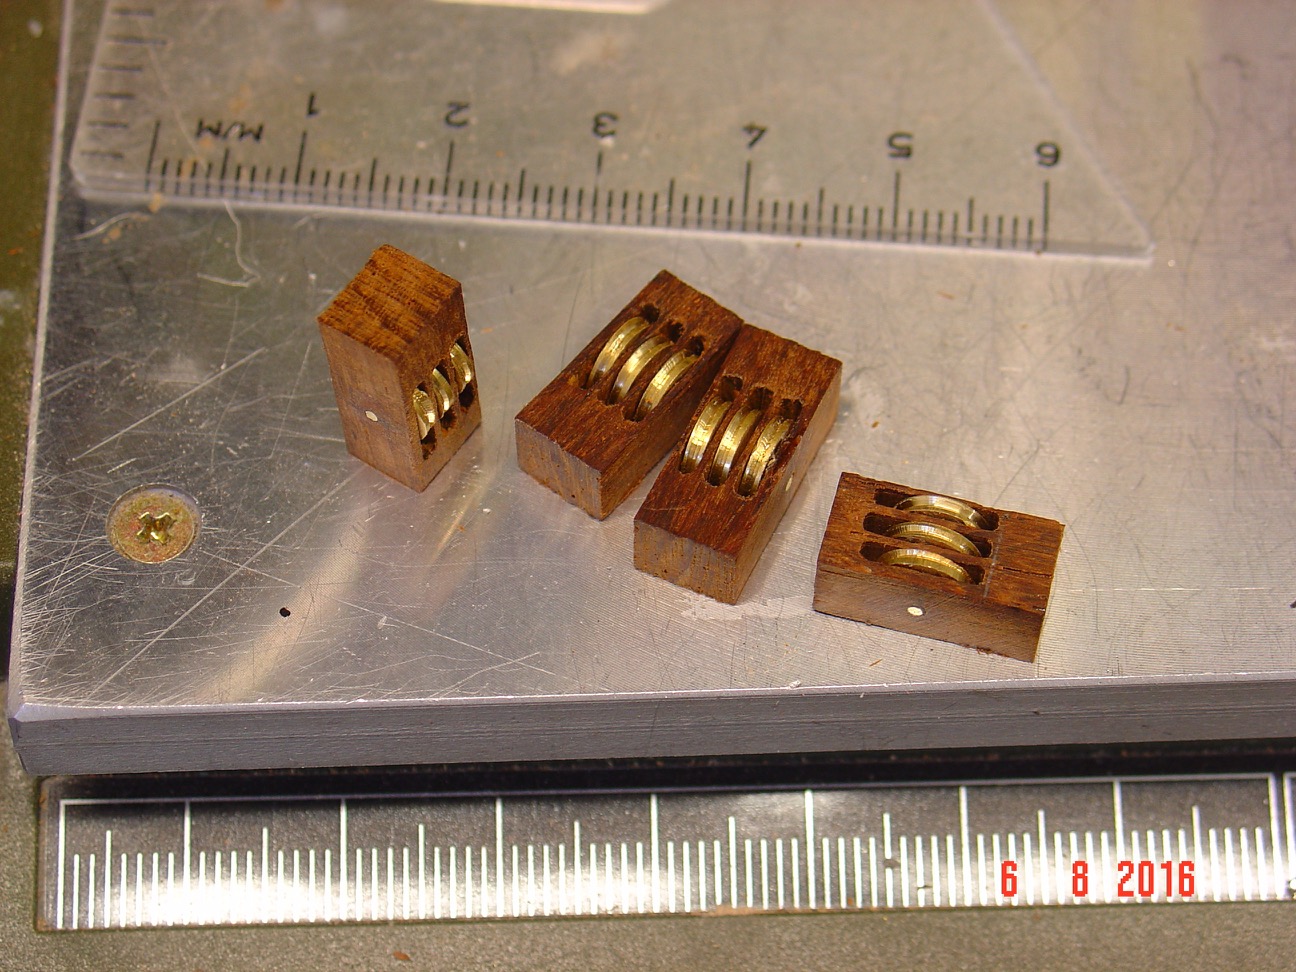
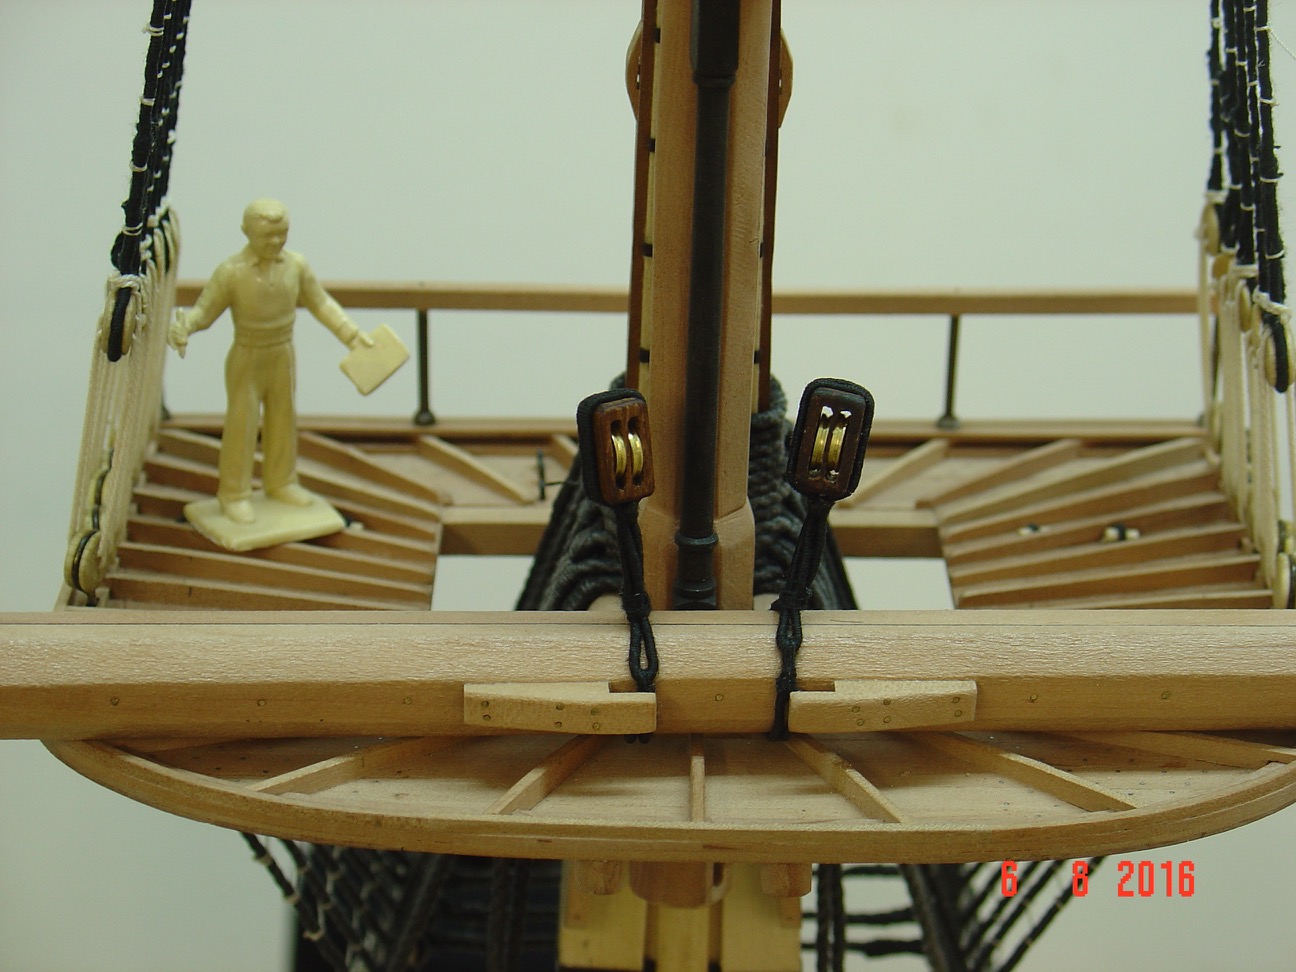
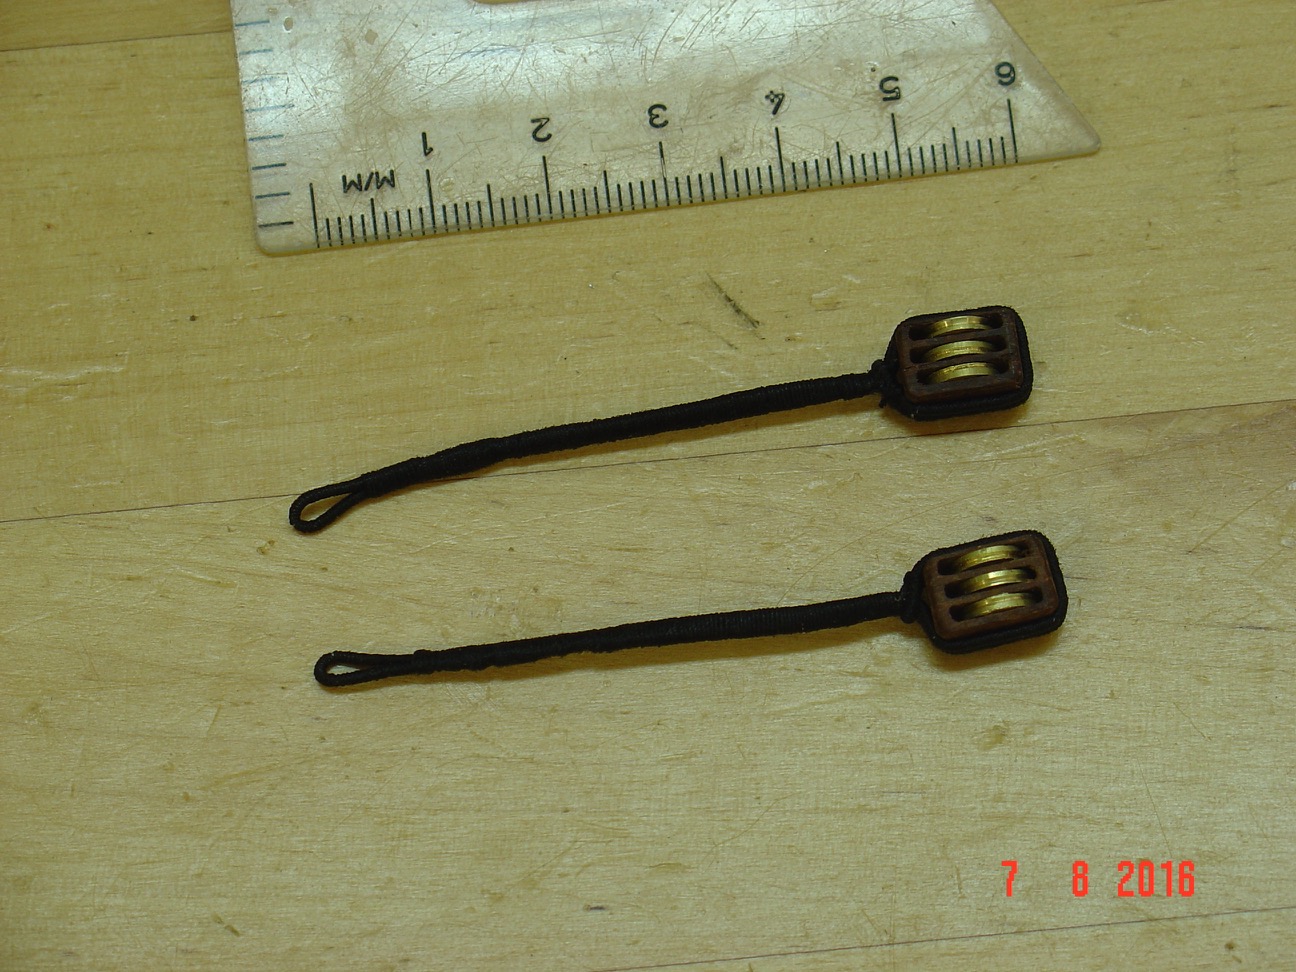
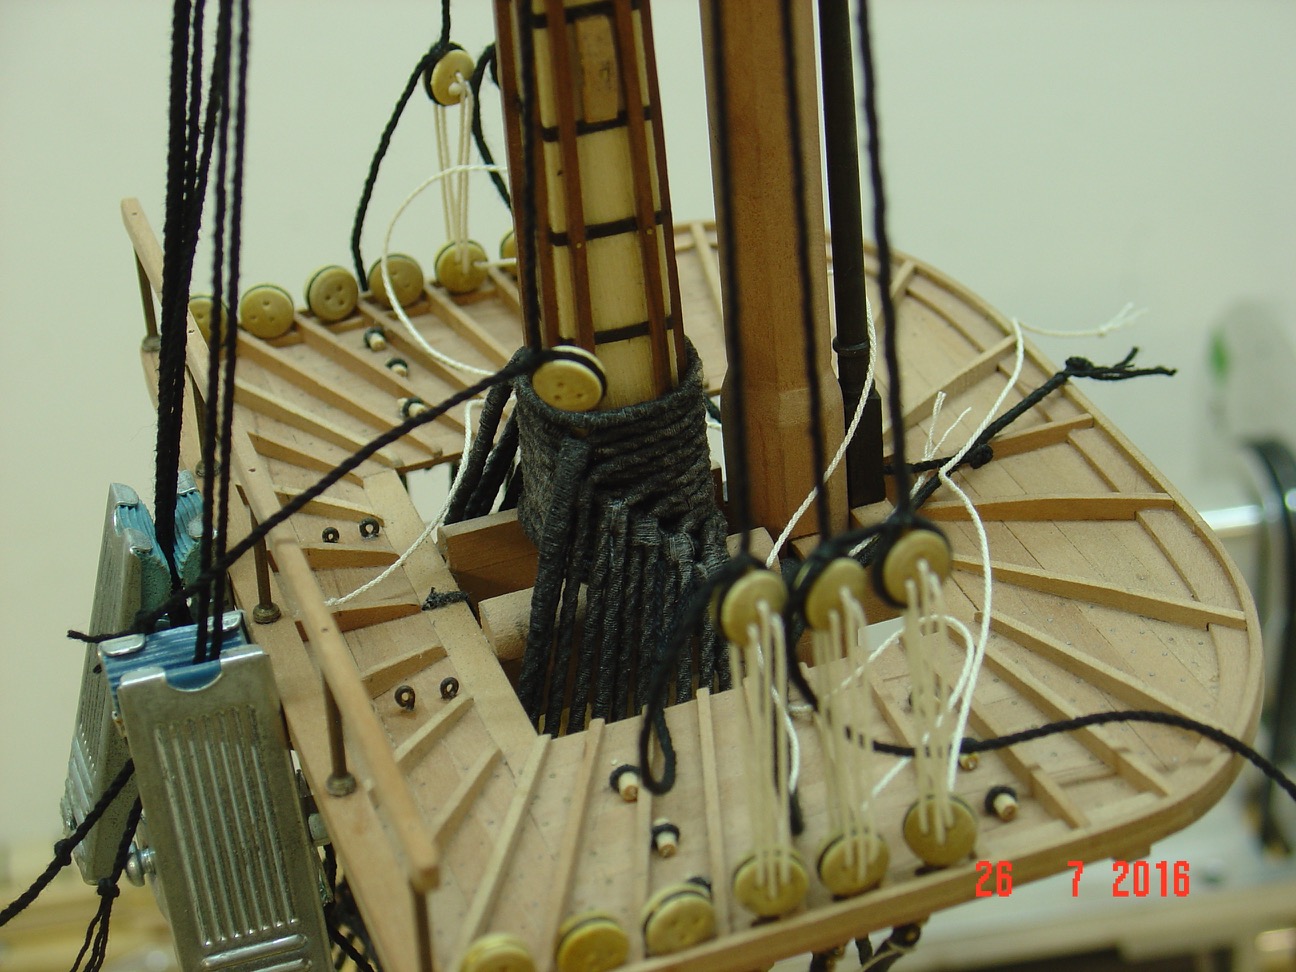
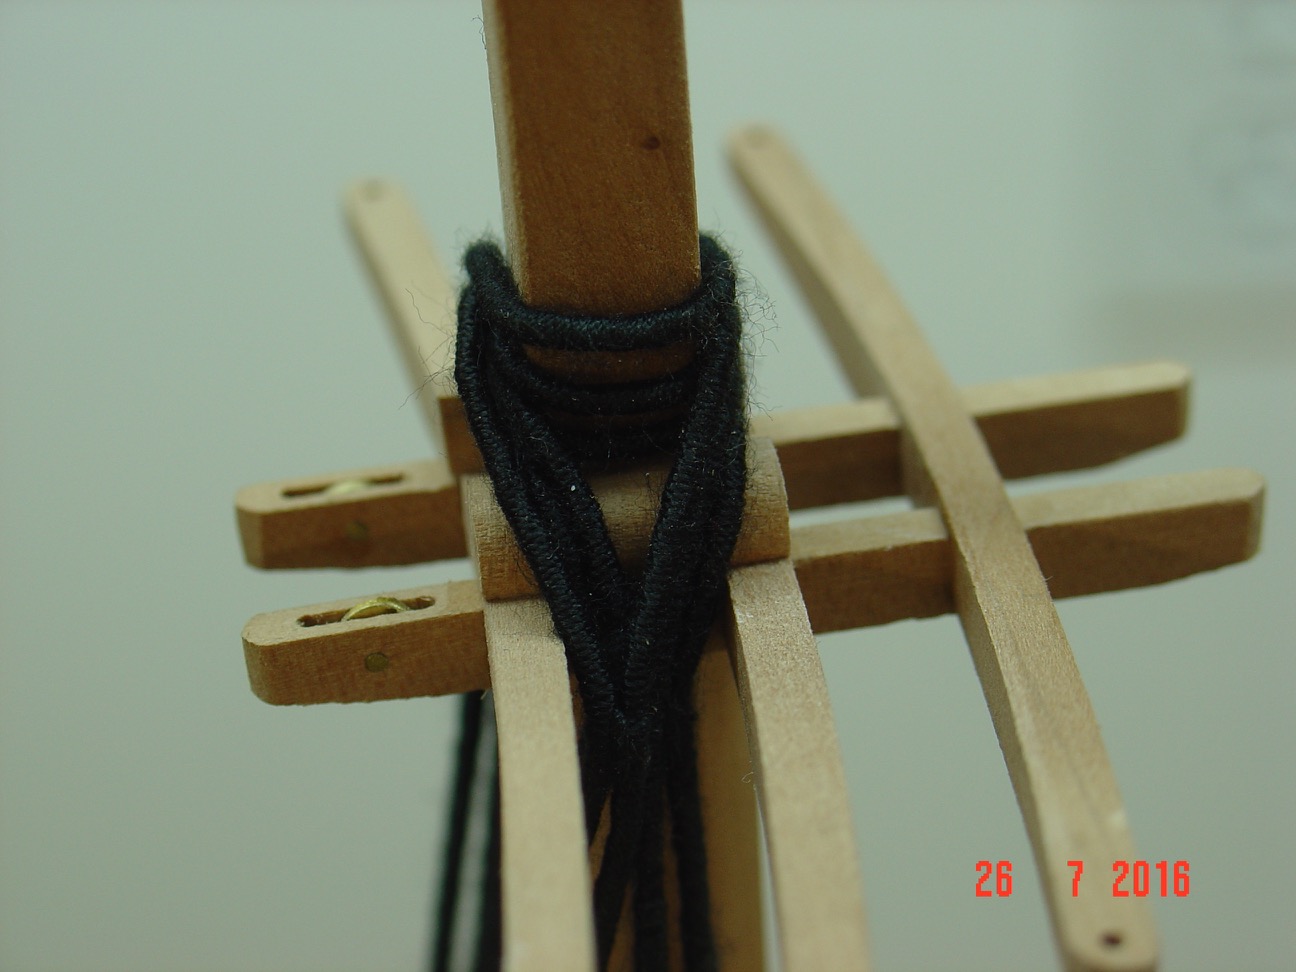
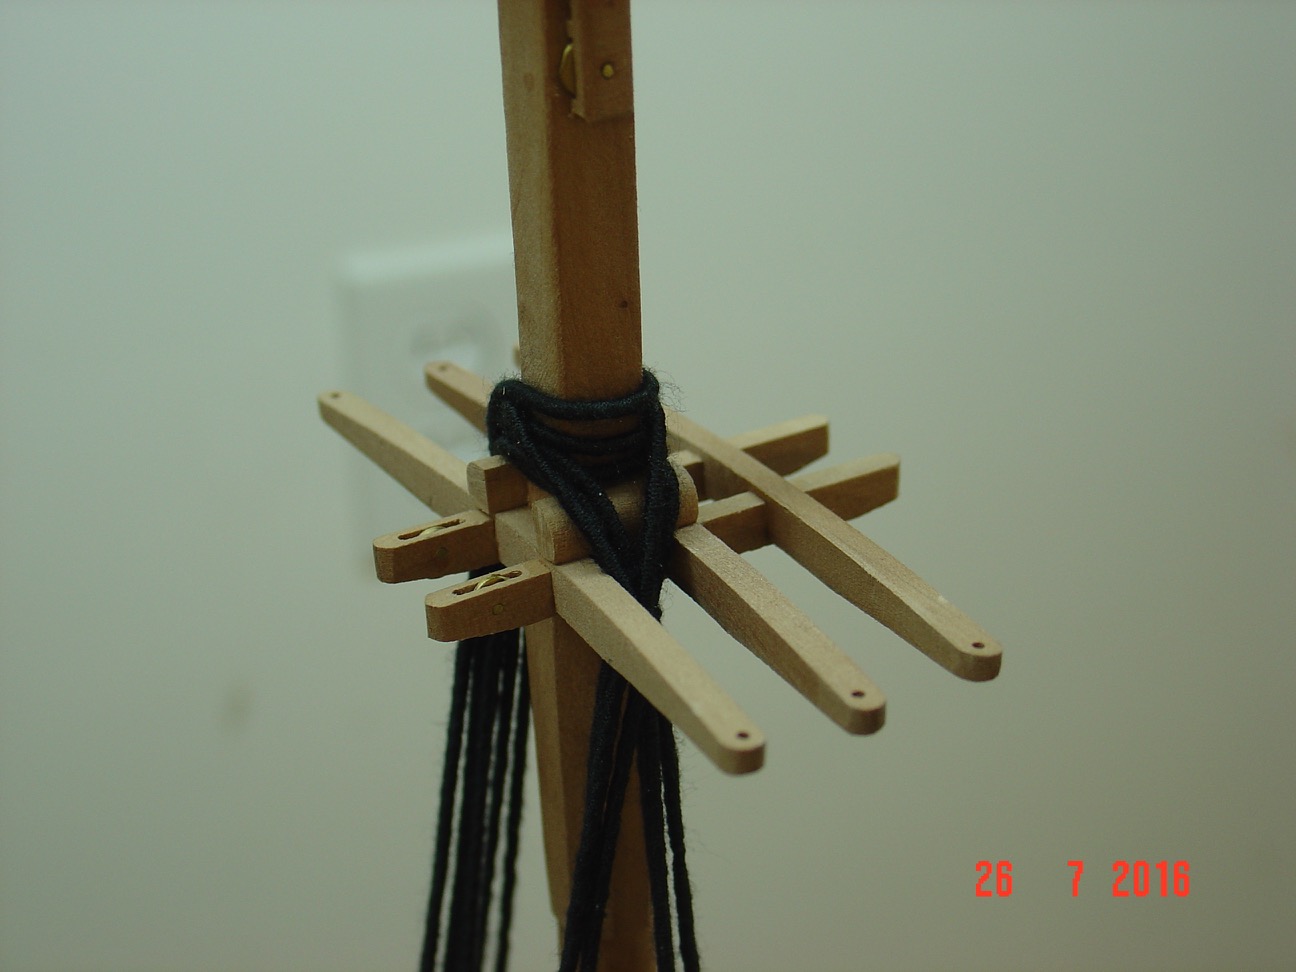
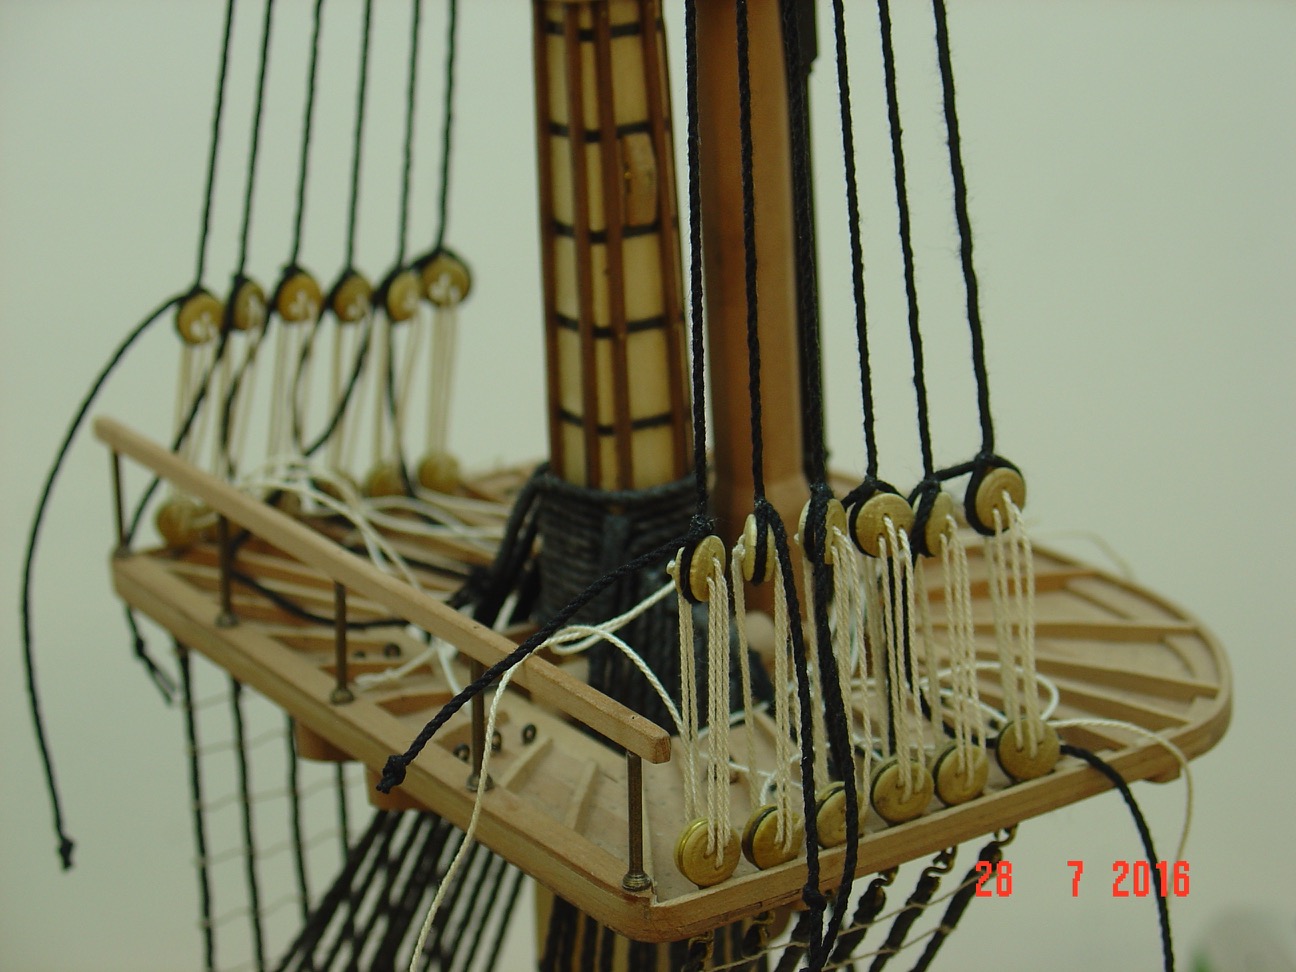
This small project is almost done. Here are some more progress pictures.
There are two things I don't really know how to solve so maybe someone can give me some ideas:
1. How to coil the rope from the gun tackles on the deck - those rope spirals?
2. How to make a flag and from what to hang at the top of the mast?
Any suggestions or ideas would be greatly appreciated.
Regards,
Alexandru


- Mirabell61, FatFingers, archjofo and 14 others
-
17
-
-
-
Alexandru
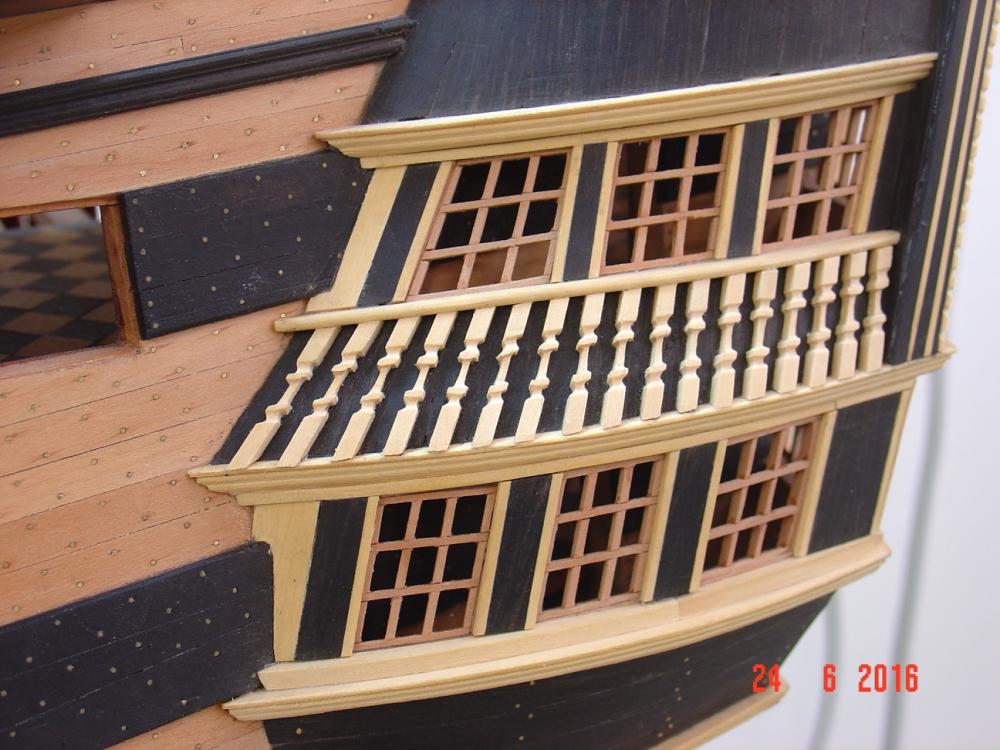
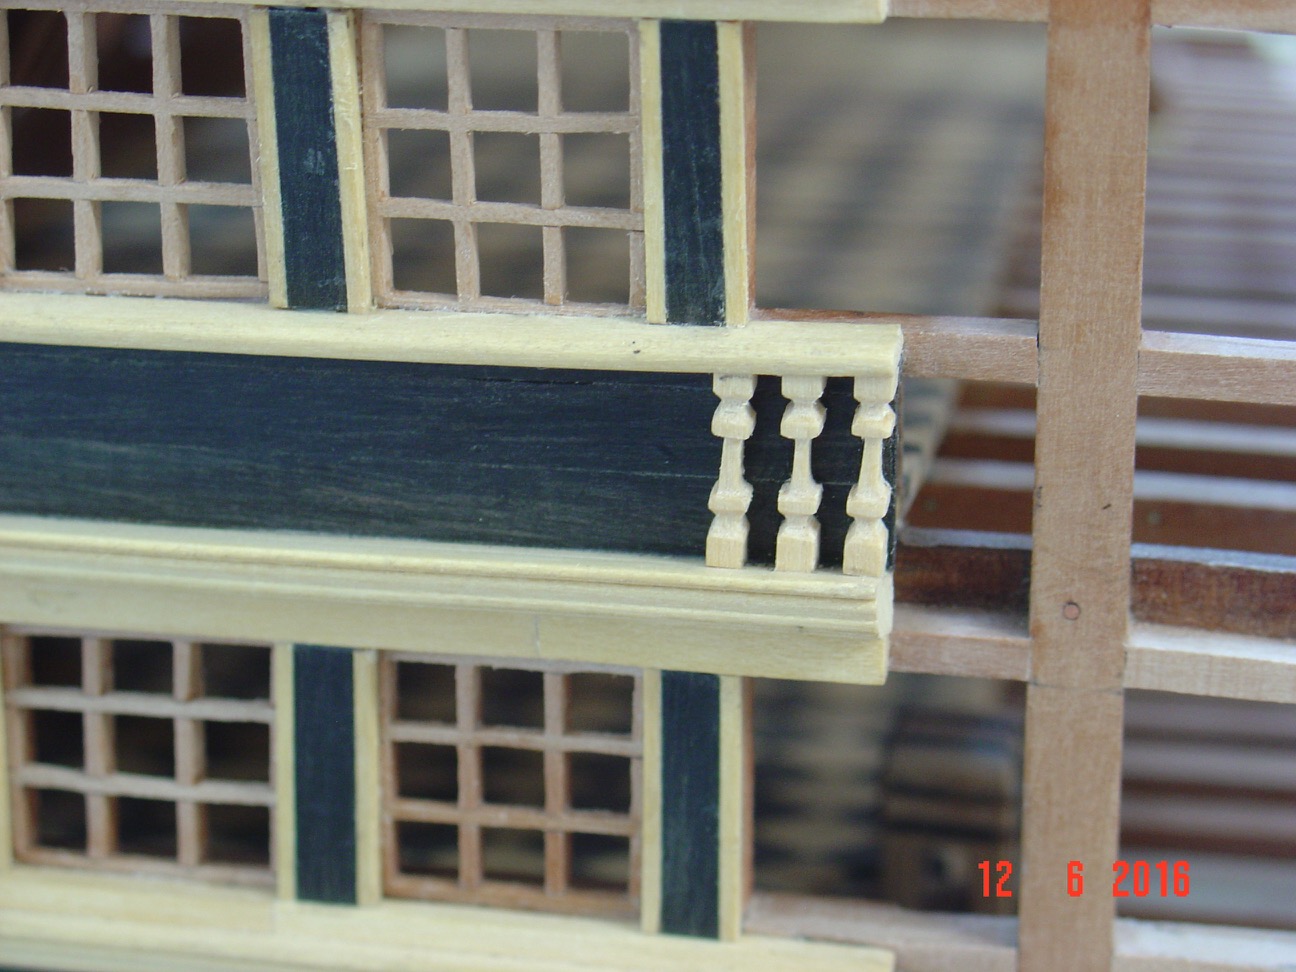
I went to your sight. Beautiful photos. I saw that you did more work on the stern gallery. Can you explain how you did the balusters? I saw the photos, but I wasn't sure how you formed them.
thanks
Marc
Hello Mark,
Sorry for the late replay but my computer (where the pictures were) was broken and it took a while to fix it.
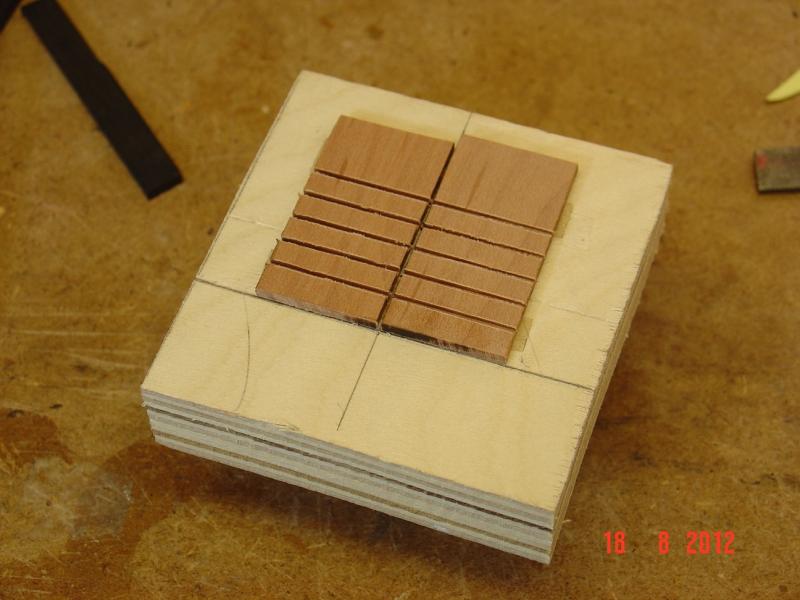
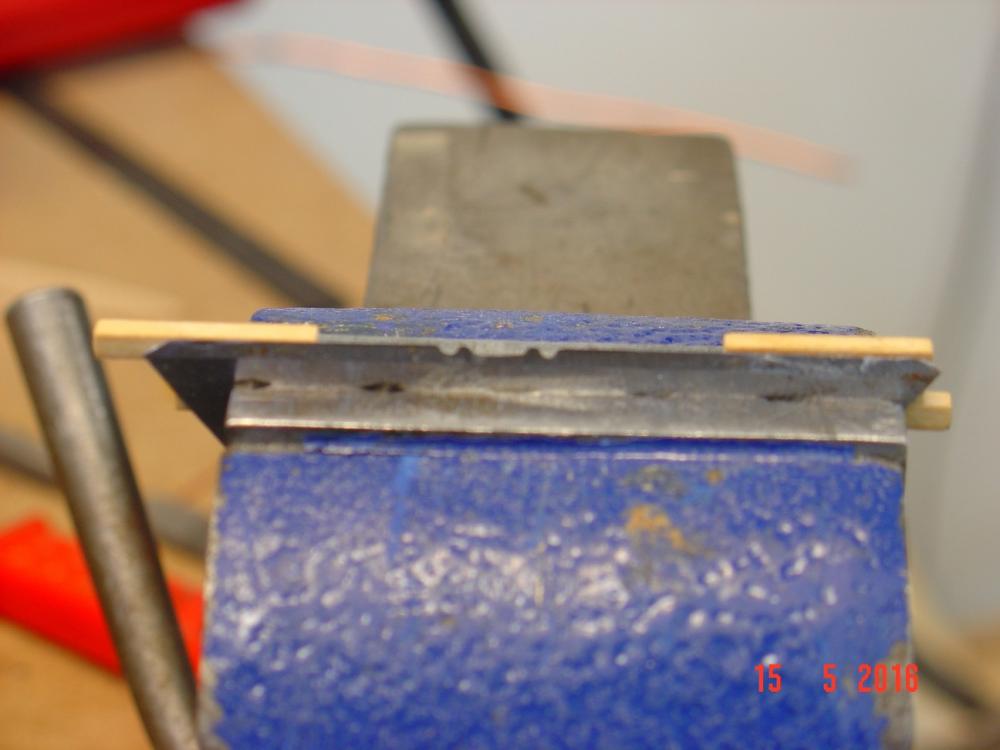
Here is a short description on how I did the balusters:
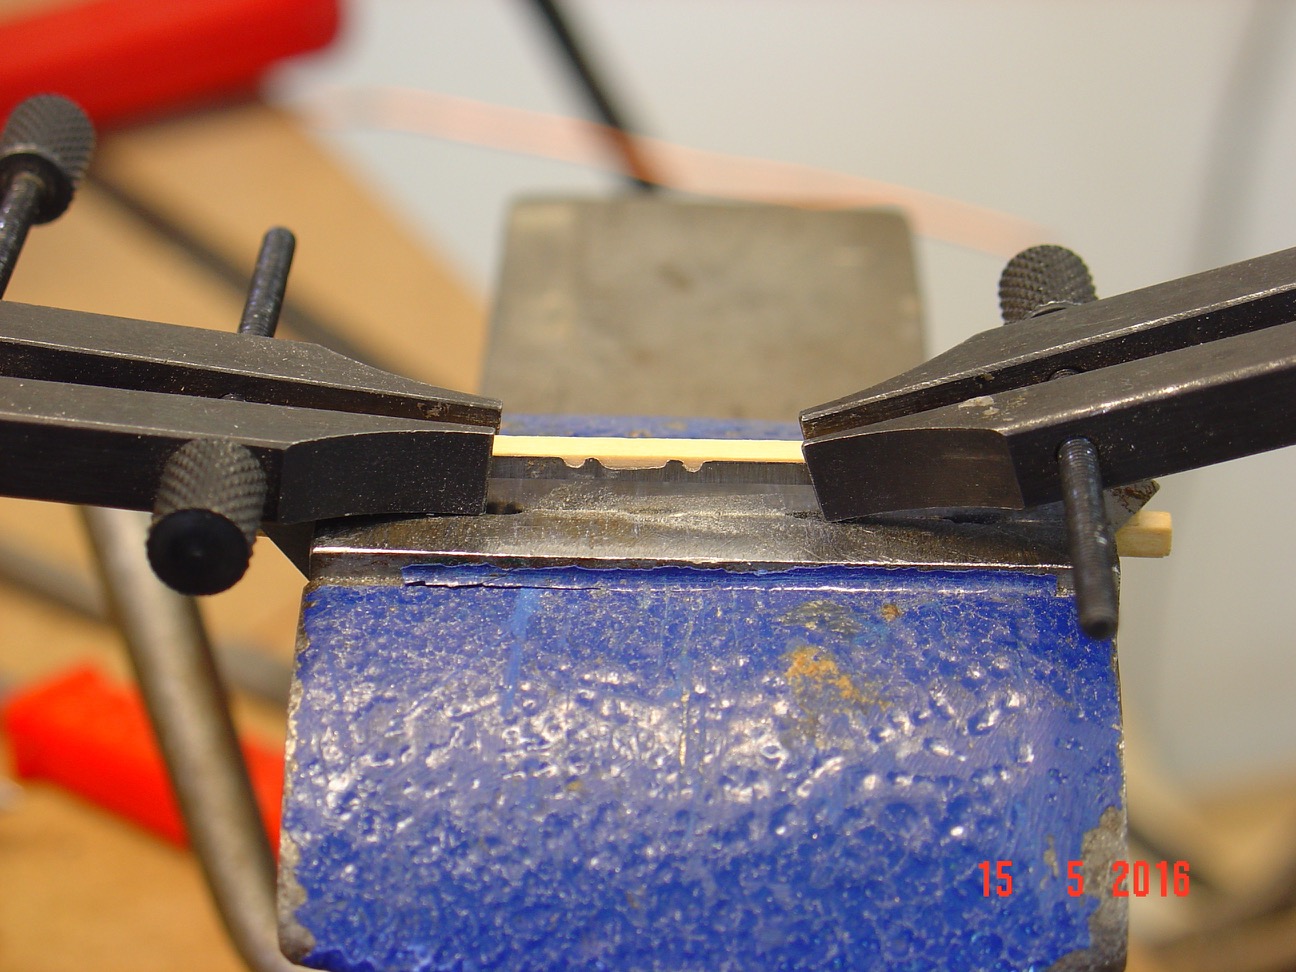
- I cut the desired shape in a piece of steel (an used broken knife blade) - you can see the shape in the first picture.
- On the back I glued a piece of wood the same thickness as the balusters (2mm in my case) at same distance (2mm) from the top of the shaped blade.
- I also glued two more pieces same thickness to delimit the length of the baluster stock - about 25mm apart. This way the square 2mm stock cut at 25mm length will fit exactly in that space and won't move sideways and its top will be flush with the top of the shaped blade.
- The whole assembly was hold in a vice.
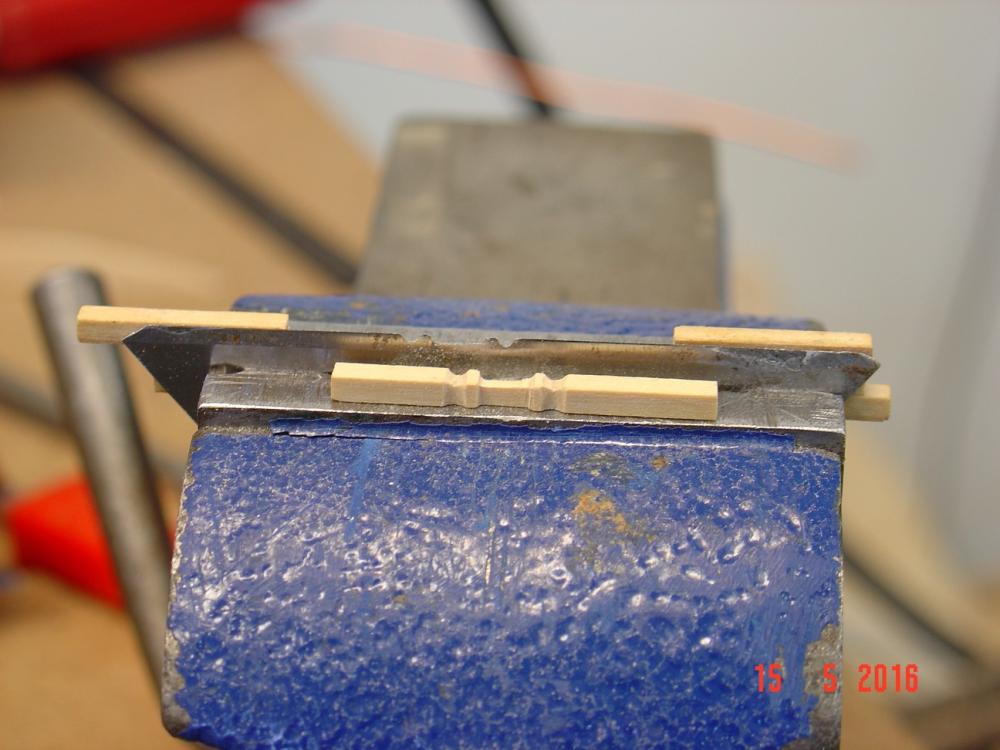
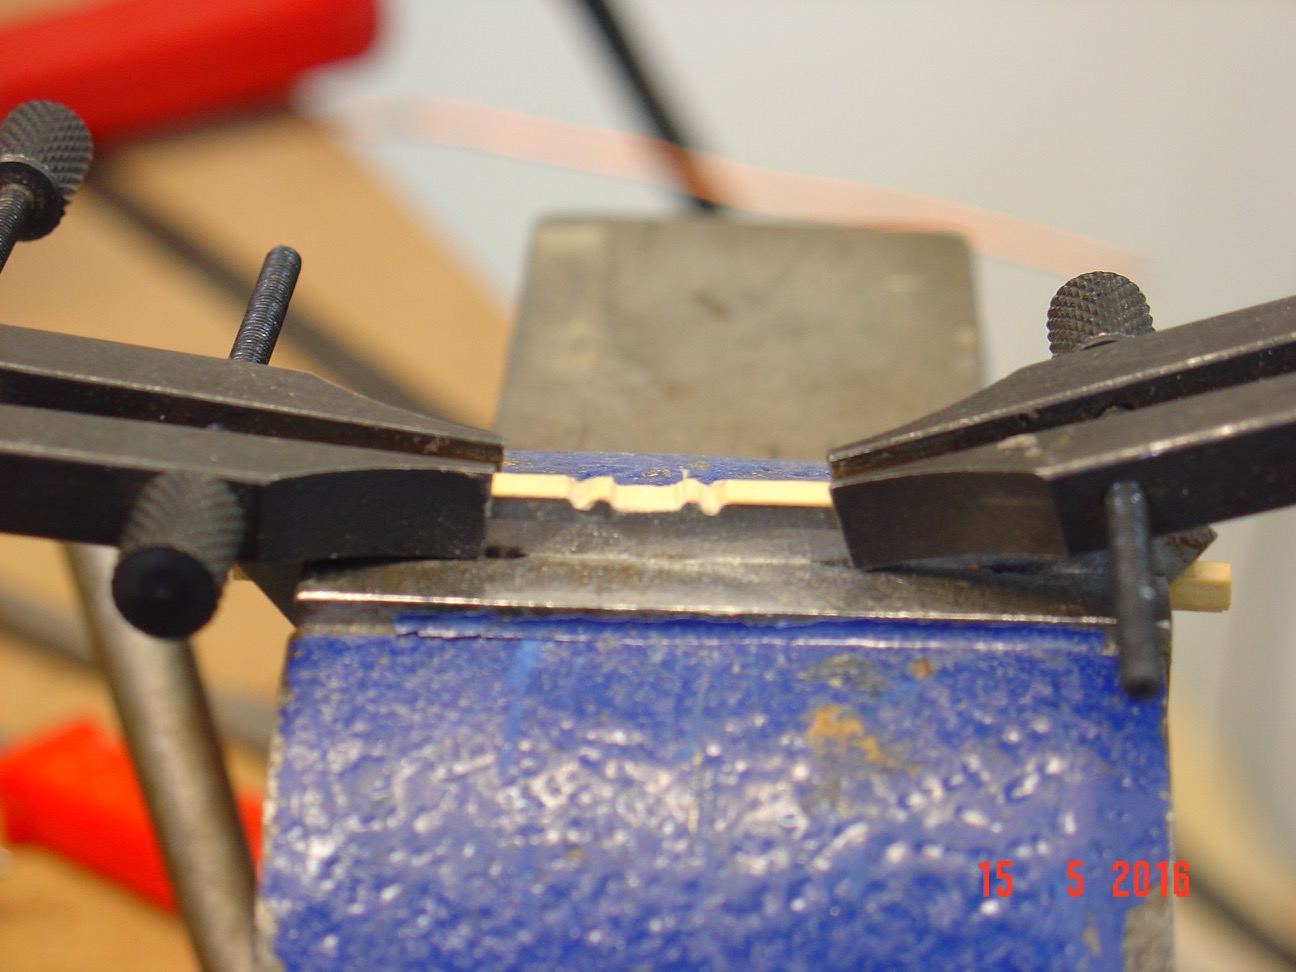
- The square pieces of box wood (blanks) were placed in that notch and fixed in position by two small clamps as seen in the second picture. This kept the future baluster from moving back and forth on the next operation - filing the shape.
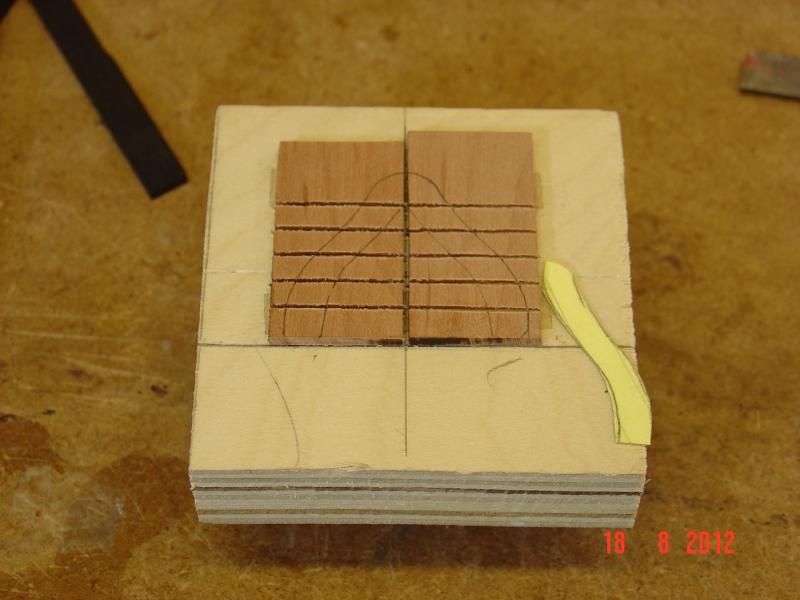
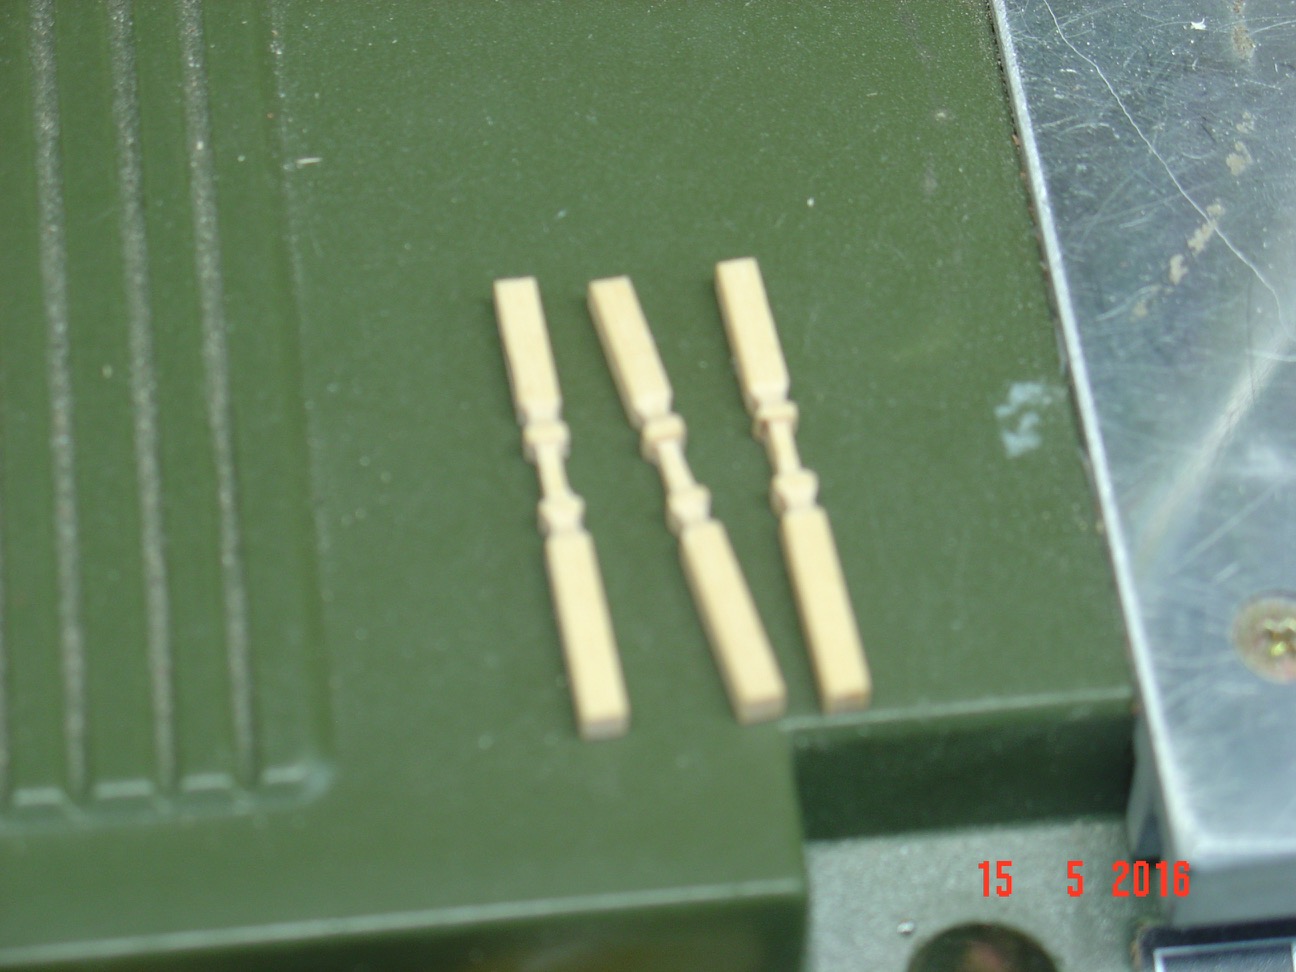
- With several small jeweller files (square, round and trapezoidal) the shape from the blade was filed into the wood. Be careful to keep the file perpendicular on the template and horizontal so to have the same depth of the cuts across. See third picture for the result of this operation.
- Losses the clamps, remove the baluster, turn it 90 degrees, put it back and fix it with the clamps.
- Repeat step 6
- Repeat step 7 again by turning the blank in the same direction and that's it - you'll have a three sided square section baluster - I only needed them three sided as they were glued on the stern gallery but you can do them four sided if you need.
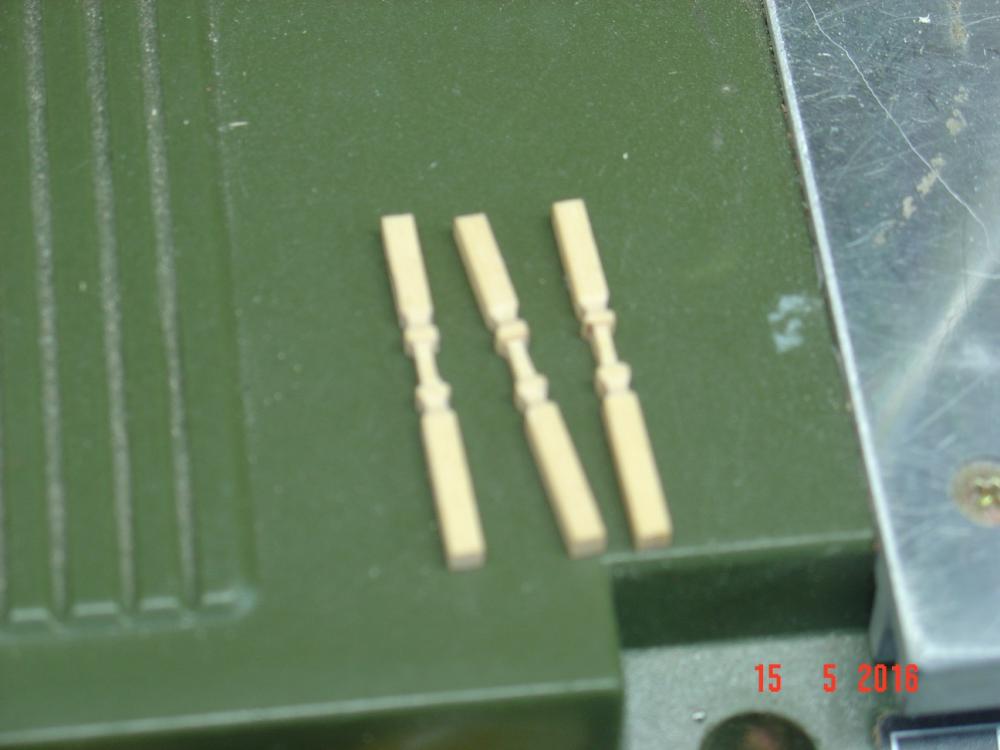
Another tricky part was doing the balusters that were placed at different angles (increasing angles) like those in the last picture.
For those first and third sides (side views) were cut (filed) perpendicular on the template but the second (front view) has to be in an increasing angle. In order to do that, the filing of the second side has to be at an angle which required the baluster blanks to be a bit shorter (say 23mm instead of 25). Here are the steps:
- place the blank in the jig as before aligned with the left side (future top of balusters). This will produce a small gap (2mm) at the other end.
- file first side perpendicular as before
- place the blank exactly as in step one for the second side
- file de second side in an angle bigger than 90 say about 100 degree (I estimated the angles trying to increase them for subsequent ones by trial and error) considering it from the left side (baluster top). Be careful to du all the "cuts" at the approximately same angle. After scraping several I got the hang of it.
- unclamp and turn the blank (always in the same direction) but this time it has to be shifted a bit to the right - depending of the angle you did the filing - say 1 mm in this case to be able to align the notches on the second side with those on the template, clamp back.
- shape the third side perpendicular again as the first one
- you're done you just have to cut it at the required length to fit the space you need it for.
Hope this lengthy explanation is clear enough. If not just ask.
Regards Alexandru


-
-
Just found this log of yours, never knew about it. Love your work. Do you have any more updates?
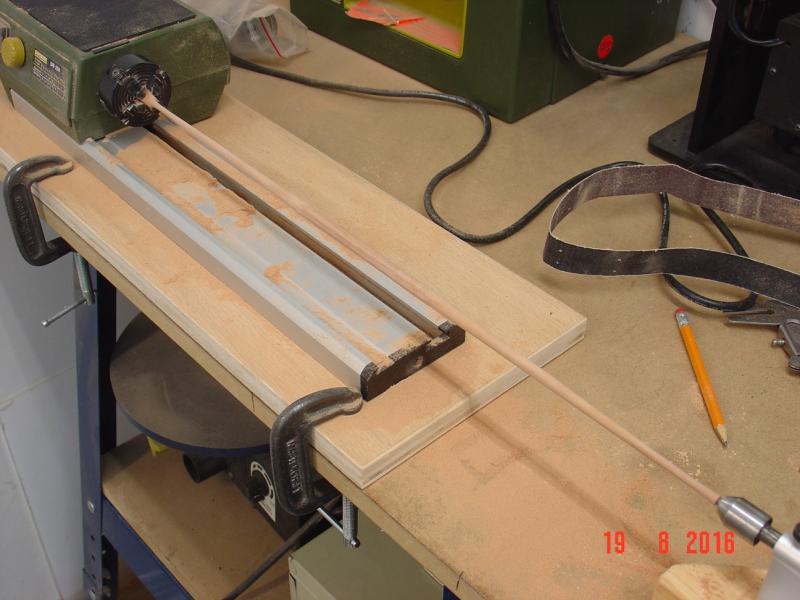
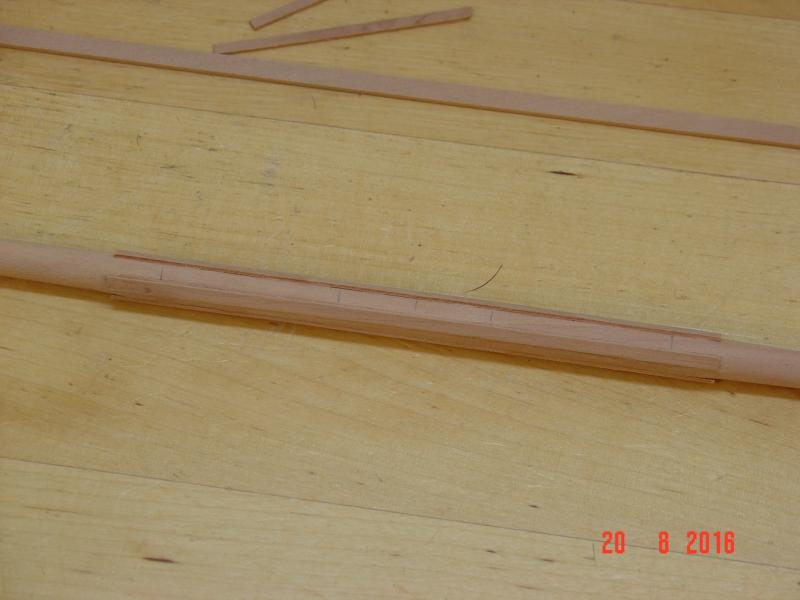
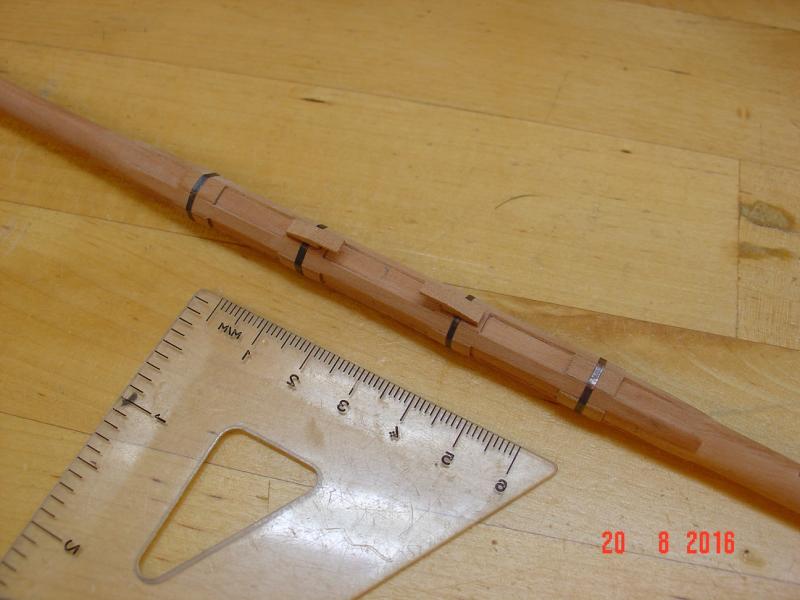
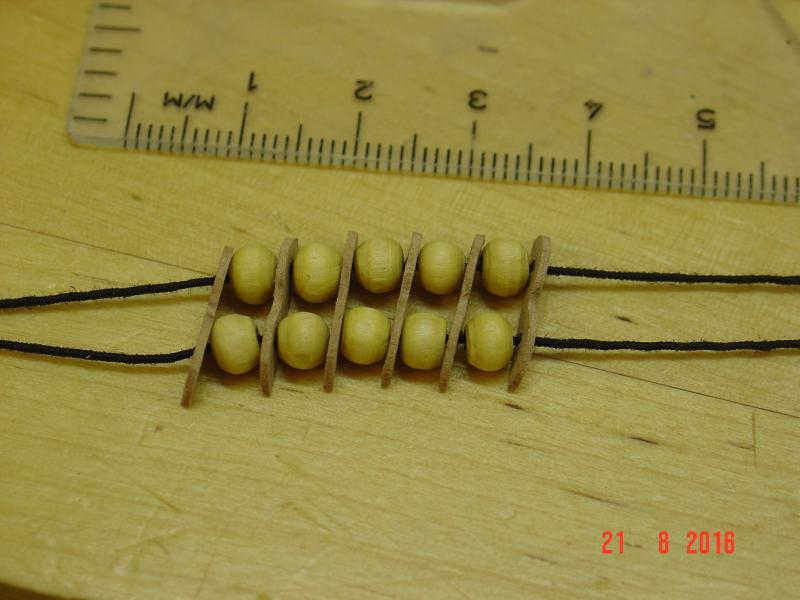
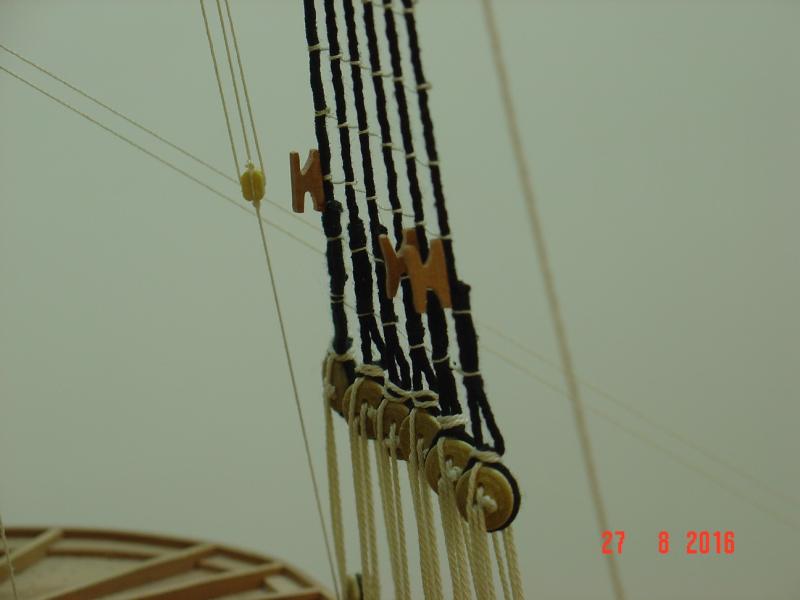
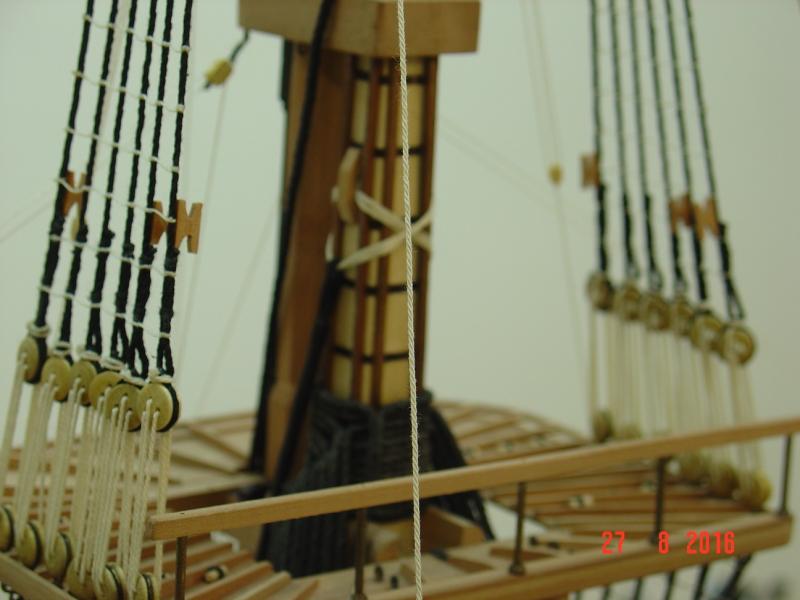
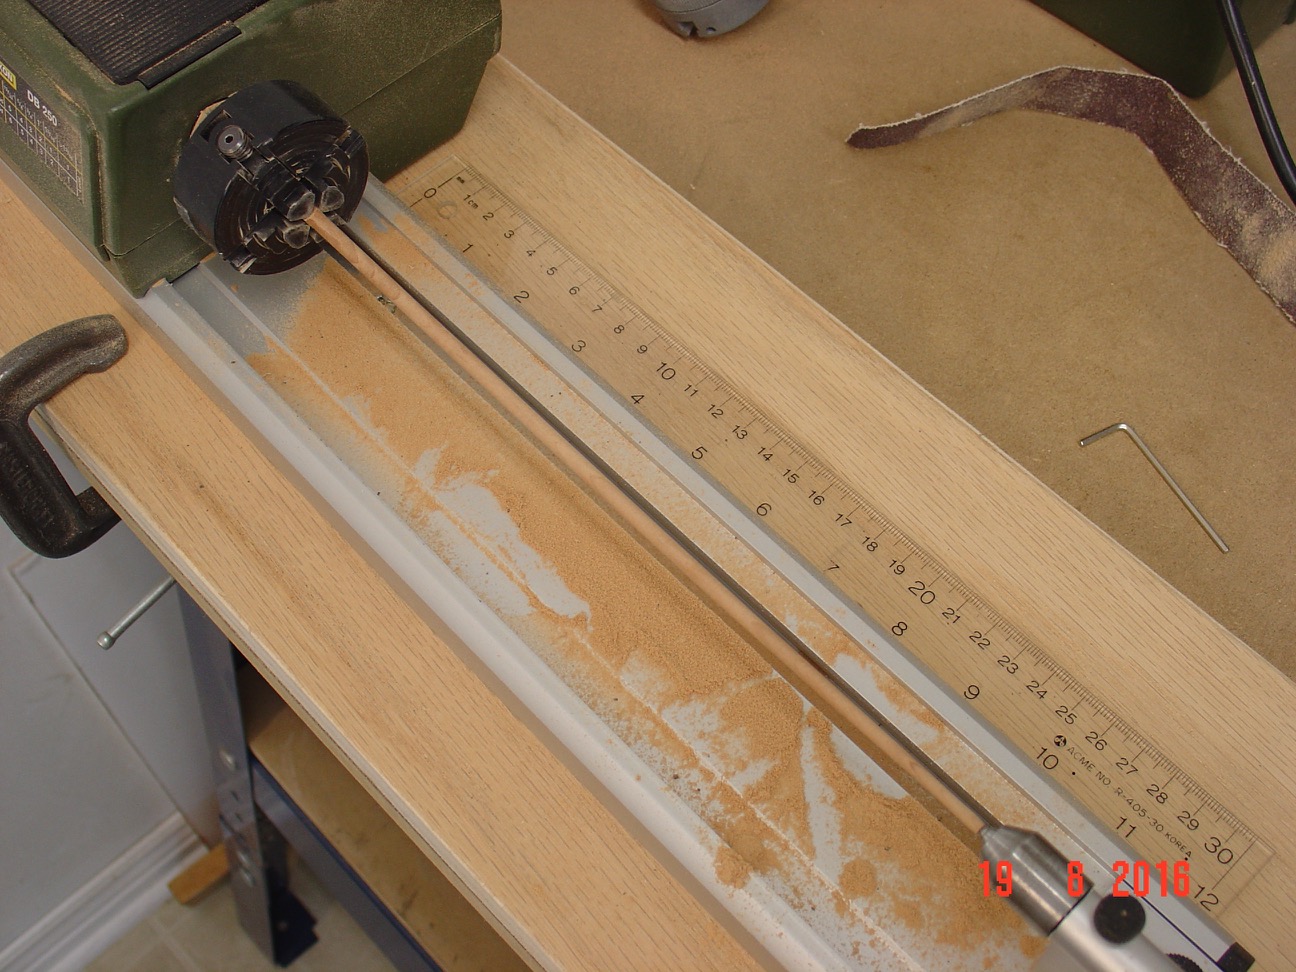
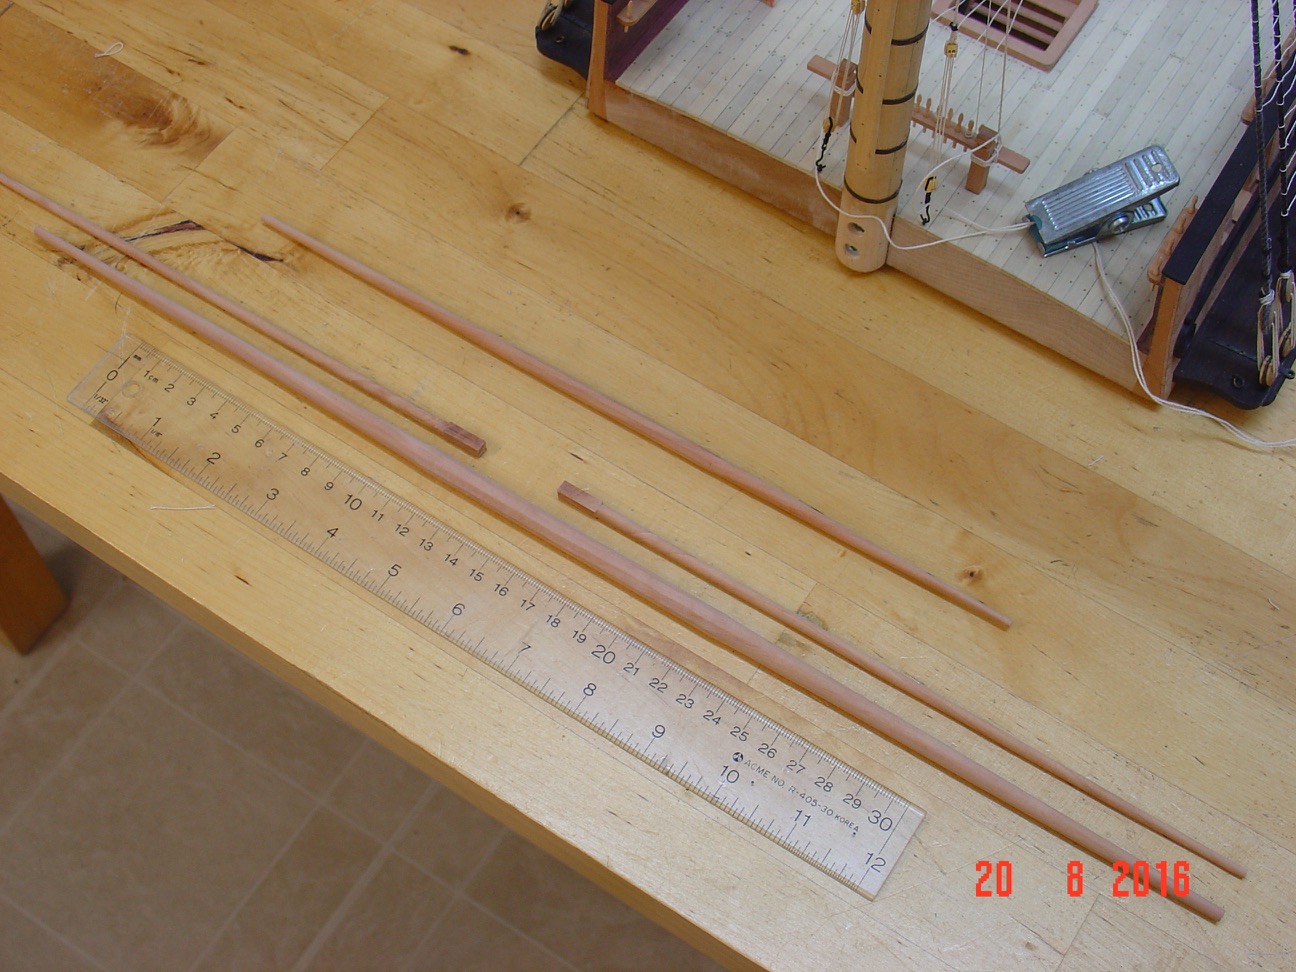
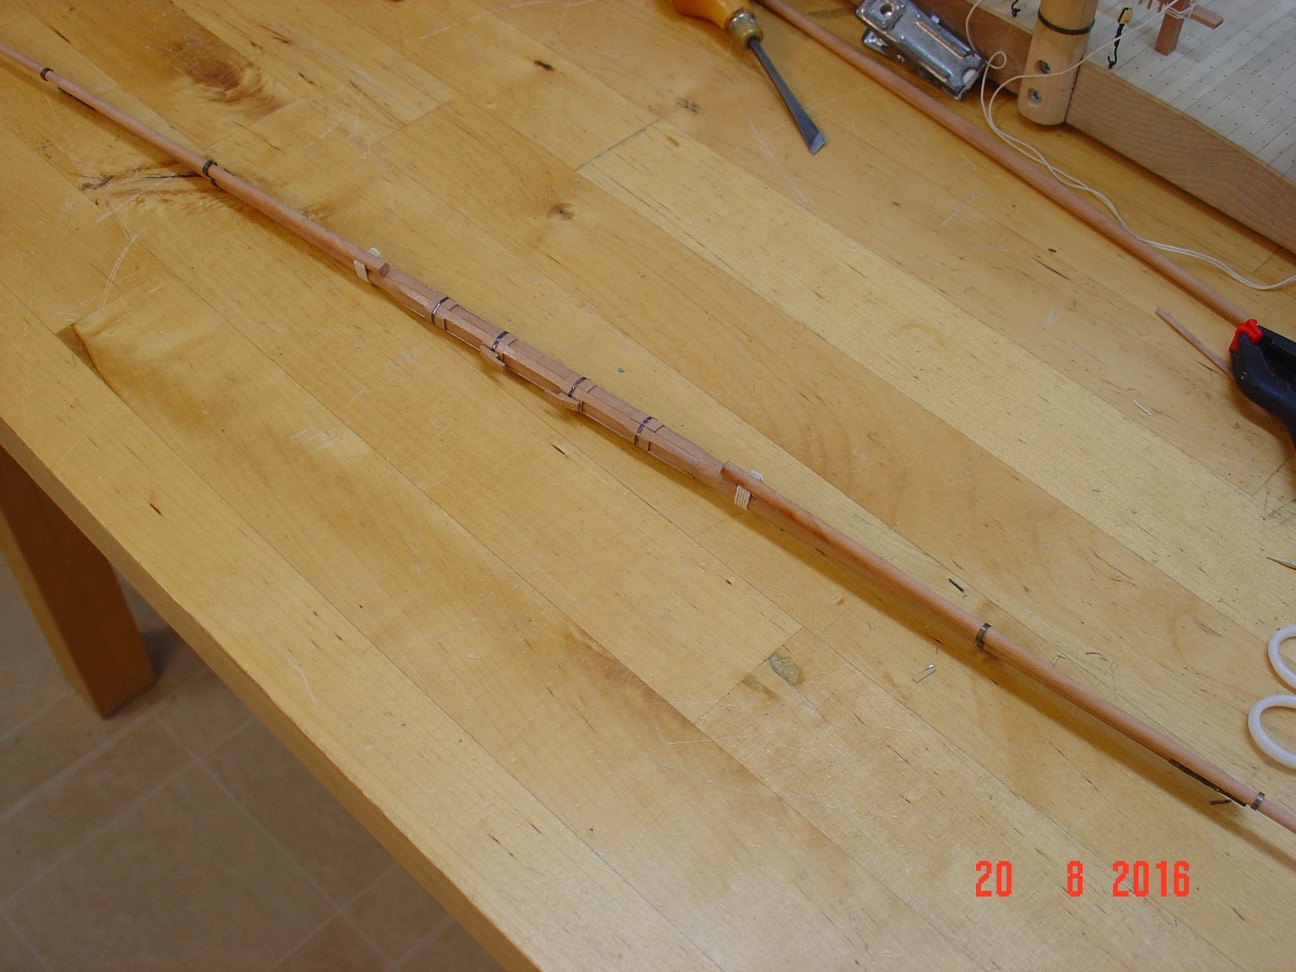
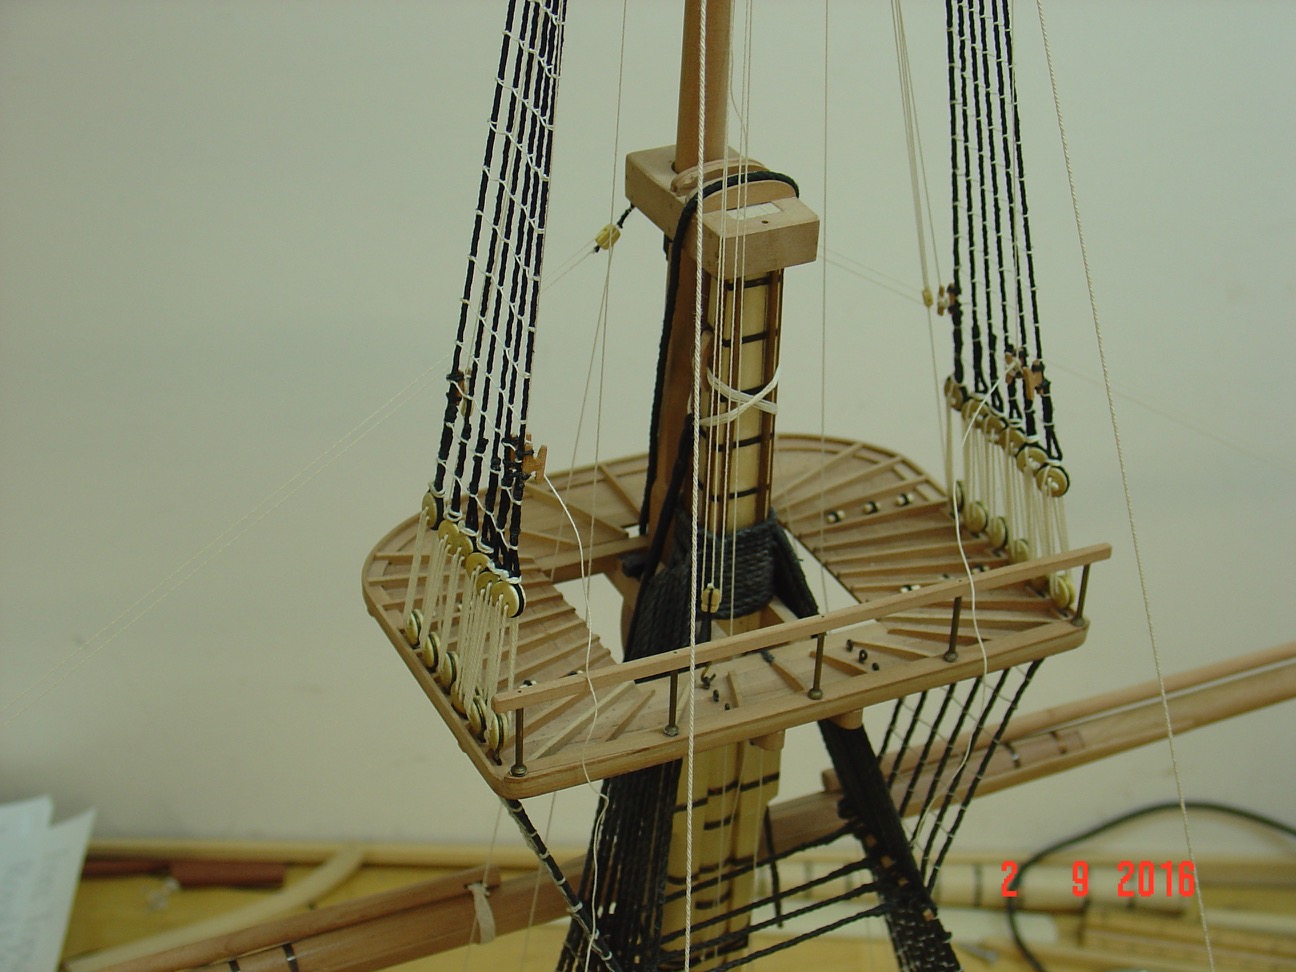
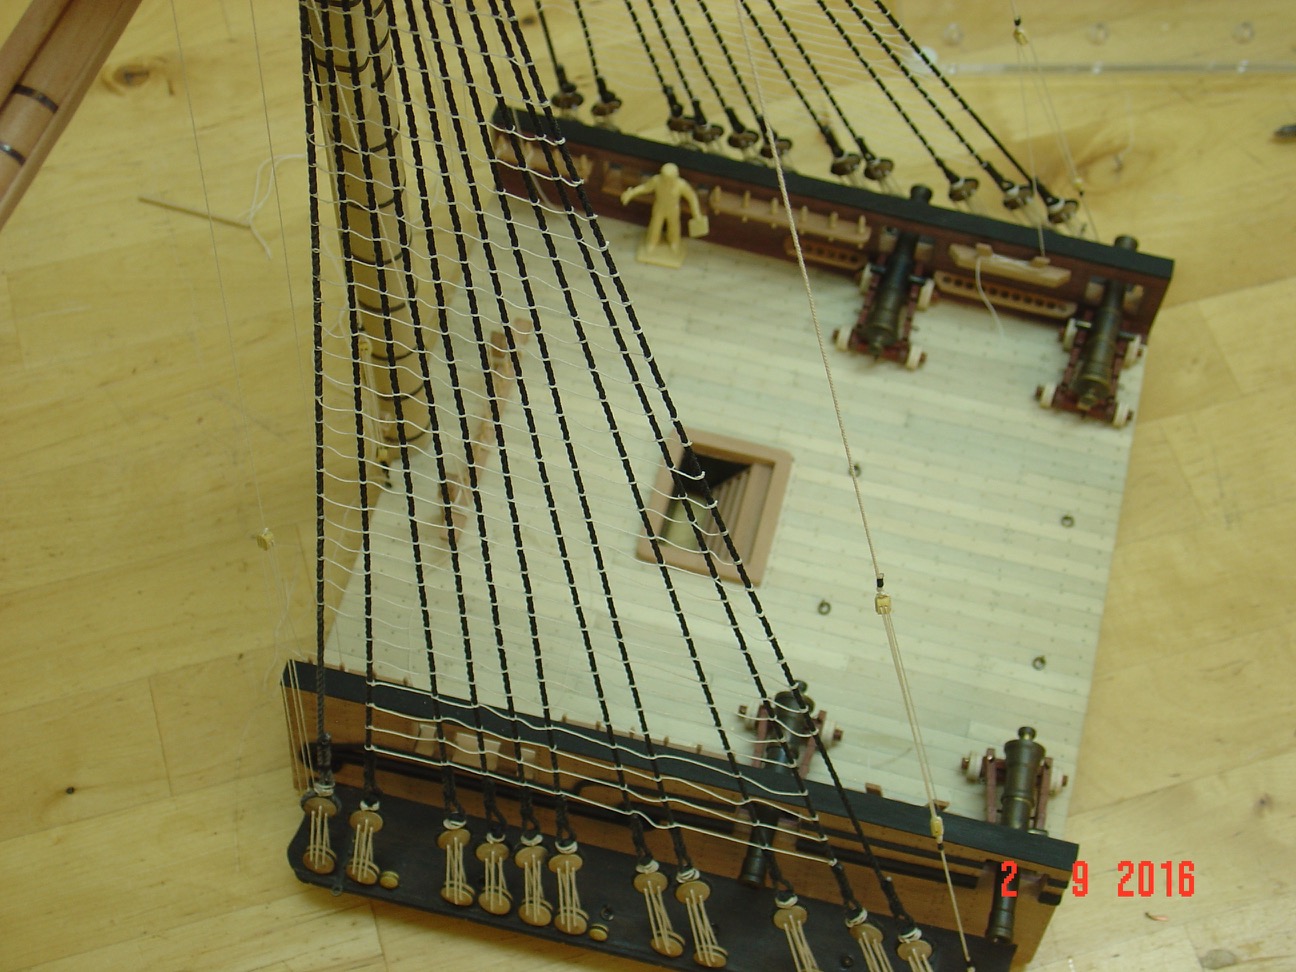
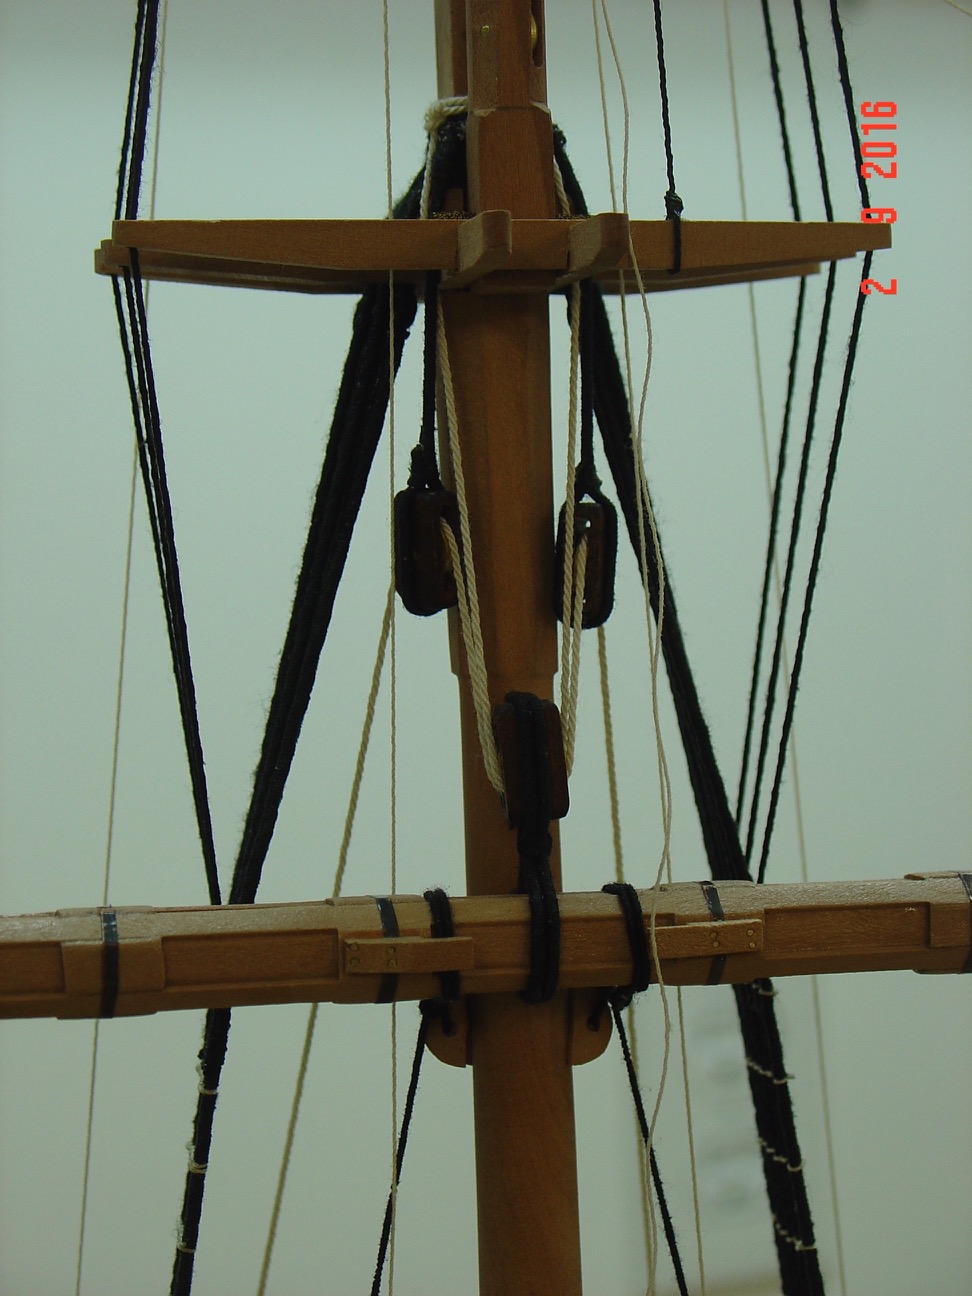
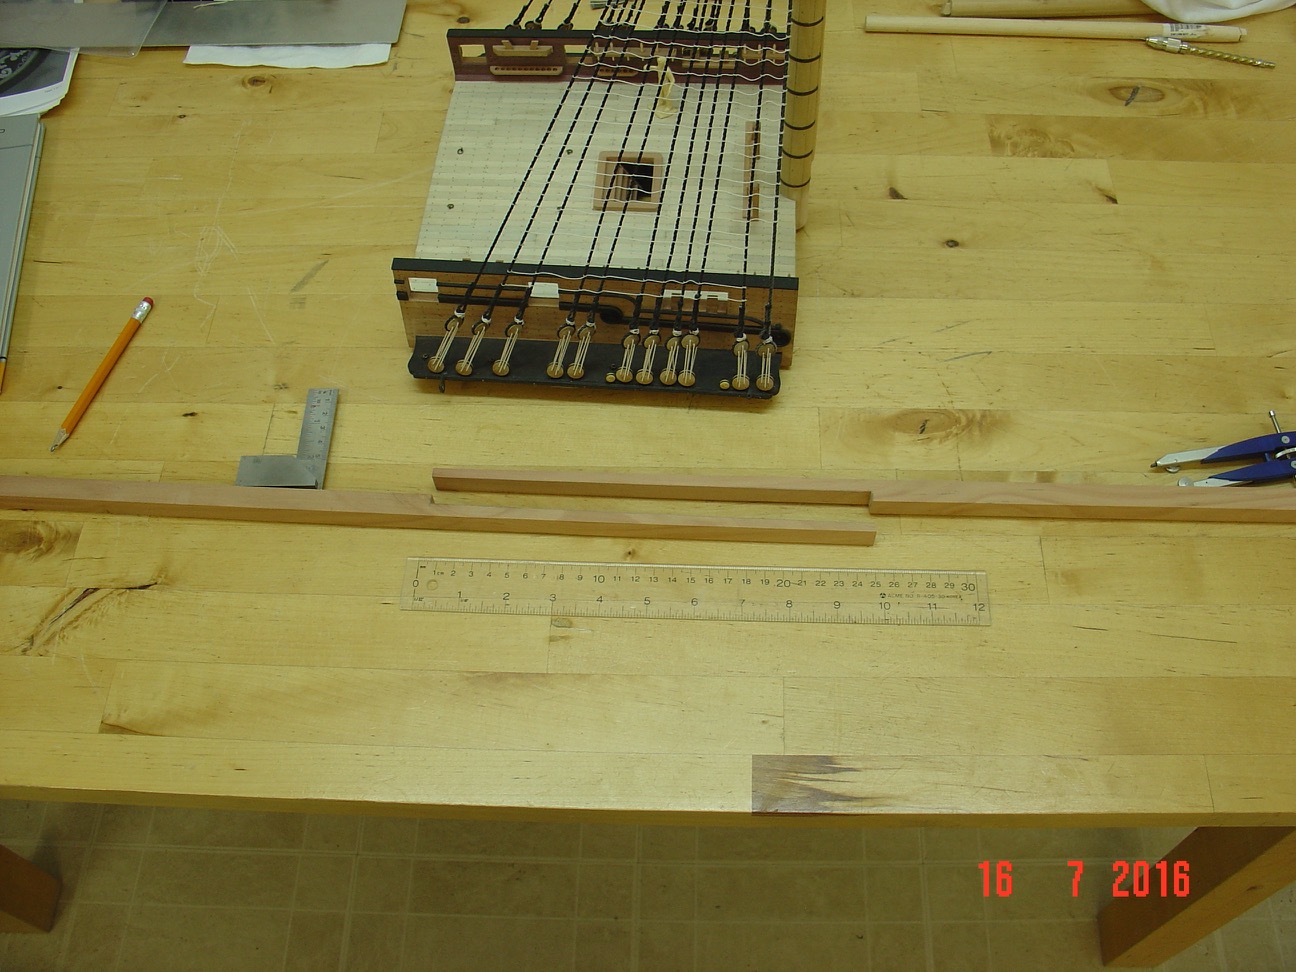
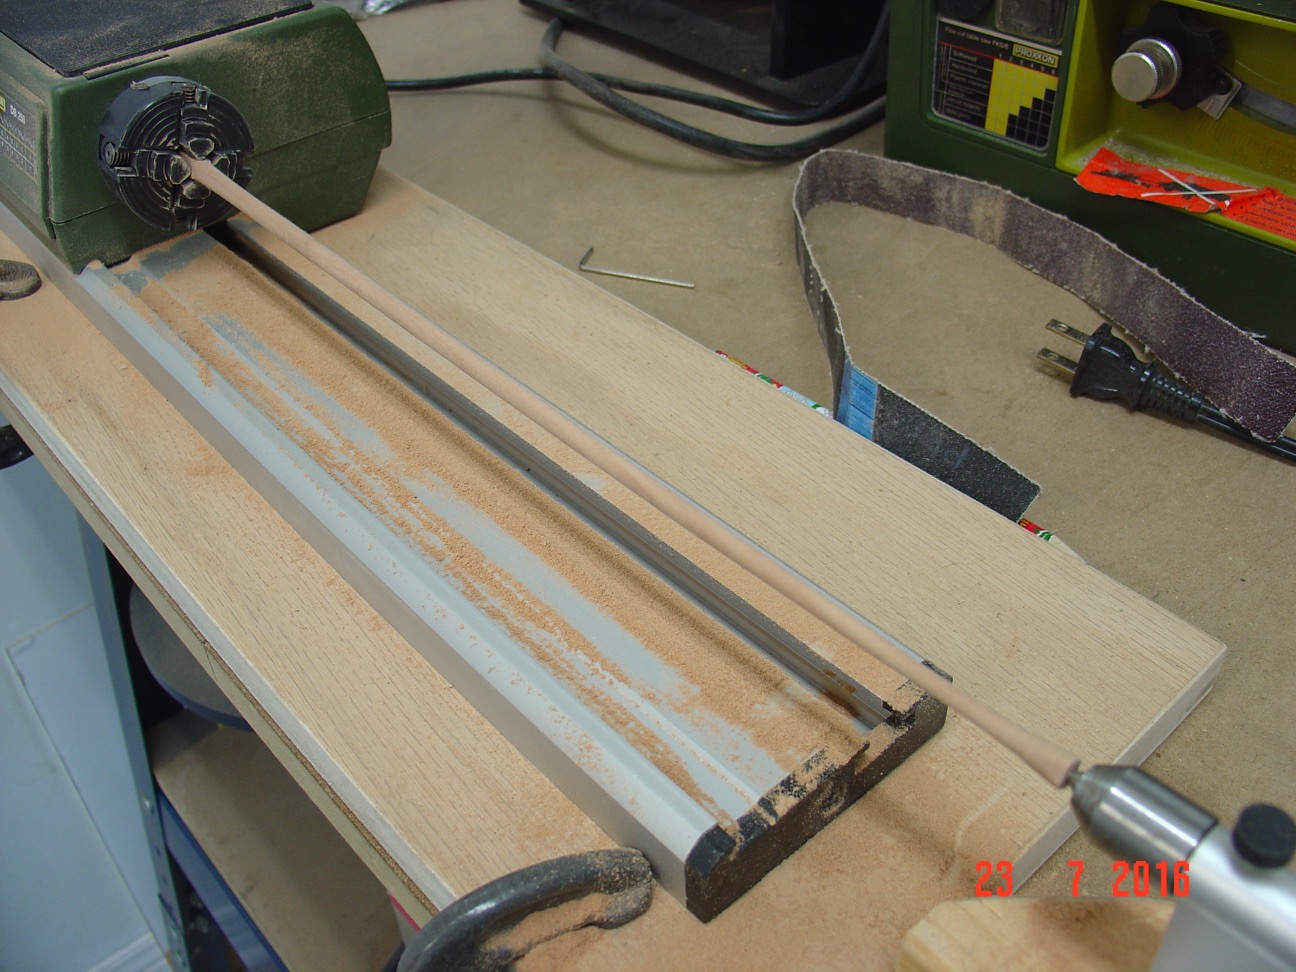
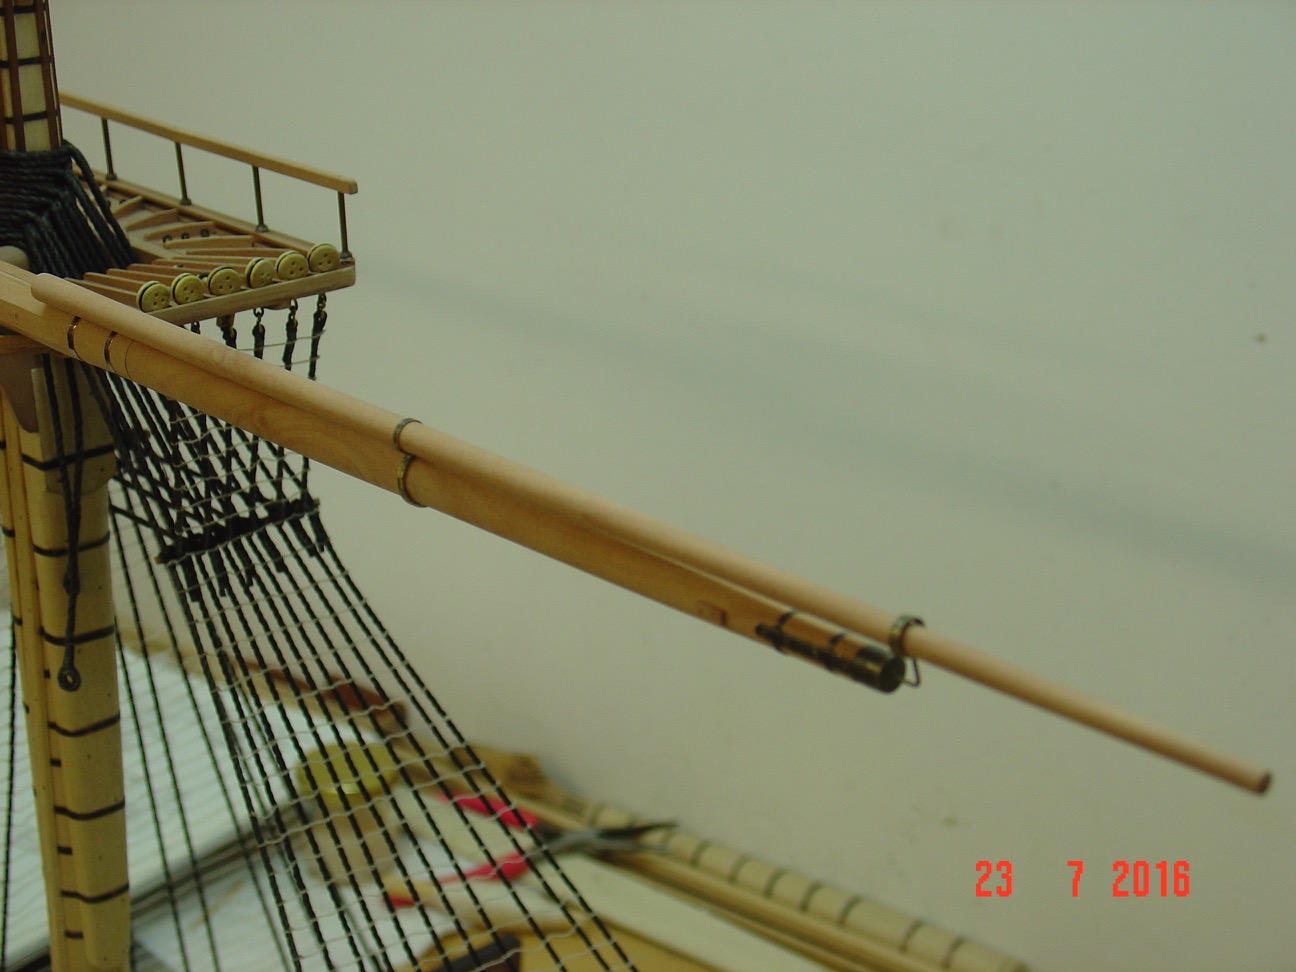
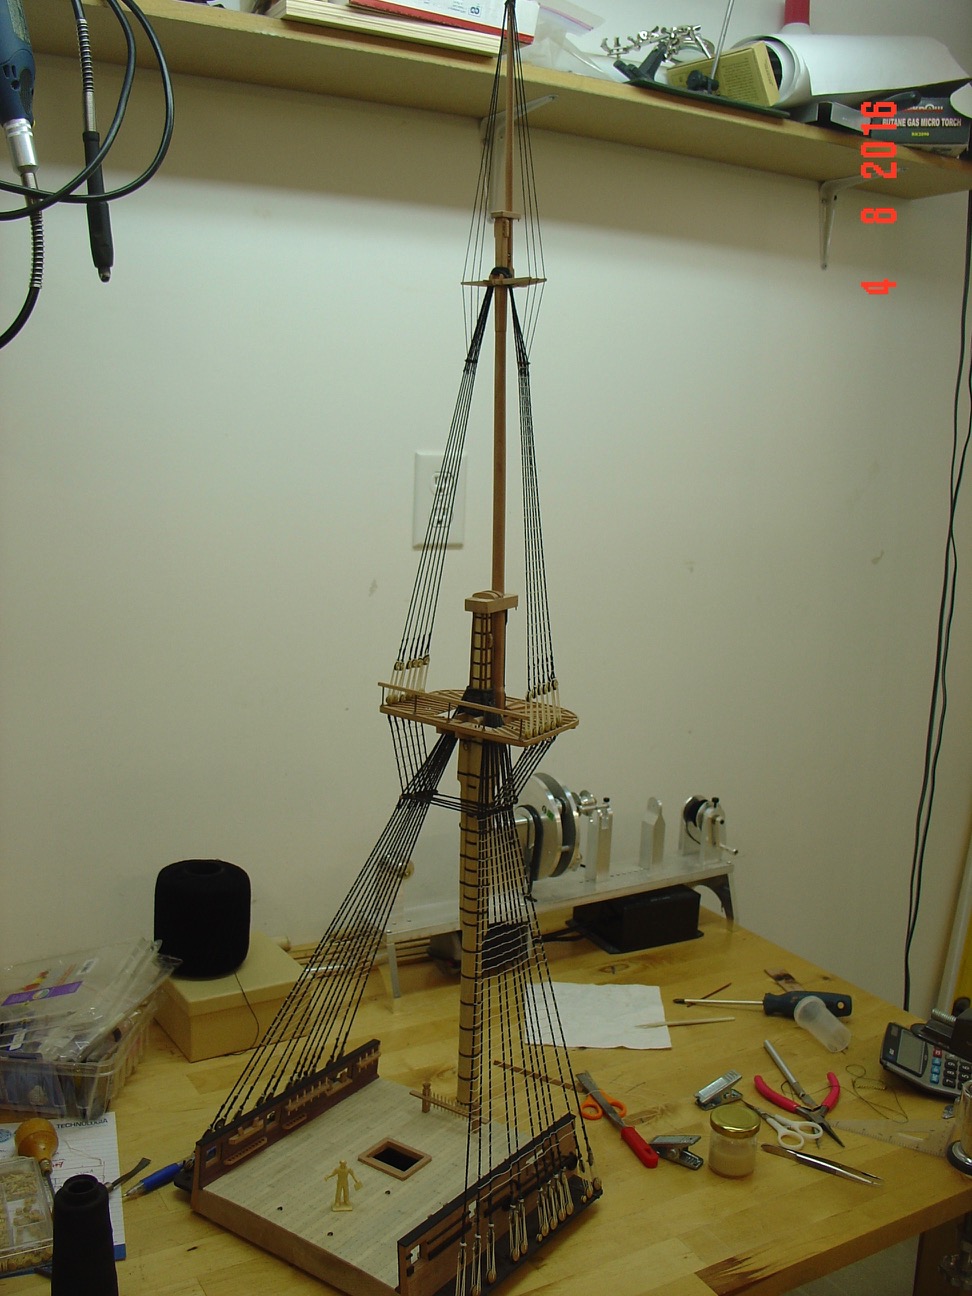
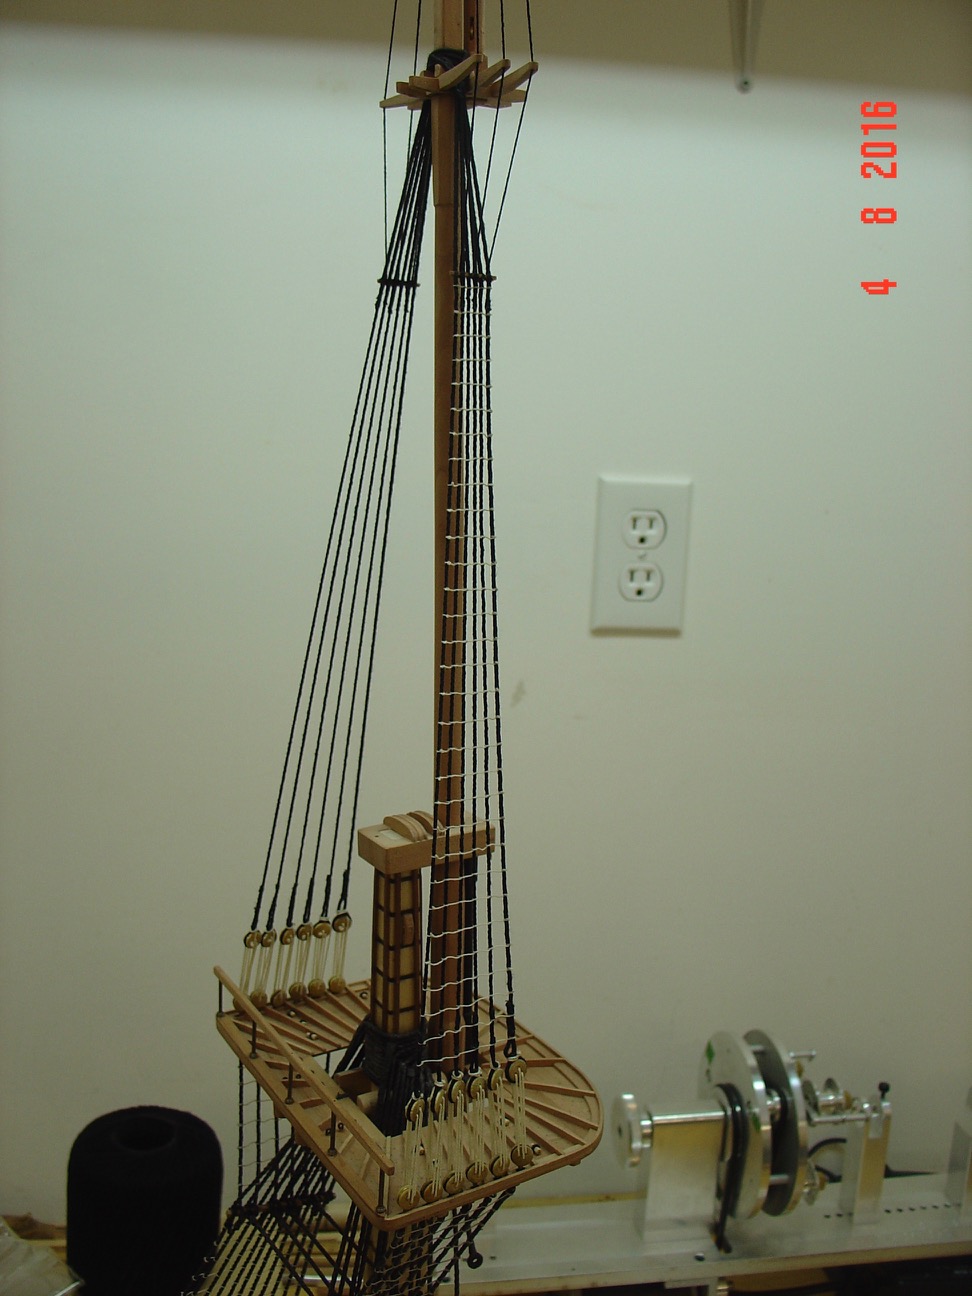
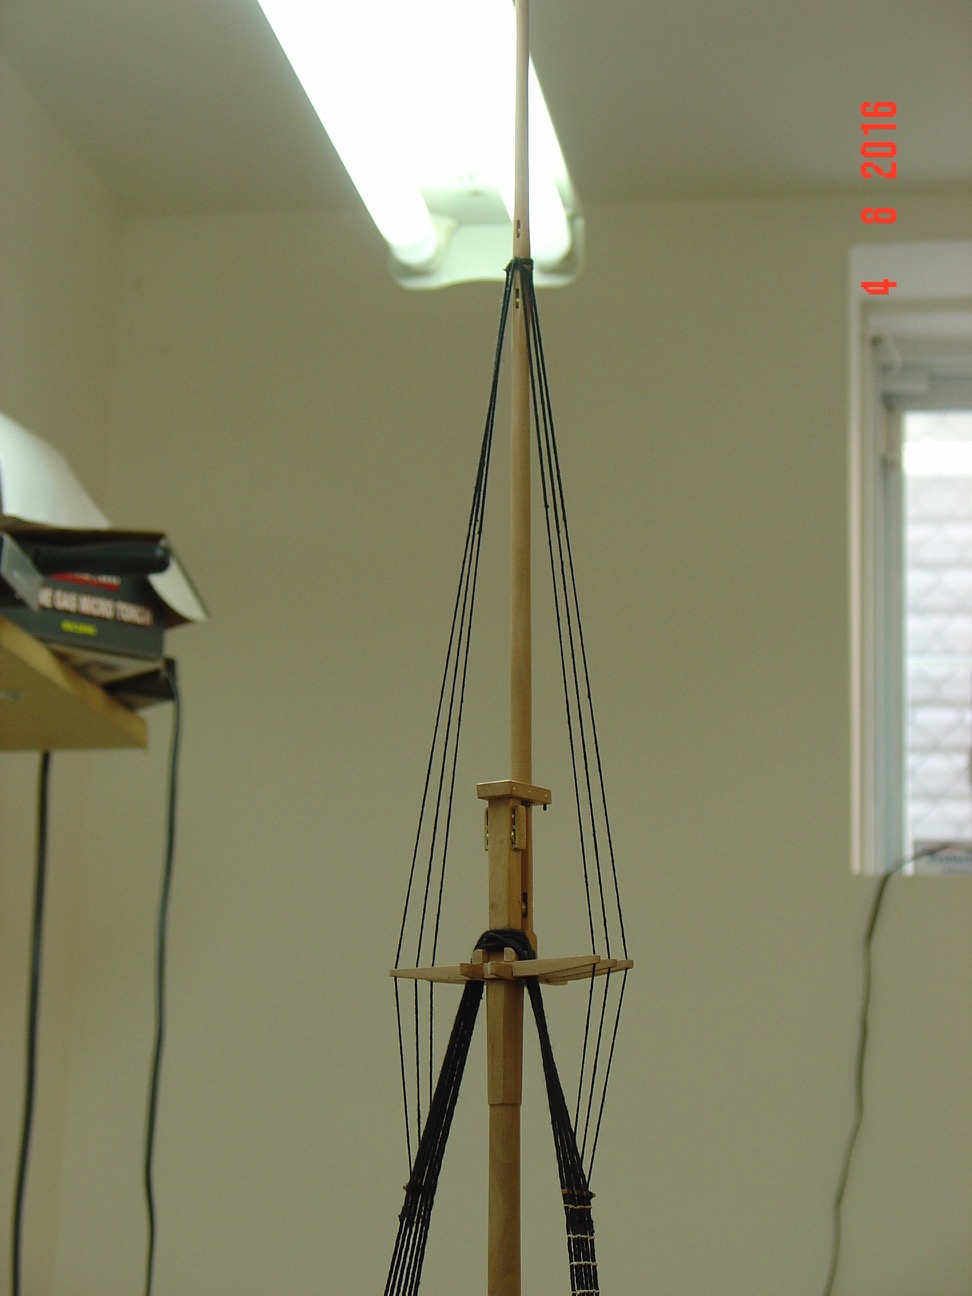
I might have just a few pictures I didn't posted yet as update for this build, but I will restart working on it soon and I will post as I go. I am planning to start by doing the three yards.
Alexandru
- mtaylor, WackoWolf, JohnnyAubrey and 1 other
-
4
-
Thank you all for the kind words and appreciation.
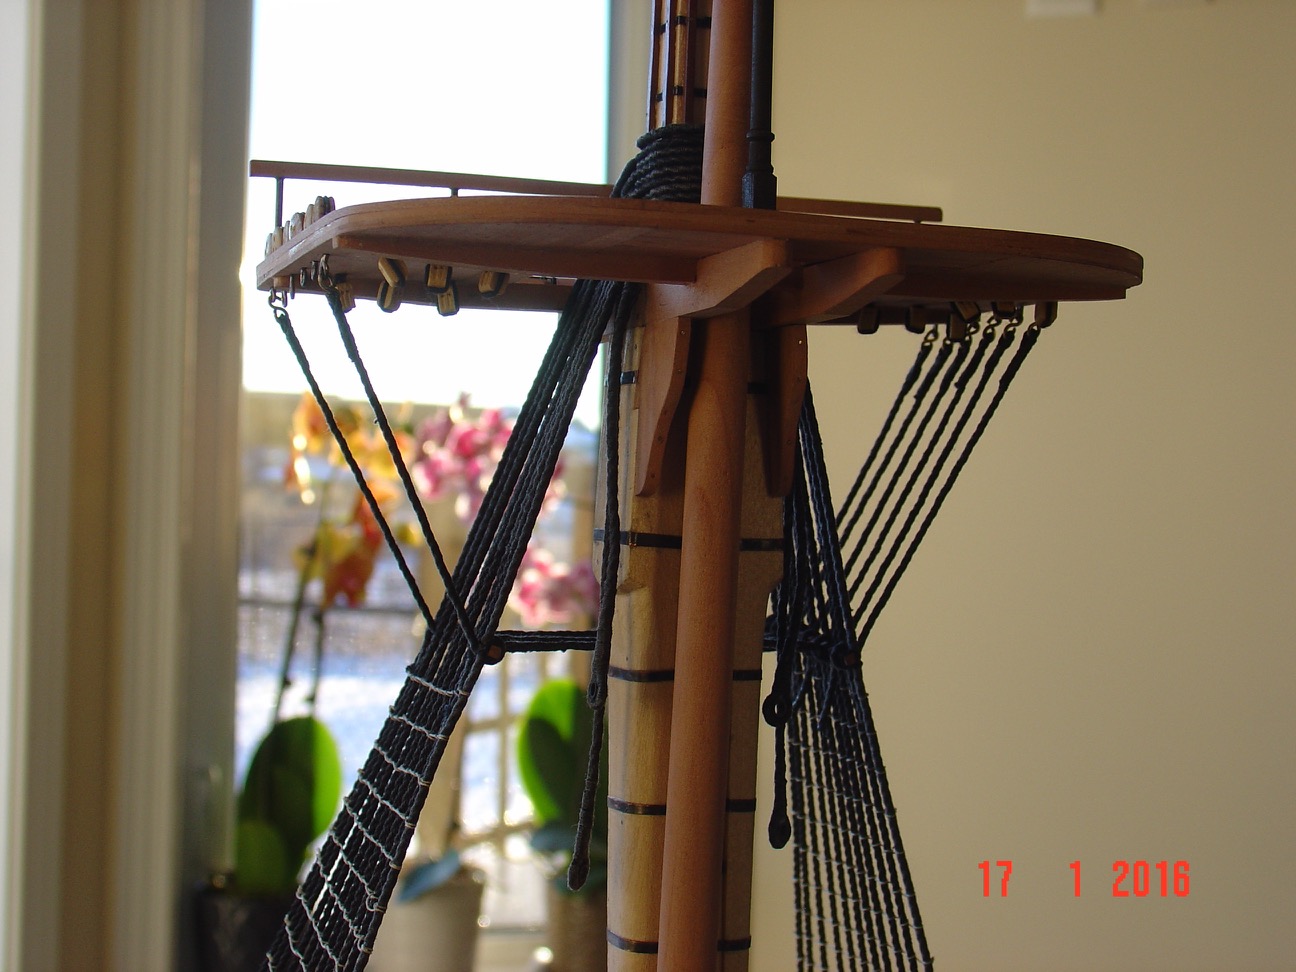
Hello Alexandru, why not continue until the first part of the mats ( the tops) with dormant ropes. It would be more complete.
No?
Isalbert
Isalbert,
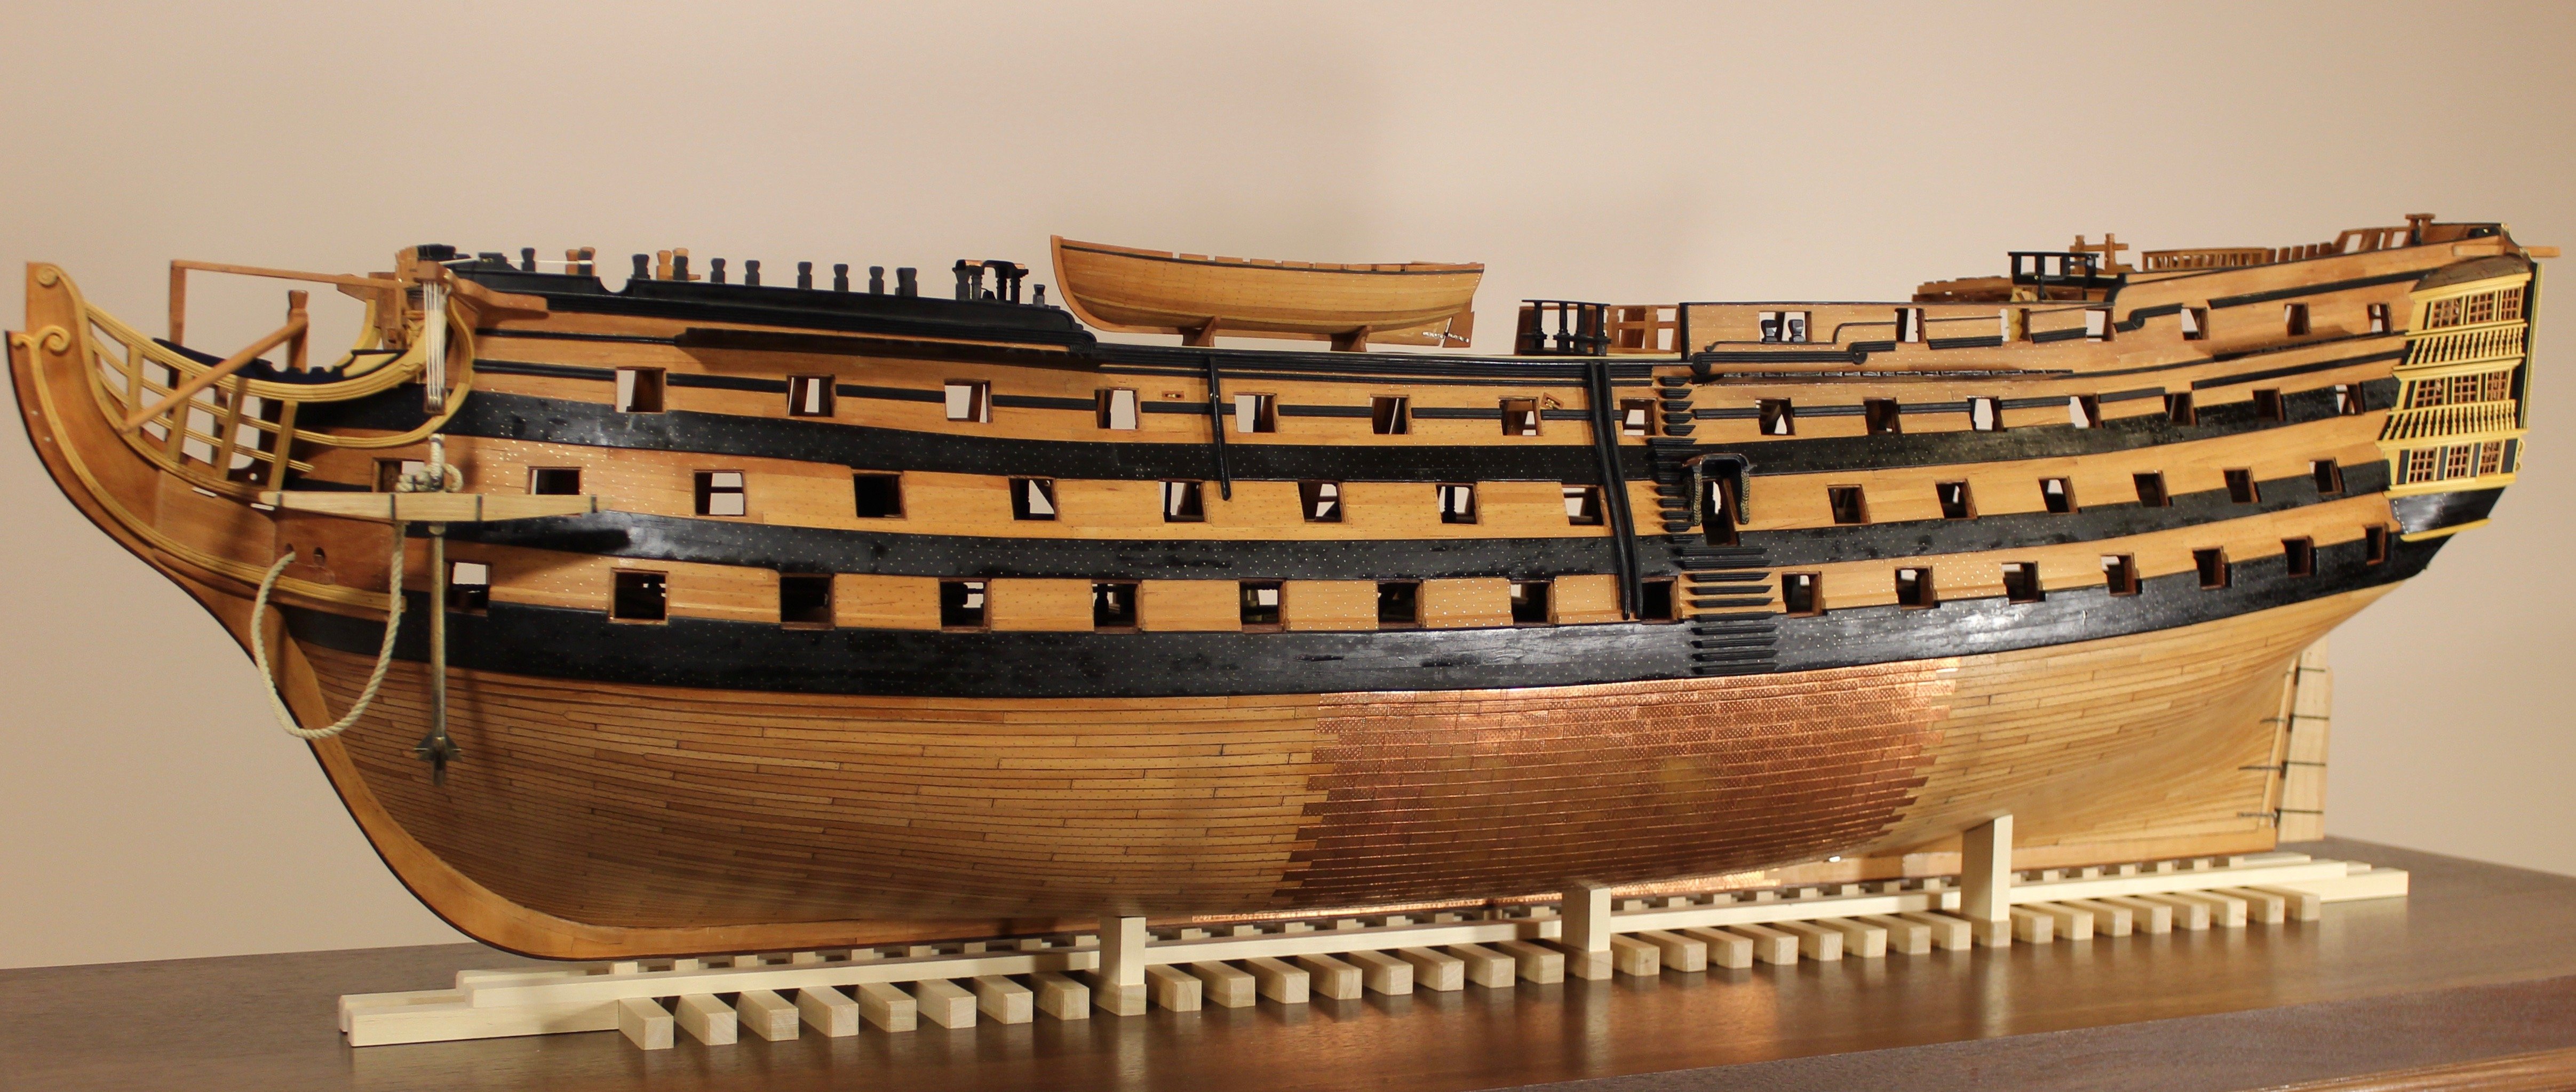
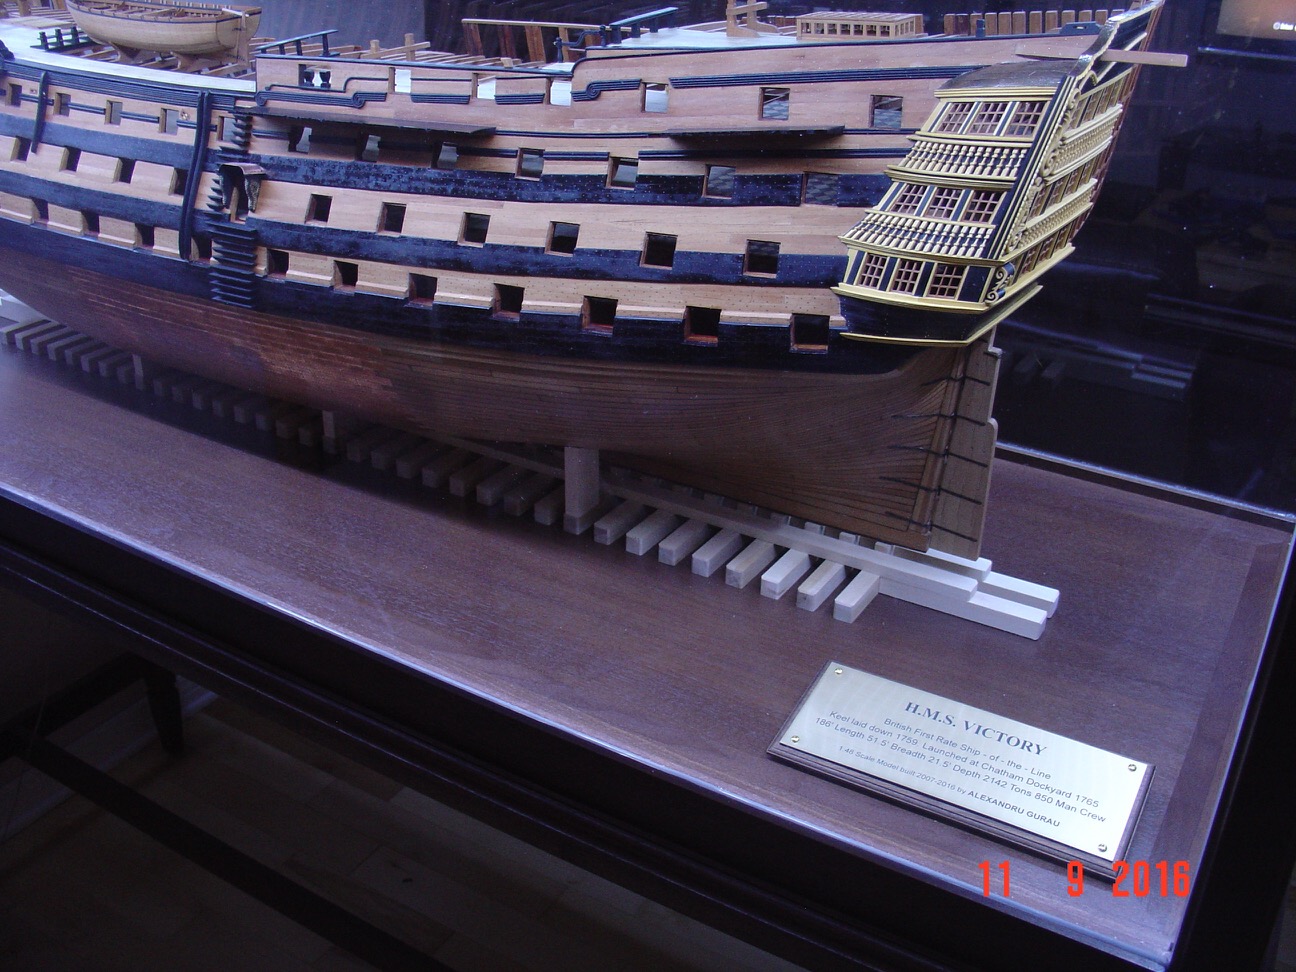
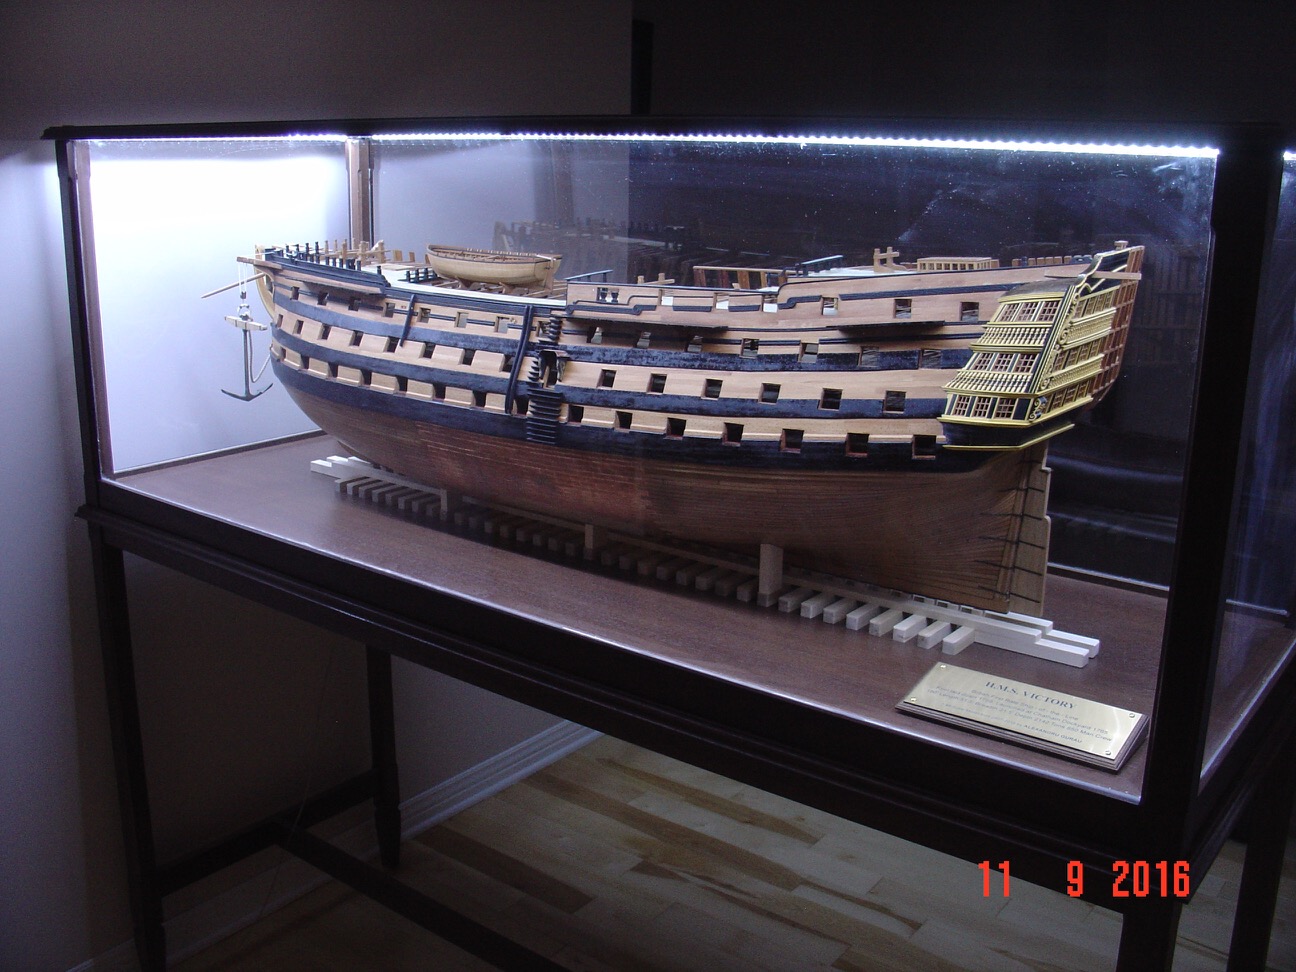
I thought about that, I even made the main mast but when I dry fit it into the model, the size of it scared me. The model is big anyway and with lower masts would have gain a lot in height - so much that it won't fit in my car anymore and be really difficult to even take out from my basement where my workshop is.
So I decided to not do any masts on the Victory, and to reuse the already made mast for another project. Additionally the custom made display box I ordered was made for the model without masts - and I payed a lot for it. To all this add the fact that I am working on this model for more than 9 years so I really needed a change - thus the decision to stop were I am and call it "done". There are a lot of other small details I could have done on it as it is (without increase in size) but in the end I decided not to.
Alexandru
- mtaylor, piratepete007, zoly99sask and 4 others
-
7
-
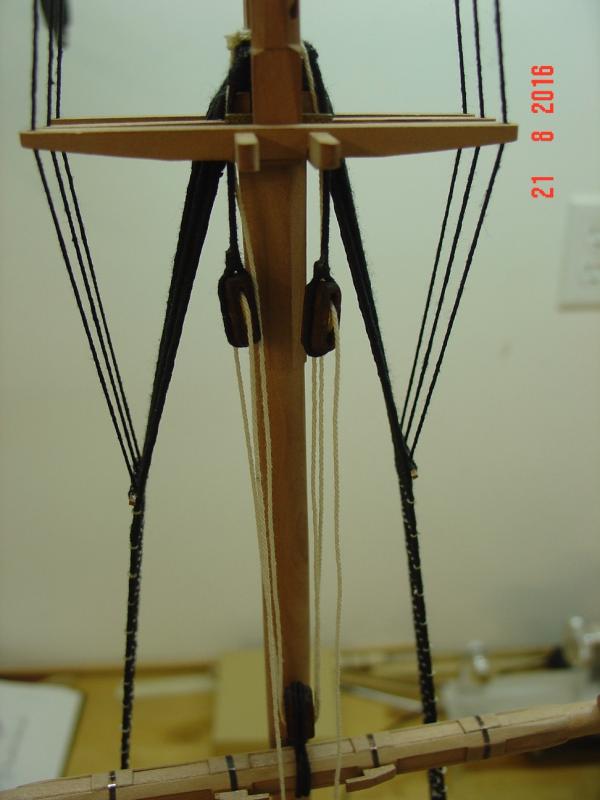
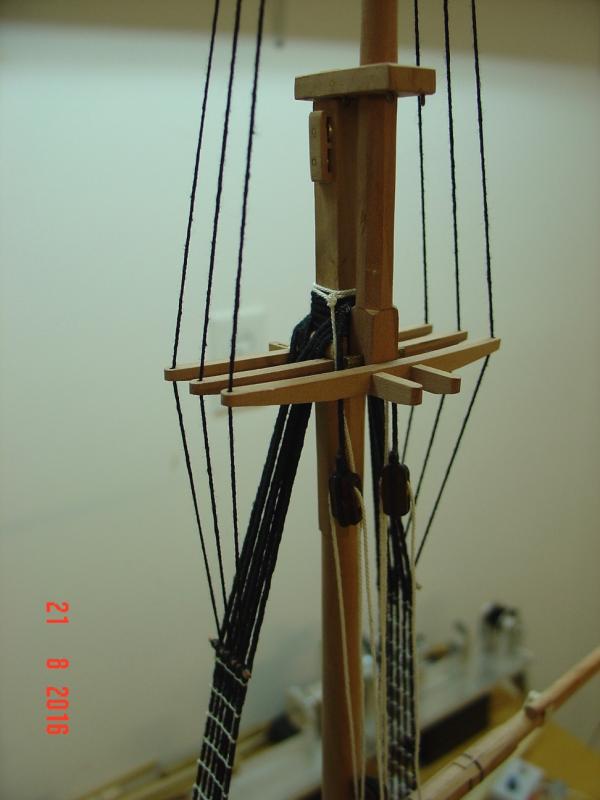
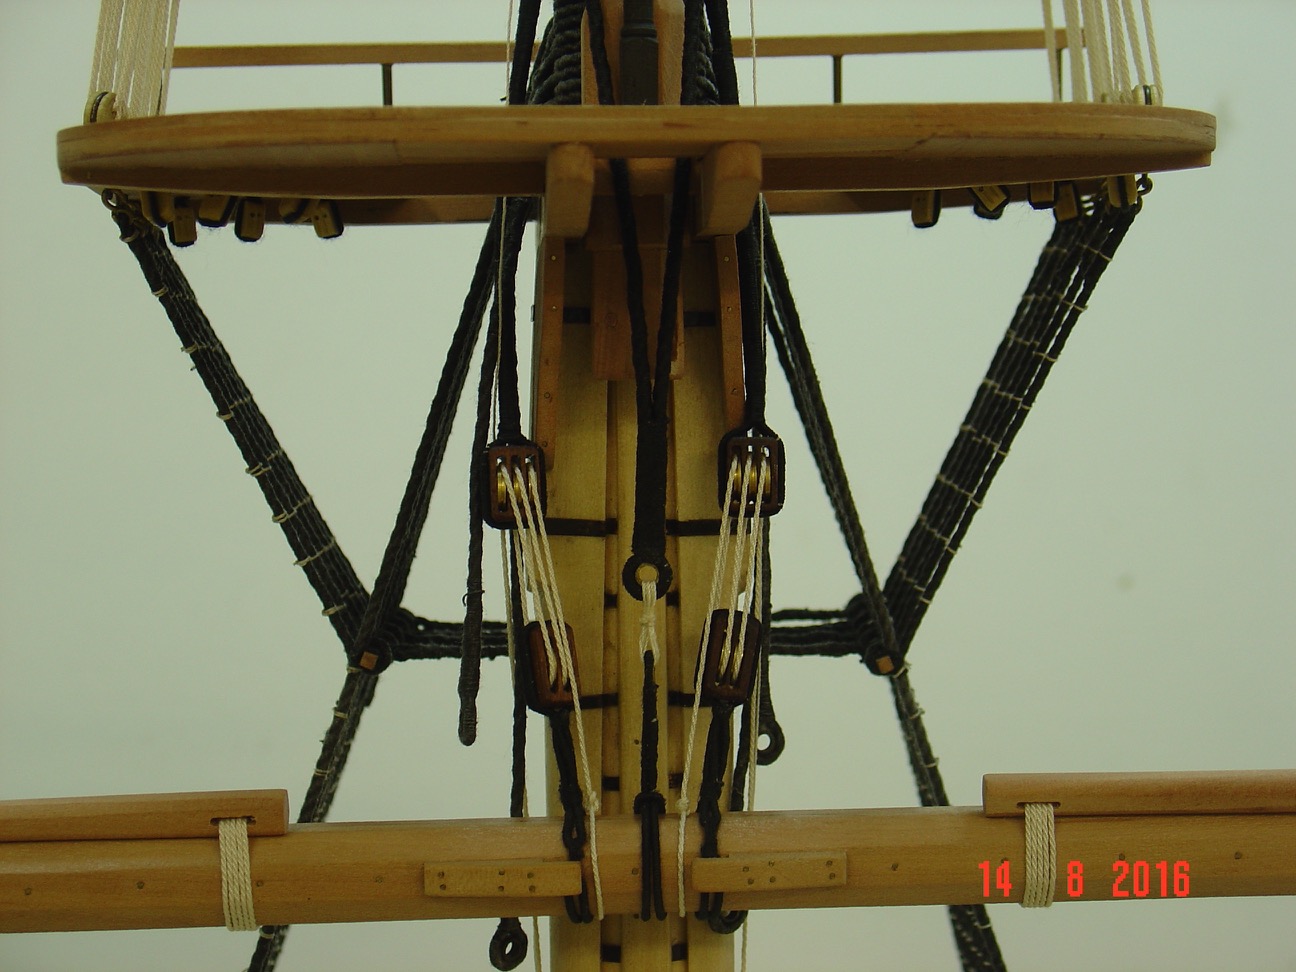
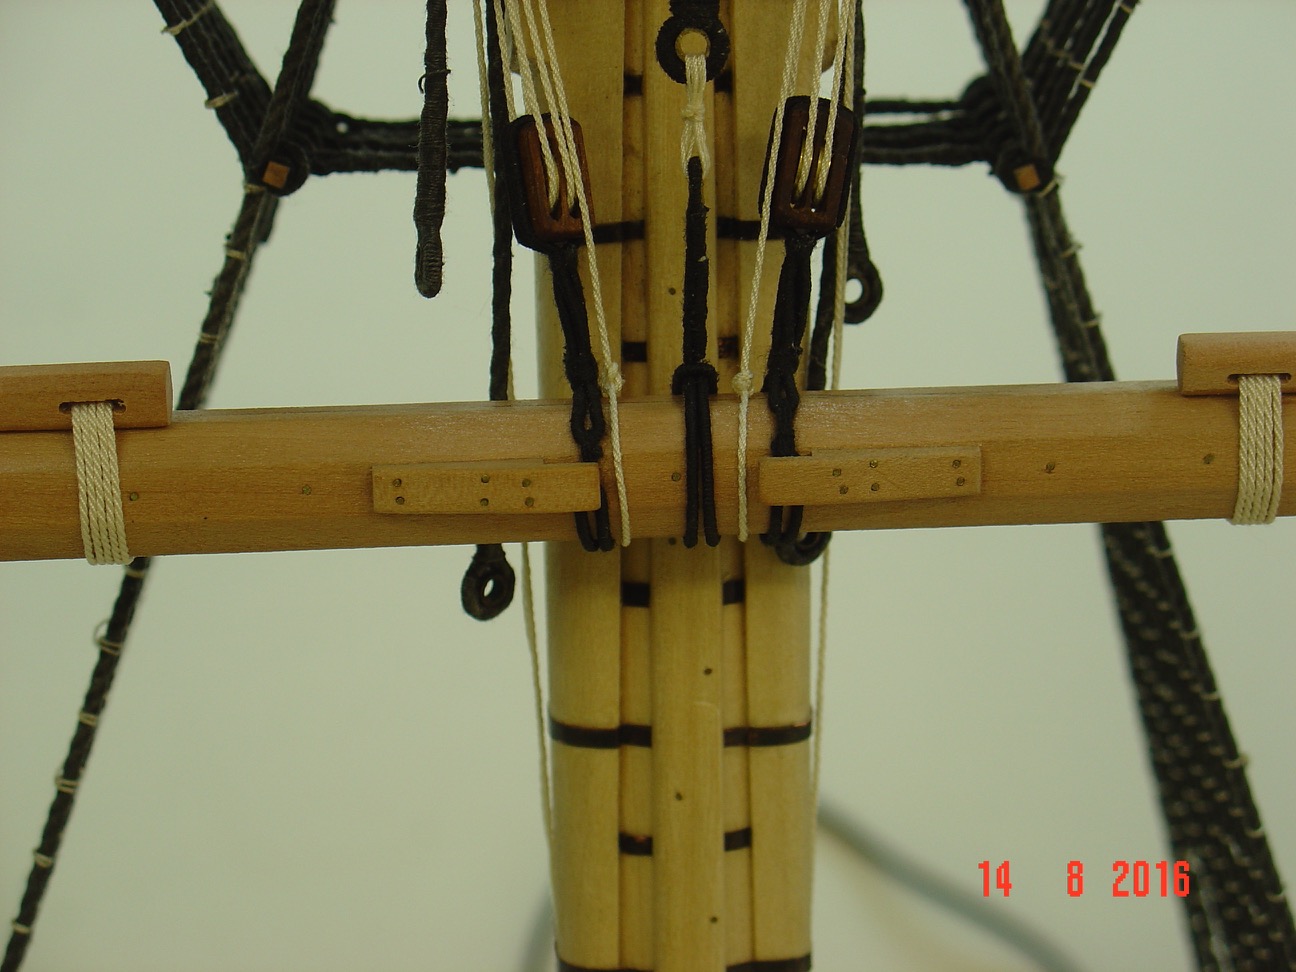
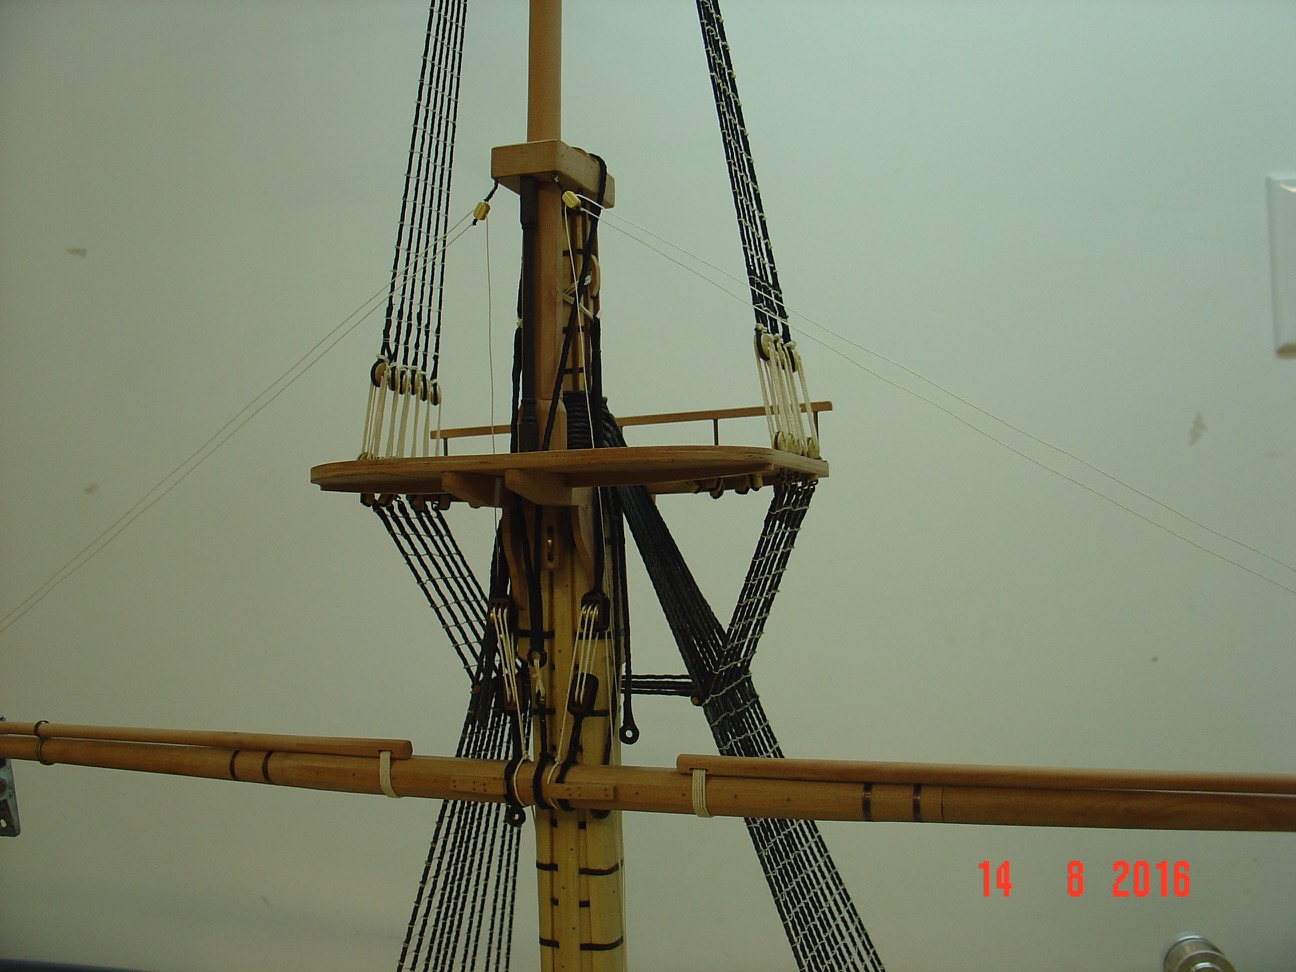
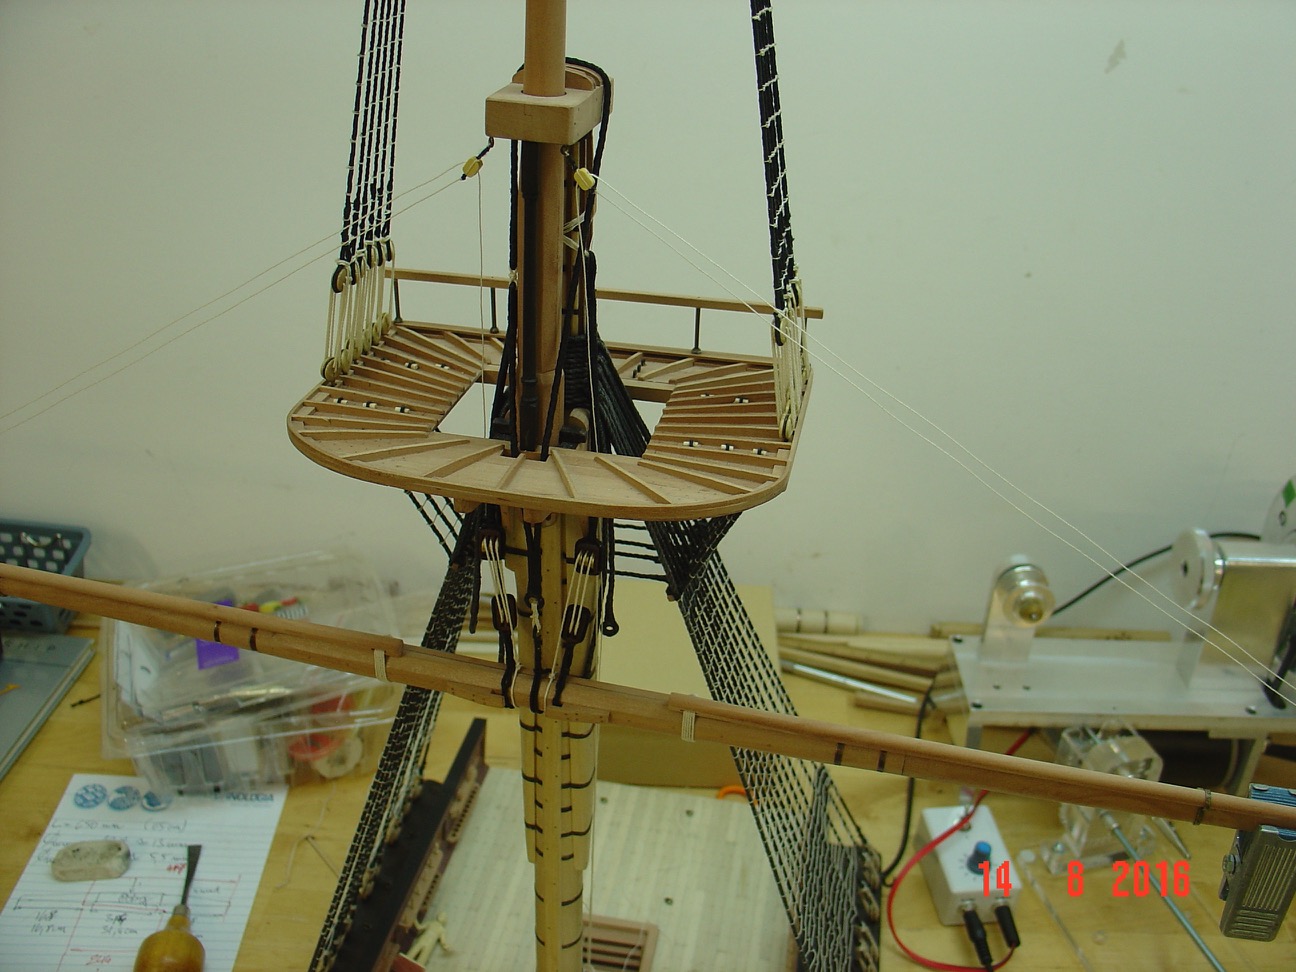
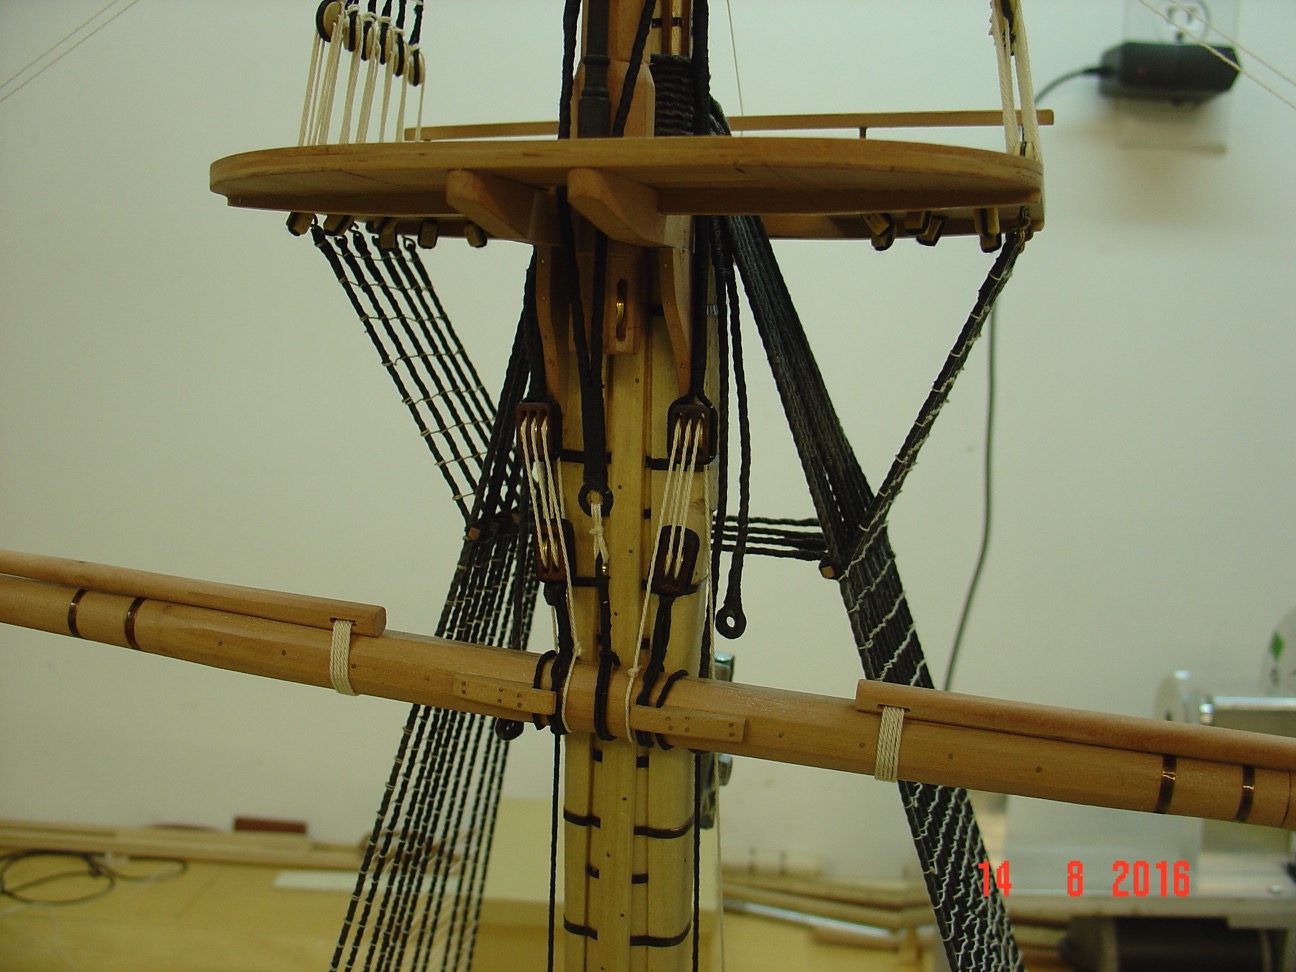
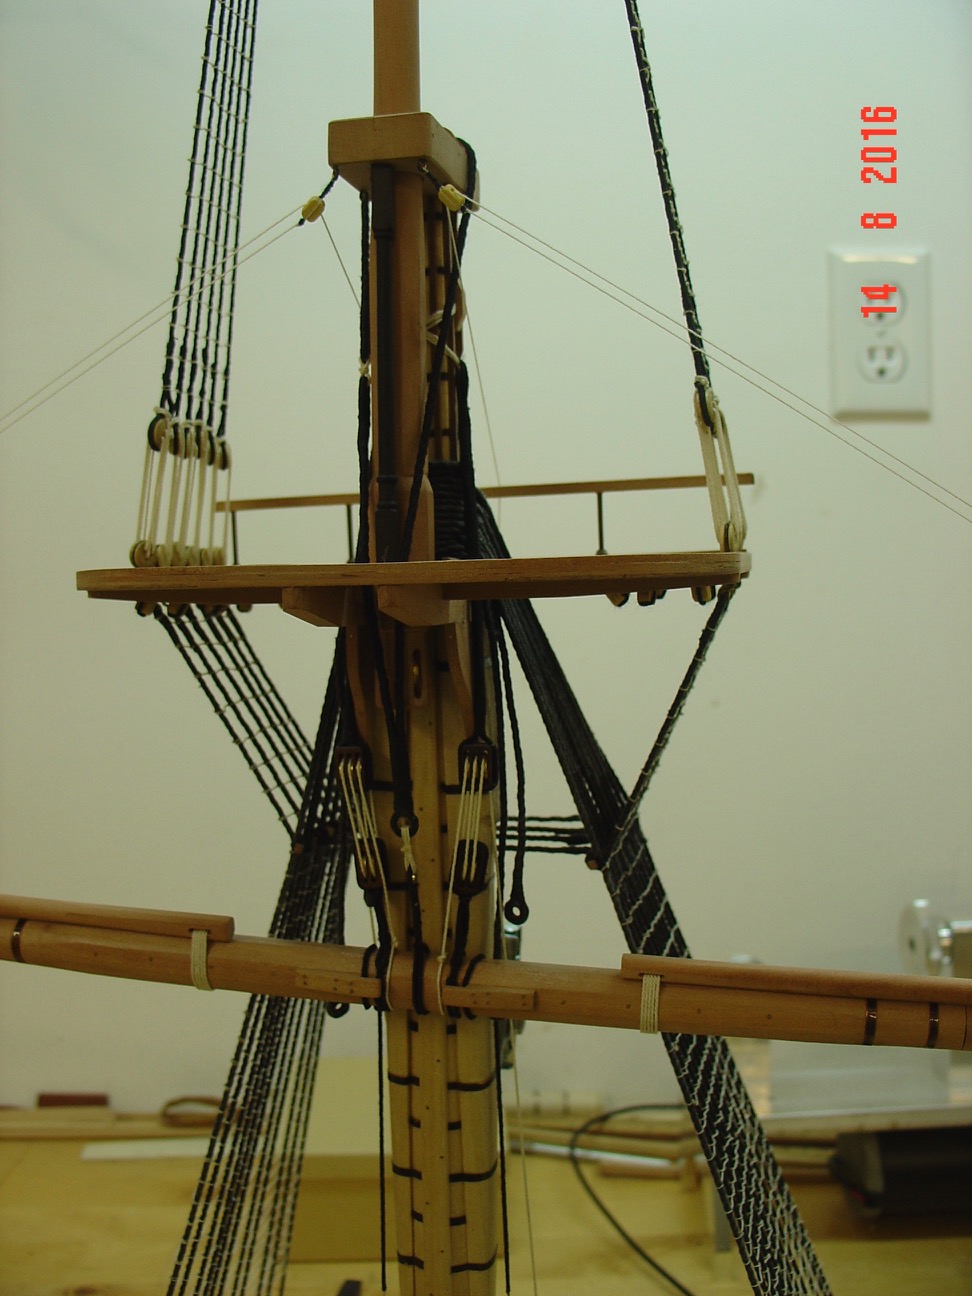
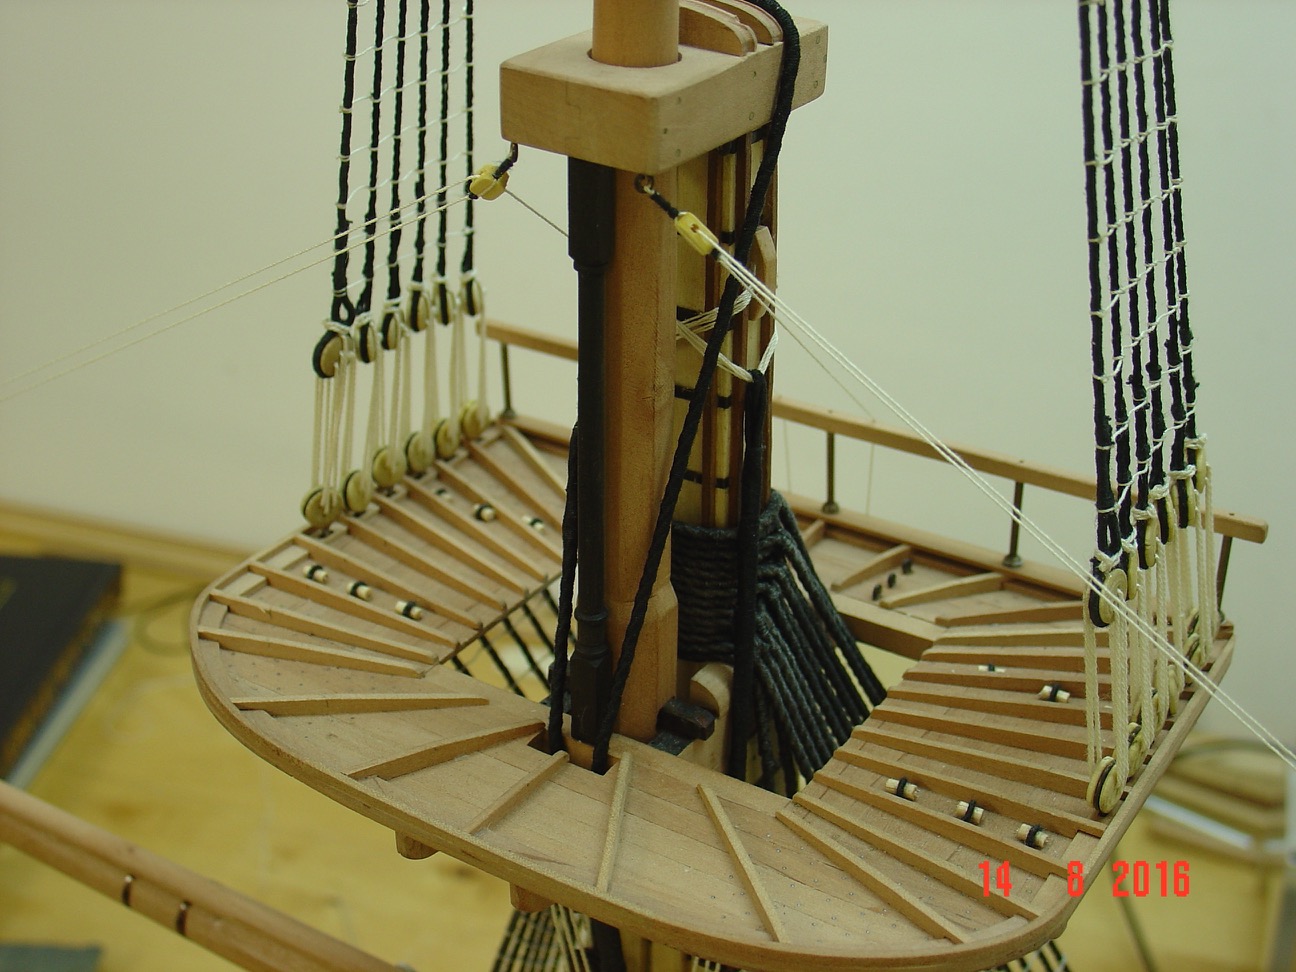
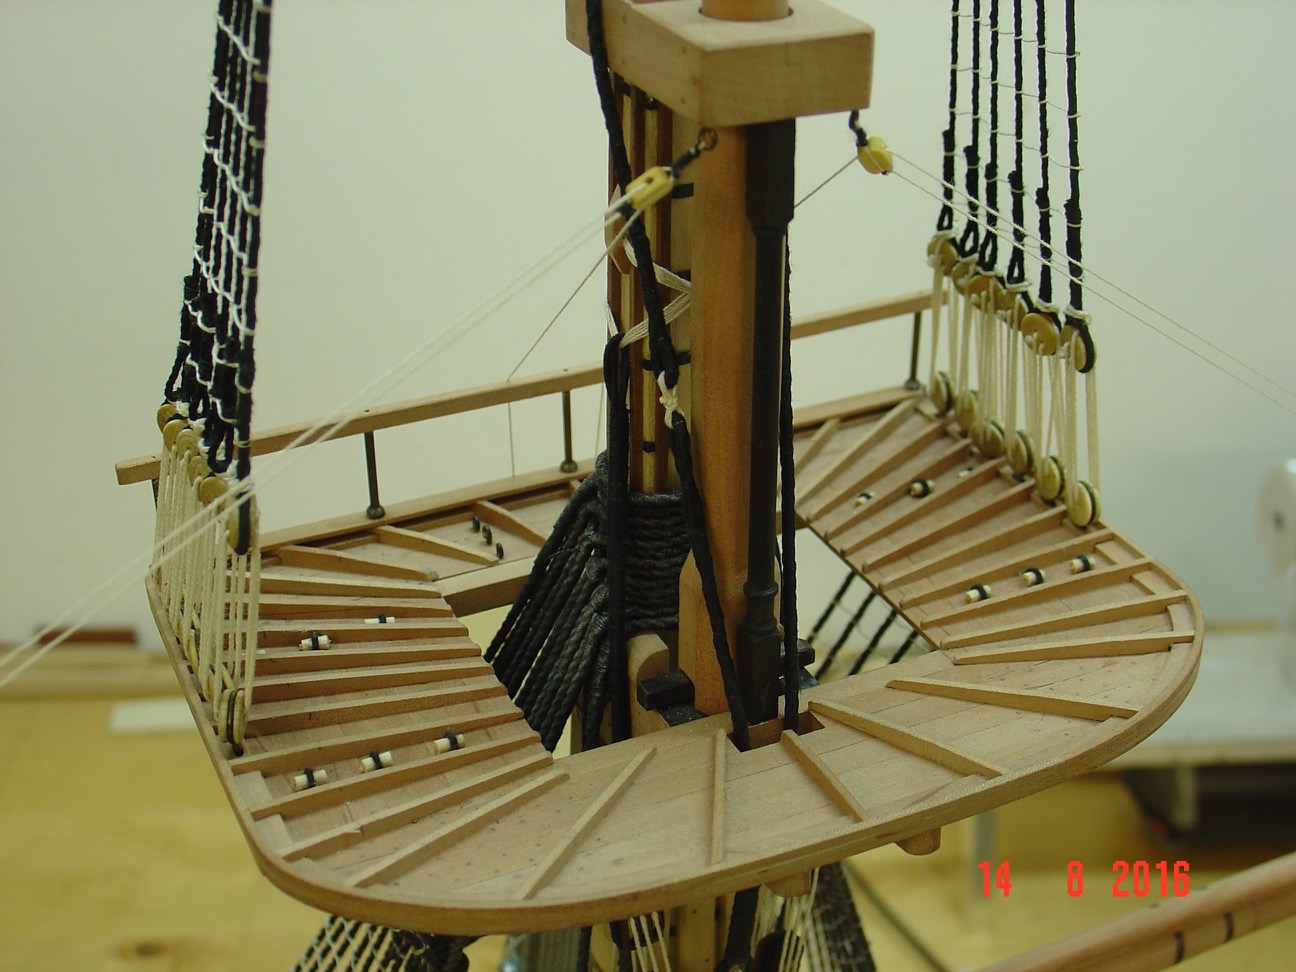
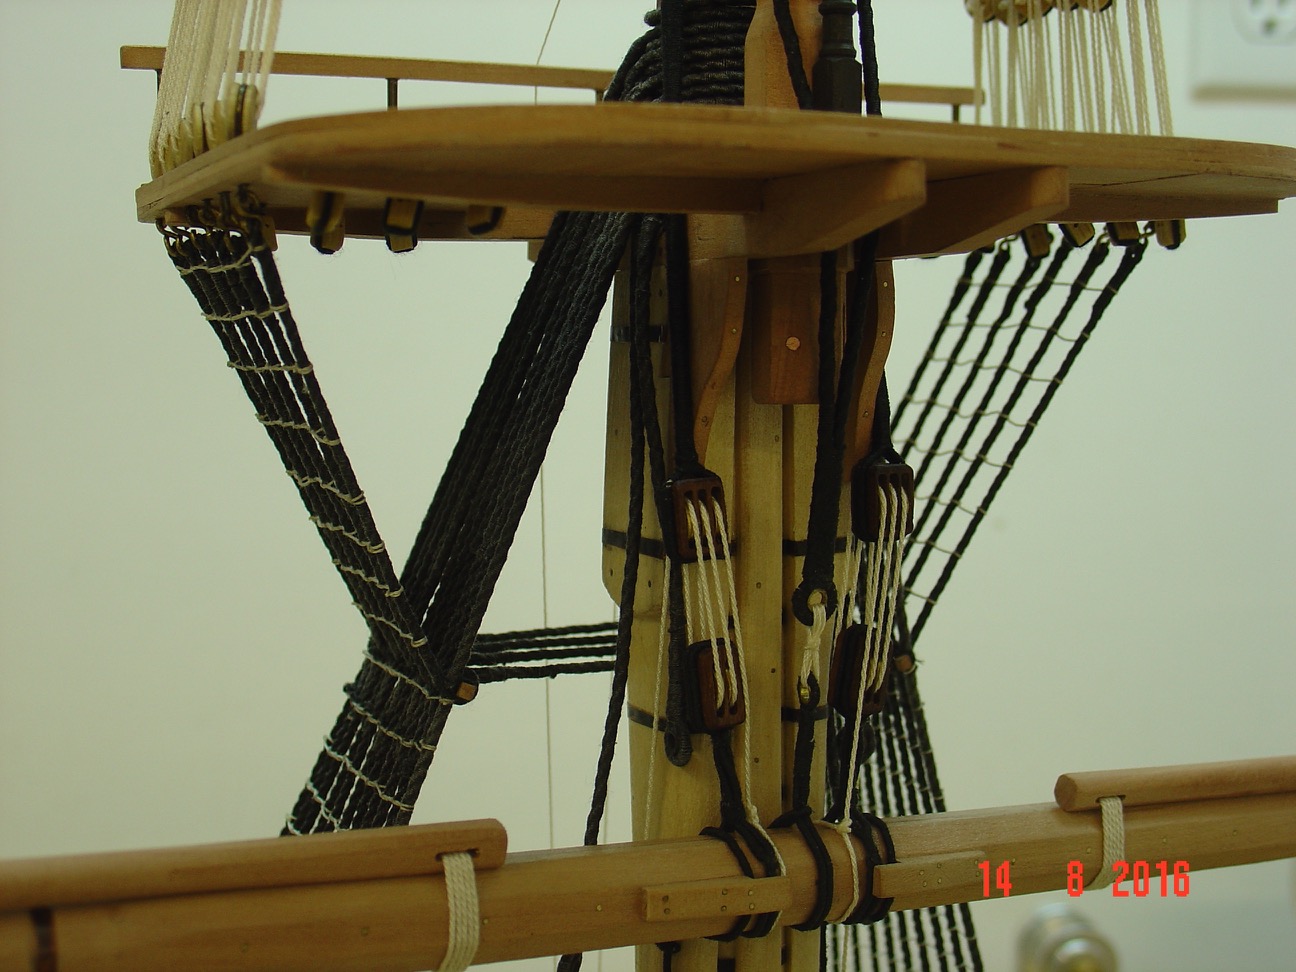
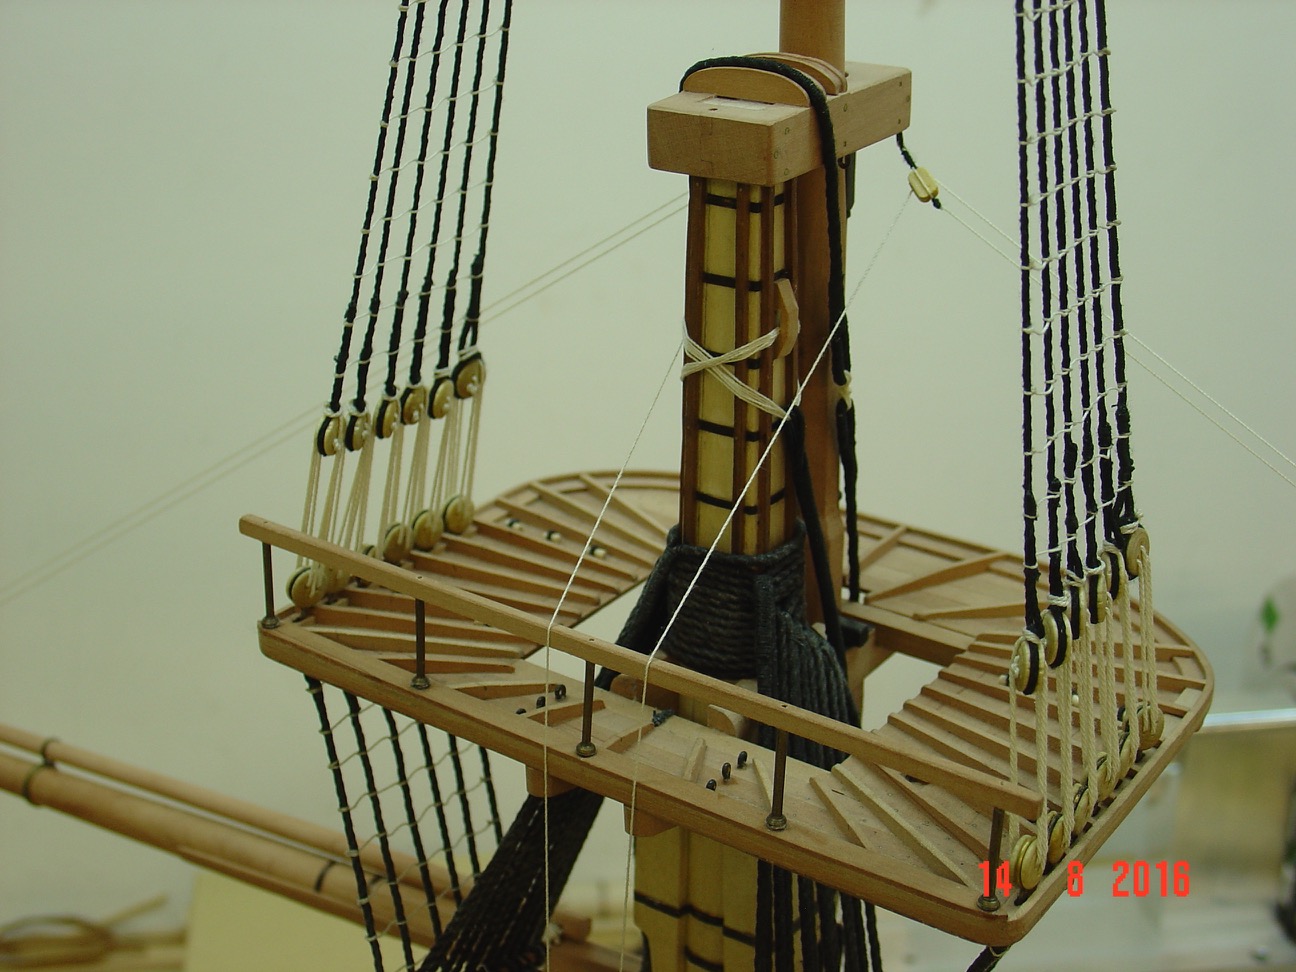
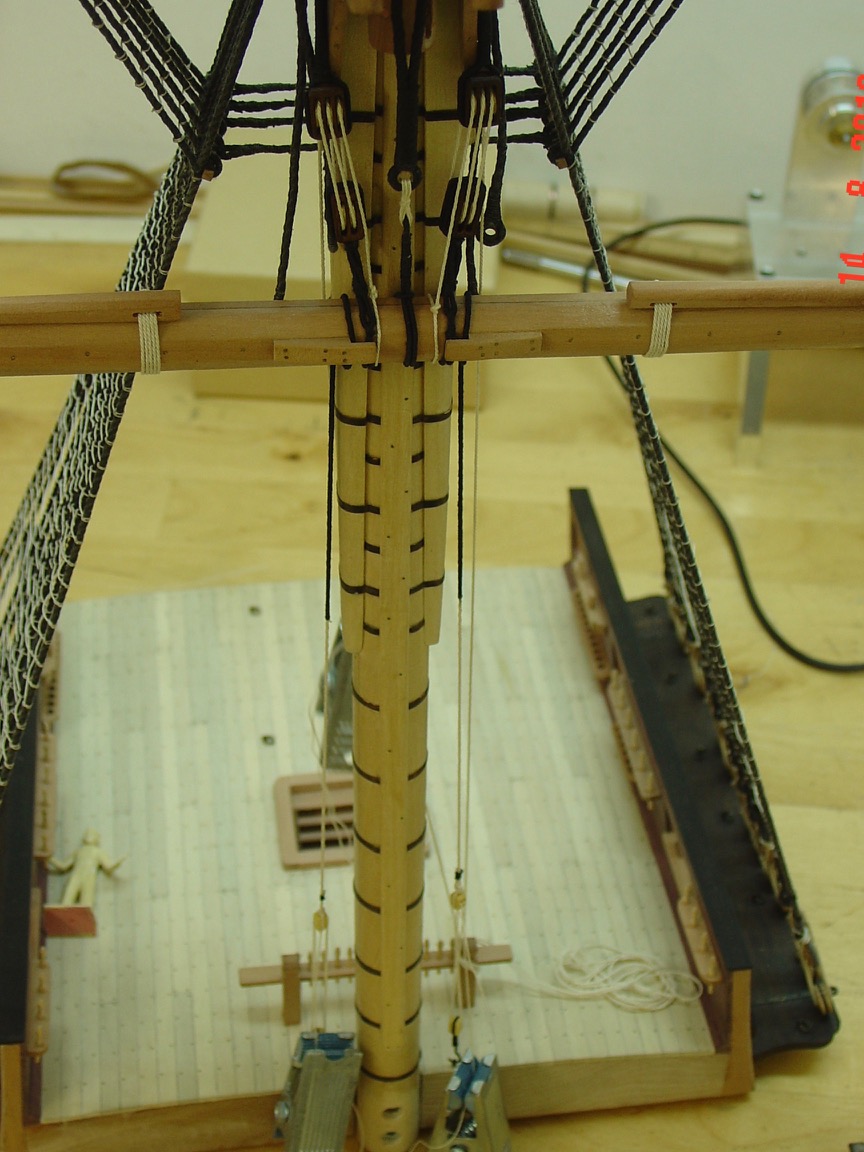
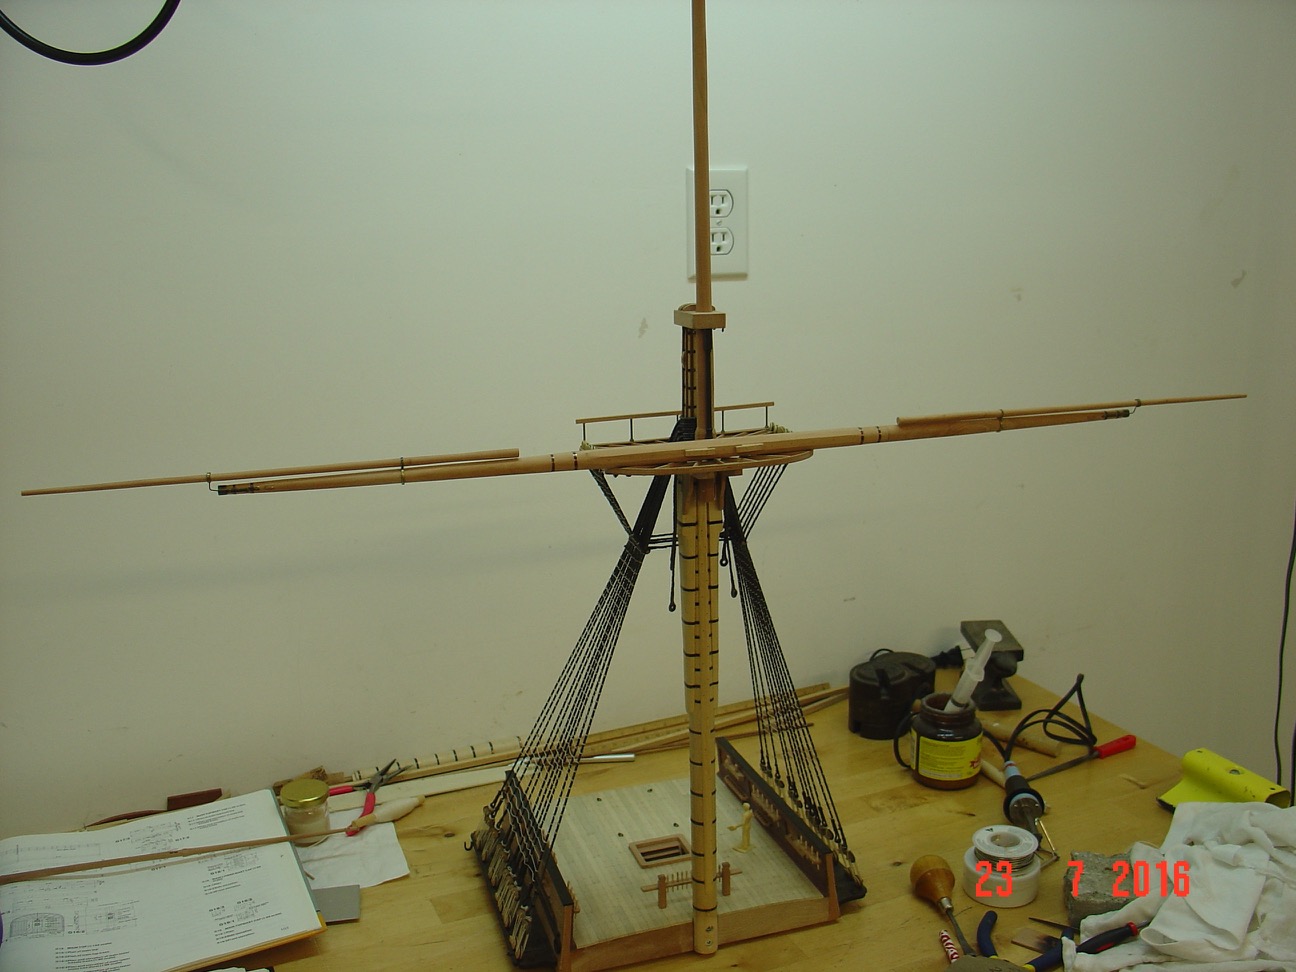
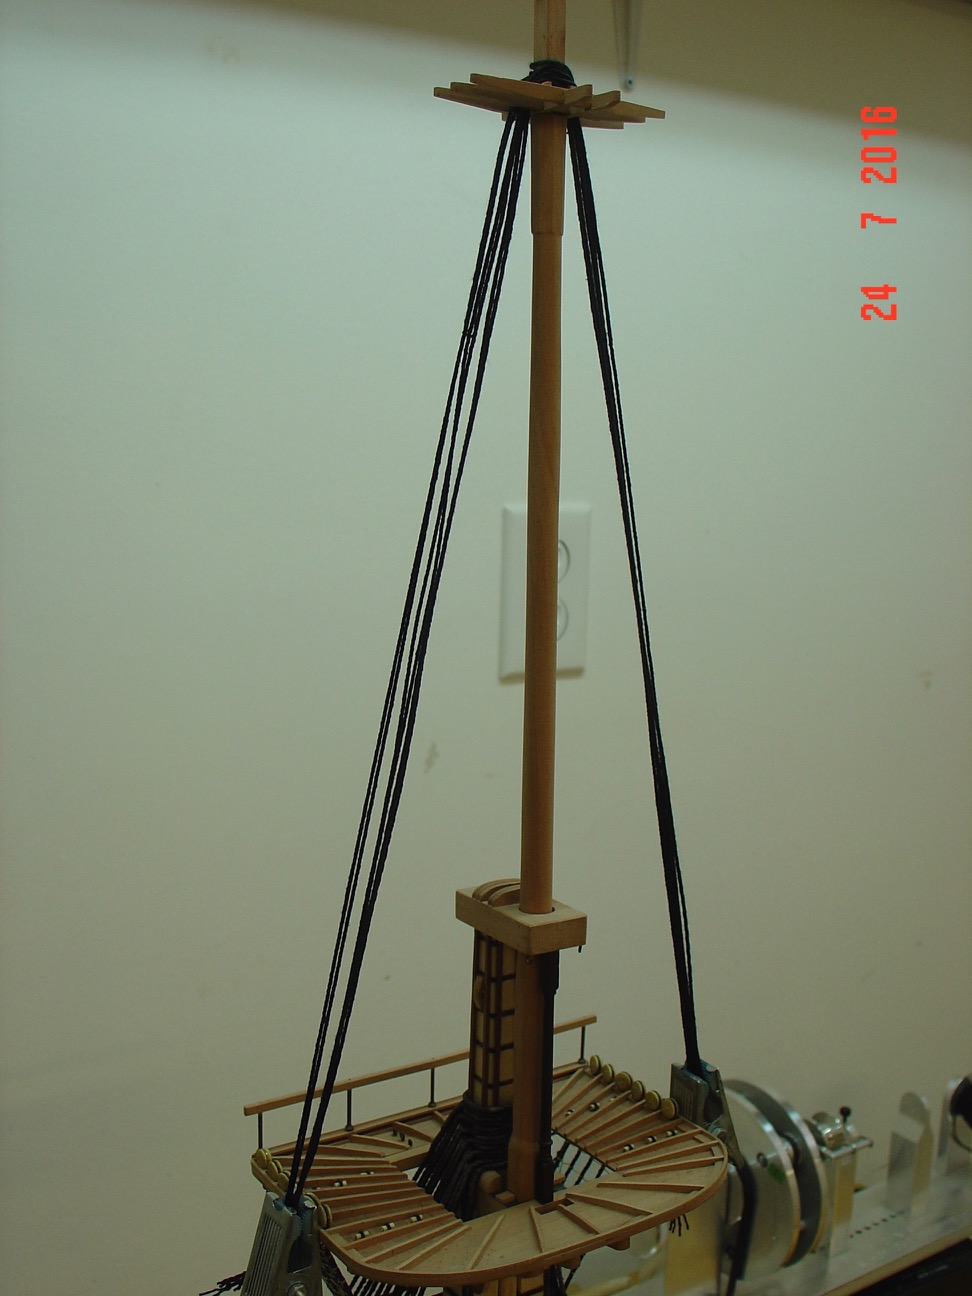
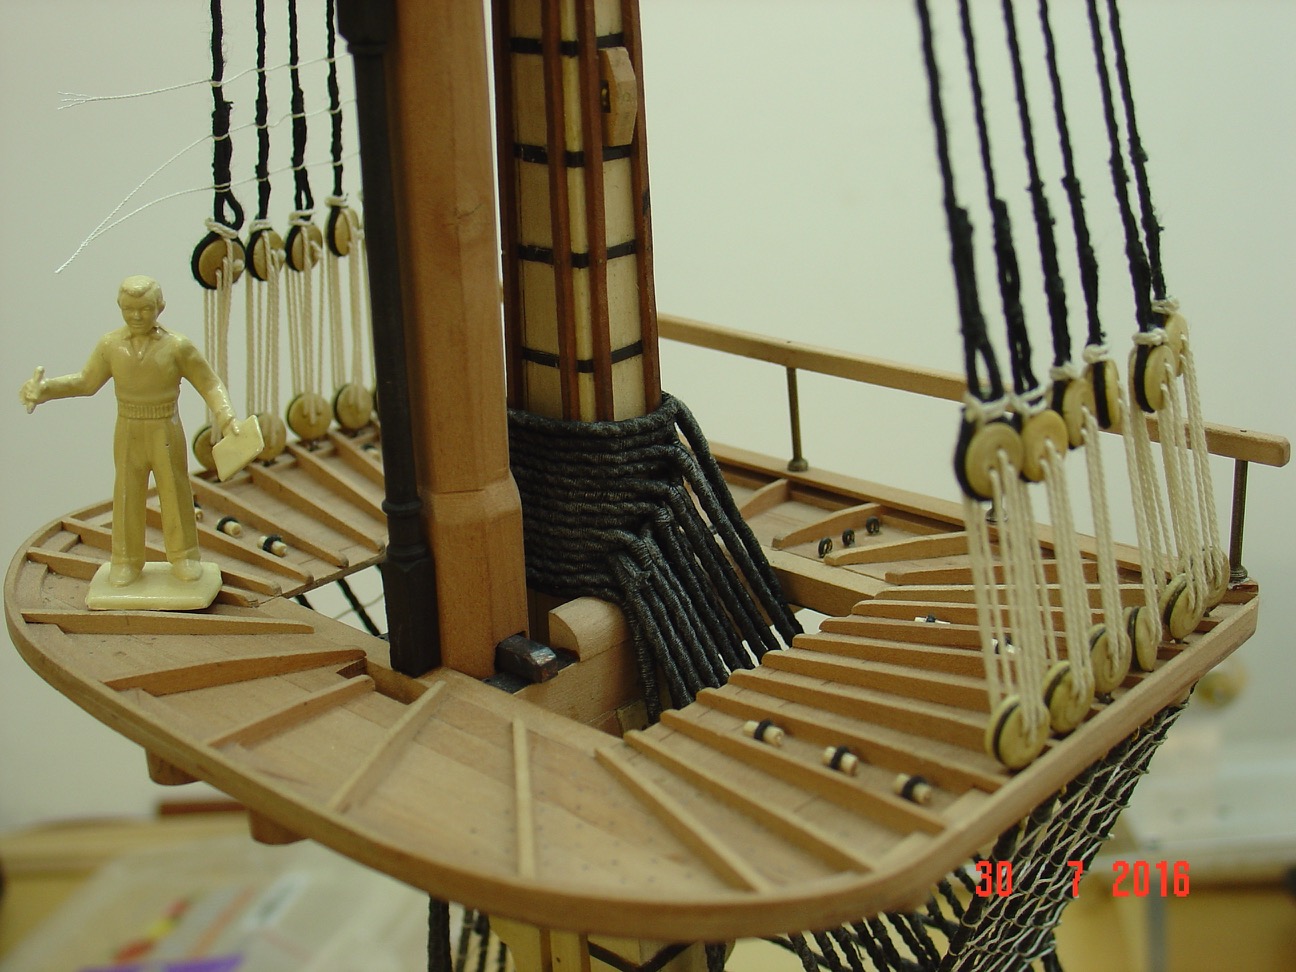
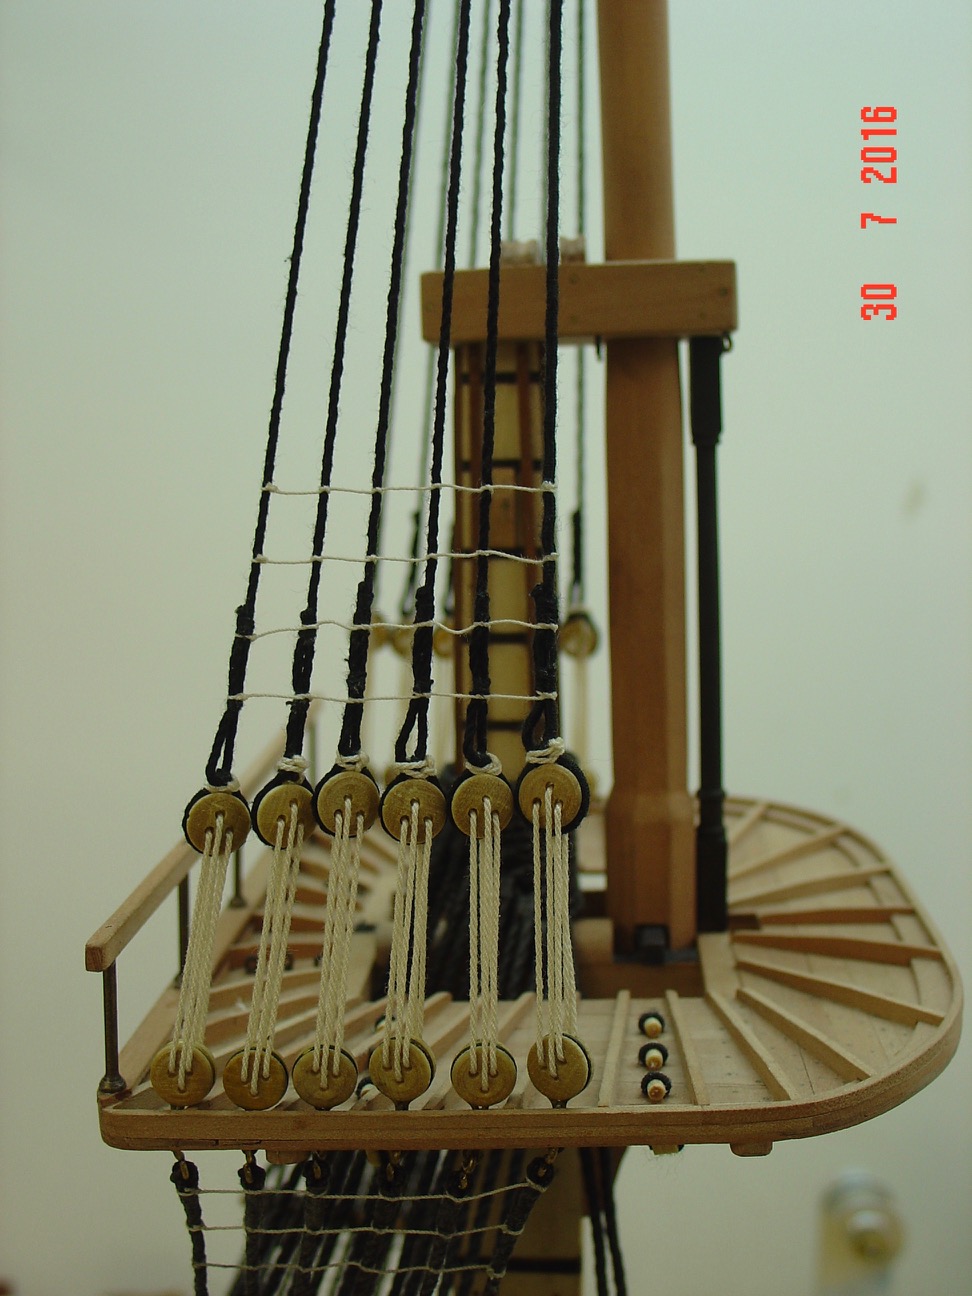
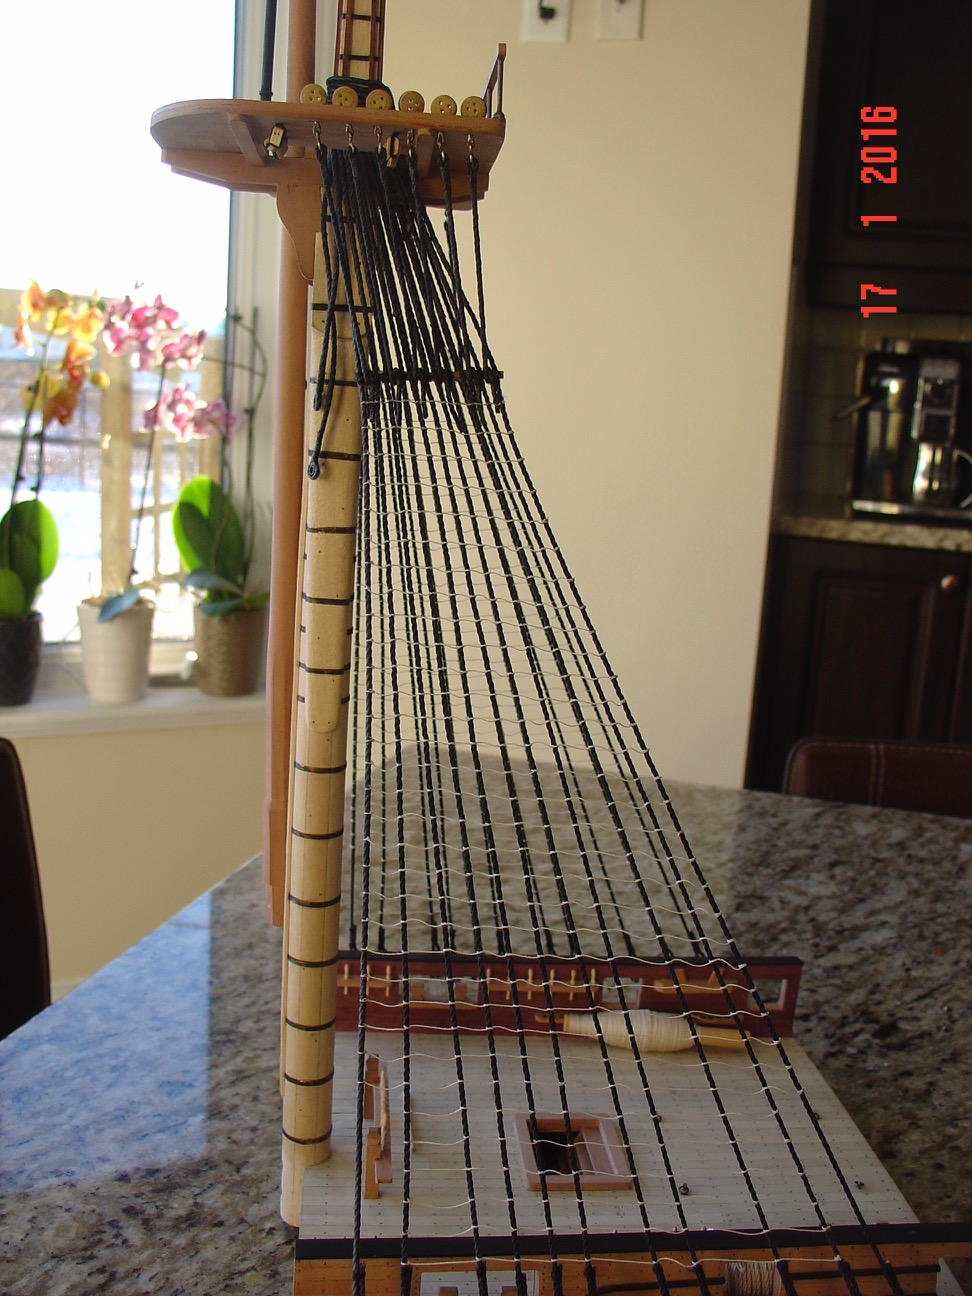
For now I do not have a brand new project and before starting one, I want to finish an already started project on Victory main mast section. Here is the build log:
http://modelshipworld.com/index.php/topic/9593-hms-victory-main-mast-section-by-alexandru-148/page-1
Alexandru
- Elijah, zoly99sask, Obormotov and 1 other
-
4


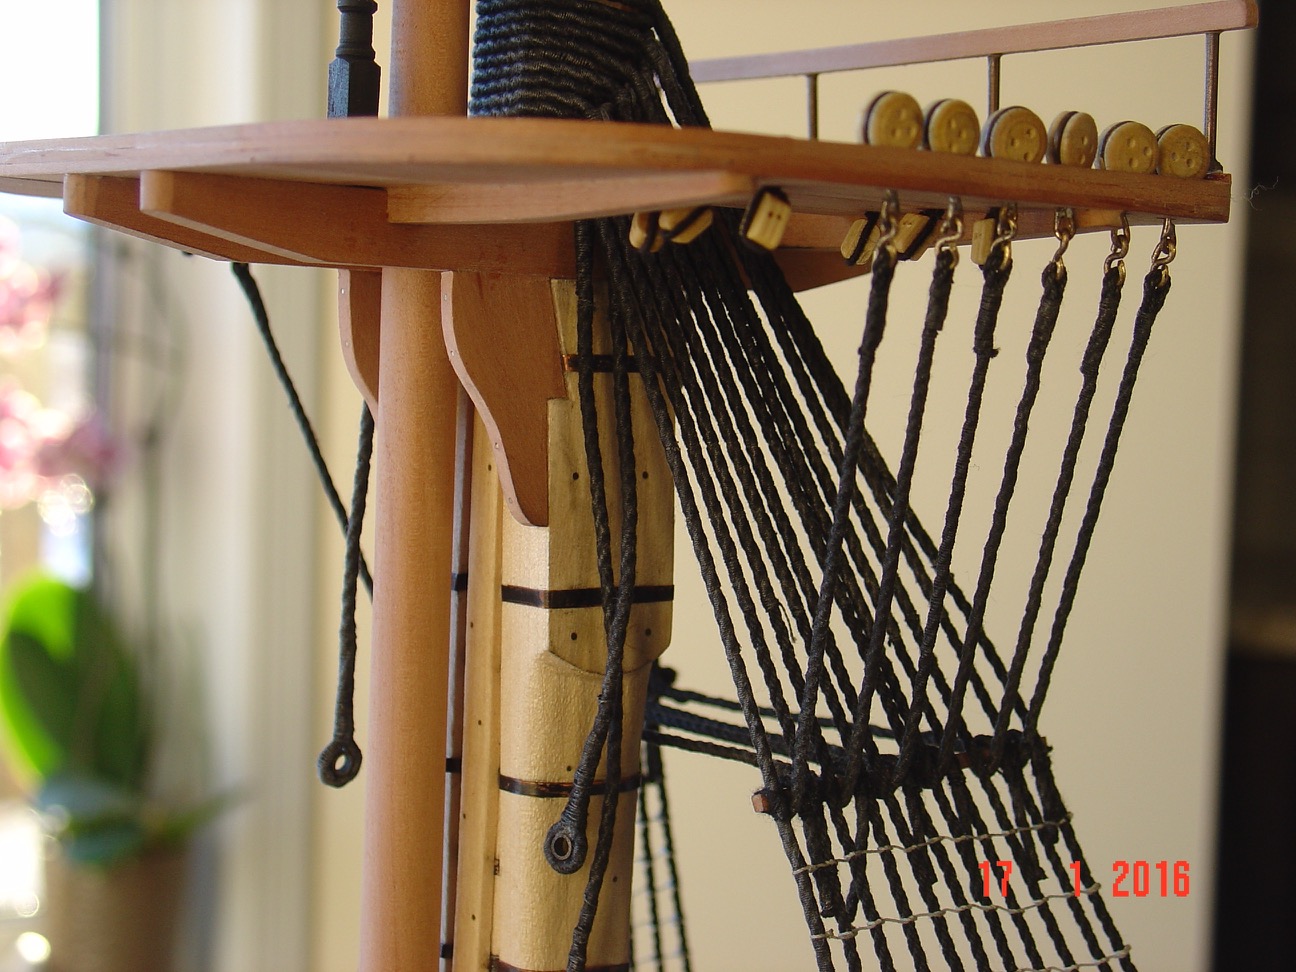
Machine a curer les ports 1750 by guraus (Alexandru) - FINISHED - 1/36
in - Build logs for subjects built 1501 - 1750
Posted
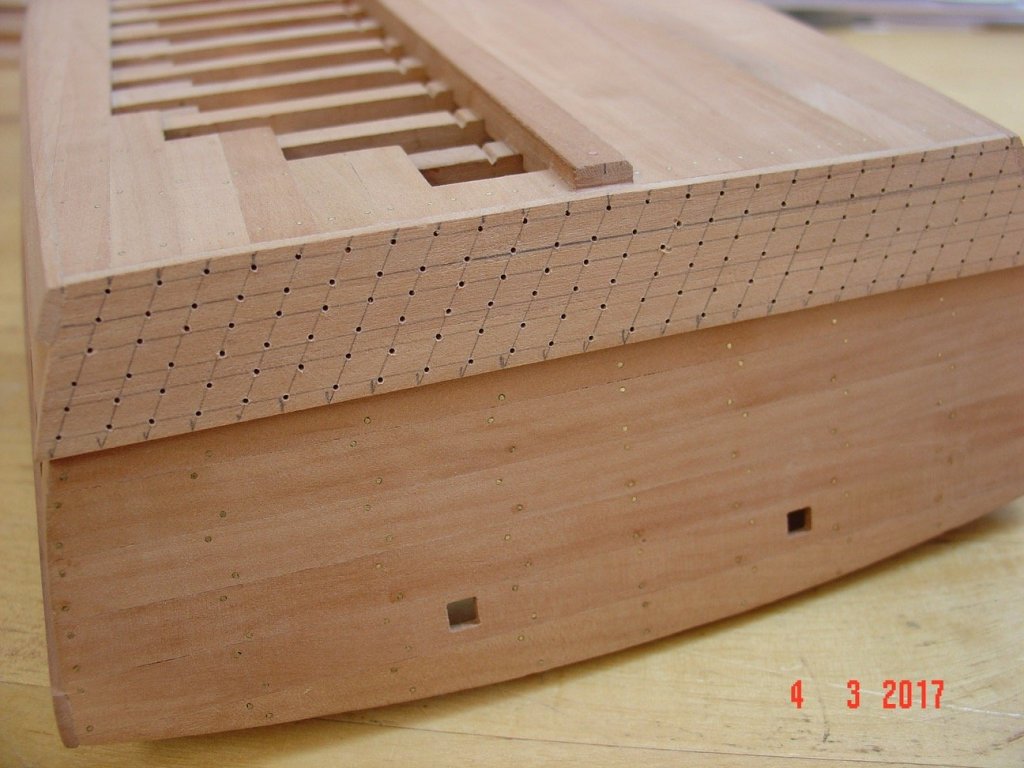
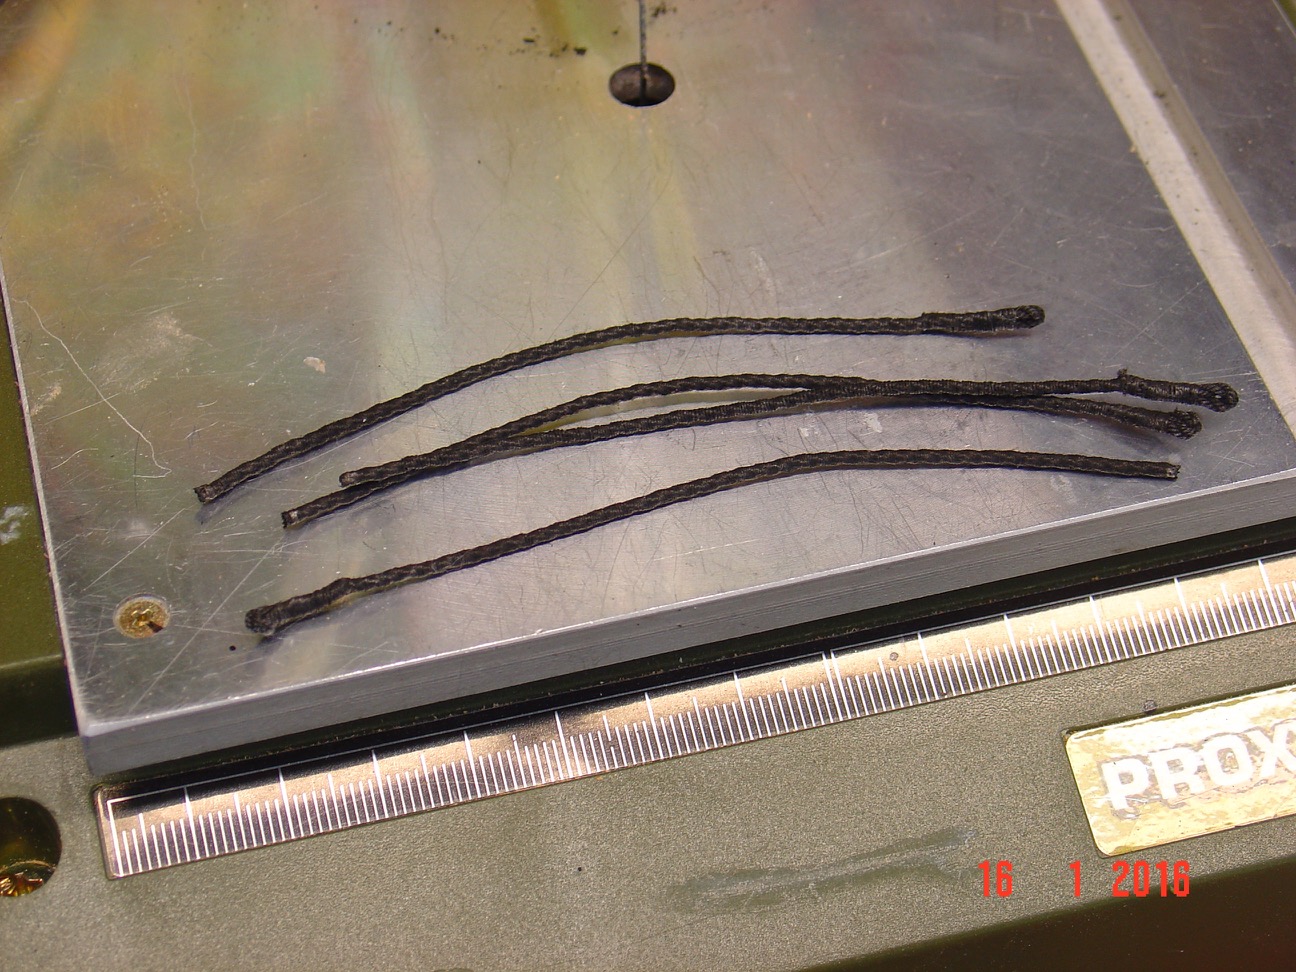
Mike,
No question is stupid.
I use files to make the nails flush with the wood. For convex surfaces I have curved files as you can see in the first picture, the second and the third file. Both have a flat surface in section but the third one is pointed so if I use it closer to the point it will file a smaller surface. For even trickier places I have a curved file with a half round section - the third in the second picture.
Hope this answer your question.
Alexandru