HOLIDAY DONATION DRIVE - SUPPORT MSW - DO YOUR PART TO KEEP THIS GREAT FORUM GOING! (Only 53 donations so far out of 49,000 members - C'mon guys!)
×


augie
-
Posts
4,669 -
Joined
-
Last visited
Content Type
Profiles
Forums
Gallery
Events
Everything posted by augie
-
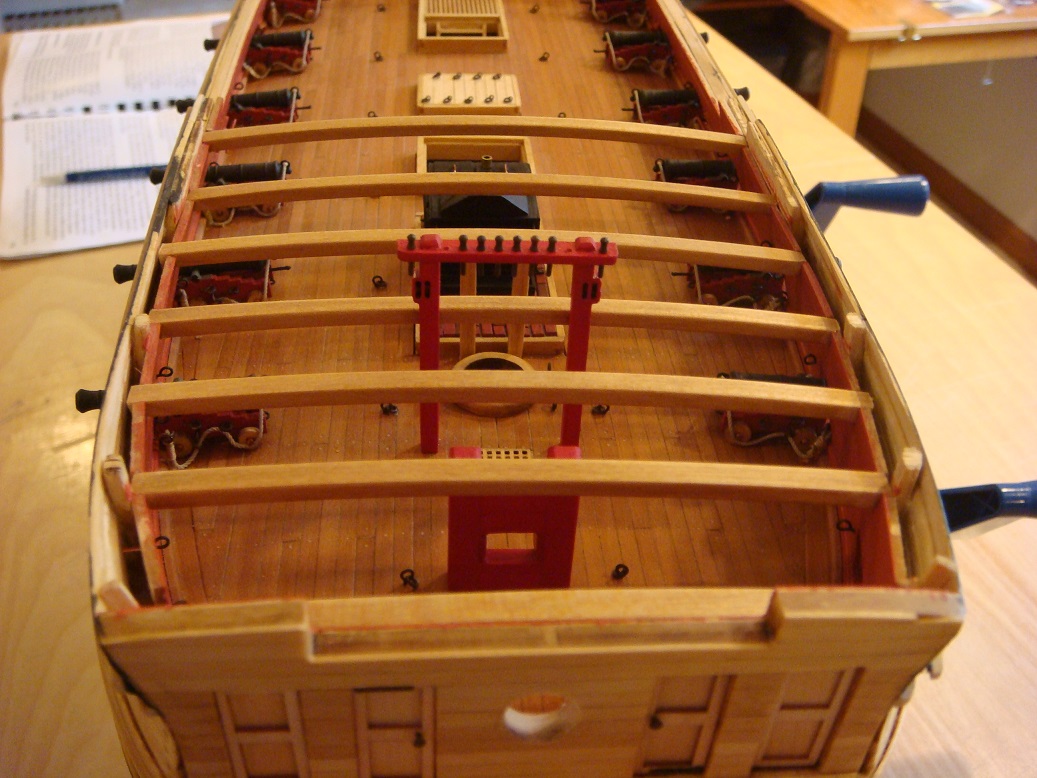
 The heavy lifting on the bow section has been completed with the installation of all the hanging/ lodging knees and carlings. In addition, the inboard planking has been completed: Next up is the completion of the inboard planking on the quarterdeck so that we can get to putting some rails on this lady.
- 2,191 replies
-
- 35
-

-
- confederacy
- Model Shipways
- (and 1 more)
-
Trawling rig is going to be spectacular. Nice to see you underway again.
- 956 replies
-
- 2
-
-
- andrea gail
- trawler
- (and 1 more)
-
That's exactly what I was trying to describe. Well done, Dirk.
- 659 replies
-
- 1
-
-
- syren
- model shipways
- (and 1 more)
-
Sal - back in the 'good old days' of MSW 1.0, Chuck had the build log for his Syren prototype. It ran some 140 pages. It included discussion/comments. Many times, it clarified what might be a little 'fuzzy' in the manual. What Chuck shows in the manual is essentially a 3 butt shift. The pattern repeats every 3rd board. But he uses only single nails at the end of each seam. So it does not match your first illustration. Your proposed system repeats every 5th board.....and does not nail every board at every bulkhead although it does use single nails at the ends of the seams. Now we're working at 3/16 scale. You need to consider not only what might be historically accurate, but also what looks reasonable. I know that when I tried to do a true 3 butt shift (with the double nails at the seams) it looked like I had blasted the deck with a shotgun. So I went essentially with what Chuck showed in the manual --- repeat every 3 boards, single nails only. But notice the 'alternating' nails at the bulkheads where there is no seam. These add a lot. Here's what I'd suggest. Make up a 'mock deck'. Maybe 4" long and 8 boards wide. Try out a variety of patterns --- as well as a variety of treenail diameters/colors, and pick what you like best. You can also do your entire finishing sequence on this sample to truly have a mind's eye view of what the finished deck will look like. Just like painting a room, what it looks like in a large area may not look like what you envisioned from a color chip. Time spent now making the final selection is well spent. Hope this helps a little.
-
Form follows function. Beautifully crisp!
-
I'm like Mark. I don't keep track....but I always have reserve. You can sand the CA off of your fingers with 150 grit sandpaper on a sanding block. Saves on acetone!
-
You got me with that one Dave. I wasn't sure if I should be happy or get out the chain saw. I'll settle for a smile.
- 2,191 replies
-
- 4
-
-
- confederacy
- Model Shipways
- (and 1 more)
-
Another vote for the jack screw. Scale looks fine.
-
Inboard planking looks very nice. Earl will charge $19.95 ----- any boat, any color. Keep that black paint handy
- 659 replies
-
- 1
-
-
- syren
- model shipways
- (and 1 more)
-
Deck planking looks superb. I think you'll like he hook and scarph. I found it much easier to do and more pleasing to the eye.
- 831 replies
-
- 1
-
-
- Armed Virginia Sloop
- Model Shipways
- (and 1 more)
-
That is really a fine piece of work. Glad to see GF back underway.
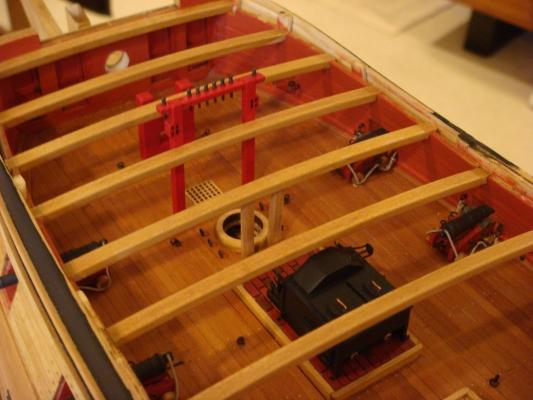
-
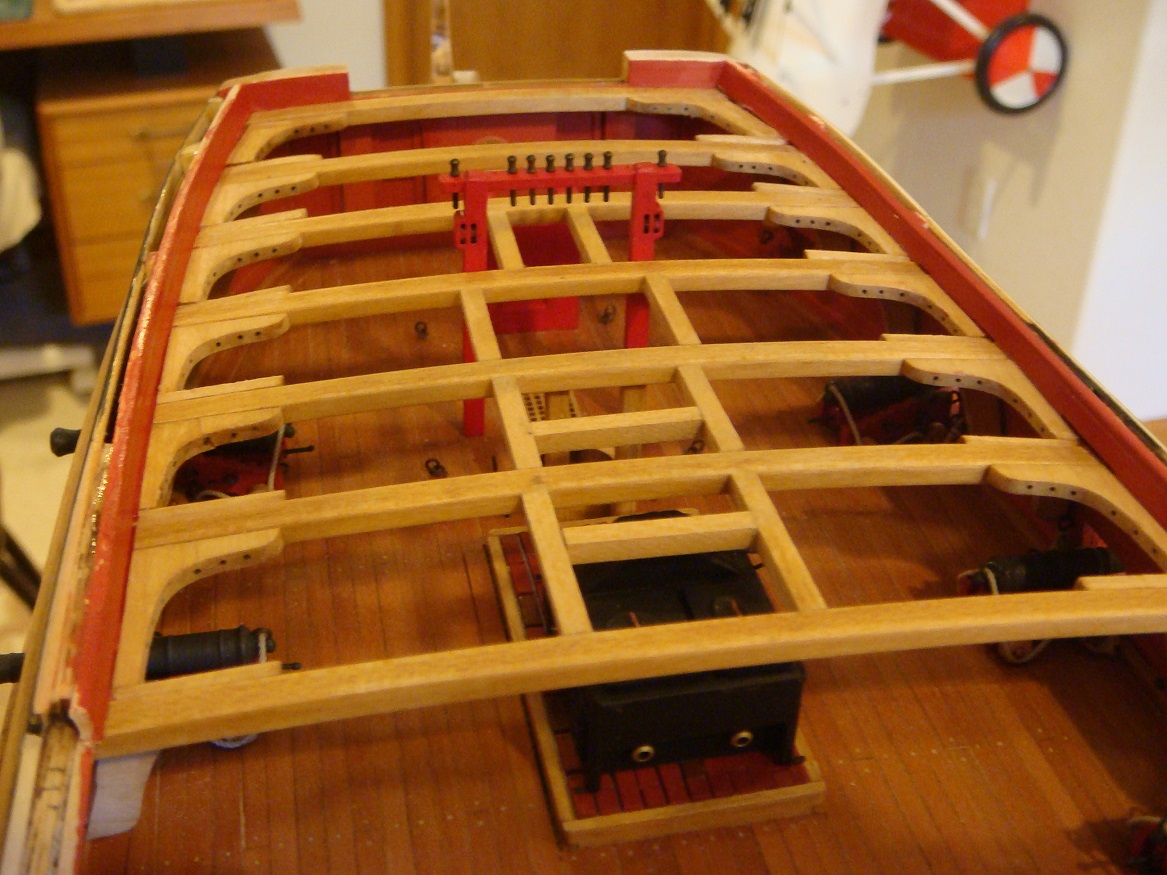
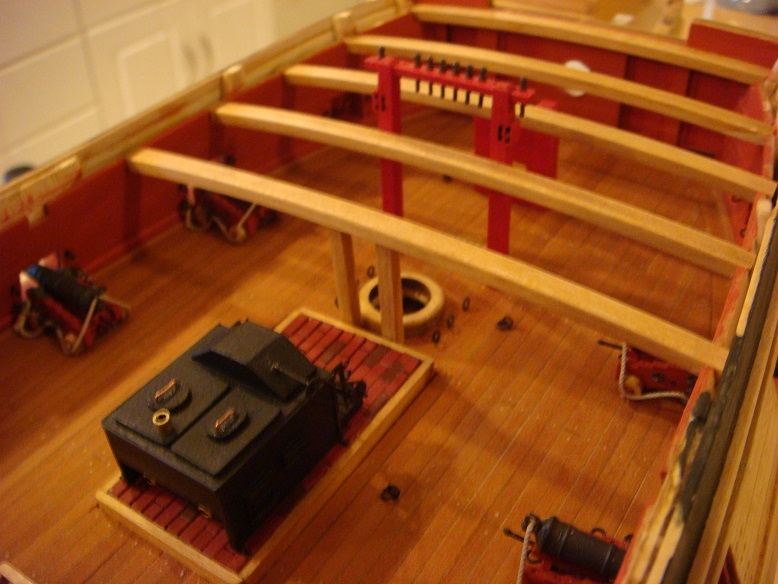
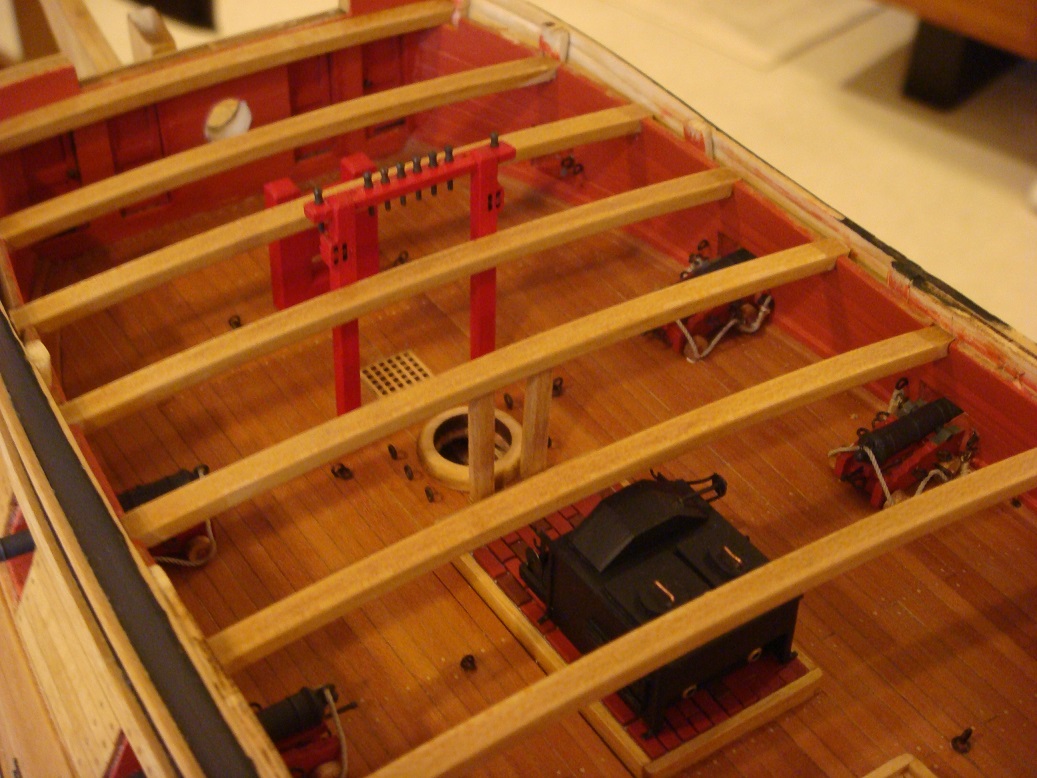
Time in the shipyard has been at a premium these last 2 weeks. But we do have a small update as we cross the 900 hour mark into the build. The foresheet bitts (with 'working' sheaves), foremast hoop and deck beams have been added up in the bow. In addition, the stove has reached it's final destination: The last of the forecastle deck beams: The view from the bow: Next we'll be putting in the hanging and lodging knees and carlings.


- 2,191 replies
-
- 35
-
-
- confederacy
- Model Shipways
- (and 1 more)
-
Just wanted to comment that, with that one pre-planned drop plank right under the wales, that bow planking is spectacular.
- 1,051 replies
-
- 5
-
-
- cheerful
- Syren Ship Model Company
- (and 1 more)
-
Great to see you on another voyage, Ken. I've always loved the look of Rattlesnake so I'll be following along. I'm sure you'll do her proud. You're off to a great start with the ship's boat!
- 481 replies
-
- 1
-
-
- rattlesnake
- model shipways
- (and 1 more)
-
I just checked and you are correct. These days they sell only a set of 3 for $ 30 . Back when I got mine it was $9. And I also get to use it to establish rivet patterns on aircraft.
- 113 replies
-
- 1
-
-
- constitution
- mamoli
- (and 1 more)
-
I did my Syren the way Jay lays out. Micro-Mark sells pounce wheels that are a little more robust and they offer several 'teeth per inch' selections.
- 113 replies
-
- 2
-
-
- constitution
- mamoli
- (and 1 more)
-
VERY nice, Rod. What type of wood did they provide for the second planking?
-
That's great Bill. Between your photos and mine he should get the idea.
- 1,756 replies
-
- 2
-
-
- constitution
- constructo
- (and 1 more)
-
This is the best photo I have. If you look at post #633, in the first 2 or 3 photos you'll see double sheaves passing through the hull planking. There are 3 sets on each side of the hull and that's where the main braces come in. http://modelshipworld.com/index.php/topic/3371-usf-confederacy-by-augie-ms-164/page-43 Since you are all planked, it would be difficult to retrofit actual sheaves. But you could simply drill the holes and connect them with a scribed line and get much the same effect.
- 1,756 replies
-
- 3
-
-
- constitution
- constructo
- (and 1 more)
-
The braces are usually run through sheaves going through the hull Rich rather than over the rail. That's how they get to either belaying pins or cleats on the inner bulwark.
- 1,756 replies
-
- 2
-
-
- constitution
- constructo
- (and 1 more)