
HOLIDAY DONATION DRIVE - SUPPORT MSW - DO YOUR PART TO KEEP THIS GREAT FORUM GOING! (Only 72 donations so far out of 49,000 members - Can we at least get 100? C'mon guys!)
×


popeye the sailor
-
Posts
16,007 -
Joined
-
Last visited
Content Type
Profiles
Forums
Gallery
Events
Everything posted by popeye the sailor
-
 thanks Piet.......and hope your holiday {s} were just as good though I was NOT to have a 'model' Christmas, I got three. one of them was my funny car...1/16 scale. the body is 12 inches long, and has wiring and hose routings. it's not the one I built in Florida back in the '70's, but it will fill the void. the admiral got me an old MPC kit........a 4-4-0 steam locomotive and tender called the General.......very nice and quite large for a 1/25 model kit. my son Kevin and Chrystal got me a 1/150 scale kit of the Gorch Fock.....a Revell kit that looks quite intimidating at skill level 5 my movie collection got a huge boost too......included is a collection on D - Day. I must have been a very good boy the work week is over........too cold to go runn'in 'round in a speedo...........so I guess I'll sit here and model more fun awaits!
 -
yup......that's gonna be an animal to plank........Billing does a lot with flat panel. I suppose it does look like it'll make her easier to do. you've made some great progress if you do use a clear coat on the deck, be sure to use a flat, and it will look better. I use flat lacquer mostly........gives a very nice finish. very nice!
-
hi there Kevin........I finally found you! lost track after the Fife build. such a superb job on the rigging........so many lines! your not finished yet.....what about the braces? the St Nectan is a fine looking project........there is some information on her at Hull Motor Boat Group if your looking for reference pictures. once again.......so good to see all the amazing progress on the Victory........hope you had a great holiday and a happy New Years to you!
- 1,319 replies
-
- 3
-

-
- caldercraft
- Victory
- (and 1 more)
-
really nice progress........the sails look great for first try
- 39 replies
-
- 1
-
-
- kdy 15 juniorbad
- yacht
- (and 2 more)
-
chiming in to wish you all a very happy new year! i have to work.........the last vestage of snuffing out holidays has hit........not enough voices to null the assault I could go into a full tyrad.......but I don't want to muddy the waters here. I'd love to see them try and take Christmas away from us........I'd take out a full page ad! Wally really wouldn't like the publicity thanks John........and a happy new years to you and Pam! I hope 2019 holds many positive things for you...good health and all! oh boy......I'll take a stab that you had either an Ibanez or a G&L Tribute....... they don't look like Fender pick ups. try bar chords CDW......there are also some different tuning that can help too. triads are another form of power chords. nice looking acoustic Robert........looks short.....I'm not familiar with guitars, but it looks like a student guitar. still very cute I have stories...........here isn't the place though. if you'd like to continue, let's start a thread in shore leave. I'll bet other would join in as well now you guys are making me feel guilty.......I haven't touched a bass for almost a couple of years now. the No name bass has been in a stand, in the corner for all this time.......the admiral has been complaining about how dusty it is. I need to address it......... again....happy new year to you all.......I hope 2019 holds good things for you!
-
glad to see your back at the table too.........very nice bit of progress lower deck insert looks super!
-
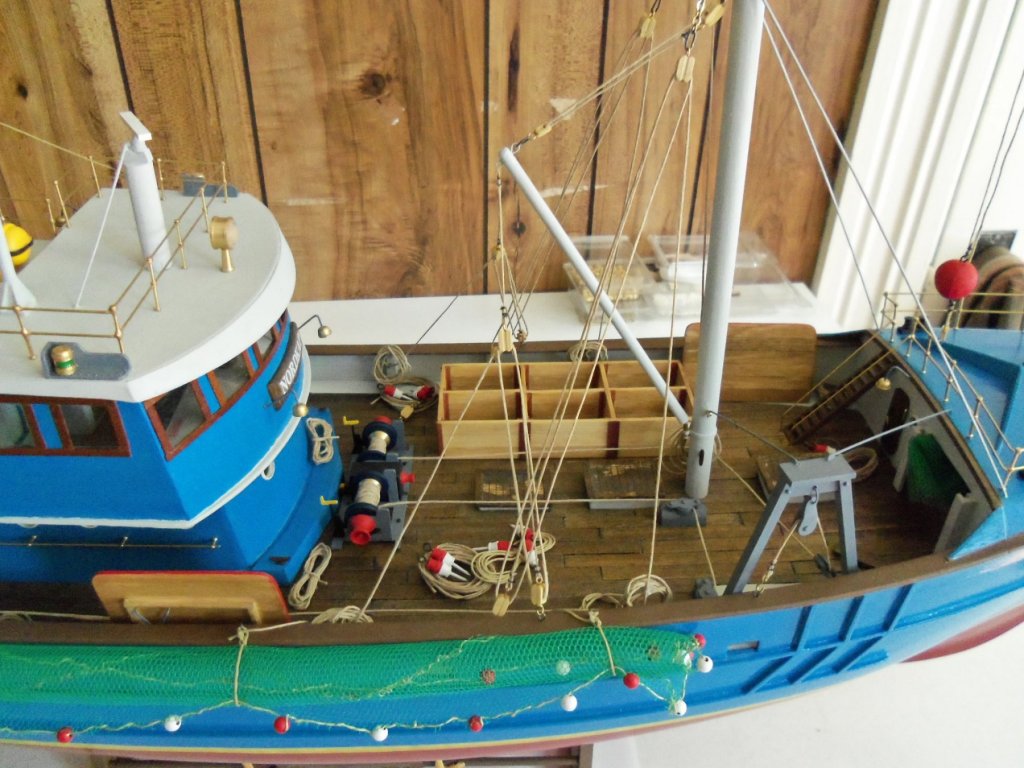
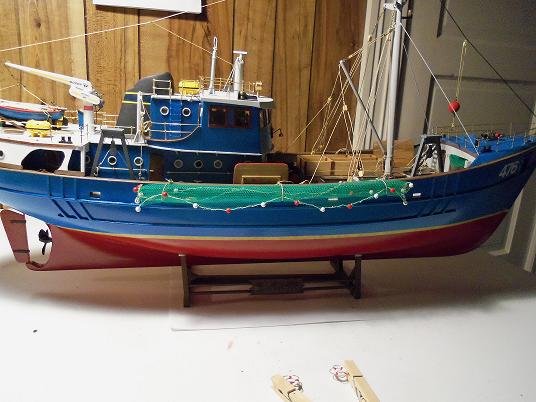
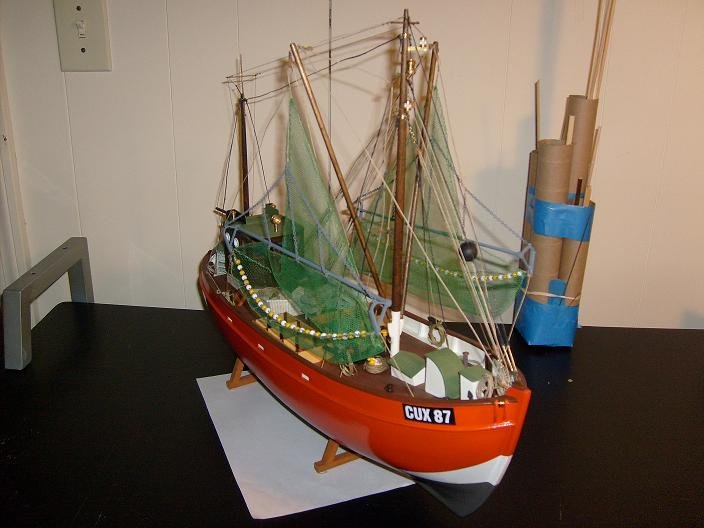
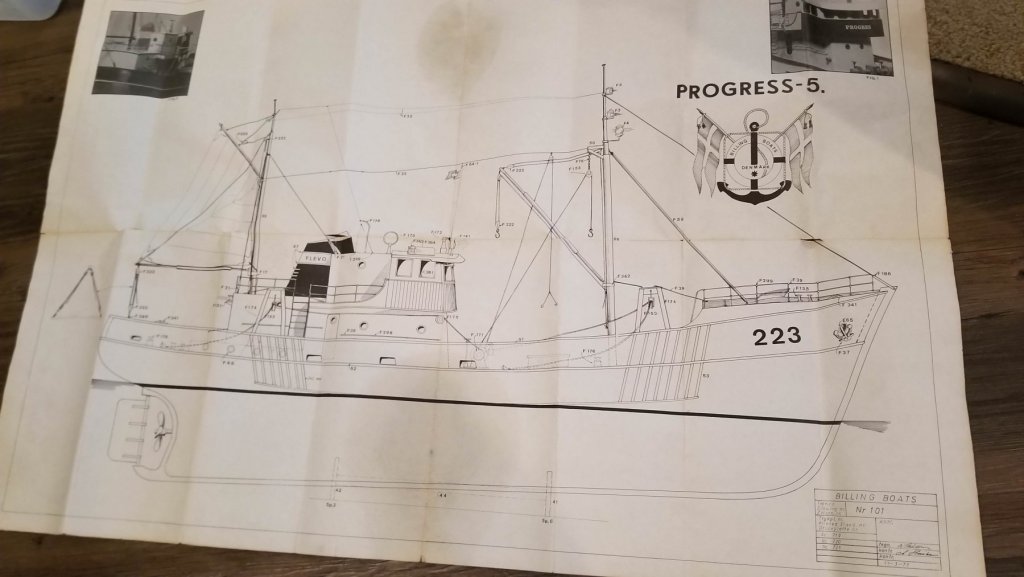
that's my Fender Squire bass........the amp is called a 'boxer 30'......I forget off hand who the manufacturer is. love that bass since I started to use flat wounds on her I also own an Epiphone 'Les Paul' knock off......has a good sound, and also a bass that I have no idea who makes it.......the admiral bought it for me when I was taking lessons. haven't sat down with them for a while now.......I really should. thanks OC rock on! for it's age, it's still a great kit CDW. I'm a confirmed Billing's nut though I'm basing this kit {and this model} as a spin off of the Nordkap kit, it's apparent how close they look in resemblance. they only really differ in the cabin structure configuration. basically, the fact that there was an actual kit of this model, is the only reason why I have it here in the kit forum. most of the 'kit assembly' is done............scratch building will take over. I'm glad that you like how it is beginning to take shape...........it will get even better once I start painting her, and start adding to the deck. the Nordkap is in the Gallery....the kit it came from was a bit newer than the kit I'm working with now. to date them, I'd need to find out when Billing's stopped using mahogany for their parts panels, and changed over to other woods, like basswood. the same could also be said for their diversion from pine strip to basswood {and other woods}. can't help it........I love showing her..... she holds the distinction, for starting me off in this hobby.....but wasn't the first model I finished. thsi one was!
-
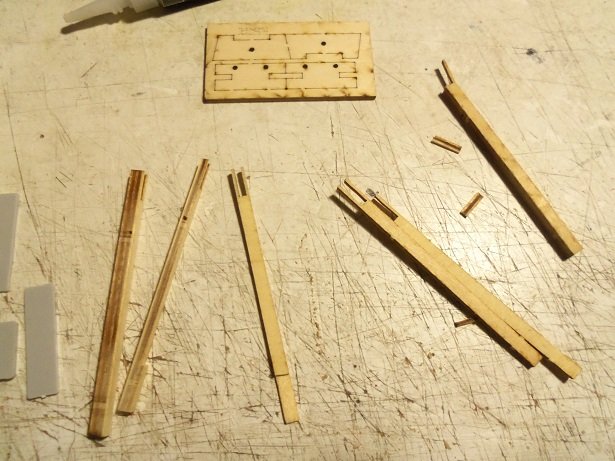
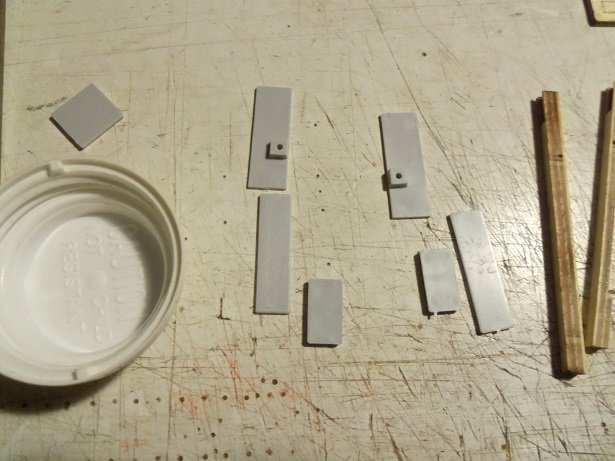
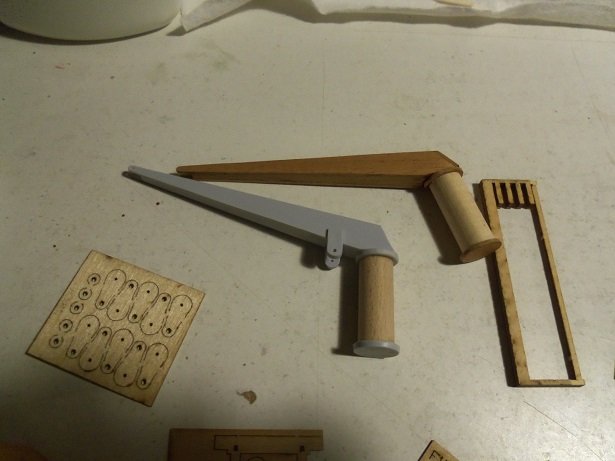
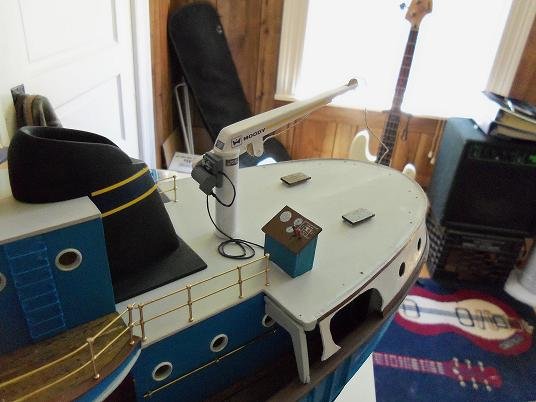
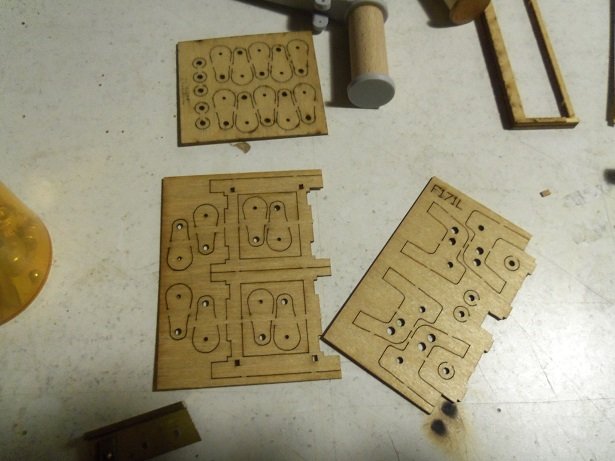
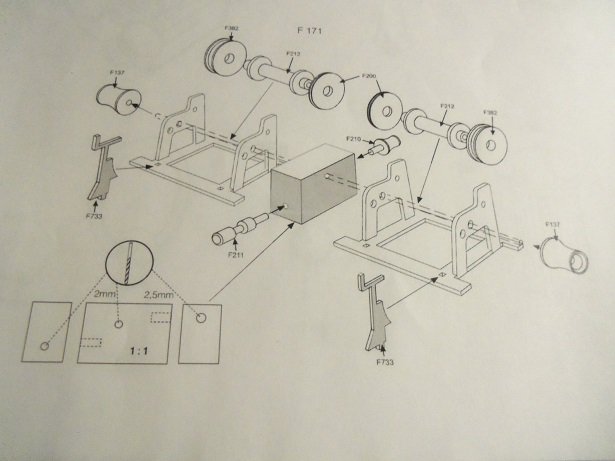
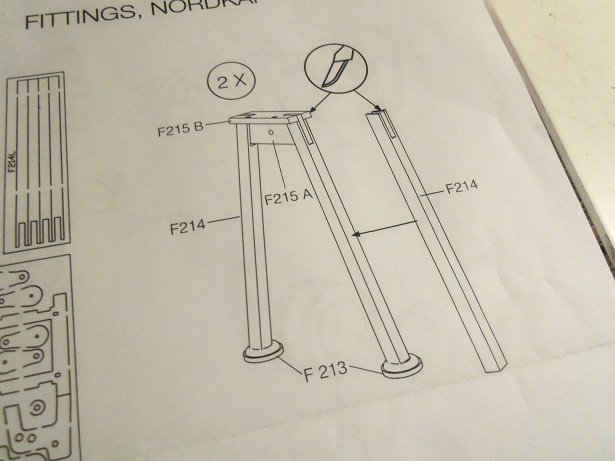
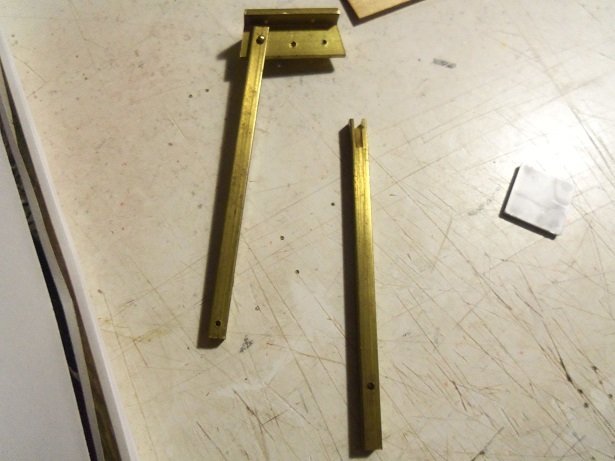
thanks OC............it will look even better, when I can get some paint on her I went on a scavenger hunt last night........I was either looking for any place that had the gallows, or an old billings fitting kit. I found neither this is what I got when I punched the uprights from the laser cut piece of plywood sheeting. they all came apart........I even broke one these are total garbage....the pieces above are the top parts. all is not lost though going further, I'm still confused as to what these parts are for......... dunno.......I'll figure it out.......the square part at the upper left is for a small crane that sits on the aft deck.........the two small rectangles are probably the basis for the vents that are arranges on the aft deck as well. I had also been working on the kit and fittings kit supplied larger crane......this is to be a manual crane {while I'm at it........I'll take you on a walk through memory lane } for the Nordkap, I motorized it, giving it a motor {nach} and a control panel there are the two vents I was talking about........the decals are interesting.........they are from an Cessna airplane kit decal sheet, the image I saved on line. the decals were made by Moody .......seemed like a good brand name for the crane. if you want to see how I made the crane, I'll post it in the other Nordkap thread. the framework for the winch is wood.......done here in thinner plyboard I probably won't use the pulley parts.........I have some that I ordered from Cornwall, that are brass....I just need to assemble them. the assembly for the crane looks like this....... I did manage to find it at Cornwall for about $30.00. I still debating whether or not to pull the trigger.........the one supplied in the kit will enable me to put a railing around it.....an aspect I saw in the Progress pictures. now........I did have two of the gallows from the older Nordkap fitting kit.....one of them I must have destroyed experimenting with it......the diagram looks like this.........with the footings. but I have one to go by........I also have the other parts so I can make a pair. I can make them like this........or I can bend the 1/4 square brass strip into an elongated 'U', and make them to look like this: I've seen many that look like this........I may go with it and save me some work
-
dunno.......I only know swiss cheese with holes in it even saw a video on how they make it.
-
thank you Sjors!
-
she'd see through that like Swiss cheese
-
looks like a model that needs a little love. besides fresh sails, are you going to do more to spruce 'er up? good bones for a restoration project are you finished with the Cutty, or taking a break? good to hear from you .....your in time for the new year! all the best!
- 39 replies
-
- 1
-
-
- kdy 15 juniorbad
- yacht
- (and 2 more)
-
other thoughts I've had...one is for the portholes. I intend to use the window maker to fill them in. I tried the punch out method before........way too much trimming. the ID of the porthole is {from what I can see} around 5/16. with most openings that I've used the window maker on, I've positioned the part, so the opening is facing downward to prevent the window maker from drying with a sunken in look. an idea that I'm toying with, is to lay them face up on a sheet of clear saran wrap, and 'well' them in..........I thought of using wax paper, but I'm unsure if the wax would hinder the see-thru look after they are dry. then......there's the removal factor.......would they stick and become damaged peeling them off. for the other types of windows, I will use clear cello.......squares are easier to do. another problem lies with the fittings........I hope Billing Boats gets enough complaints about this. they made the gallows out of plywood stock, laser cut into the parts needed to make them. I was toying with them, with the intent on assembling them......but they are a lost cause. the laser cutting melted the glue between the plys and they were splitting apart.....the uprights are terrible! rather than contact them......and possibly get more of the same, I'm going to look around, or even make the parts for them myself. the ones that came in the first Nordkap kit were made of brass and they were pre assembled..........glue or solder on the footings, add the pulley blocks, and they were good to go. I'll need to advise the budget director......I know it will be like asking the king for a ship to discover America.........but it must be done. I'm glad I found this out now, and not later. I will also be checking the winch too........1/2 of that has been changed to wood.........the frame parts
-
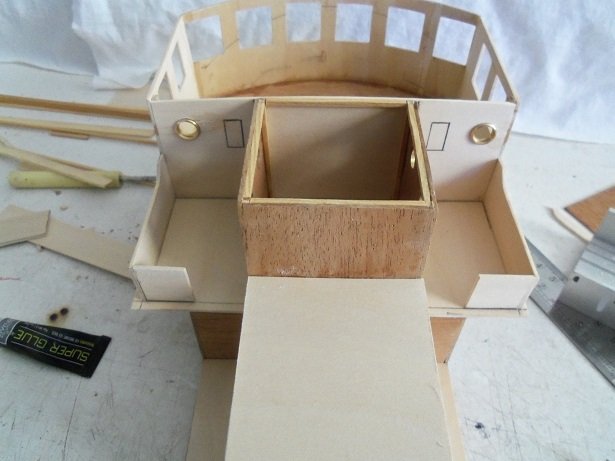
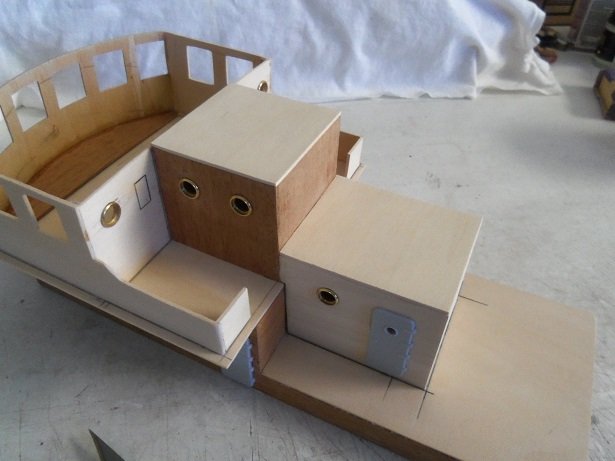
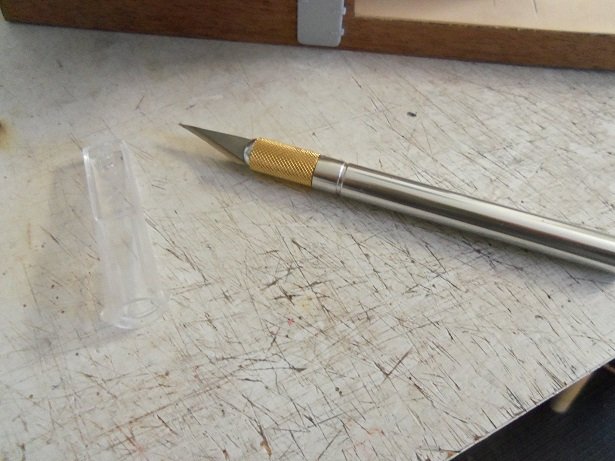
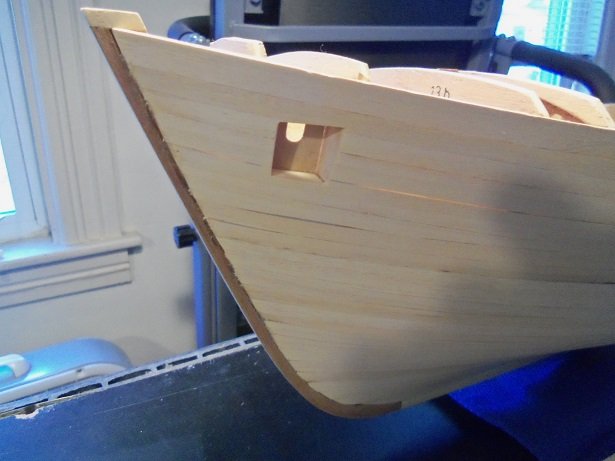
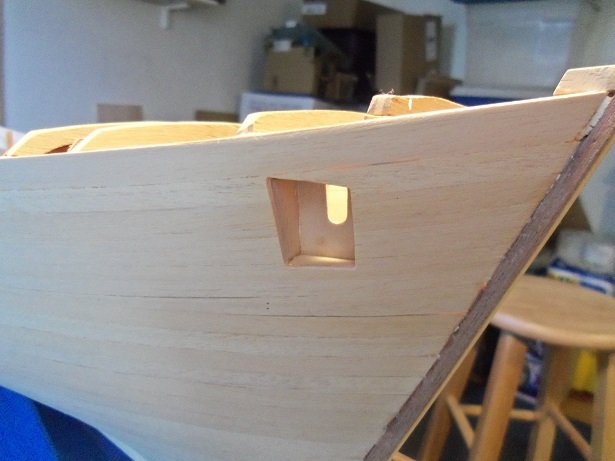
I didn't get too much table time yesterday.........the tree has left the building. all but a few remnants of Christmas remain. I made a jig to help in raising the entrance doors to the helm room, to the proper height, so I could trace the cut outs for the windows in the doors. there is a left and right door, so I made sure there was enough space for the hinges, for the doors to swing open properly. I had included the roof on the lower cabin.......figured I would add the roof on the aft cabin. the helm room will get the same treatment as the other structures, as far as framing is concerned, so adding the aft cabin roof isn't going to be in the way. I'll just have to try and hide the seam along the two parts. there was also an overhang that I was going to leave on the lower cabin.........but it was uneven. I tried to straighten it out.......but I cut too deep, and had to remove it totally, leaving it flush all the way around the cabin. oh well........that's what molding is for counting the bow bulkhead, I found that I have five extra portholes left over. I'll find a place for them, so I can use them all. then came the task that I think we all hate to do.........cut into freshly laid planking. the thought of making a mistake can be quite paralyzing for the faint of heart. I bought this x-actor a short time ago..........it boasts that it's supposed to be sharper than the average x-actor. ahhhhhh-hemmm.......we'll see about that Obechi cuts like garbage anyway.........like cutting into thick wet cardboard. but, it went OK though........sanding the edges as I went along........and making sure that I didn't cut into the box itself. in that regard...they weren't kidding...........I did make a couple tell-tale marks...........but they were easy to sand away. I did have my doubts about assembling the boxes with the bottom sill........I was thinking of making them triangular, with no sill, so they would blend into the hull at the bottom, after sanding. I did the Nordkap this way as well..........I didn't like it then, but at that time, what did I know..........my bashing skills didn't wake up til after the hull was fully planked. that was progressive anyway........changing one thing.......and then another..........and by the time I was full time on the deck, I was do'in the Sinatra. all 'n all......they came out alright. I suppose in lieu of molding around the openings, I can just round off the edges and blend in the entire box. I didn't look at the diagram until after I had done it.......the anchor hawse holes are different.......but I wasn't sure of the anchors supplied in the Progress kit. the ones in the Nordkap kit would have been partially pulled into the holes and the anchor part would have been hanging in the breeze........not the way an anchor should hang. "hell's spit........I'm jest spinn'in me winch fer nuth'in!" they pass muster wit me more soon............:)
-
planking looks great!........the port side is really good your gaining on 'er
-
well done Jack! awesome job on the railings..........overall great job good to hear that there another on your horizon........I'll keep an eye out for it
- 140 replies
-
- 4
-
-
- the sullivans
- trumpeter
- (and 2 more)
-
if it were that easy.........she's just now coming to grips that there's another large hull in the house if I do though, I have just the ship to mod it after......... I will pass it along that you said it was OK though
-
such beautiful work Doris.........always enjoy catching up with your log I hope you had a very good Christmas and happy modeling in 2019!
- 1,035 replies
-
- 5
-
-
- royal katherine
- ship of the line
- (and 1 more)
-
good to hear things are looking up Frank! hope you and your family had a wonderful Christmas and hope better health in 2019
-
pumps look great Pat........hope you and your had a super Christmas as well
- 1,013 replies
-
- 4
-
-
- gun dispatch vessel
- victoria
- (and 2 more)
-
always neat to see her all laid out like that quite a bit stuffed in there already! awesome project to be sure.........oh, and I always thought those vents should have been slanted.......they look much better that way
-
your making some great progress on her J..............your gett'in her the way you want her. look'in great!

