


popeye the sailor
-
Posts
16,007 -
Joined
-
Last visited
Content Type
Profiles
Forums
Gallery
Events
Everything posted by popeye the sailor
-
 thanks OC.... whatever your looking forward to.....I'll try to make it interesting thanks Bob........they'll look even better once I figure out how to fit 'em in place
 -
sorry to hear of the mishap KP.........hopefully you'll be able to get 'er back up to muster. I've had a few of these myself.......it's not fun
- 122 replies
-
- 4
-

-
- tamiya
- King George V
- (and 2 more)
-
it was great to see all this activity Daniel......but you did.....you had me confused for a moment there I shoulda known...... more of your fine workmanship, and a trip too! definitely a model to marvel over!
-
she's look'in good Sam.........glad to see your making some good progress on her rigging looks really good as well as your blocks
-
moving right along..........look'in really good
- 131 replies
-
- 1
-
-
- finished
- artesania latina
- (and 1 more)
-
congratz on finishing your Connie! such a superb looking model..........you did a great job on her
- 1,354 replies
-
- 1
-
-
- constitution
- model shipways
- (and 1 more)
-
that is the way they should look.......the studding sails sort of layer over the main sails, since they are only used during a long voyage, when more wind power would be needed. on short jaunts, they aren't used that much. with the booms forward of the yard, they won't interfere with the main sails either. refer to the pictures of the Revell Cutty instruction sheets I posted. when doing the running rigging, keep in mind that the braces are backwards on the rigging diagram sheet. the fore braces run aft towards the main mast, the main braces run aft towards the mizzen mast, and the mizzen run forward towards the main mast. study the rigging sheet and you will get a sense of what I'm talking about the rigging instructions for the Revell Cutty, I believe isolates them for easy referral.......I'll check this out and post them if you'd like.
-
you've made some really great progress Rob! the rigging looks absolutely super in awe and very impressed with your work
- 1,208 replies
-
- 2
-
-
- great republic
- clipper
- (and 1 more)
-
sorry to hear that recovery is slow. take care and let your hand heal........much more important looking forward to your continuance of this wonderful project.
-
yea........orientation is everything. most folks set the yards up on Styrofoam, so they don't move, others use the 'helping hands', while others yet, have alternative methods to arrest them. using CA is particularly troubling, due to it habit of soaking into the thread, solidifying the thread very quickly. one needs to be sure that the block is set in the direction of it's 'pull' when rigged, before the cement is applied. I use white glue as much as possible for this instead......makes re-positioning a little bit easier. so........partially built, eh.........two tickets for the dark side?!?! you'll get plenty of scratch building experience, depending on their condition....not to mention how complete they are you'll have fun though.......I started bash'in and scratch'in from my very first model. there is a lot of info out there on the Vasa....and quite a few logs here on the site. I also have a partially built Robert E Lee........just the hull and a few key parts. I'm still up in the air as to what I'm gonna do with it........I may do a ferry....or maybe a 'what if' civil war battle ship. either way, it will be fun to do. I did notice that the studding sail booms on your lower yard will need re-positioning. they should be oriented to the front of the yard, in a slightly upward position. just copy what you did with the upper topsail yard, and you'll solve the problem.
-
hello John......and thanks for the good word. it's planking.........I'd rather be play'in with the cabin structure hopefully, I can get this huge carcass planked over and ready for the next step. I'm still very happy with how the kit is assembling so far.
-
thanks all for the kind comments and hit'in the like button the wharf was shut down for the Thanksgiving festivities, although I finally reboxed the paints I received recently.........I neglected to tell yas about it well.........a fellow member here was dealing with another fellow, who was selling off his brother's estate {condolences, sad but true}, and there was a huge amount of paint in the offerings. he bought them up and sold them to me on the cheap.......a collection of Humbrol, white ensign, model master, and testor's paint. some of the paint was quite old........the testor's and model master didn't fair too well, but in the end, in just the Humbrol and white ensign paints alone, I ended up with around 150, 14 ml paints...military and likewise. I had separated them all according to country......INJ, KM, US, etc. finding paint charts was equally as fun. but now that Thanksgiving was over, I had to box them up, because I had them lined up all over the boxes of Christmas decorations. I won't have a paint shortage in the near future, I can tell ya that! one other piece of the estate that he though I'd be interested in, is so awesome.........I've only dreamed about building something this large.........a kit of the Tamiya 1:200 New Jersey! it has been already started, but the gent did a super job with it, as far as he got......I likely won't have to do very much reassembly. once I get a handle on projects and find the time, I'll bring it out to work on.... I'm as giddy as a school boy
-
the case looks great.........as well as the ship in side congratz on finishing the Chebec, a super looking model! very well done.......I'll be looking forward in seeing your next subject.......should be another interesting build.
- 692 replies
-
- 2
-
-
- eagle of algier
- chebec
- (and 2 more)
-
thanks Robert it can be complex, depending on the ship your modeling. keeping in mind that the mid ship is wider than the bow and stern on most ships, stealers and tapering is required to fit all the strakes. in cases where the bow is wider than the mid ship and stern, jogging planks may be needed. I'm no expert at it either.......I create as straight a line as possible and go with it. I did a poor example of jogging on this hull, but my intention was to fill in the rest of the open areas of the bulwarks, so the entire deck would be closed in.....not that it mattered, since that part of the bow deck won't be seen. luckily, we have quite a few folks here on the site, who have much more experience, that we can learn from thanks for the good word..........and to all who have hit the like button
-
you know your in trouble when you have pictures that contradict each other. before finding MSW, I was always under the impression, that the main stays and mizzen stays were tied to the preceding masts. it was a shock to find that they actually went through a block and terminated on the deck or fife rails. it dawned on me that stays were indeed adjustable.........and that simply tying them to masts was illogical. as has been said, we are all constantly learning....nice to know that there are some learning curves. it's a relief that there was no real right or wrong......but, they do look better going under rather than over. I never knew of these holes and that they had a name. those are some really good pictures too.
- 525 replies
-
- 1
-
-
- cutty sark
- mantua
- (and 2 more)
-
the launches look awesome.........perhaps you can add the few part that are missing after they are painted. in any case, the PE assemblies are really good........lots of great detail
-
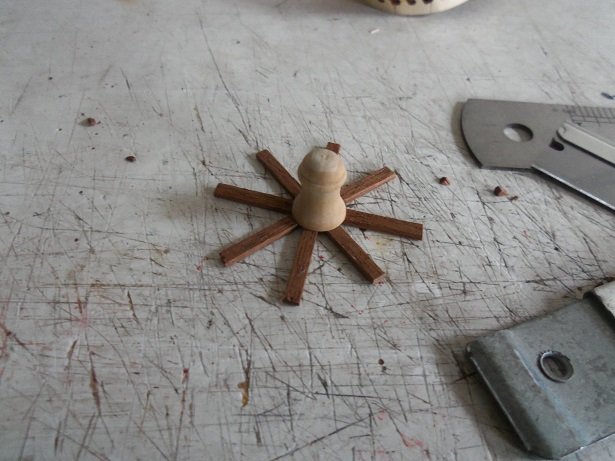
I did find one picture in the camera from last Friday. small part really.........the start of making the capstan. it's Thanksgiving today.......for all who observe this day.........We at the wharf send our best wishes and have something near and dear to be thankful for.
-
I do owe you a thank you..........your glue bottles intrigued me. for all this time, I've worked from the Elmer's glue bottles. by the time I get to the end of the big bottle, the nozzle won't adjust anymore because of wear and tear. a browse through Amazon, and I found an eight pack of those small bottles! not a bad price either. this afternoon, we were out and happened into the local Staples, where I found a gallon of white glue for $13.00. I'm not sure what office uses that much glue........but it suits my purpose just dandy! I almost sure I read you mentioning about the bottles.......if not, then my dementia has hit a new high. either that, or I read too many logs
- 258 replies
-
- 2
-
-
- harriet lane
- model shipways
- (and 1 more)
-
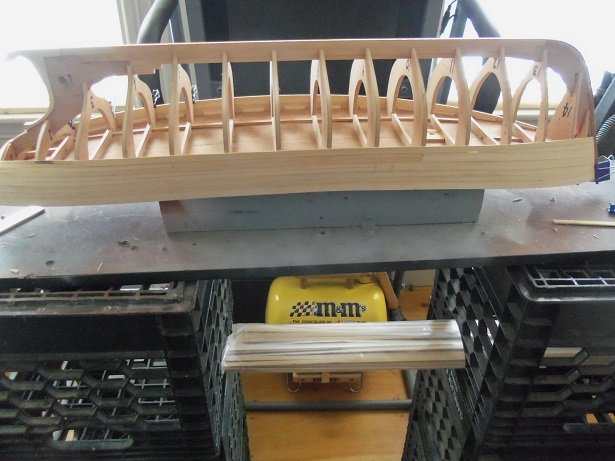
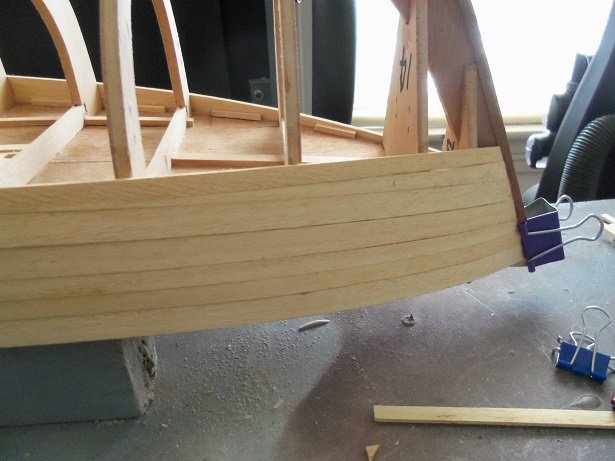
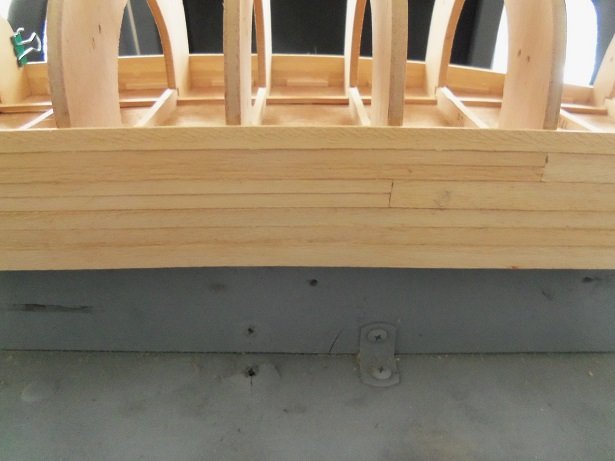
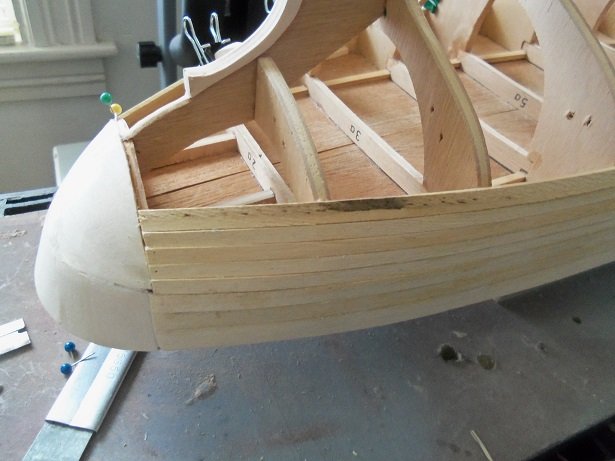
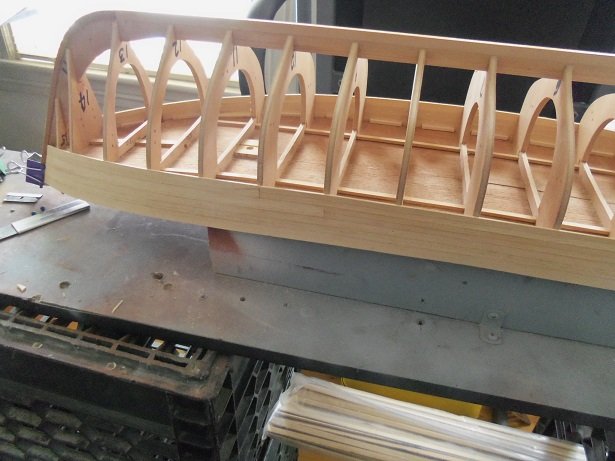
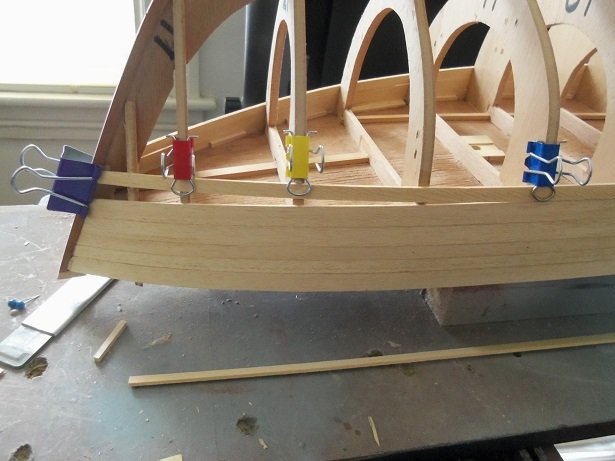
I do have a small update on the Progress........not too exciting, since I'm in the thralls of planking. after filling the two strakes of 10 mm with the pairs of 5 mm planking, it resumes with the 7 mm. this is where I will position the first stealer at the bow. the bow may need two of them to keep the line straight. I already did the starboard side. adding the stealer leveled out the line at the bow. before I go any further though, I will need to fare the the bulkhead roots, where the sander couldn't touch without damaging the rabbits. it can be seen here almost touching the rabbit. I could have gotten fancy, in jogging the 5 mm planks, but I kept it simple. at the stern, I will have to start tapering the planking, or this curvature will become more pronounce. it will cause problems if I let it go and reaches the stern rabbits. turning the hull around to the port side, I've already laid the 5 mm planking and finished off the strakes. I've already marked off where the next plank is to be placed at the bow. I'll make the filler from the odd 10 mm plank strips that were cut off. more soon
-
yes.....it is a tight fit.......and it gets more interesting as you add more lines folks who build a lot of sailing vessels have special tools to work with, like long forceps and scissors. I've even heard about using a needle threader for rigging the dead eyes and blocks {I still do it the hard way}. when rigging blocks on the yards, most decide the orientation of the yard, and tie them so they will hang in the desired position. heck, I don't even know all the particulars yet....we're always learning. you should do the standing rigging first, since some of the running rigging is going to depend on it.
- 105 replies
-
- 1
-
-
- thermopylae
- sergal
- (and 2 more)
-
I left a comment on your log.........added to the thought of making the hole larger, you need to take account of how much of the first level you have to work with. it's a very interesting idea glad you decided to come on board with a river boat project....you have very neat ideas!