
DONATION DRIVE - SUPPORT MSW - DO YOUR PART TO KEEP THIS GREAT FORUM GOING!
×


popeye the sailor
-
Posts
16,007 -
Joined
-
Last visited
Content Type
Profiles
Forums
Gallery
Events
Everything posted by popeye the sailor
-
 thanks Piet......take a look at 'Z' scale...they might work for you: http://www.modeltrainstuff.com/HO-Scale-Microscale-Decals-s/1417.htm http://www.walthers.com/ https://www.reynaulds.com/preiser.aspx not too sure how they would look Lou........they would appear a bit flat. there must be a call for them though I did a little yesterday.......the end fascia parts gave me a bit of grief. I have a work around though. looking at he forward structure doors, I took a look in the Nordkap fitting kit and got the pins......I have more coming, so no threat of not being able to replenish them. we got over 20 inches of snow....my day was pretty broken up dealing with it. we went from bare ground.......to over 2 feet of snow...in just over a week! I'd say we got nailed on this one though. I hope to have an update for ya'll soon
 -
congratz Danny! she looks fantastic.........so much detail and depth even some of the end repairs you made on the outer hull {the minor handling damage}... ...... the stern looks like it has weathering! did you do anything to the bow deck emblem? couldn't tell if it was still shifted! she's an amazing model Danny....if you do this good a job, not liking the kit, I can't wait till you tear into the Hood! congratz again.........very well done!
-
look'in great Kevin......quite a bit of detail on there already.
-
boy!.....you picked back up on this one and ran with it.......didn't you??!?!?! looks great!
-
I saw the unpainted figures Ken......but in seeing how well these look, I think they're worth it. the unpainted one do come in a larger assortment pack.........if I need more, that might be the way to go. I do wonder though if I can give them the same level of detail. the admiral is not a painter either......she used to do ceramic houses, but I would usually end up doing the trim work and fine stuff.
-
if you really want a good laugh, look up my United States project and look at how I made gratings. for a first attempt though, I wasn't too far off the mark, although, there is a noticeable scale issue. the thread method looks good......nice even spacing too another method that I tried was sandwiching in mahogany thin strips....they can be purchased in assorted widths, depending on how thick your planking is. the only bad point with it though, is the fact that .5 mm is a bit too wide, but looks really nice once sealed. carriages look'in good so far.
-
not to worry........I read that you had fixed it the rigging so far looks very good.
- 378 replies
-
- 3
-

-
- t78 norden
- billing boats
- (and 1 more)
-
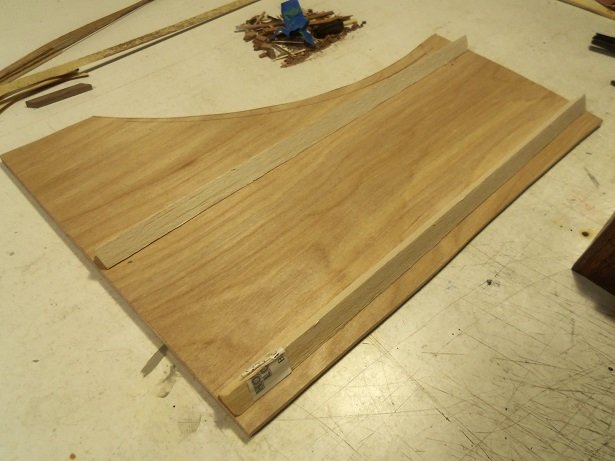
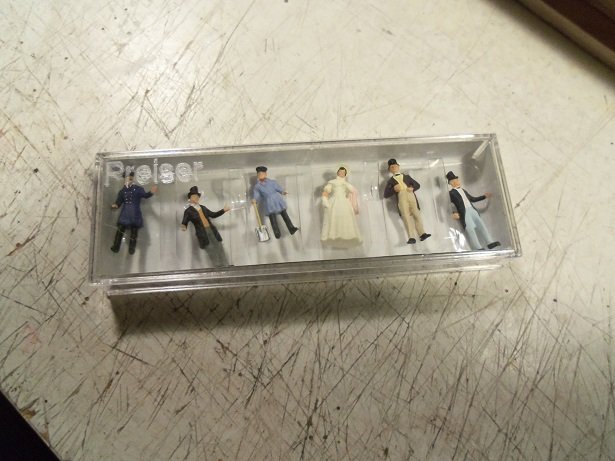
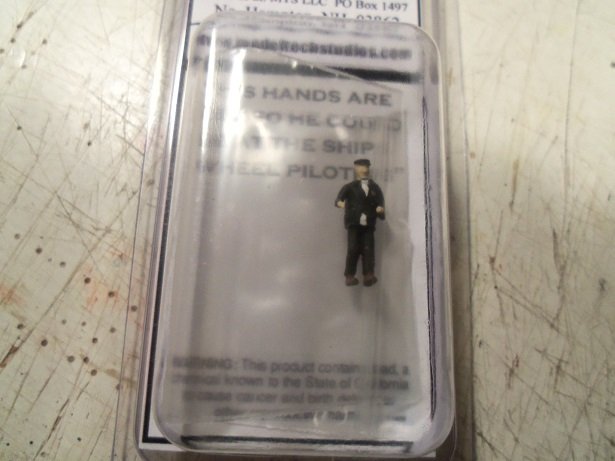
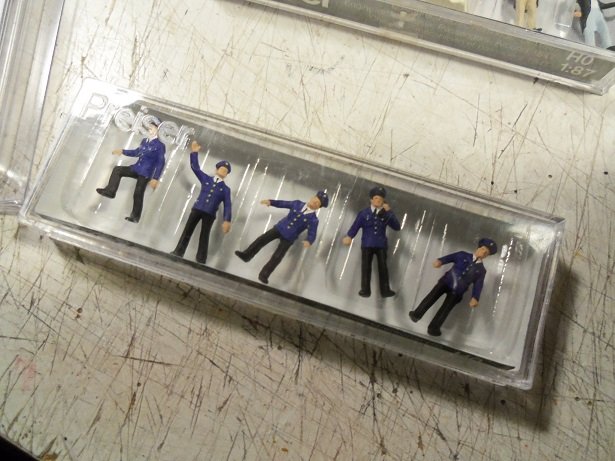
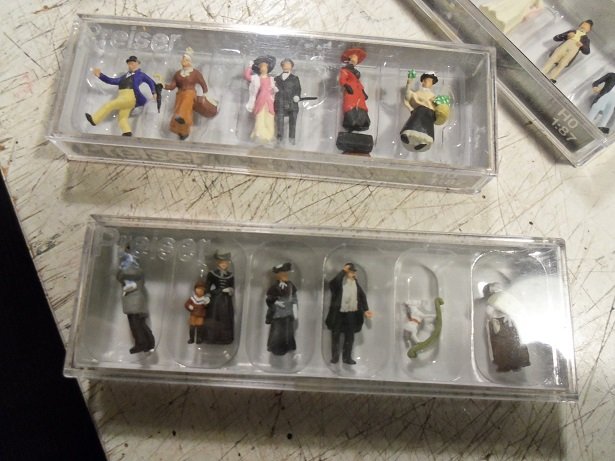
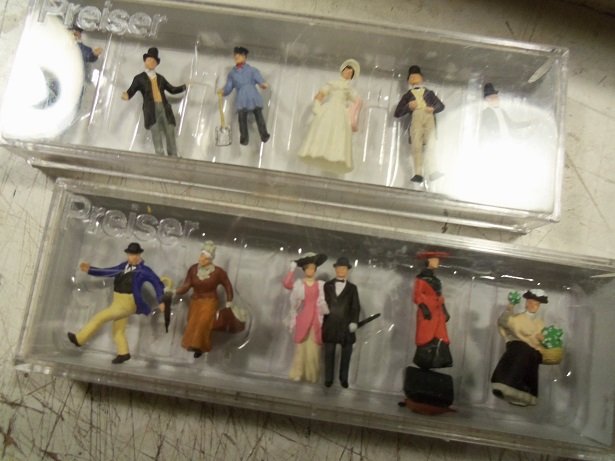
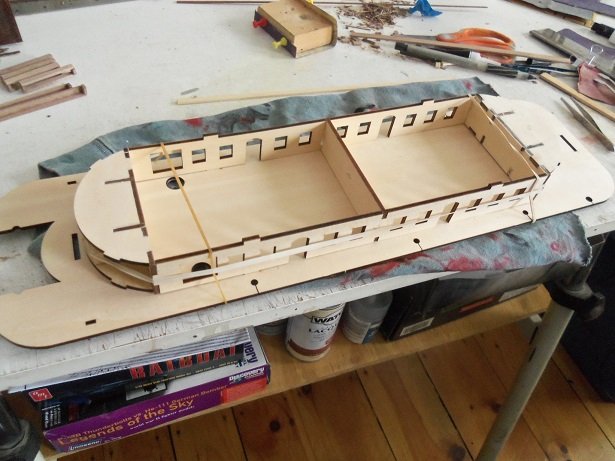
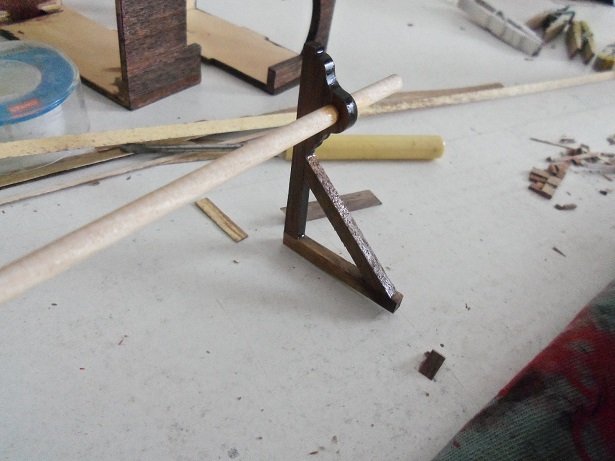
yawwwwn.....what is it? Gibbs got us up early this morning for an outing. I kinda laughed {the admiral wasn't though}.......kind of a drill for the upcoming week, for starting the new work schedule so...while I'm up early, I thought I'd get an early start {what a brilliant concept } I though I'd show you the stand I made for it......I will be squaring the base off, so it looks better. it made sense to use the balsa......a really soft wood that won't mar the finished bottom. I probably won't need to line it with felt. I've forgotten what I bought the balsa for.....I had bought some 1/2 inch square stock too. the length is good too, lining a good length of the model. I might try and repaint the paddle wheel brackets and the troughs.......not sure if I like them with a flat finish. if I do anything, I may leave the troughs flat, and gloss up the brackets, since they will be highly visible. as I mentioned, I received the figures! I'm very impressed with the level of craftsmanship...the paint work is phenomenal the admiral wanted to see how they would look on the model......she couldn't believe how small they are. comparing them to the scale of the aft section doors, they look right, but seems to be out of scale with the overall look of the model. I noticed that anyway........the ratio of the aft doors, compared to the size of the doors on the forward structure, one gets a sense of the imbalance. the figures are made by Preiser of Germany....ordered from the Model Train Stuff website. I wanted them to have the look of the deep South.......you know, the Southern Belle thing.....puffy dresses, parasols.......top hats and three piece suits...the gambler. I chose a special guy for the helm......I hope he can be seen window height. I may assemble the helm room to find out....possibly make adjustments, if needed. this figure is by Model tech studios......I was surprised to find that they are based in North Hampton, New Hampshire. they deal with nautical, and action type figures. If I was doing a diorama of a work shop scene, I'd have found the perfect for it. odd that this chap is the same scale as the others, but seems a wee bit smaller in comparison. http://modeltechstudios.com/hoscalepeople.aspx?page=3 I also got some uniformed crew members........there was another in the earlier package.......probably why I was drawn to these folks. here are some more passengers........ I will likely need to get a couple more packs.......folks sitting.......some farmer looking folks. I think the crew are a bit modern.....but I wanted anyone looking at the model to be able to pick them out easily. .......not like they'd be thinking 'period people' anyway. the figures will add a wide range of color to the model.. not sure what I'll use the rocking horse for. I could cut off the rockers, add a pole and a coin receiver, and turn it into a 'dime store' amusement ride out of it from here, I looked up Preiser figures, to find their base site, and I happened onto two other model train sites. one of them has an even larger selection of figures, so I have more to choose from. with what I spent already...........I hope the admiral don't flip when I get more
-
nice work with the armament Piet lots of really nice extra detail!
- 378 replies
-
- 4
-
-
- java
- pacific crossroads
- (and 2 more)
-
thank you Kevin, John and OC, for the kind comments this was the last three day work week for me.......I start my new four day schedule next week. on a good note.......I received the figures today. I really like the way they look. you'll get to see them soon thanks for all who hit the like button.
-
very nice progress Danny.......your finished! looking forward to the 'finished' pictures
-
I see your well under way with the rigging....looks really good for the gammoning on the bow spirit.......to stop the thread wrap from sliding down, you could have added a small chock {or a stop} on the spirit boom, to hold the gammoning where you wanted it. nicely done
-
thanks Piet....and to those who hit the like button I used them.
-
I agree about the stairs......unless you have an idea about 'no slip' treads. the windows came out great as well your way ahead of me
-
no problem kind of an honor to have Kev's Vic come for a visit. you fixed the bow spirit....didn't you Kevin? I took a browse through the log.....you'll need to replace a few pictures.........yep.......splendid ship! as for today, all I've done, was roll up the port ladder and stow it away, and make up the aft sail {still need to refine it...I'm not gonna get too fussy over two sails}. not much left to go thanks for the good word.......for following along.....and for all the likes ! enjoyed having you look'in in "take care of those you call your own, and keep good company" {Queen}
- 378 replies
-
- 7
-
-
- t78 norden
- billing boats
- (and 1 more)
-
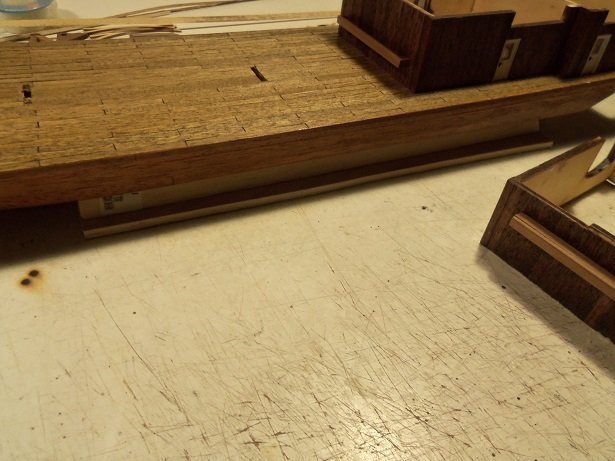
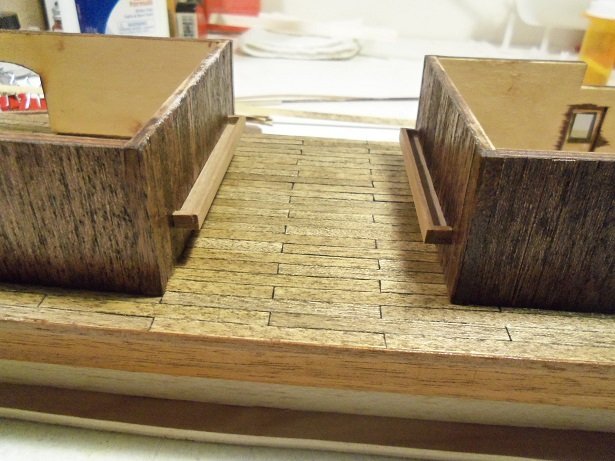
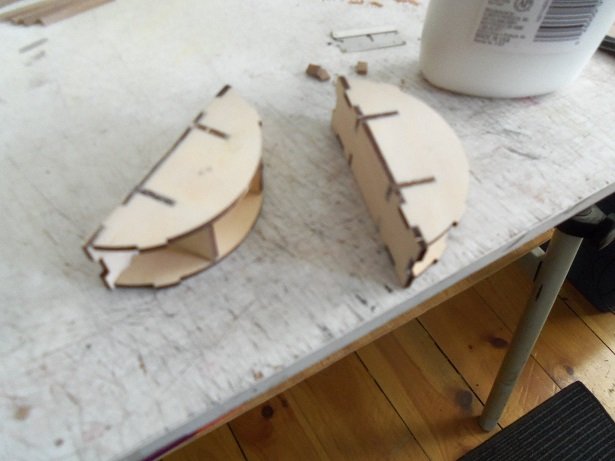
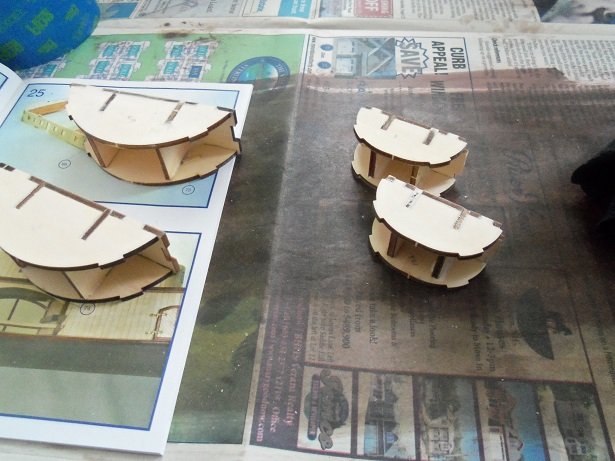
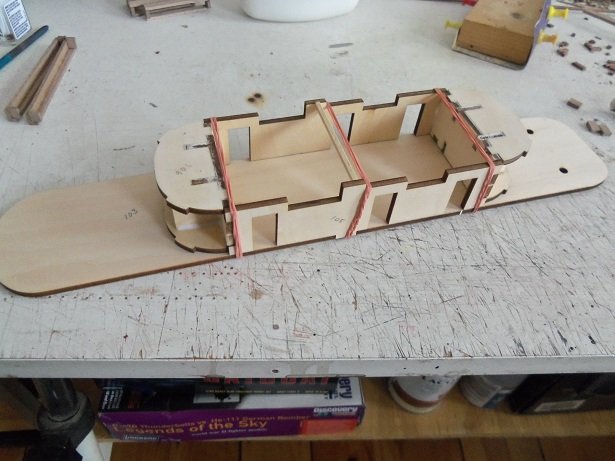
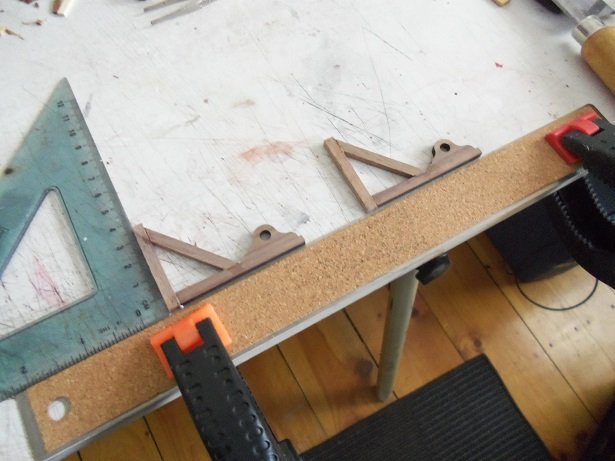
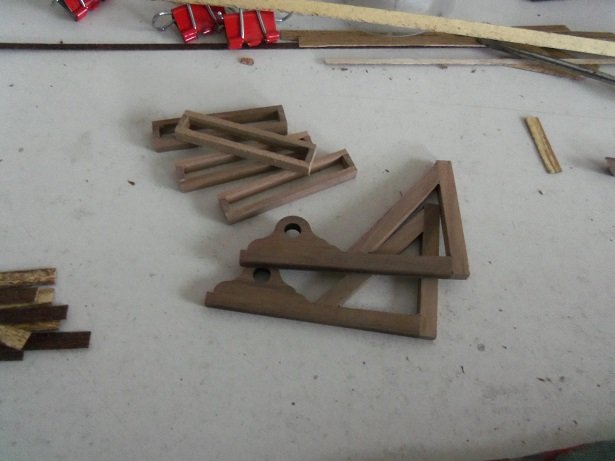
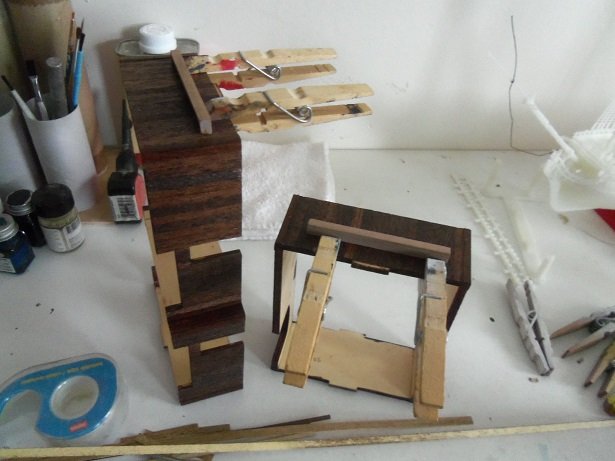
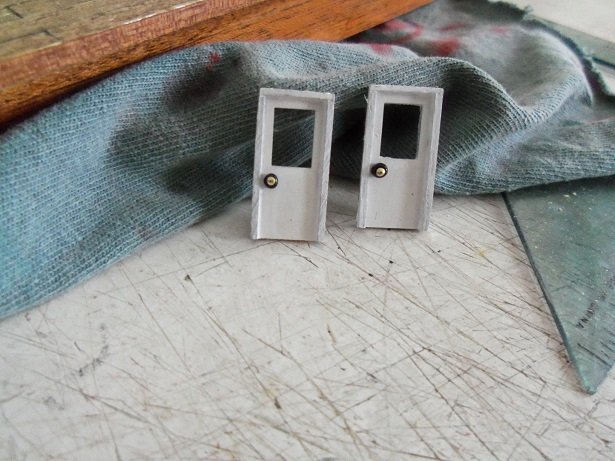
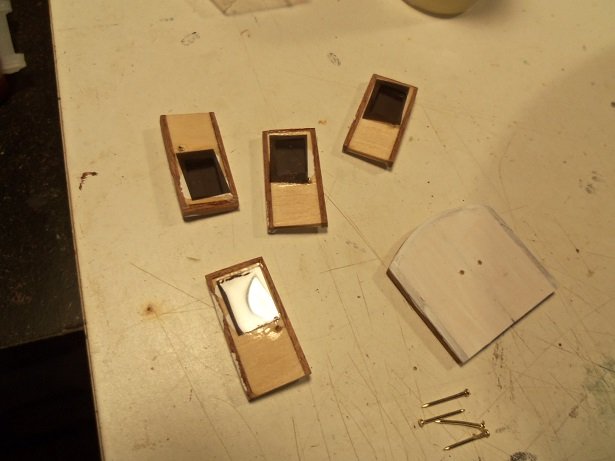
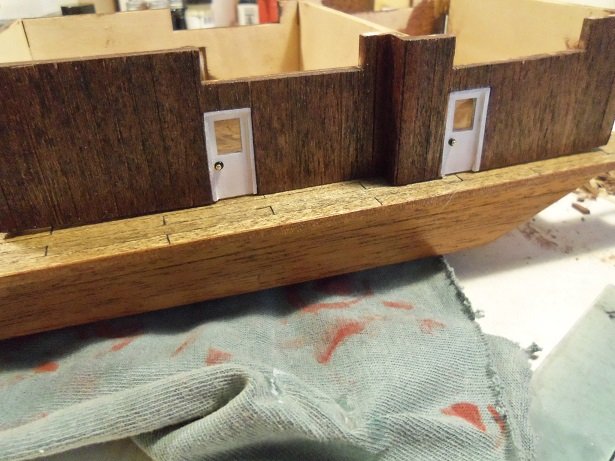
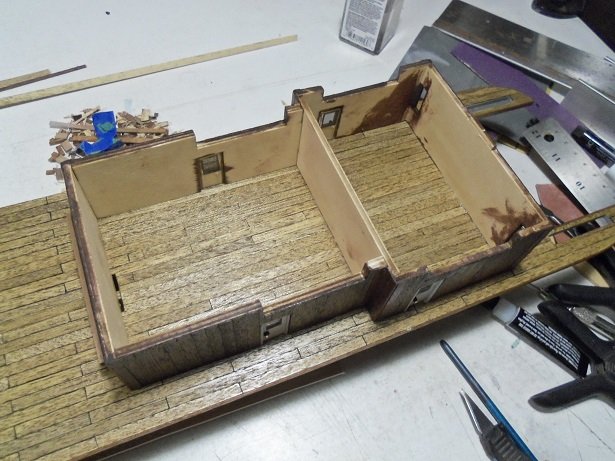
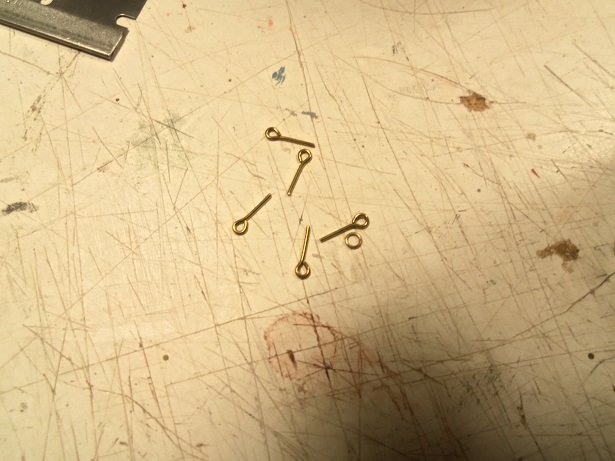
today is riverboat Friday I thought I do a little on the T.D. just to crack my knuckles, I started the session by assembling the ends for the second level structure. some of the joints fit tight, but they went together without much of a fight. I had assembled most of the vents, for the aft structure. all that was left, was to glue the top pieces on. as I was fishing out the parts for the second level structure, I noticed that the third level structure, assembled the same way. so, I put the ends together next. but......hey! why stop there? ....assemble the sides, and all that will be left to do, will be the front and rear fascias! rubber bands will keep everything in check. I cut a piece of planking to act as a spreader for the center....I may glue it in permanently later on. the second level didn't need one...it has one built in. the brackets for the paddle wheel were assembled next. I made up the jig to get them squared away. while they were drying, the vents were trimmed and sanded. by the time that was done, I could do the same thing to the brackets. the troughs were trimmed and sanded at this time, and later cemented onto the first level structures. I set 'em up at 10 mm off the floor...doesn't say anything in the instructions. when dry, I gave them a coat of poly urethane....I forgot it was a flat. I did the same thing for the wheel brackets......yep, no shine at all. I'll decant some of the semi gloss lacquer later and give them another coat. the wheel brackets are still wet.......dried flat like bone white..... Kinda like'm with a shine to them ran into that problem with the beads again.......they want you to use them for door knobs. I think they are kinda big....too big, in fact. I pulled out my bottle of beads that I use to make parrel straps and did a side by side comparison....the one on the right is the supplied bead. I'll just pick out the smaller ones and go with that. that done, came the windows. they show you a thatched window, but all they supply is clear cello. nawww, I'm good with that......I have that tinted window film for cars. I'll just use that no need to be too fussy.......as long as they cover the opening. later, I'll dab the knobs with flat black, to get rid of the brass color. the doors were cemented in place. these need to be in place, so the structure can be cemented to the deck. the gaps were still present here......the structure did not want to sit flat on the deck. I sanded the center of the mating surface some, and made sure the doors were flush......but there is just too much of a gap. it will take a lot of pressure to get it to conform. the first attempt was futile.......I even tried to weigh it down with one of the admiral's plants. looked strange with a huge pot on top.....but even that wasn't enough. I aborted the mission before the darn thing fell over! the next attempt worked.......I changed up on the glue. instead of using white glue, I used CA. I took a warm damp cloth and wiped most of the white glue off the deck and the structure. taking a rectangular piece of 1/4 plywood, which I'll square up later to make the stand...and some 1/2 triangular balsa, I'll make the stand and get it off it's keel. the balsa was cut to a pair of 12 inch strips, and cemented to the plywood around 3 inches apart. with the bottom / deck sitting on the new slip / stand, the structure was cemented in place with the CA..........held in place by hand for what seemed like forever. I gotta get some of those clamps........those would have been my salvation releasing the pressure....the structure stayed fast.....looks a lot better than it did the first time the other structure was next........first off, the doors needed to be given another coat of white. too much ghosting. while they were drying, I had a look at what they suggest I make the door knob from.....an eye bolt and a ring. don't like that.......I have just the thing coming when I order the planking for the Nordkap, I added a package of those stubby eye bolt thingies {I use them for hand railings} those will be perfect. I also have some antiqued brass rings,,,I think they might look better {note to self....look into that}. another odd thing I see, is what they show for hinges in the instructions, are not what they supply in the kit. I'll look into that too..... another good thing.......the figures I ordered for her have been shipped.....and I got everything! nothing was out of stock these are some of my eye bolts......even they look too big. I could just say the heck with it and do up some knobs for them. it's a thought process right now..... ...planning and scheming icky mae!


-
I'll bet he can climb 'em just as fast! nice job!
-
I'll need to revisit that project.......can't recall where you left off. one of these days, you'll get the itch......or an idea, and you'll jump back on her that's usually what happens to me. sometimes, merely giving though to an aspect of the build will trigger taking the cover off {I cover all my projects}. those types of projects take most folks years to complete, so your not to far off your time line { if you have one}. it'll be like visiting an old friend, when you do
- 378 replies
-
- 5
-
-
- t78 norden
- billing boats
- (and 1 more)
-
thanks Kevin! I want to get the Thermopylae back on the table. I have the Tumbl'in Dice on the other table. so, between the two, should keep me busy for a while I ordered a few more parts for the Trawler Syborn as well........I'm very close towards finishing that project.
- 378 replies
-
- 5
-
-
- t78 norden
- billing boats
- (and 1 more)
-
thanks Bob.........just as long as my thinking isn't too far out there thanks to everyone for the likes
- 378 replies
-
- 4
-
-
- t78 norden
- billing boats
- (and 1 more)
-
congratz Michael on such a huge and complex project! you've packed so much interesting detail in this model, right down to the blocks and art work she's a very stunning ship!