
MORE HANDBOOKS ARE ON THEIR WAY! We will let you know when they get here.
×


popeye the sailor
-
Posts
16,007 -
Joined
-
Last visited
Content Type
Profiles
Forums
Gallery
Events
Everything posted by popeye the sailor
-
 midwest sold off the model end of their business.......I forget who bought it. I have this kit too.....I'm at the step of making the mast hoops. I'm not happy with their method, and have been trying different methods to make them. of course, I've gotten caught up with my other model builds, and it went back into the box. I'll bring 'er back out one of these days. it's a cute little kit.......you'll have fun with her. I also built their Maine lobster boat.......another nice kit......tricky, but nice none the less I have logs on both of them. I'll enjoy following along...........welcome to MSW
- 24 replies
-
- 4
-

-
- finished
- Chesapeake Bay Flattie
- (and 2 more)
-
I know what you mean about printers.......I deal in decal making, and sometimes it's hard to get colors right. I feel good when I get'em close great looking progress on her...looks super nice I hear Chuck sells some decent thread/rope....his link is on the forum page .
-
hello Bill........sorry it's taken me so long to reply. sounds to me like your giving up......here are some points to think about. the kit is detailed.......and you've provided quite a few of the details that define the vessel. if I look at her quickly, my first thought would be of the Andrea Gail....so you've captured the essence of the vessel. the vessel also shows that you've put a lot of effort into it....and to me, that means more than if you had done a stellar job on her. what I see here, is that you chose a subject that was a little too complex for your experience. there are many smaller kits out there.......simpler and more standard....I suggest you continue, and try one of these kits. if your into Billing's kits, they even have a few that are beginner level. I hope your going to display her..you actually did very well on her, in spite of the problem you encountered. you could even try plastic kits. don't give up the ship my friend.....I hope you continue
-
I built one when I was in my teens.......looks like your off to a great start looking forward in seeing more progress.
- 9 replies
-
- 2
-
-
- constitution
- model shipways
- (and 1 more)
-
2 cool for words KP! this belongs on the 'what if' forum I've started to collect the vehicles...I have Burt ward's and Michael Keaton's batmobiles so far. very well thought up and executed
-
they are the capstan bars........can be painted wood brown. the capstan is shown on the spar deck, but information contained in other build logs suggest that there is a gun deck level capstan as well. should you choose to make one, there are 'how to's' in them as well. another thing to mention is that they show the pumps at the bow {beak grating}. they do not belong there......they can be relocated on the gun deck. either one of these build logs will have information and additional stuff for you: I did the older production kit........updated kits may have changed or omitted this. I hope this helps you
- 106 replies
-
- 2
-
-
- constitution
- revell
- (and 2 more)
-
they all look like bent children when we first start out......as long as you have the contour of the hull, you've half the battle won
-
now....that is just too cool Bob! will the spar deck drop down to that level {what am I saying......of course it will........it's a Schooner!} that's a prominent feature of these vessels
- 682 replies
-
- 3
-
-
- halifax
- lumberyard
- (and 1 more)
-
clear cello and a sharpened brass tube the same diameter? nawwwww.....now I'm getting silly
- 295 replies
-
- 5
-
-
- amatsukaze
- halinski
- (and 2 more)
-
ever notice what's on my computer screen when I post...........that screen stays on there for long periods of time as I build. I'm thinking of snapping a screen shot, to use as a desk top, so I'll feel more at home!
- 140 replies
-
- 4
-
-
- jolly roger
- lindberg
- (and 1 more)
-
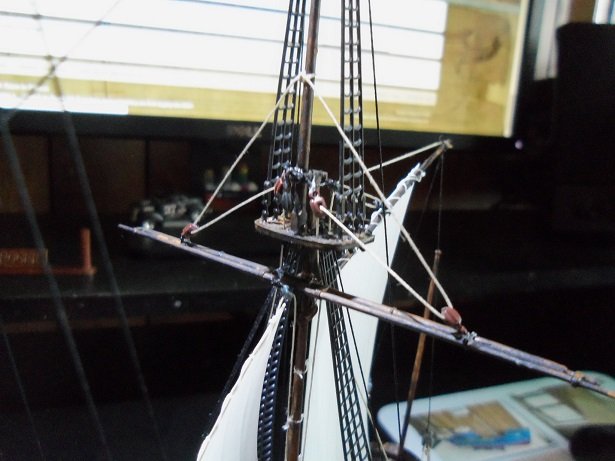
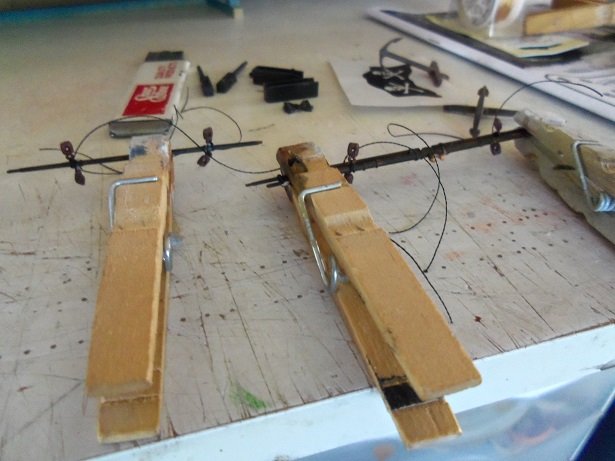
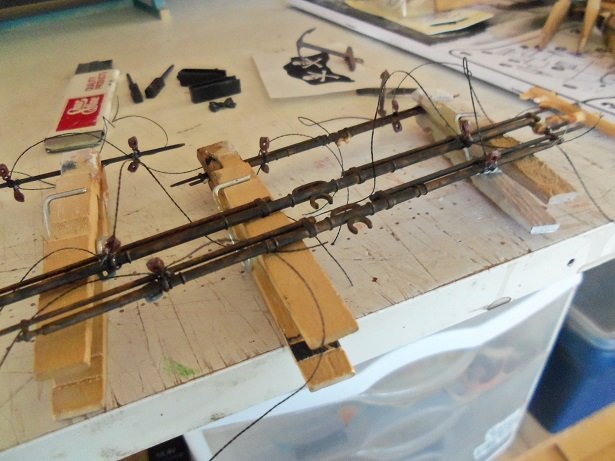
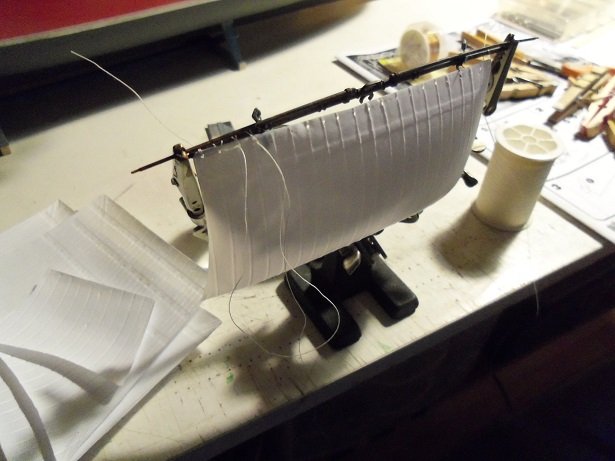
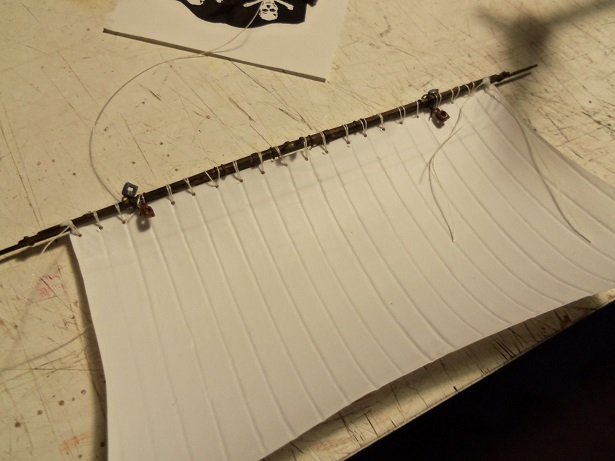
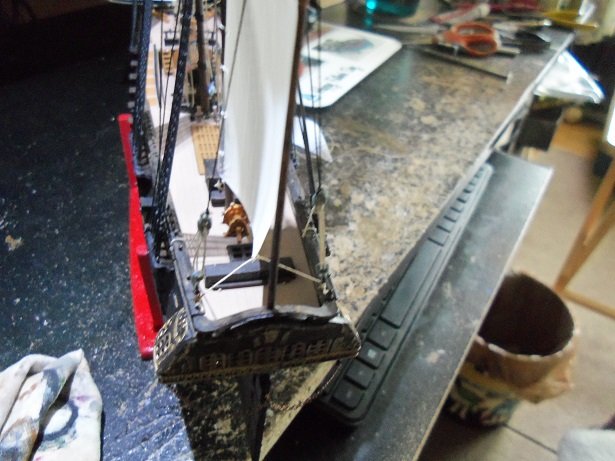
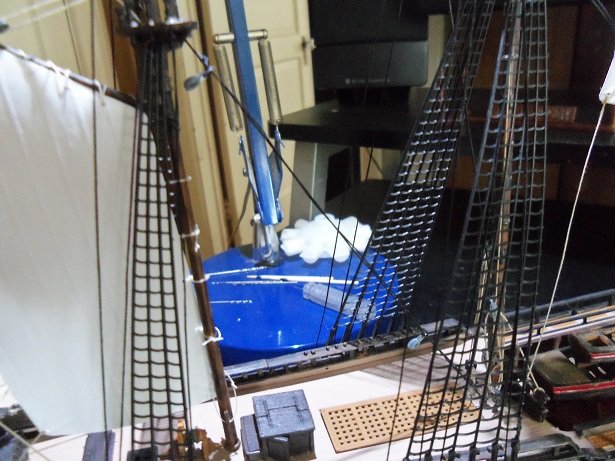
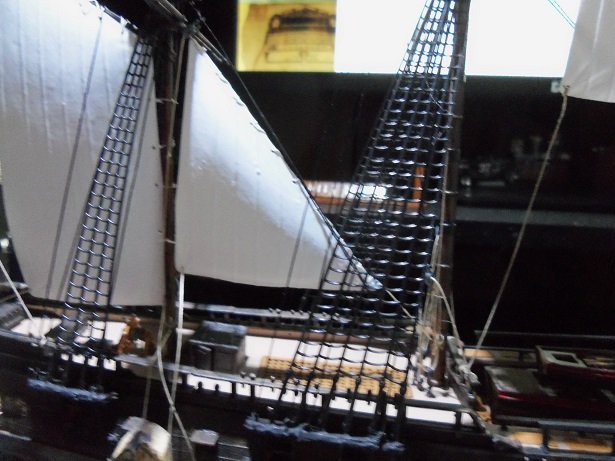
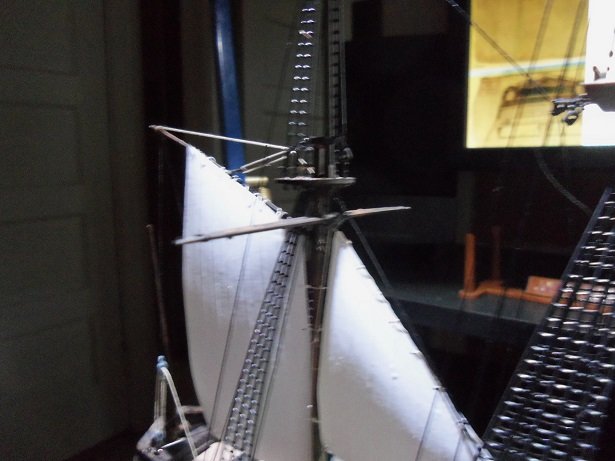
thanks Frank.........and to all who hit the like button there are seven sails to go.......the idea starts out with trying to speed things up a little. the process of sewing on the sails does take a bit of time. the day was also devoted to tying on all the blocks that will be needed to rig the yards. all I have left of the gray blocks are a few double blocks......I may be 1 shy, I'll have to tie them and see. having made the observation that the extra eye on the ones I already tied, will not be needed...I cut them all off. I believe this is where the phrase "you'll live to regret it" comes to mind, because now that I'm at this stage, examination the line routing is proving otherwise. so I will have to make do with what's here.........it's not as bad as it sounds though. as an example, I rigged the lifts for the lower mizzen yard, after tying on the single blocks for it. clothes pins will keep the lines taught until I get around to terminating them. blocks for the upper yards were tied on.......a pair for the lifts, and a pair for the sheet/clew lines. I put these two lines together for this model........should prove to be interesting. here is the top fore mast yard and the upper mizzen yard. these are just single blocks........the lower fore and main yards are done with a pair of double blocks, and a pair of single blocks. the double blocks are there......their just folded up under the yards........it's good that they are this flexible. they will conform to the rigging when done {this might be the thorn in the side of many a modeler}. sewing on the bow spirit sails was done by hand {naturally}......holding them and sewing them as I went along. I did the same for the upper mizzen sail......as mentioned.....time consuming {but then again.......so was tying on all the blocks}. I need to trim off the excess thread. in doing the lower fore mast yard....I started to do it by hand.....then I thought I'd try something different. I got out the 'helping hands' and set the yard up on it. well.......first it started out badly, having continued backwards {I had to remove four or five loops}. then it compounded with the loose thread getting hung up on all appendages sticking out on the 'hands'. coupled with the fireworks that was going on outside.......I was getting rather vexed. by the time it was done......I was fit to be tied >insert pun< I saw that perhaps the clew blocks could have been more to the center.......there's quite a gap there. I though of maybe tying on a couple more blocks, but then it would appear like a bunt or leech line, and I really don't want to go that far into it. so, it may stay like it is. note the double block on top, and single below.........the use of these block is far better than those stupid rings six more sails to go............not tonight though.......I left this, to something a little less tedious. the upper mizzen yard assembly was cemented in place. while it was still drying, the lifts and clew lines were rigged and weighted, to hold the yard in place as it totally cured it's an interesting set up.........the sheet/clew idea doesn't look too bad starting out as a sheet line, it's simply run through the corners to keep the sail in place...........then through the block as a clew line. the lower lifts, upper lifts, and upper clew lines need to be terminated at this point. I will do this tomorrow, as I tie the other yard assemblies. hopefully, I can get them all done, so I can do the fore mast...........tall order?

- 140 replies
-
- 15
-
-
- jolly roger
- lindberg
- (and 1 more)
-
that's quite a collection you have there........boggles the mind to hear you have more not shown don't feel bad though.........there are other folks out there that devote their cellars to their collection I {on the other hand} tend to partially build 'em and then hold them in que.......one of these days I will get caught up.....I swear! I'm sure that someone will be interested here........you have some really neat subjects.......you have good taste
-
the difference in the deck alone is something to admire.......hard to remove all that molded crap! you've really made some superb progress since I last looked in I wish I had your weathering abilities.........just green with envy. very nicely done!
-
I dunno.......I think the snake is rather cool, although I'm not sure if Bounty had it or not. the ratlines look really good......but I think they might be too far apart. I hate to see you get too far ahead, and then find this out. perhaps someone can confirm this. I waste more thread.........fat fingers can be a curse
- 291 replies
-
- 1
-
-
- bounty
- billing boats
- (and 1 more)
-
the hull looks great
-
that's a quality shine Grant........really nice R/C set up too!
- 339 replies
-
- 6
-
-
- dumas
- Chris-Craft
- (and 3 more)
-
nice color for the decking......it looks awesome! really nice progress
- 192 replies
-
- 3
-
-
- sovereign of the seas
- sergal
- (and 1 more)
-
great progress Jerry she's look'in super nice! we all have our ways in attaching sails.......we do what is comfortable and easier.........there's no wrong way in that amazing how quickly you moved through this build........very well done!
-
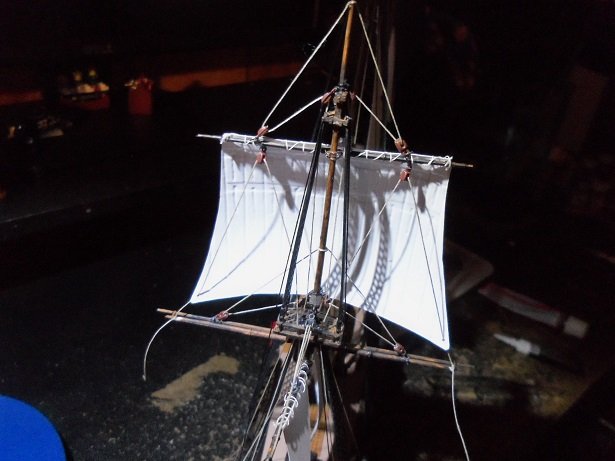
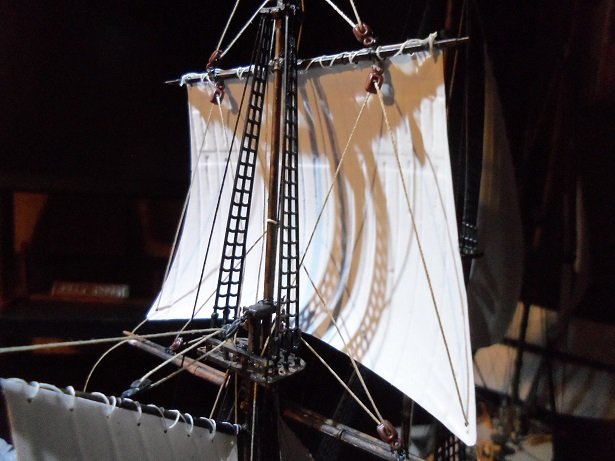
sorry about the late reply gents.......I wrote this the other night and forgot to post it I should know better than to visit during the work week, as I am usually quite tired and tend to fall asleep at the computer. the admiral ends up herding me into the living room, where I'll end up sleeping on the couch. I hope to retire someday 7-2-2017 thanks Piet.......with the large scale Revell kits I've done in the past....I've had the chance to try things out. some of the running rigging can be done somewhat limp, and will have hardly any impact on the rest of the rigging thanks Patrick........Gibbs is hardly an issue........I do my best not to drop anything on the floor the trawler is 1:30......I think.....the Jolly Rogers is 1:130........yepper, big difference! I have a large living room.......that's where I put up the big shelving that I photo'd the group. I'm thinking of moving them around to try and add another shelf. then again, there's no complaints about me putting up another one thanks for the kind word! I do have a few pictures in the camera still..........the spanker have the sheet lines and the vangs now. I've also done the mizzen stay sail. next will be the rest of the sails......then I can do the lifts and braces. thanks to all who hit the like button 7-4-2017 I love this new feature in the reply submission.......without it, all that I had written would have been lost. it brings it up and gives you the option to keep it or delete it....perfect for guys like me! hi there Frank! I can't believe I'm working with plastic sails either they're just right for this model though....it's the rigging that I'm focusing on. I'm trying to incorporate the way it's supposed to be done, as opposed to how it's done with plastic kits. there is so much that is left out........for anyone to add any into their builds, will enhance the model quite a bit! one oversight I did was to rig blocks with a eye bolt on both ends.......with the way I see the lifts running, the extra eye will not be needed. no biggie.....I can simply trim them off. I also forgot to add them for the lower mizzen yard......but that's not a big problem either. I'm almost out of the gray blocks.......I will have to use some of the brown blocks for the yards.....I have no more single blocks in gray. you might say I wasted four of them......adding them to the backs of the fore and main tops, but I'm not going to remove them, since they seem to add a tiny bit more detail. I finally got the pictures out of the camera too. here's where the model is so far.........the vangs and sheet lines for the spanker sail. then the mizzen stay sail...... then the lower mizzen yard.........I forgot to add the blocks I'll see how much 'yard' work I can get done today
- 140 replies
-
- 9
-
-
- jolly roger
- lindberg
- (and 1 more)
-
as I mentioned a while ago......it was good that you didn't use the Billing supplied parts for the chain plate. I still have a good inventory of those flat pieces, and I continue to use them for other things she's looking great..love what you did for the chains........really nice progress as well I built a Guillow's Piper Cub as my very first, when I was in school.......there's a rather funny story that goes long with it. I had a great teacher {literally!} though it only had a 12 inch wingspan, it's would be a mosquito compared to what your future holds for you.........I am green with envy! I'll look forward to the start of that build
- 291 replies
-
- 1
-
-
- bounty
- billing boats
- (and 1 more)
-
some wicked nice progress going on here Danny....the props, stand, and the structure look great! very neat and clean
- 295 replies
-
- 3
-
-
- amatsukaze
- halinski
- (and 2 more)
-
really sweet progress Bob.......nicely done on the furnishings
- 682 replies
-
- 4
-
-
- halifax
- lumberyard
- (and 1 more)
-
looking good KP it takes the sheer beauty of the sails to bring them around that's what I love most about this Revell series, they build to really nice looking models.