popeye the sailor
-
Posts
16,007 -
Joined
-
Last visited
Content Type
Profiles
Forums
Gallery
Events
Everything posted by popeye the sailor
-
 with something that ornate Mark.....I'd glaze all three. as you were narrating earlier, I had the thought of simply looking at her from the stern and gauging the hull lines......that would give you an idea of how much they jut out. I see you already did that well played orange
 -
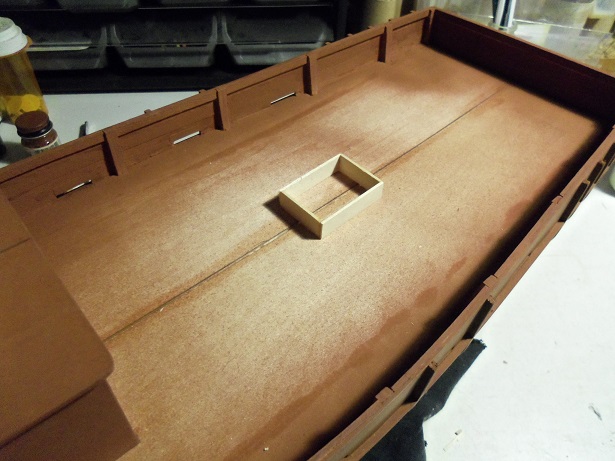
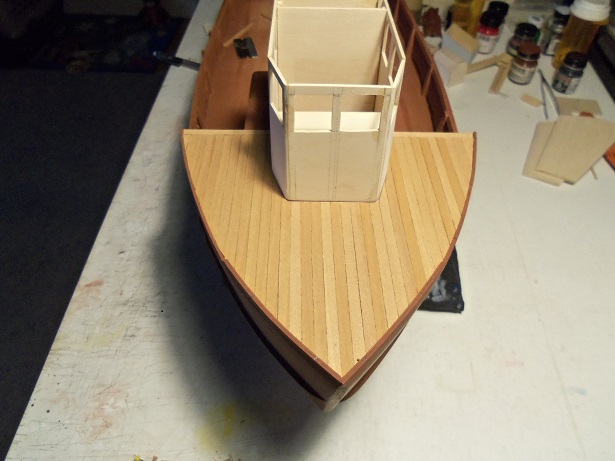
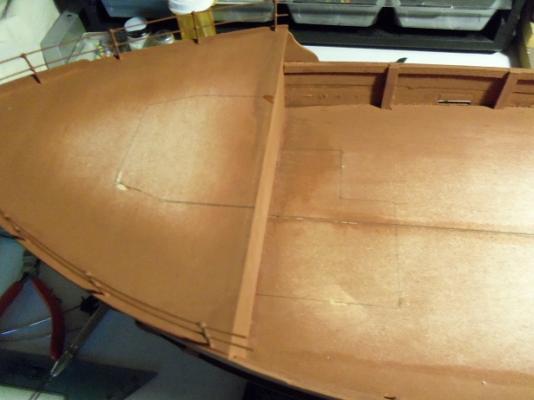
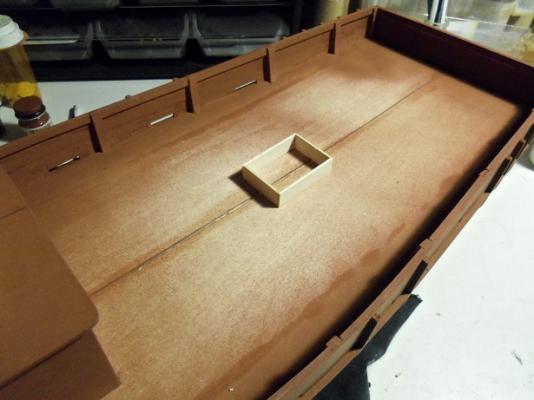
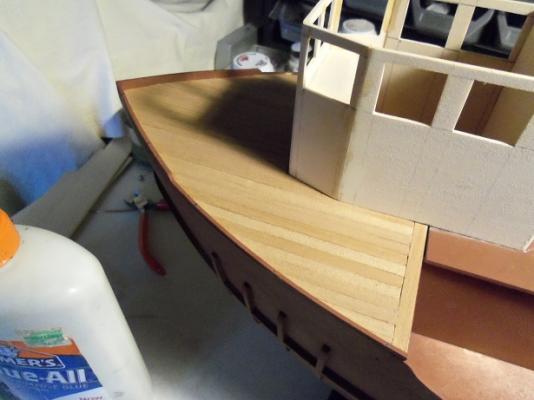
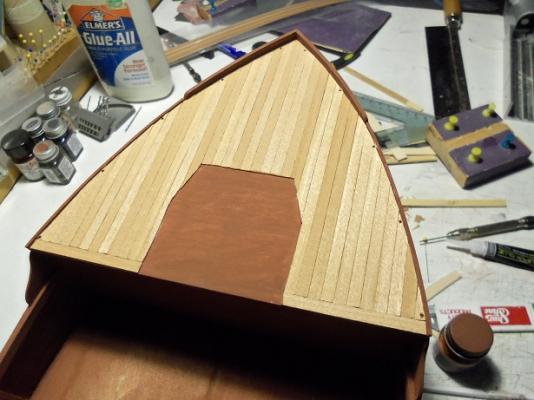
I did the first step with the deck treatment today, but I needed to get to that point first. I began with the fore deck, cleaning up the helm room.......squaring the windows and sanding. I want to cement the two structures together, but I had to mark the decks where these structures are located. now I have the tracing done........cement away! while I was at it, I fleshed out the hold for the main deck. it will be sanded and primed later on. now...to plank the fore deck. it didn't take me too long to do it.....I didn't do any calking or butt staggers. with what I'm going to do, I won't need to because there is a very good chance that it will never be seen. the fore deck is done. I haven't gotten around to paint the helm room yet.......I should have for this next photo. I had to find and re drill all the holes for the railings.........clearly, I have assembled them too soon. with the primer that I had decanted earlier, I painted the unplanked area where the helm room is to be located. the rest of the dash was added to the helm room.......a hole was pre drilled for the ship's wheel. I took it to the porch to paint it with the primer......and that blasted can of primer wouldn't spray! I couldn't get it unplugged, so I'll end up decanting the rest of it........in the meantime, I brush painted it. the fore deck will be lightly sanded at this point in time. it came out pretty good........almost too good for what I'm about to do. here goes nothing

-
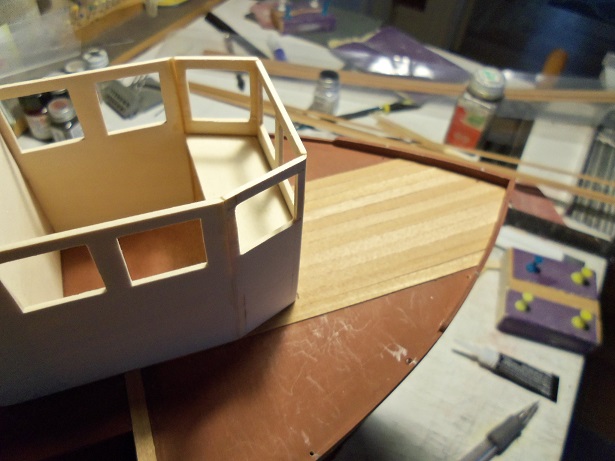
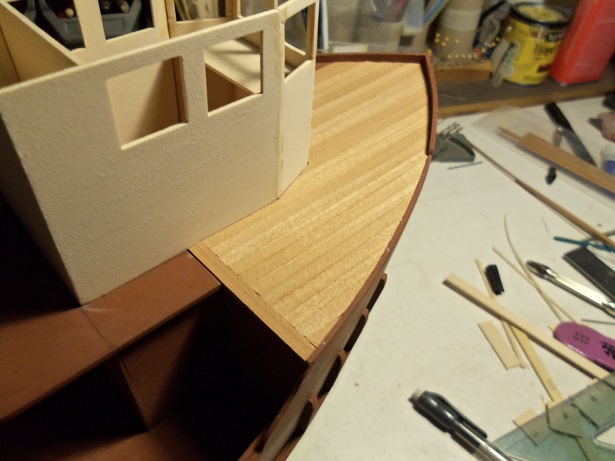
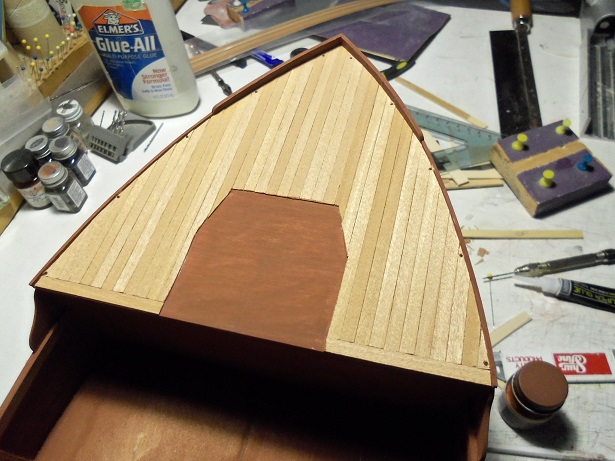
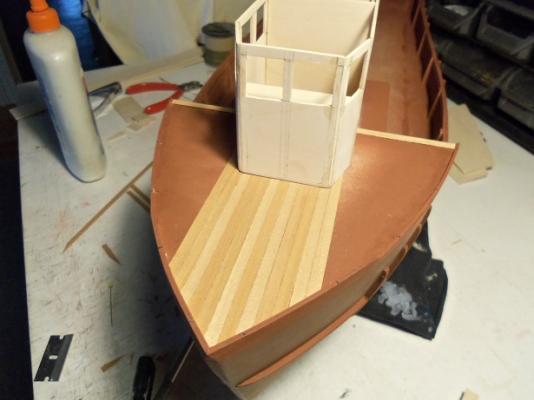
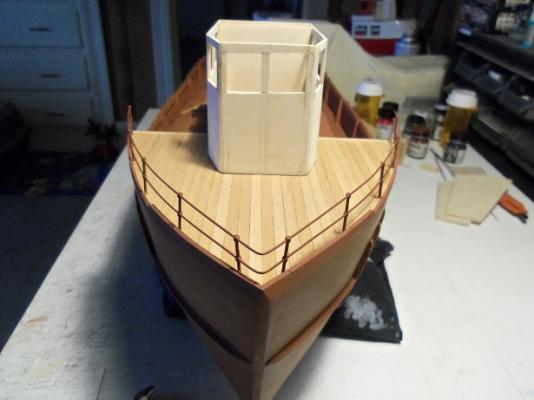
thank you all very much! thanks also for all the likes thanks Mobbsie.........I do have to be careful. if I keep going like that, I might as well put my plan B into motion, and let this one leave the fold like the Andrea Gail did. actually, it's not a bad idea.......a lot of the thoughts I've been having takes this ship away from the holiday theme. I'm beginning to think that I can't domesticate the wild thanks Bob...that a heck of a nice compliment for this northeastern landlubber thanks John and Lawrence......I guess there is beauty in the simpler things. I wanted to give it a bit more shape, but at the same time, I didn't want it to eat up too much of the fore deck. there is more to add......there always is.......I've filled in the edges and need to sand it a bit more. I also want to add 'deck texture'........you'll be seeing this very soon
-
Patrick.......those last few pictures say it all.........a truly splendid vessel indeed! so cool to see this project grow to what she looks like now.....you've done a great job!
-
Cutty Sark by NenadM
popeye the sailor replied to NenadM's topic in - Build logs for subjects built 1851 - 1900
sweet work on the compass.....another bit of detail for the layout!- 4,152 replies
-
- 5
-

-
- cutty sark
- tehnodidakta
- (and 1 more)
-
I think the best thing to do is get an idea of what class of vessel it will be...then look up the type of rigging for that particular vessel. the basic rigging for that vessel, will give you the ideas to modify it to your vessel. whatever sheet you plan to raise will need the rigging for it's function. you may elect to run a second fore stay.........lash your jib sails to them. I love your configuration....very unique! well done
-
the trick is though..........to get one finished there's no time limit.........go at your own speed. you done some really sweet looking gems in the past.......I see no reason why this one will be any less I look forward in seeing more progress on her.
-
.......oh, that......you have me confused. I was commenting on someone else's build. perhaps one of these days I'll get up the nerve to build a vessel that large. for now though, I'm content with the projects I have going.........I have several here. this hobby is so addictive.......when I first started, it got my mind going in so many directions....it was insane! so far, I've been able to move around my builds, doing a little here and a little there. I hope to see this build finished with no hands jumping ship I wish you well
-
there's a lot to consider when modifying a plastic kit in this manner. I had a dickens of a time setting up the wood decks for my United States....but now that I've done it, I'm quite happy with it. I've built this kit before {many years ago}. of course, I've never been a fan of how these deck sections go together. you've got a good idea going.........keep at it my friend, you'll find the solution
- 601 replies
-
- 4
-
-
- constitution
- revell
- (and 1 more)
-
Agree with everyone else Jesse........sealed and painted, the barrels will have the smoothness of brass. great job.........your doing well in spite of how you feel........strength and determination I hope you feel better soon. totally impressed
- 1,306 replies
-
- 9
-
-
- syren
- model shipways
- (and 1 more)
-
well.....you want to correct some of it.......after all, your teaching them something that will last them a lifetime I applaud what you and your crew are doing.......I think its wonderful......and your coming out with a great build to boot! wish I could have done this with my two boys.......sadly, the interest wasn't there. I'm enjoying the build.......be proud of your ship mates
-
she looks awesome with her standing rigging! she fitting out nicely have a great vacation
- 1,616 replies
-
- 6
-
-
- caldercraft
- agamemnon
- (and 1 more)
-
it is as it is with everything else.......you may order the timber to build the house, but you'll always find yourself at the yard buying more your choice of color is super.......images you may find will show them with many different schemes. I do it a lot myself.......jumping around building the sub-assemblies...in the end, it will all come together. when that happens, you'll feel good.......you'll see how much progress you've made {in a very short amount of time}. your doing a fine job!
- 250 replies
-
- 5
-
-
- willie l bennett
- model shipways
- (and 1 more)
-
she's looking great. I'll have a my hands full trying to get mine to look as good as yours.....when I get 'round to building her
-
well done!
-
very interesting........I was under the impression that she had a steel hull. I used to watch his show as a youngster......as well as the mutual of Omaha 'wild Kingdom. the model still looks great after all this time nice
-
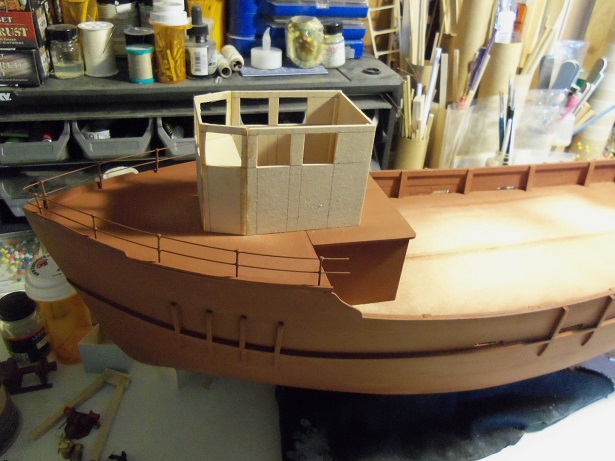
thanks for the kind comments and the likes. I'm going to partition the back section off.......I'll put in some round portholes {I need to see how many I have left}. there more to be added to the structures.......first, to get them cemented together. I will keep them removable for the time being. I thought of that as a funny answer Carl........you beat me to the punch
-
Nawwwwww, I takes me spinach'k raw! Akk-k-k-k-k-k---k-k--k! so you know about the garlic? my whiffle hen died I've seen these in kit form........but a scratch built one will be even more interesting!
-
I was going to write a scenario such as that! figured I'd better quit while I was ahead yes.....there are many factions of elves.......woodland elves, etc.........I would imagine that there was a community that lived near water. "Sheloi !" {elven greeting}........you are one imaginative Tellor {human} !
- 10 replies
-
- 4
-
-
- kalavente
- prayer ship
- (and 2 more)
-
I think it's like a mission ship.......or perhaps a ferry {imagination and dream inserted}. I've played a few roll player games that involved elven lore....kinda contradicts the dictionary description.......but anyone who has played the game Divine Divinity....the game defines them as a race. as depicted, elves are mischievous......such as the fabled Loki. I'm sure Keith has a concept going I like your use of shapes here Keith........well blended together with the use of angles. the deck layout is very unique. really looks super!
- 10 replies
-
- 3
-
-
- kalavente
- prayer ship
- (and 2 more)
-
looks like a really neat project gun carriages shaping up to look really cool. I'll pull up a chair as well
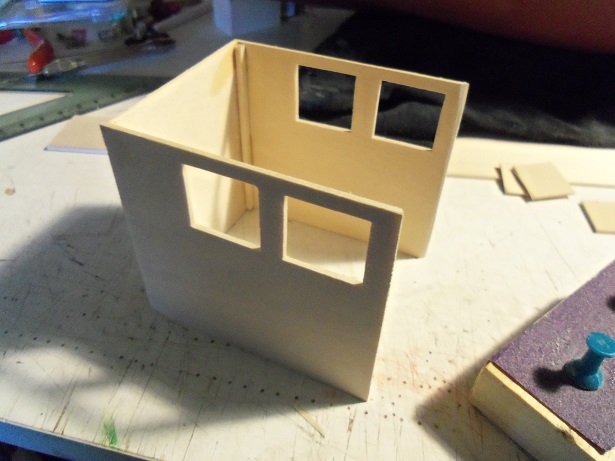
-
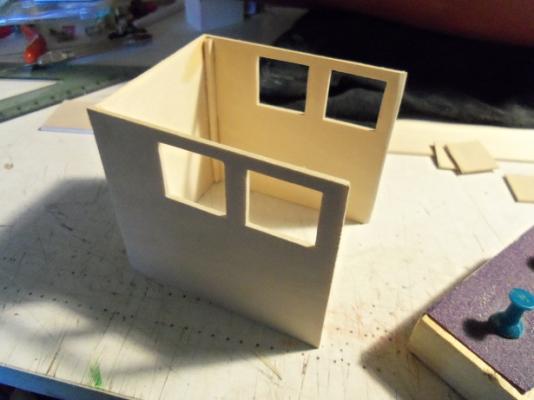
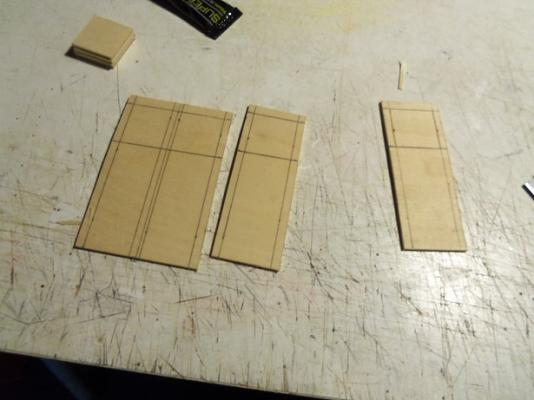
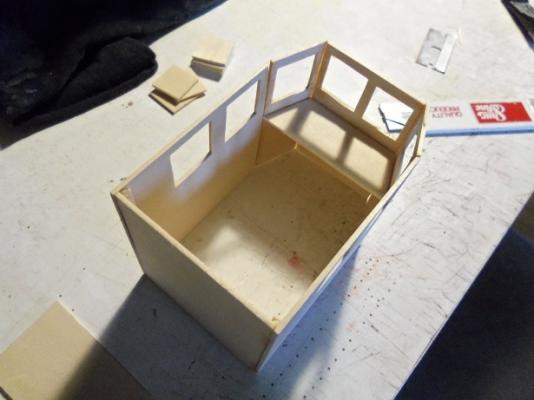
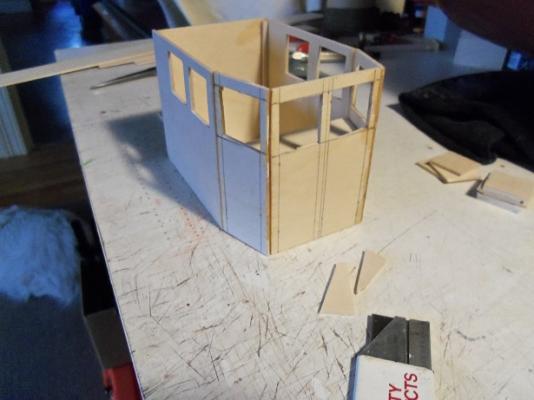
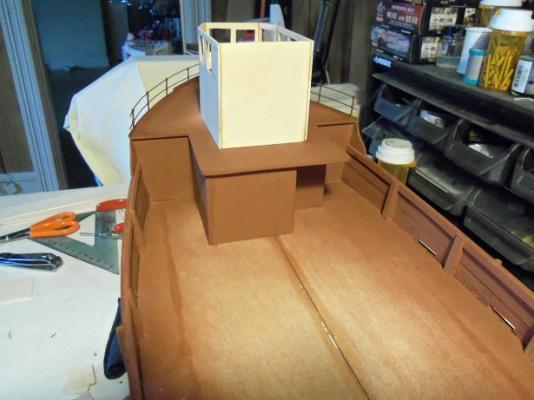
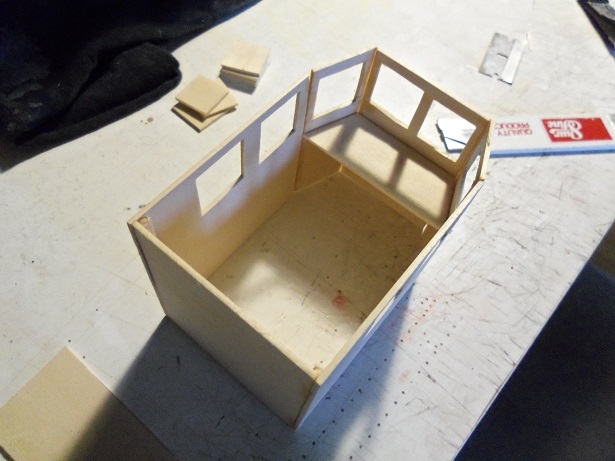
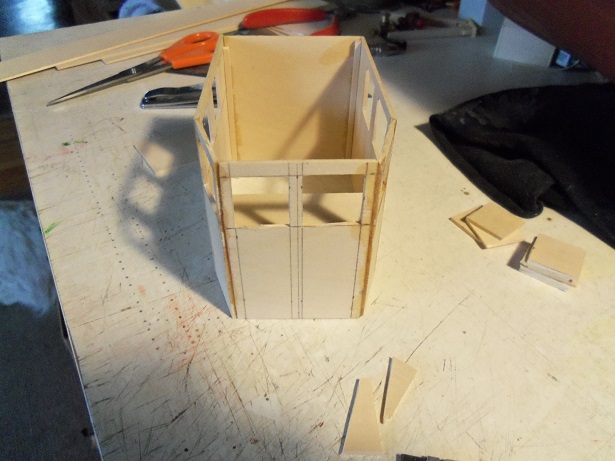
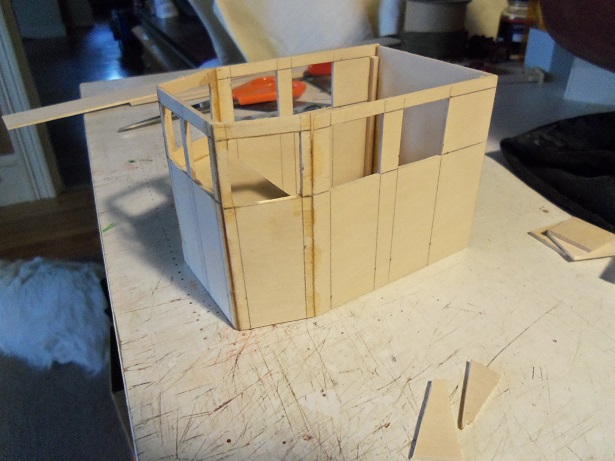
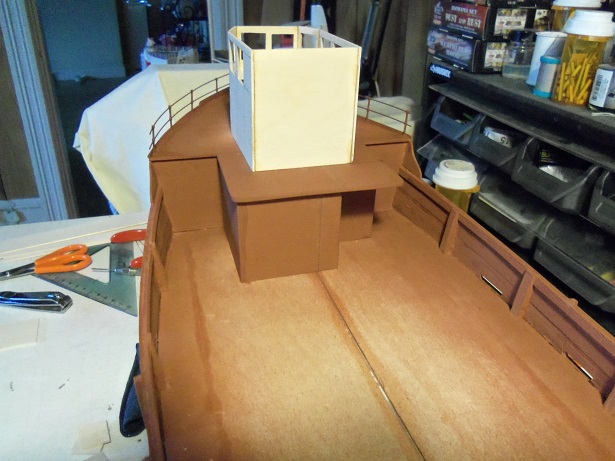
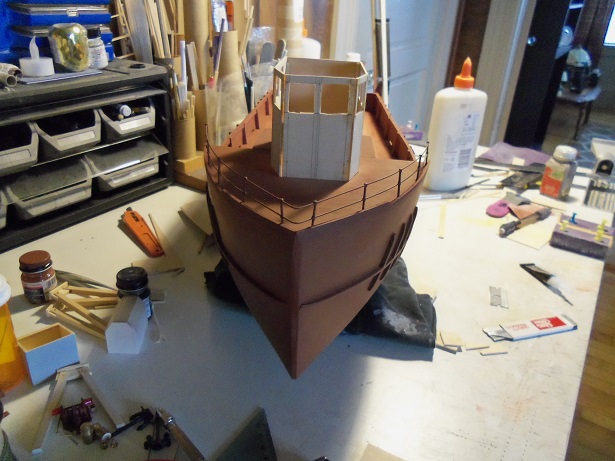
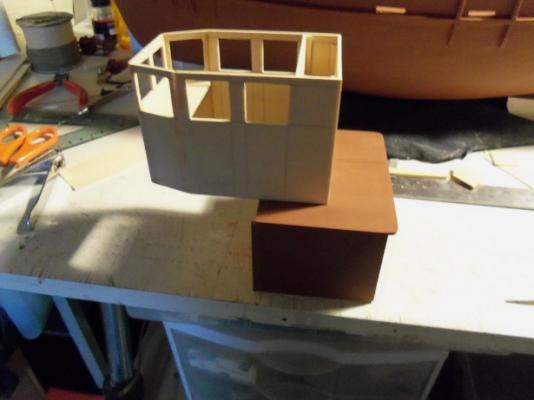
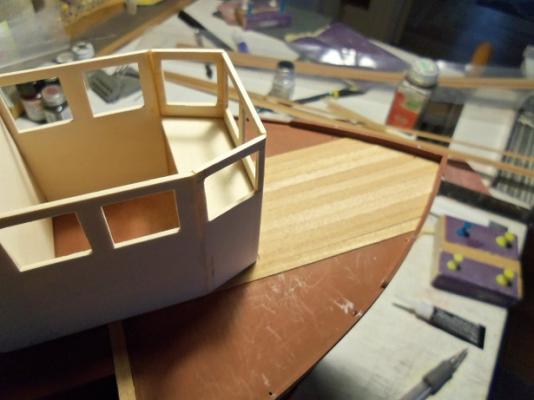
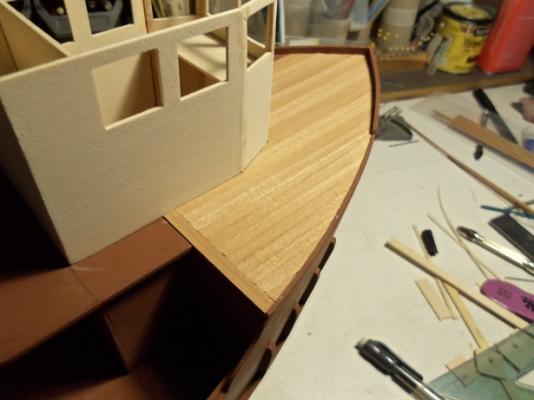
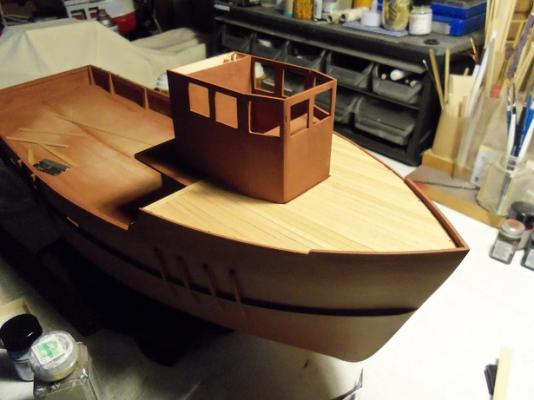
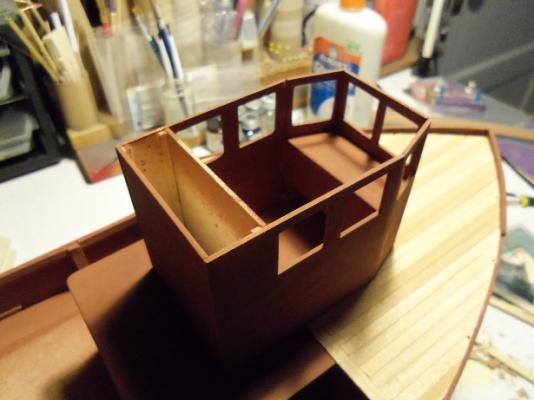
speaking of an update........ I was racking my head, trying to come up with a unique helm room for this boat. I wanted to give it the same shape as the lower structure, but in my head, it just didn't look right. so I went a little taller....2 3/4, as opposed to the 2 1/4 I did with the lower structure, and I traced out the windows. it was cemented together, making sure it was square. then the front parts were cut and traced out for windows as well. seeing the way the grain was running, I knew I was going to have problems........and I did. the window frames broke a couple of times.....and I fixed them, not wanting to waste the wood, or make new parts. it was even a bigger hassle trying to cement the front walls to the rest of the helm room. but I did it. positioned on the deck, I ran a few thoughts through my head. now that I have the structures assembled, I can trace them out on the decks and set into motion, the idea that's been bouncing around in my mind. I really should get some cap rails on there too. the inner bulwarks and the bottom paint is going to be the red primer.......the rest of the scheme is soon to follow. it will look better, once I smooth out the rough spots and get some paint on it.