


popeye the sailor
-
Posts
16,007 -
Joined
-
Last visited
Content Type
Profiles
Forums
Gallery
Events
Everything posted by popeye the sailor
-
 nice progress John........love the staggered planking gonna be a real sweet hull!
 -
what color green did you use Piet? looks to be the same color. want an even bigger laugh..........the bottom is to be hull red before I get to that though, I need to modify the shoe......which means I have to alter the size of the rudder I made. thanks for the good word thanks Patrick........it would have been better to touch it up right away. now it has had time to dry. shouldn't be too much of a problem though. thanks for the good word......darn thing amazes me as well
- 956 replies
-
- 2
-

-
- andrea gail
- trawler
- (and 1 more)
-
I think you covered it quite nicely Sherry! very well done tutorial!
-
thanks for all the nice comments....my goodness, I'm speechless! the best compliment that a modeler can get, is when the model takes on a life of it's own. I'm glad I decided to do it now......than to keep it on the back burner for as long , as I already have. I'm glad the your all enjoying the build, as much as I am I read your recent post Carl.......I am glad to have made you smile. your well being is just as important....I do hope that you'll be able to fins some time for yourself. the whole color thing was spontaneous.......didn't leave much time for prep. it's what the instructions called for....Emerald Green.......a very nice Irish color! March...........and even......spring! that's a good idea Michael..........you so busy with your engine.......and you took the time to think up something for me ...you are just TOO kind! of course, I might have to take the rubber legs off, so there will be more vibrato...I'll have to try it! no worries Augie......as mentioned, I have four other airbrushes I should do a thread and show them......I'm sure there are others that have a favorite. the green is only the beginning thanks for the good word! thanks Marty.......if I thought to do it right away......I could have used thinner on a Q-tip, to remove most of it, and later touched it up with the white primer. I haven't decanted any yet......need to do that. thanks for the good word. it's OK mobbsie.......I have it all down to a science my only draw-back so far, is I catch up with my browsings.....only to look in the next to be buried again! you folks are VERY busy builders I wouldn't have it any other way! I had a five day weekend.....I tried to do an update for all five day....and I failed on Friday I'm getting back up to speed.......but I wish I was where I was at...like I once was. thanks for the good word hello Michel......welcome to the Wharf! always glad to see new folks.......thanks for the good word! I don't know about Greenpeace Sjors........but yepper.......she's green. hope to get more paint on her soon! thanks my friend! thanks Aldo.........still a ways to go yet, so there's still plenty to see. glad to see your following along.....hope things are going well with you.
- 956 replies
-
- 7
-
-
- andrea gail
- trawler
- (and 1 more)
-
thank you George! now it don't look like an old time movie ! that is a funny thing about paints Michael.........I have.....or had if I used them up already, a bunch of older Testor's paints, from when I had stopped modeling at one time. when I got back into it.....I found that most of them were OK. I like the Humbrol and Floquil paints...if I remember right, they had the numbers and descriptive names for the colors on the caps {humbrol did....can't remember what floquil had}. I even had some of the old Pactra paints {another good enamel in my book}. I needed some yellow at one time......bought some at Michael's craft store {not my normal haunt, but it closer to my house}. went to use it and found that it had skinned over! I took the skin off and added some thinner.......I was able to save what there was of it. to me......it really doesn't matter if it has a plastic or a metal cap, the 1/2 and 1/4 oz bottles, can be a bit of a crap shoot. these smaller bottles are more convenient for me....the 1/4 oz bottle works well with the Testor's E-Z airbrush outfit...the caps screw onto the bottles. Humbrol, floquil, and the Pactra bottles can also be used. are you paints in the 1/2 pint cans with the wide mouth lids? better seal in my view........more of a plus for paint thanks for the good word. I still have that third bottle on my desk......and I'm still shaking it. I wish they had a automatic paint shaker for these little bottles.......I have quite a few of them to shake!
- 956 replies
-
- 1
-
-
- andrea gail
- trawler
- (and 1 more)
-
thanks Bob......I like the color too I have the third bottle on the desk at the moment.....whenever I get fidgety......I just pick up the bottle and shake it I was looking through my Testor's paints.......I see that the #1124 Green, is very close to the Billing's Emerald Green BB#3. I will need to do a couple splotches to be sure........I'm sure that the Testor's color is in my paint shop spectrum. if it is, then I'll have very little trouble making the decals I need. white lettering {white decal paper}.....changing the background to green. I made it through the burning hoop with just a slight singe........thank you my friend......I hope you like it as much as I do!
- 956 replies
-
- 2
-
-
- andrea gail
- trawler
- (and 1 more)
-
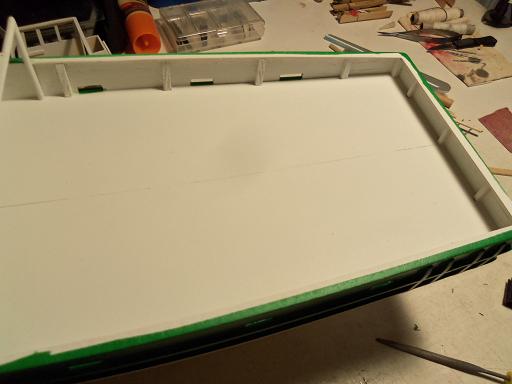
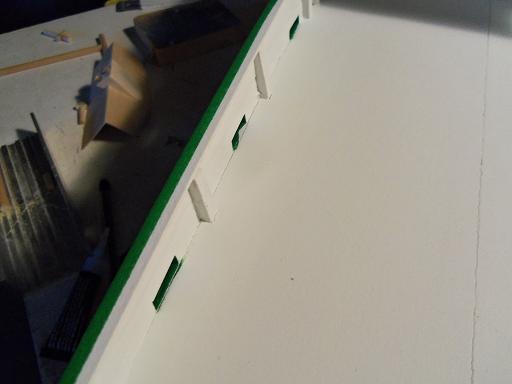
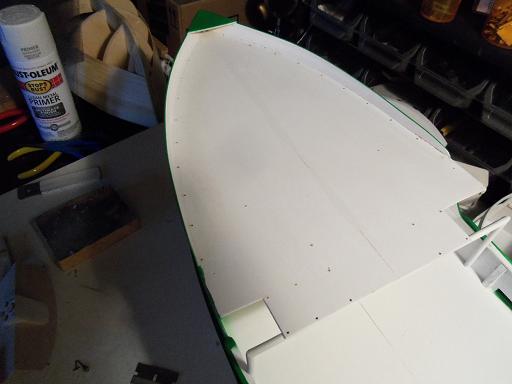
removing the upper area masking, I was surprised to see that there was so little over spray. I will need to see what the cap rail color is supposed to be.......I think it is Green, so I used it as a mask point. the main deck isn't too bad.......the scuppers will always be a sore spot........I can never get perfect paint in these areas. the fore deck needs a little touch up........but it fared rather well with the way I masked it here are the most critical areas.......under the fore deck. the starboard side did very well.....nothing here to speak of. but the port side didn't fare as well.......still, there's only a slight tinge, so it's not too bad. I'll need to decant some of the primer, to touch them up. really not too bad considering the task it took to mask it. one I can paint around the lower rub rail and establish the line........and get the rudder in place.......then I can do the bottom paint. then....with all that done......I can go no where else, but up! I'm smiling the hard part of the paint is over
- 956 replies
-
- 13
-
-
- andrea gail
- trawler
- (and 1 more)
-
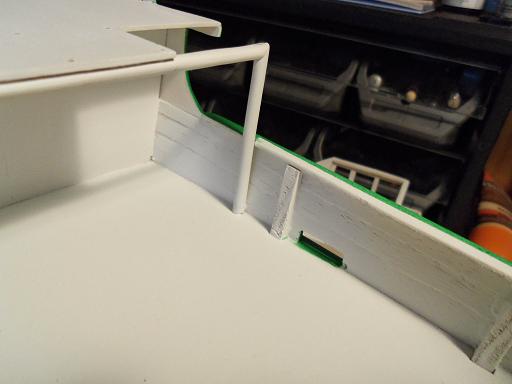
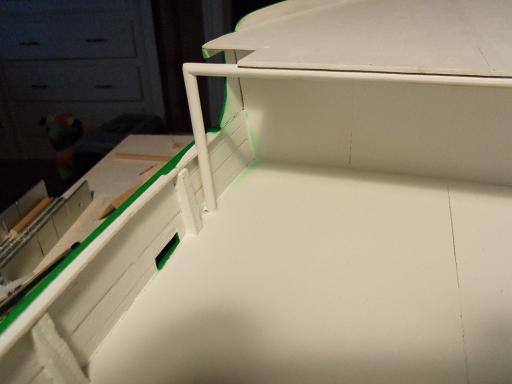
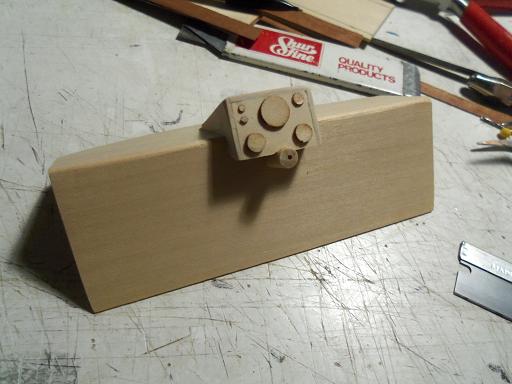
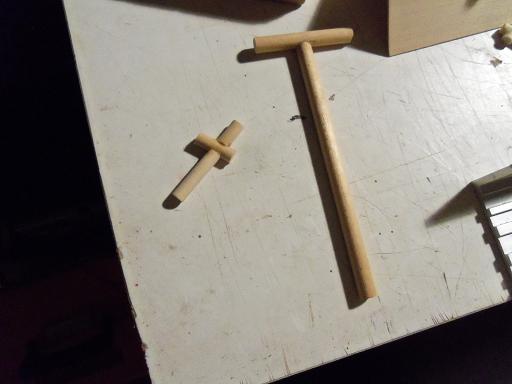
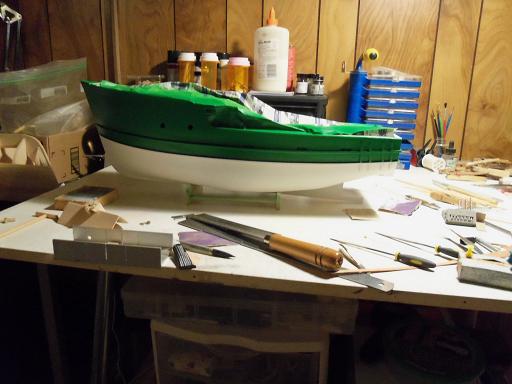
now that the roof is well under way, I thought I'd get the interior of the pilot house in order. I'm probably not going to do a lot in there........but I will throw something at it. going into the cast off piece bottle again, the dash was fitted with gauge bezels still thinking of what to add, I made up another sampson post........and what looks like another, much taller vent tube assembly, associated with the catch hold. while this was drying, I settled into a video game.........more thought about where to go next. then I snapped! normally, when I paint, I do it as I go along....I get a better separation of color that way. but, with the way this build came about, and was assembled, I wasn't able to do that. all I could think of, was "how in the heck am I going to mask her?" and.....keeping the deck area paint free. I have boxed myself into quite a corner here.......gonna take some creative taping to save my butt! it took a bit of effort, but I did it. no exhaust fan, and less than desirable temps........I'm going for it! let's just say that this spontaneous decision, shouldn't have been done with so little regard with what could go wrong. first was the airbrush..........the one I have relied on since 2010...the Testor's E-Z air siphon feed. I still say that it's not a bad airbrush for the money.......I bought the complete "Amazing Air kit" for something like $29.00.......and I've painted all of my builds since then, with very little trouble. I think the sad part about this airbrush, is it's mostly made of plastic, and can become badly worn over time. the heads of the plastic caps can become distorted and contributed most of the problems with the paint delivery. needless to say.......when I was done, I scalped what I could from it, and the rest went into the trash! I have another one, that I bought from the clearance rack at Hobby Lobby, that I can outfit and use with my compressor, as easy as I did with the first one. my other problem was the paint. if anyone has followed my exploits in the past, I had acquired a good supply of Billing's paints a while back. I still say that these paints are a good quality paint......goes on nice and has a really hard finish when dry. ones that I've opened so far, have been the more common paints, and have been OK. I have opened others though......you can clearly tell that they've been on the shelf too long.......long gelled and hard *useless*. such is the case for the paint I used here......I brought down two bottles, to the cellar paint room. the first one had a skin build - up around the neck {which I did use}.......the second one was completely dead I have one more bottle of this color in my inventory {I hope it's good} for all the trouble and frustration I encountered, the paint work didn't come out too bad. I checked that third bottle, and it is good.........I'll need it for touch ups I was going to start this update with an upbeat Irish motif because of the new color introduced.......if I would have done this last night....you would have experienced all sorts of blarney! so.....here is the new color added to the mix 'Emerald Green'. after some time, it was brought upstairs where it's warm. I was surprised to find only one small run, on the whole job........very insignificant with how everything went. the bottom hull section was masked around the lower rub rail......before the bottom paint is done, I will paint this area. there is no waterline on this vessel. I gave it more time to dry, before I removed the bottom masking. I was still curious about the deck area......I'll wait a bit longer to reveal it.


- 956 replies
-
- 16
-
-
- andrea gail
- trawler
- (and 1 more)
-
I'm pretty sure that it can be use over an oil stain.......that you may want to test first. it works very well on mineral stains {common household stains}............not sure about the oil based sealers though....again, that's probably best to test first. sure.....if you prefer the blonde look.....it can be used on the bare wood..........really makes the grain pop!
-
wonderful progress John.......nice work on the bow! I too had a problem with the hard paint dilemma......to complicate the matter further, an airbrush that wouldn't cooperate! trash pick up just hauled it away {guess what I did with it >evil grin<}.........good thing I have three or four other airbrushes I can use! nice work on the mast {s} as well..........your really cook'in now!
- 2,250 replies
-
- 1
-
-
- model shipways
- Charles W Morgan
- (and 1 more)
-
looking awesome Piet! love the stand!
- 176 replies
-
- 2
-
-
- muscongus bay lobster smack
- Midwest Products
- (and 1 more)
-
thanks Patrick....sometimes I do kick myself for not getting into that area of detail. I don't weather too much.....proof in the pudding would be my lobster boat......which I gotta get off my duff and get some gallery pictures up {it's been finished for a while now}. I have tried to do it........see it the next morning......think it's terrible, and then fix it. one of these days, I'll give it a go........but don't say I didn't warn you hey there Mr. Dangerous........I took this past Monday off, and I'm making an almost perfect attempt at doing something every day.....I'm on a five day week end there's an update for today...still need to get it up........and then cook up what I'll do today. the bad part is that I haven't done anything on my word press site........I am sooooo freak'in far behind! thanks for the good word!
- 956 replies
-
- 3
-
-
- andrea gail
- trawler
- (and 1 more)
-
I've been a mechanic most of my life...figure I've seen quite a bit. but I look at what your doing...and I'm totally amazed! nice!
-
there are folks who build models...........and those who model..........you are definitely the latter! beautiful work Nils! the WOW factor of this build , is WAYYYYYYYYYY over the top!
-
Cutty Sark by NenadM
popeye the sailor replied to NenadM's topic in - Build logs for subjects built 1851 - 1900
guess they don't paint under there Marc....... but.....you can see what type of rail support they had there gee Nenad........in your last picture, I was going to say that your table looks just like mine I see her now, and she looks great! well done on the rails.....when all the rigging is on them, you'll have captured the snippets and bit of detail, that the visiting tourist can only see through their shuttered eye. detail is a funny thing......one person can only see so much....another person see so much, but glances over what the other person saw....that's probably the biggest problem with 'layered detail'. some of the smallest detail can be overlooked. never think that it's a waste........even at this point in your build, you have added detail that even the model manufacturers, didn't even think to put into their kits! you are well on your way, in building one of the most 'comprehensive studies' of this vessel......your log runs deep with ideas and thoughts. now.......if Bob and Marc carries out what their plans are.......this site will have the benefit of having three highly detailed logs to follow! also......here is the 'scary part'.........you've done well so far, and you continue through the rest of the deck fitting........what do you think your rigging is going to look like? nothing short of spectacular......I can tell you that! great job Nenad!- 4,152 replies
-
- 3
-
-
- cutty sark
- tehnodidakta
- (and 1 more)
-
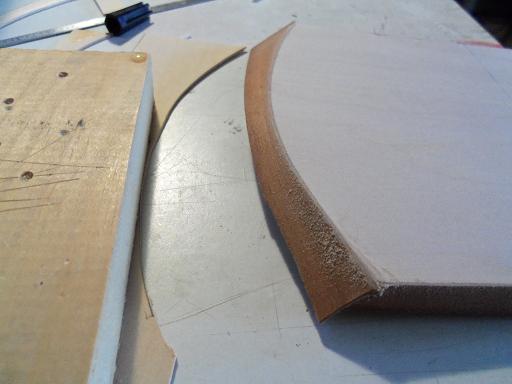
what a fine bunch of comments to read........very frustrating afternoon...........thank you very much. I showed the admiral the ice maker. I gotta stop doing that........now she'll NEVER let me buy the pre-fab stuff thanks Frank and Augie! a while ago, I mentioned that this build has the same feel, as when I did the M&M boat. the only difference here, is that I'm following some sort of instruction. rest assured though, that I'm not following them to the letter.......merely for reference to see what the parts look like. thanks Mark.......considering that the appliance you mentioned was made before my time.......the only conclusion I can come up with, is that I might have owned one in a past life, or I saw it at the dump! I sure as heck, didn't deduce it from the plans......that's for sure! thanks Michael.......it killed me...I'm usually pretty good with figuring this stuff out in my head. to get that slant, the arch of the curve actually changes......diminishes quite a bit. I guess it was a good thing, because the visor really needed to be thinner than 1/16, which is why I was using 1/32. the mahogany is 0.7 mm.........worked out even better! thanks Carl.......as I mentioned, don't hold me to that aft brim work on the roof.......I have another idea. there is enough room for the entrance, but I don't like it. what I have in mind will look better. the black 'n white thing is only for now........I think there is another color I can throw into the mix........soon as I can get the cellar set up........March is coming in January! thanks John and Nenad........the really good part is coming................. hello Marty! yea....you got me....I planned to do that to the vents. ....just a but of accent on the louvers......white into a dirty black background {shows depth}. doing all this........makes me think I should have bought the kit. nawwwww, now where would the fun be in that? glad to have you follow along.......it should start to get more interesting. thanks for the good word! there's another update tomorrow...just figured I'd warn ya ahead of time. ya may want ta practice yer jig!
- 956 replies
-
- 2
-
-
- andrea gail
- trawler
- (and 1 more)
-
WOW!!! Sjors.....looks like you had a lot of fum on your days off! time very well spent, my friend! she looks awesome!
- 1,616 replies
-
- 2
-
-
- caldercraft
- agamemnon
- (and 1 more)
-
if your looking for a good seal coat......I would suggest a lacquer. it come in gloss, semi gloss, and flat......I tend to use the semi gloss, since it soaks into the wood and becomes dull. it's also a nice hard finish as well. give it a try on a test piece.........I'm sure you'll like it saw your log on the right hand side of the forum page...........very nice work! I started a billing's kit right around when J started his. one of these days, I'll get back to it.......meanwhile, I'll have yours to enjoy! looking forward to it
-
thanks George........there are times when trying to make parts, requires a not so subtle approach. I get a lot of those thanks for the good word
- 956 replies
-
- 2
-
-
- andrea gail
- trawler
- (and 1 more)
-
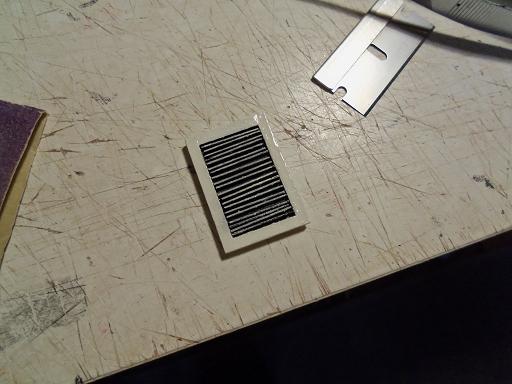
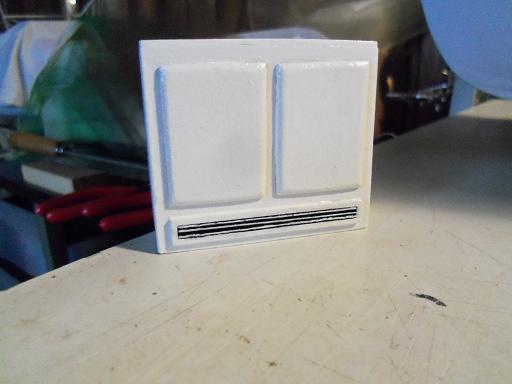
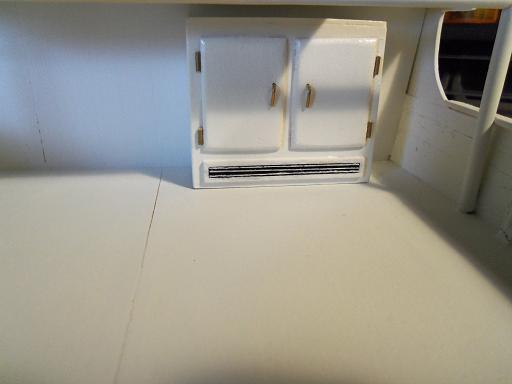
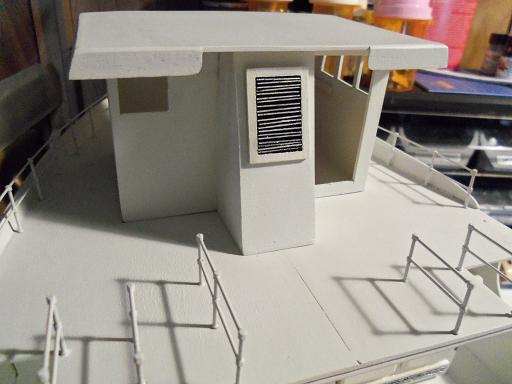
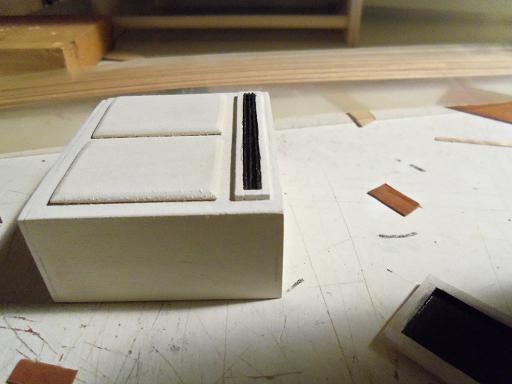
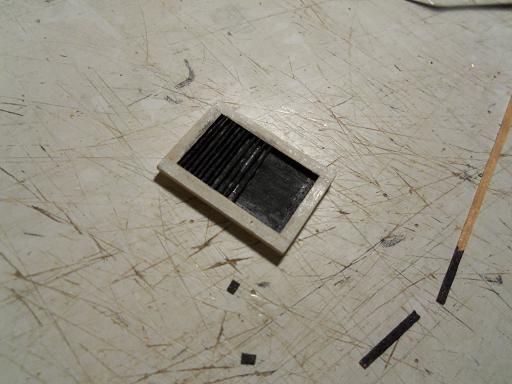
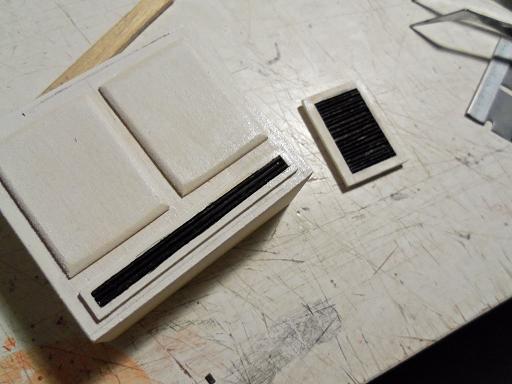
pulling out the white paint..........more white?!?!?! yes.....folks, I'm building a boat......in black 'n white! even the instructions are in black 'n white! could it be.........is this the reason why I'm going in circles with these colors? MAN!!!!! I gotta run out right now, and find a kit that has full color instructions! spoof'in's fun.....isn't it? why.......I do it all the time well, anyway.....the ice maker needed a second coat.......right along with the frame of the vent. I was real careful not to get any on the fins........and then it happened! crrrrraaaaapppp! hey....... ......that don't look too bad! I did the tips of the fins with a damp brush........and the rest is posterity. not much else to do with the vent........so I finished off the ice maker. the door handles and hinges are just bent brass rod {different sizes}. painting the heads of some 7 mm brads made for simulated bolts or screws.....whichever the mind prefers. the vent was put in place. ....and together, they exist......in perfect symbiosis {or as near as I can get them}
- 956 replies
-
- 17
-
-
- andrea gail
- trawler
- (and 1 more)
-
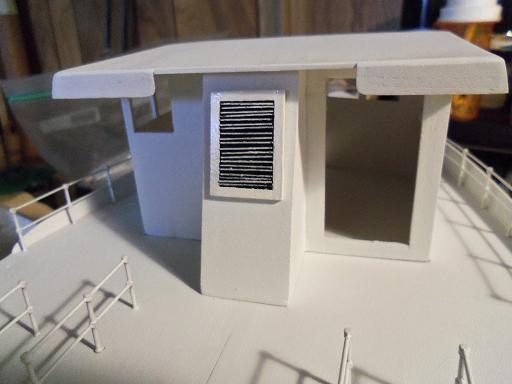
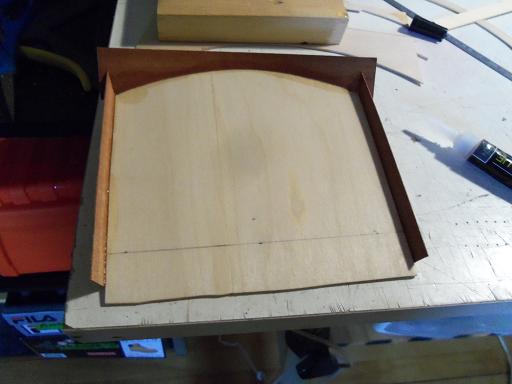
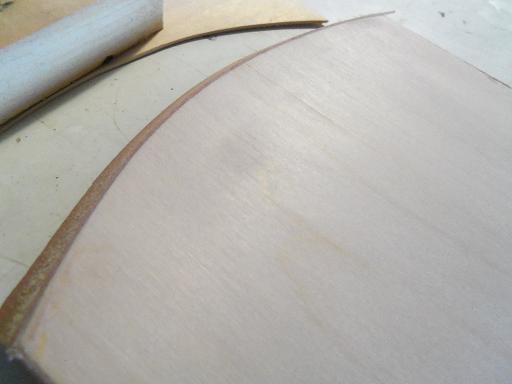
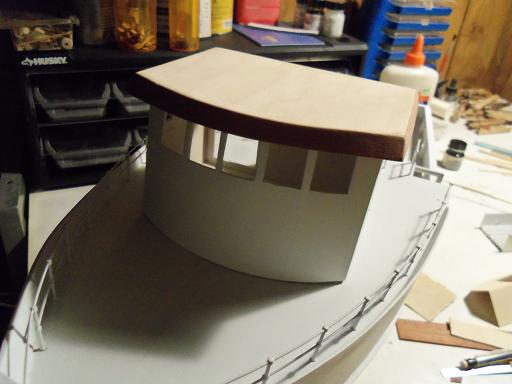
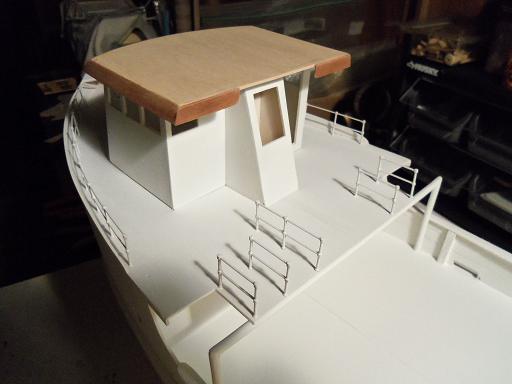
making the flat part of the roof was easy....... making the visor was another. the curved front was beveled to accentuate the slant....and then it started! I couldn't get the curve right, without causing the roof to curve along with it. I was using the last piece of 1/32 thick flat stock I had....ended up making that unusable in short order. luckily I have that pack of thin strip mahogany {25 mm wide}.......so I used it. at this point, I was pretty fed - up with trying to be pretty with it.......cut the width of the sides and roughed it out {wished I had three hands for it} once the glue had dried...to the point where it was holding well enough, the top part of the visor was trimmed flush with the roof. in between this foolishness, I had painted some 2 mm thin strip black, and began to make the fins for the grates in the ice maker and the vent. this was another trial of patience.......with putting as many fins in the space....and keeping the spacing even {I kinda lost that battle}. complicating the matter, is the fact that everything is black. I had to wait a few times for the glue to dry......I was using a long pin to adjust the fins. I'd hit the preceding one.........and that would put me back where I started. but I got them both done. I did a lot of adjustments and sanding to get the visor in shape. mahogany is not an easy wood to work with....especially at this thickness. still need to do a little more to the port side front corner. around the back, I wasn't too keen on leaving the corners open.....so I did this. I might change it though......I thought of something else. either way I go....there is enough roof overhang, where it won't hinder the entrance.
- 956 replies
-
- 14
-
-
- andrea gail
- trawler
- (and 1 more)
-
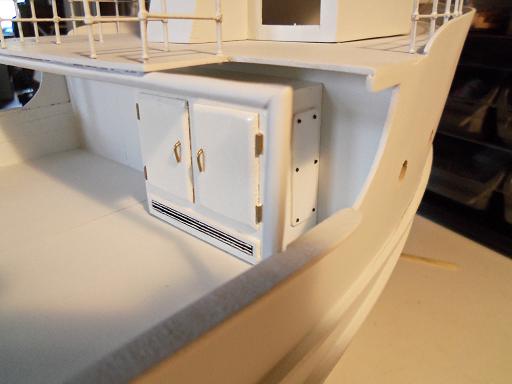
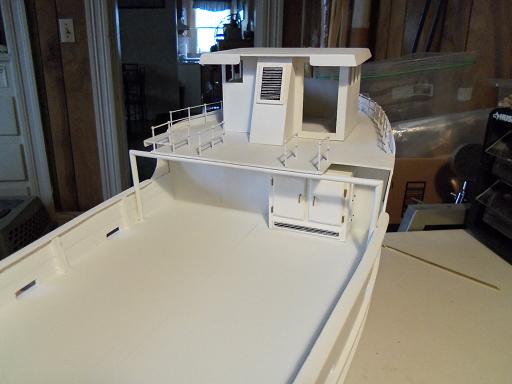
thank you all....so very much! I am a bit humbled......really appreciate the kind comments once a couple more key elements are done, then the deck work can begin, and things will start to show the complexity. it's a mind boggle, just to think of what to do next......going from one sub assembly......to the next. now to finish off some of them, and get them ready for the time they can be put in place permanently. thanks again for the good word and to those who hit the like button.........should be another update......very soon
- 956 replies
-
- 2
-
-
- andrea gail
- trawler
- (and 1 more)
-
looking very nice Bob....gonna look cool when it in place in the hull! nice work on the stove
-
it's still early Mark.........still time for that idea you haven't thought of yet, to come to the surface your planking now......you've come further than you did in V1..........that counts for a lot! very nice start