


popeye the sailor
-
Posts
16,007 -
Joined
-
Last visited
Content Type
Profiles
Forums
Gallery
Events
Everything posted by popeye the sailor
-
 looking pretty good to me John has a nice look to them.....
- 2,250 replies
-
- 1
-

-
- model shipways
- Charles W Morgan
- (and 1 more)
-
I think it's nice......there are a couple variations there.....in the picture, the first two show an inner bulwark wall. look at the third and fourth, and there are no Inner bulwark walls........you can see the ribbing. your last picture show that you've made openings in the inner walls.......what are they for?
-
Cutty Sark by NenadM
popeye the sailor replied to NenadM's topic in - Build logs for subjects built 1851 - 1900
so much to think about........I ran into somewhat of a dilemma with this on the Revell Cutty Sark as well. it's really good to see all this being brought to light enjoying your log Nenad- 4,152 replies
-
- 2
-
-
- cutty sark
- tehnodidakta
- (and 1 more)
-
WOW! so many cool options.......I really appreciate the suggestions! I think outside the box so much......I forget which side I'm on sometimes! I'll post a picture to show you what they look like thanks for the offer Tom.....I'll PM you should I get stuck! Nenad........ thanks for the hunting and fishing tips.......I got plenty of relatives that live in the stix........{where I'd rather be}. 00 buck....slugs......loved my 'ole 12 gauge, god 'ole 'point 'n shoot' ! motto: "you don't miss, with this!"
- 956 replies
-
- 1
-
-
- andrea gail
- trawler
- (and 1 more)
-
nice cabin interior......when I saw your last picture of her, I was going to ask if you were putting in deck supports. I didn't bother though...I knew you would didn't want to ask a pointless question super job so far!
-
thanks George and Bob..........thanks as well to all who hit the like button I'm going to look around for something that will work. the way these 'anchors' are made, I would need flat pieces........which would mean melting down weights to make a flat sheet. if I find it as my only resort....then I guess it's what I'll need to do. the idea with this is to give them the weight they need.......the cables that they are attached to are run through pulleys........so this suggests that they can be manipulated...lowered. they could very well be used as anchors, if the need arose. I probably could even get away with using solder...I have a whole roll of it. we shall see......we shall see thanks all!
- 956 replies
-
- 1
-
-
- andrea gail
- trawler
- (and 1 more)
-
this is going to be interesting.....doing ratlines at this stage of the rigging. don't believe I've ever seen it before sails are looking great Nils.........such beauty!
-
amazing!!! super work there Michael!
-
oh.......I also laughed at Midwest's idea to use cotter pins as well have you found any other use for them, other than to hold a wheel on?
- 176 replies
-
- 3
-
-
- muscongus bay lobster smack
- Midwest Products
- (and 1 more)
-
great progress Piet from when I last looked in again.....you amaze me with your brass work! love the way you assembled your blocks!
- 176 replies
-
- 1
-
-
- muscongus bay lobster smack
- Midwest Products
- (and 1 more)
-
it was a pleasure J.........go ahead......rub it in ! yea.....I know...I gotta get off my flat spot and get moving. you've given me lots to think about......again.......good job, my friend!
-
very nice .........a very unique life boat! really neat to see them in a 'school'
-
nice work on the shrouds so far.......is there really a solid rule? the order I follow most of the time would be fore stays....then the shrouds. I also see that your doing the assembly per mast step........which is also a good approach {I'm the knucklehead that's still assembling the entire mast...and then rigging }. would doing the fore stay after the shroud...add too much tension to the shroud? I wouldn't think so, if your careful with how much tension you use. the foremast lower fore stay is a dead eye pulley assembly anyway, so it would be easy to adjust the tension, keeping as close to the + side of zero tension as possible. the shrouds should be taught, so the ratlines can be done. your making some good progress........I hope others chime in and give their views on this as well. from the diagrams I see in the background.......you have some unique rigging ahead of you
-
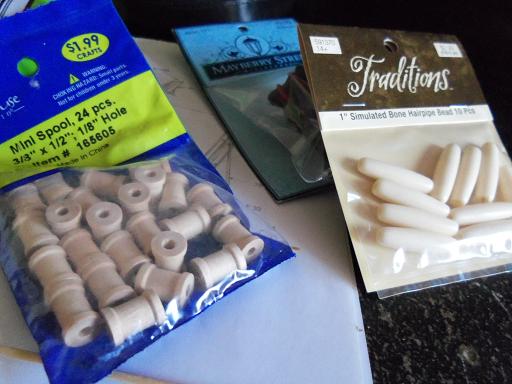
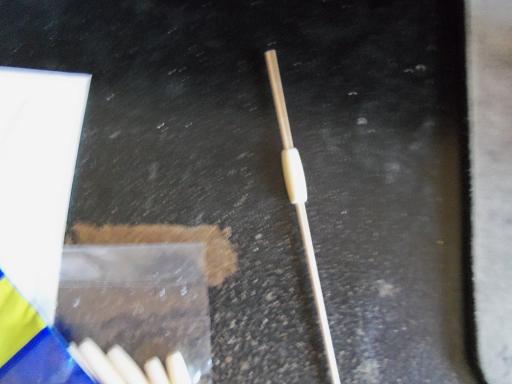
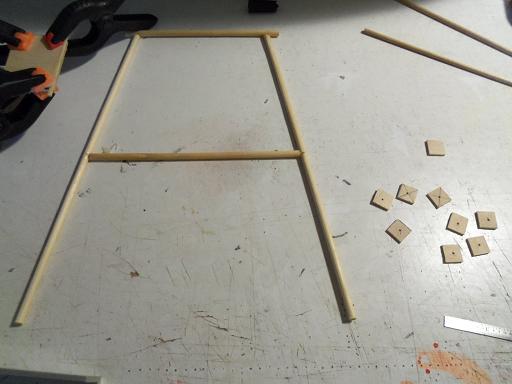
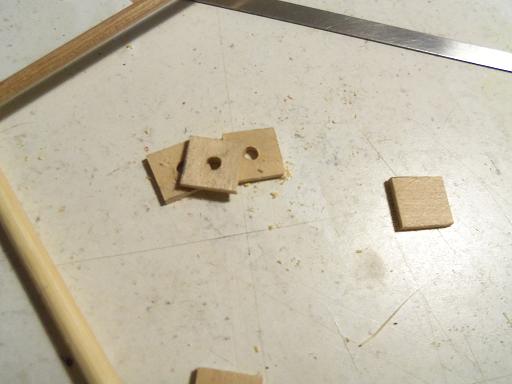
Friday......I felt restless.....that and I needed some strip stock. I would have preferred 1/32 X 1/32 strip, but I ended up settling for 1/16 {I'll need to sand anyway } the admiral and I went to Hobby Lobby...I like to bring her along. it gives us some 'out time' and she's quite helpful with bouncing ideas back and fourth. I remembered that I needed beads for the floatation buoys......I need to make five or six of them. I was in one isle.......I found some that would work, but I would need to drill out the holes, since they are not the same diameter as the dowels I had gotten. I was looking at a couple of other types, when I heard the admiral ask if these would work..........I headed over to where she was. looking at what she had found.......they were slightly larger than what I had found {not by much though}......but the holes going through them was PERFECT!!! there are more than enough in the package.......if I choose to do a couple extra......I can! the spools are just something I saw that I might have a use for later.......ya never know they're the smallest I've seen so far......I'm always on the look out for these things. once we got home.......I couldn't wait to try the assembly out. it looks good! again, there are no measurements for them, so I will have to size them to the rack. these booms that I refer to, are actually known as stabilizers. for such an elaborate design, the only function for them, is to keep the boat from rocking side to side. they have weights on them and can be deployed......lowered and spread out further, to add mass to the boat, depending how rough the seas are on a given day. I need to find some lead sheet, or strips, in order to make the 'anchors' to tether off of them. I know that lead has been somewhat outlawed for use in plumbing and other hardware uses.......it used to be found in rolls. perhaps I can find it pertaining to the 'soapbox car' medium, those little cars made from wood......I see them all over the place. they even have kits for them I digress........sorry.....my mind loves to wander anyway, it may have been better to notch these squares, but I didn't want to cause a calamity......making a hundred of them, just to get eight good ones......so I took the much easier route. sanding should make them look better...here is the first one. then I made the other one. I did manage to defeat quite a bit of the curvature......just a tiny bit of deflection remains. enough that I'm happy with it I snapped a couple of pictures to show a friend of mine at work......he lives in Maine and has been around these boats. he also has a book on the Andrea Gail....he's going to try and find it for me. he was quite impress with what I've done, stating how spot-on it looks. the only thing we didn't get into was the rigging.......but we can talk further, now that he's seen where I am with it. the kit instructions really doesn't shed much light on it.
- 956 replies
-
- 15
-
-
- andrea gail
- trawler
- (and 1 more)
-
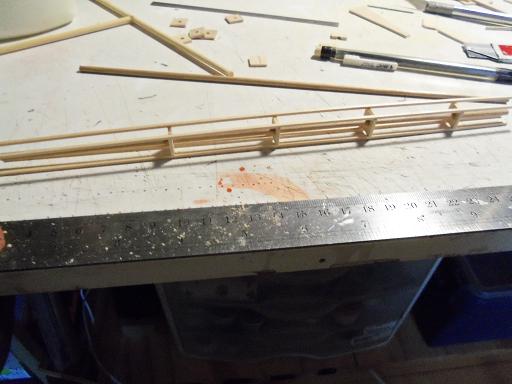
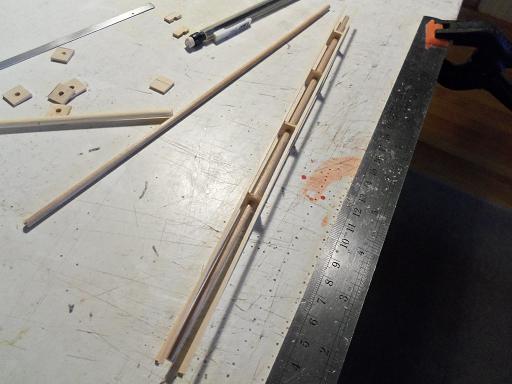
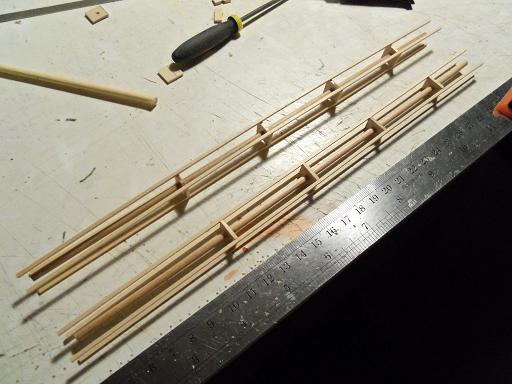
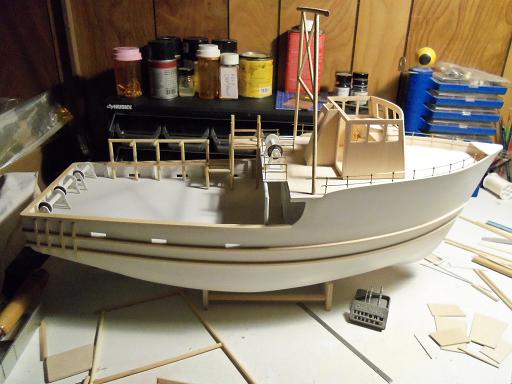
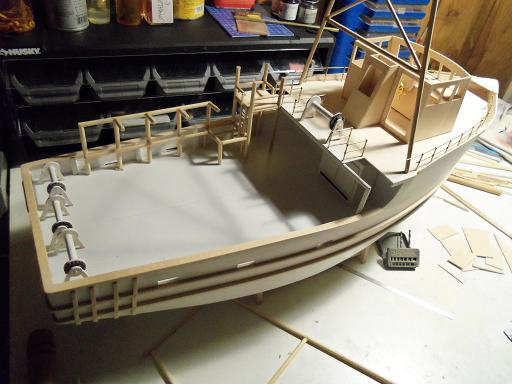
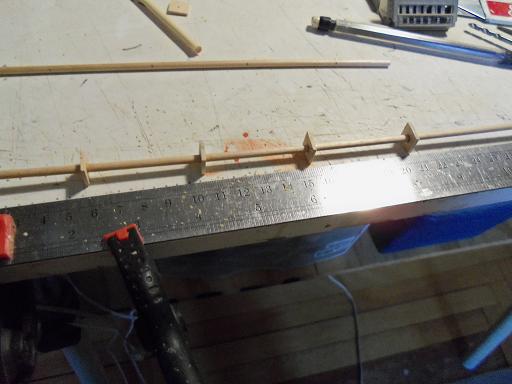
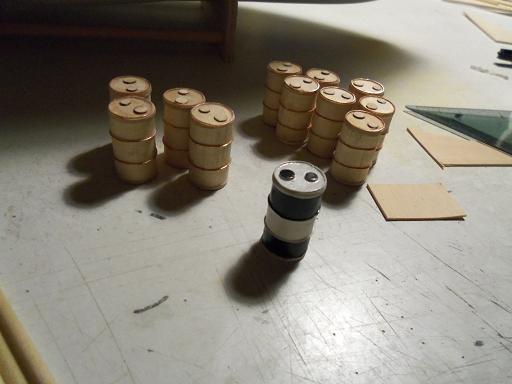
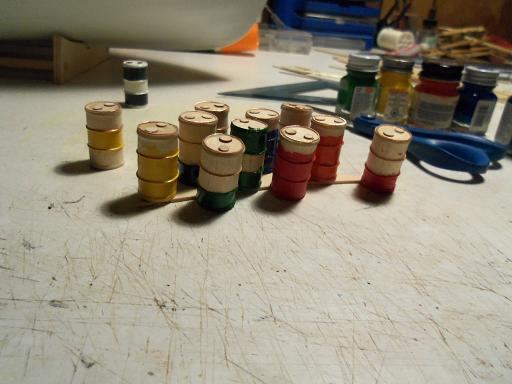
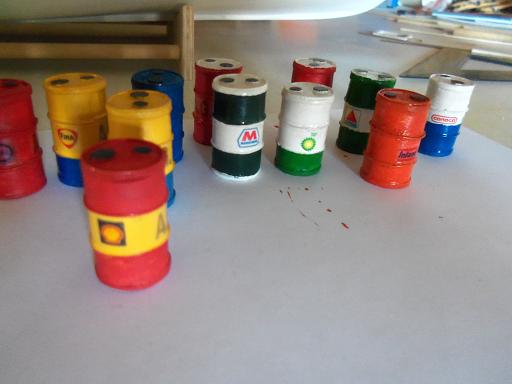
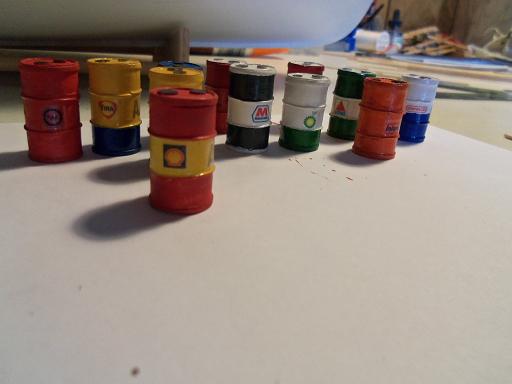
So.....the fuel drums are pretty much finished at this point. it may have been better to do most of them the same, with a few odd balls, but I did say I wanted to add color to the dominant white thinking the idea here is that these drums were picked up over a long period of time........in the kit, they show that they are all painted the same...... is anyone familiar with the song "little boxes" by Pete Seger? on with other aspects of the build........ I began to make the rudder......three layers of flat stock, the center one segmented for the shaft that will run through it. sanding and shaping is the next step for it......the rear section of the trawl rig was next to be made. the instructions give no measurements for it, so I had to gauge it to the first section I made. in the kit, it shows that it is a fixed assembly.......I wonder if it is actually hinged, so the height is adjustable? the little squares that are next to it, is another aspect that I will be working on. there are no measurements on these as well........so they are also gauged with the height of the trawl assembly. I cut two lengths of dowel a bit taller that the trawl rig. these 'brackets' will be skewered onto the dowels, segmenting it in four places. being hard to find true and straight dowels......with the next step of the assembly, I will have to try and work the bends out....somehow. this is some of the work I did last Friday........finally got the pictures out of the camera.....it gets more interesting down the road


- 956 replies
-
- 9
-
-
- andrea gail
- trawler
- (and 1 more)
-
cannons look super Sjors! I'm sure you'll figure out a method that will work!
- 1,616 replies
-
- 2
-
-
- caldercraft
- agamemnon
- (and 1 more)
-
thanks Michael and Carl........not really a weathering master.....but I'm looking in on both aspects. thanks for the good word
- 956 replies
-
- 1
-
-
- andrea gail
- trawler
- (and 1 more)
-
I think the word is 'assume'.........but I don't feel it applies here your breaking new ground here.........I don't know too many folks who have done this. whether you break one egg........or 30....in the process.....your still making progress, and that's what counts!
-
thanks a lot gentlemen.........yea, it's probably overkill....but why not I think the vent bung could have been smaller Nenad.......I do have some smaller punch outs. I figure these are in good contrast to one another. a bung, is a bung..... on top and unsung.... that would be a hoot, wouldn't it.........to prose about something as silly as a bung believe me Sjors......I'll be careful I think I should be more careful, with the milk crate collection, I've accumulated through the years! the kit instructions show no lashings for the drums........they are simply cemented on the decks. I may do something with this thought in mind though.......thanks for the insight it would be interesting Marty, if I was modeling the Orca. this is another boat, I wouldn't mind doing with the movie 'jaws' as a reference......it would be all one would need to model her and add some really neat detail, and turn out a nice looking build. the other day, I tried to see if another boat was used in the movie. in the case of The Perfect Storm, a vessel called the 'Lady Grace' was used in her stead. in the TV show 'Gilligan's Island', four boats were used in the show......one was called the Bluejacket, which was seen in the opening intro of the show. I remember reading about how they acquired the boat that was seen wrecked...very interesting story on it...I think they were wheeler express cruisers.......the one on the beach was a '63. I never did find out if they used a prop boat for 'Jaws'.
- 956 replies
-
- 4
-
-
- andrea gail
- trawler
- (and 1 more)
-
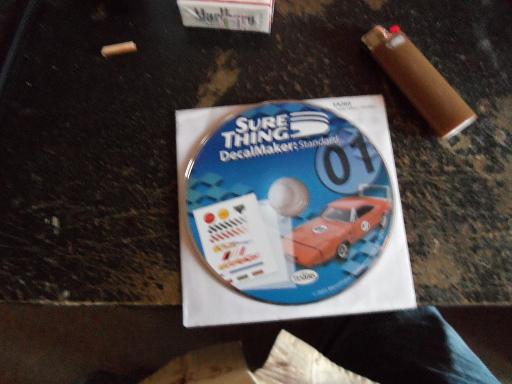
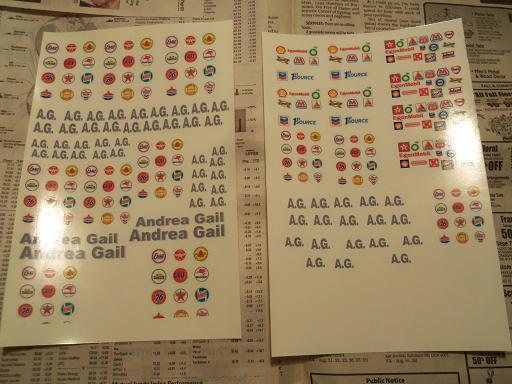
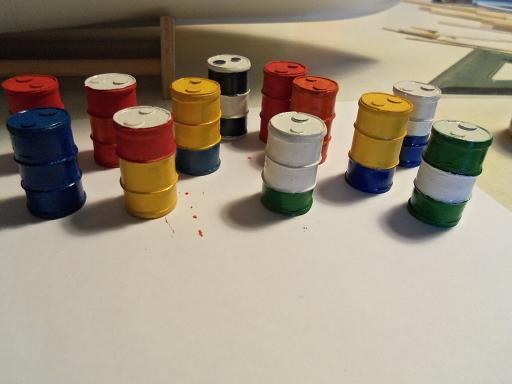
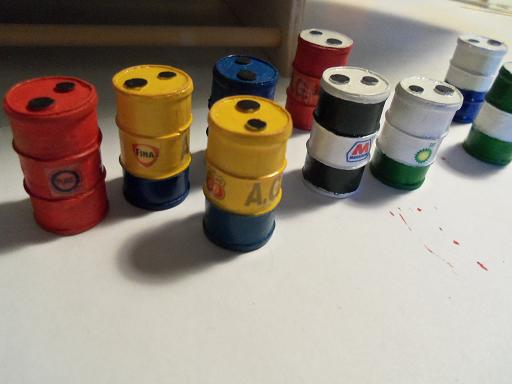
OK........now I'm going to put the finish on the fuel drums. then I can get on with some of these other sub assemblies. there's still a bit more to do with the podium / rack.....the ice maker......still a couple more ladders to make {say it isn't so}.......and for some reason..there's a nagging feeling to cement the pilot house in place {I know I still need to make the roof}. anyway........I installed the decal maker in my computer......wasn't sure that it would work on Vista. happy to report that it does.......now to force myself to get the update for it {keep say'in I'm gonna!} the next couple of pictures, you've already seen.........here they are all done up to the point of paint. so, online I found some logos. I did grab some singular logos.......but thinking that there may be some issue with sizing them down {getting them all to be the same size}, I thought to grab some logo clusters. Hmmmmmm.......sounds like a cereal, don't it "sit right down and have yourself a bowl of logo clusters! they're in the cereal isle, next to the Quaker Sprockets!" for some reason......the A.G. decals came out gray. I did these with the clear decal paper....I have white, but I'm sure to run into the problem of trying to match the background color. I couldn't remember what the stern decal looked like.....it needs to be in white. one saving grace I saw was that the drum color is not that big of an issue.......they used whatever drums they were supplied with, it seems..... either that, or oil that was bought in bulk, was drummed by that supplier. I just got them as close as I could decals were applied after that..........might be a bit on the overkill side, but I think they look pretty good. so......on an overly white deck and layout.......I think I can throw enough color into the mix......meanwhile, I'll put the extras away, in the hopes I can find a 1/16 or 1/8 car model, I can bash the heck out of
- 956 replies
-
- 15
-
-
- andrea gail
- trawler
- (and 1 more)
-
I often wondered if this would be a doable idea......I've never done it myself. your proving that it can be done.....bravo! very nice progress as well
-
yepper Walt! it's a hobby........not to consume our every waking hour.......{well........in my case...it's a lost cause } last night in my dream........I lost a ships boat......heard it hit the floor. this morn, I woke up..........and I STILL can't find it!
-
kept her shape really well Bob. sweet little build!