HOLIDAY DONATION DRIVE - SUPPORT MSW - DO YOUR PART TO KEEP THIS GREAT FORUM GOING! (Only 51 donations so far out of 49,000 members - C'mon guys!)
×


popeye the sailor
-
Posts
16,007 -
Joined
-
Last visited
Content Type
Profiles
Forums
Gallery
Events
Everything posted by popeye the sailor
-
 nice recovery Jct......ya done good!
 -
thanks Bindy! you can make your own sanding sticks, any shape you want. I also do it with odd pieces of planking.....various widths. I didn't need to buy her a new Iron..........it's got a Teflon coating :D :D .....no stick! thanks for the good word thanks John.......good to see your back
-
the ship's boats look great Tom........really coming together
-
I don't have a name for it: they say there's a reflection 'tween modeler and selection of the ship they wish to portray so this ship built by hands guided by envisioned commands and leaves us with nothing to say neither wood nor plastic it looks so fantastic I find it hard to convey so I write you this prose I can't hand you a rose "museum".....is all I can say
- 883 replies
-
- 8
-

-
- royal caroline
- ship of the line
- (and 1 more)
-
sorry to see that........but she did well under nominal power. you have to feel good about that did she take on any water during the trial, or was it a factor in the motor's demise?
-
see if you can find those eyelets leather belts and stuff......they come in different sizes and metals
-
Sjor's up to his old tricks again? ya know boys.......we were looking for a good place to offload Justin Bieber...........I think we just found it :D :D
- 1,616 replies
-
- 2
-
-
- caldercraft
- agamemnon
- (and 1 more)
-
thanks Augie and Patrick.........you never know the true size of the build, until the masts are on......or in this case, dry fit. I was lucky with this kit......it gave me the measurements and a 1:1 diagram of the assemblies. now to see how they will take stain so true Augie.......Patrick, your Niagara rocks!
-
congratz Patrick! she looks superb......very well done.....nice 'n clean, and the rigging is awesome! yepper! Be proud....you did it!
- 299 replies
-
- 1
-
-
- niagara
- model shipways
- (and 1 more)
-
even funnier when you ask about something and tell them what it's for :D my best area is the jewelry dept......some of that stuff is just crying to get embossed on the transom of a ship.....or even a figurehead! Christmas stuff is still available......not as abundant, but I did see a few things that would be a nice touch I've heard of JoAnne's, but I don't think there are any around here......we have Micheal's and a place in the Mall of New Hampshire {the name slips my mind}. only sad thing is....Hobby Lobby don't sell wooden kits, I have to go to Hobbytown for them. cocktail party toothpicks......I've seen them.....had that thought myself
-
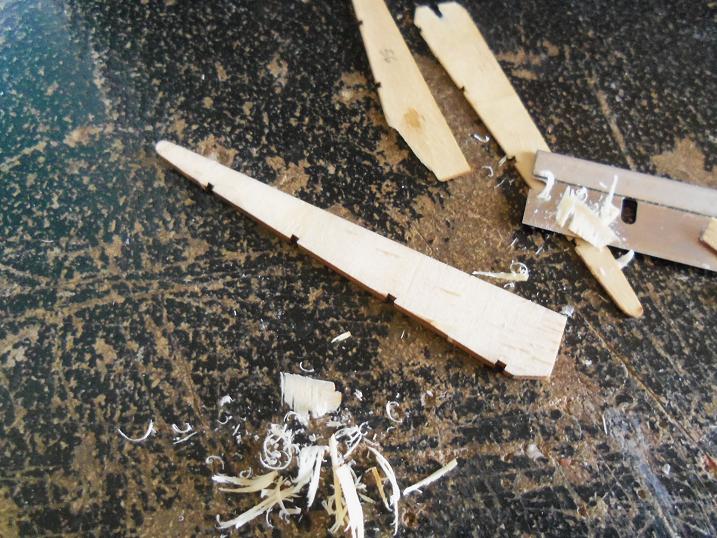
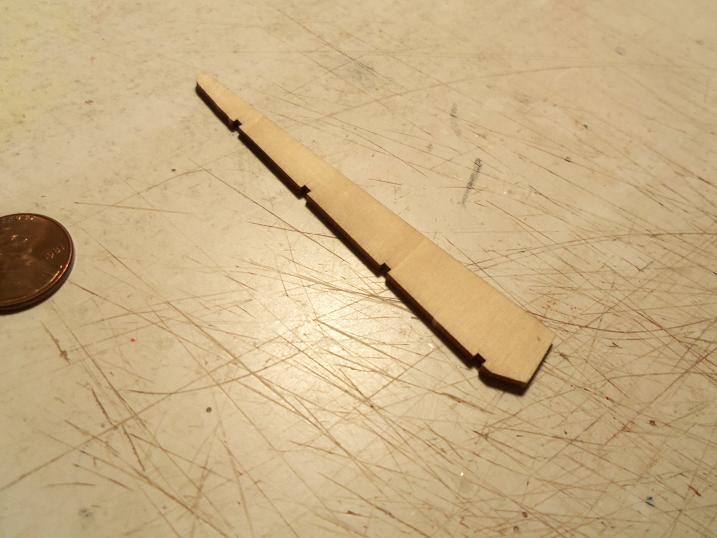
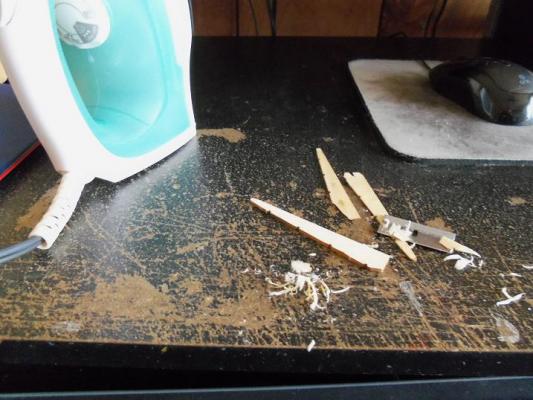
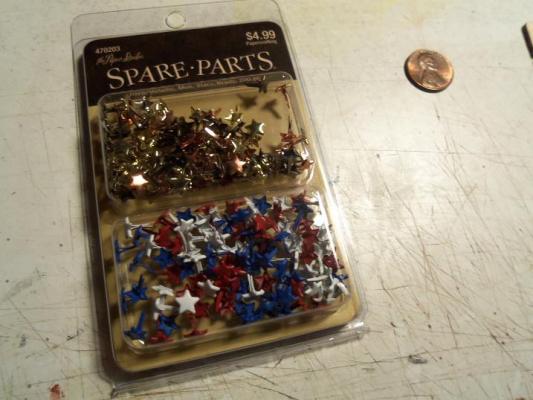
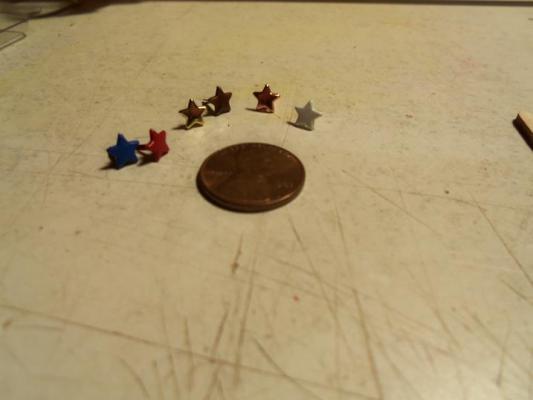
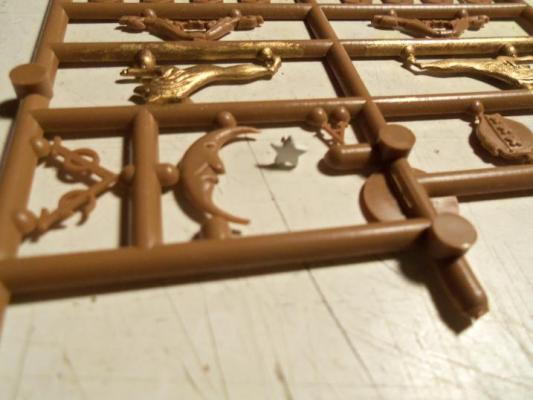
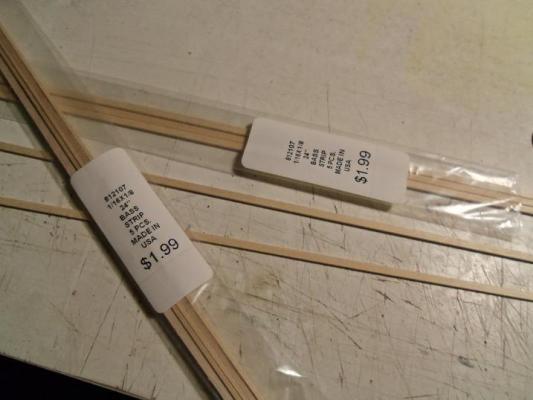
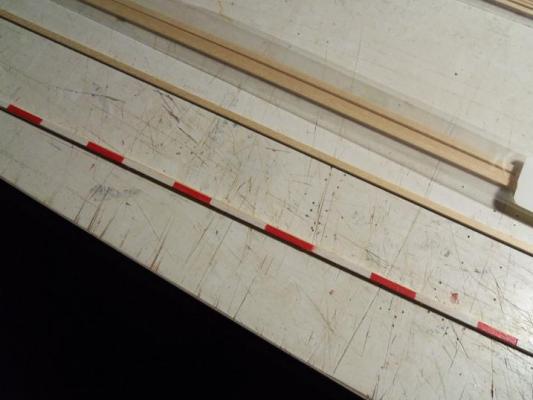
today.......I did a little here.......and I did a little there. I got this real crazy idea.......what a time for laser cutting, not to be on my side, with this kit. I'm sure a lot of you folks experienced this from time to time......open your kit, and pop out a few of the parts, only to find that the plywood lamination had separated. some would complain......some would simply glue it back together. I usually choose the latter route......but I lament......I now wished it had happened to the rudder. my idea depended on this to happen.....and it didn't! I must make it so! water.........water separates everything! it separates pebbles from silt.......it separated my son and his girlfriend, when they were kissing {that was fun}.......it even separates with the wave of a hand {I didn't see this......it was in a book I was reading}. so, I soaked it in hot water. after an hour or so, I laid it on my table, and waited for the outer laminates to curl. it didn't.....wasn't wasted time though.....I got my computer stuff done. OK then......the next logical option is heat. I got the admiral's Iron, I set off on plan B. the admiral saw me with it, and the quiz show started. I promised her that I would buy her a new one. I told her "don't try this at home!"........she came back with "I don't have to.....I have you!" {she's been with me too long.......she's a heck of a straight man}. after pressing it with the Iron for a few minutes, I was able to remove both sides with a razor blade. taking it over to the table, I sanded the residue off of both sides. now.......I've taken what would probably equate to about 1.5 to 1.8 mm from the thickness of the rudder, which is 4 mm to begin with. I think that by planking it over with thin strip stock, it will have a much better finish, than the bland surface of plywood. I'll continue with it tomorrow I also made a trip over to the local Hobby Lobby. my focus was on two items......stars and diamonds. my search was slow.......until I got into the paper craft dept. here I found these brads....probably used to clip multiple papers together....not sure, I don't do the craft. with the supplied decorative parts for the ship......there is the moon, but no stars. it's clear to see that there are at least five or six stars, along side the moon. these come in many colors and finishes......... gold, silver, copper, antique, as well as red, white, and blue. I need the white ones......no need to paint! I did find some even smaller ones in the dept that deals with embossing hats, belts, and other articles of clothing. they are even smaller than these that I have here. they go by the product name "Bedazzles.....Bedazzleit"....something like that.....card package with a bubble box with the product inside.....really colorful package. they cost $5.99. I would have bought both items, but the other part of my search, was proving to be a bust, so I had to turn to a more expensive alternative. the diamonds were proving to be harder to find.........I was looking for the playing card shaped diamond...not the glittering bobble that melts a young girl's heart. these diamonds adorn the sides of the stern's artwork. the thing that stuck in my head though was that while the stars would have been an addition to the transom {and probably carved}, the diamonds would have been painted on, and would then produce no rise in the artwork itself. I bought a package of decal paper. all I need to do is go on line and find an image of a diamond. then copy it and import it into the decal maker. there I can replicate a string of them and size it down to fit in the space. it will have a light color background, so this should work out quite nicely. one other item I got, was the wood for the stern rail details. I have painted up the .5 x 3 mm thin strips red and white, and I got some 1/16 x 1/8 x 24 strip stock to do the job. these will be stained, cemented in place, and the striped strips will be laid over the face of the rails. this is what is to come........when this is done, the bow will be next, and then the entire ship can get a flat clear coat, to liven up the finish. I'm going back in my rabbit hole now.....call me for tea, won't you


-
I could do that Mobbsie.......I did the same thing with a couple of builds......but only with the main mast however. this will still leave the fore mast, as my Achilles heel. it will work out........once I get the standing rigging in place. thanks for reminding me of a process that even I used to do....I must have been off on a fool's errand that day thanks for the good word!
-
nice job on the hull Bob.......the paint looks great!
-
looking good Michael
-
simply amazing Nils.........I enjoy doing railing work I see you buy in bulk :D
- 222 replies
-
- 1
-
-
- gorch fock
- barque
- (and 2 more)
-
do you wish you had done one more row of planking for those eye bolts? it's good to see your still tool'in in the workshop. hope you feeling better.
-
cut 'em some slack....he showed you a boat didn't he???? :D looking forward in seeing the finish gallery Patrick........nice looking oars! the Connie huh...........now that will be fun!
- 299 replies
-
- 1
-
-
- niagara
- model shipways
- (and 1 more)
-
thanks Sjors.......still more to go yet, before I get to that point thanks for the good word thanks Sherry.......the nests were the big scratch build part of it......that is......unless I think of anything else to do thanks for looking in and you kind comment
-
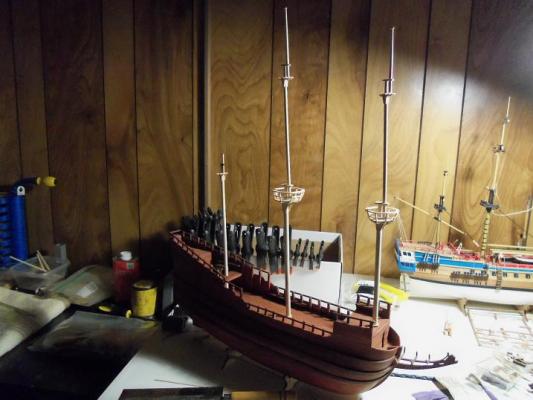
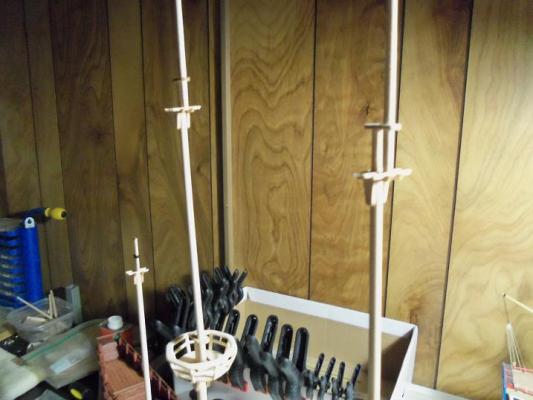
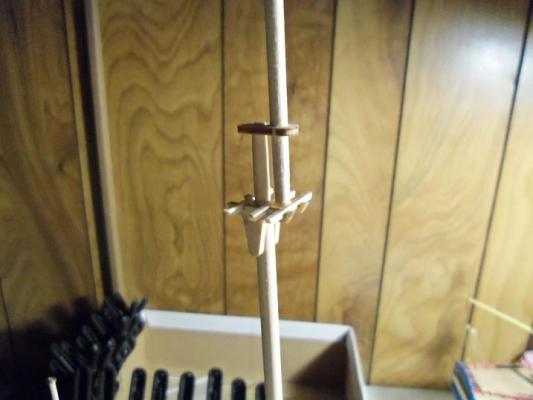
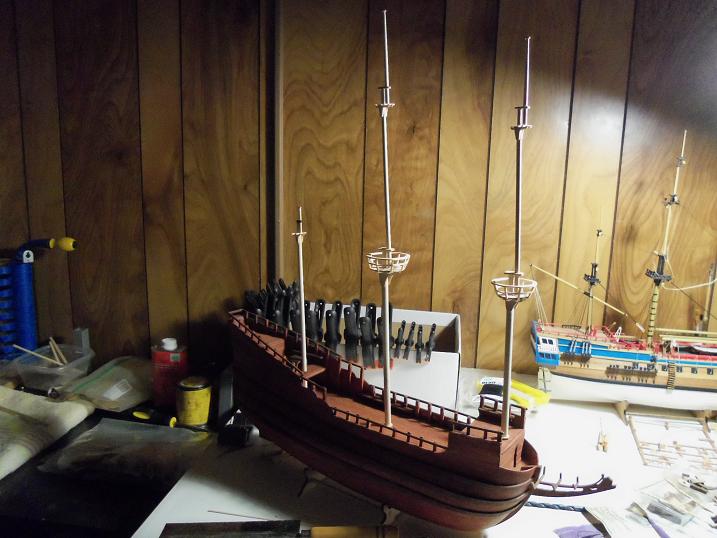
thanks Frank.......the masts are just fitted in place......I want to finish them before I cement them in. they are off a little......the fore mast more than the other two. the mizzen is set in place already......no adjustment needed.....the fore mast needs to be brought forward a tiny bit.....and the fore mast needs to have negative rake {lean forward a few degrees}. one problem I always tell myself to do..... apparently I didn't listen on this build, is to create mast pots under the deck platform. since this is a POB kit, there are on inner placements for the masts. the main mast is the only mast that the mast root goes all the way to the keel.....it's free floating inside. the mizzen sits tight in the two collars.......the lower collar is as far as it goes, with hardly any at all past the deck. the fore mast at the moment, is sitting on a ledge inside the hull.......where?.....I don't know when I do cement the mast in place, the root is going to have nothing to sit on in there, the collar is going to be the only anchor point. when I do the standing rigging, I will have to be careful not to distort anything. so, for now, it will be to clean the masts up and stain them {got my fingers crossed with the crow's nests}.....and then the eye bolts and blocks. I'll need to create jigs for the fore and main masts.........but I have a few more things to do before I get to that point. I hope to finish what I'm doing to this build very soon..........then I can begin some more work on the build I've been teasing everyone with {in the background}. thanks for the good word!
-
thanks Bob........when kits start coming with 'text book assembly instructions' ........then we can build 'em like the pros. of course, it may take a few years to get all the tools they used to build it........to be honest, I can't wait that long I guess I'll just have to depend on all the great R&D developers, here on the site..........wha'd ya say to that! :D thanks for the good word Bob.........I yam, wot I yam!
-
thanks Augie......the fore mast has to lean forward a little more than it is, but the main and the mizzen have just about the same rake, which is good the canopy is still off a little......about 1mm........pretty good considering it was off 3 to 4mm's to begin with. I can probably do something to fudge the excess. thanks for the good word
-
with the exception of the bow spirit......the masts were dry fitted on the ship. they stood up proud, without too much prodding.......so I was able to get these pictures. why waste the moment!