


glbarlow
-
Posts
3,855 -
Joined
-
Last visited
Content Type
Profiles
Forums
Gallery
Events
Posts posted by glbarlow
-
-
So the duchess will be loading boxes of the duchess. 😁
- Kevin, mtaylor, chris watton and 5 others
-
 8
8
-
I guess you know to do a good deal of tapering to have the same number of planks at the bow as at midships and the stern.
-
Welcome to a great forum
-
I’d say it’s unusual to build the bulwarks off the ship. Sterns varying from model to model for the same kit is typical. I’d build the bulwarks to the height it needs to be to fit the ship and in this case the transom. It may require trimming some planks to create the necessary height.
-
Nice job making all those small parts, it’s looking really nice. Sharp attention to detail.
- Canute, Ryland Craze and MEDDO
-
3
-
-
1 minute ago, MEDDO said:
Did you do that or just leave em as is?
I’m going to leave them as is, no fixative. As you know there’s a lot of brush work with the powders to get the best definition. I don’t want to risk anything on top of the barrels, I don’t trust myself with the airbrush to not muck it up. I might to the same as you on the barge carvings though (I have it on the shelf now).
-
-
-
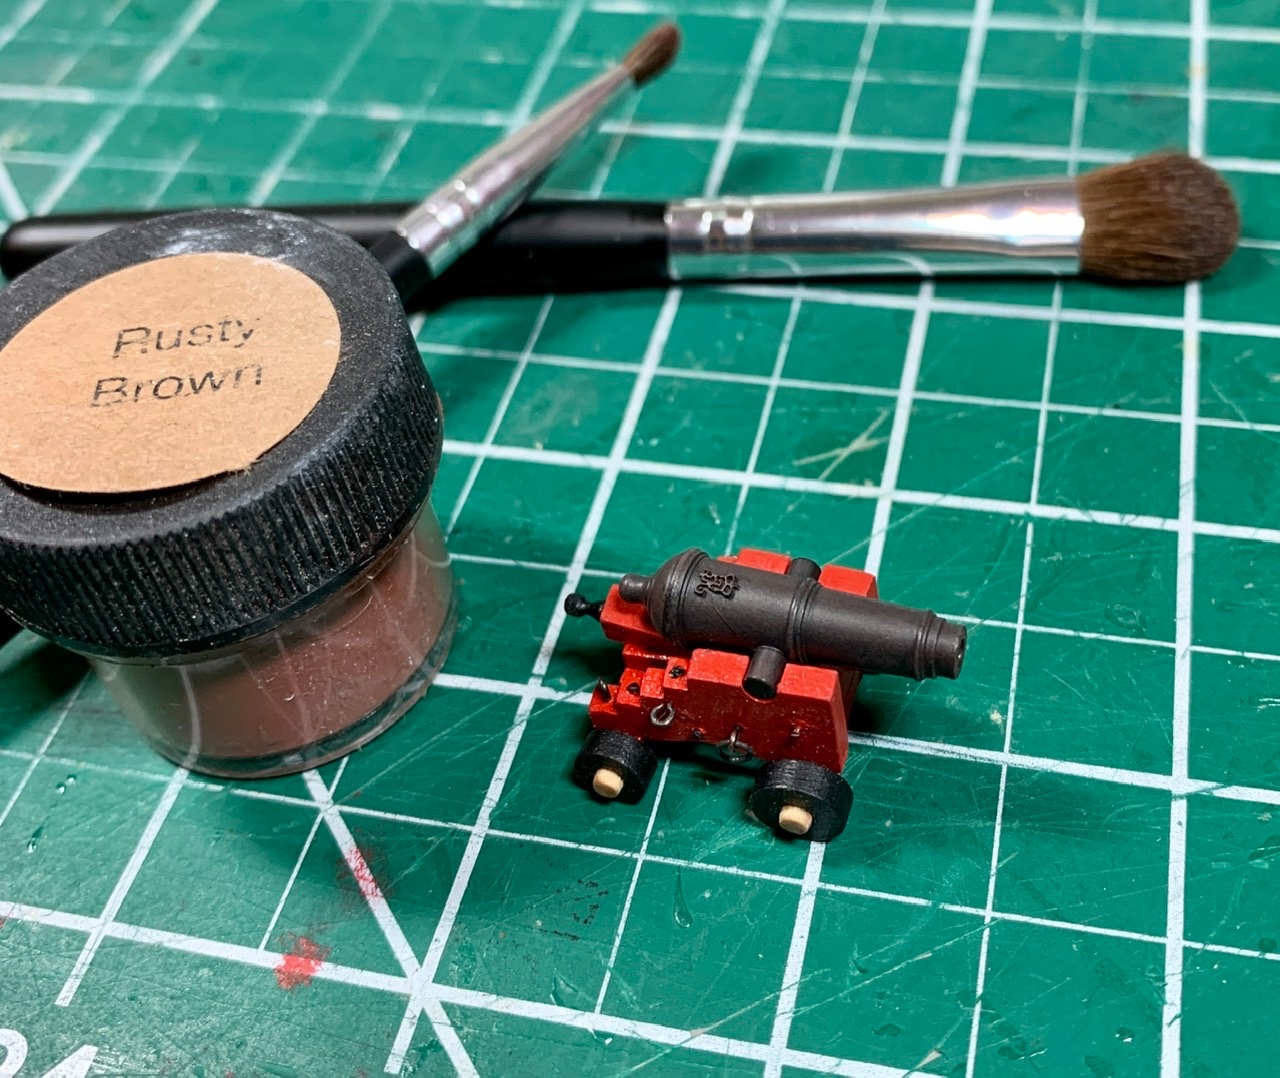
I’m not one to agonize too long. I added Rusty Brown weathering powder on the primed only carronade and I’m happy with it. Now just 11 more guns. Thanks Derek and Lou, both your comments contributed to this now duller primed only gun.
- Blue Ensign, egkb, Matt D and 11 others
-
14
-
4 hours ago, ASAT said:
a top coat has a bit more hardness than prime
Thanks Lou, oddly of the hundred or so cannons I’ve painted I’ve never used primer. It’s so evenly spread I’m reluctant to add another coat of paint. Also thinking about dusting powder as Chuck does, so many decisions. 😳
-
1 hour ago, DelF said:
admiralty finish on another barrel
I’ve used it on all my other models, no spares, if it goes on one it goes on all. But I do have the other models to compare.
This finish is dull and flat, more than the photo would indicate. A bit silky perhaps but “factory fresh” looking. It’s a quandary -
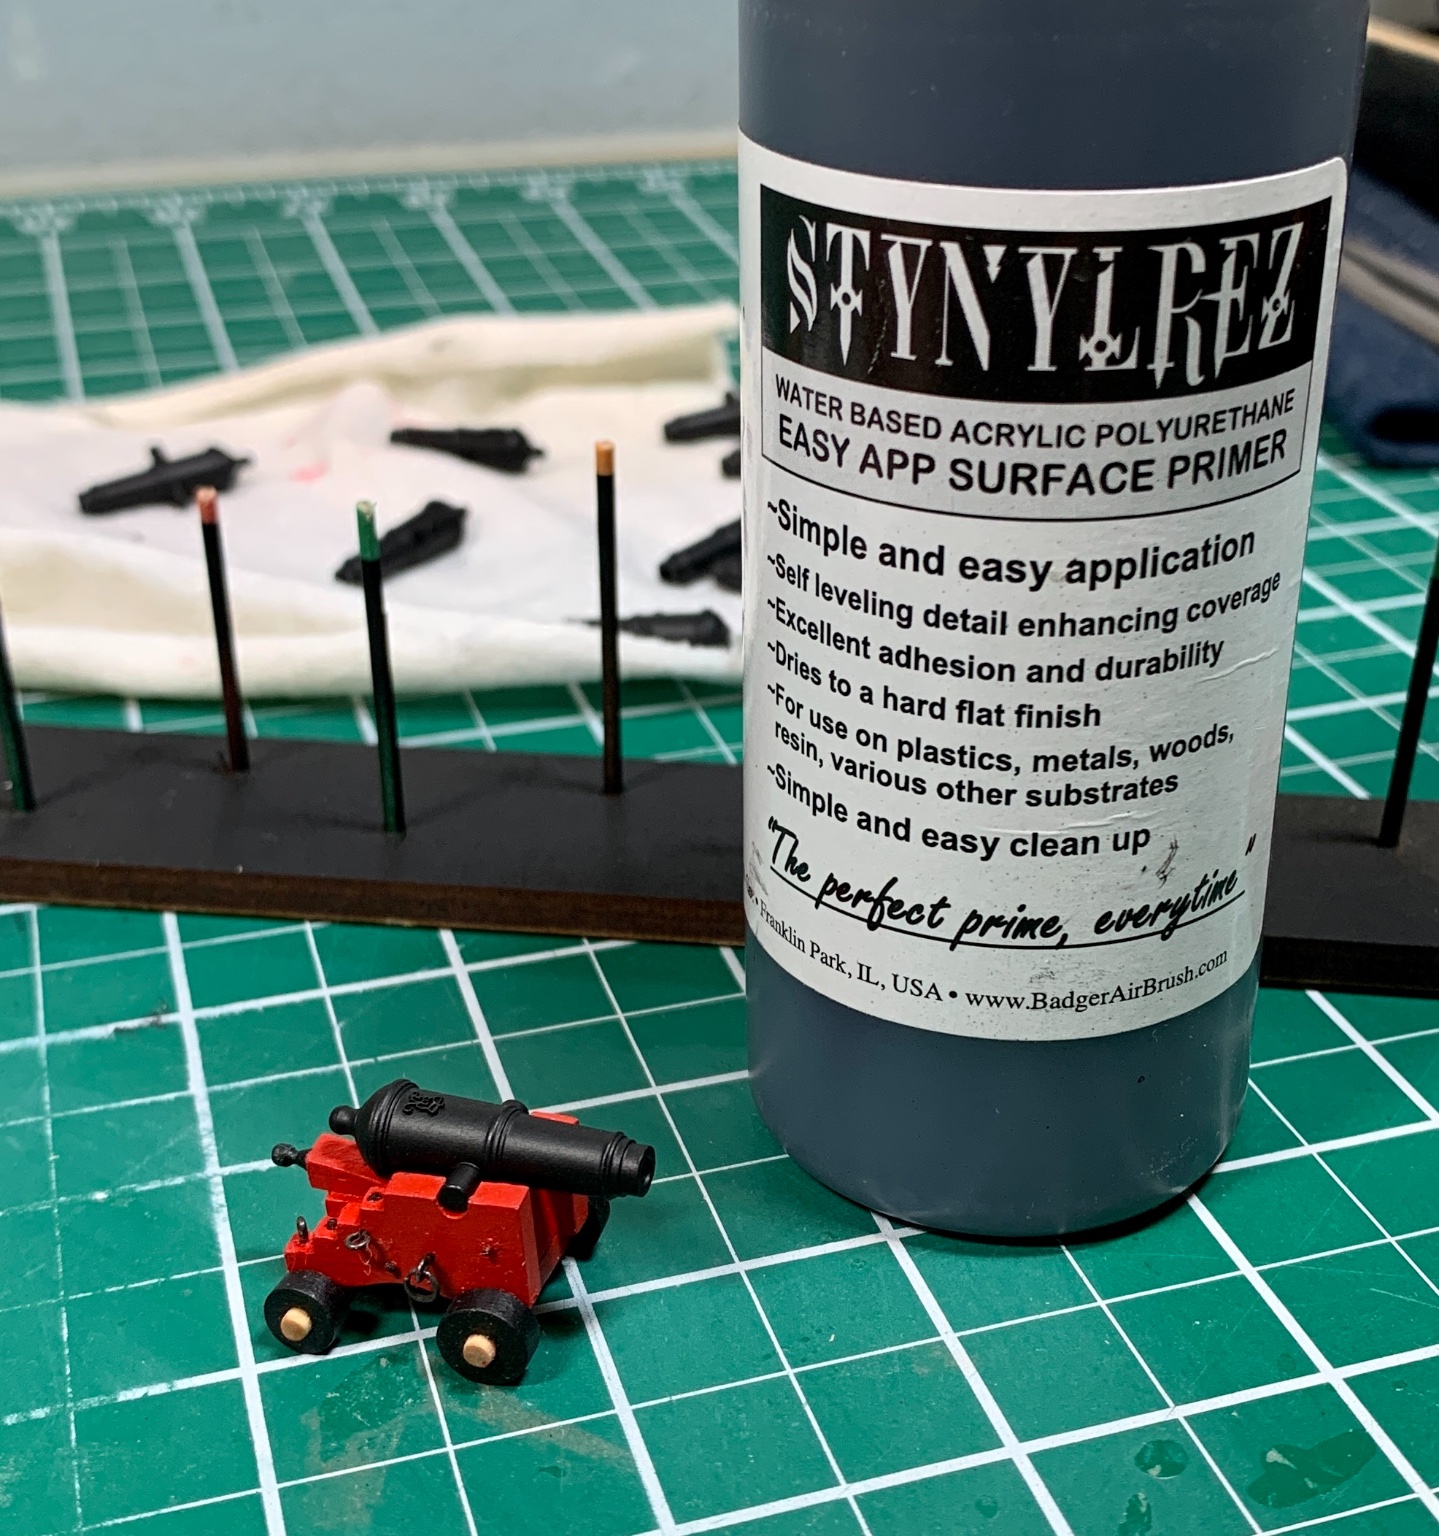
I decided to take a rest from the hull and start the process of building the guns. More on that later.
So here’s a question. I did the prep on the brass cannon then used my el cheapo airbrush to spray primer with the intention to further paint them with my Admiralty Ironwood Black and and dusting powder on that. However, I like the dull flat metal like appearance from just the Stynlrez primer and thinking to stop there. I don’t have much airbrush or metal primer experience.
So the question: Am I missing something important about just stopping with the primer and calling it done, will it last and stand the test of time or is primer without paint like coffee without water (I’m sure there is a better analogy but...)?

wow that's a big photo
- Edwardkenway, Bill Brown, DelF and 4 others
-
7
-
Great detail in the partners, and I just decided to paint Cheerful’s hatches black. Did you use Admiralty paint Flat Iron or Dull Black?
- Rustyj and FrankWouts
-
2
-
Fascinating as always. Are thos SM61 and SM62 blades? I’ve noted your using them before, do yo favor them over a good pair of wood working micro chisels?
- Blue Ensign and Martin W
-
2
-
2nd planking, tapering is important as is plank bending. Follow Chucks video you’ll be fine. Start at the top and work your way down about a third of the way. Then go to the bottom and do the bottom couple coming up 2-3 planks then go back up to the top and finish coming down.
Why? Because if you’re not perfect and have to do some filling in you’ll be doing it in a place that can’t be seen once painted and mounted.
-
Chuck has sheets cut especially for ripping planks. I learned to rip my own, it's quite rewarding.
I don't think you're going to find sources in the US for any pre-ripped planks anymore and especially not Alaskan Cedar, I believe it's a bit of a Syren specialty. It's a topic that's been around for awhile, the US sources simply couldn't make a go of it.
The Lumberyard is not a good source for wood despite the name in my experience. I ordered boxwood from there is was so bad I sent it back. There are some European sources for maple and a few other woods, but definitely not Alaskan Cedar.
-
33 minutes ago, MEDDO said:
The thought of drilling into the keel off center and splitting it gives me the heebie-jeebies or somehow having it not fully secure and then having the entire completed model levering itself off with much splinters....
This, as you’ll read in the log, is why I drill those holes at the very beginning of the build. The first time my model set on this board was when it was nothing but a keel, the second time when it was just a skeletal frame. The third time was for these photos. I don’t use glue, I epoxy the pedestals and the rod inside them to the base, then epoxy the ship to the rod and pedestals when the ship is ready for rigging. I also drill so the rods go past the keel into the frame, 25mm into the ship in Cheerful’s case. I will admit a certain tension drilling those holes, but it’s offset and much easier by being done early in the process. I wouldn’t want to be holding a completed model in my hand upside down doing it.
I have 9 models sitting around my house, every one was mounted this same way. So far they are still tight to their boards, though admittedly I don’t sling them around to test their soundness. I also add a brass plaque to the board with the ship’s and my name along with the completion year, just in case I forget any of those three things😁.
- Edwardkenway, mtaylor and MEDDO
-
3
-
42 minutes ago, bartley said:
Did you make them yourself or are they available commercially?
The pedestals and the mounting board (as unfinished walnut which I sanded and applied WOP) both came from modelexpo.com. They didn’t fit the width of Cheerful’s keel however. I had to spend some time with my Dremel to widen the slots. You can also see I used two different height pedestals with the way Cheerful lays out. Hope that helps.
-
-
I’m always amazed by the small details you add, and the creative ways you come up with to add them. I knew I was saving all those old Pegasus parts for a reason.
- Martin W and Blue Ensign
-
2
-
-
Thank you. It may get another coat before I’m done. I’m glad I didn’t tree nail it and the WOP seeping between the seams does a nice job of distinguishing the planking runs. I came to like the little bit of variation in the wood color.
The only thing Annapolis would want with it is target practice, but it’s a nice thought. 😁
- Gregory, MEDDO and Ryland Craze
-
3
-
We had our dachshund Sam for twelve years, I miss that dog.
- Canute, chris watton, hollowneck and 1 other
-
4

Chris Watton and Vanguard Models news and updates
in Traders, Dealers, Buying or Selling anything? - Discuss New Products and Ship Model Goodies here as well!!
Posted
I think we've been down this road.