


glbarlow
-
Posts
3,855 -
Joined
-
Last visited
Content Type
Profiles
Forums
Gallery
Events
Posts posted by glbarlow
-
-
My Cheerful coat has lots of coats. Apply it thin, hence the wipe on, it can take as long as 36-48 hours to fully dry. At any time sand it with 400 grit and apply a second coat. Generally 2 coats, but more doesn’t hurt. Just don’t let it gunk up when you apply it. Wipe on, wipe off.
It’s great stuff. Doing some practice runs to get a feel for it off ship is an excellent plan.
-
-
3 hours ago, Rik Thistle said:
definitely not parallel with the false keel
You can get that second plane with your iron. Clamp one end of the plank to your table and gently twist it while running the iron along the board, like “air ironing.” I did this a lot on my Cheerful, it’s less precise but it gets the job done. Just be careful not to iron your plank holding hand ...he said from experience... I just wet the board with my finger dipped in water.
edit...what I said is essentially what BE described
- Rik Thistle and BobG
-
 2
2
-
2 hours ago, SpyGlass said:
expensive
Not at all expensive in the US. I also use water based in some applications. I have no problem with it, but the WOP is better.
-
Minwax Satin Wipe on Poly. Ronseal is a UK thing, not used in the US. I think Home Depot may have a different brand, doesn’t matter, the Wipe On Poly Satin is the key thing.
Wipe On is different than other varathanes. It will specifically say Wipe On Poly on the can. It by far is the modelers choice.
-
Your first 2nd planking looks great, nice job!
The common approach used by many modelers on this forum and the one I use is Satin (not Gloss) Wipe On Poly. It seals, looks great, and can be painted over or applied over paint. Your posts don’t indicate where your from, WOP is commonly available in the US, any hardware store has it. There is a UK version, but I don’t recall what it’s called.
-
On 11/15/2020 at 9:42 AM, Justin P. said:
a favorite brand of paint
I use Admiralty Paints, I like it so much I order it from a store in the UK as I haven’t found a US source for it. Humbrol also seems popular. I went wit Golden Paints for the red on Cheerful, because for it I wanted, really red.
I dip the brush in the paint, it a drop falls off it quickly when I pull it out then a second drop slowly forms that’s when I have it thinned enough.
Your work is very crisp, nicely done.
-
On 11/15/2020 at 1:18 PM, VTHokiEE said:
cordless drill and my digital caliper
I recently bought a lathe I don’t know how to use yet, up to now I’ve used your same method for years. You’ve done it well, your masts and spars look great as does your serving.
I don’t know how Chris describes it in the instructions but typically shrouds are a doubled, one line from dead eye, up around mast, back down to the next dead eye then that now double line seized at the mast. Maybe I’m missing something.
- Gregory, VTHokiEE and Old Collingwood
-
3
-
Creative work, nice adding these details.
-
1 hour ago, chris watton said:
That is true, but you still need someone very good to digitally sculpt the parts, and that's before high quality 3-d printing costs.
I'd think the market for that is very very small. I had three choices, including the figureheads, when building Vanguard. I am quite certain I'd never build it again just for a different name on the stern and figurehead on the bow, though I was tempted the first time to use the elephant figurehead, it was kinda cool.
-
Another fine work. Still think you need fish in the hold, each one hand carved 🤣
-
-
-
I appreciate and thank you all for the likes and kind comments. Always nice to read and inspiration to keep moving forward with the log.
- CiscoH, Ryland Craze, MEDDO and 1 other
-
4
-
14 hours ago, MEDDO said:
I have been contemplating this quite a bit recently
14 hours ago, Edwardkenway said:I'm definitely considering Cheerful.
I hope you both go for it, I don’t regret it a bit (well there has been a moment or two, but I got over it, lol). With the monograph, mini and starter kits, some good build logs, and Chuck’s ready advice you have all you need. I write my log with the hope of inspiring/helping someone to build Cheerful, so I hope you do.
- Keithbrad80, MEDDO, Edwardkenway and 5 others
-
8
-
-
Your hull looks great, nice work.
-
The level of research and detail is impressive.
- druxey, Blue Ensign, Martin W and 1 other
-
4
-
I’m thinking they should replace the box photos with yours...
-
7 hours ago, Edwardkenway said:
when at first glance makes you think "no way, I'll come back to this".
There was some of that, but there was no way forward until I sorted it out. I did go off and make a few cannons as a delaying move 😁
7 hours ago, Blue Ensign said:A helpful how to,
I appreciate that, like you I try to be helpful to others as I’ve been helped so many times on this forum.
Thanks guys, I appreciate the comments and the likes!
-
Thanks for the tip on blades. I buy the #11s by the hundred and change them frequently. I should look for a source for the SM blades, I know others use them as well. I buy Excel blades, I find them sharper and last longer than Exacto.
I agree about this being a tricky step, it required some thinking and a slow pace to sort out.
-
-
34 minutes ago, VTHokiEE said:
a more proud/excited pose.
He’s reflective, contemplating what’s next 🤣
Thank you for those comments. I hope I’m providing detail that will help others take on the challenge. I’ve seen your work, you can build Cheerful.
- mtaylor, Ryland Craze and VTHokiEE
-
3
-
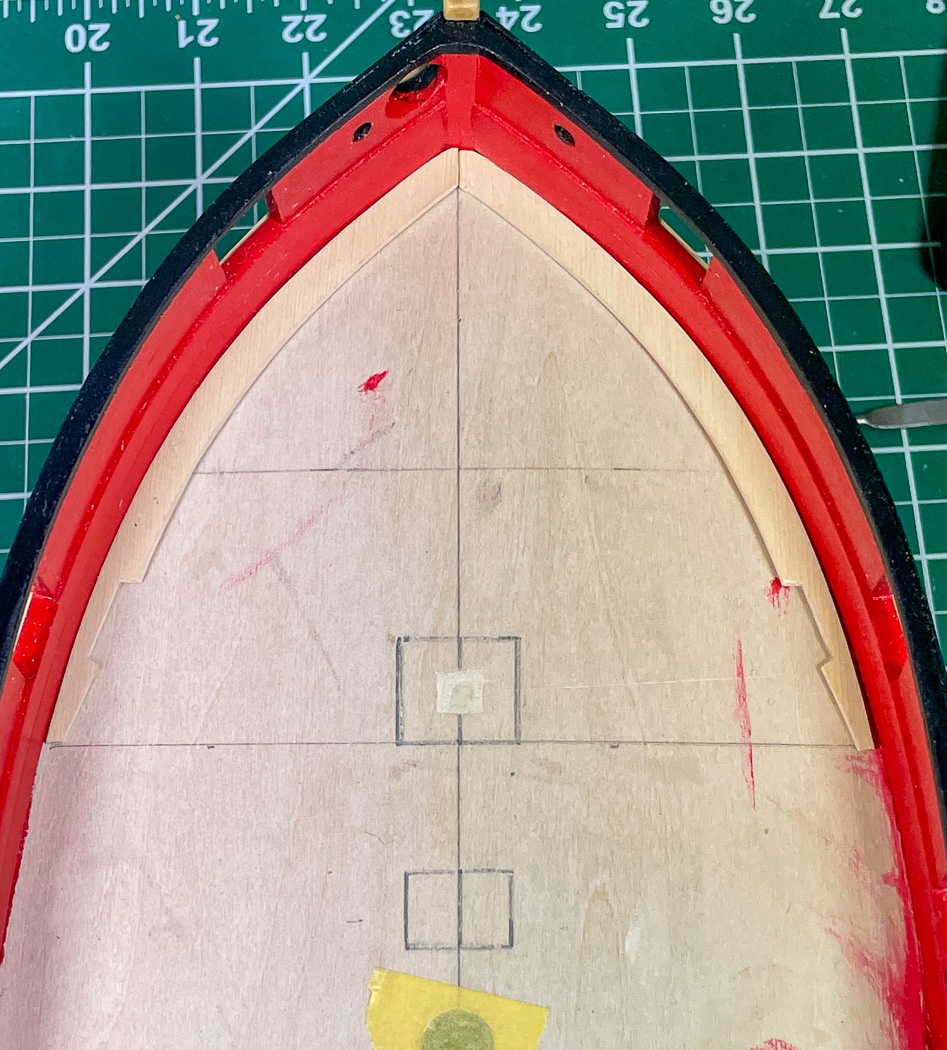
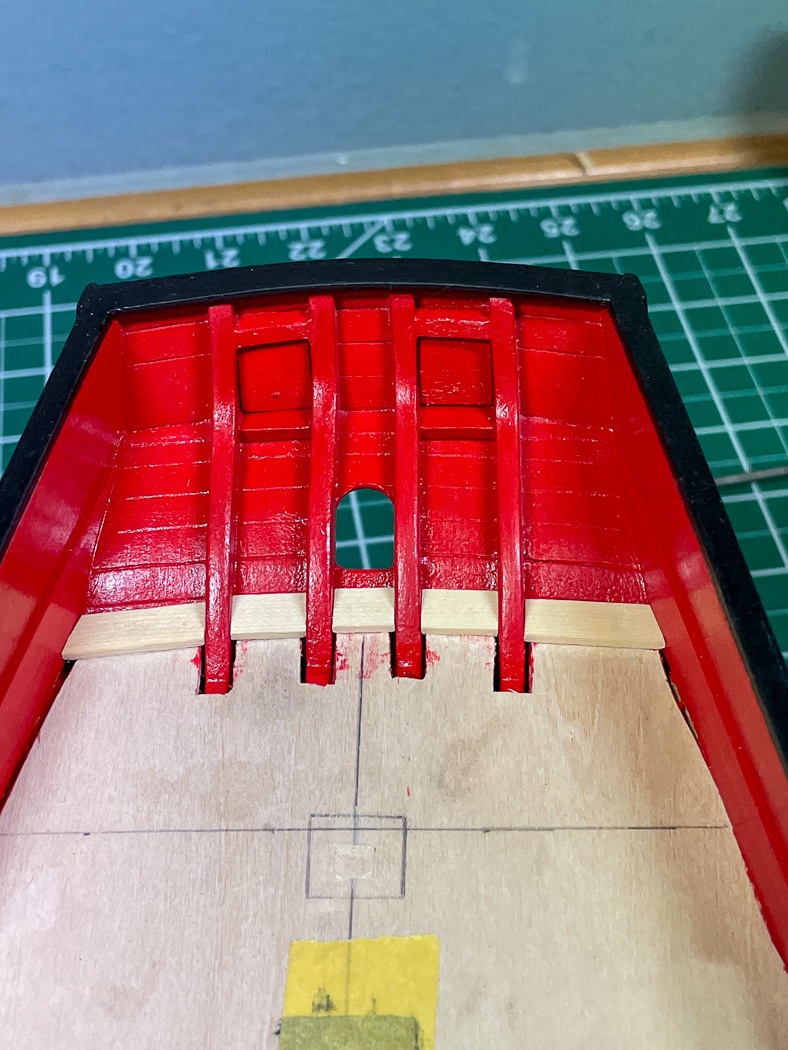
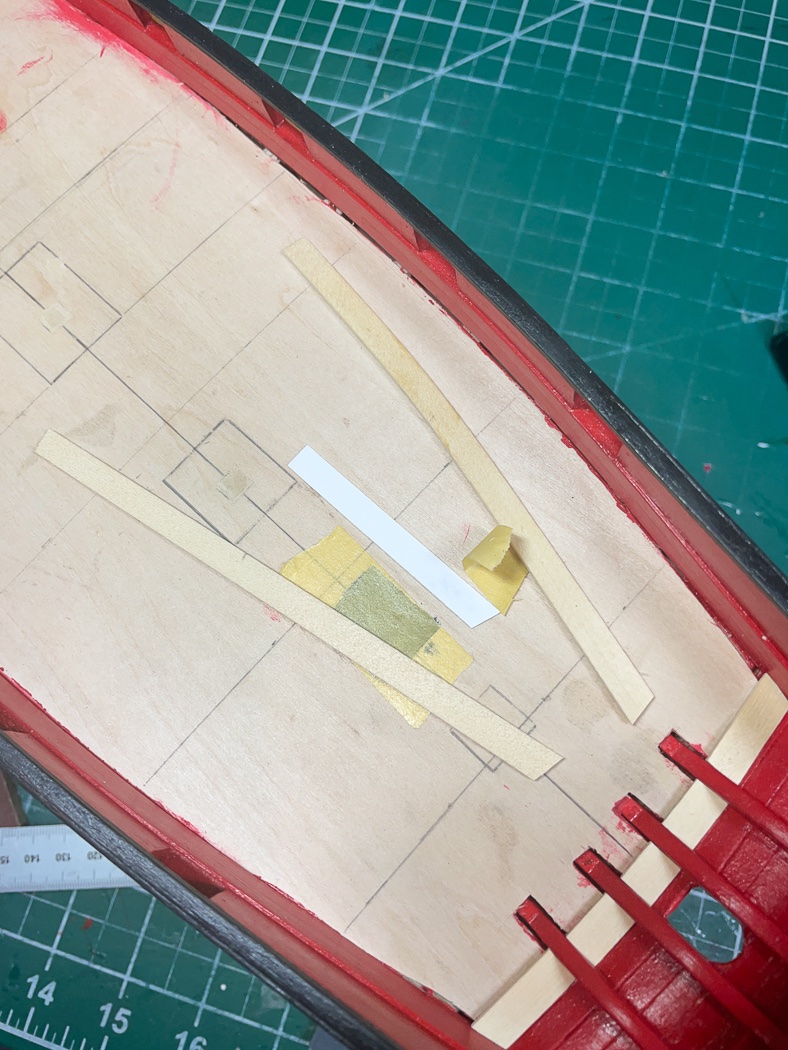
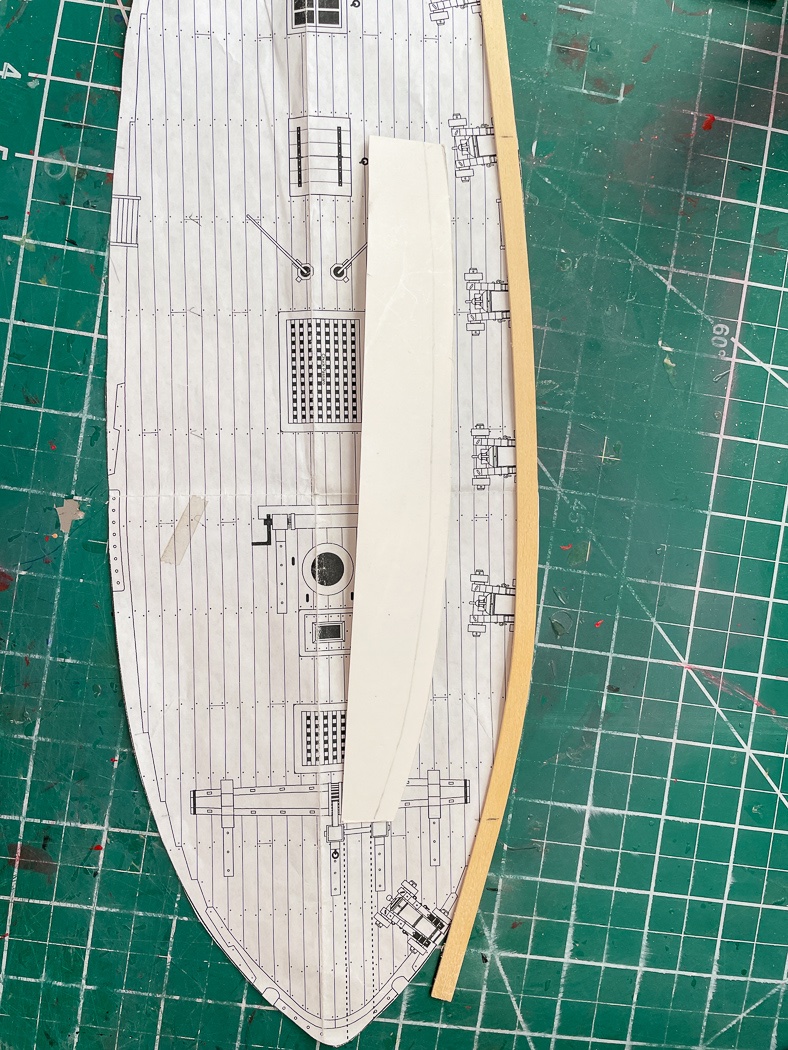
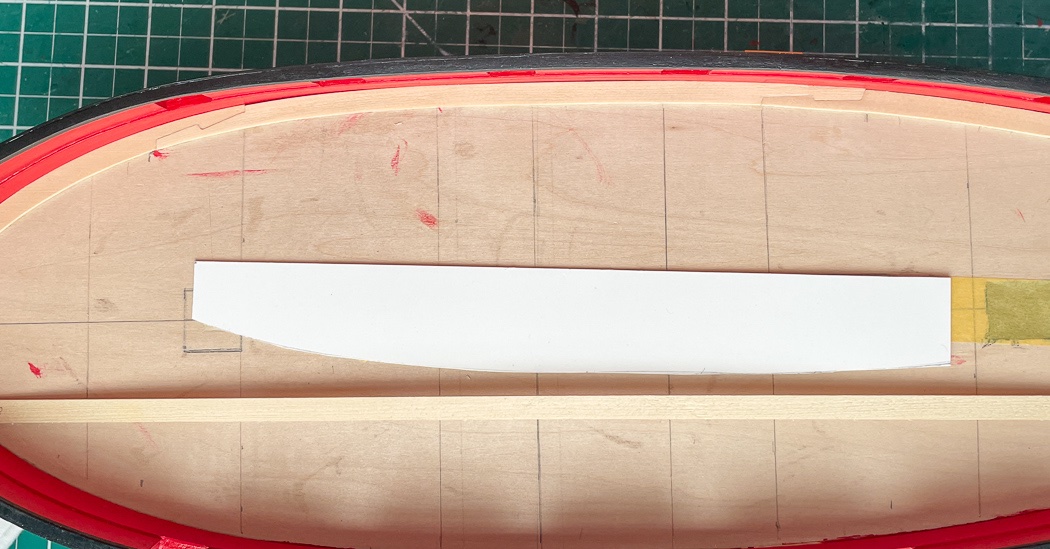
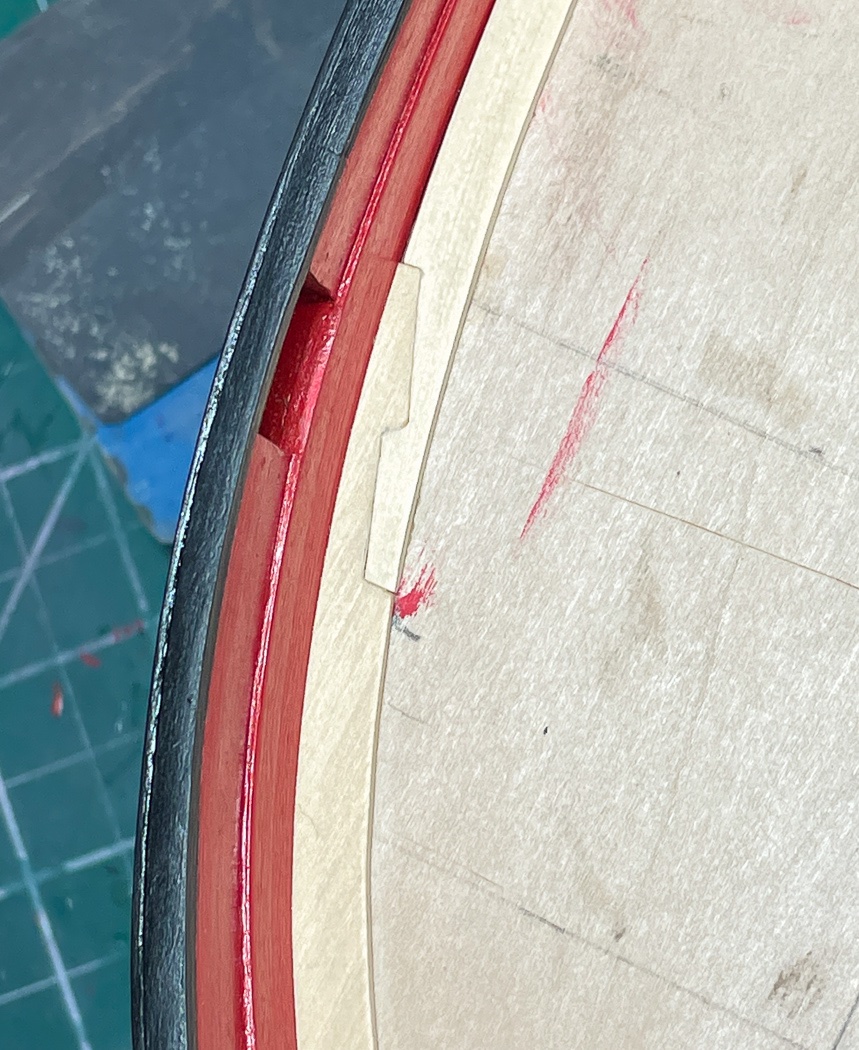
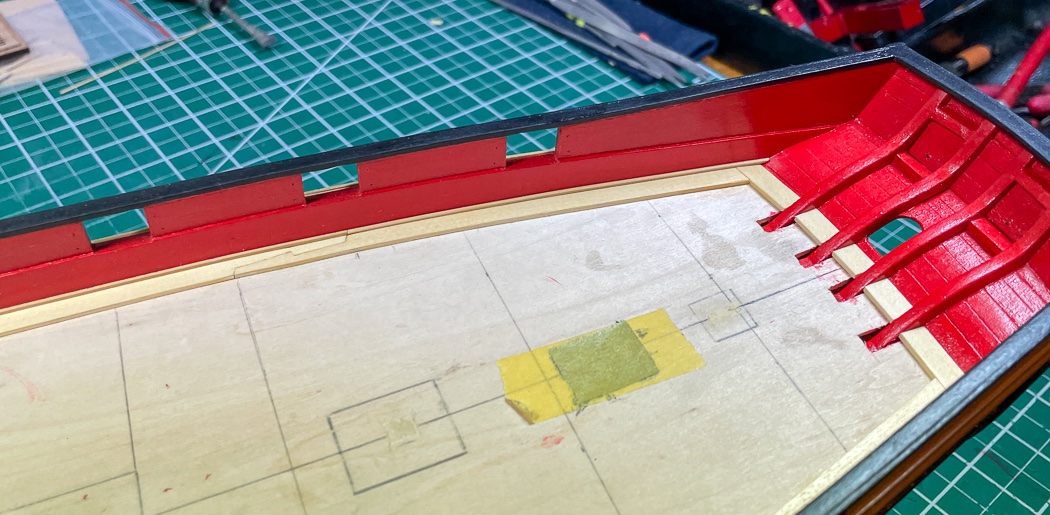
The margin planks and waterway - this small step is no small thing. I had no idea how to even begin despite reviewing multiple logs and reading the monograph multiple times. The finished product is just a ¼” strip of wood that runs along the outside perimeter of the deck. Making the six separate pieces along the bulwarks and five more small ones for the stern was an interesting adventure, and once again a first for me. It doesn’t look like much seeing the final result, but a lot of time goes into fitting everything together properly.
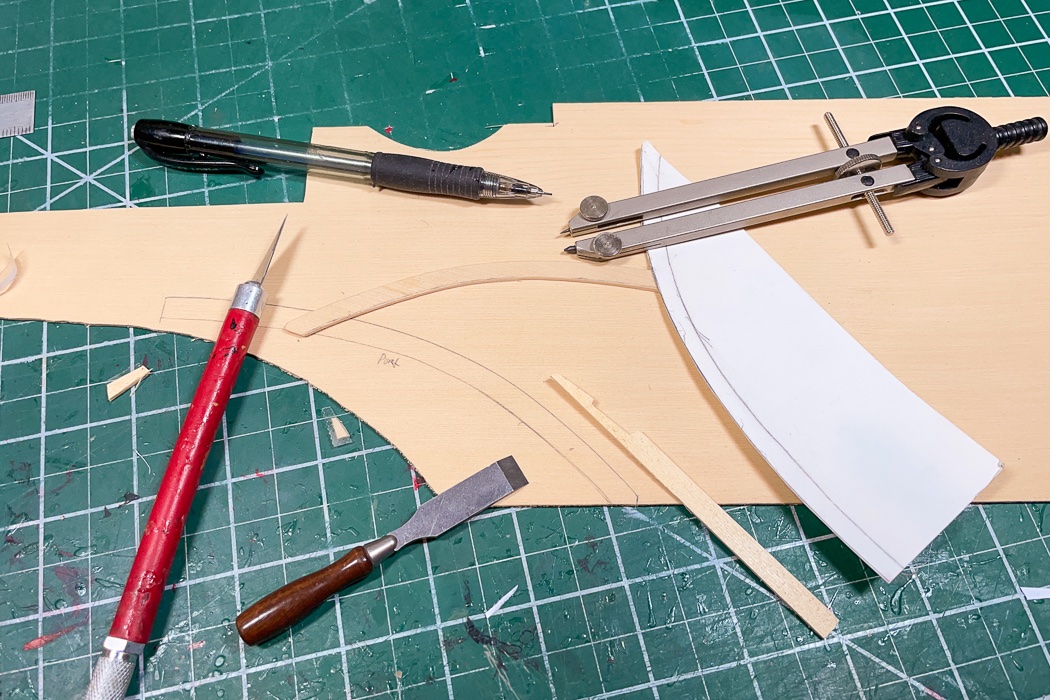
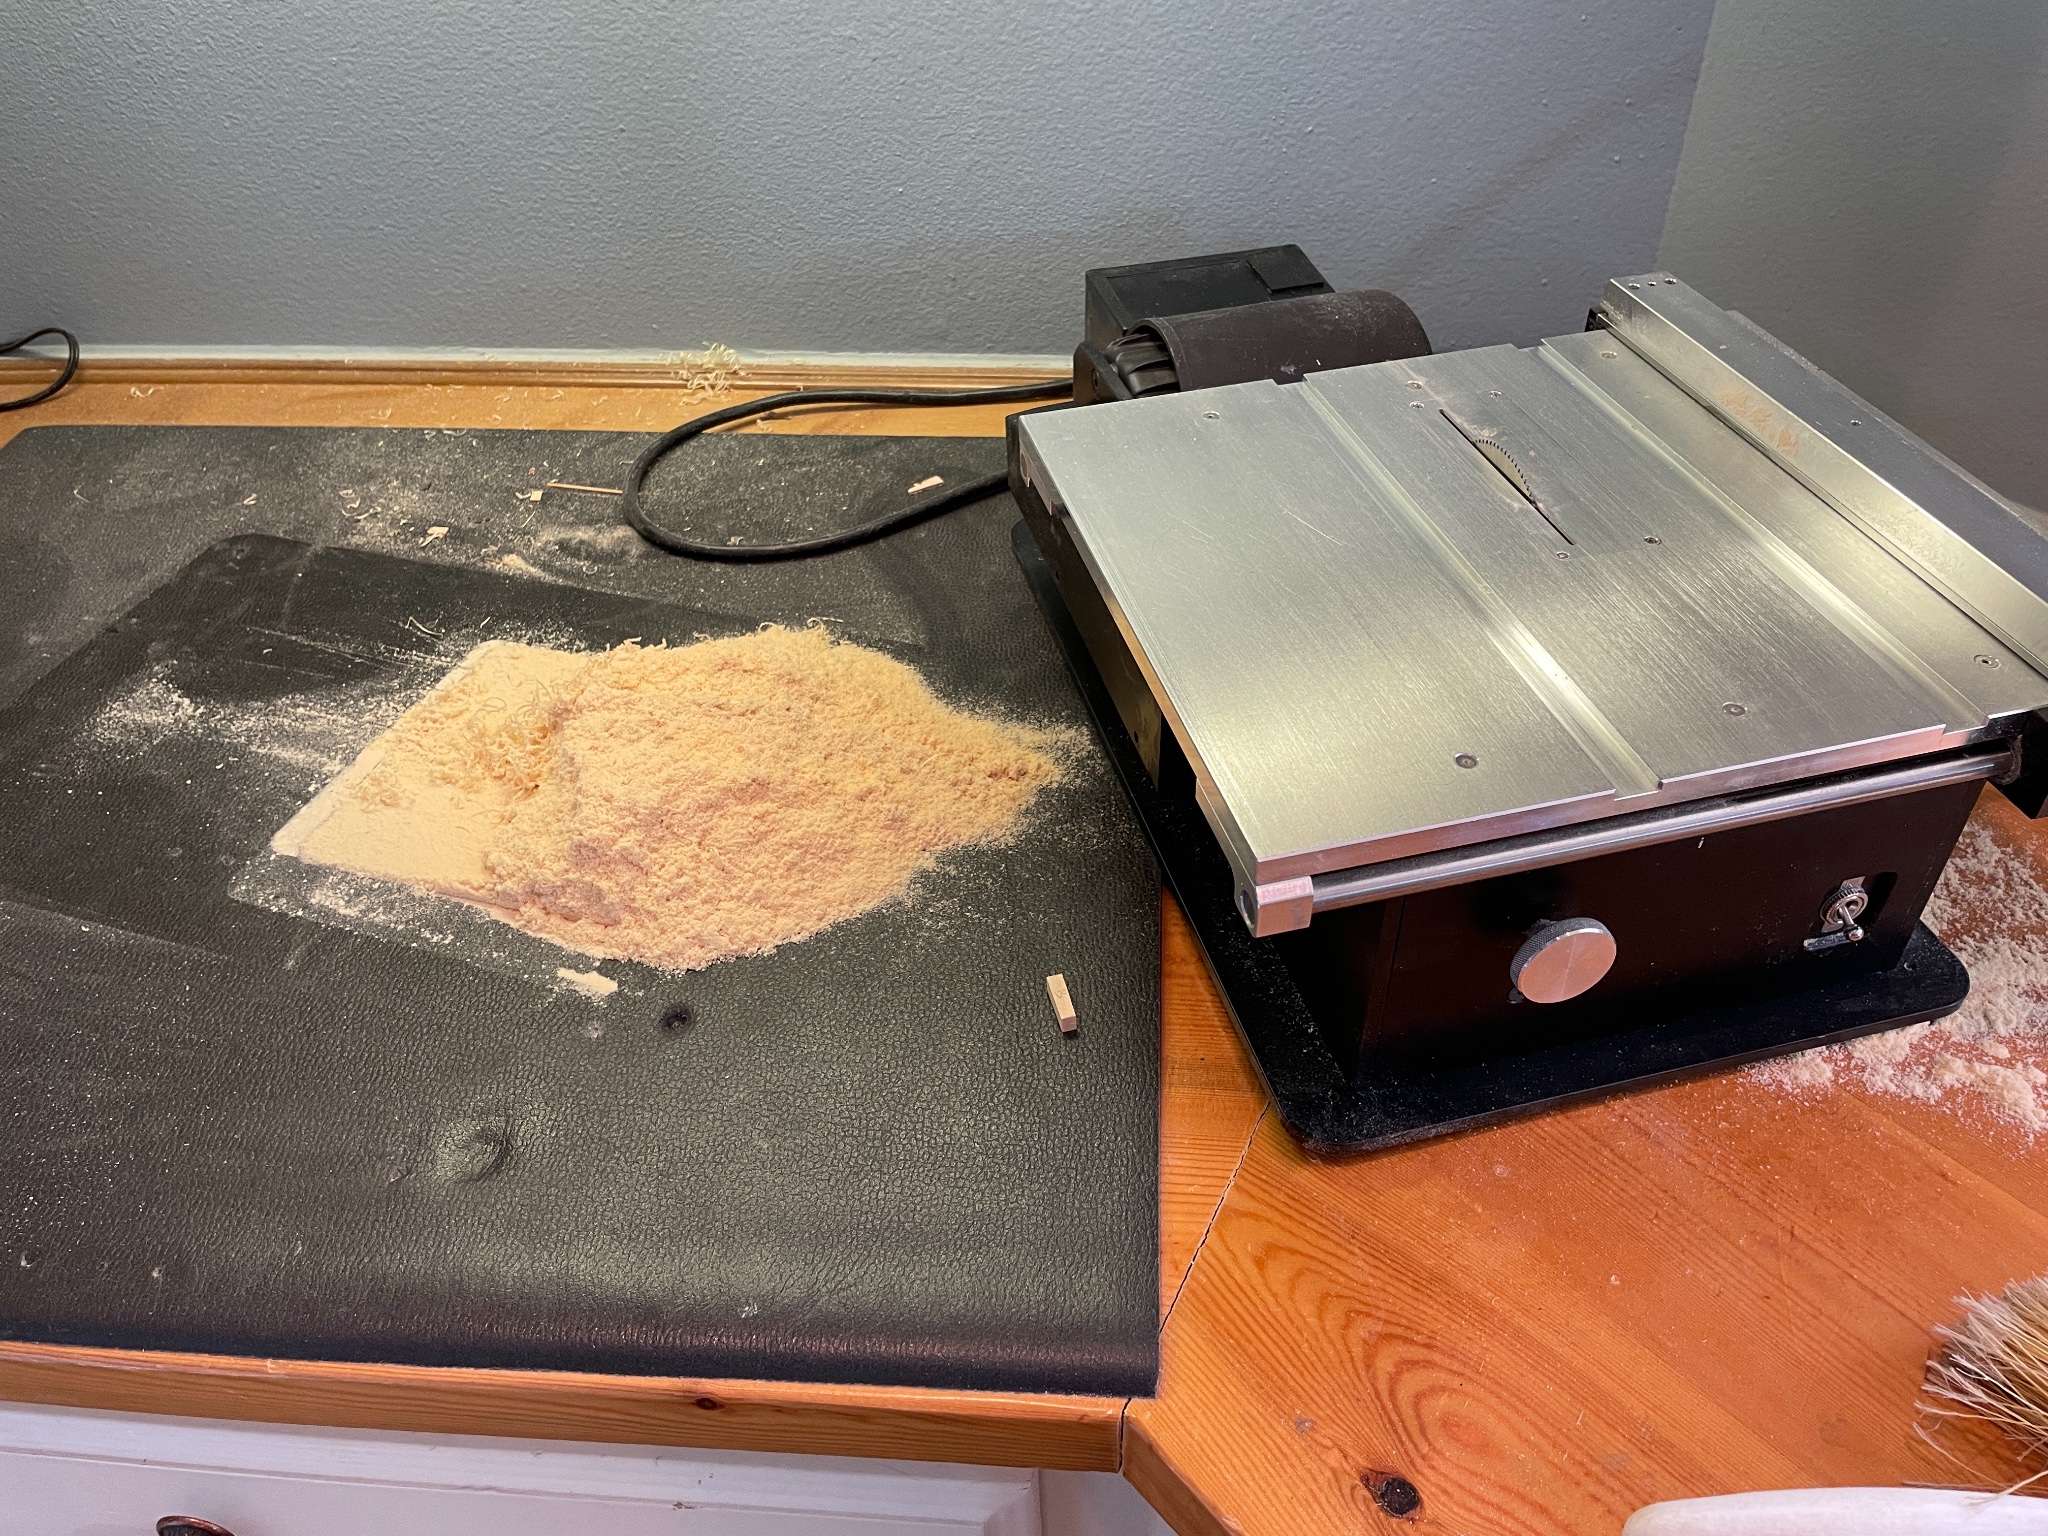
I elected to start with what I considered the hardest step first, cutting margin planks to fit the bow area. I decided to place the first scarph joint near the second port, consistent with photos in the monograph but a little different than shown on the plans. This basically divided the hull into thirds. I started with a cut out of the deck from the plans, used that to cut card stock to get the curve, then further modified that on the model to get an accurate curve. I transferred that to 3/64 sheet and then off to my new scroll saw. I smoothed the resulting edge on my Byrnes Sander then used dividers to measure the ¼ width, which I also cut out on the scroll saw. Once sanded smooth (this inner curve by hand, I know some would take a Dremel to it but I'd rather go slow, there's a lot of time in it by this point) I copied a model of the scarph cut from the plans on a piece of scrap, penciled that onto my new bow piece then cut it out with my #11 bade with an assist from my freshly sharpened chisels. I did it all over again for the other side and smiled with relief I’d figured all this out. My scroll saw skills are improving and while in theory I could have cut it without one, it sure comes in handy, it's a basic model but that's all I need.
All this may sound quick and simple but it wasn’t - I did each step slowly it was important to get exactly ¼ width to match up to the planks I ripped from ¼ wood for the mid and stern sections. Slow sanding and constant checking made sure I got it right.
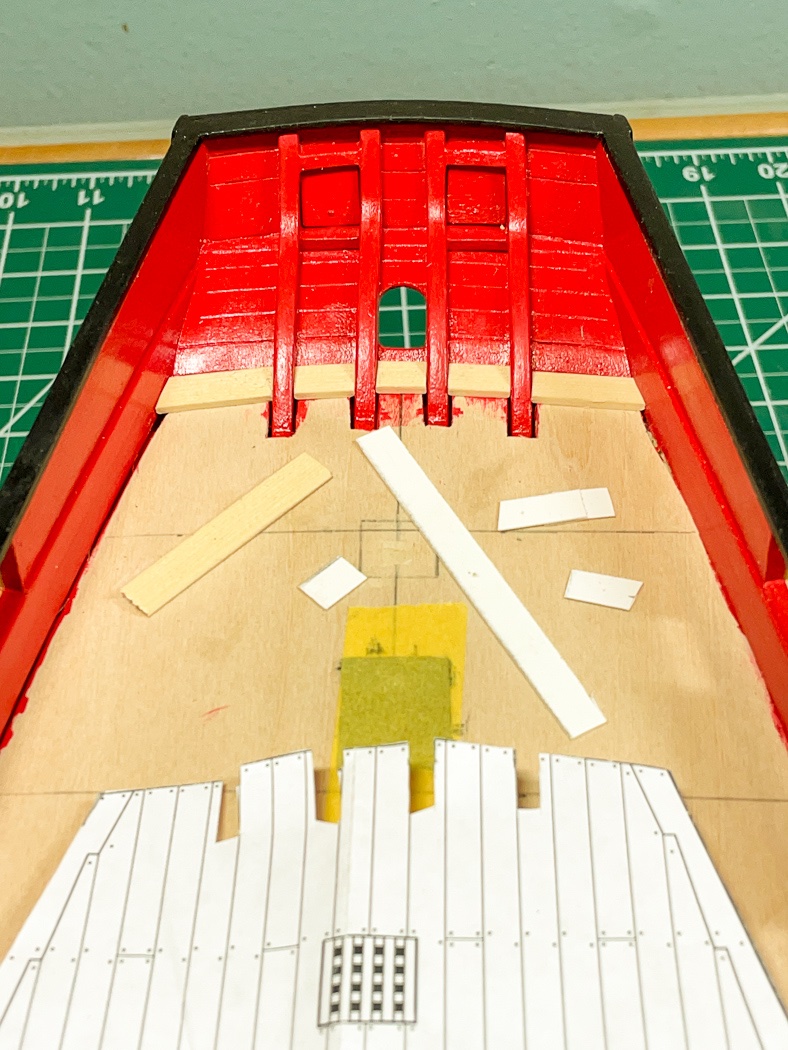
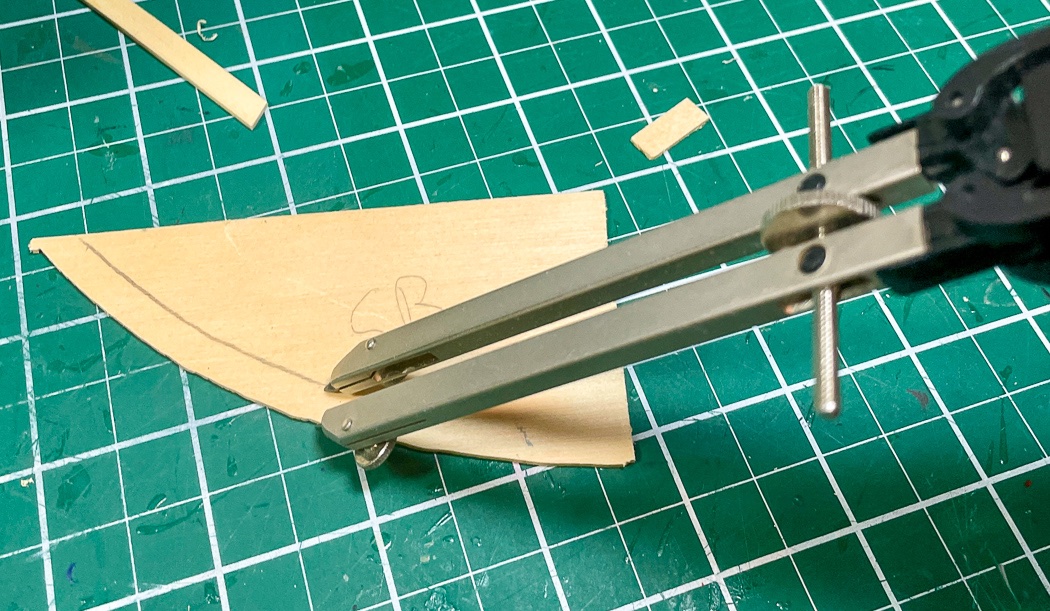
Next up, the stern. I started by sanding a 15 degree bevel with my Byrnes sander into a 6 inch strip of ¼ cedar to match up flush to the counter, then used the plans and card stock to get the proper width and angles. I created a little expander cutting one piece short of the width, putting double sided tape on that and sliding another short piece to fit snuggly. Using the card stock saved a lot of wasted wood and using the cut out of the plan got the card stock close to the shapes needed, I have have plenty of card stock.
The stern portion of the margin planks were pretty straight forward. I got my plank bending station out and was able to fairly quickly get both sides shaped, then with my scarph pattern penciled on I cut the scarph joint. Again card stock along with some tape made it easy to get the proper angle on the stern end of the margin plank.
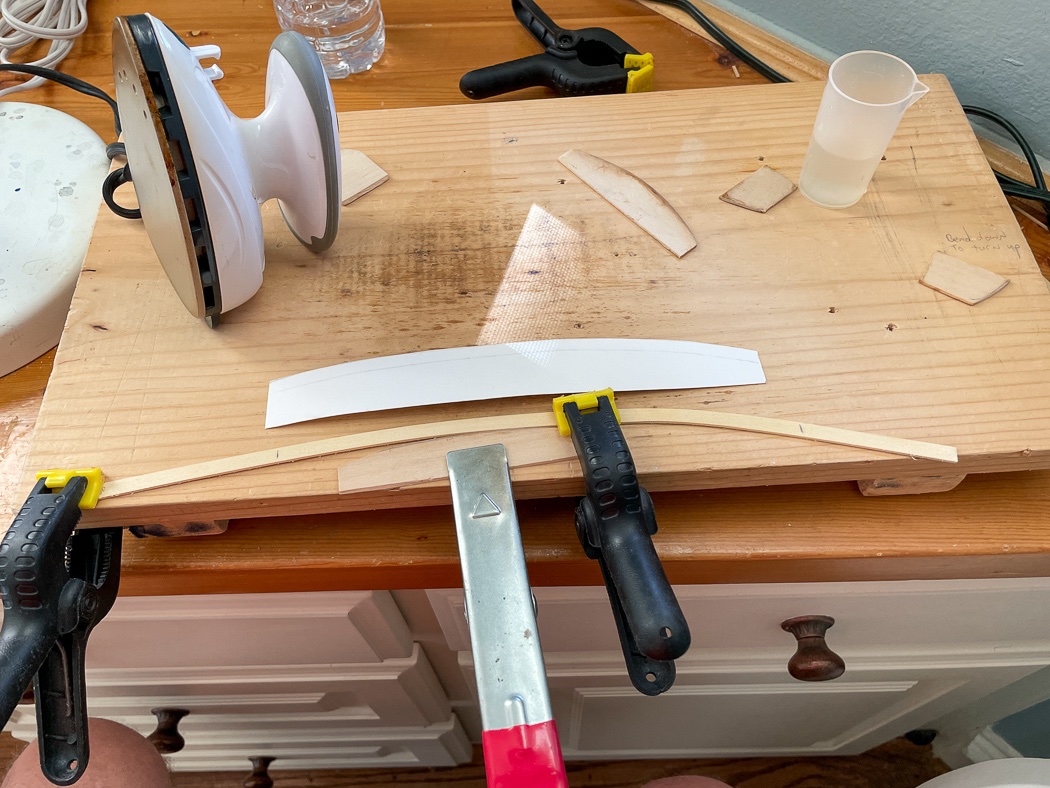
I thought I was almost home, I wasn't. I followed the same plans, card stock, process to get the needed curve for the mid-section. It wasn’t until I used an extra long plank (the pencil marks in the photo signify the needed length) and completed multiple heating sessions with different curve patterns on my plank bending station was I able to get the curve for the middle section of the margin plank. It’s a shallow curve with a strong bend at the bow end, it took some time to bend the ¼ cedar into the proper shape, matching it to the card stock pattern also helped. My first attempt with a plank cut to the proper length wouldn’t allow me enough torque to clamp the hard curve at the end. Once again I’ll say Chuck’s heat plank bending method works. Without soaking (using the steam setting on the iron did appear to help this time) I was able to shape, reshape, and reshape again to get a flush fit. These two planks both basically took a day’s work to get right. The cedar held up fine to multiple trips under the iron.
To get the proper scraph cut penciled on I put the freshly curved mid plank under the bow piece and held them in place with plastic clothes pins (these have soft tips and not much pressure to avoid marking up the hull), traced and cut the joint. Once it was done I did the same for the stern, doing one at a time is essential to ensure the right length. I cut the joint too big based on the penciled guide then slowly filed and sanded all the angles and cuts into a relatively smooth fit. It comes as no surprise that while the pattern I cut worked for the stern and bow sections, the final curves create a different angle to match - something the first version, which I’ll politely call prototype now that its in the waste pile, proved. I was too in the zone and forgot to get photos of this step.
I know it just looks like a few curved sticks of wood, on a kit these would be provided as laser cut parts if they were provided at all. Making them myself was something I wasn’t sure I could sort out, it’s pretty rewarding having done so. I’m happy with the result.
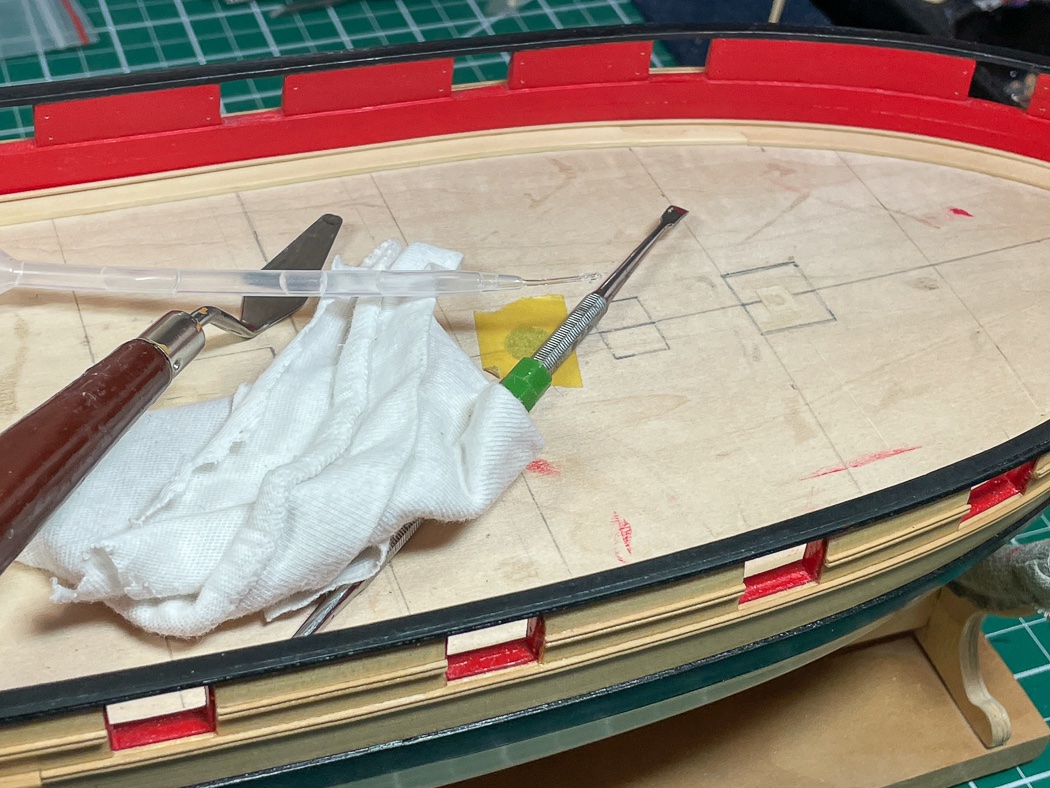
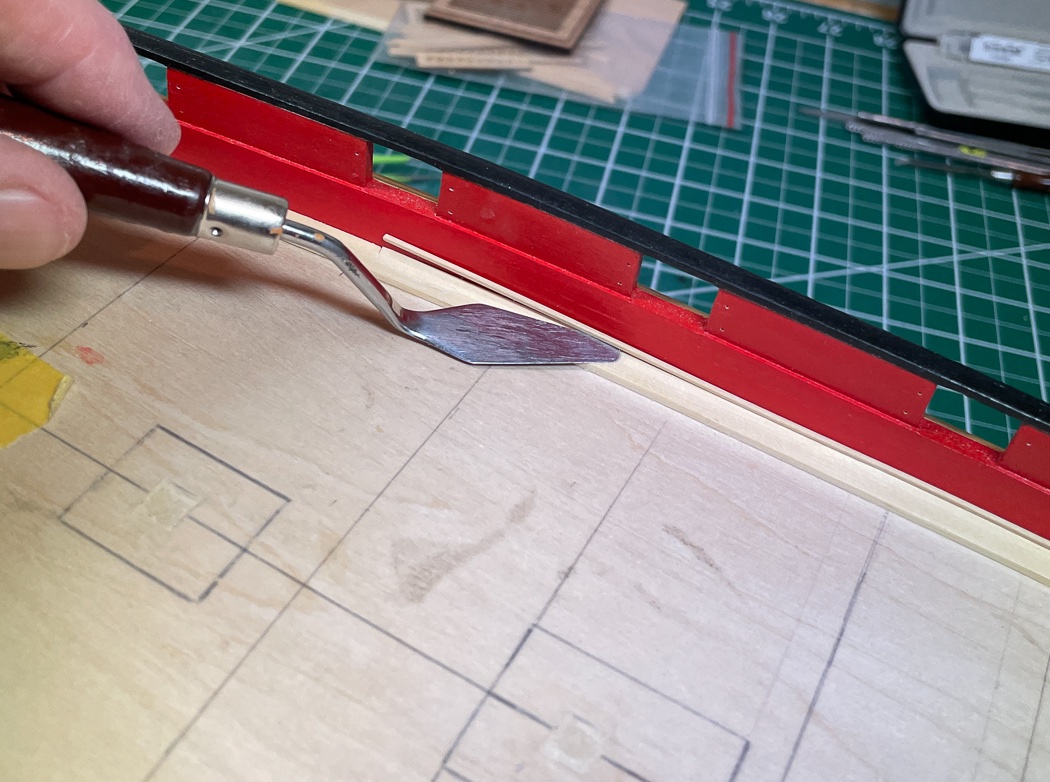
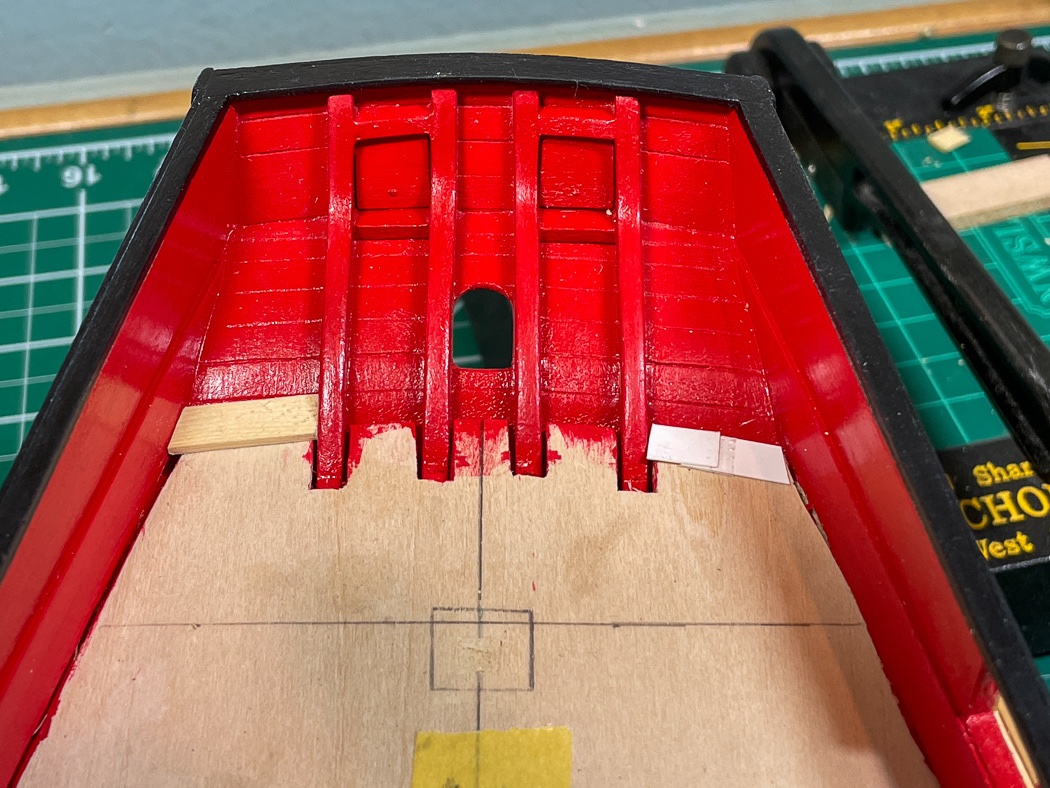
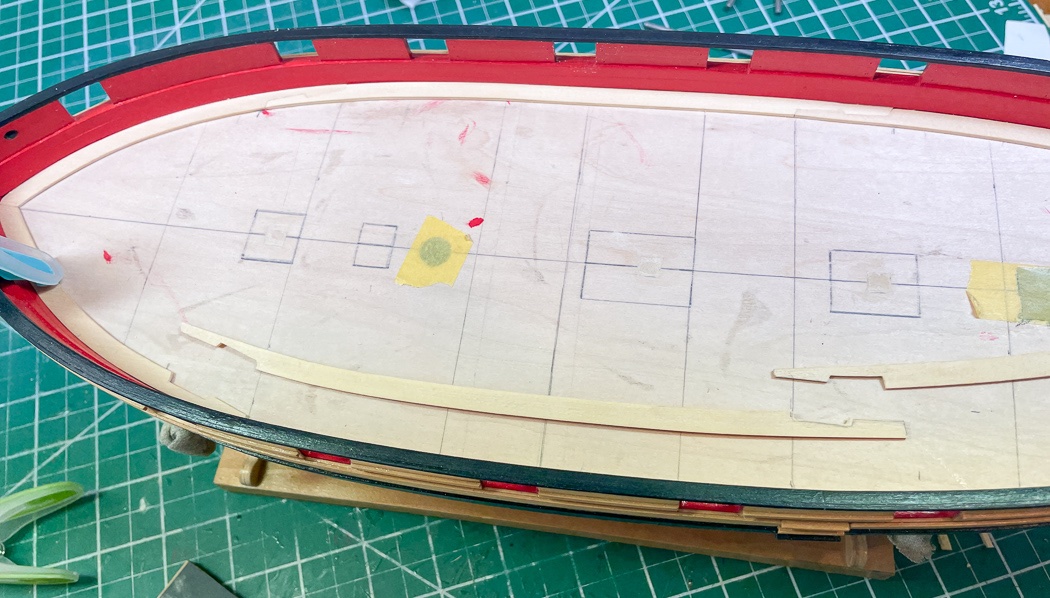
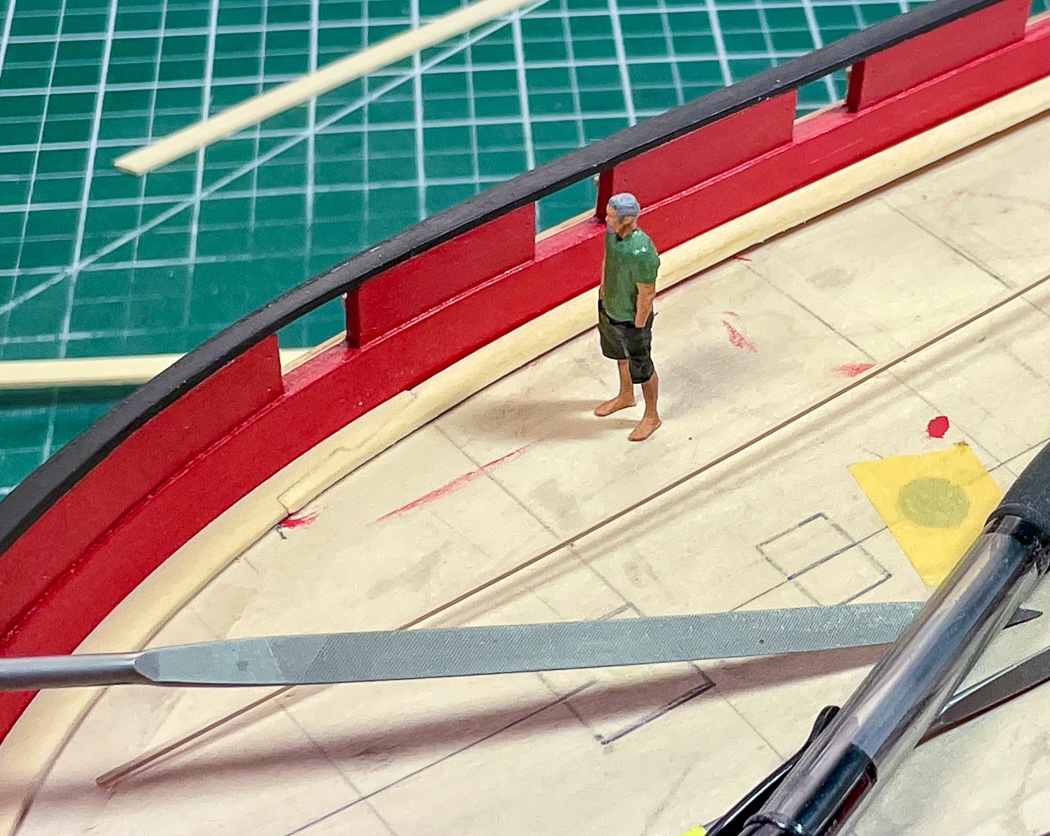
The last step is to use 1/32 square strip with one corner rounded off to form the waterway (when you want something fun to do take a piece of 1/32 square and round off just one corner). As Chuck notes on the real ship these and the margin planks where actually one solid piece, this simulated approach works just fine. I was able to use boxwood strips Chuck kindly provided. I love the cedar but it doesn’t cut down to 1/32 square very well, it just kind of shreds.
I have some tools that are versatile and multi-use, this very thin spatula is one. I put a dab of CA on the tip, ran it under the waterway a few inches at a time, then fit it tight with a soft cloth and using my trusty dental scraper. Once I settled into this approach it went quickly.
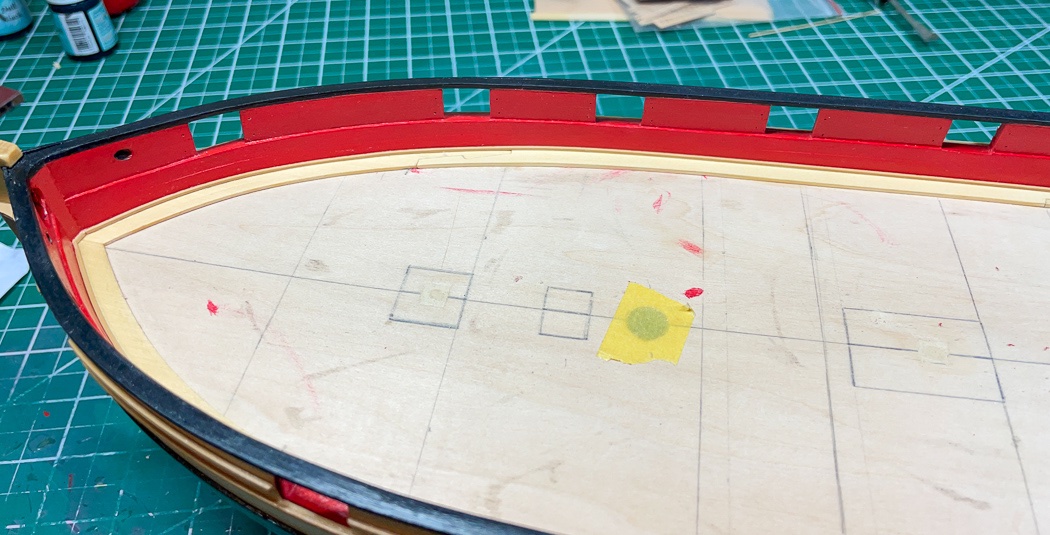
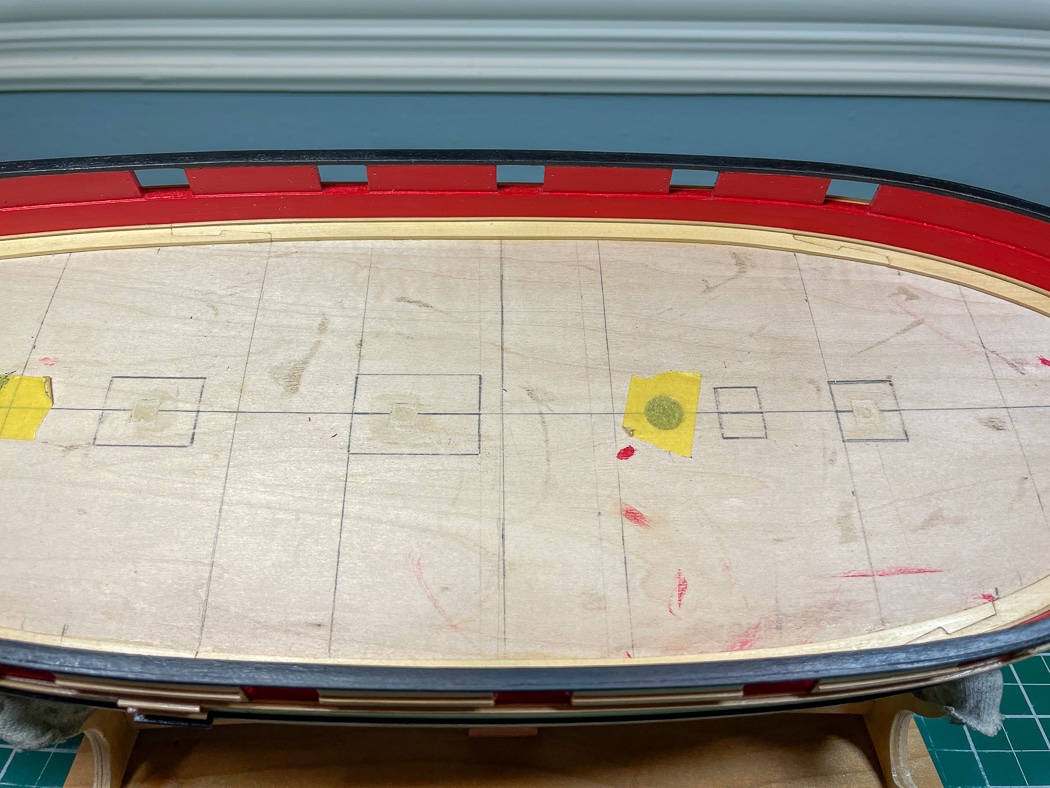
Here is the finished product with a light coat of WOP to protect it a bit, I’ll wait until the rest of the deck is in before sanding it.
As I noted I’m happy with the result and having had the experience, but I’m glad to have this step behind me. It was one of those that I really had no clue how to do when I first read at the monograph. It seems things I didn’t know how to do is becoming a pretty long list as I’ve noted throughout the log. I do know how to make cargo hatches and that’s next.
PS: I feel like this post has a lot of photos of sticks…
- Ronald-V, mtaylor, Edwardkenway and 15 others
-
18

HM Cutter Cheerful 1806 by svein erik - 1:48 scale
in - Build logs for subjects built 1801 - 1850
Posted
It does get a bit tricky at this point, your eyes seem to tell you one thing but that doesn't correspond to the tick marks. You really have to trust the marks, I found trimming based on the second bulkhead vs. at the bow worked better, plus constantly rechecking the remaining distance.
Your planking is looking great, nice and tight.