


glbarlow
-
Posts
3,855 -
Joined
-
Last visited
Content Type
Profiles
Forums
Gallery
Events
Posts posted by glbarlow
-
-
-
I haven’t tried my servomatic yet, glad to hear you had no problems.
- Ryland Craze, Canute and BobG
-
 3
3
-
Great tutorial detail we can all use, thanks BE!
-
6 hours ago, Edwardkenway said:
workmanship
5 hours ago, JpR62 said:explanations
4 hours ago, DelF said:carpentry
Thank you all for the kind words. I appreciate your taking the time to have a look.
Thanks to all for the likes as well.
- Edwardkenway and mtaylor
-
2
-
This will be fun to follow Rusty. I have Flirt and will be first in line Sphinx so I’ve passed on this one and will enjoy it vicariously.
- Rustyj, VTHokiEE and FrankWouts
-
3
-
Things are proceeding slowly right now, one because some of the deck details are slow work but also because the holidays are coming up and Covid or not life gets a bit more hectic.
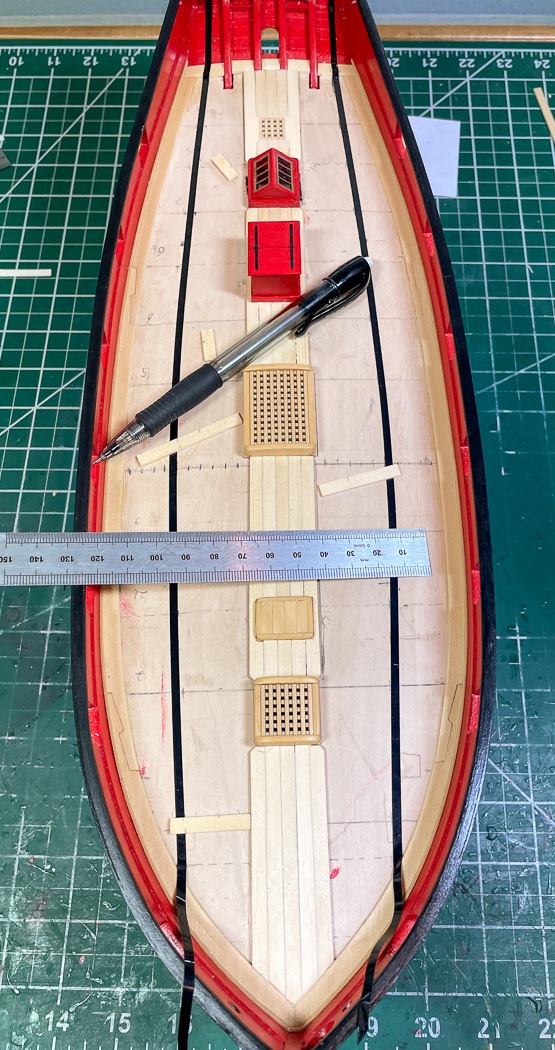
I’ve decked a few models in my time but here we are again with another first on Cheerful, the curved planked deck. The deck is planked in two belts (much like the hull only flatter) The first step of the process is to establish the curve for the inner belt of six planks either side from the five already laid. I used thin artist tape, perfect for the job. I had one clear staring point, the full six plank width at midships. maybe a general idea of the bow and stern end point from studying photos of Chuck’s model in the monograph. But then its no more than a feel for what looks right, not easy for my metric based mind. I stuck and unstuck tape until it wouldn’t stick any more then pulled out a new piece and started again. I had to ask for a little affirmation from Chuck I was in the ball park and that finally I was. With that done I duplicated my 'artistic' curve on the other side - which I might add is harder to do. It did help to confirm equal distances from each bulkhead using small scrap wood.

Then it’s time to line the deck just as I did with the hull. I had marked the bulkhead locations back when I installed the false deck, that was a wise move on my part, no need to guess where they are at this point.
I converted the tape line to a pencil line and removed the tape. Using the planking fan and strips of card stock I worked each each bulkhead on both sides. This is tedious but essential work, it took me a full day to complete this task, there are no shortcuts to measure, mark, measure.
In order to avoid slivers of planks on the sides of the deck furniture the monograph notes to instead cut the plank at an angle creating a notch to fill with the next plank. I had six of these to make as it turns out. I made templates by cutting one card to be just the plank width then a second card to fit the notch, then used double sided tape to combine them and complete the template.
These are not easy to make right. The concept is easy, the execution not so much in order to get a tight fit. I used more double side tape to attach the template the the ¼ plank and used my trusty #11 blade to cut the plank. Then I did that 5 more times…ok more than 5 more times was needed to get 6 that fit right. I was thankful this was not a kit (yet again) because I just kept ripping and cutting ¼ planks until I had what I wanted. In the end it creates a nice look I think.
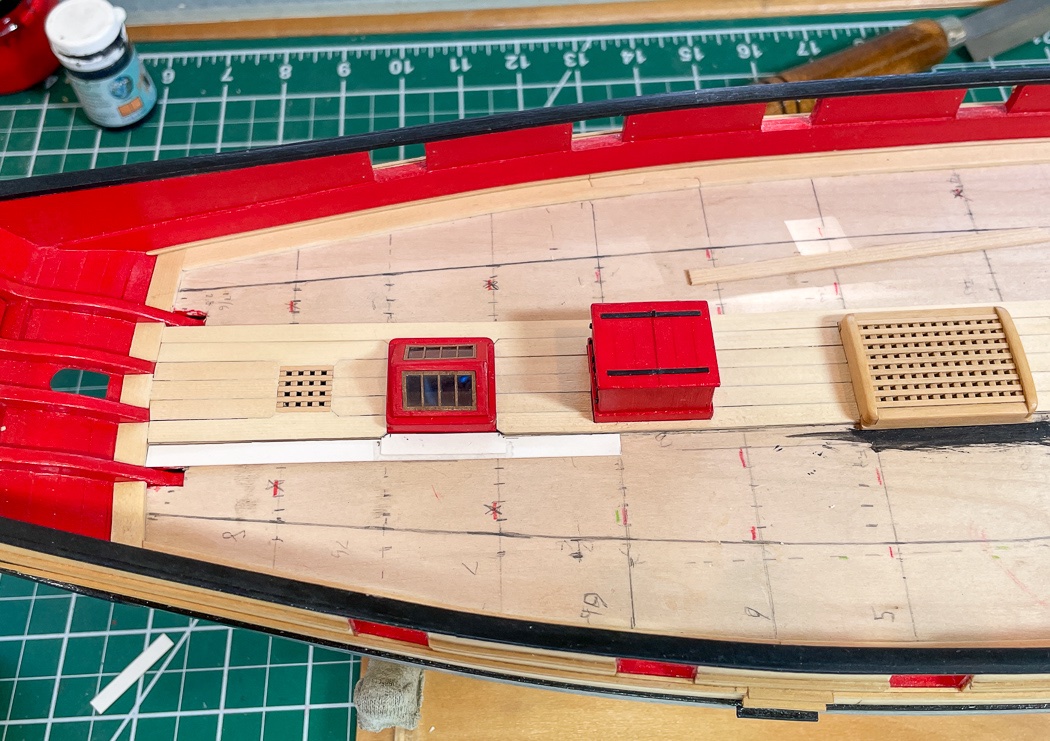
As with all the deck planks I ran a #2 pencil line down one side of each plank to simulate the caulking. In the process of making these I twice knocked a hinge off the companionway, I decided not to replace them a third time until I was done with the decking.
I’m happy with how these came out and will admit to two modifications I made, on purpose, because I’m of limited skill. With creating the notched fits around the furniture I elected not to taper the first run of 6 plank belt because I didn’t think the combined tapered and notched plank looked right, at least not to the extent I could make them.
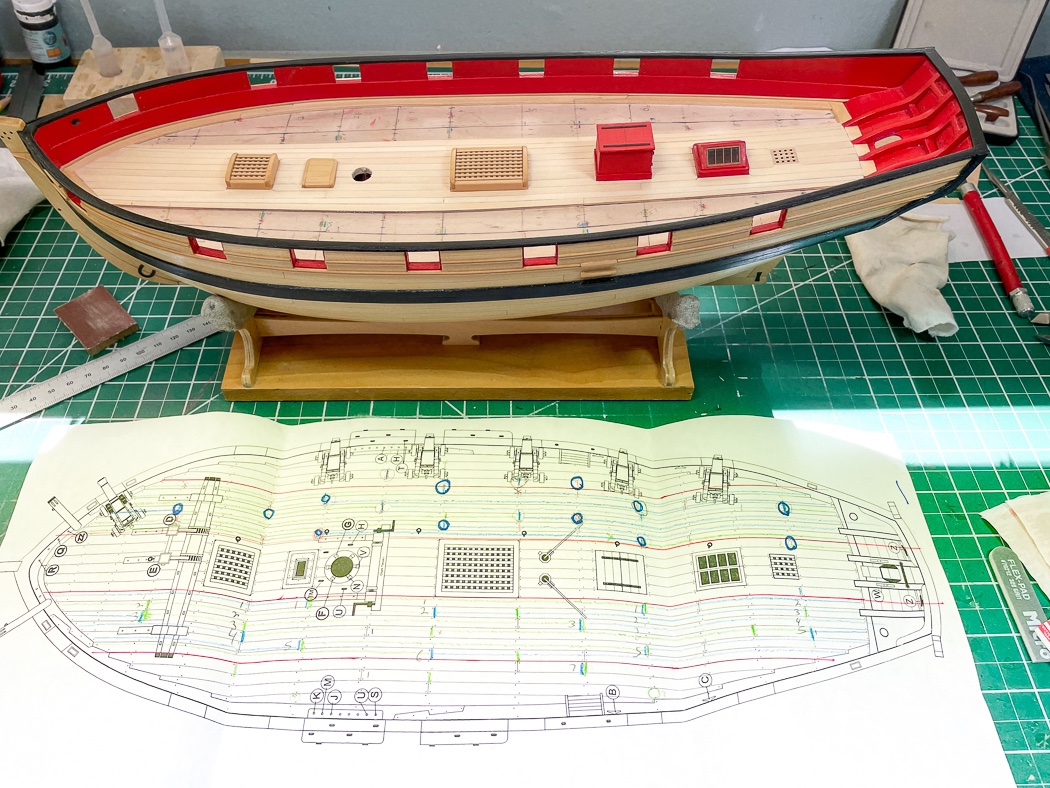
I also modified the butt shift pattern from the plans on this first row for a similar reason. As a result I spent a good deal of time on a paper copy of the plan modifying it to stay true to the four butt shift pattern, then transferred those marks to the deck. I elected to use a razor saw to cut butt joints partway through a full length plank for those close to the stern or bow. This was the best way for me to ensure a clean taper given my limited skill. For model purposes I really only needed one actual cut joint per row.
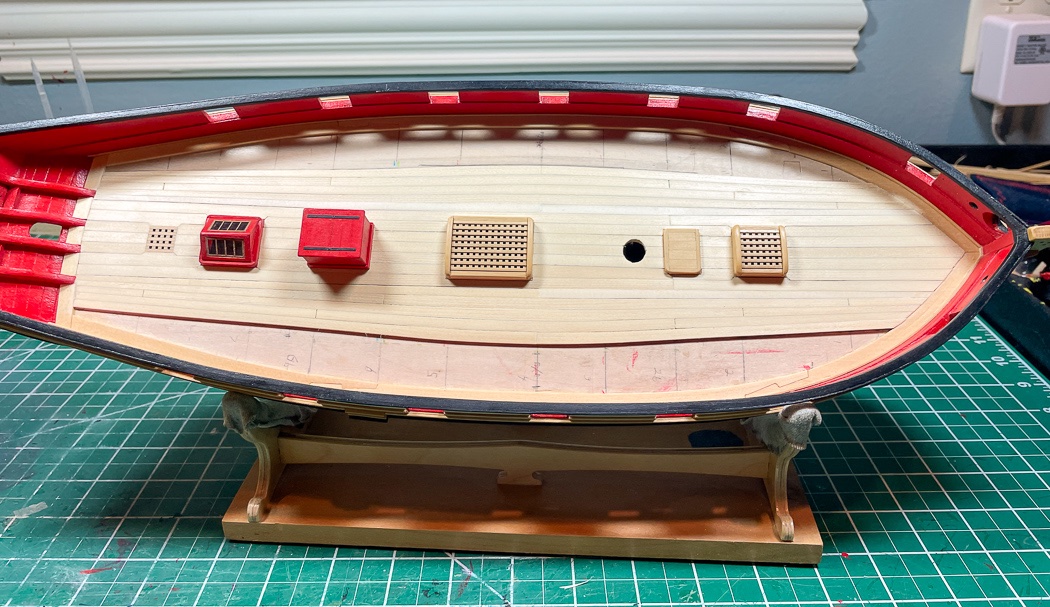
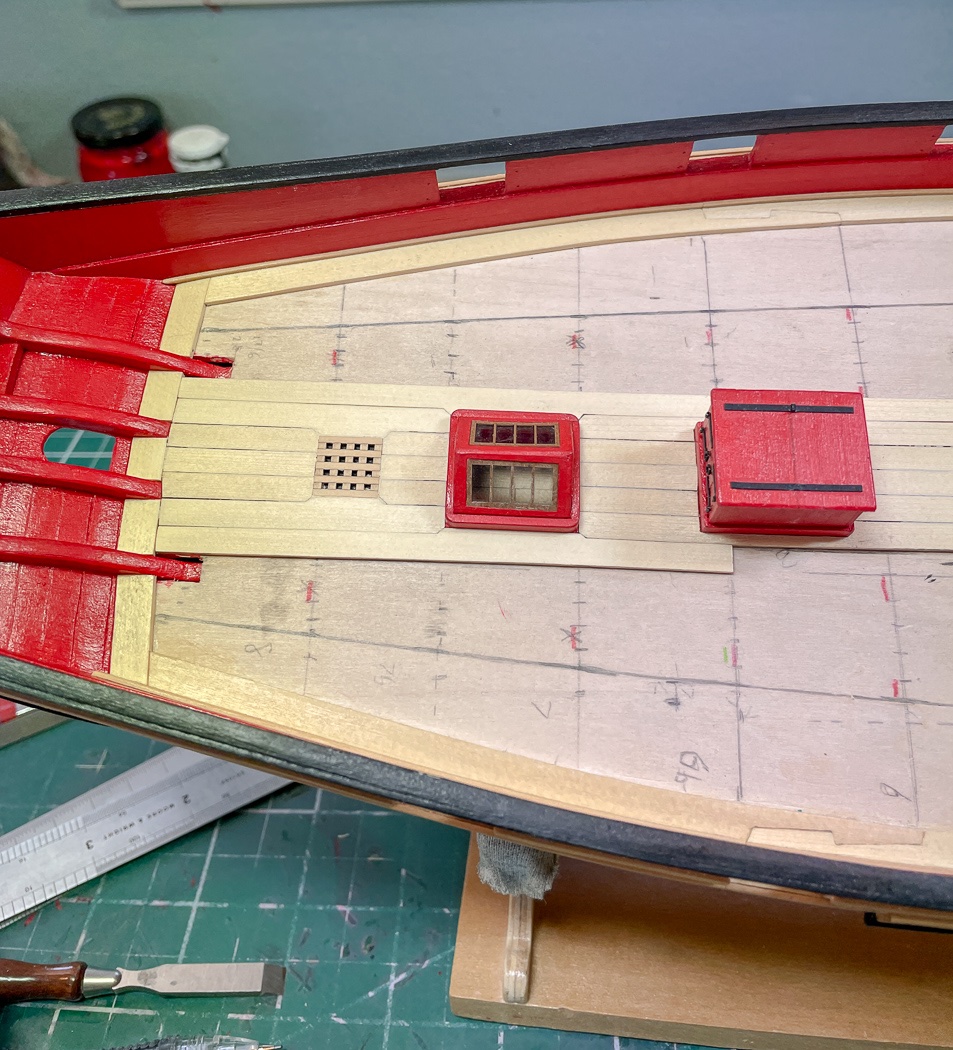
Here’s the first belt competed, I’m not sure I got the curve exactly right, I think it will look fine once the 2nd belt is installed. I have not done the final sanding and scraping or applied any WOP, I’ll do that with the finished deck. I’m ok with the color and grain variation, the WOP will even it out and, like the hull, it gives the deck character.
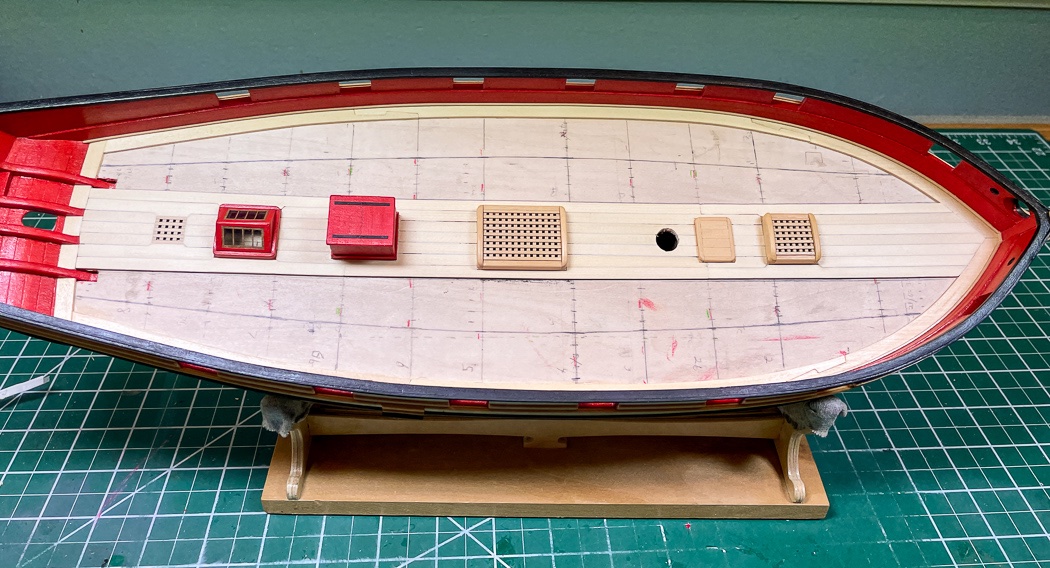
Off to cutting hooded planks for the second belt and finishing up the deck.
-
-
-
-
So with the Alert or others on this list, you could build it without gun ports and paint the hull a subdued color. From an on the shelf model perspective I’m not sure a hull painted black would be very appealing though.
From the little I know I’d think their would be very little difference for a repurposed ship. Not many if any were built to be smugglers. Aside from subtle differences to make it quieter and faster it would look much like the original commercial or war ship. Britain’s cutter fleet like Alert were in part to chase smugglers so .....
- Edwardkenway, lmagna and mtaylor
-
3
-
The truth is breaching ropes are probably enough for those tiny cannon. Especially after the ship is rigged. But is enough good enough. I only did breaching ropes on my Nelson, but that was because I was ready to move on to Cheerful.
I will fully rig Flirt when I get there, as very painful to my fingers and eyes that will be. 🤣😂.
Only you will notice....😳
- Vane and Edwardkenway
-
2
-
-
I scratch built the bowsprit bits for Lady Nelson because the kit pieces were so out of scale. Take a look from the link below if your interested..
Very nice work on main bits, excellent craftsmanship.
- mtaylor, Edwardkenway and FrankWouts
-
3
-
On 11/30/2020 at 2:30 PM, VTHokiEE said:
set the taper
I don’t know about the finger plane part, but I get the taper my taking measurements at various points from the plans then frequently check it against the wood with my digital caliper as I turn it with a drill or lathe using various grits of sandpaper.
- mtaylor, thibaultron and Canute
-
3
-
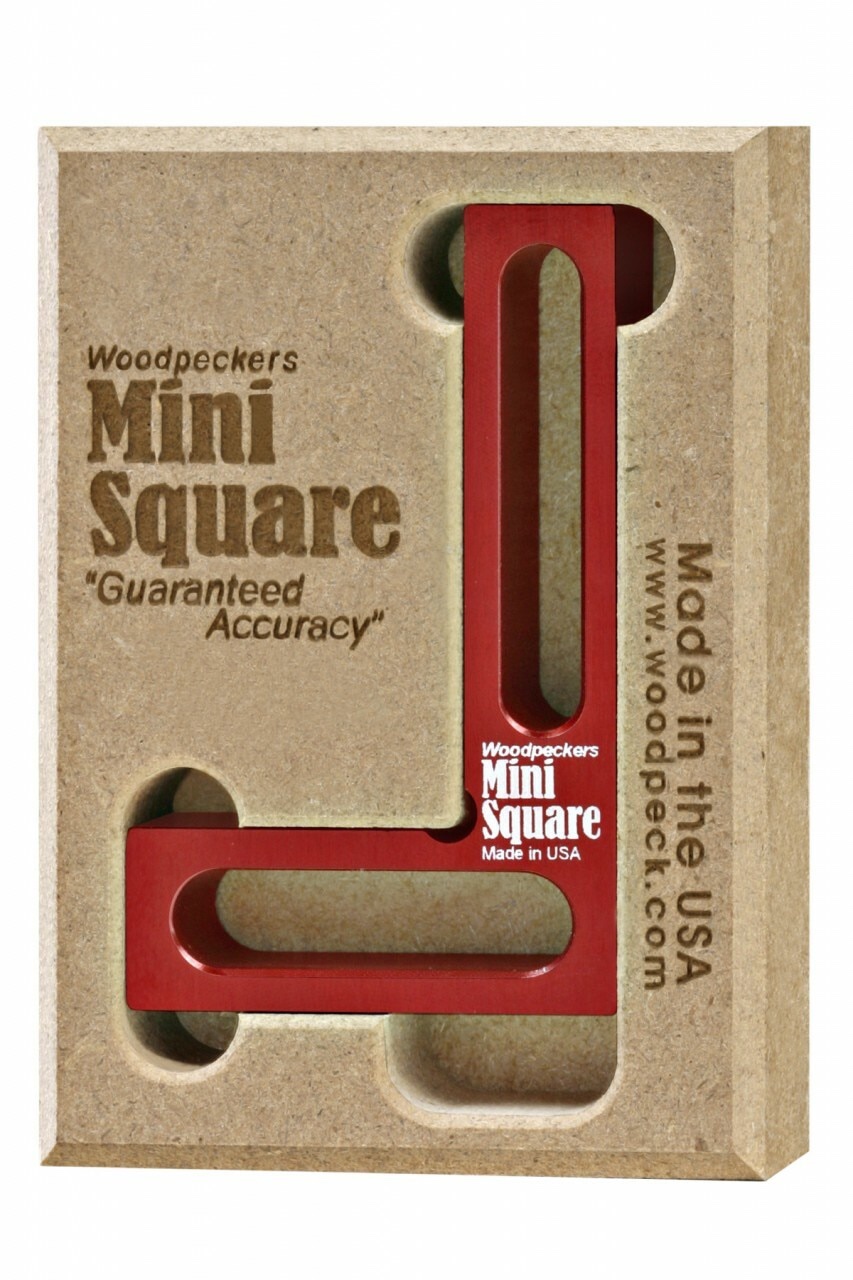
https://www.ustoolandfastener.com/woodpeckers-mini-square-minisquare/?utm_term=&utm_campaign=ECI+-
I have three of these and two mini triangles they work great for keeping things square.
Sorry for the huge photo and crazy long link.
-
Check your plans as you start rigging to make sure the "eyes" on the dead eyes top and bottom all line up the same.
Nice looking detail work - very crisp and tidy. I always appreciate someone who can paint neatly.
- Edwardkenway and Vane
-
1
-
 1
1
-
1 hour ago, Guybrush said:
What kind of changes could be made to give it a "less of a British warship" look?
I think you'd have to do the research on that and decide what you wanted to do. It's an armed fast cutter, likely what smugglers would have had. As you noted there likely isn't any quality model out there that is "smuggler's vessel." I'm only offering a likely representative vessel that as I noted, an excellent kit with quality parts, design, wood, plans and instructions. It could be as simple as how you paint it.
- Ryland Craze, mtaylor and Canute
-
3
-
-
I agree with Chris, Vanguard Model's Alert is a cutter and would be typical of smugglers - certainly a great starting point.
https://vanguardmodels.co.uk/product/alert-order/
Vanguard models are the best kit in the industry in my opinion, well designed, using pear wood instead of cheap walnut, with excellent plans and instructions. I highly recommend anything designed by Chris Watten. There are a number of nice build logs already on Alert, a search will lead you do them and give you a great start to how this model looks. It would be easy to make it less British warship and more smugglers. It was a fast ship, the prerequisite of any smuggler.
On another note as a dad, that's very kind and an exceptionally nice thing to do for your dad.
- EricWilliamMarshall, ccoyle, mtaylor and 1 other
-
4
-
I forgot that Chuck points out the need for vertical lines for alignment as well as horizontal ones.
Your’s is a better method, mine is just old school. I will have to learn new tricks and will give Inkscape a try for Cheerful. 😁😳- Old Collingwood and VTHokiEE
-
2
-
The best finish in my opinion for a model is Satin Wipe On Poly. This is a US product, but I believe there is a Euro equivalent. I’d recommend against stains and varnish, they are designed for furniture, not models, again in my opinion. At any rate I’d remove any gloss or semi-gloss product for satin or matte.
Gun carriages are most commonly deep red, sometimes yellow.
British ships had “white stuff” below the hull water line before copper plating, I don’t know that US ships did. The definitive Baltimore clipper, the Pride of Baltimore is a combination of dark green, black, and yellow.
- Keithbrad80 and mtaylor
-
2
-
4 minutes ago, VTHokiEE said:
print off some lined paper
Lined paper behind the shrouds is essential, as much for your eyes as the spacing, you just can’t see the rope after a while without it.
I determine the spacing between lines from the plans, then create a template in Excel with that spacing using format cell height and single underline cell commands. Make it wide enough using format cell width to block out everything else and cut it tall enough to fit between the deadeyes and hull at the bottom and the mast and shroud lines at the top so it holds itself in place, not that it won’t keep falling but it helps.
I’m just a fountain of useless information ...
-
The pearwood is such a refreshing upgrade to model making, it’s a nice look. You have a nice place to work.
- chris watton and Glenn-UK
-
1
-
1
-
2 hours ago, VTHokiEE said:
I'm going to take a look at your Lady Nelson
I wrote that on the “other” forum and got frustrated that no one engaged, so by the time I got to the rigging I just posted photos because I didn’t want to just abandon it. I copied it over to MSW since I didn’t plan visiting that forum again, so sorry it won’t be much help on rigging.
- VTHokiEE and Old Collingwood
-
2
HM Cutter Cheerful 1806 by glbarlow - FINISHED - 1:48
in - Build logs for subjects built 1801 - 1850
Posted · Edited by glbarlow
Thanks for the comment. I wrote a separate post on how I rip planks. Keep in mind this is how I do it based on what I learned from others, there is more than one opinion on the topic. Here’s the link to that post.