


glbarlow
-
Posts
3,854 -
Joined
-
Last visited
Content Type
Profiles
Forums
Gallery
Events
Posts posted by glbarlow
-
-
20 minutes ago, Bossman said:
Cheerful is next on my stocks
It's a challenging but interesting build, you'll enjoy it.
3 hours ago, BobG said:We're our own worst critics
I'm going to run out of wood if I don't quit critiquing myself 😄
4 hours ago, garthog said:Beautiful work and a great narration
I enjoy the writing, thank you Garthog 🙂
4 hours ago, Geowolf said:one of the best planking
Thank you!
- BobG, Ryland Craze and mtaylor
-
 3
3
-
Thanks for the comments and likes everyone, they are appreciated and inspirational!
-
On 6/17/2020 at 9:51 AM, VTHokiEE said:
draught markings
Those look nice and I’m sure a challenge to get on so straight.
- VTHokiEE and Old Collingwood
-
2
-
Those are some nice looking Cannon! I do think the tiny handles add a nice touch and are worth the effort.
My cheat is to use some small brass belaying pins cut off and drilled in.
-
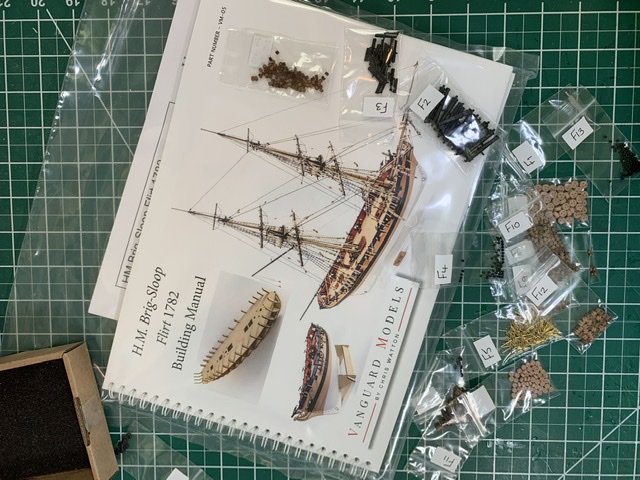
Here’s some photos. They may be a little disappointing because the parts are in their sealed plastic bags. I have a long way to go on Cheerful so in their bags they’ll remain.
I included a bag of boxwood next to my bag of pear for Speedy. Again sorry also in their bags.
You can see how neatly it’s packaged, every bag has a part number including the ropes and blocks Many of the lasered parts are also numbered.
I can say I’ve never seen a kit so well packed and packaged... well except for Speedy .. but Chris has taken it up a notch with this MS version of Flirt.
I really want to tear into the bags, but will resist.
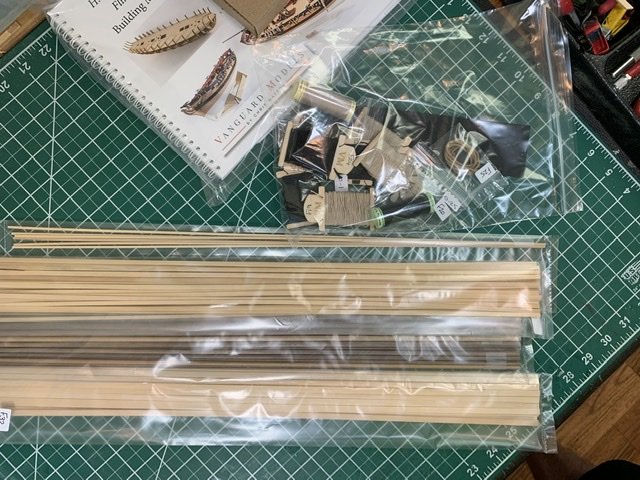
Pear from Speedy on top, Boxwood for Flirt on bottom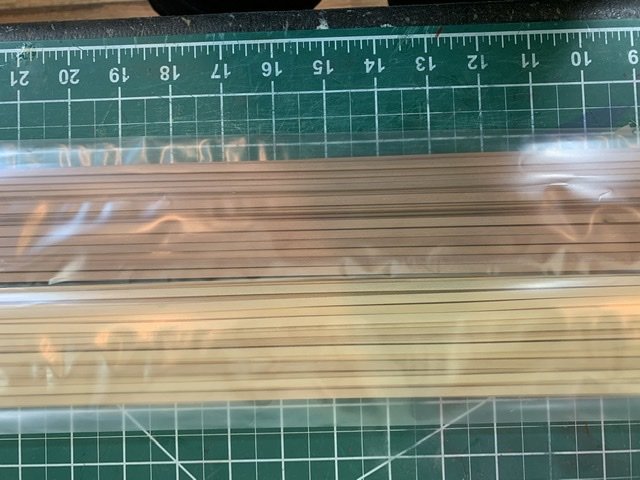
Notice the thick, full color, spiral bound instructions.
So much boxwood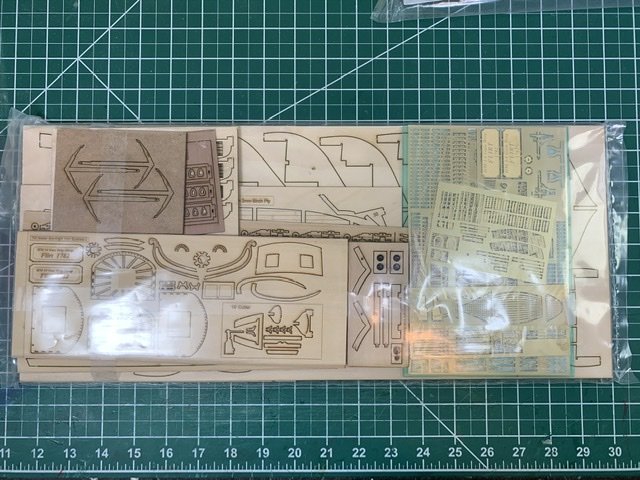
-
14 minutes ago, DelF said:
carpentry
13 minutes ago, MEDDO said:square tuck looks
Thanks guys. I’m kinda happy with it if I can just stop looking at the errors.
- mtaylor and Mike the Maxx
-
2
-
22 minutes ago, Chuck said:
Well done
I need to again be clear that Cheerful comes with a live coach. On many more than one occasion I’ve reached out and quickly got expert advice from Chuck, including here. Thanks Chuck!!
- mtaylor, MEDDO, Ryland Craze and 2 others
-
5
-
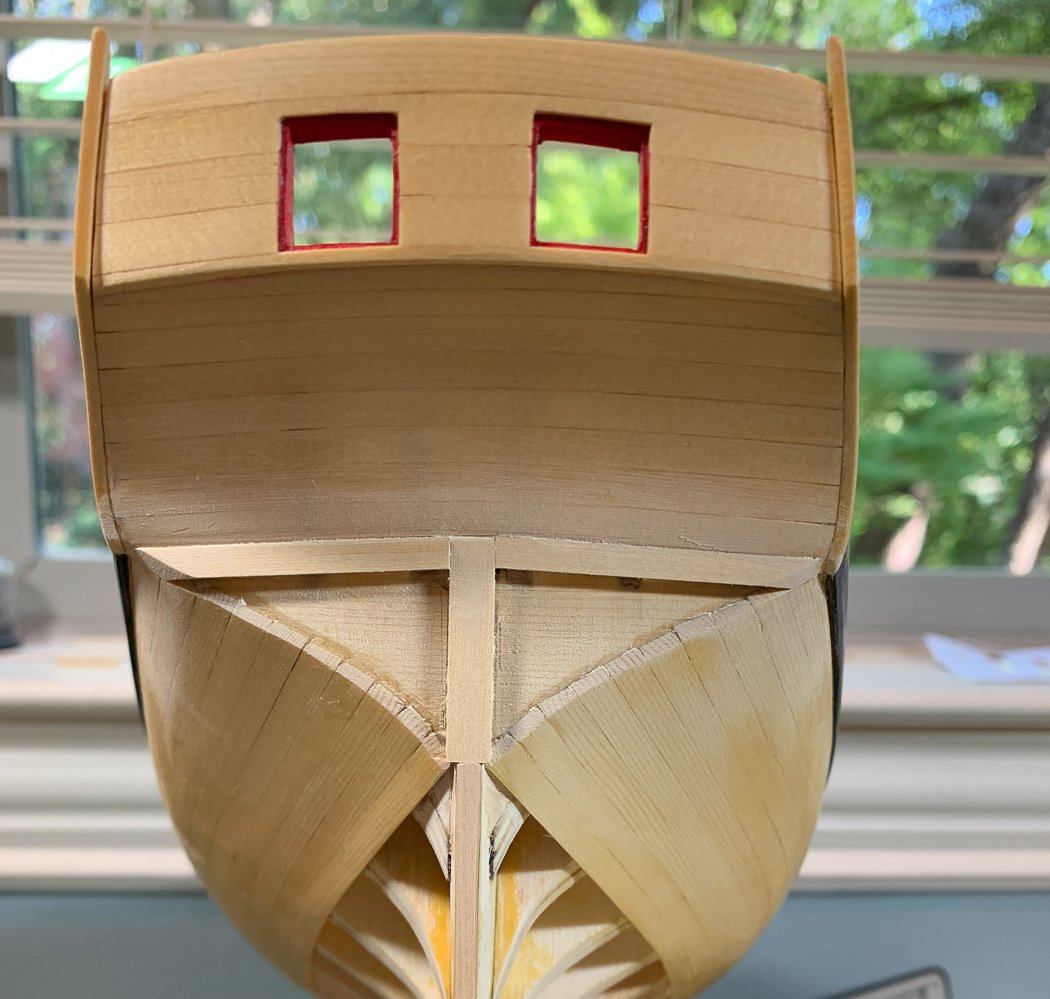
There were a number of things about building Cheerful I’d never done or seen before. In the case of the square tuck I didn’t even know what one was. Fortunately @Chuck instructions are clear enough - I just dove in and took it a step at a time.
I’d already made it challenging by not leaving enough of a gap between the bottom layer of the of the square tuck and the counter. So I filed and sanded until what once was a 1/32 backing triangle was now equal in thickness to a communion wafer. I elected to use 3/32 wood for the square tuck itself instead of recommended 1/8 for a better fit.
Step one is adding the center piece and the two top pieces, that was pretty easy, if only I could stop there.
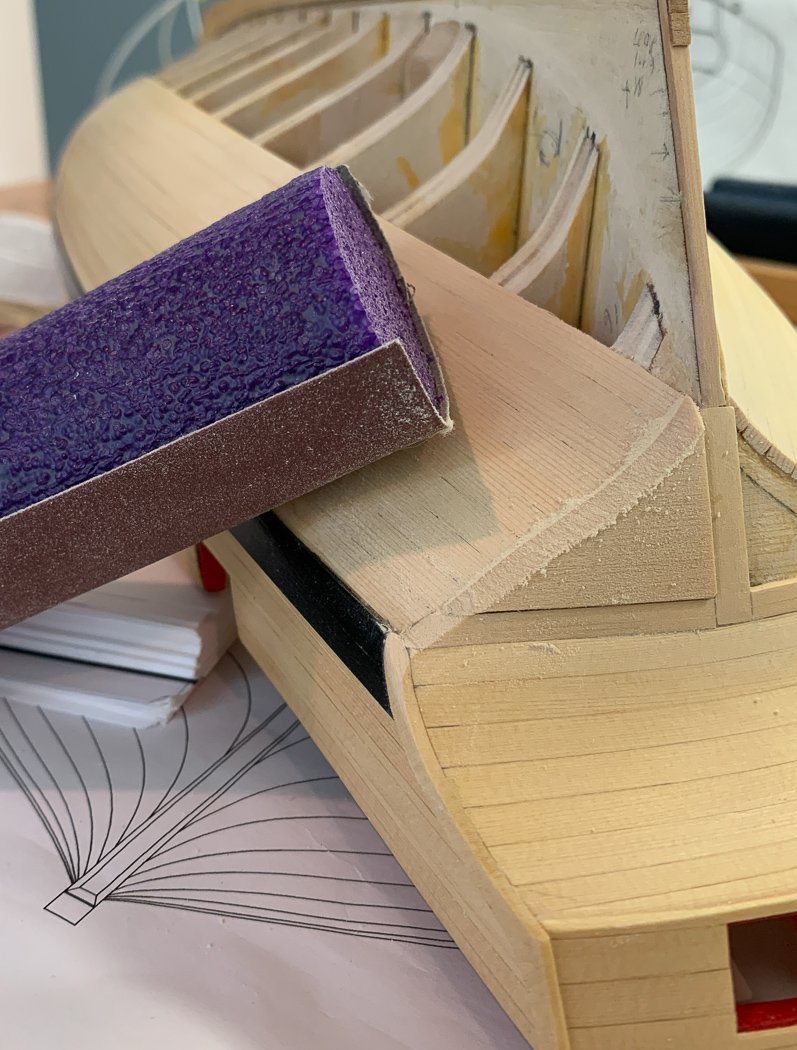
And then the fun begins, I got a little involved and forgot to take a lot of photos. The next step is shaping a solid piece to fit against the top and center pieces, lightly attach it to my wafer thin backing with just two small drops of CA, then shape it to fit flush and follow the flow of the bottom of the hull. My recently acquired foam sanders in different shapes came in handy. Of course the key is to sand the piece flush but not go through the bottom of the already sanded hull, which I managed not to do.
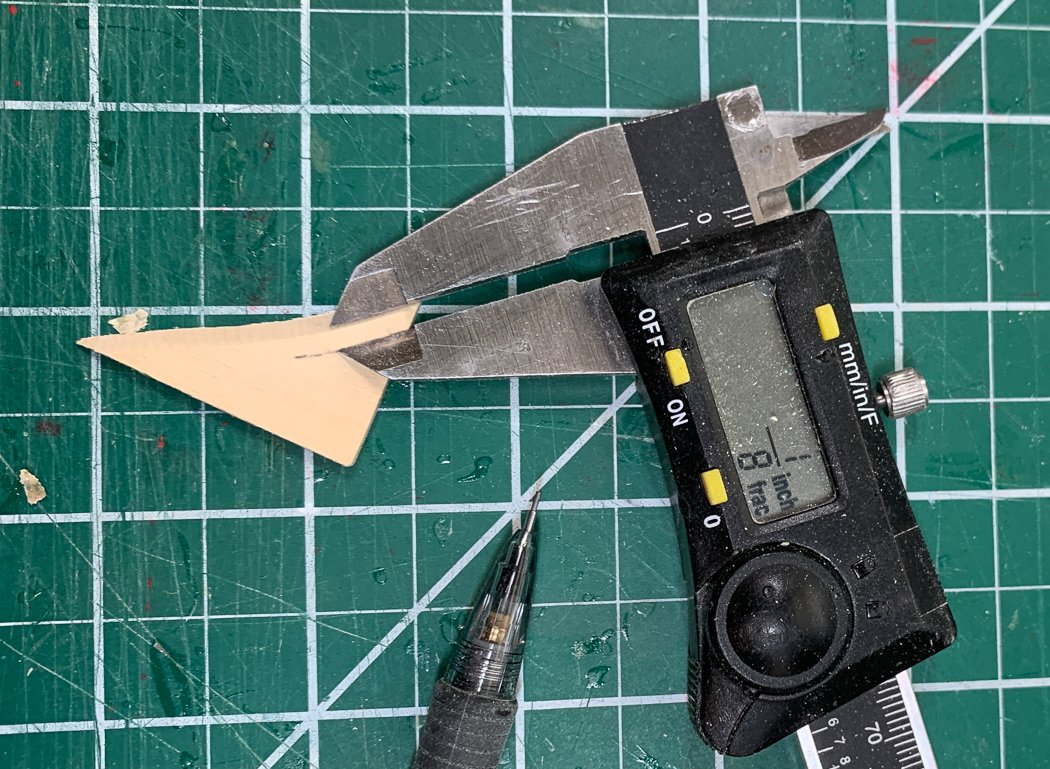
With it sanded smooth and a flush fit, using 180, 220, and finally 320 sandpaper, I pried it off with pair of pliers...not... Actually very carefully with an extremely thin putty blade. I marked a 1/8th line along the curve using my digital caliper and a series of marks as I moved it around the outside of the curve. I don’t have a scroll saw, I was able to rough out the curve with my #11 blade, one benefit of using the thinner 3/32 wood I suppose. I cut away from the line and then carefully sanded it down to the 1/8 mark - measuring the top flat part of the wood. The sanded slant doesn’t matter and is not included in the 1/8.
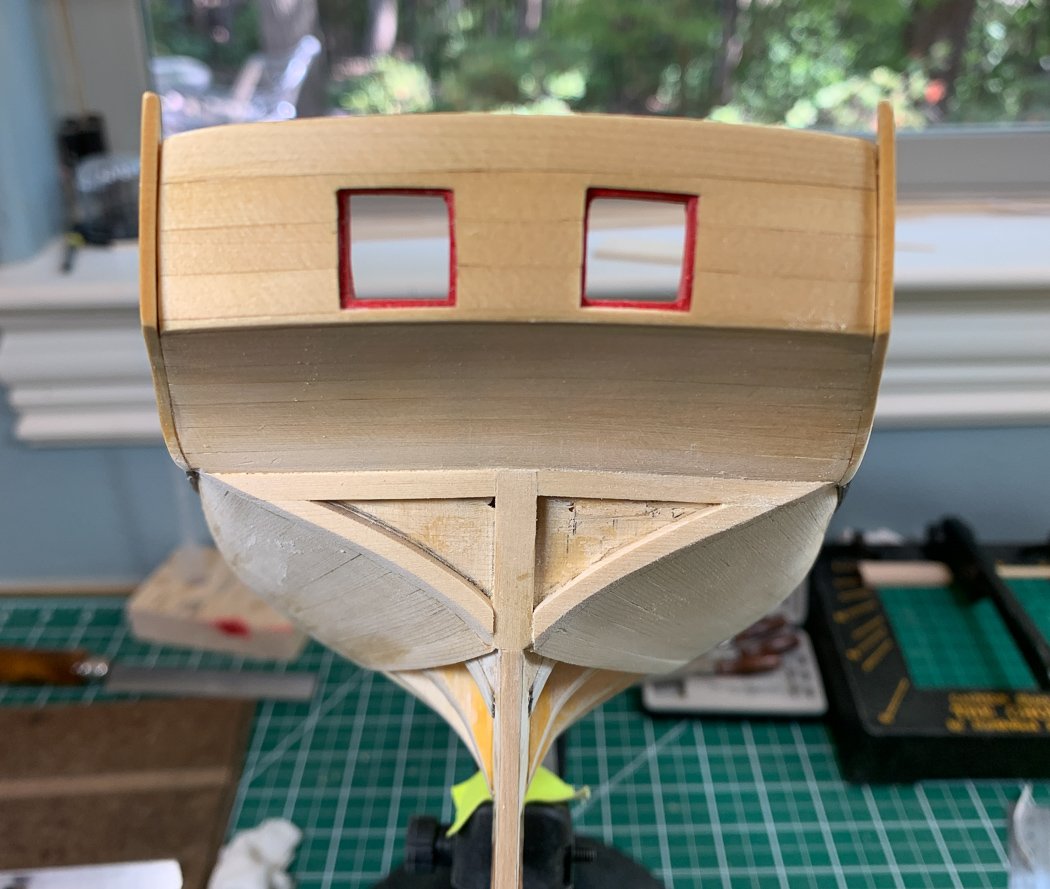
With both sides complete I attached them permanently and began the process of filling them with 3/16 wide planks cut from the 3/32 wood (although plank width, regular planks are too thin). I didn’t take any photos of that process. I first sanded the top angle to match the top piece (I never changed that angle on my Byrnes Sander so it was easy to match). then measured the two lengths of the bottom angle to fit….and yes while 10 planks are fitted, more than 10 were cut - my scrap pile got a little taller. I also used my phatic glue and cedar saw dust to fill in gaps. There was only one, otherwise I was perfect. I can say that because they are all nicely filled and no one can tell now…ok there were two…ok more than two.
All sterns are different, mine being no exception - I had to use a piece of 6mm wide (about 1-2mm wider than 3/16 wood) for the teeny tiny triangle of the outer most piece to fill the gap. This is the mindset I have been able to adjust to, differing from kits. I have a lot of uncut wood in various thicknesses, I’m not limited to what’s in the kit - so I needed wider piece I cut a wider piece.
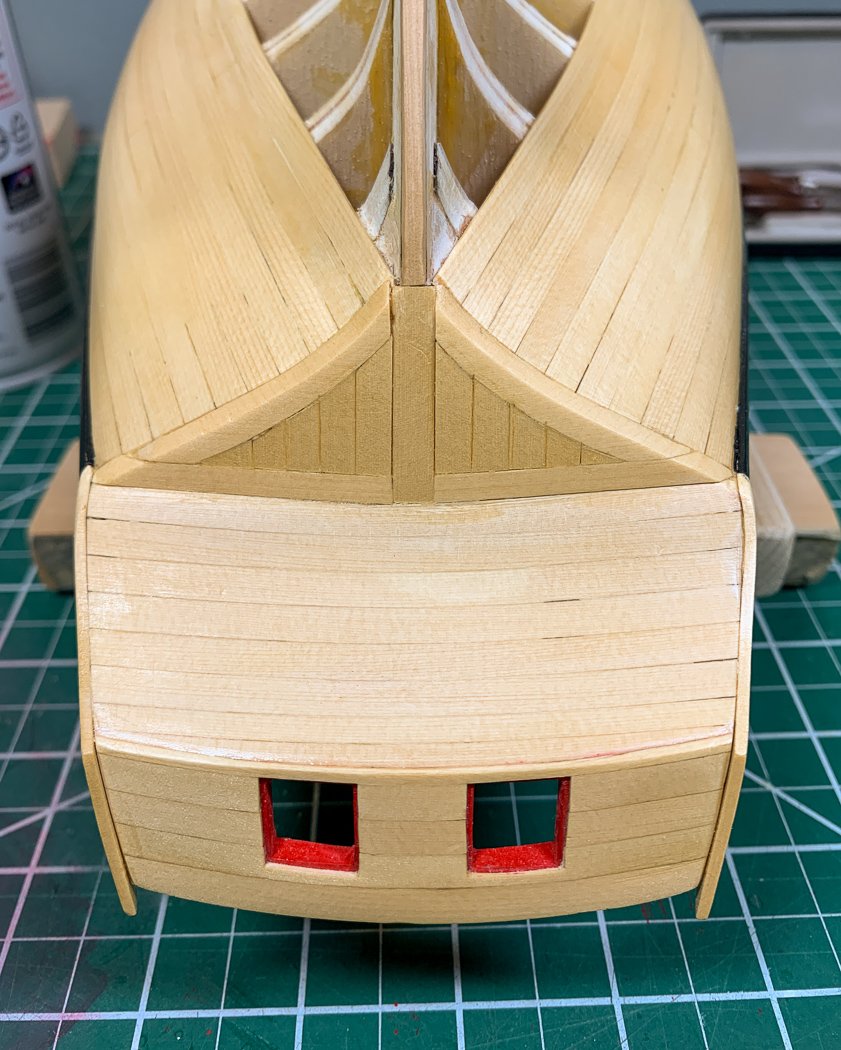
And now I have a square tuck, though I still don’t know what’s square about it. It's not perfect. Once I finished mine I stopped looking at Chuck’s nice photos in his monograph, no good can come from that. So I've added a little more character to my model.
I have the counter sanded ready to paint red but I’m not going to do that until I get a good tight fit of the stern post. For whatever reason at the moment I’m not close to it fitting tight - hard to know what part to sand where. That’s a challenge for tomorrow.
-
-
4 hours ago, chris watton said:
pearwood 2.5mm 2 hole blocks.
All the blocks look great, very well made.
6 hours ago, DelF said:you should have the pleasure of rigging your own 🤪
I guess you have a point, so okay....🙂
- Nirvana, mtaylor, chris watton and 2 others
-
5
-
On 7/18/2020 at 3:03 AM, Edwardkenway said:
So planking continues slowly,
I don't see much of a taper as those planks go towards the bow?
- FrankWouts and mtaylor
-
2
-
1 hour ago, Edwardkenway said:
Can't wait to see your log for Flirt,
I told James I'm just going to use his photos, I can't top his work. Plus I'm outsourcing the cannon to Derek 😄
- Rustyj, Edwardkenway, mtaylor and 4 others
-
7
-
-
15 minutes ago, VTHokiEE said:
what is an appropriate elevation for the gun
Quoins is what they are called and they would have a handle - with such tiny guns I'm not sure how essential that is. In my view not having the handle but including the quoin is fine, it's also a nice touch if you included them, either works.. It's also likely they are necessary to have in order to adjust the elevation. My view on gun elevation is what looks best with it sitting in the gun port. But check them all before finishing. The gun ports may vary in height based on the curve of the deck. You're photo looks fine - I think as long as they aren't pointed below 90 degrees whatever looks good and fits the gun port works. The ship the cannons are aiming at is probably level with the ship they are on, so......
You're painting is nice and precise - always an important point.
- Old Collingwood and VTHokiEE
-
2
-
On 6/11/2020 at 10:00 AM, VTHokiEE said:
some "nice" brushes on order
An 18/0 brush for these small touch ups is your friend.
- Old Collingwood and VTHokiEE
-
2
-
Your deck fittings are superb, really nice work. Those small details may not show on their own but collectively they add a great deal of professionalism to the overall look. They help make it all come alive. Like Derek I’ll be stealing, I mean adapting many of these to Flirt when I get to her. Well done!
- Edwardkenway, VTHokiEE, Ryland Craze and 1 other
-
4
-
Not sure about all the harsh judgements and concerns about accuracy, seems silly. It’s a movie. They used the USS Bainbridge because it was available for filming. It’s a 98 minute streaming movie, of course there is CGI involved.
I read the book recently, it was not as good as the movie. The movie is an exceptionally well told tale about leadership under extreme pressure, if you missed that point I suggest you watch it again.
-
-
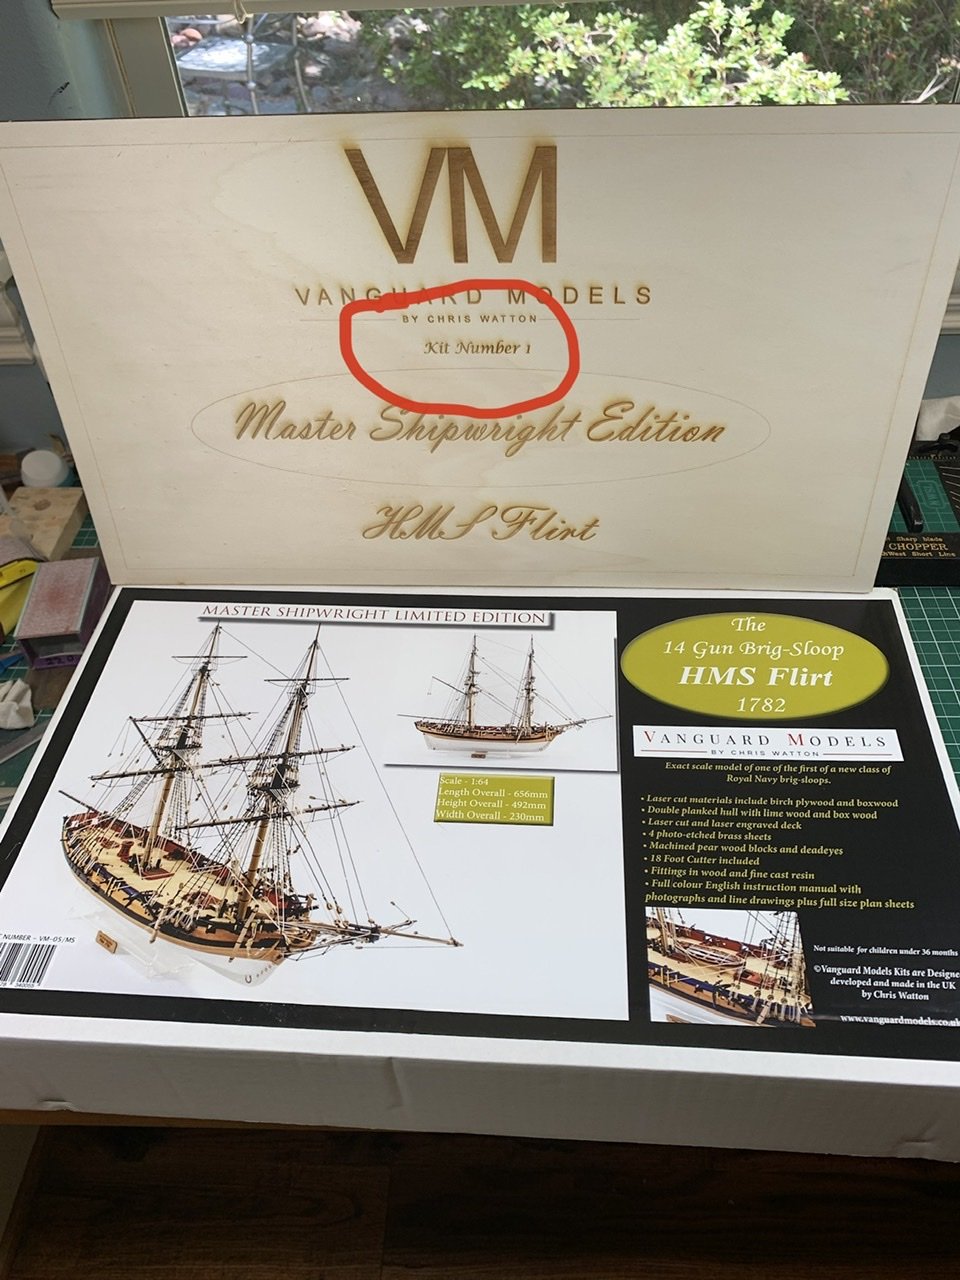
I’ll of course start a build log when the time comes but a few first look observations:
-It arrived just a few after being shipped, no delays with UPS
-the shipping sleeve is thick and sturdy, no dents from crossing the Atlantic.
- more bubble wrap inside the kit box preventing anything from sliding around-everything inside in multiple sealed plastic bags grouped by instructions and plan, strip wood, boxes for the pear wood blocks, which look extremely sharp, detailed, and well made.
-The lasered parts look soo much better than any kit I’ve ever seen. And of course everything is boxwood.
I don’t know how many of the 18 Master shipwright Editions are left, I highly recommend getting one.
- DelF, hollowneck, Nirvana and 7 others
-
10
-
Well this is pretty cool. I’m honored to have kit number 1 of Vanguard Model’s HMS Flirt Master Shipwrights Edition

Thanks Chris for including the nice lasered board!
Everything inside the box is such high quality. I’ve never seen so much boxwood. Very nice!

Admiral Cochrane also approves
-
The basket is next level, I agree with Yves, now you need carved wooden herrings 😂🤣
-
-
Either by making a copy of the items, cutting them out and attaching them to the wood with some rubber cement and cutting out the wood from there, using tracing paper to make a template, or taking the measurements with a ruler or digital calipers And transferring that. All assuming the plans are to scale.
There must be different versions of POB, I didn’t have to do any of that. Not going to be a common kit or a easy first build. Hopefully you can find a build log of someone using this same version of the kit and follow along.
-
2 hours ago, Brewerpaul said:
doing single planking
These kits really aren't designed for single planking, the bulkheads are further apart (and less of them) than a single planked model. If this is your first model that'd be a stretch to pull off. The double planking gives you a much better looking hull when you're done.
3 hours ago, Brewerpaul said:a filler in addition to the nose filler?
Yes, between the 2nd and third bulkhead and yes you'd fair the hull with it already there to ensure a smooth flow of the planks. If you haven't planked one before be sure to look around on the forum for a process that works for you. Bending and tapering planks to conform to the bow and the flow of the hull is both a process and a learned skill.. Both my Cheerful and Lady Nelson build logs explain the process I use, but there are many ways to do it.

HM Cutter Cheerful 1806 by glbarlow - FINISHED - 1:48
in - Build logs for subjects built 1801 - 1850
Posted
Thank you for saying so.
I hope it proves helpful to others
I refer to your Cheerful log a lot, thank you.
I appreciate your thinking so.