


CaptainSteve
-
Posts
1,857 -
Joined
-
Last visited
Content Type
Profiles
Forums
Gallery
Events
Posts posted by CaptainSteve
-
-
Once upon a time (some two years back), I had to work from a very small coffee table. This space had to house not only the model, but also all my tools and various items of clutter - NONE of which was rubbish, mind you. I would regularly have to enact a full clean-up, just so that I could locate a simple pair of tweezers.
Fast forward two years, and I have a dedicated bedroom-cum-modelling room. Any sane person would think that this should have solved the problem ...
But, that sane person would be so very, very wrong.
Instead, now I just have more space to be filled with new and wonderful tools, toys, books, spare parts etc etc etc.
The upshot: it takes me every bit as long to find the pair of tweezers I was using 5 mins ago, as it took me to find that same pair two years back !!

-
-
One question I do have is about the red lead paint applied on the dressing belt; it appears in photographs of the real ship to cover the three rows of the dressing belt and about half a plate dimension down into the hull plates. There is no mention of it in the instructions. I would appreciate any thought or comments others might have on this painted stripe.
Ken. I think you will find that the decision whether or not to include the red-stripe basically comes down to dating your build to a specific time-frame.
It would appear that, at various stages of her illustrious career, there has been a white gun-port stripe, a yellow gun-port stripe, as well as the red dressing belt stripe. Most likely, other variations and combinations were used at different times and by different commanders. After all, she was a war-ship, and subterfuge is all a part of the Art of War.
See USS Constitution Yellow Hull Stripe here for the discussion on this matter.
Incidentally, that is a brilliant practicum on copper-plating and I am certain it will prove very, very useful to many Connie builders in the future.
-
-
-
Brave move, Harvey !! 'Tis never an easy decision to cut-out work you have spent hours on. But, once you have re-done the shrouds and are happy with them, then you will wonder why you waited so long.
I applaud you.
(All I'll say further is, been there, done that ... in my case, many times)
-
-
-
Kudos, Dan !!
Showing the internal workings of the chain-pumps is just a stunning detail !! I can honestly say that I have never seen this before.
Personally, I am in favour of your idea to paint the outside of this (and similar) detail cut-aways. Once you have three, four or more of these detail sections, then it will quickly become apparent that this is the purpose of the red outlining.
(Mayhaps, not an iridescent PhotoShop cherry red, but more of a flat matt, carronade-base, dull red)
Just my two cents worth ...
-
-
Hey Patrick. Try this:
... there was a post here on MSW that I recall seeing some time ago which may hopefully help you ...
The suggestion was to put some stocking material over the end of your vacuum cleaner. Then clean around the area. The stocking should stop any small pieces from disappearing into the nether regions of your vacuum bag.
- EJ_L, Elijah, EricWilliamMarshall and 1 other
-
 4
4
-
Thank Ye, everyone. Verily, I believe I shall step back for a day or two and re-assess me next move.
Instead of drilling a hole, which sounds scary, what if you filed a groove down the side, so you could set a thin rod into it, and hold it with wood glue? That way, it'd be stronger in the meantime, but wouldn't have a hole in the middle, and you could release the glue when you're ready to remove the rod. And the groove would presumably be hidden once the model's done if you put it on the proper side. Am I crazy?
CH. I do believe that is quite a sane suggestion.
-
That now brings us to the “tribulations” section o’ this series of postings …
“Arr !! Indeed-eth it does !!” noted CaptainSteve, forlornly. For, twouldst seem-eth that, upon final inspection, one o’ the stern timbers were to be out of alignment.”
Further, and far worse, whereby Our Hero didst e’er so lightly attempt to correct this piece, tragedy were to strike … and it didst break-eth !!!

“And it be a corner timber, as well !! Thusly, I beseech-eth, o’ Ye o' the Horde,” he were to implore-eth. “Wouldst I be able to re-attach the piece ??”
As of this past even-tide, CaptainSteve hath re-glued the broken timber upright …
“But,” he sighed, most heavily, “I be left a-wondering, will this be structurally sound ??”
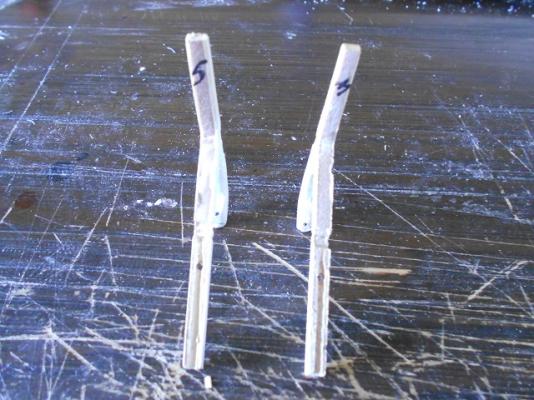
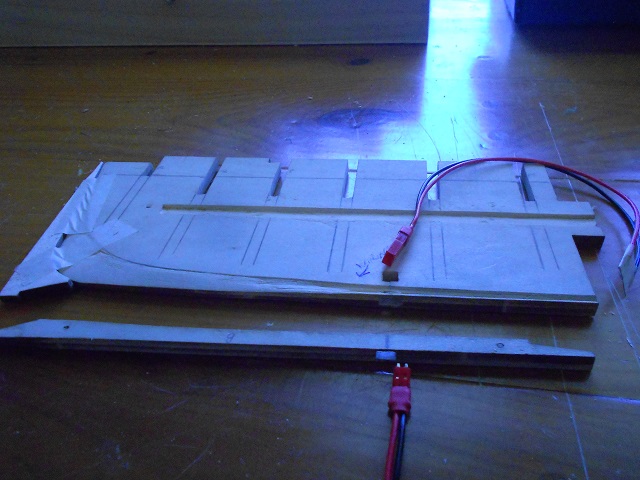
Given that it is a corner upright, couldst he drill-eth a hole, and mayhaps use a small piece of wire – a piece from a staple, mayhaps – as an anchor, to re-affix-eth the errant timber upright ??
- thomaslambo, gjdale, capnharv2 and 11 others
-
14
-
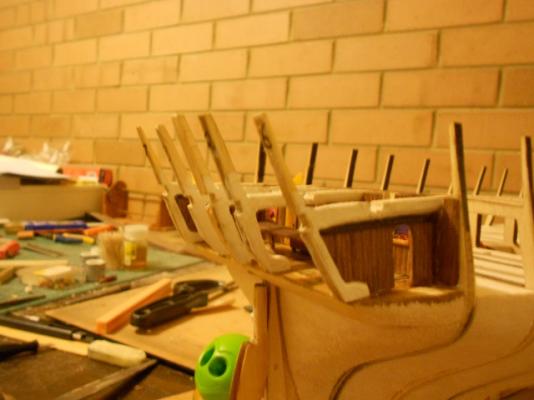
“Now, those wi’ a keen eye,” CaptainSteve were to continue, “may ha’ noticed above that there still be two o’ the stern timbers yet to be fitted.”
This be because, as previously mentioned, he doth plan on adding LED lights to this build.
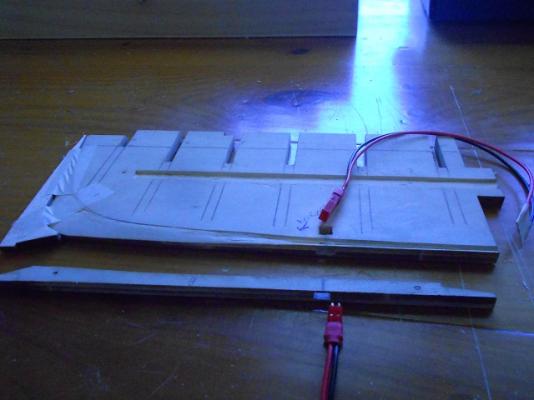
These timbers have been drilled for the LEDs …
… and grooved to take-eth the wiring for same …

“A’ready,” Our Hero began-eth, “the wiring plug hath been fitted to me keel, and wiring stubs hath been brought inside.”
Unfortunately, that be close to the limits o’ CaptainSteve’s electrical know-how. Fortunately, he doth know-eth of a colleague much skilled in the (un)dark arts.
“As such,” he went-eth on, “I be leavin’ this update here for now. But a-fore we get into matters of Electrification, an anecdote …”
Indeed-eth, CaptainSteve doth recall-eth an incident from his own Youth, whereby he were to discover-eth for his ownself the basic principles o’ the process o’ Electrification.
“T’was Christmas time o’ that year”, he were to begin-eth. “And I be but ten years o’ age. Me brother, CaptainDennis (fer whom this ‘ere build be intended), were but 16 months younger ‘an me ownself.”
“Indeed-eth,” Our Hero were to explain, “he remain-eth so, to this very Day !!”
Ahem …To cut a long an’ rambling story short, Our Hero and his brother had managed to con their beloved parents into a deal whereby these two schemers would receive the super-duper-all-extras-included-bestest-deal-on-the-planet-ever-Mum-and-Dad-honest-to-God-electric-race-car-track-set as a combined Xmas AND next birthday present for the both of them.
(Regular fans may wish to take-eth note o’ CaptainSteve’s choice o’ terminology here: specifically, "a combined ... present” and, " ... for the both of them".)
‘Scuse me ?? Betwixt two brothers, you say, CaptainSteve ??Surely this could lead to nothing but co-operation and an out-pouring of filial love.
All were goodly up until the time whence we didst taketh to re-designing the track lay-out. Something went awry, and one car didst becometh stationary and most uncompetitive !!
Reasoning, even at this tender age, that there be no mains power, Our Hero decides to test the voltage … by applying his tongue across the metal bits of a section of track.
Crouched o’er the track and with his tongue in contact with the rails of the track, he signals to his beloved younger brother:
“Juth a wee bid, bruvva-deareth”, he were to utter.“What ??” asked his beloved younger brother, as he plunged the plunger on the controller to its’ full-plungeable depth.
“GAAAAAAAAAAahhhhhhh !!” were CaptainSteve heard to reply-eth.
- hexnut, mattsayers148, Cathead and 11 others
-
14
-
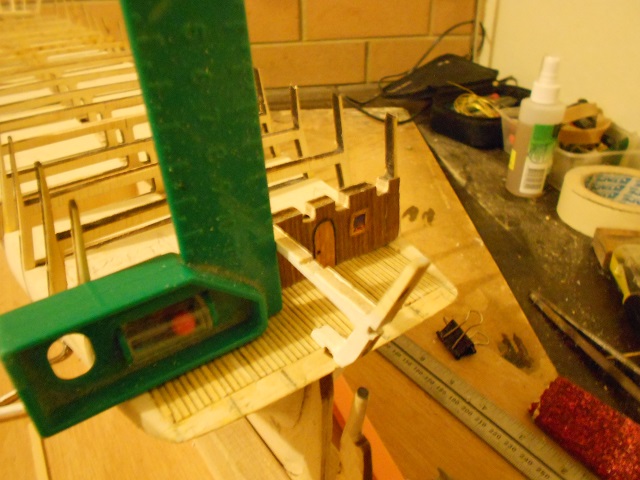
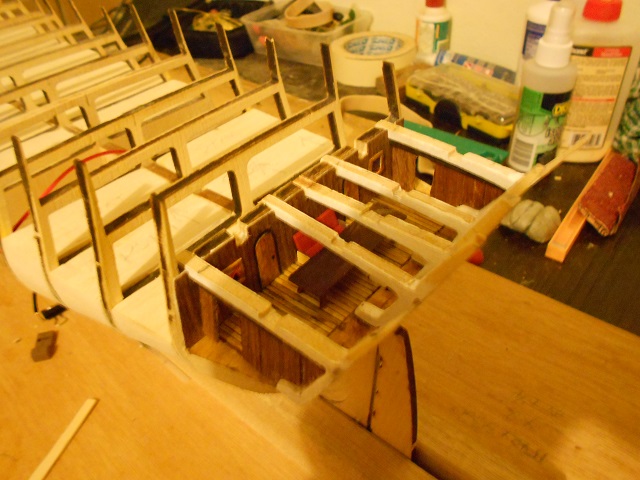
There hath been troubles, triumphs and tribulation a-plenty in CaptainSteve’s modellin’ room o’er these past few weeks ...
Now, despite being greatly enthused and inspired as he was by works of magnificence such as those from Doris … and Siggi … and so many, many others, CaptainSteve doth wish-eth to note that he hath always intended fer the stern quarters interior detailin’ to be viewed at “galloping horse” speeds.
“Or faster, if possible !!”, he were to interject.
“Forsooth,” he were to open with. “I didst maketh plans and all …”

For, verily, from whence Our Hero didst first plan to display some sort of furniture in the Great Cabin region, he didst intend-eth plan to utilise the veneers of Tasmanian Blackwood for the interior panelling…
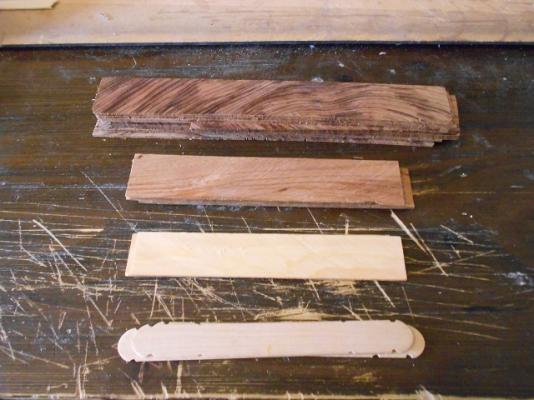
“It be a beautiful wood, don’t it ??” he enquired of the horde.
The problem, and the part that he forgot to be mentioning, is that it also be an extremely close-grained hardwood, thusly making it most difficult to work with …
“But it also be a right PITA to work-eth with, and prone to much splinterin’ and shatterin’ !!”, Our Hero were to declare-eth.
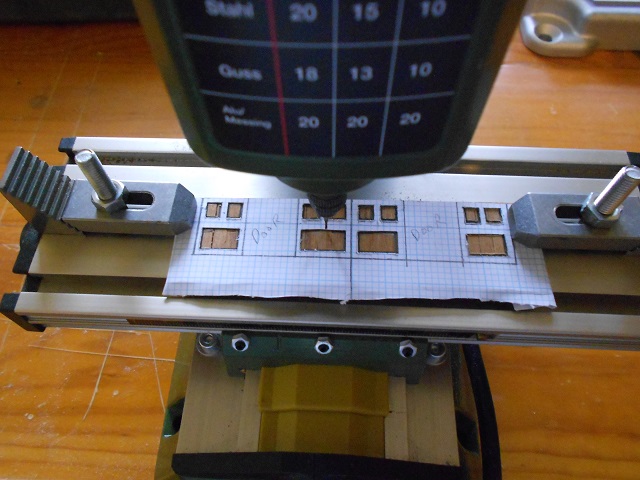
“Whilst I were not to keep many pictures o’ me failings,” he stammered weakly, by way of explanation, “I didst try to simulate the panelling with me Proxxon mill.”

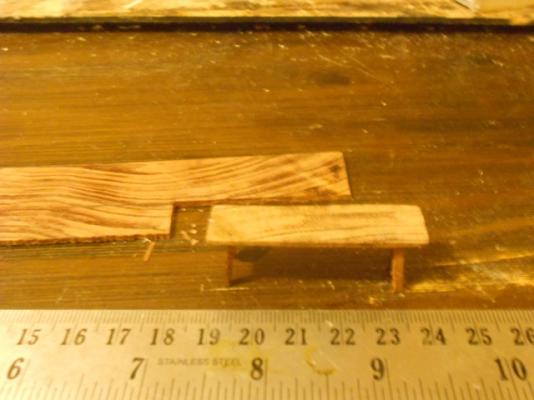
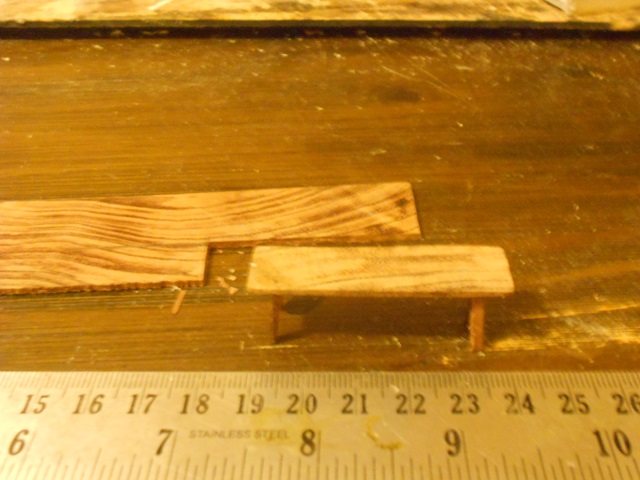
Eventually, CaptainSteve did constructeth a board-room table from a small piece of the Blackwood …
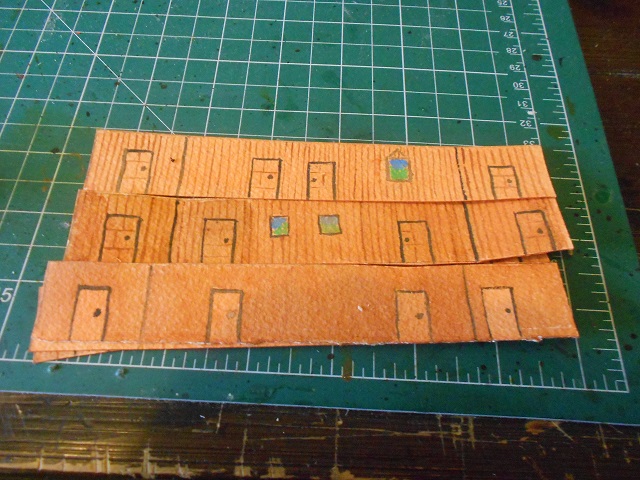
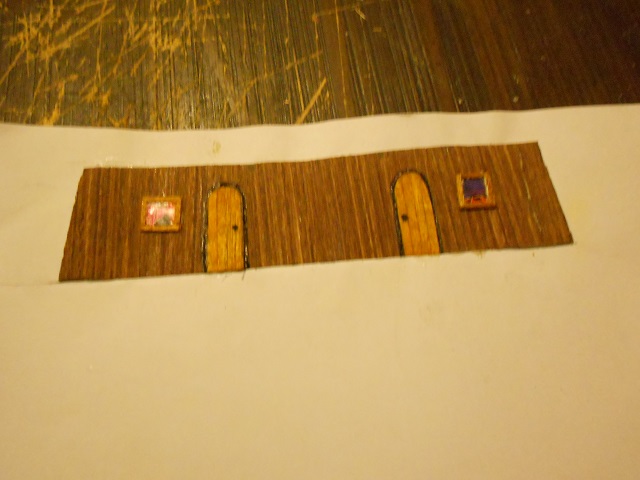
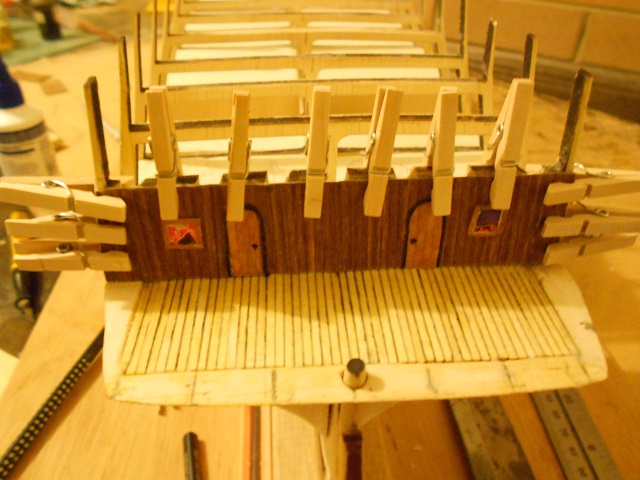
CaptainSteve explains: “In the instance o’ the first, I be a-planning on adding false doors at the back of Bulkhead R …”

“… as well-eth, there wouldst be doors leading to each o’ the side galleries.”

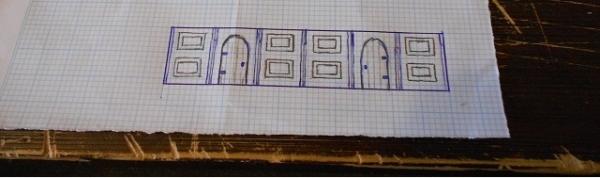
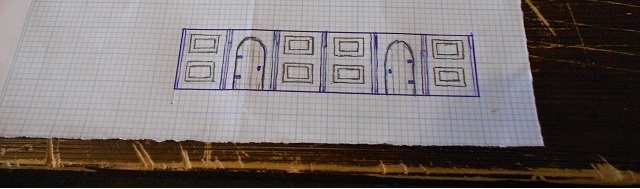
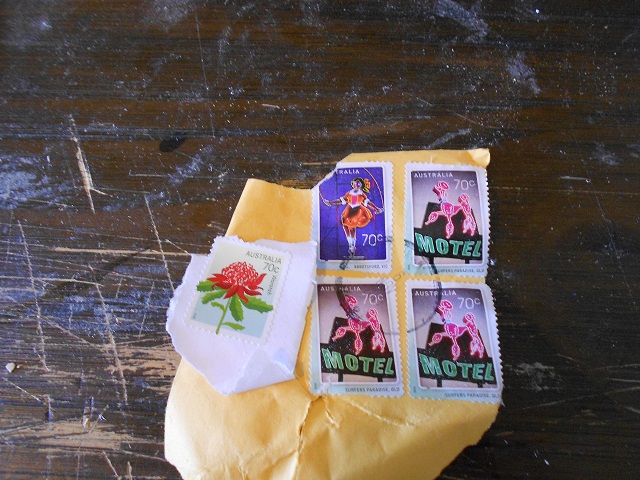
“In addition, I didst also paint-eth some wall-paintings …”
If truth be known, Our Hero didst merely build-eth a frame, some 3mm square, and didst glue-eth such to a postage stamp. All that remained was a quick trim.

“Arr !!” he were to mumble, sheepishly. “I be found out. I didst think-eth that, at a ‘galloping horse viewing distance’ mayhaps no-one wouldst notice.”
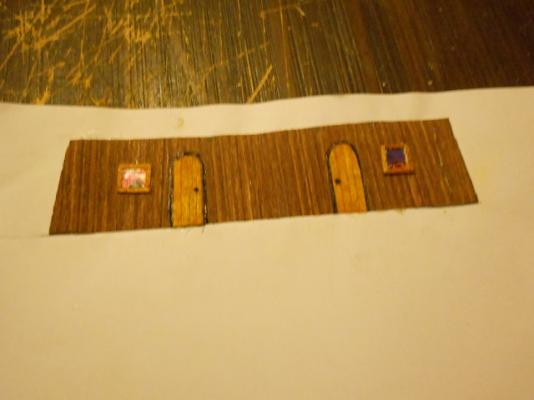
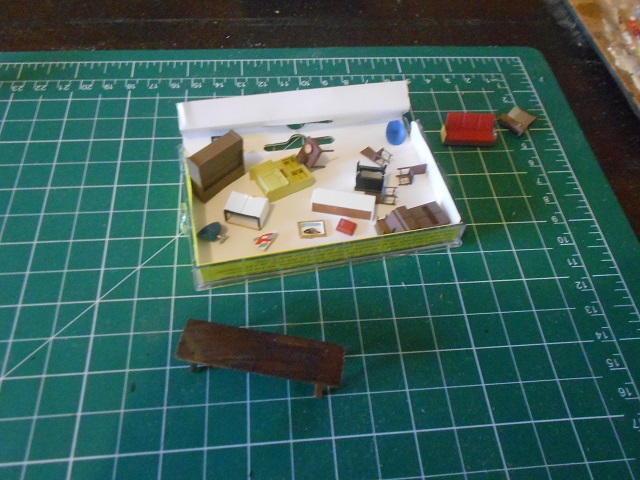
Here be pictures ….


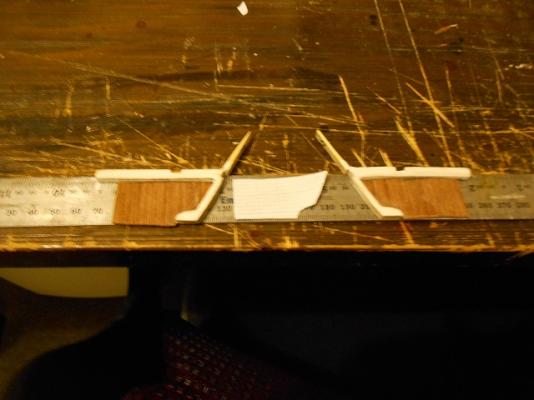
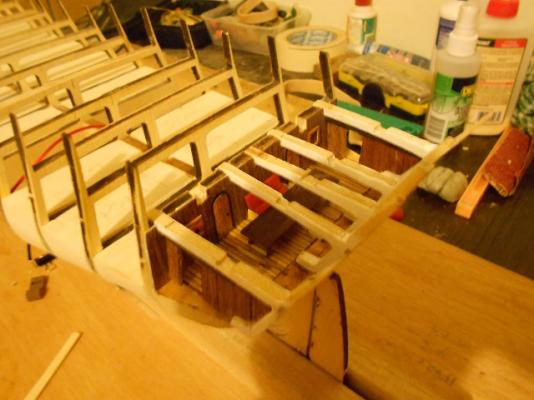
“Ye may note,” CaptainSteve noted, “that the lounge be just a piece of doll-house furniture which I were to ha’ a-layin’ about the place.”

Our Hero intends to be a-leavin’ the doors sittin’ ajar …
“It be the better fer allowing me lighting to be visible through the side gallery windows.”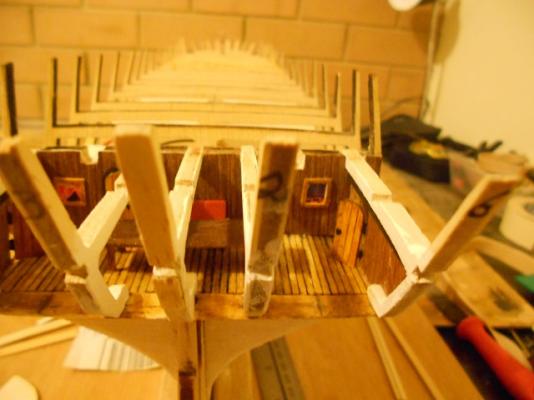
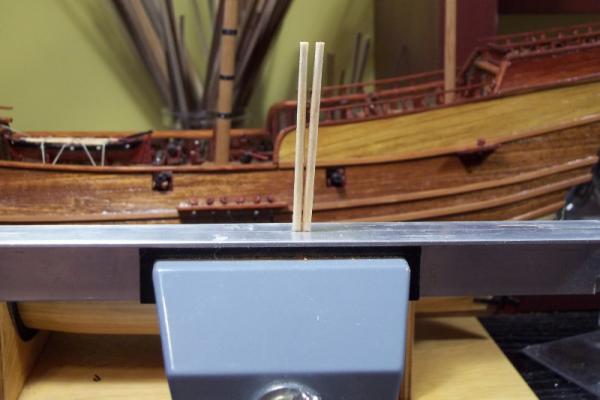
As a final touch, he didst make-eth up a pair of map scrolls …
“These, I be just sitting lazily upon me Blackwood Captain's table,” he explained.
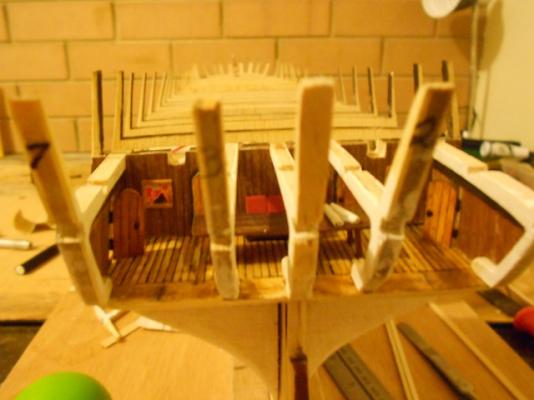
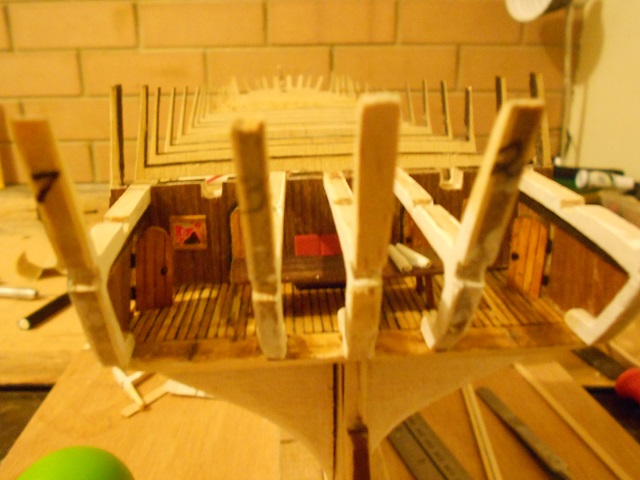
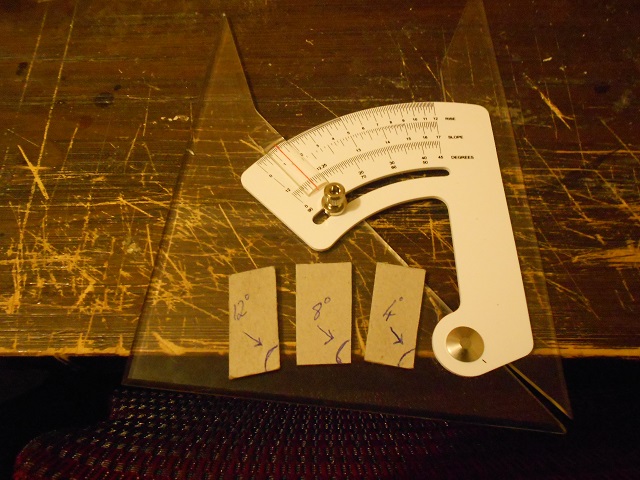
“By the by … “, CaptainSteve were to cry-eth out !! “I didst modify the angle o’ me window frames e’er so slightly.”
Upon checking the pictures in AOTS more closely, Our Hero didst find-eth that the angles of the window frames are, more accurately: 3.50, 70 and 10.50. As such, new templates were cut from scrap card pieces.

“In truth,” he were to explain-eth, pointing to the above picture, “I didst decideth to go instead with angles of 40, 80 and 120.”
CaptainSteve be thinkin’ that these settings be more aesthetically pleasing …
What say-eth the Horde ??
- zoly99sask, Aussie048, mtaylor and 14 others
-
17
-
Awesome figurehead, Matt .... it looks almost as though it has been carved into a rock-face !!
- Bobstrake, GLakie, mattsayers148 and 2 others
-
5
-
-
-
Dave,
Like almost everyone here, I am in awe of your carving skills, and just love following every update you make. Mayhaps, one day in the distant future, I might try to emulate your work. But, for now, I will strategically stay with ships that are less ornate than your Sovereign.
However, I have some questions for you ...
... most noticeably the little crown (an obvious mess) was completely replaced by the one seen here.
Does this mean that you have only re-carved the crown piece ?? Or the entire badge ??
If only the crown, then how on earth do you attach it to the main badge section so seamlessly ??
As a well-known MSWer is famous for asking, enquiring minds need to know ....
PS: Keep up the great work !!
- Piet, GLakie, SawdustDave and 4 others
-
7
-
-
For those who may have missed it, re-printed below, with permission, is MSW member donrobinson’s brilliantly easy method for making oars for your ship’s boats …
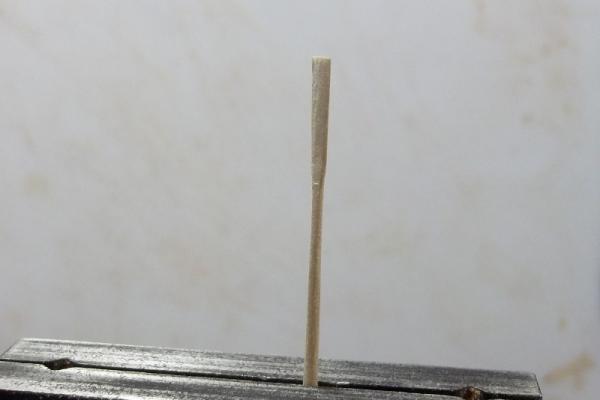
The dowels I am using are 2mm and found at a local hobby store. I soaked one end in water for fifteen-twenty minutes then put in my mini vice. I put them in at a depth of 15mm and left them clamped for about the same amount of time.
My vice has notches in the jaws for holding stock so that is why I am using the angle iron so as not to distort the dowel.
This picture is showing the initial dowel(at the bottom) how it comes out of the vice and then the various shapes that I made. They may look a little crooked in pictures but they are straight just the photo playing tricks.
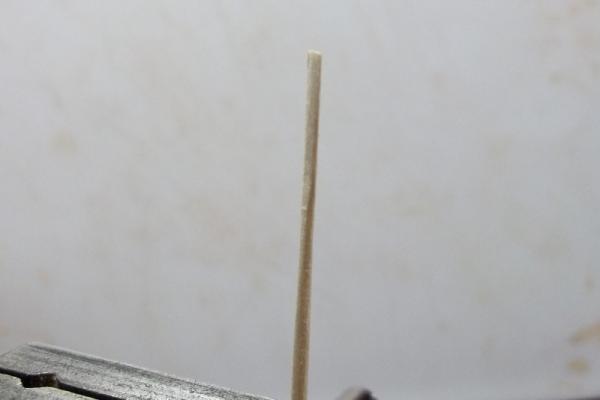
These last two pictures are just trying to show the edge of the blade.
I show clamping two dowels at once but in reality just do one at a time by the time you take one out(and replace it) get it shaped properly the next one is ready and so on and so on.........
Try it out it is quite easy and beats laminating or carving down larger stock to shape. Different size stock can be used but just adjust your soaking and clamping times.Thanks, Don.
- Bobstrake, Geoff Matson, mtaylor and 8 others
-
11
-
-
-
That's one impressive mile-stone passed, Tom !!
- usedtosail, Burroak and GLakie
-
3


Licorne 1755 by mtaylor - 3/16" scale - French Frigate - from Hahn plans - Version 2.0 - TERMINATED
in - Build logs for subjects built 1751 - 1800
Posted
Just beautiful, Mark !!